Genshin Impact map: What's changed in Inazuma
New additions to the Genshin Impact map and where to find collectibles.
How to get to Tsurumi: Island of fog
Genshin Impact Electroculus: All locations
Genshin Impact Sango Pearls: Find Kokomi's materials
Genshin Impact Fishing: Pick the best spots
Genshin Impact Peculiar Pinion: Get the new gadget
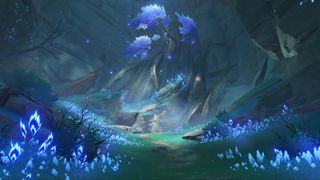
The Genshin Impact map has expanded even more with the 2.2 update, adding the final missing island of Tsurumi to Inazuma. This new location is shrouded in fog and mystery, and just like the other islands, has its own unique puzzles and questline to follow. If you're unsure of how to get there, and complete the quest that clears the fog, this Tsurumi Island guide can help you out.
With the addition of the final island, the Inazuma region is complete, meaning before too long we'll be heading to the next Archon realm, Sumeru—though many think The Chasm area of Liyue will be added before that. Either way, if you're looking for the latest details about areas yet to be added to Teyvat, this Genshin Impact map guide should have the info you're looking for.
If you're just starting out in Genshin Impact, this guide also contains a list of Anemoculous locations, so you can level the Statues of the Seven in Mondstadt to get some rewards, complete your adventurer milestones, and gain those regional benefits.
Inazuma
Genshin Impact map: Inazuma islands and landmarks
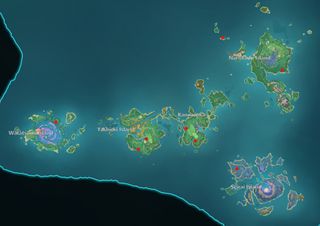
Like Dragonspine before it, Inazuma is the latest region that was added to the Genshin Impact map in version 2.0. We originally only had access to the three main islands, Narukami, Kannazuka, and Yashiori. Then 2.1 added Watatsumi and Seirai, and now 2.2 has added Tsurumi.
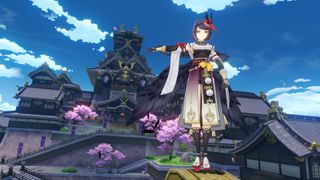
Inazuma is an archipelago of storm-battered islands. It is home to the Electro Archon and takes inspiration from Japanese culture, so expect to find cherry blossoms, fields of flowing grass, as well as plenty of sacred shrines, and forbidding castles. The region also has Electro-based elemental puzzles scattered across its map and new enemies, materials, bosses, and secrets to discover.
Here are the islands and locations you can visit in Inazuma:
- Narukami: This main island houses Inazuma city and the Raiden Shogun's castle, as well as the port-town of Ritou. The island itself is named for the Narukami shrine located on a mountain at its heart, surrounded by Sakura trees.
- Kannazuka: This island is defined by the crater at its centre, which houses the Mikage Furnace, a forge harnessing the power of the Tartarigami left behind by the serpent of Yashiori island.
- Yashiori: This island still bears the scars of the Electro Archon's fight with a great serpent, and its split-skeleton can still be seen along with Musoujin Gorge, a ravine created by the slash that cut it in two.
- Seirai: This shattered island was the victim of a strange disaster and is now eternally engulfed by a powerful thunderstorm.
- Watatsumi: Home to the Sangonomiya Shrine and the resistance army against the vision hunt decree, this island is shaped like a crater that dips below the sea level.
- Tsurumi: A fog-shrouded island that was home to the Thunderbird, Kapatcir.

Anemoculus
Genshin Impact Anemoculus locations by region
Looking for a map to all of the Genshin Impact Anemoculus locations? There are a whopping 65 of these useful resources to find, letting you upgrade Mondstadt's statues of the seven for stamina and AR XP bonuses.
PC Gamer Newsletter
Sign up to get the best content of the week, and great gaming deals, as picked by the editors.
So, to help you find all of the Anemoculus, I've put together a Genshin Impact map to get you where you need to go. Just find the number marked on the map, head there, and follow the corresponding instructions so you can collect them all.
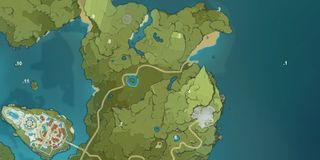
1: From the beach you will spot an island in the distance. Create an ice path and you can reach your destination: You won't have the stamina to swim that far.
2: From the cliff, use the glider. The Anemoculus is right beneath the cliff.
3: The Anemoculus is floating next to a tower.
4: On the foot of the cliff there's a pile of destructible stones (looking different to normal ones). Use a Claymore to break them quickly, or jump attacks.
5: On top of a large climbable wall.
6: Climb up to the top of the tallest pillar.
7: On top of a pile of rocks.
8: The Anemoculus is floating near a watchtower, you can climb it and glide from that point.
9: From the cliff, glide below. It’ll be on a platform, surrounded by Anemo slimes.
10: Create an ice path or glide from the top of the Mondstadt chapel. Activate the Anemo monument to get a glide boost and get it.
11: From the last glide boost you can also get this one: It’s sitting over the water nearby.
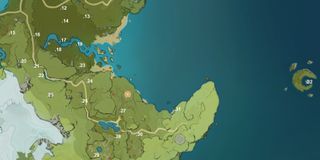
12: Floating between two trees, glide from a nearby rock to get it.
13: There’s a tree surrounded by bushes. The Anemoculus will be within its leaves, you just have to jump to get it.
14: On top of a rock.
15: On the roof of a house, you can climb or glide from the cliff next to it.
16: Climb the pillar with the chest on top, it’ll be on the edge of the cliff next to it.
17: On the branches of the giant tree, climb up there and you can't miss it.
18: Collecting the three Anemogranum will create a wind current that can lift your glider to get it.
19: Climb up the broken pillar and glide to the Anemoculus from there.
20: On the edge of a cliff above the enemy camp.
21: Jump from the edge of the cliff, it’s just below you.
22: Collecting the three Anemogranum will create a wind current that can lift your glider to get it.
23: Activate the Statue of the Seven to create a current. Ride it and the Anemoculus will be on top.
24: Floating between some trees near the temple entrance, jump to get it.
25: Climb the rock formation and glide from there, the Anemoculus is right above the enemies.
26: Collecting the three Anemogranum will create a wind current that can lift your glider to get it.
27: Floating high above the path, glide from one of the cliffs to get it.
28: Sealed in a barrier, glide from a cliff above.
29: Inside the main hut.
30: On top of a ruin, glide from the cliff to the south-west to get it.
31: Jump and glide from the cliff and you will see it on a small grass patch in the water. It won’t show up on the minimap until you get close enough.
32: You can either create an ice path or solve the puzzle of the three spirits, which lets you ride a wind current to the portal that warps you there. The Anemoculus rests on top of the Spyral Abyss gate arch.
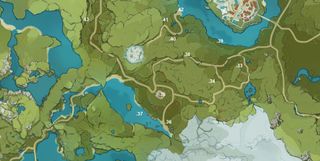
33: The Anemoculus floats above the edge of the cliff. Collecting the three Anemogranum will create a wind current that can lift your glider to get it.
34: Collecting the three Anemogranum will create a wind current that can lift your glider to get it.
35: Climb from the front door of the Winery to the balcony, and from there to the left side of the roof, where the Anemoculus will be waiting.
36: Activate the Anemo pillar, that summons three Anemogranum that will create a wind current once you get them, so you can ride it and get the Anemoculus.
37: Either glide to this point from a nearby cliff or create an ice path to reach it.
38: The Anemoculus is right underneath the edge of this cliff. Jump with the glider, and turn around to get it.
39: Either glide to this point from a nearby cliff or create an ice path to reach it.
40: The Anemoculus rests on top of one of the pillars. Use fire to burn the brambles.
41: The Anemoculus rests over a circle of pillars, climb a cliff, and glide from there to get it.
42: Observe the trees close to the cliff’s edge, the Anemoculus will be on top of one of those.
43: Climb the rocks as high as you can, the Anemoculus will be on a ledge sticking out of the cliffside—you can glide to get it.
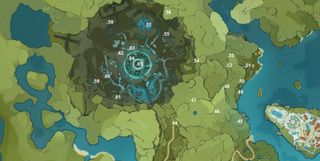
44: Floating high above the path, it's easy to get if you glide from the cliff to the east.
45: Collecting the three Anemogranum creates a wind current that can lift your glider to it.
46: On the foot of the cliff it’ll be a pile of destructible stones, breakable with a Claymore or jump attacks.
47: On the floor, beside a slime.
48: Right on the edge of the cliff.
49: Above a tree, easily obtainable by gliding from the nearest cliff.
50: Break the destructible stones with a Claymore or jump attacks
51: Jumping from the above cliff, you just have to glide in time and the current will take you up again.
52: Climb as high as you can and glide to avoid the barrier guarding it.
53: Underneath the staircase, break the boulders on the right side next to them and you will be able to enter.
54: Activate the Anemo monument and ride the wind current to get it.
55: Under the highest arch in this section of the ruins, ride the wind currents and you’ll be able to get it.
56: The high pillar in this location is actually hollow with the entrance at the top. Climb to the cliff above it, and then glide to enter into the pillar. The Anemoculus will be resting at the bottom.
57: Climb up the hourglass-shaped rock and glide from there, it’s easy to spot it from here.
58: Climb to the highest point of the central tower and glide from there to the point marked, landing in the upper part of the pillars circle and walking until you reach the Anemoculus.
59: The Anemoculus is resting over the branches of the large tree near the bridge, you just have to climb.
60: Climb up the cliff to the right of the last Anemoculus, and you should find an Anemo monument. Activate it and ride the wind current to get it.
61: The Anemoculus is resting on top of the pillar, you can either climb to the top or glide from a near cliff.
62: You will see some platforms look for a cave-like entrance: The Anemoculus is inside.
63: On ground level, in a small cavity underneath the ruins you can find this Anemoculus slightly hidden behind a pillar.
64: On the level below the Statue of Seven, floating near a Ruin Guard.
65: On the top floor of the Temple, next to a chest.
Shrine of Depths
Every Shrine of Depths location for Mondstadt, Liyue and Inazuma
If you're looking for powerful artifacts and character ascension materials, then you'll also want to check out all of the Shrine of Depths locations in Genshin Impact. Below is where to find each special dungeon in Mondstadt, Liyue, and Inazuma.
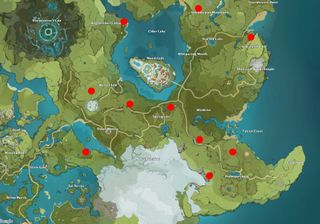
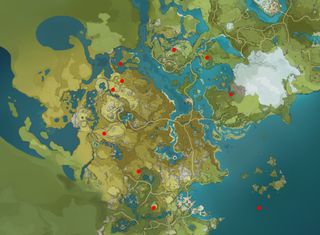
There is also a single shrine of depths located at the peak of Dragonspine. To discover it you must unlock access to the top of the mountain by destroying magical crystals. This handy peak of vindagnyr guide will help you out.
<a href="https://www.pcgamer.com/best-genshin-impact-kokomi-build-banner/" data-link-merchant="pcgamer.com"" target="_blank">Genshin Impact Kokomi build: Divine Priestess
<a href="https://www.pcgamer.com/best-genshin-impact-baal-build-banner/" data-link-merchant="pcgamer.com"" data-link-merchant="pcgamer.com"" target="_blank">Genshin Impact Raiden build: Electro Archon
<a href="https://www.pcgamer.com/how-to-get-genshin-impact-childe-tartaglia-build-best/" data-link-merchant="pcgamer.com"" data-link-merchant="pcgamer.com"" data-link-merchant="pcgamer.com"" target="_blank">Genshin Impact Childe build: Fatui Harbinger
<a href="https://www.pcgamer.com/genshin-impact-hu-tao-build-banner-materials/" data-link-merchant="pcgamer.com"" data-link-merchant="pcgamer.com"" data-link-merchant="pcgamer.com"" data-link-merchant="pcgamer.com"" target="_blank">Genshin Impact Hu Tao build: Pyro prankster
Most Popular


