Chapter 15's Cosmic Realm is a mind-bending location that sends you round in circles, which makes finding all of the City of Ry'uul secrets a bit of a pain. Though far from the largest level in Doom: The Dark Ages, its several separate maps make it hard to figure out exactly when you're able to access secrets you can see just out of reach.
Don't worry though, I've figured out the perfect route to collect all the Doom: The Dark Ages secrets in Chapter 15, City of Ry'uul, so you're not clueless in the Cosmic Realm. Below you'll find all the secrets and collectibles laid out in chronological order, so you can easily grab them as you go through the mission.
Doom: The Dark Ages City of Ry'uul secrets and collectibles (Chapter 15)
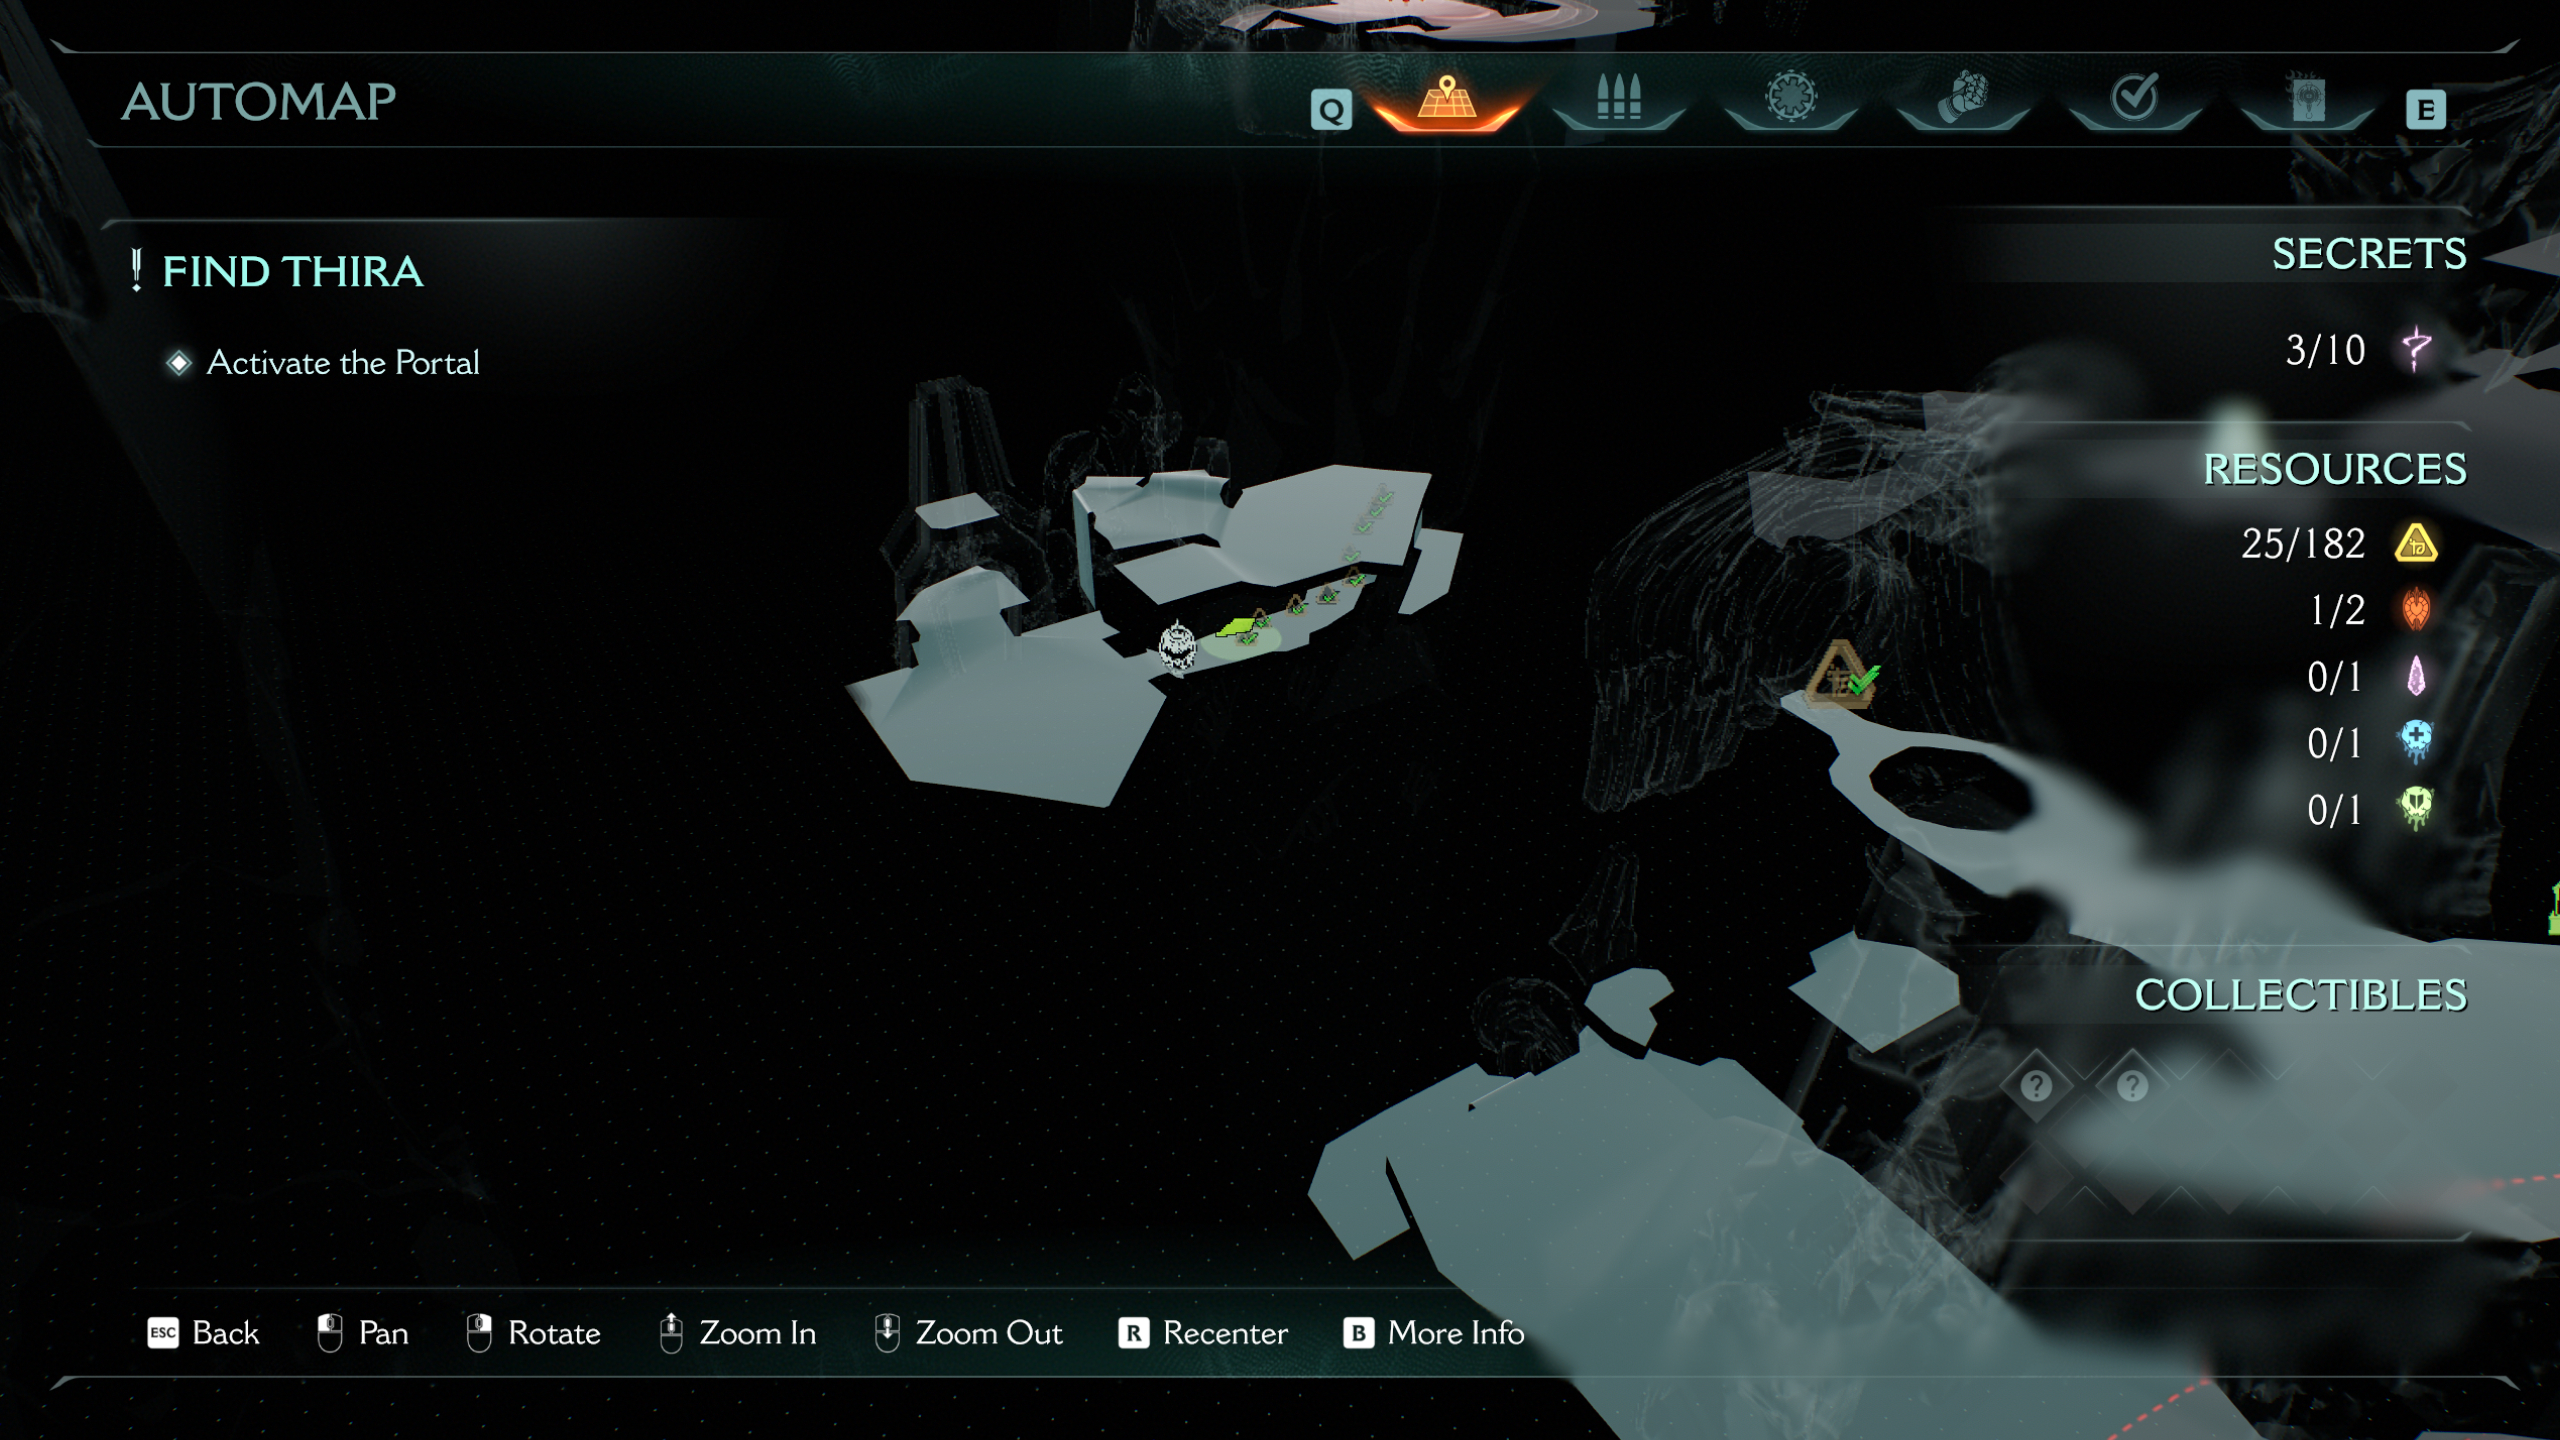
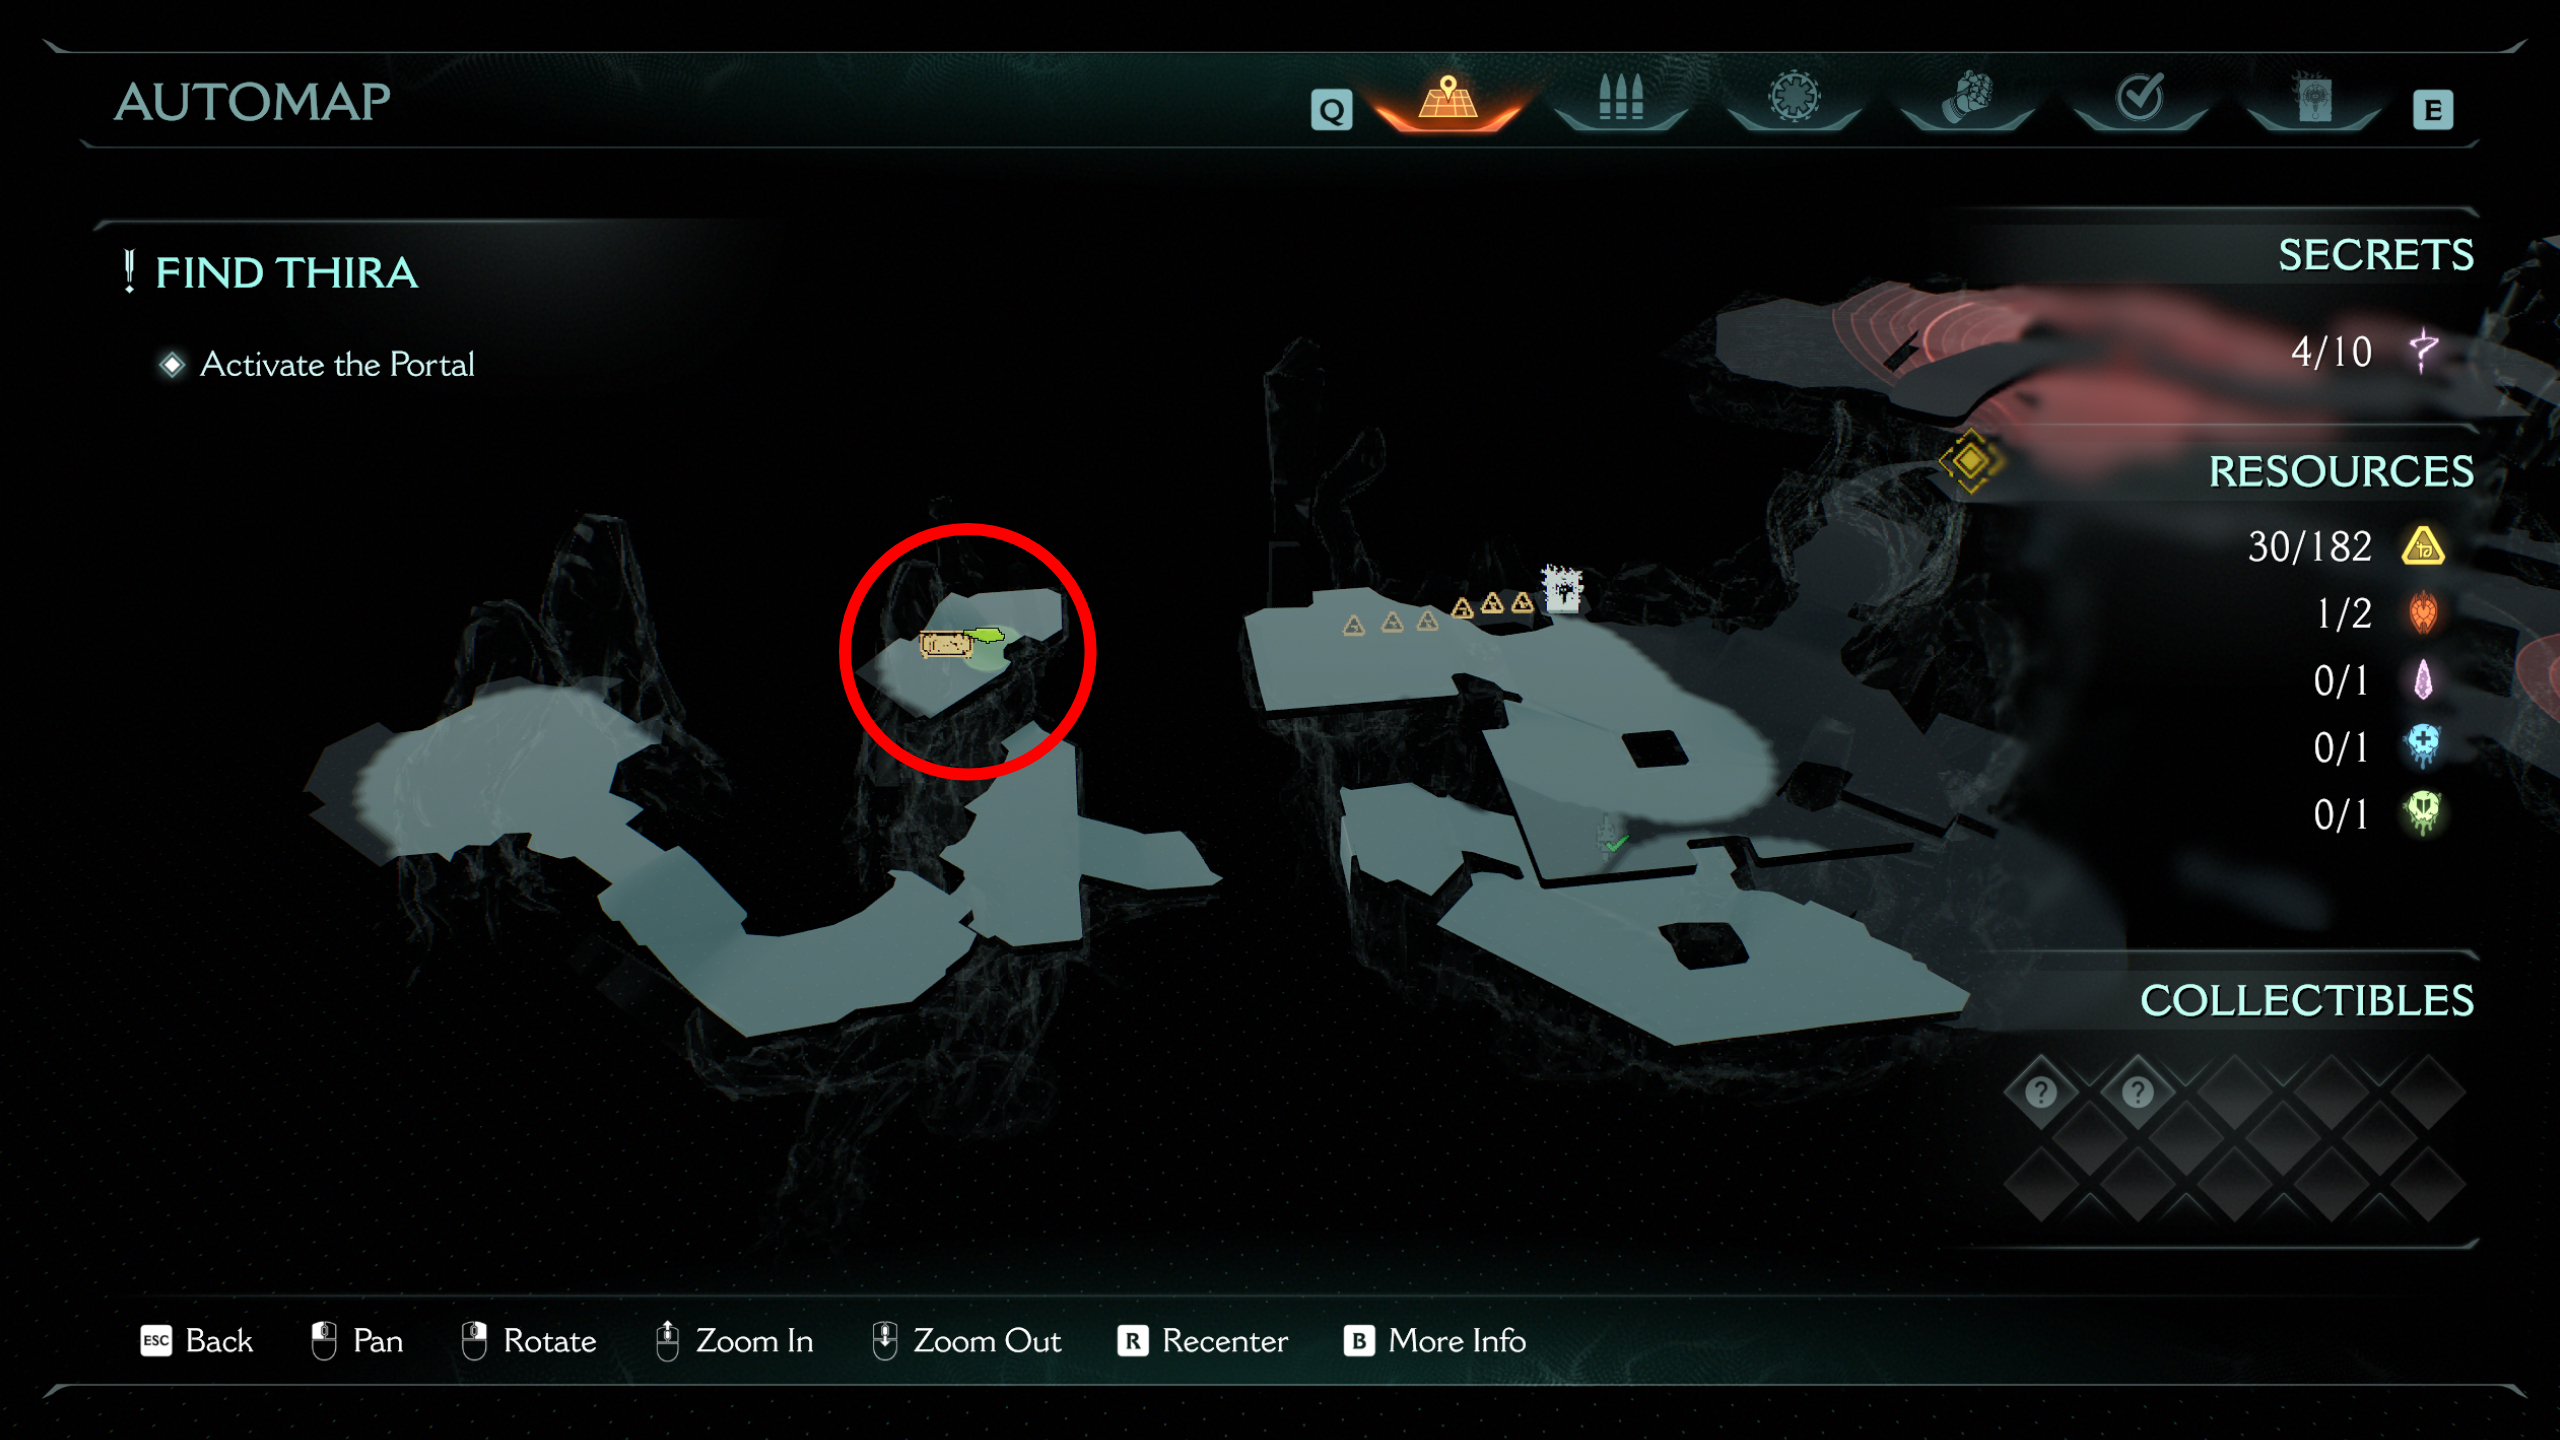
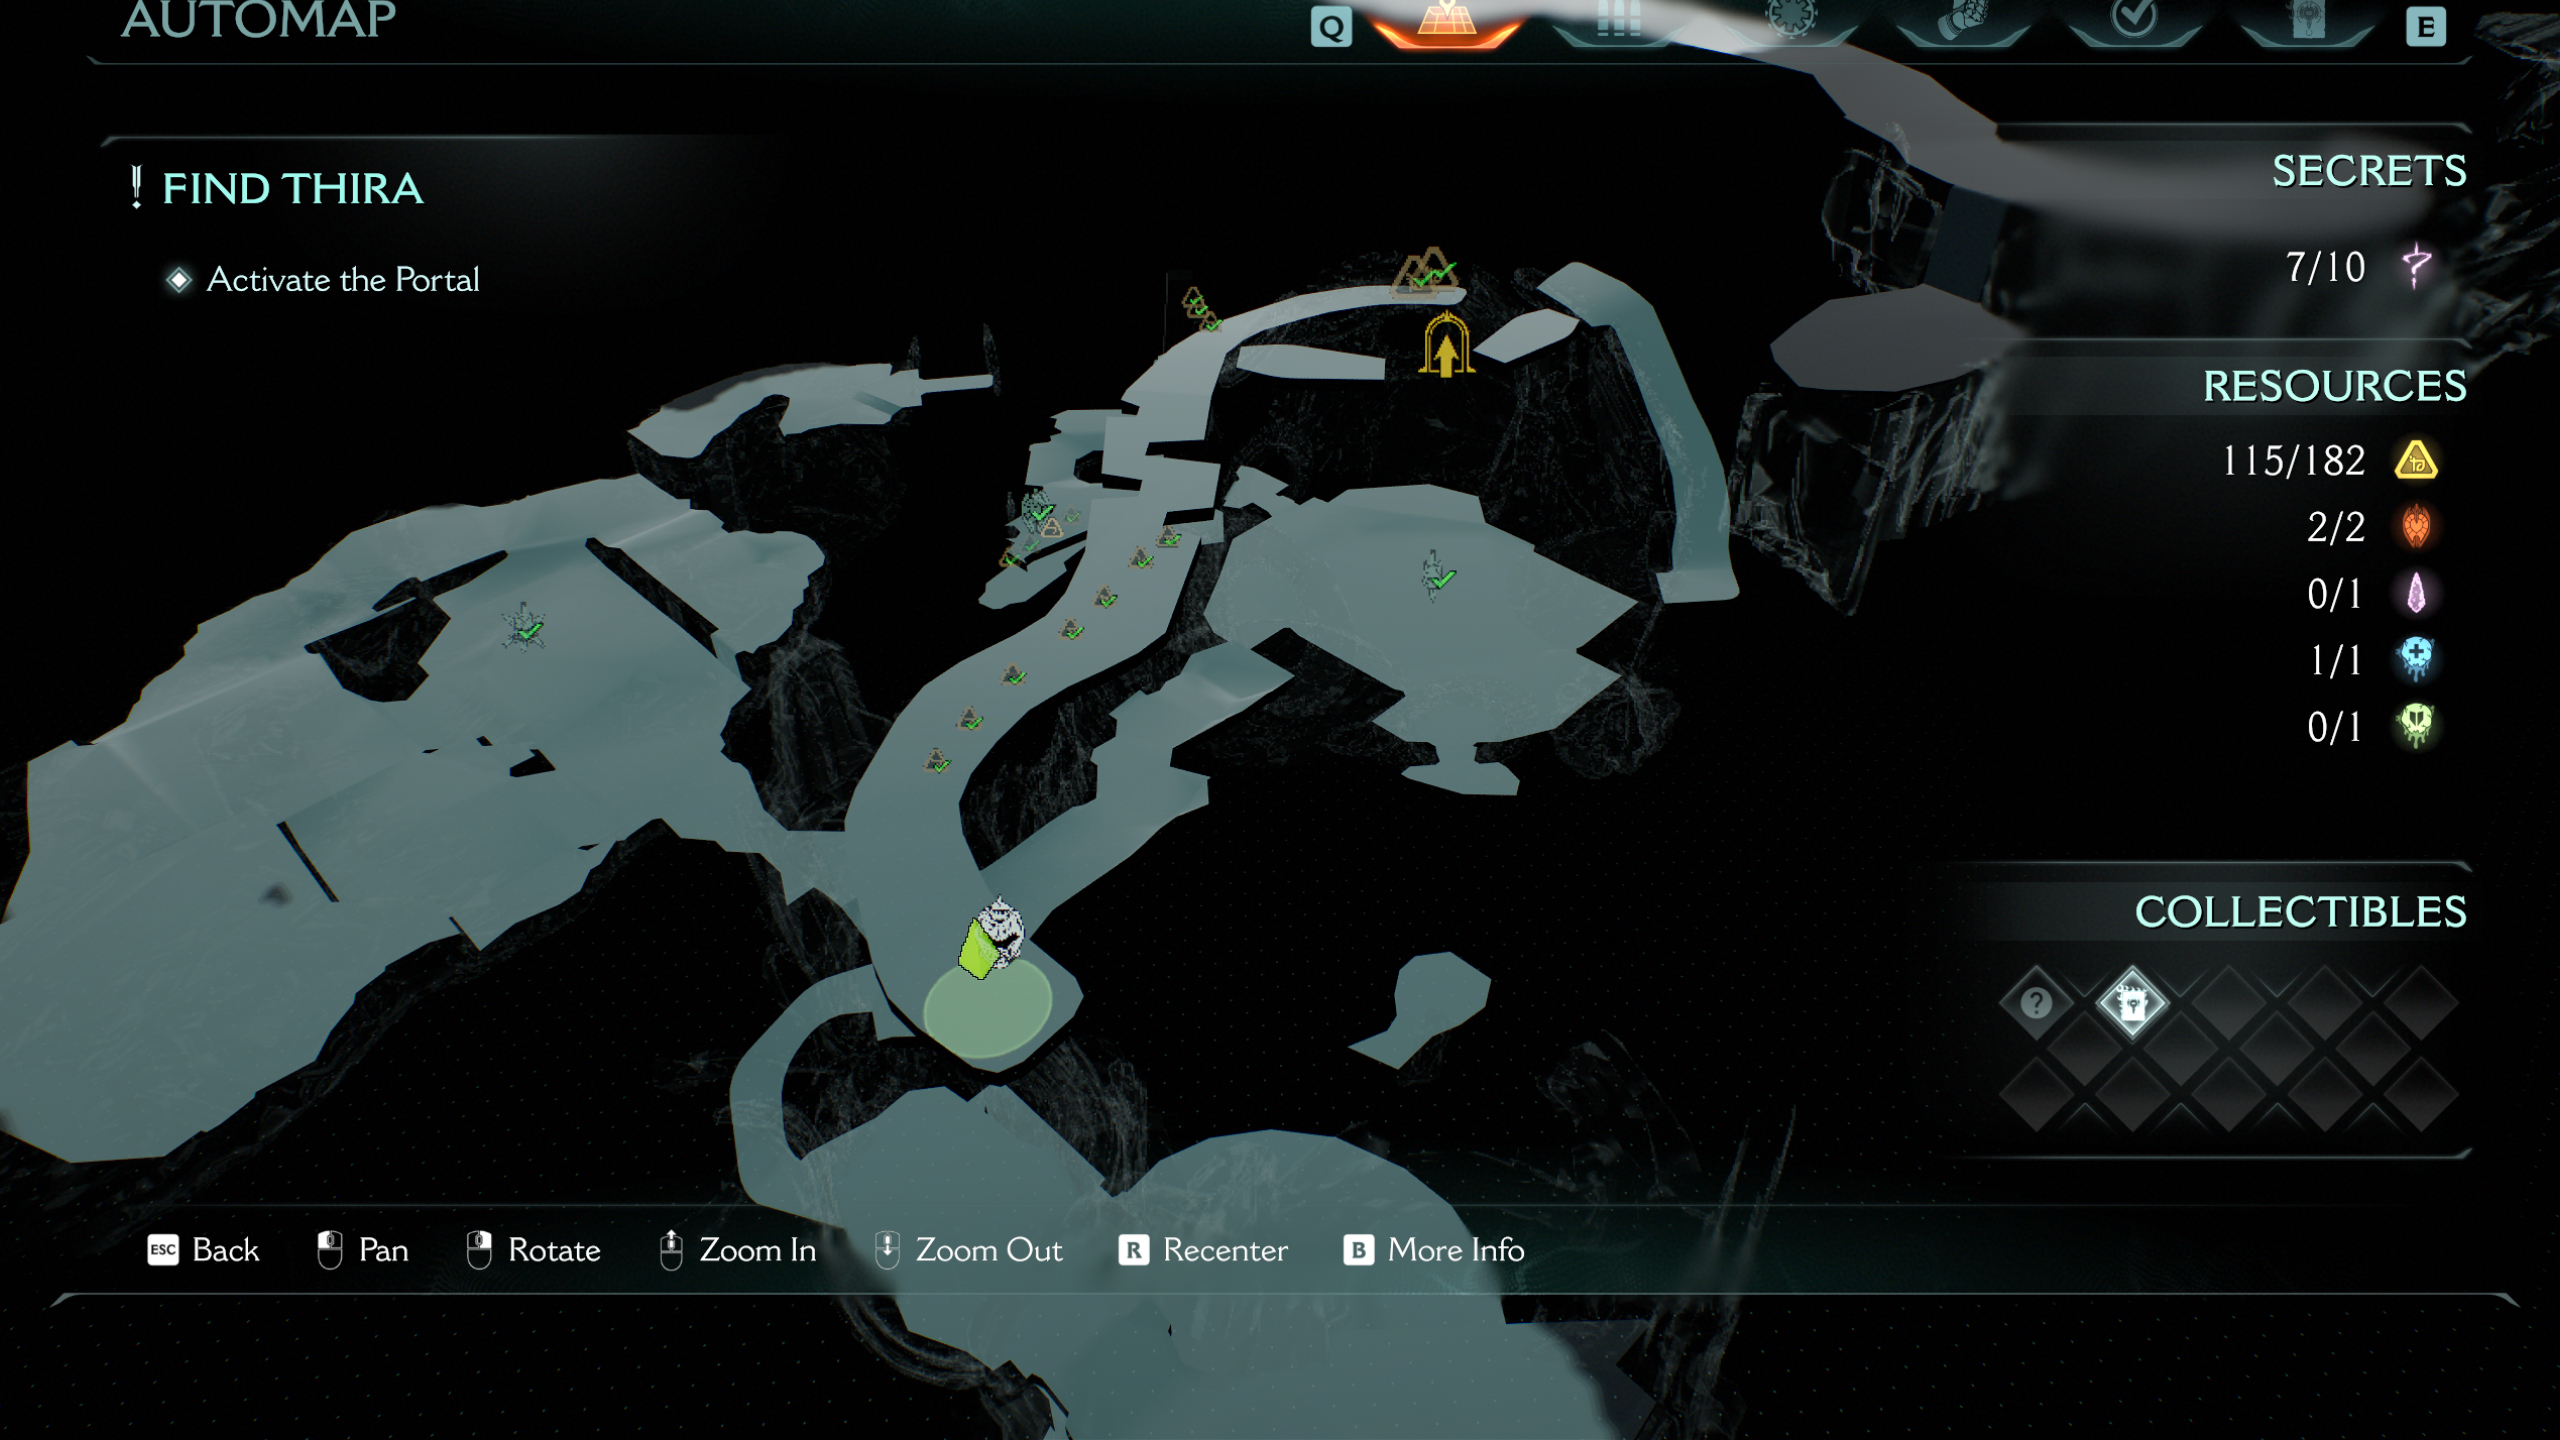
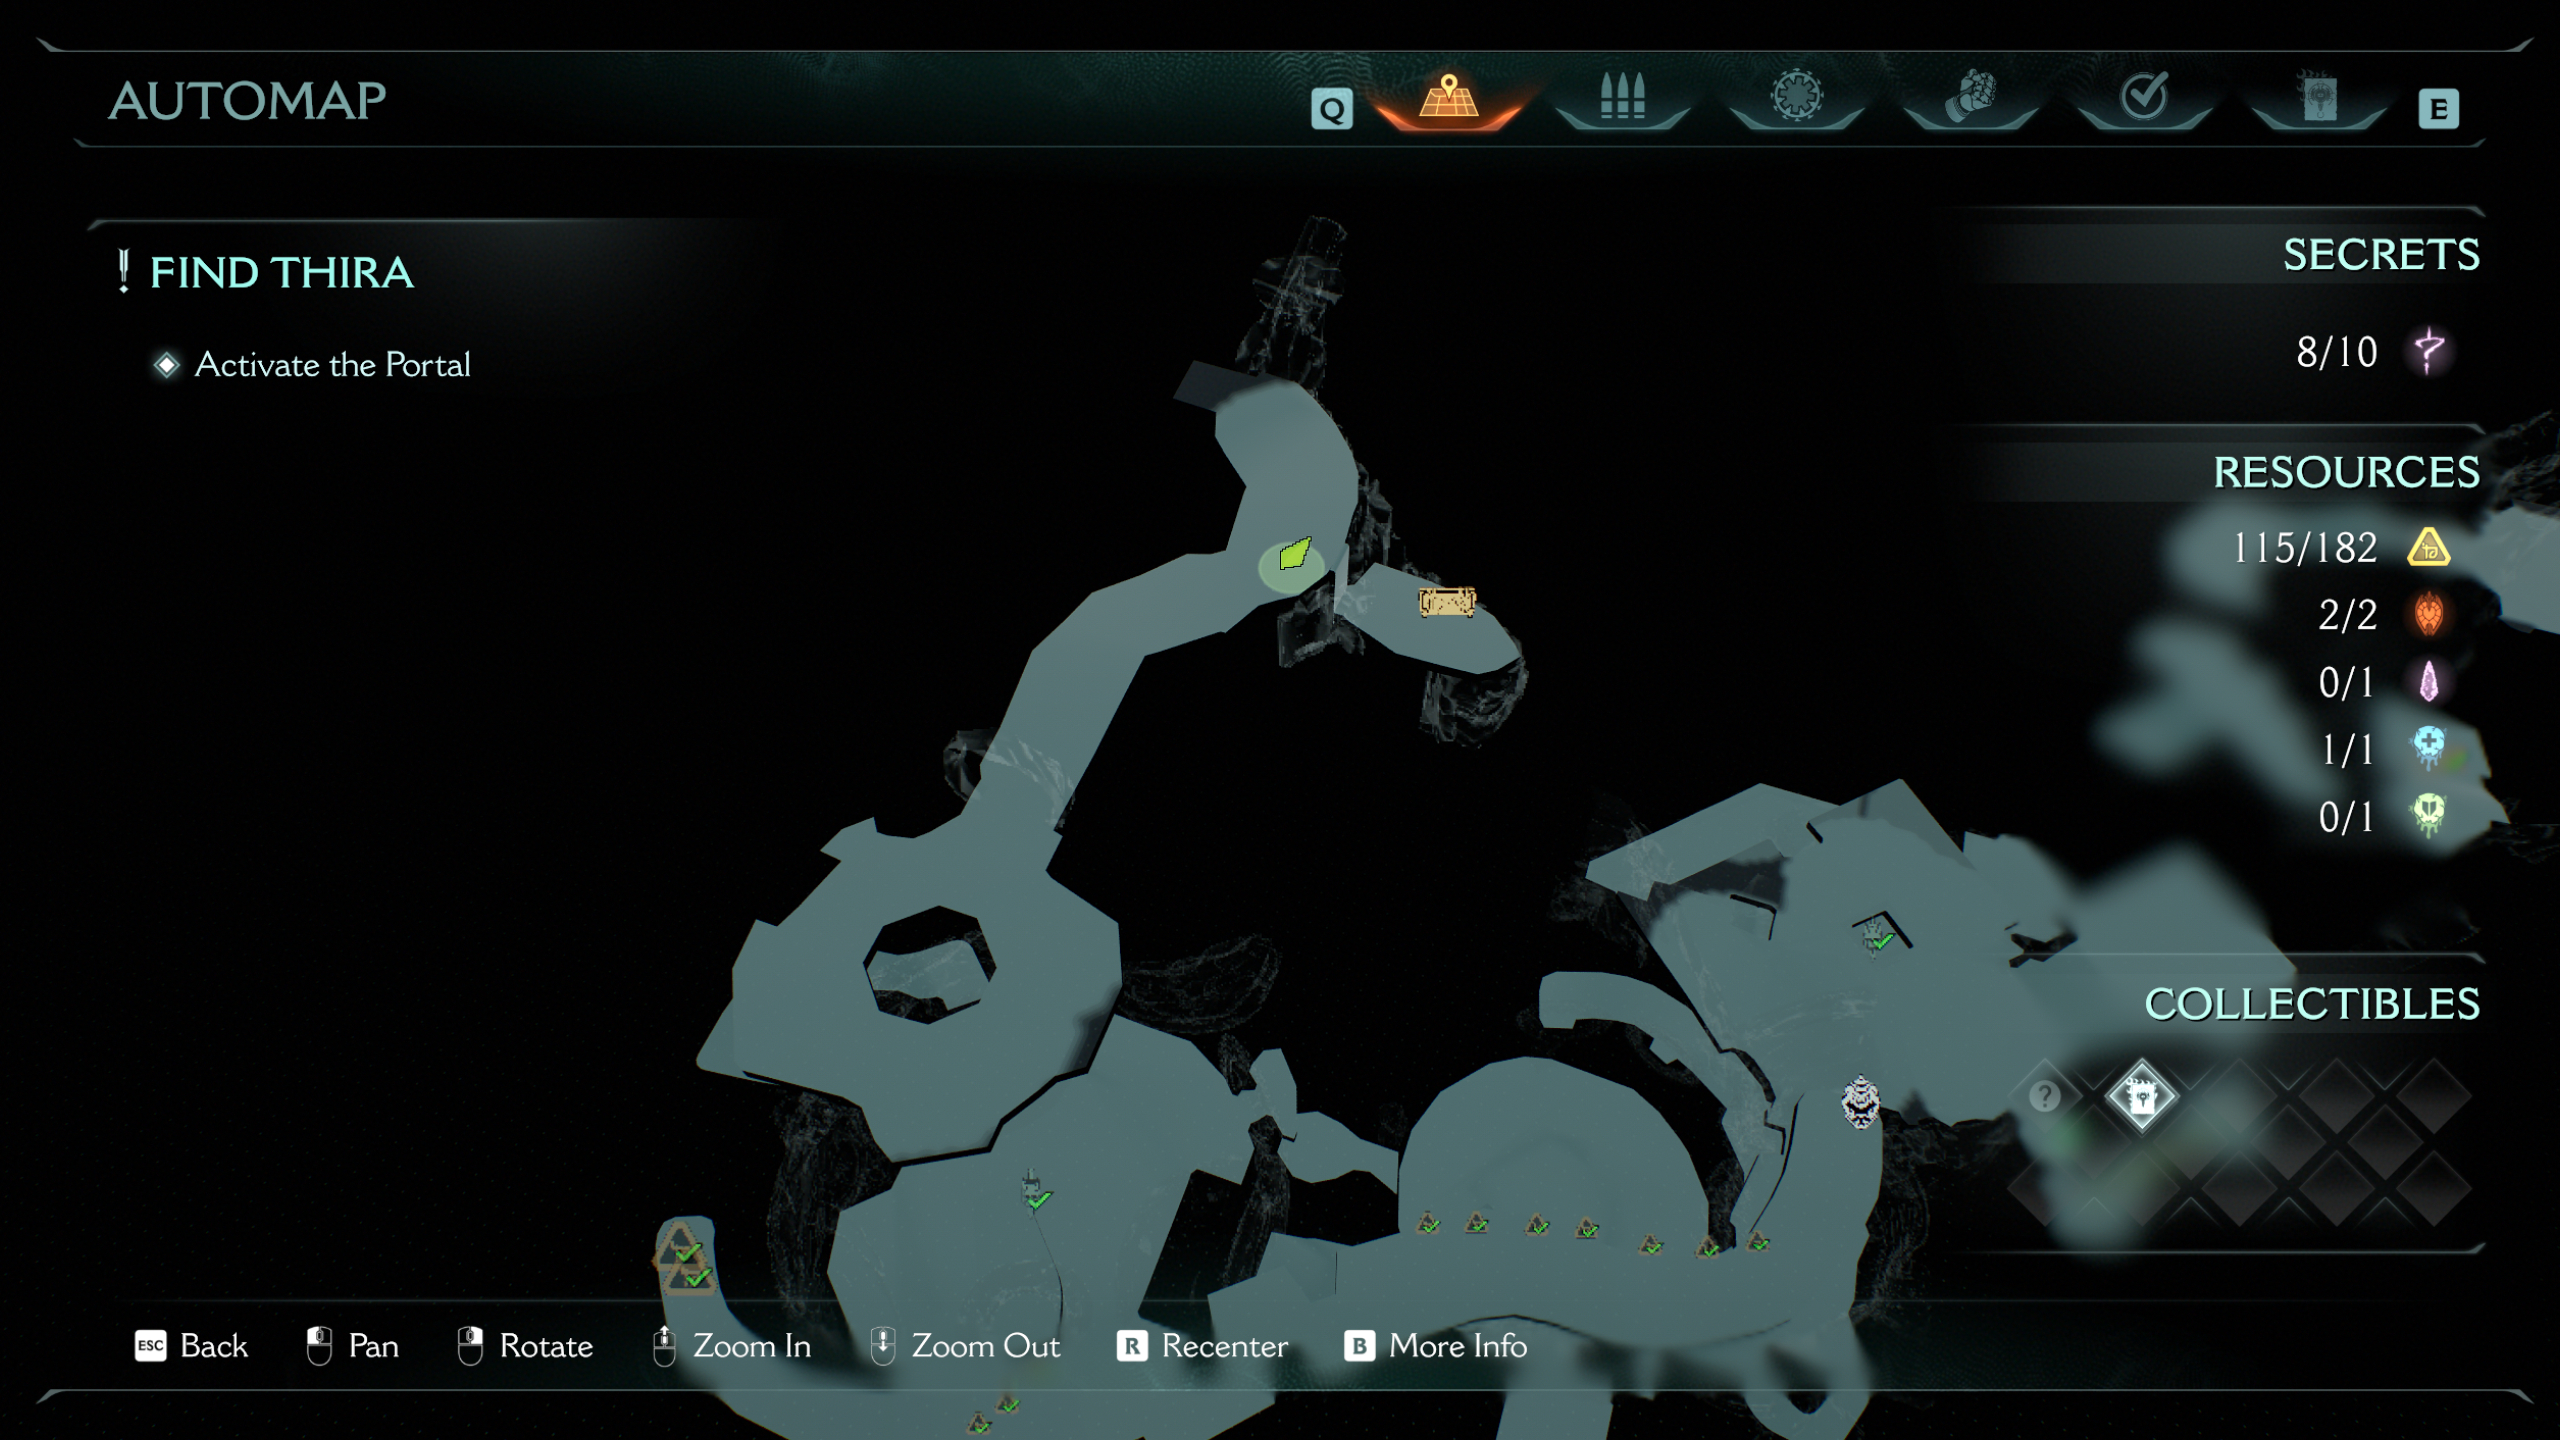
There are ten secrets and two collectibles in Chapter 15. Sadly, these collectibles are just a codex and a toy, so no fancy new weapon skin up for grabs in the City of Ry'uul. There's also 182 gold, two rubies, a wraithstone, and two demonic essences, some of which you'll earn just by completing the objectives.
1 - Gold

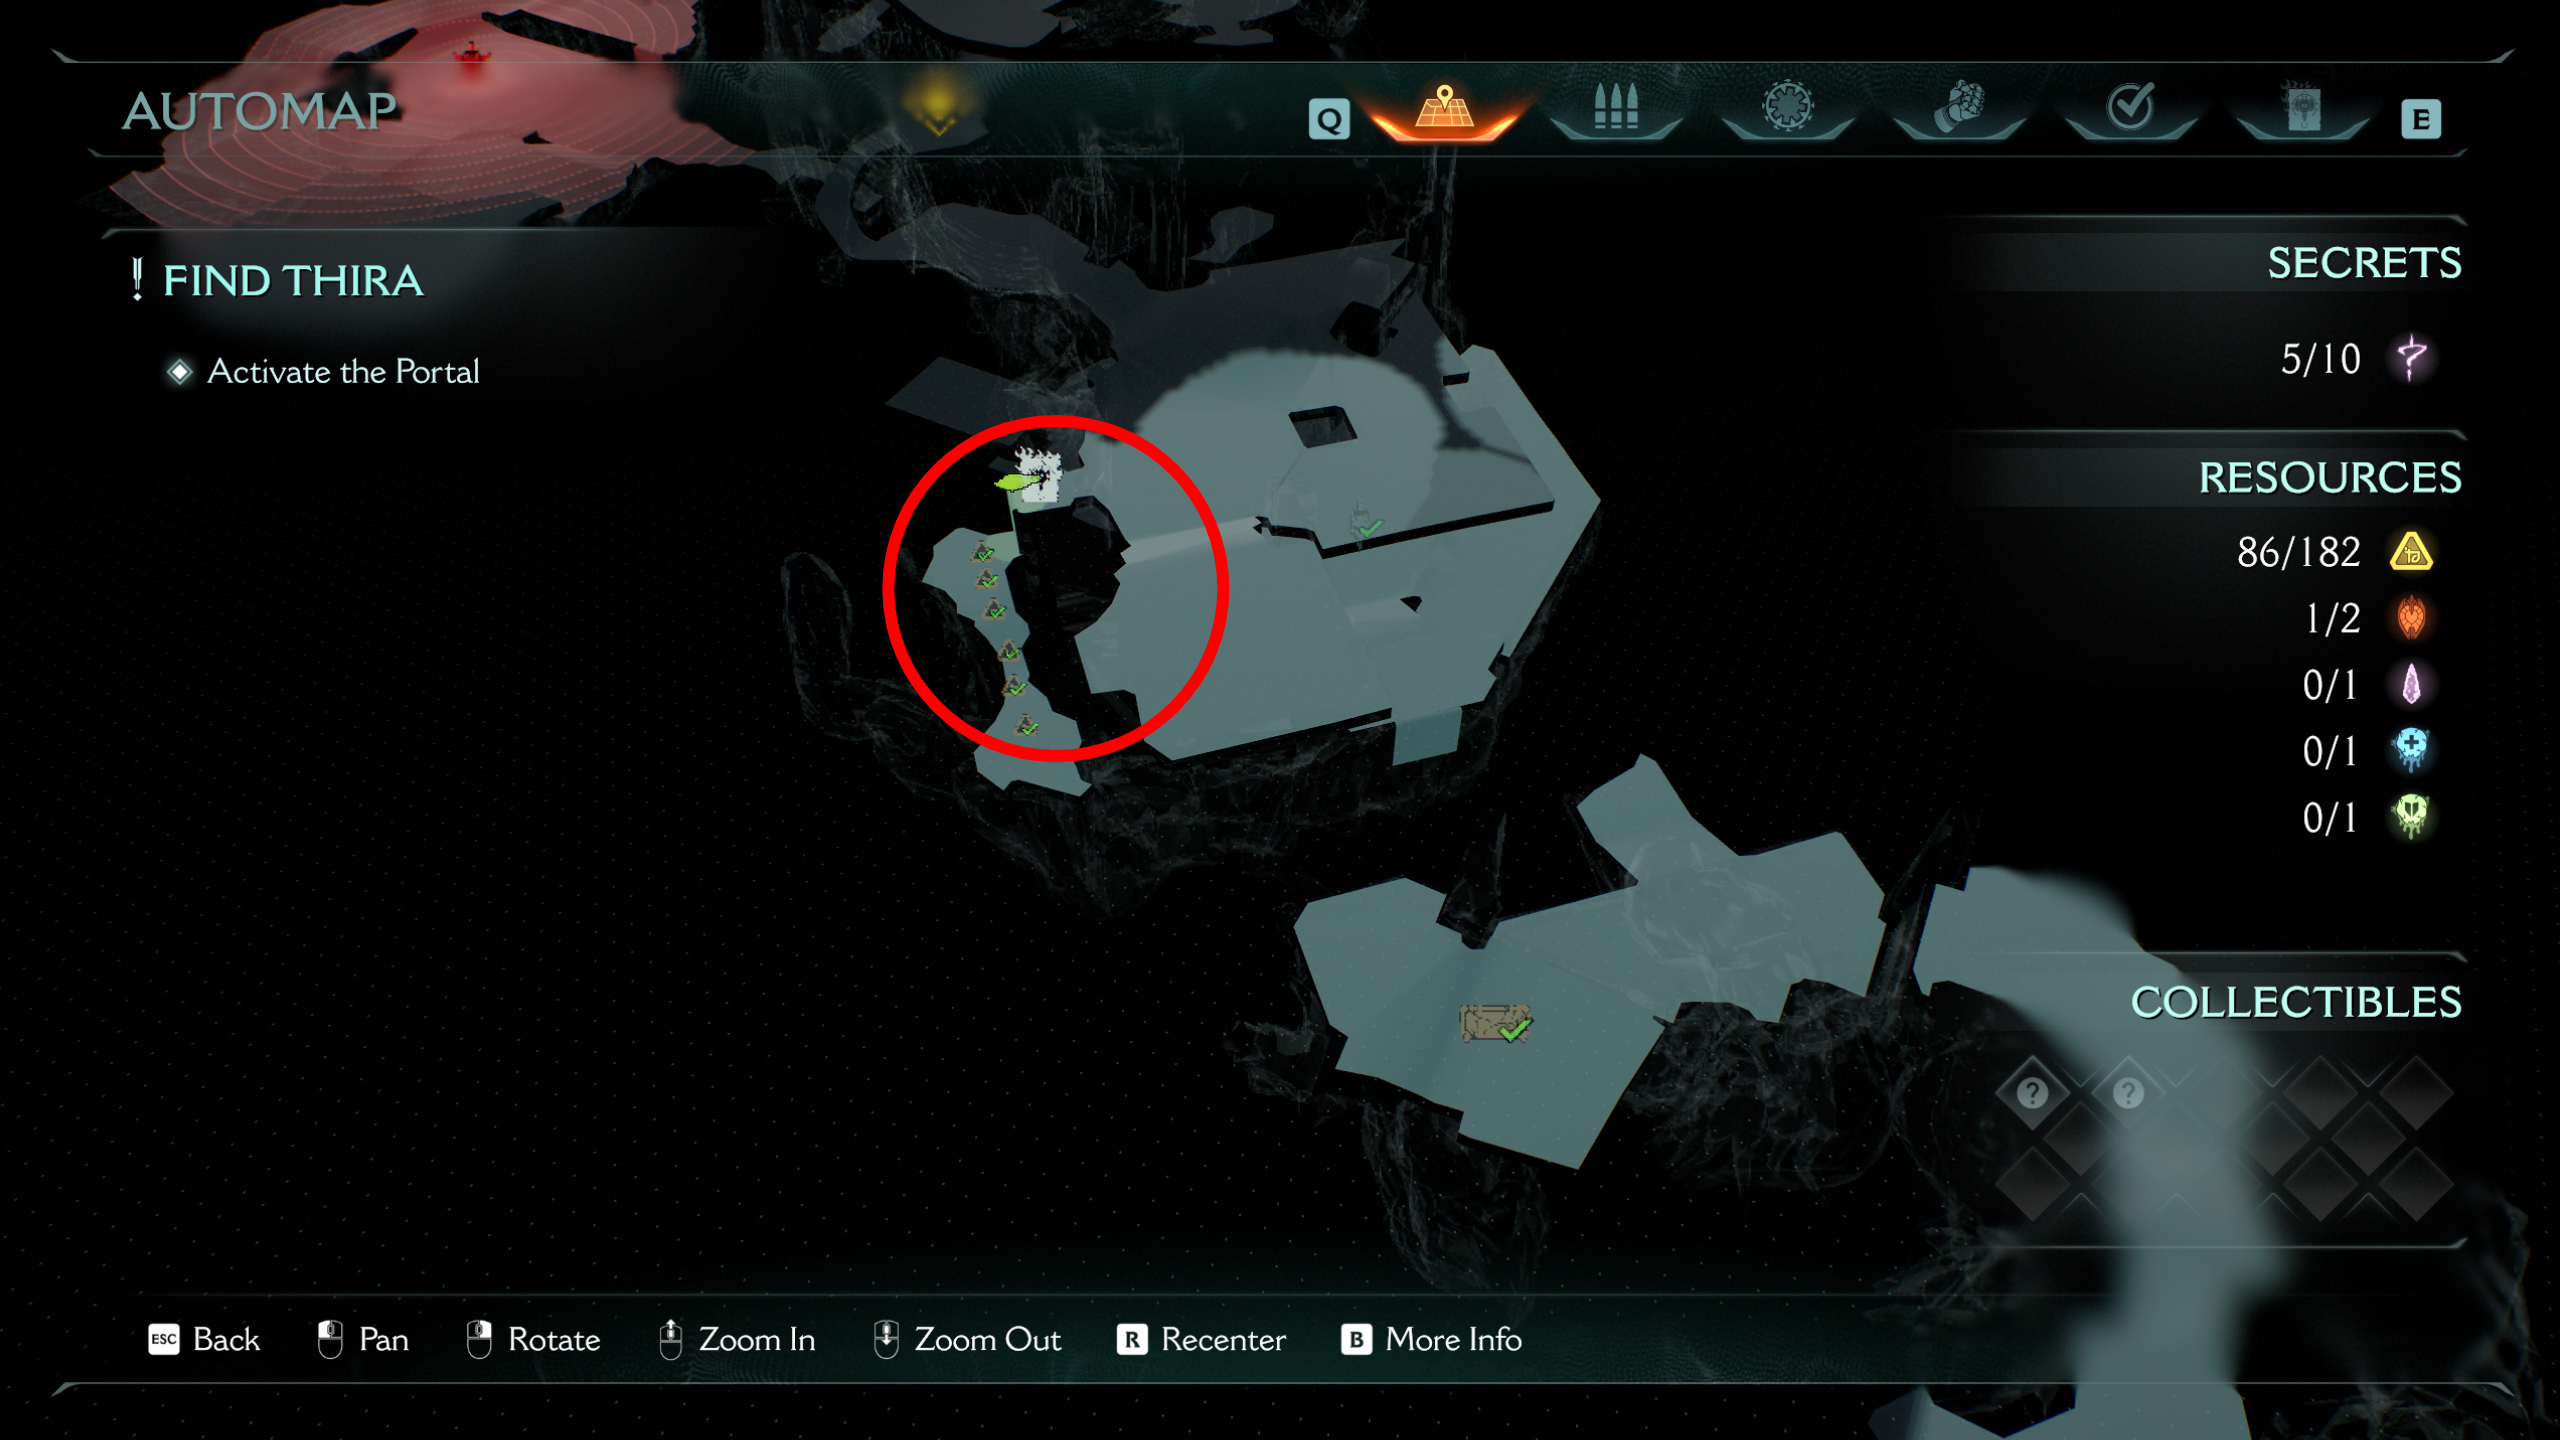
The first secret comes almost immediately; before taking the green launch ring to leave the first floating island, drop off the ledge directly underneath the ring and break the branch barricade. This reveals a small area with the gold, but also a switch to open the gate back to the starting area, which is key for the next secret.
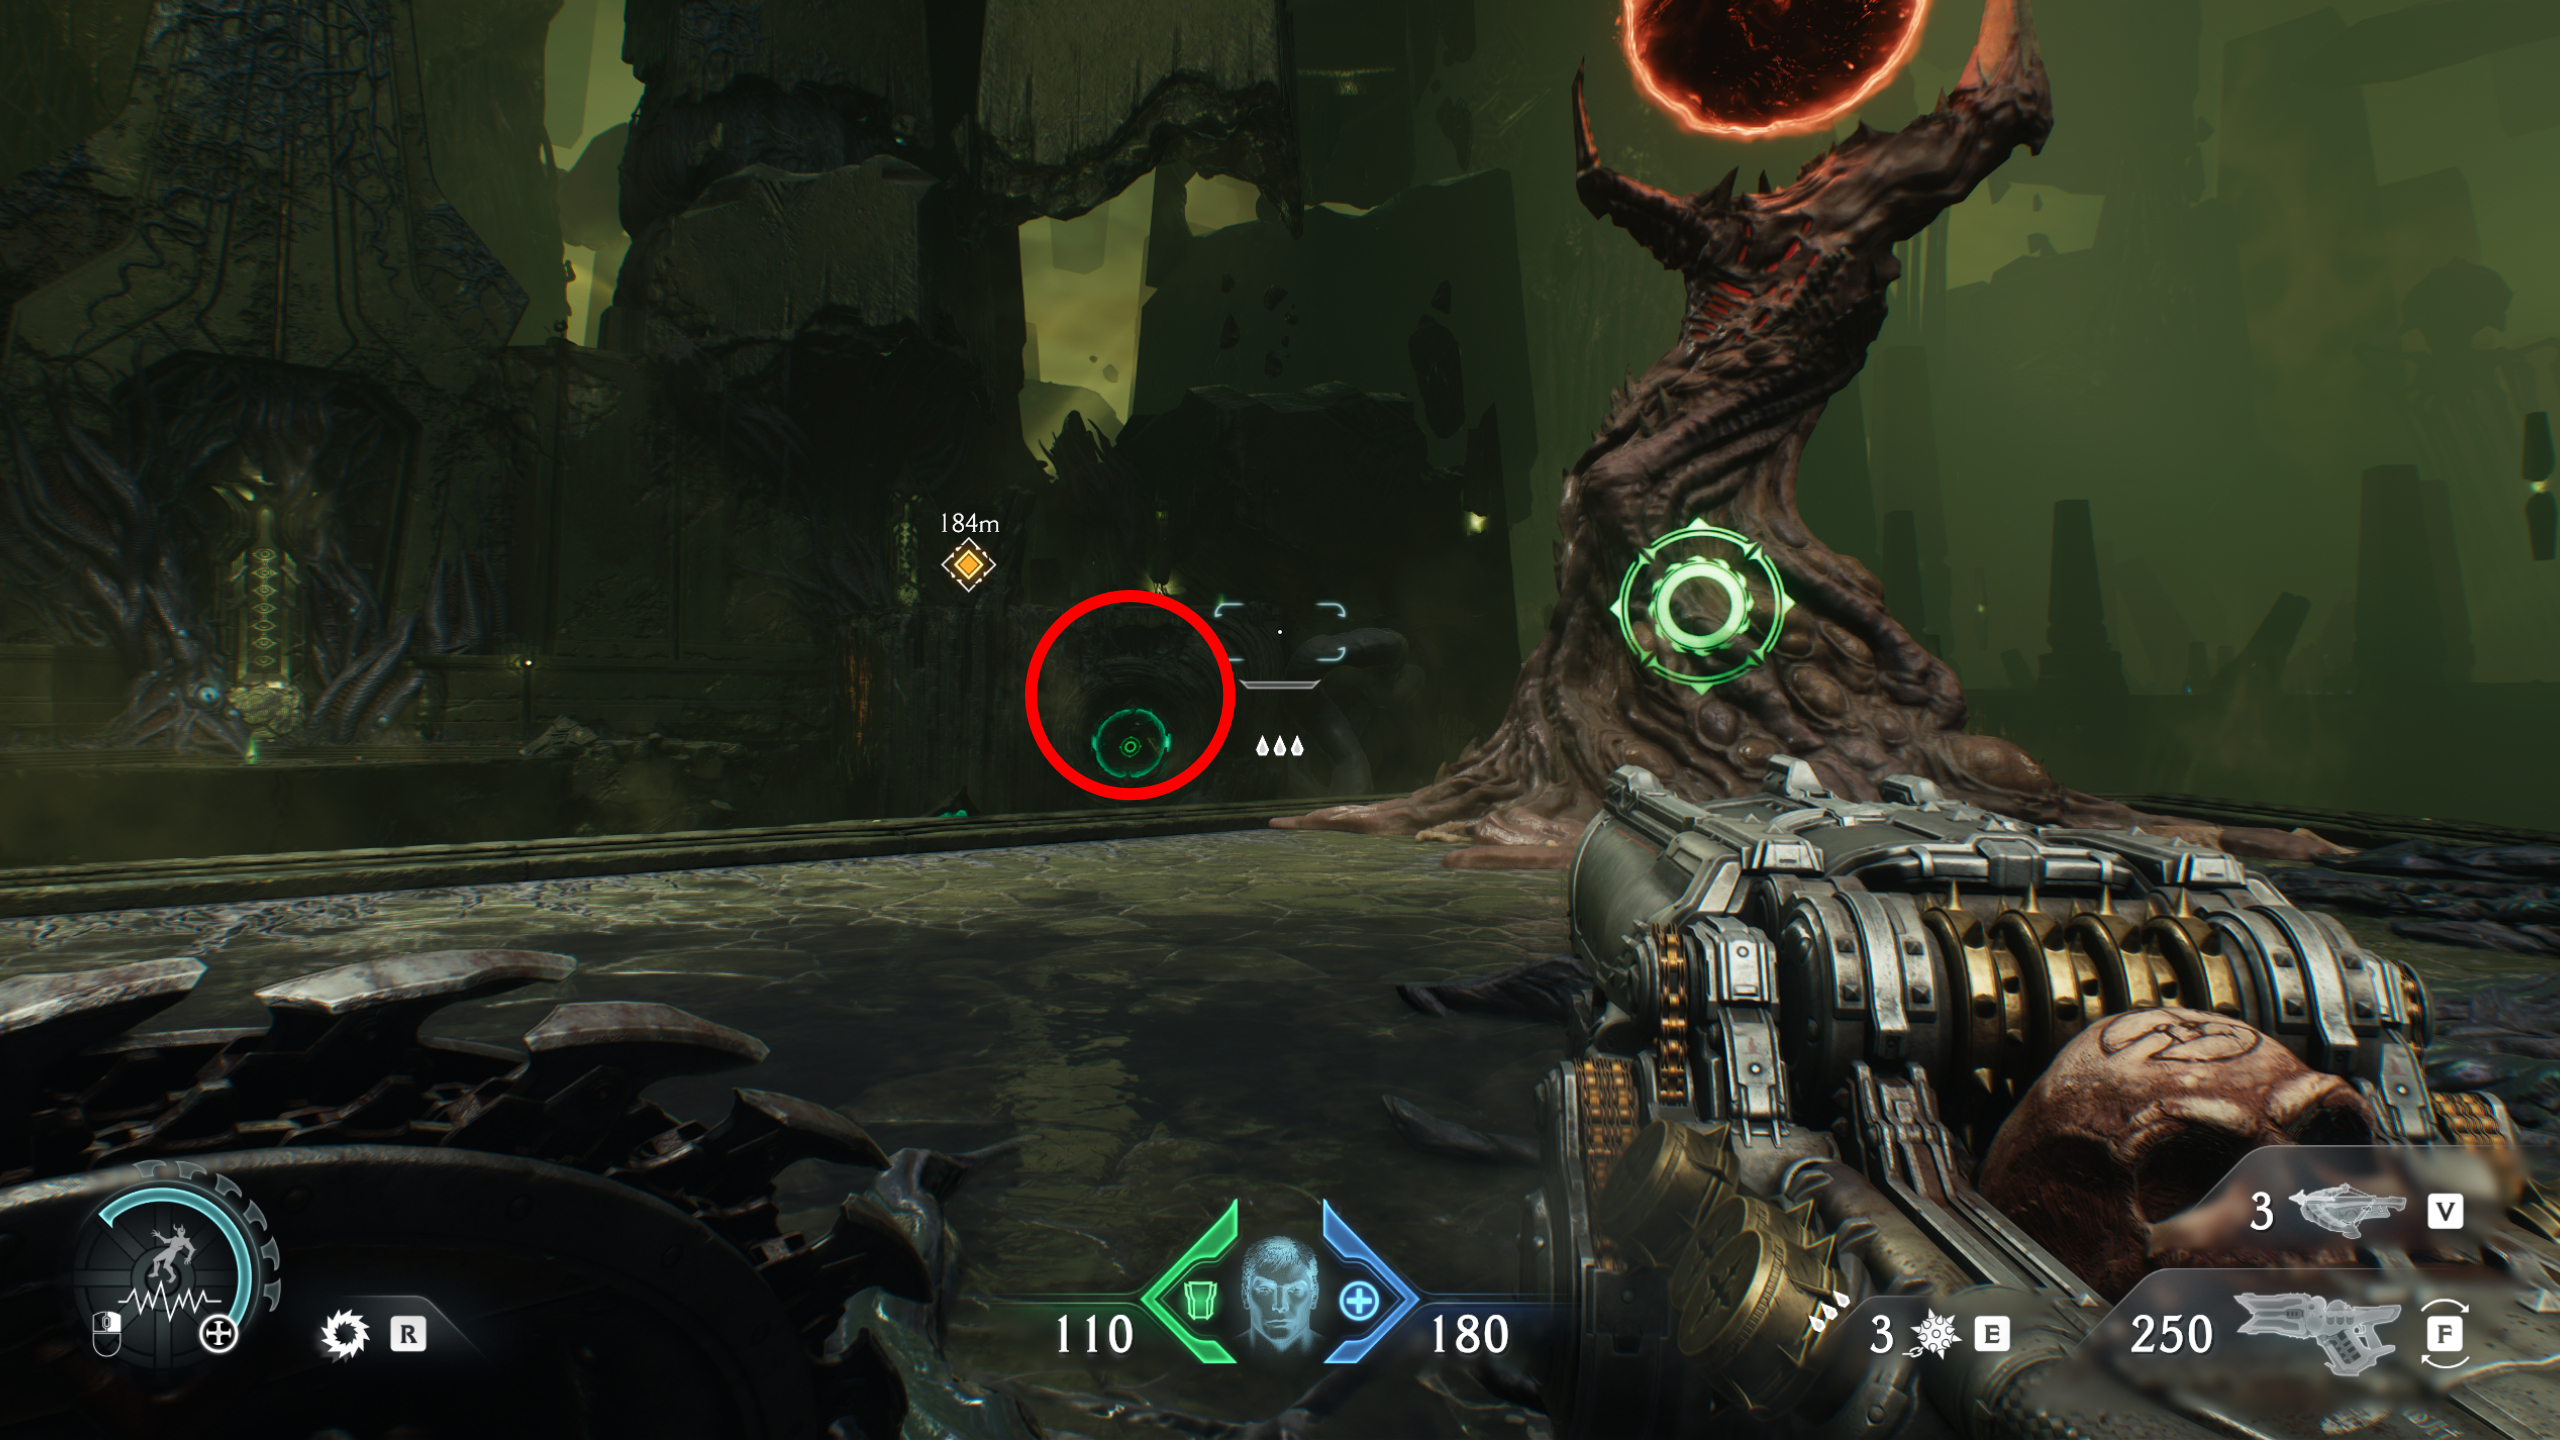
2 - Ruby
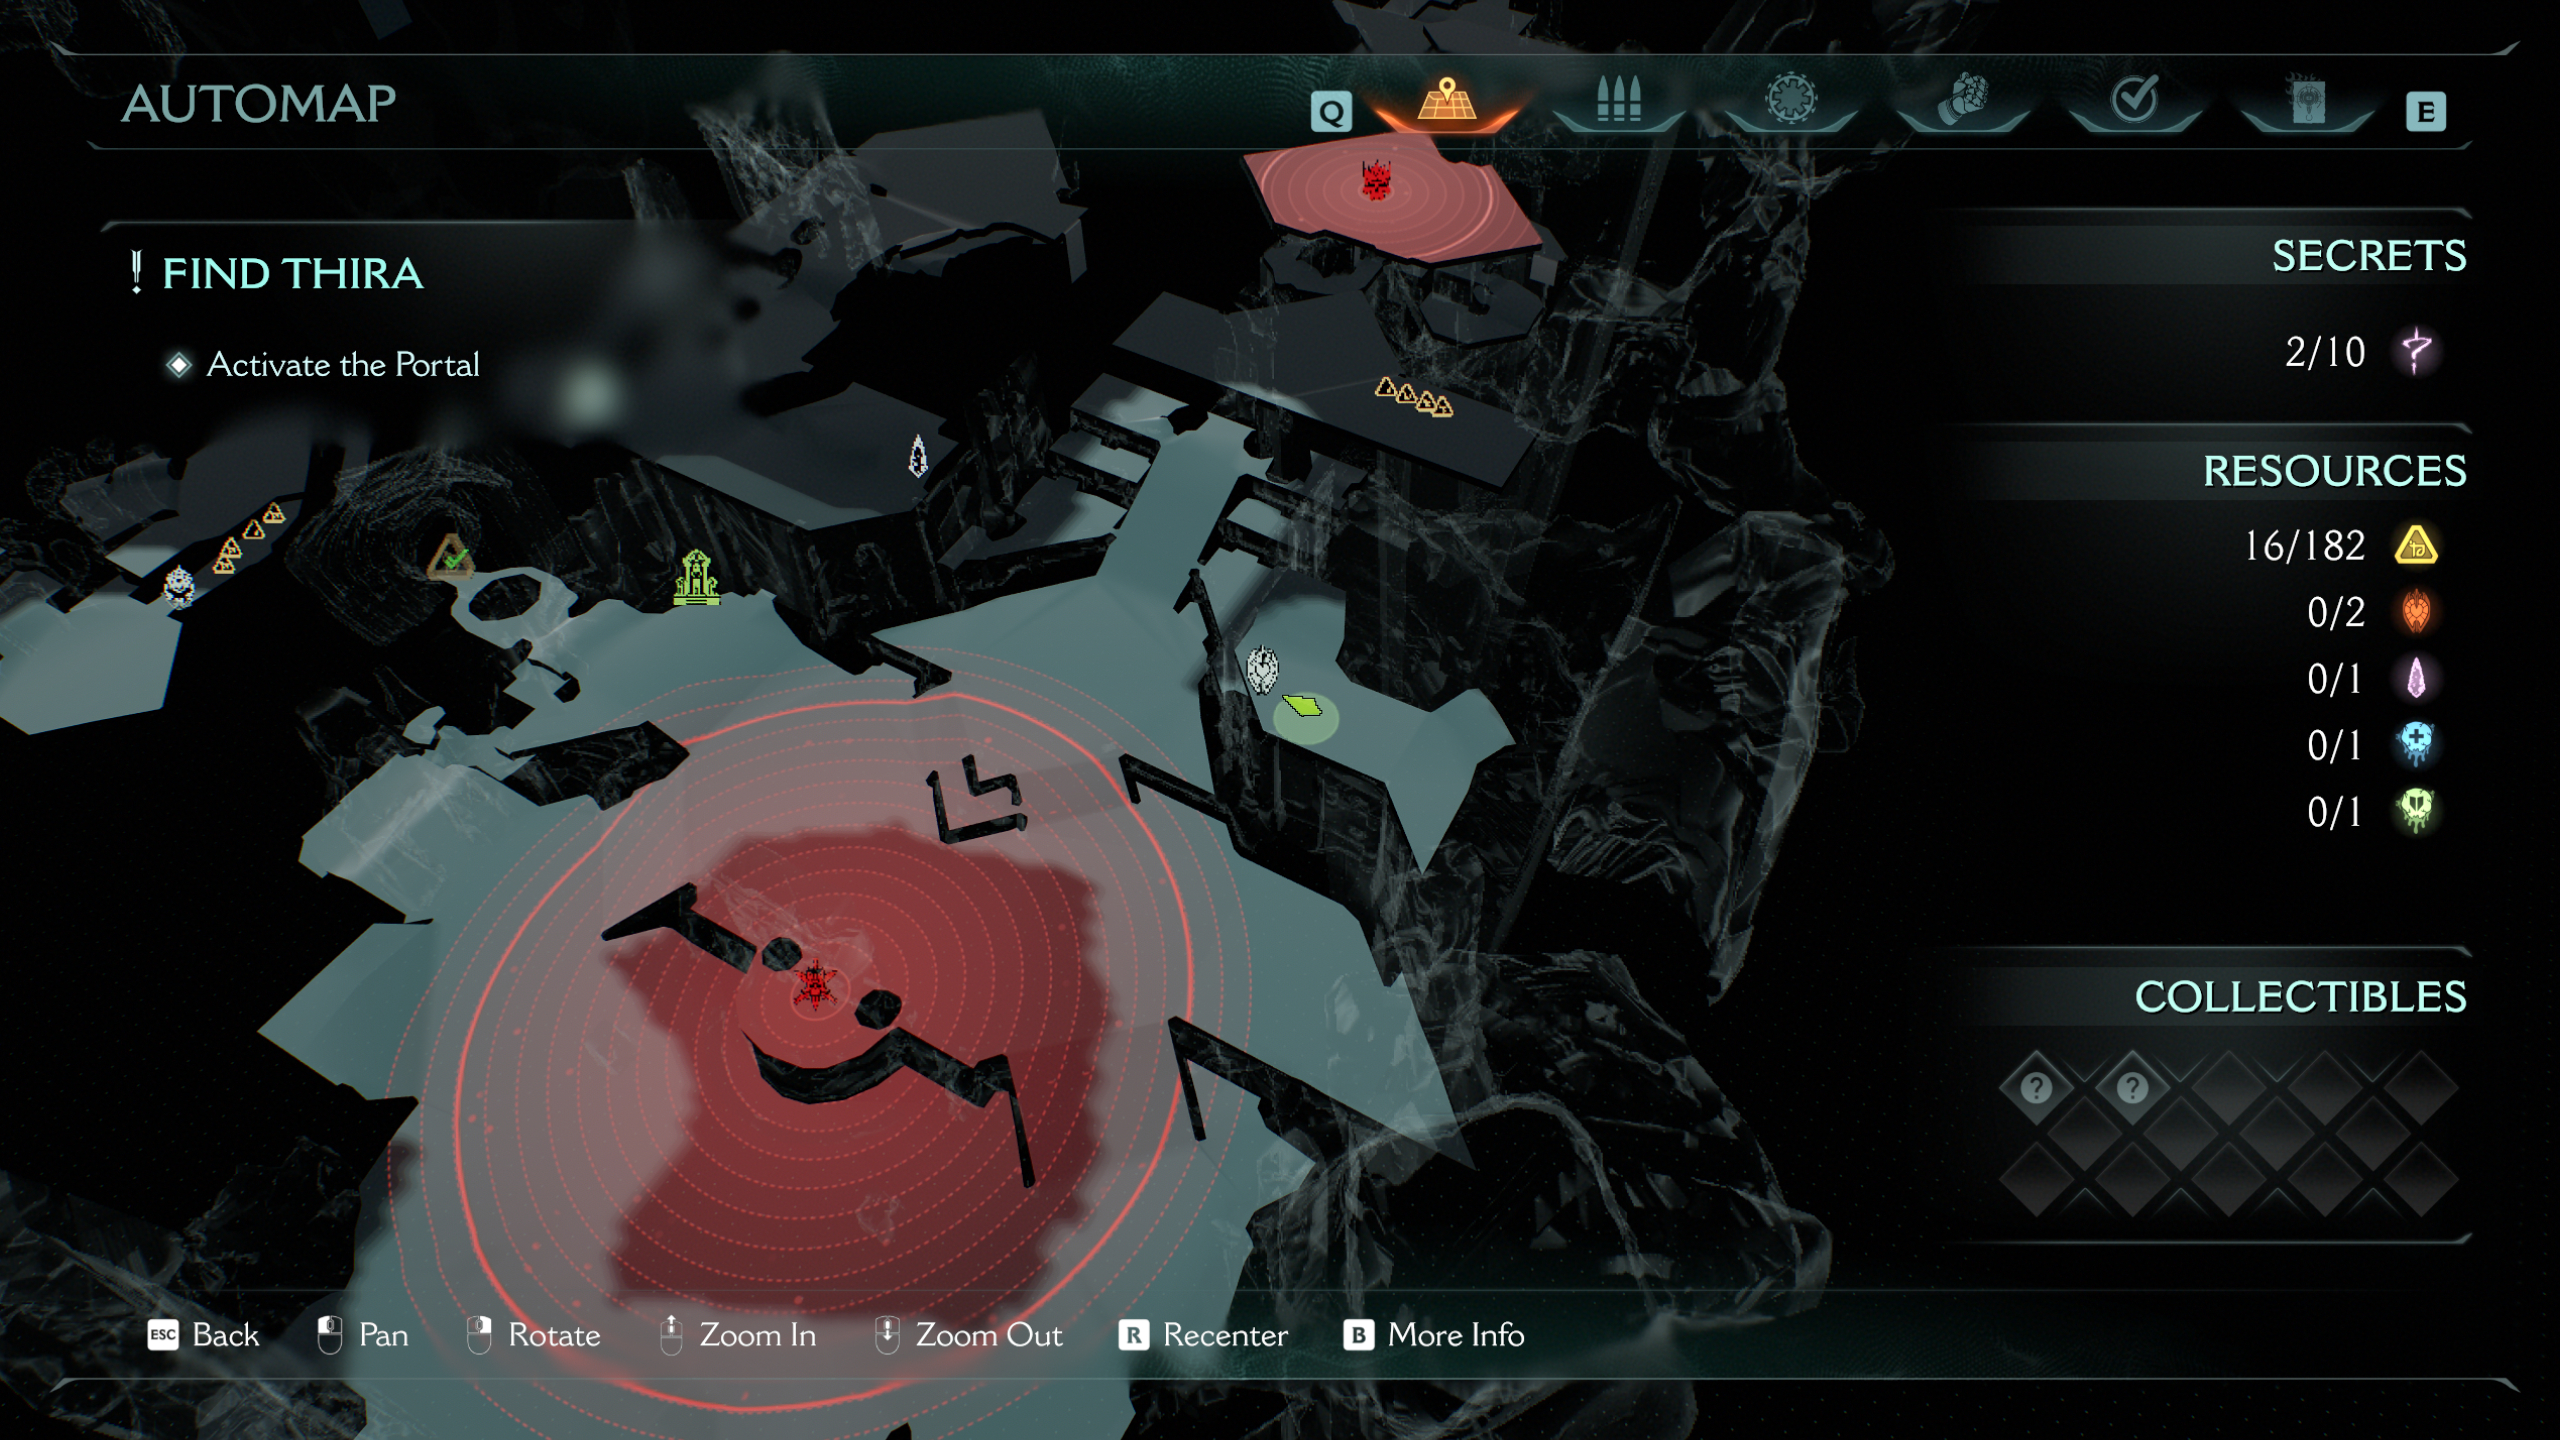
Directly after the previous secret, use the switch to open the gate, and you'll see that a jump pad also activates opposite you on the other side of the area. Take the jump pad and you're launched up to the ruby statue. You'll no doubt notice another secret and jump pad on the other side of the area from up there, but you can't get that one until much later.
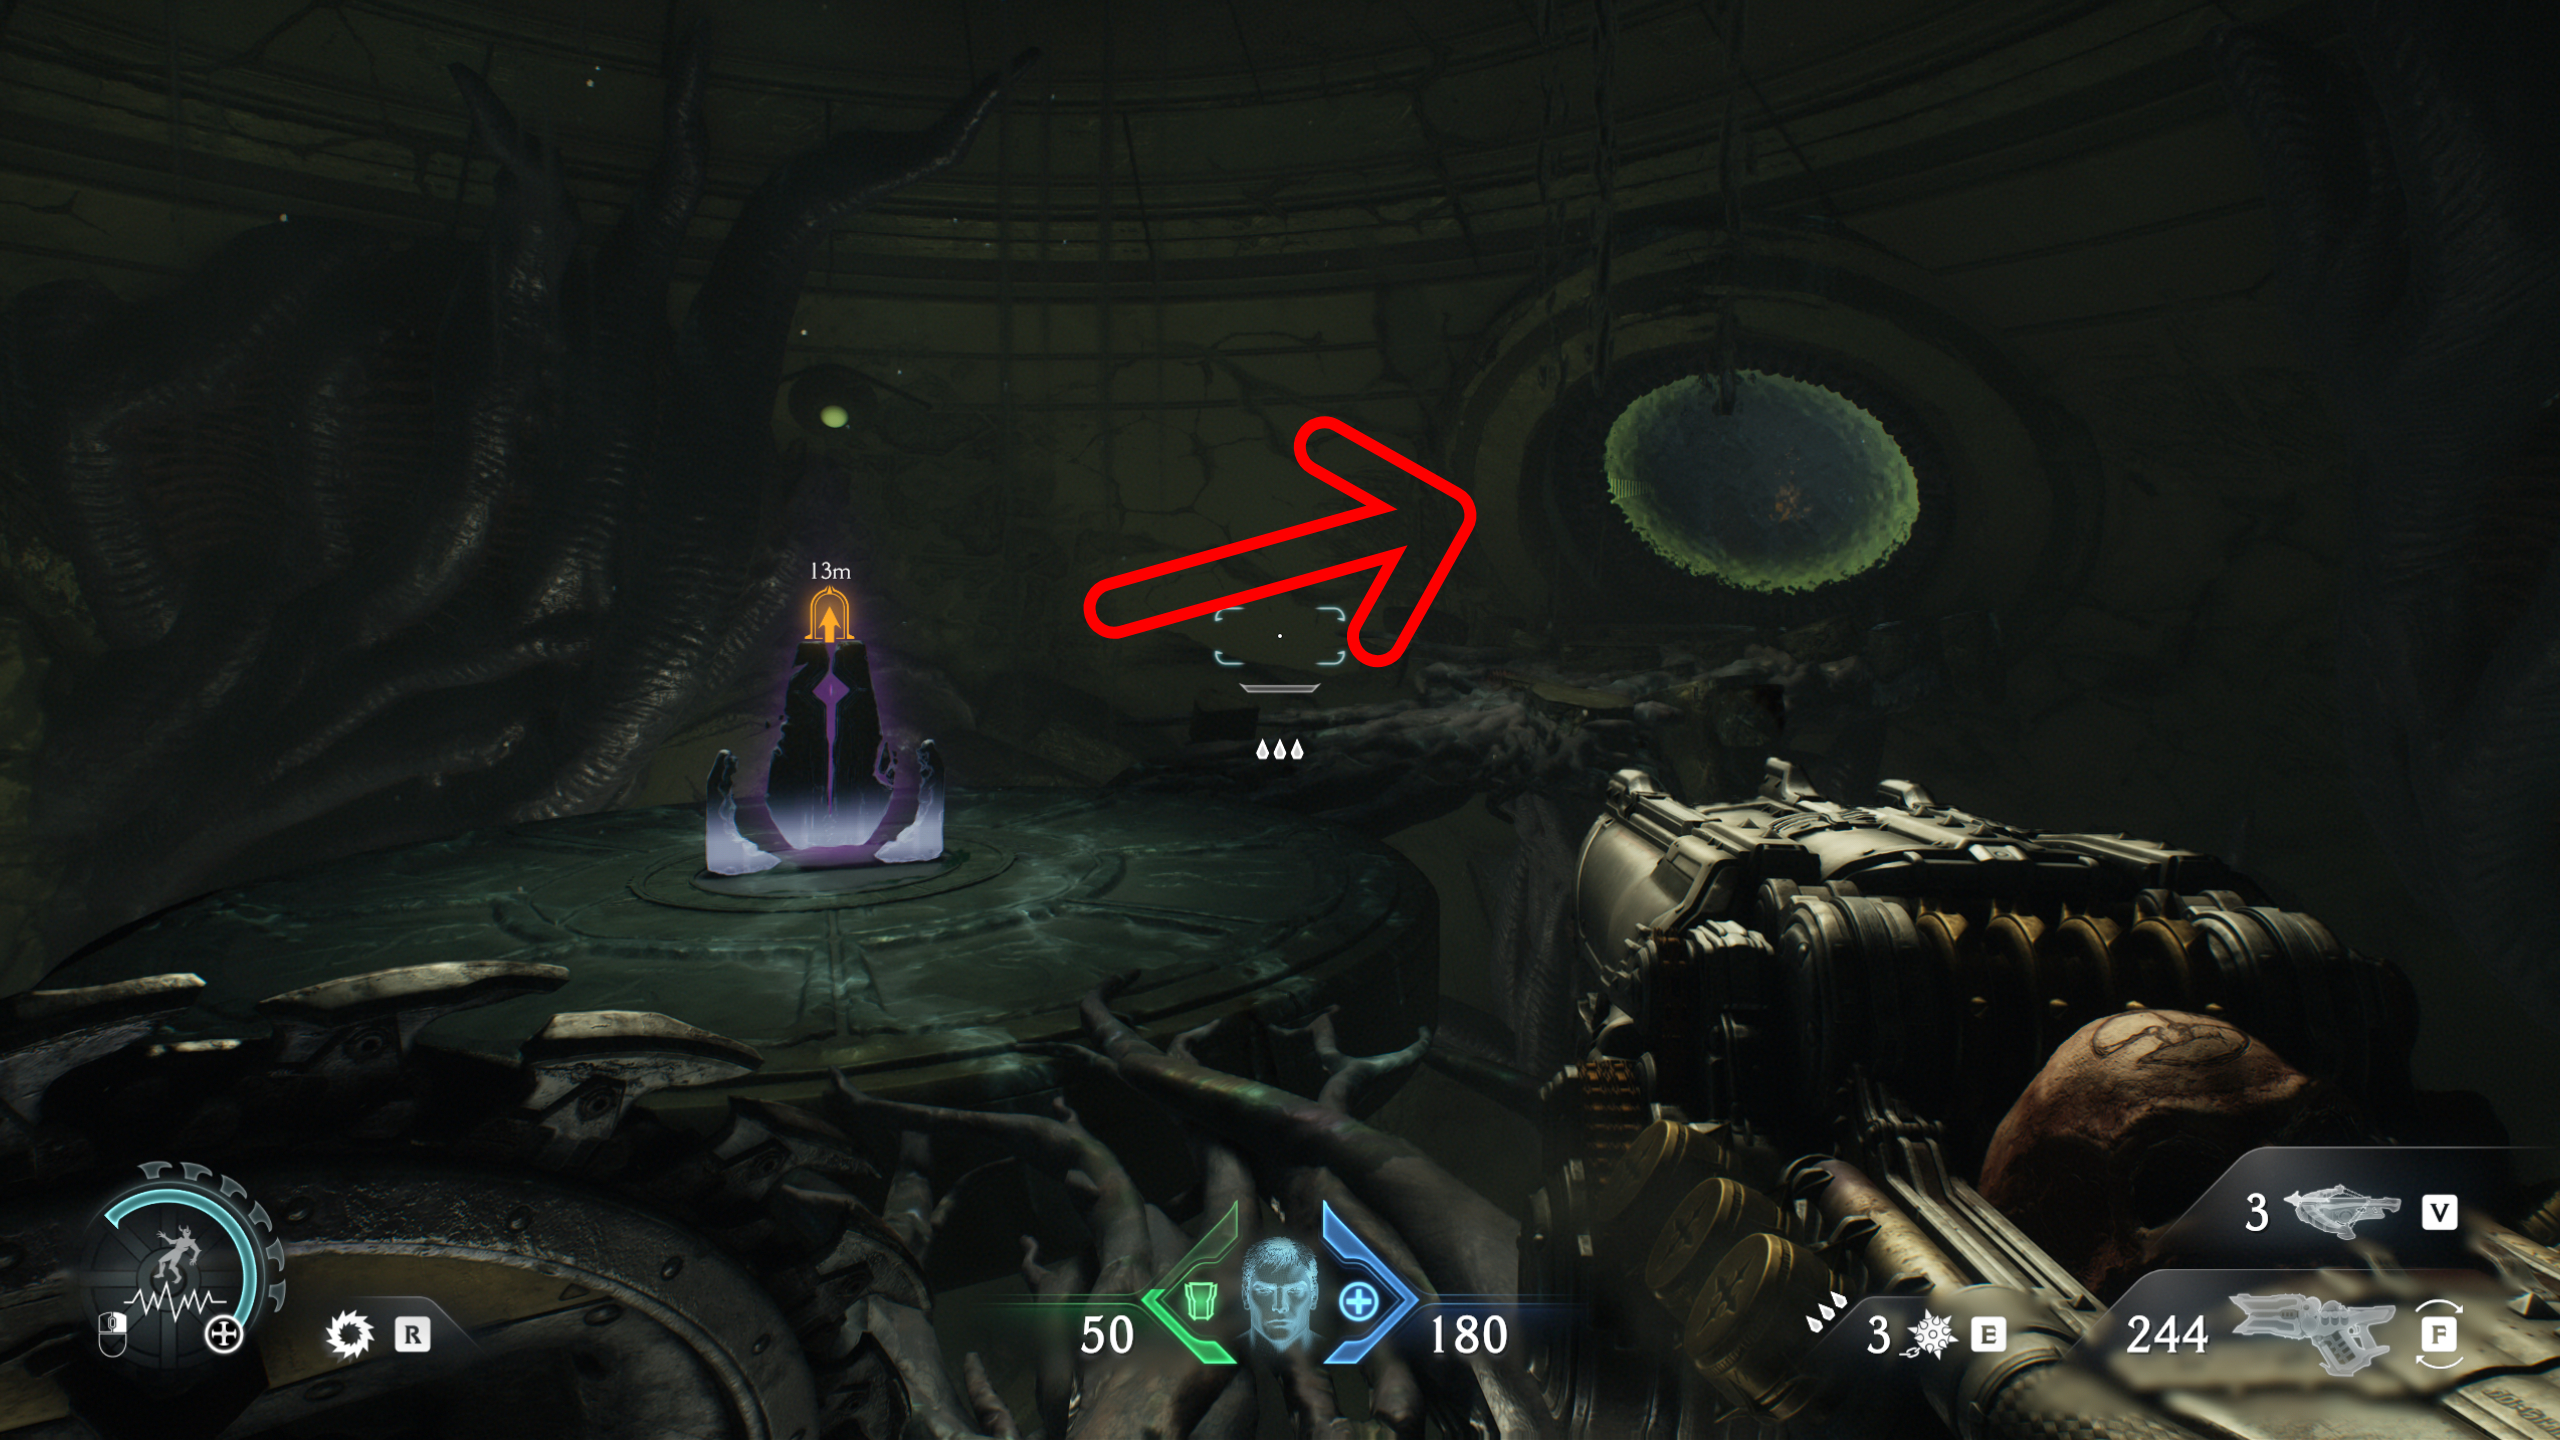
3 - Life sigil
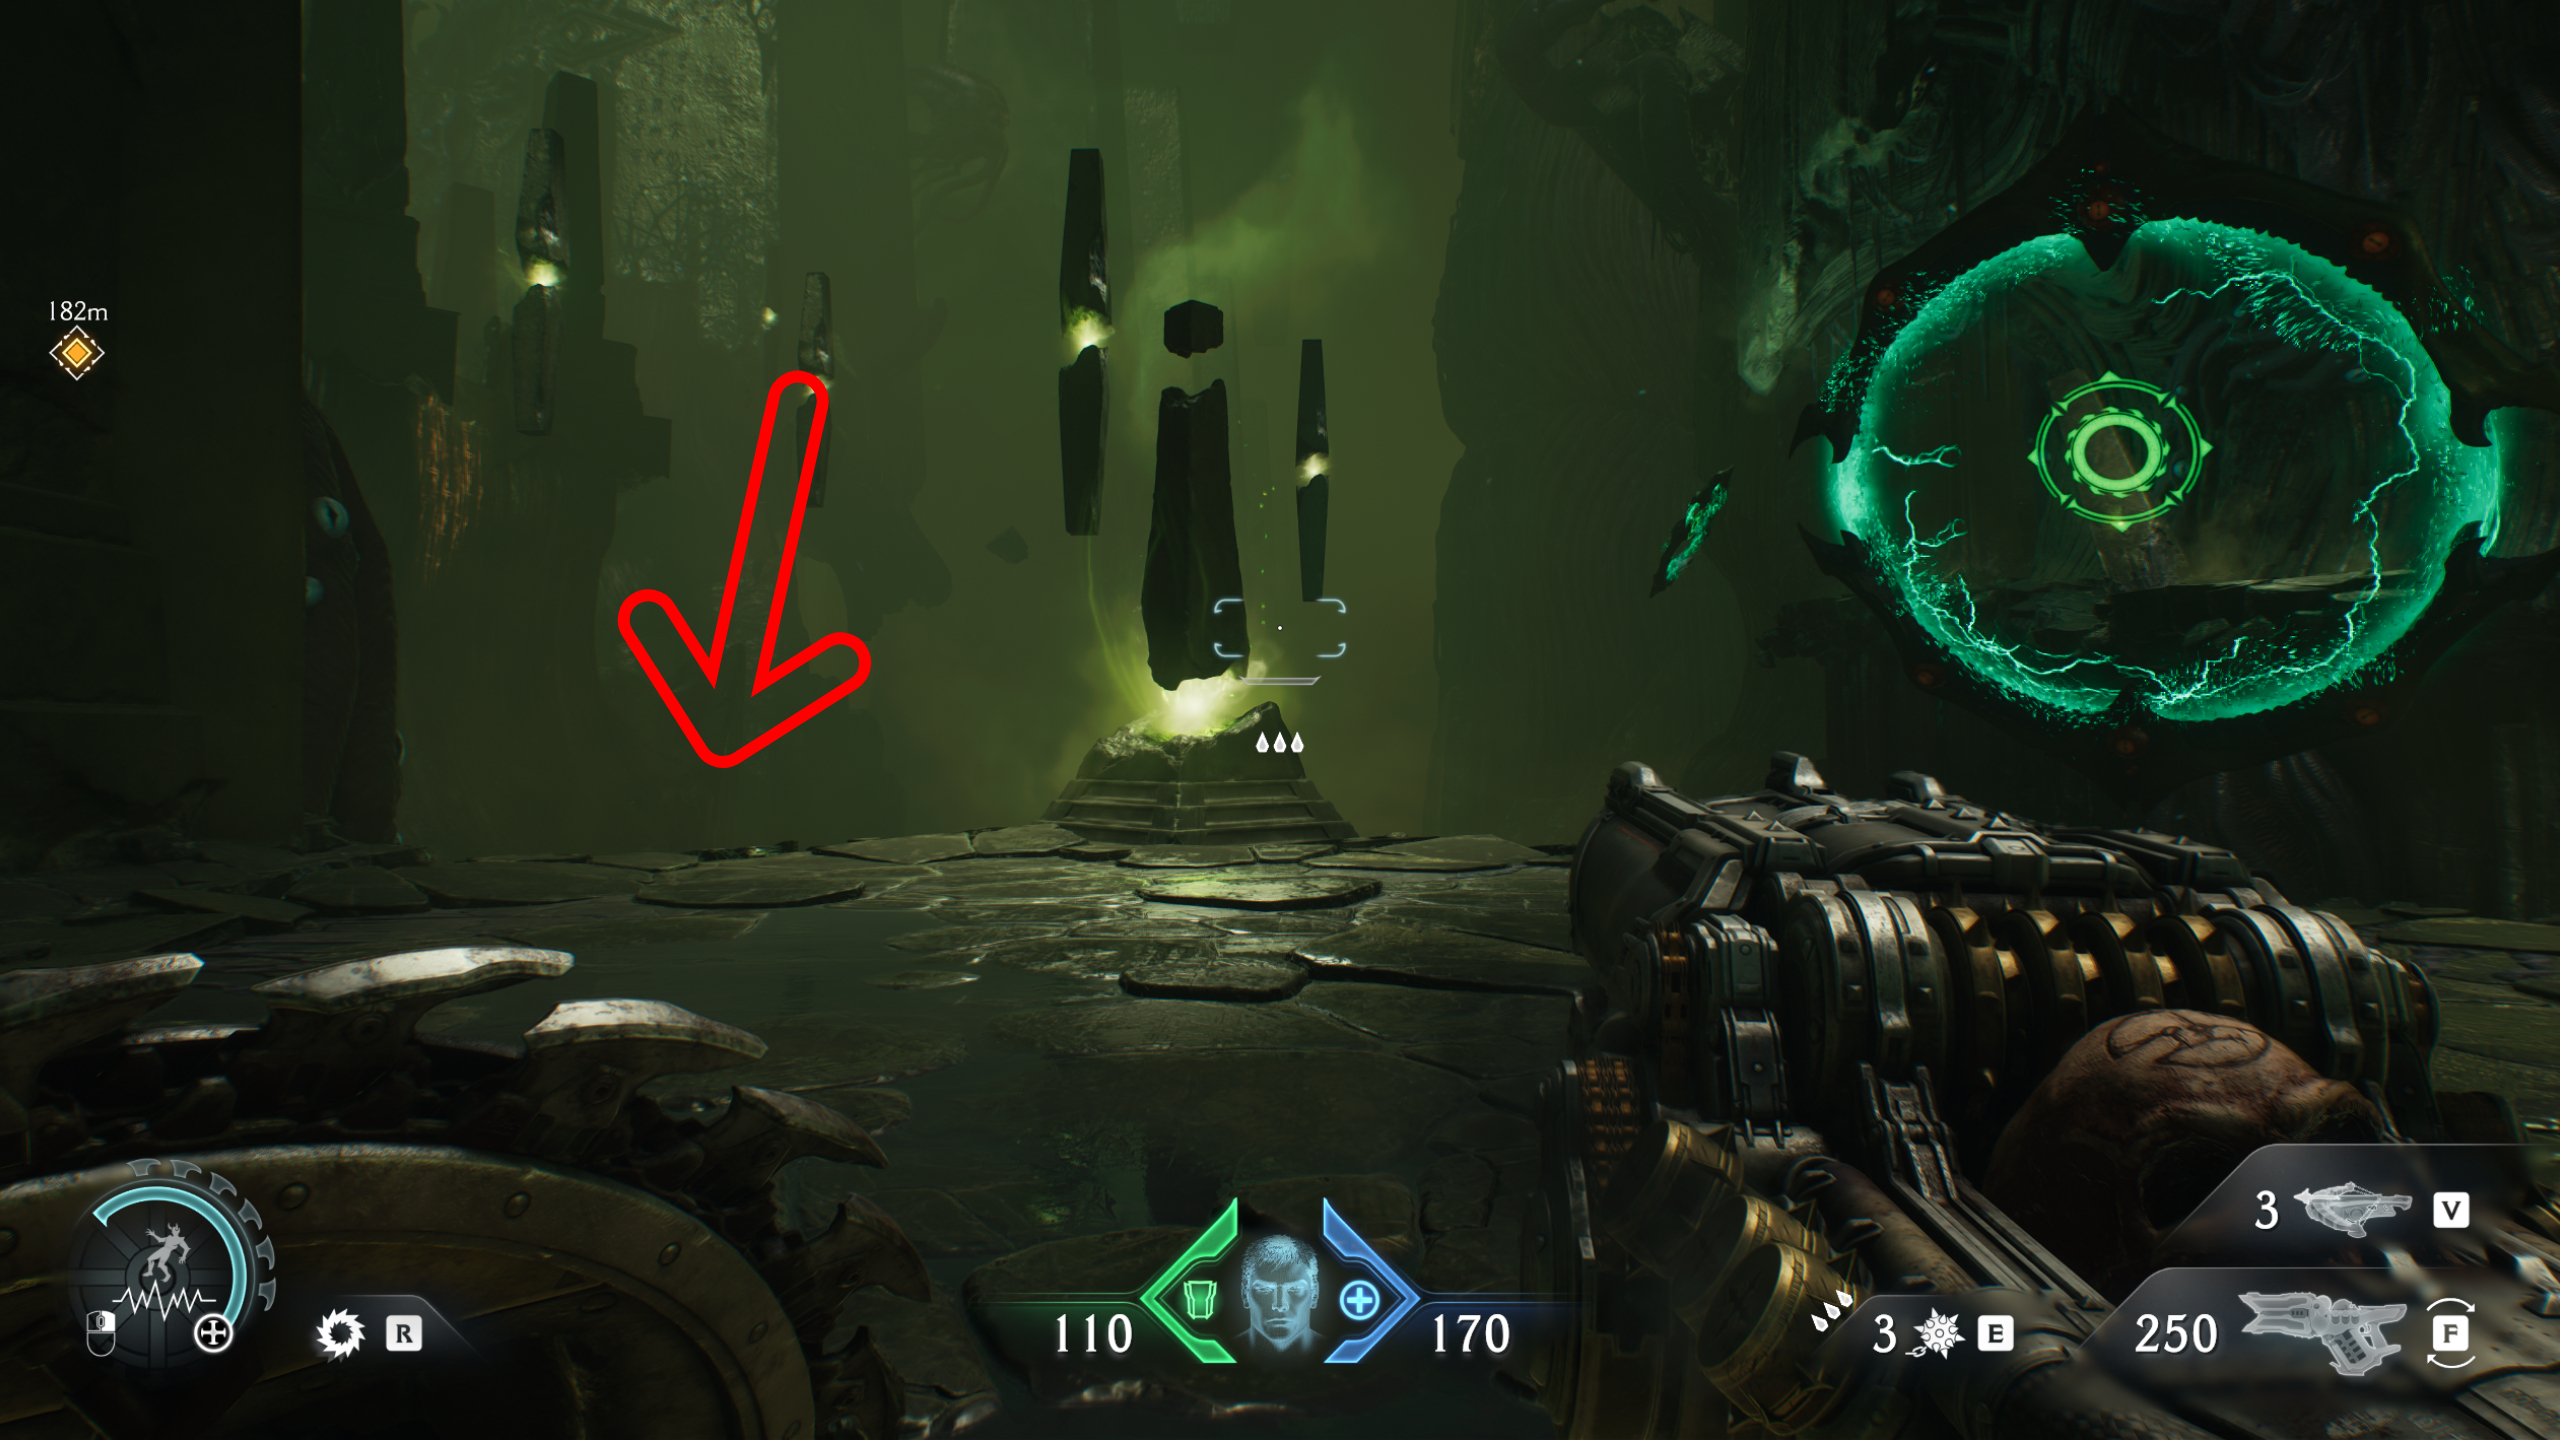
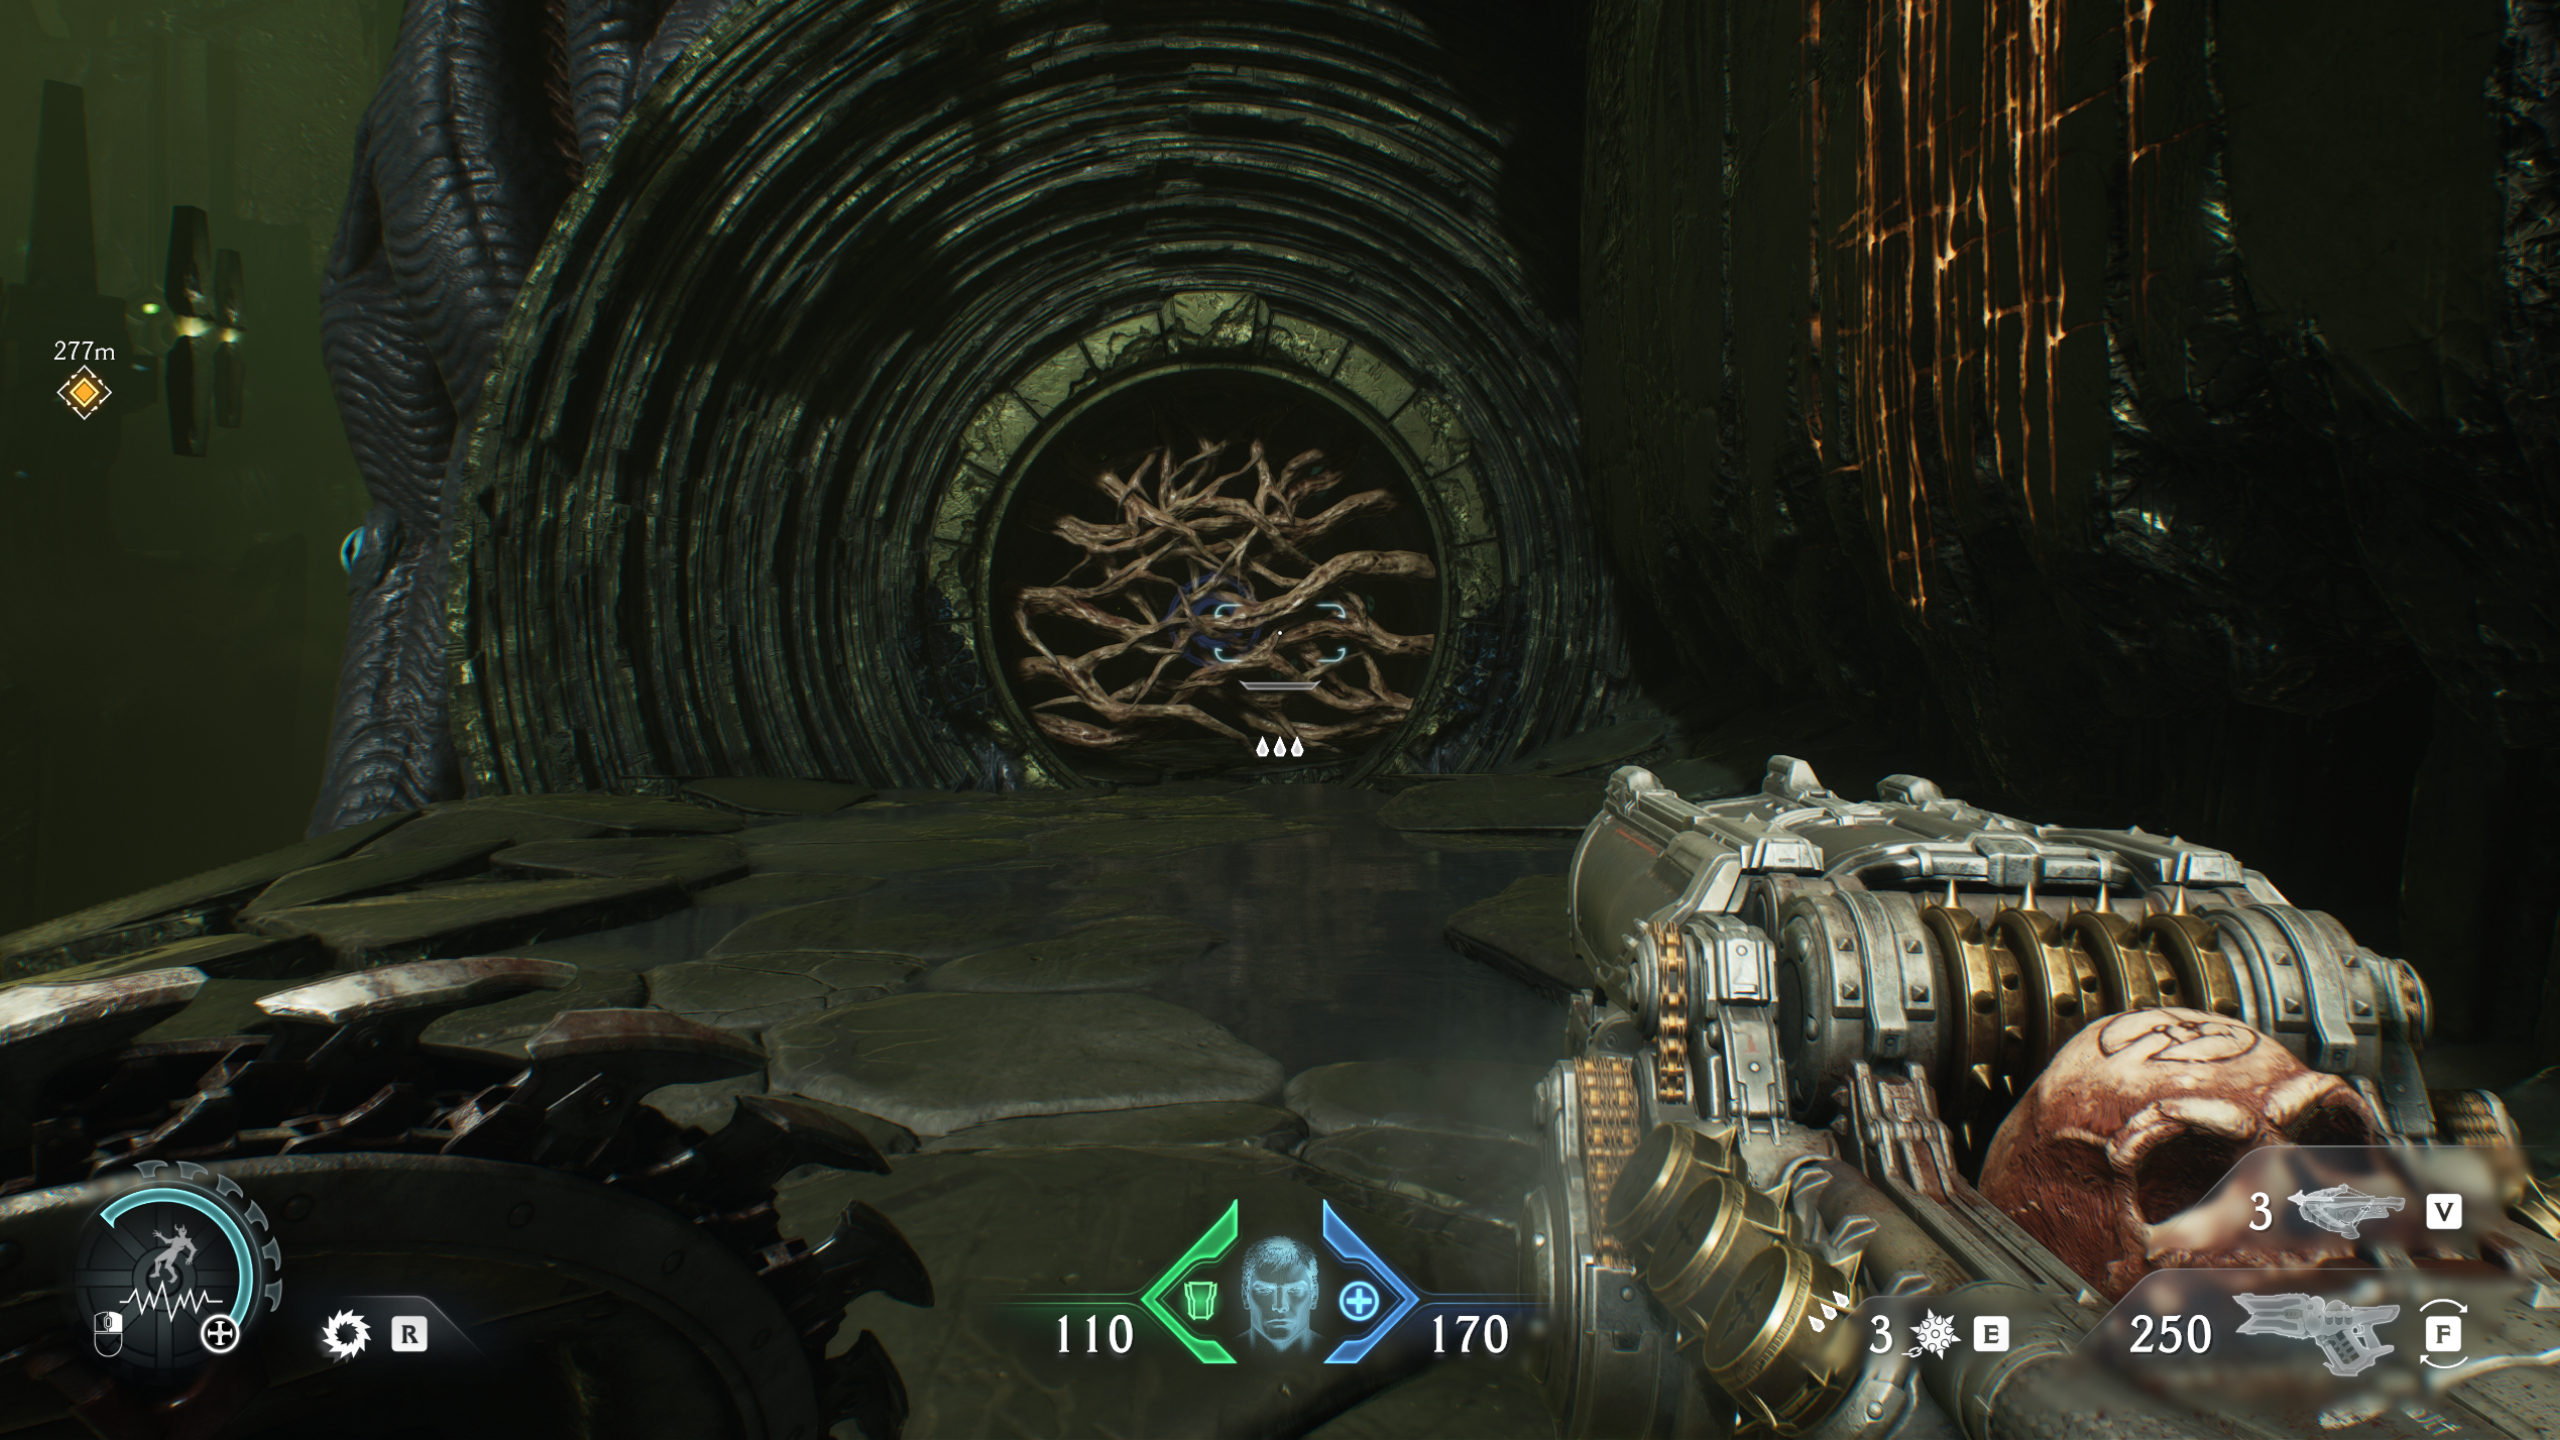
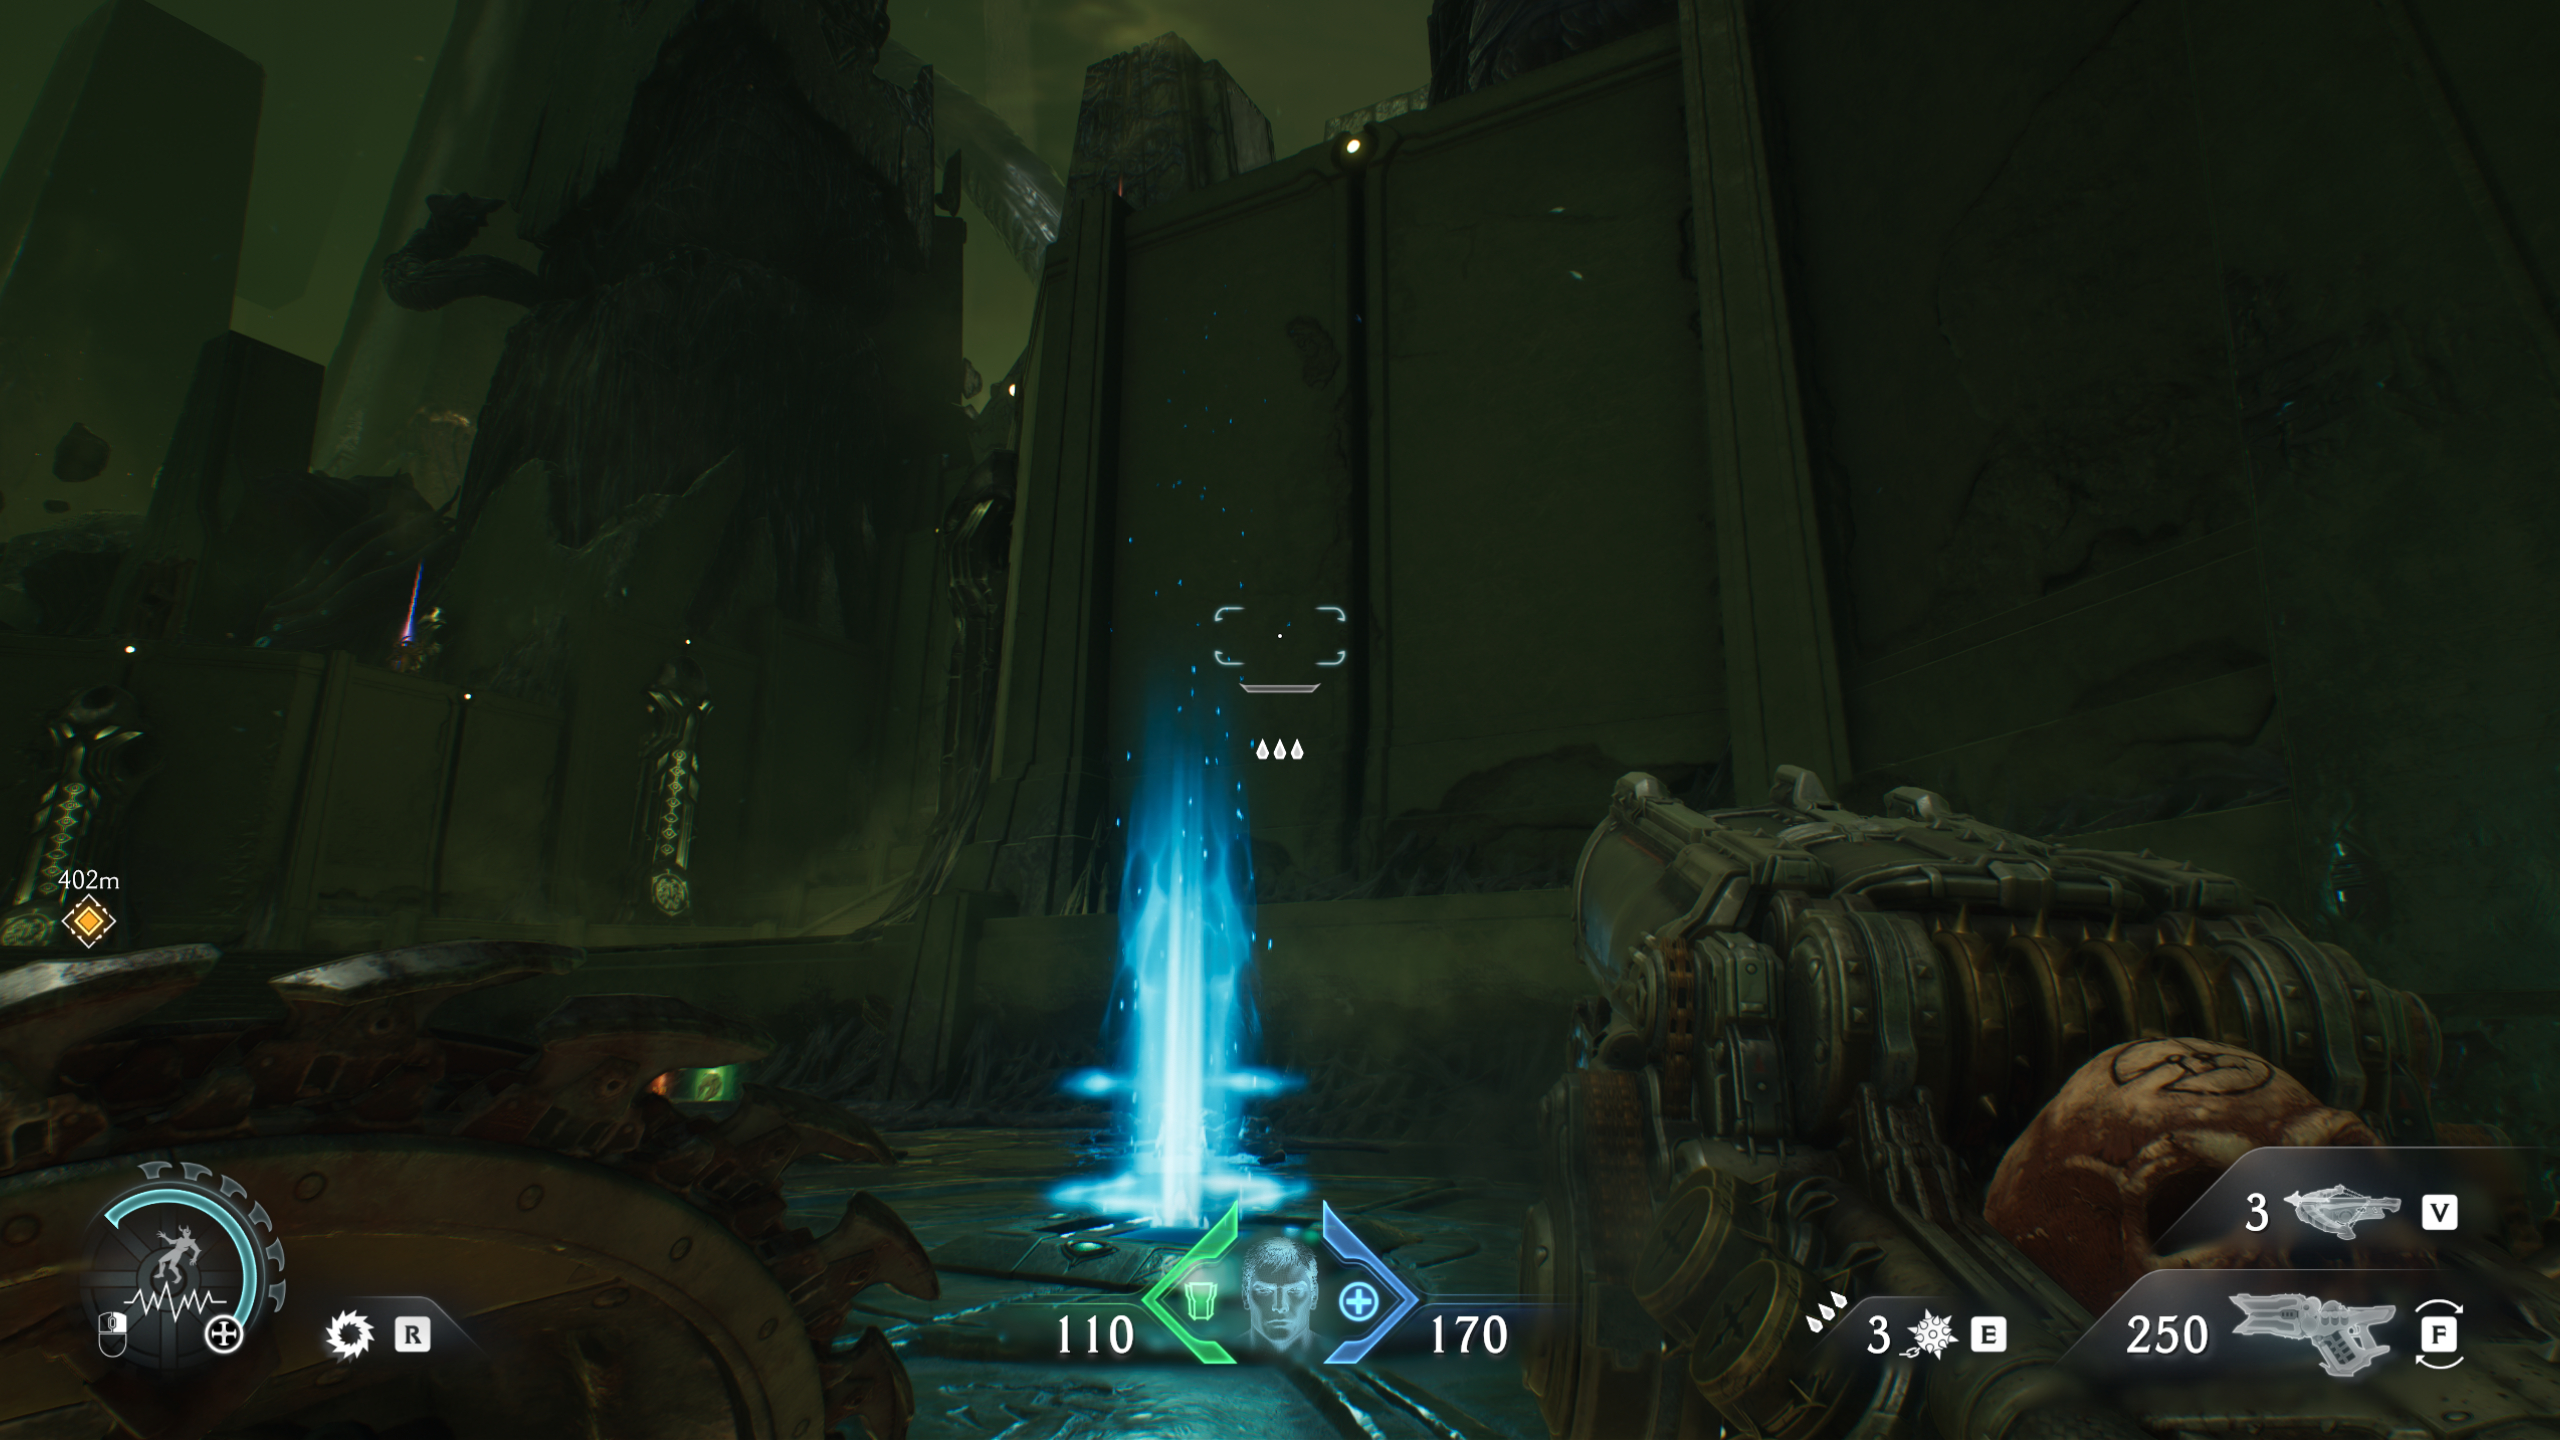
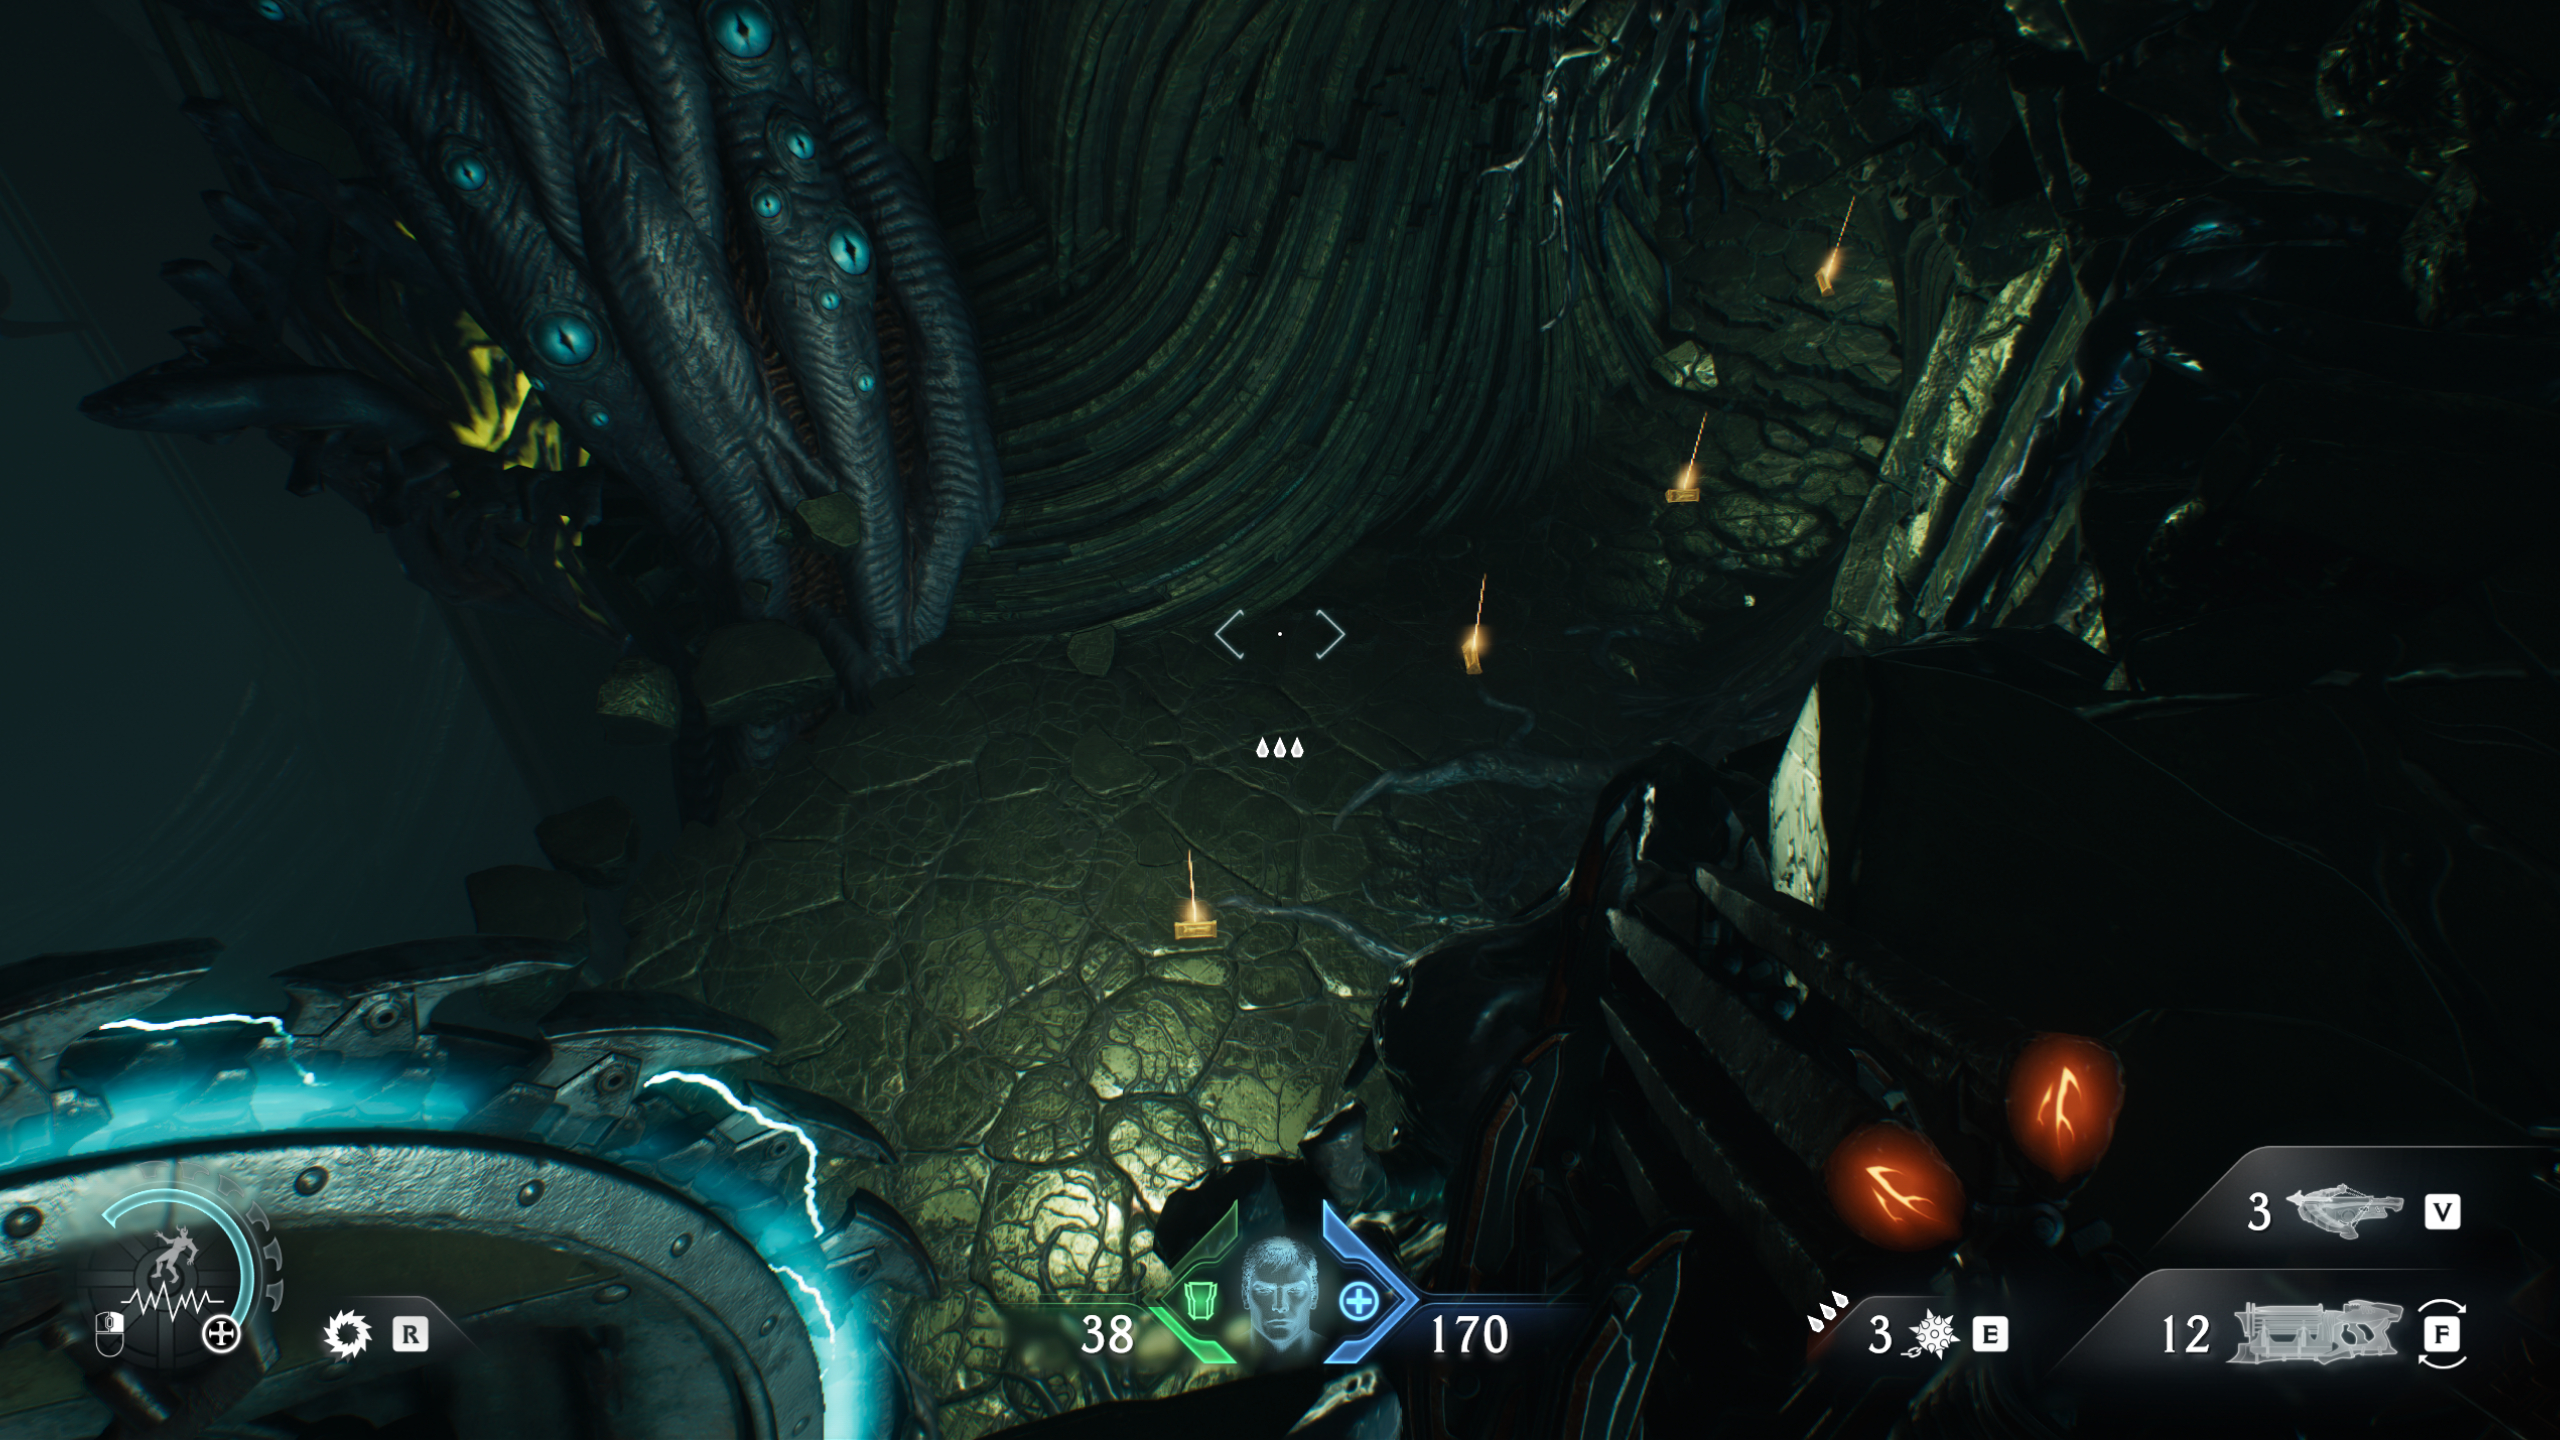
Use the first green launch ring to access the next floating island, and continue until you reach the next ring. Turn left just before the ring to drop off a ledge into a tunnel filled with tentacles, where you'll find the life sigil.
4 - Gold chest
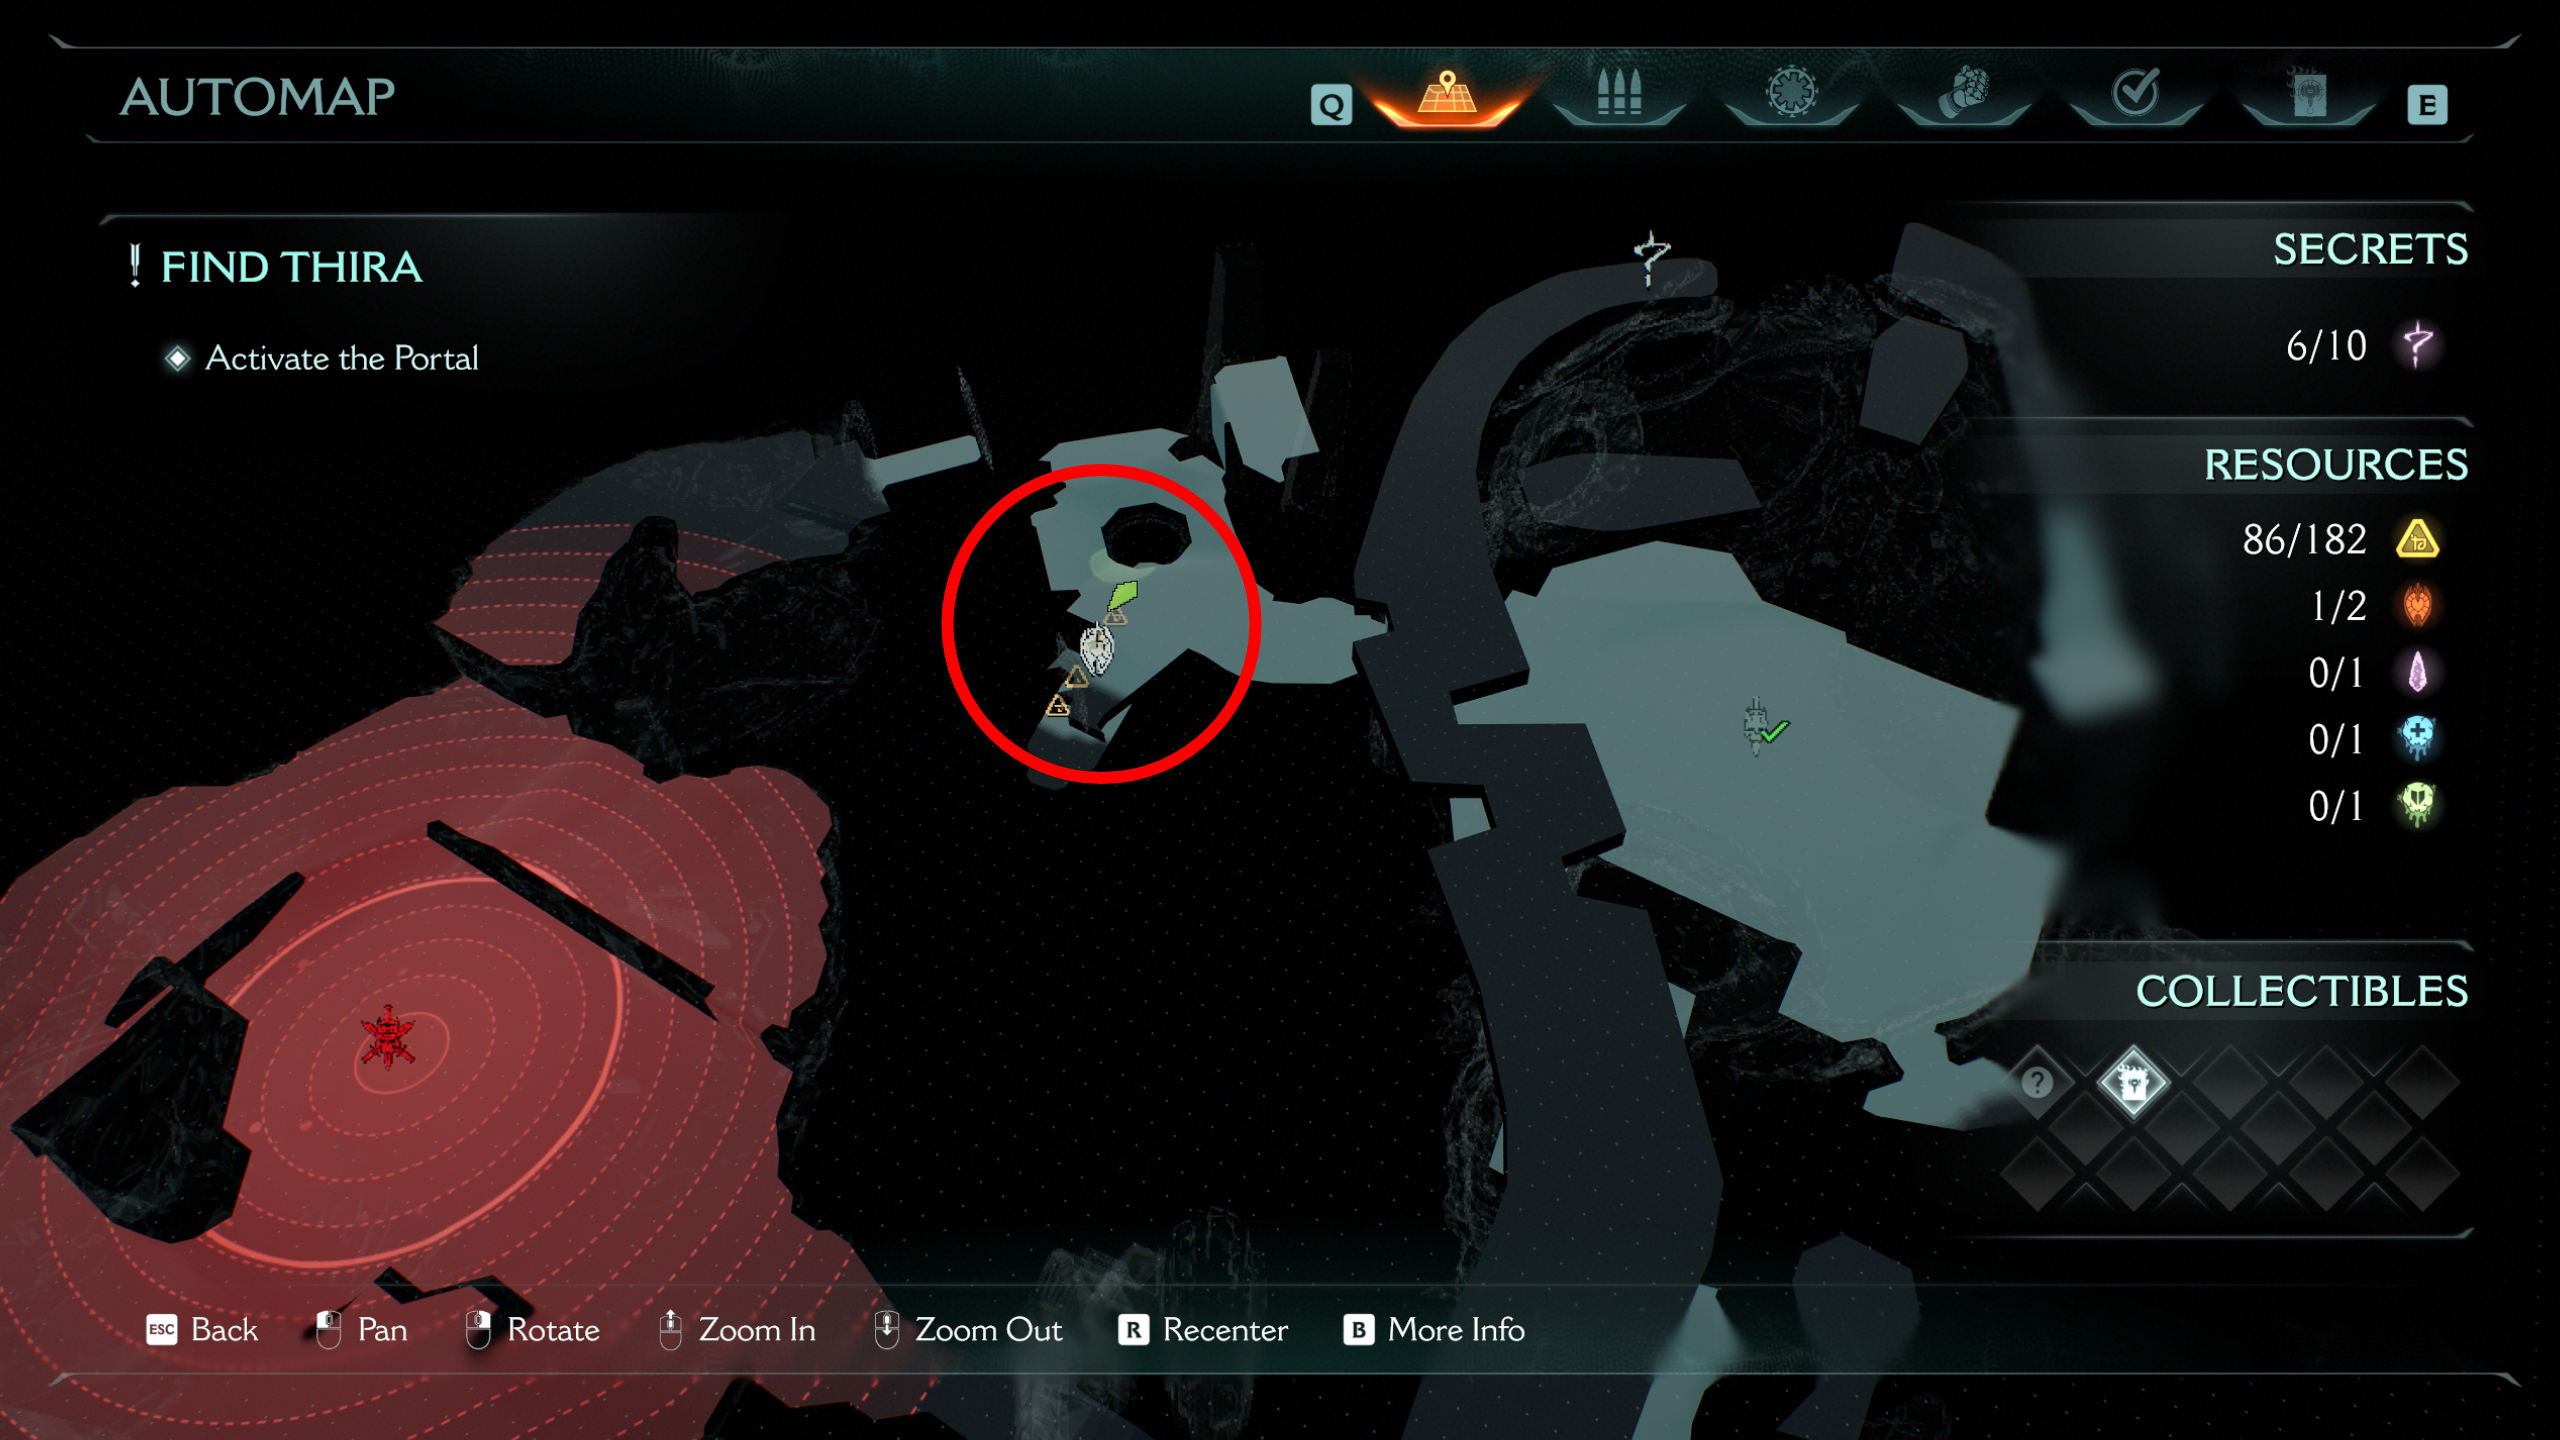
After using the cosmic eye and passing through the point of no return, continue to the next island and immediately turn around to shield jump up to the ledge with the chest.
5 - City of Ry'uul codex entry (collectible)
Directly after the previous secret, return to the main island and the ledge where you were before you shield jumped across the gap. From here, look to your right and drop down to a hidden area between a broken pillar and the wall, which leads to the codex.
6 - Ruby
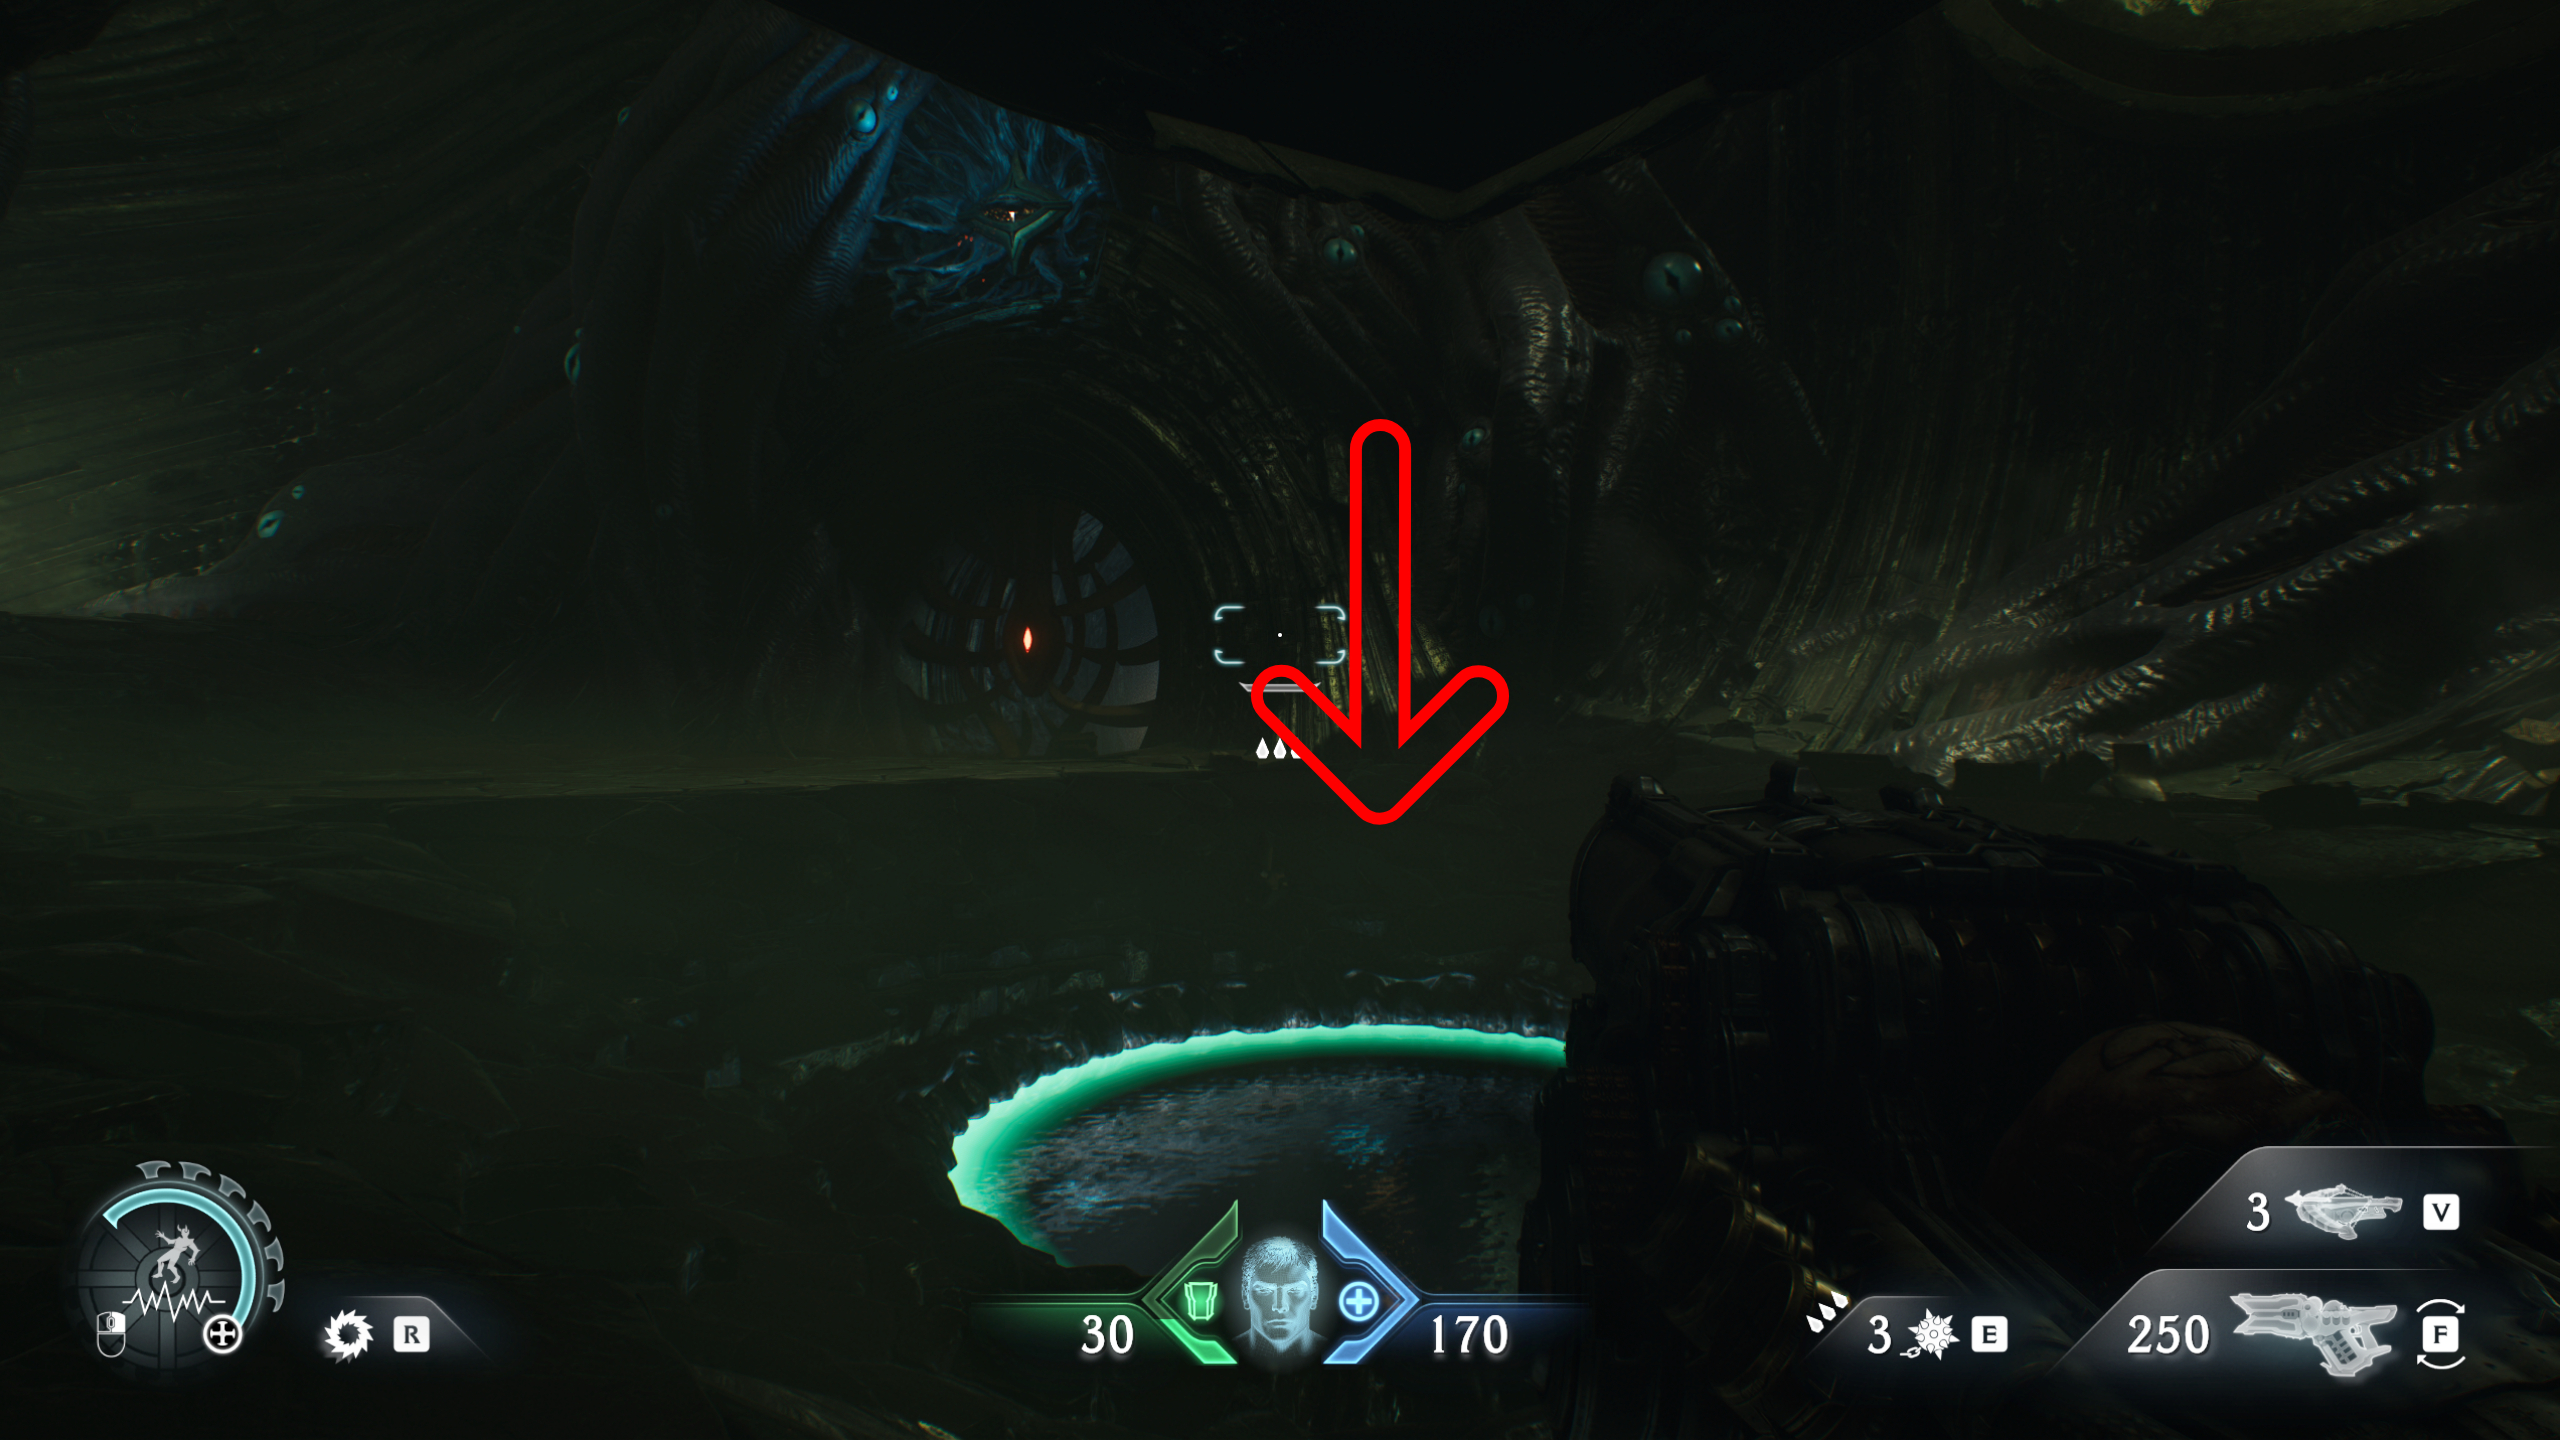
After picking up the Dreadmace, follow the objective into the next room and activate the lift, but drop into the water tunnel hidden beneath it instead. Dodge the blocks that try to crush you and swim up on the other end to enter the gated room with the ruby.
7 - Life sigil
Continue with the mission until you've earned the health demonic essence and completed the simple block puzzle to loop back to the room where you unlocked the Dreadmace. You'll now be able to take the water tunnel to the lift.
Before activating the lift, walk past it and go up the path opposite you, leading to another water tunnel that takes you to the life sigil. Make sure you don't activate the lift first, as you'll block yourself from returning to the area, requiring you to reload a checkpoint or start the mission again.
8 - Gold chest
Following on from the previous secret, you'll be ambushed at the top of the lift. Before going through the door at the end of the hall, walk off the ledge to your right to grab this chest.
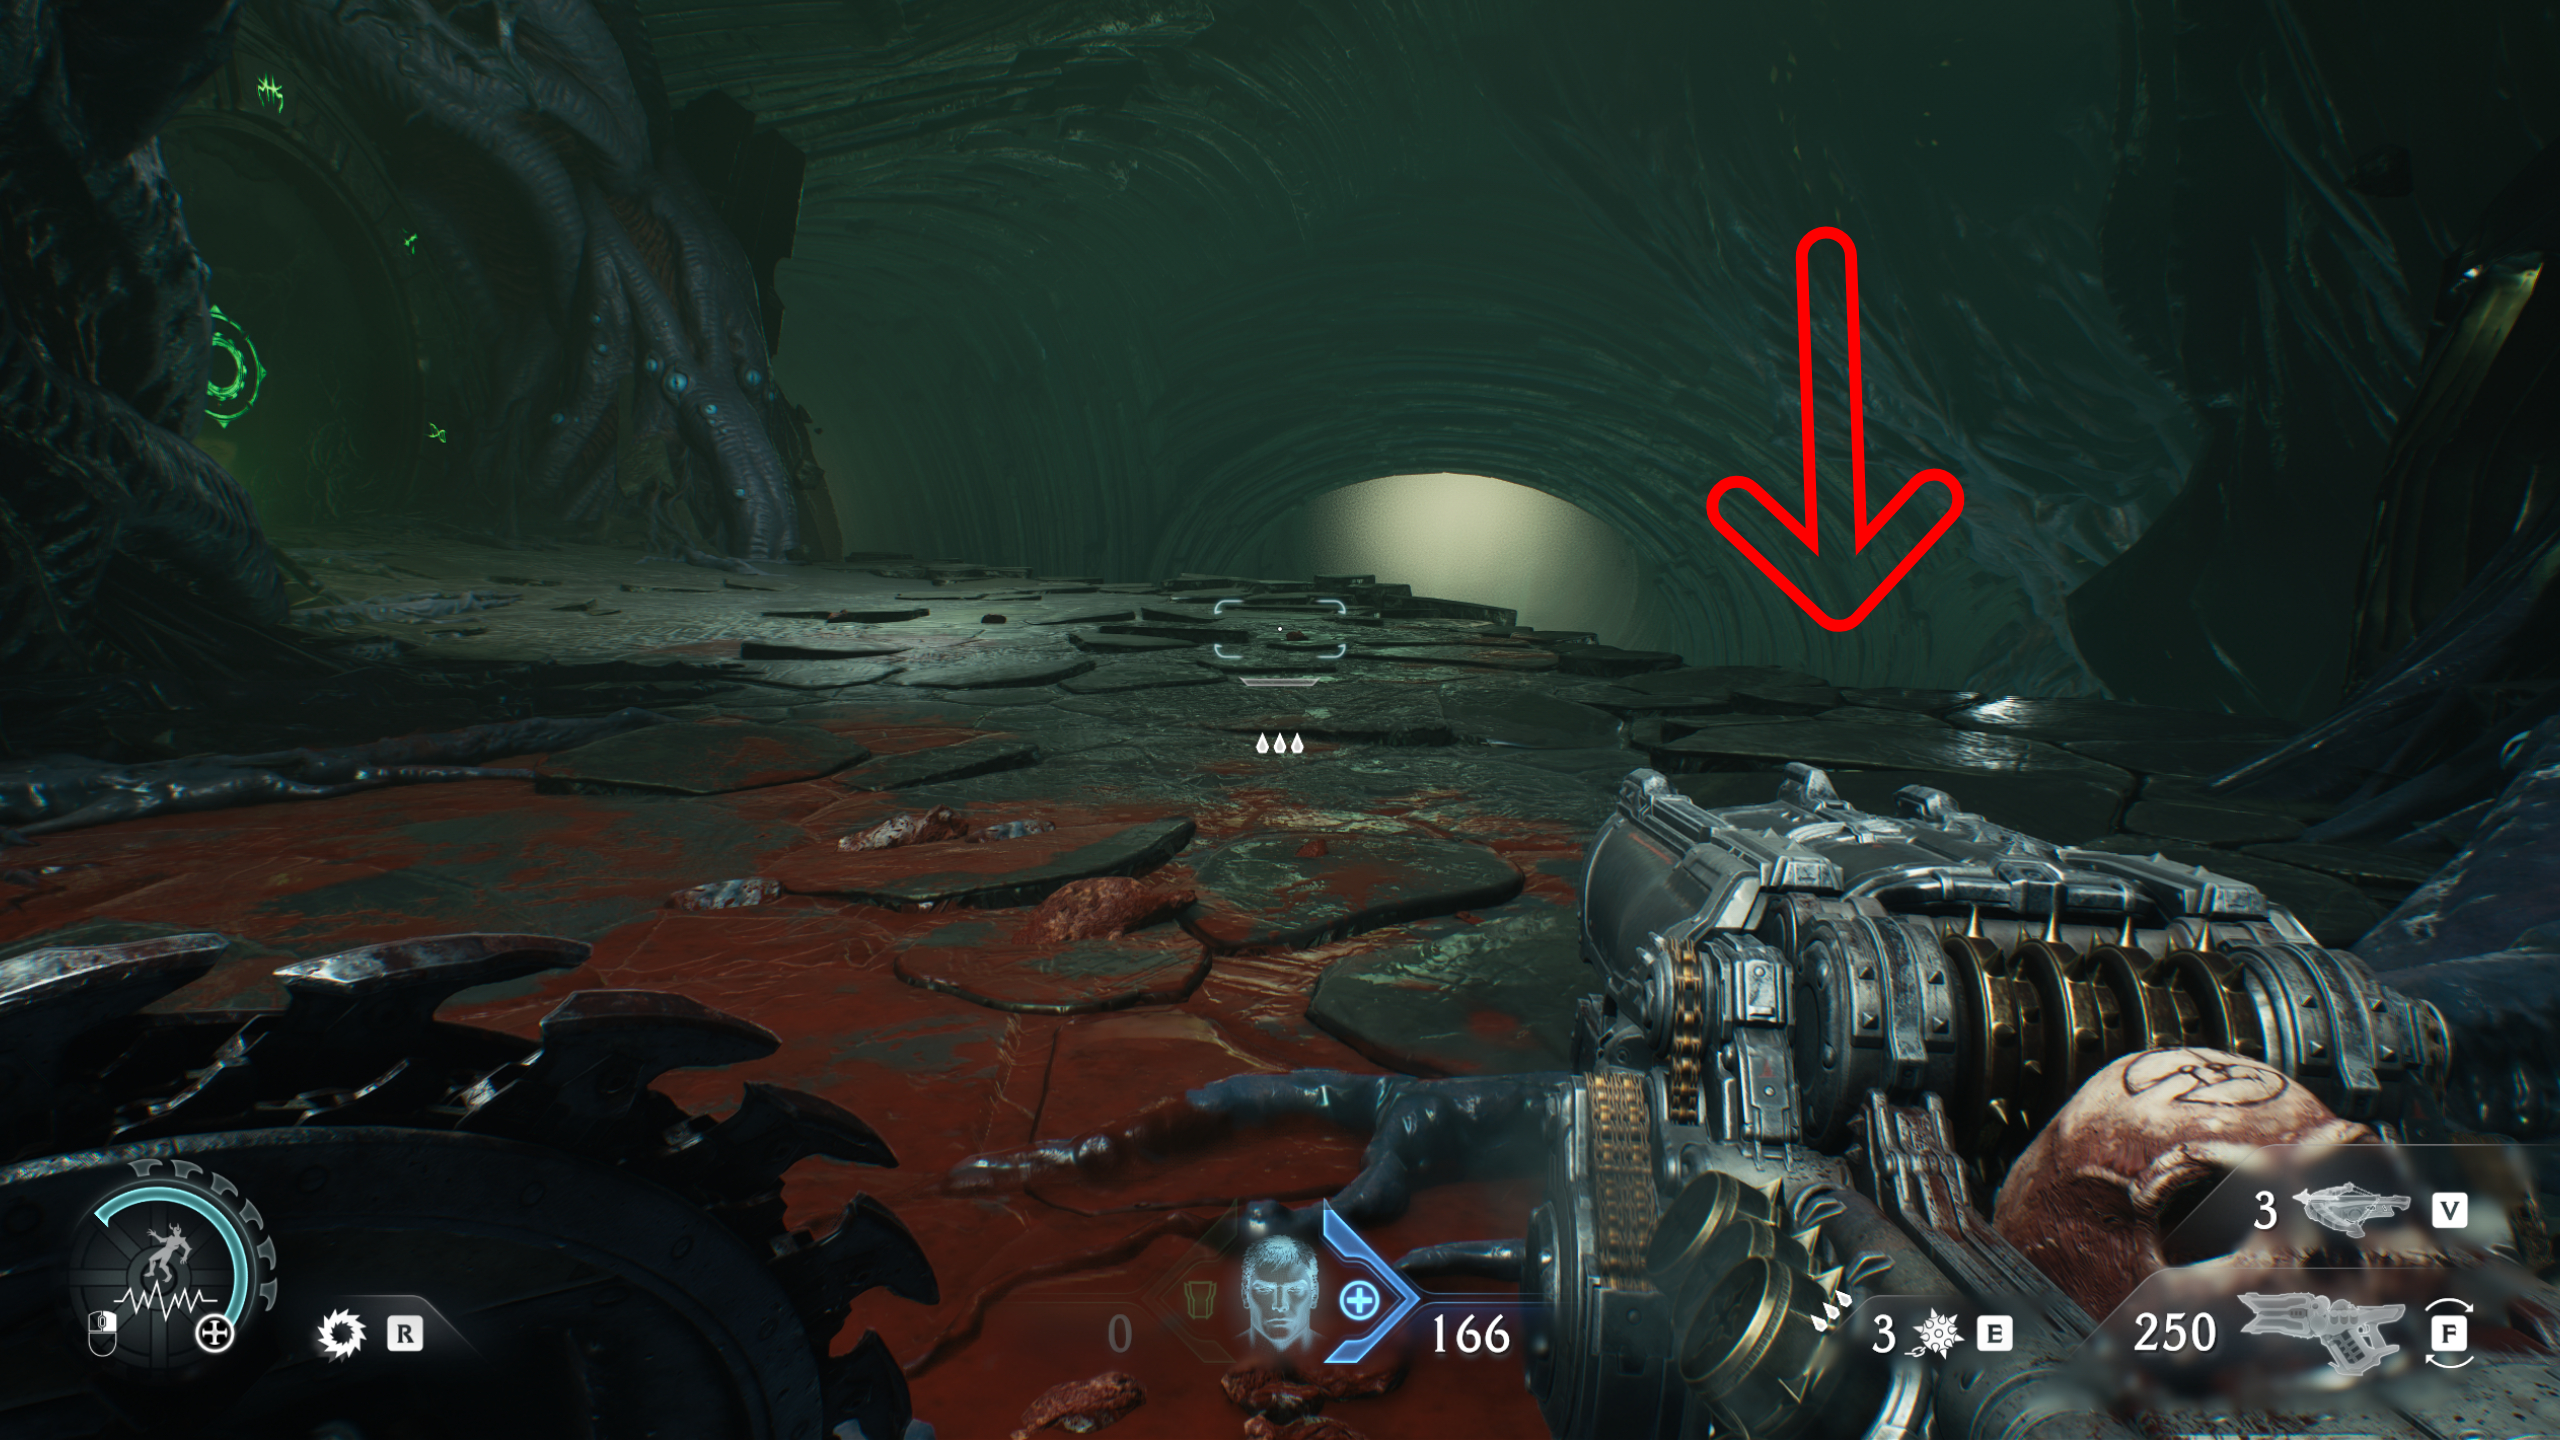
9 - Gore nest (armour demonic essence)

Continue with the mission until you reappear on the first map. Jump across the islands, following the objective, until you climb to a platform where you’re supposed to go through a large door and continue to the starting area. Instead, drop off the edge to the right of the door, where you’ll find a hidden launch ring that will fling you to the gore nest island that you passed by earlier. Clear the nest and you'll earn an armour demonic essence.
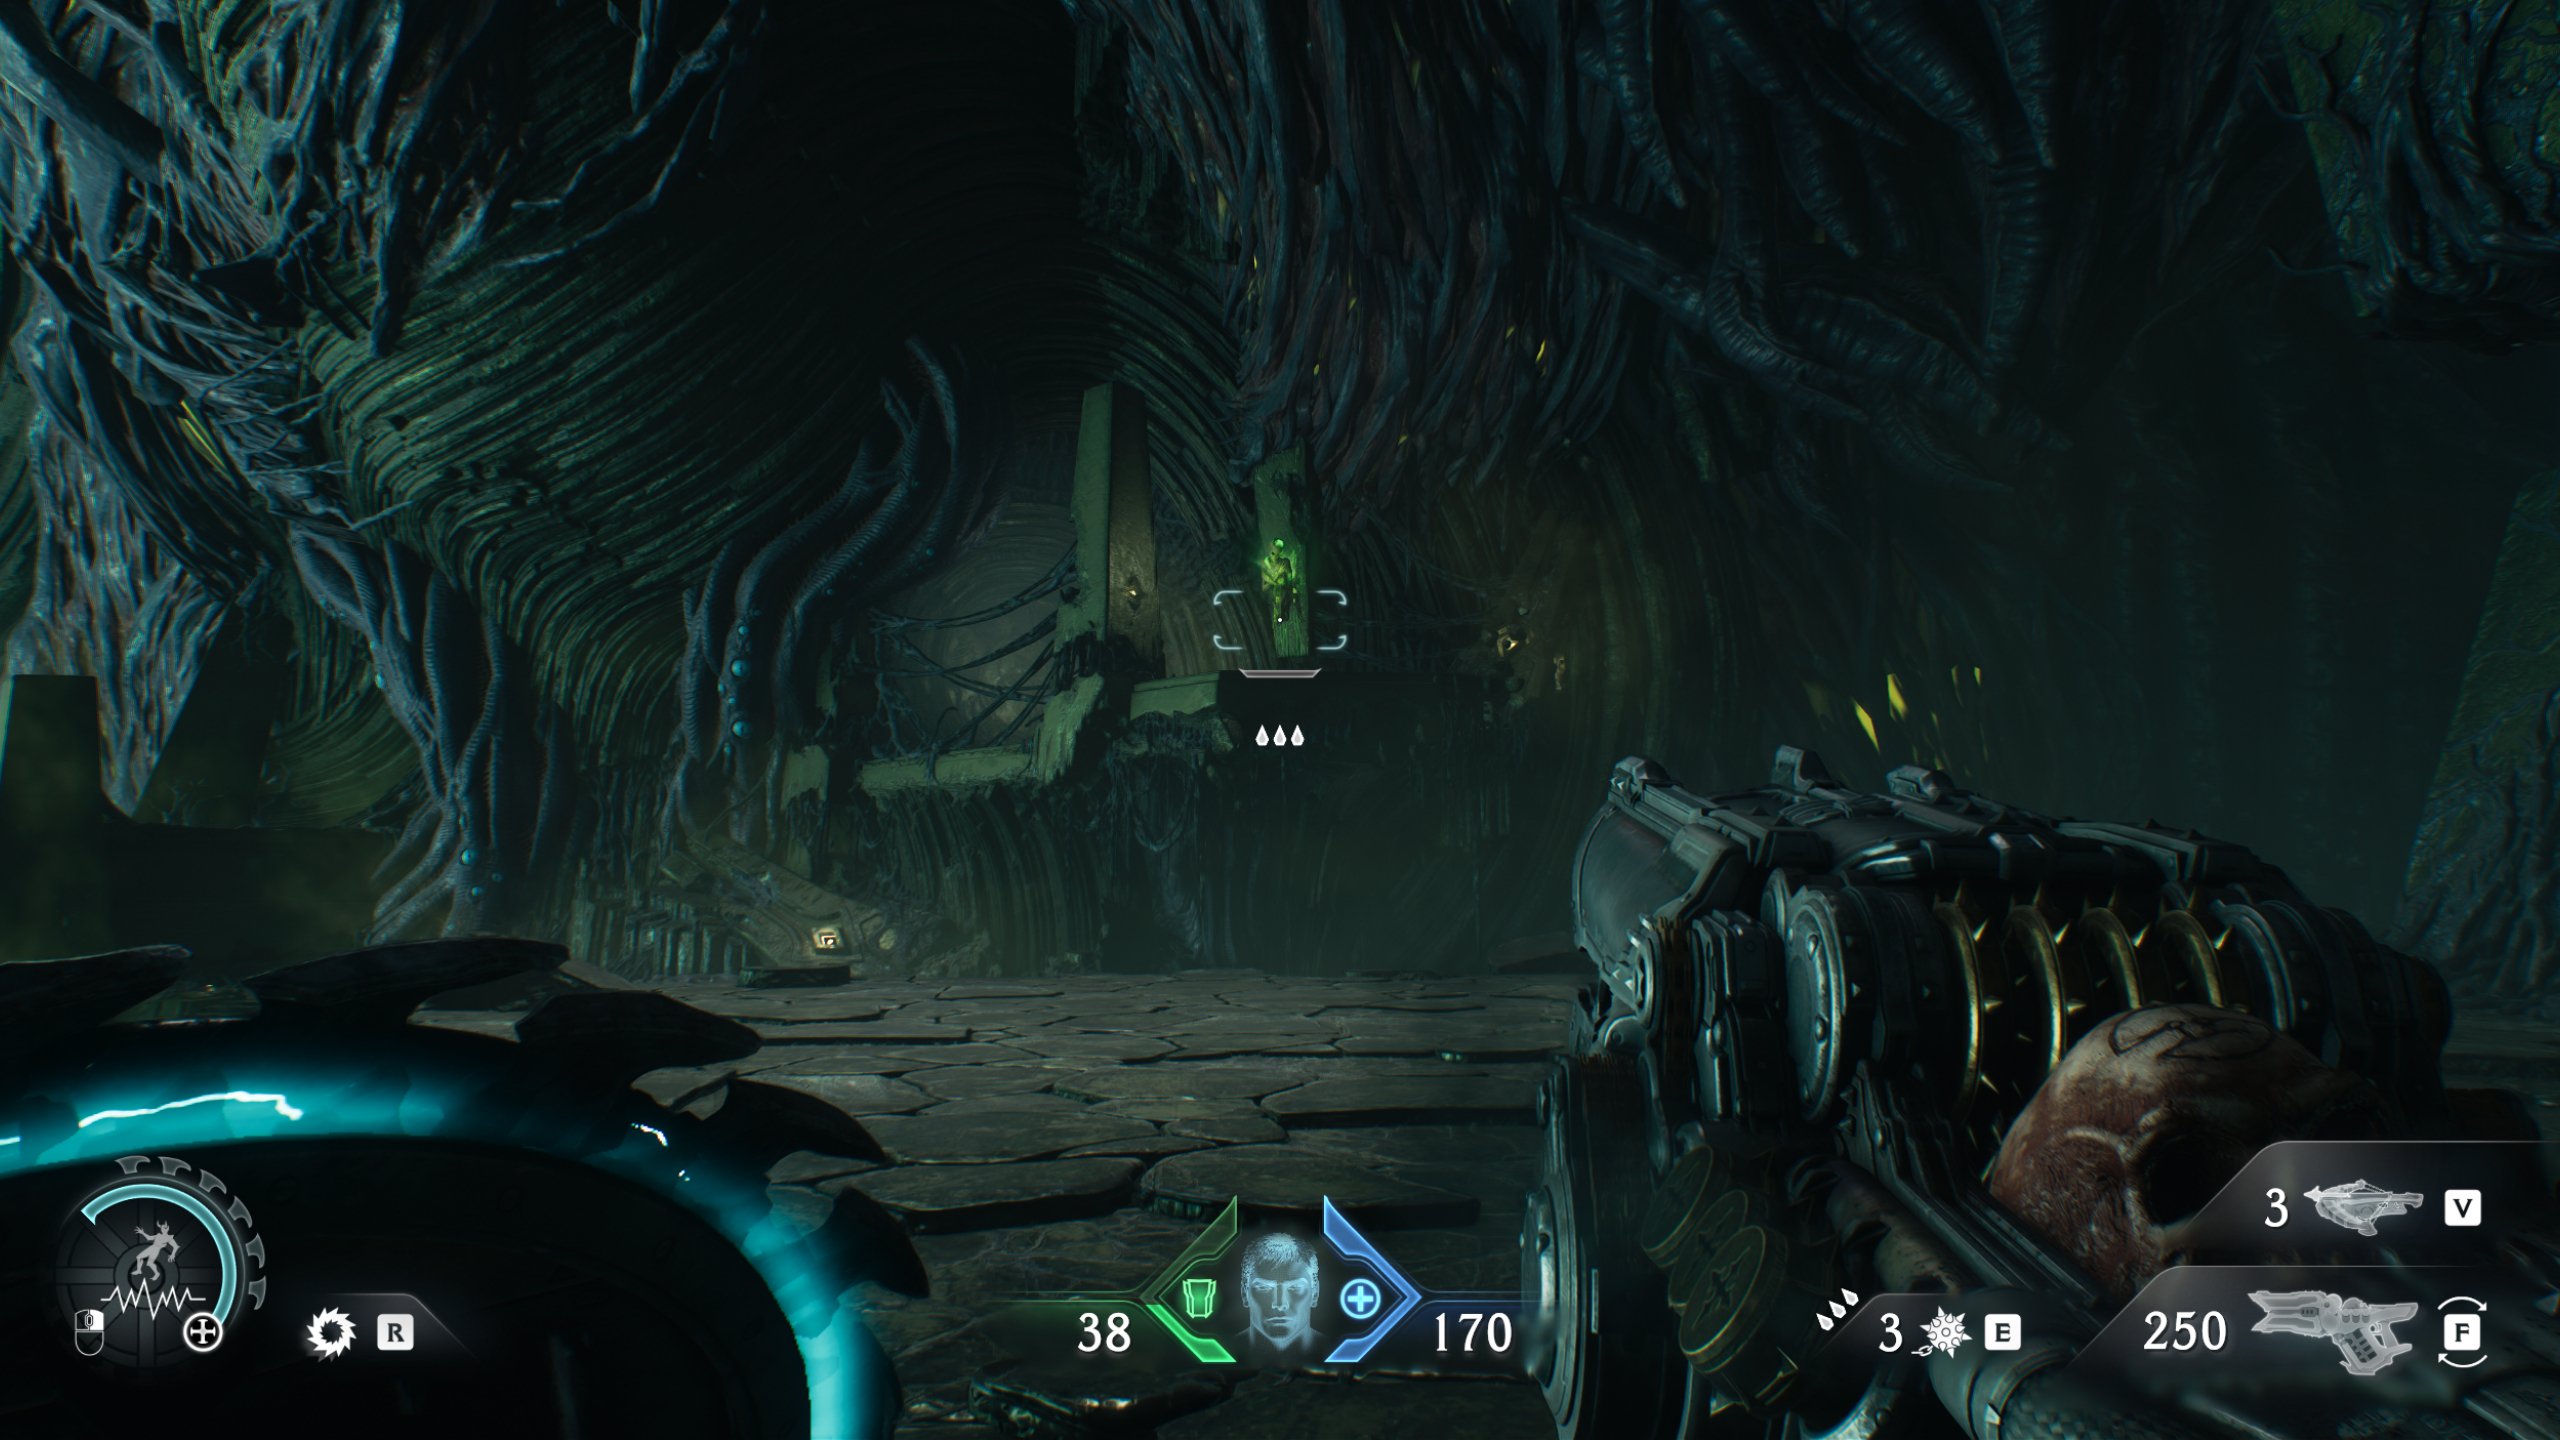
10 - Aggadon Hunter toy (collectible)

Just after heading through the large door to return to the first area near the end of the mission, look right and break the wooden barricade where you'll find the toy. There’s a wraithstone nearby as you head towards the objective as well.


You must confirm your public display name before commenting
Please logout and then login again, you will then be prompted to enter your display name.