How to set up a streaming studio for under $150
Ask PC Gamer is our weekly question and advice column. Have a burning question about the smoke coming out of your PC? Send your problems to letters@pcgamer.com.
I want to start Twitch streaming but I don’t have $200+ to blow on a good USB microphone and webcam. Is there any way to put together a streaming setup for less? - Jim O.
There’s a world of options available for setting up a streaming studio if you look beyond the computer hardware section and want to learn a little about audio and video. Tight budgets are the order of the day for most small A/V shops and recording studios, so you get a lot of bang for your buck by shopping alongside the indie music and video crowd. These people know how to stretch production dollars.
Fortunately, you don’t have to personally trawl camera shops and music stores to find the hardware you need. Everything is available online; I’ve included Amazon links for all the items included here, but most of these components can be sourced from other retailers.
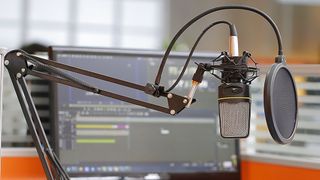
Sound quality is most the most frequently neglected part of any podcast or Twitch presentation. Brushed aluminum USB mics look mighty sweet on your desk, but a more economical audio solution is available via PylePro’s PDMIC58 workhorse microphones.
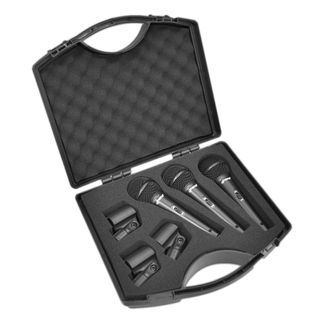
These amazingly high-quality $12 cardioid mics have been the best-kept secret of roadies for years and provide an excellent foundation for podcast broadcasting. They can take a fair amount of abuse but are cheap enough to consider buying in 3 packs, especially if you plan on having friends over to join in the commentary.
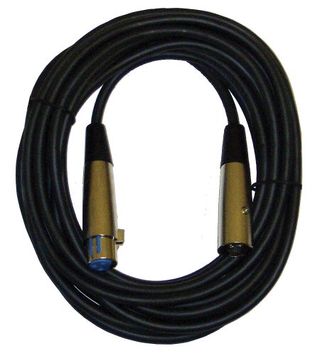
Like all semi-pro and better mics, these PylePros use XLR connectors rather than the standard 3.5mm inputs used by most computer audio equipment. Fortunately, XLR cables are readily available, tough, plenty long and so cheap it makes you wonder about the markup on USB counterparts. A 20’ cable with locking metal ends runs just $5.
Location, isolation & filtration
While microphone quality is vitally important, the location of the mic and how well it’s outfitted to deal with problems like wind noise and pops created by breathy words or sudden volume changes are equally important.
PC Gamer Newsletter
Sign up to get the best content of the week, and great gaming deals, as picked by the editors.
Stands and tripods aren’t afterthoughts and need to be carefully selected for their role. A well-made stand is always in easy reach and doesn’t require an elaborate ritual for adjustment. It should also be reasonably quiet as a quality mic will pick up every creak, thump and grind.
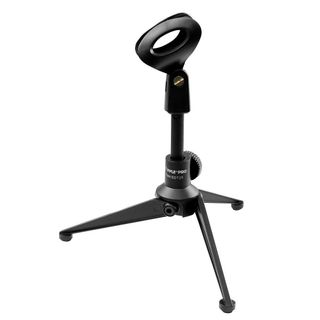
The standard $10 desktop PylePro PMKSDT25 foldable tripod is a good, compact fit, but even better is Neewer’s Scissor Microphone Stand. This $15 item suspends the mic above your desk on a self-supporting spring loaded arm that freely moves around but stays wherever you leave it, so it’s always in the sweet spot for recording your voice.
While this particular model comes with a shock mount to prevent desk vibrations from transferring to the mic and an XLR cable built right into the frame, it’s not the only one worth considering. The plain $12 version, sans cable and featuring a normal mic attachment, has plenty of other uses and is worth getting in addition to the deluxe model for reasons I’ll get to in a moment. Either can attach to a desk or shelf via an included clamp, or be slotted into a weighted base; old desk lamps are a good, cheap source for these bases if you’re having trouble finding one.
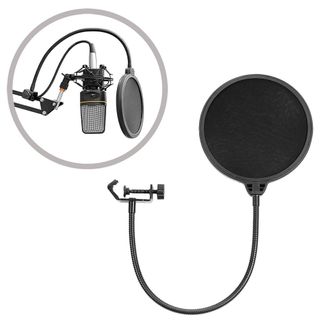
Getting rid of wind noise and pop is the last step for mic setup and there are two ways to accomplish this. First is a proper pop filter which is a little bulky and meant for indoor use but works like a charm, and the other is a simple foam mic cap which is cheaper, smaller and provides excellent wind protection outdoors as a bonus but muffles sound very slightly. These frequently overlooked items are just a few dollars, but the difference they make in sound quality is enormous.
Mixers
With the mic and stand squared away, it’s time to figure out how to hook it up to your PC. Forget about buying an adaptor—a mixing board is your best choice.
They might be intimidating to look at, but mixers are actually very simple to use and plenty of inexpensive models are perfect companions for a budding studio streamer. Behringer’s Xenix USB mixer series are a time-proven pick for this role, available around $40-60 on perpetual rotating sale for various 5-channel and 8-channel models. There’s even a tiny 3-channel model, but price cuts usually make one of the more feature-rich versions a smarter buy.
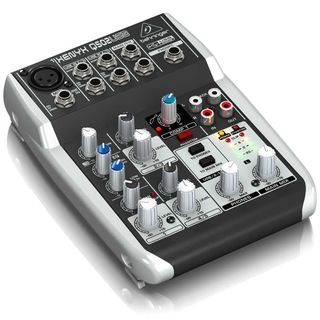
These mixers connect to your system directly via USB, getting around possible motherboard static and noise issues, although they also support the standard ¼” and other audio connectors if you decide to go the traditional I/O route.
In addition to powering and connecting the mics properly, mixers offer a wealth of other functions to spice up your streaming productions. A multi-band equalizer is provided for each XLR channel, and you can mix in multiple sources such as game audio, music, sound effects, audio clips or other material via the additional line inputs with devices such as tablets or audio players.
Some models also feature real-time effects such as reverb and echo for each channel, selectable via knob presets on the unit itself. In fact, most of the controls are right on the hardware console and require no software installation or manipulation at all, other than simply selecting the mixer as an audio source with your streaming software of choice. Non-USB versions don’t even need drivers.
While Behringer’s Q502USB model is a great starting point, make sure to pick a mixer with enough XLR inputs to cover your future microphone needs. If you plan to have guests on your podcasts, consider a mixer with at least 2 XLR channels, and if you want your gear to pull double duty on your weekend band gigs, 4 XLR channels would be even better.
Ready for your close up?
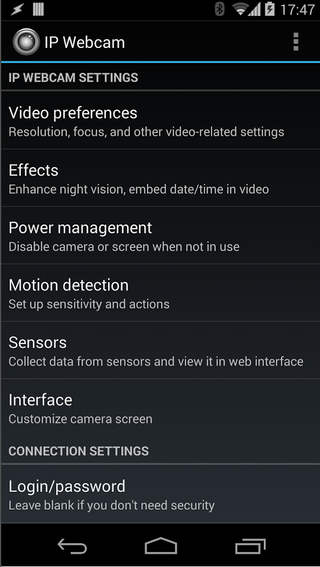
USB webcams have come a long way, but they aren’t the only option when it comes to adding a quality video feed alongside your game’s stream or podcast. Chances are you already have an excellent wireless webcam alternative and don’t even realize it: your smartphone.
Most mobile phones made in the last 5 years have excellent image sensors, and tapping that hardware is as easy as a quick visit to Google Play or Apple’s App Store. I used an older Samsung Note 2 along with the free IP Webcam app to create a wireless HD camera feed in just a few minutes via this method. Old phones left around after upgrades are perfect candidates for camera use since they won’t ring in the middle of a session.
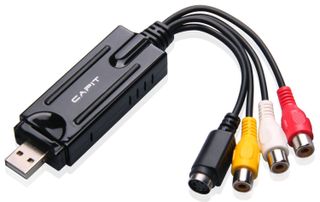
Another route is repurposing aging video or security camera gear. Old video cameras, the kind that connect with composite cables, s-video or other analog technology, are an often-overlooked resource. These easily attach to a computer with $15 USB video capture devices and convert into handy digital video feeds. Security cameras work well here too, especially when size and weight are considerations. While these devices are limited in resolution due to their SD (standard definition) nature, they provide fluid frame rates and frequently feature superior lenses, adjustable FOV (field of view) or other handy features that make them viable video alternatives.
If you’re wondering what that extra scissor-arm stand mentioned earlier is for, the camera is it. Even more than a mic, having the ability to quickly place a camera wherever you like and have it hold that angle is indispensable. In this case, that plain scissor-arm stand along with a generic windshield cellphone holder and a pair of zip ties around the base combine to create a dynamic camera rig that frees you from the dreaded desktop bound nostril-cam view or sleep-inducing static angles from fixed-in-place feeds.
What’s the tab?
Depending on extras, the cost for this gear starts at just $100, or the price of a single high-quality USB mic, and it all tucks away easily behind your monitor till showtime. For the original $200 price, you can upgrade to 3 mics, an 8 channel mixer and add other extras, eclipsing the functionality of a standard USB mic and cam combo completely. Not bad for a Benjamin.
For more on starting your own gaming channel, check out PC Gamer’s Beginners Guide to Twitch Streaming.
A note on affiliates: some of our stories, like this one, include affiliate links to stores like Amazon. These online stores share a small amount of revenue with us if you buy something through one of these links, which helps support our work evaluating PC components.
Most Popular

