Crimson Desert's treasure maps are some of the most devious in any game I've played. Usually, the location you're looking for isn't too far from where you found the clue, but that's not the case here. Hidden Treasure Map Piece 7, which you can pick up from the model castle on the east side of Hernand, is a great example.
While it's likely the first treasure map you'll find, Piece 7 sends you across the entirety of Pywel to find its hidden loot. So don't waste your time running around Hernand for an hour like I did, and solve the map as follows.
How to solve Hidden Treasure Map Piece 7 in Crimson Desert
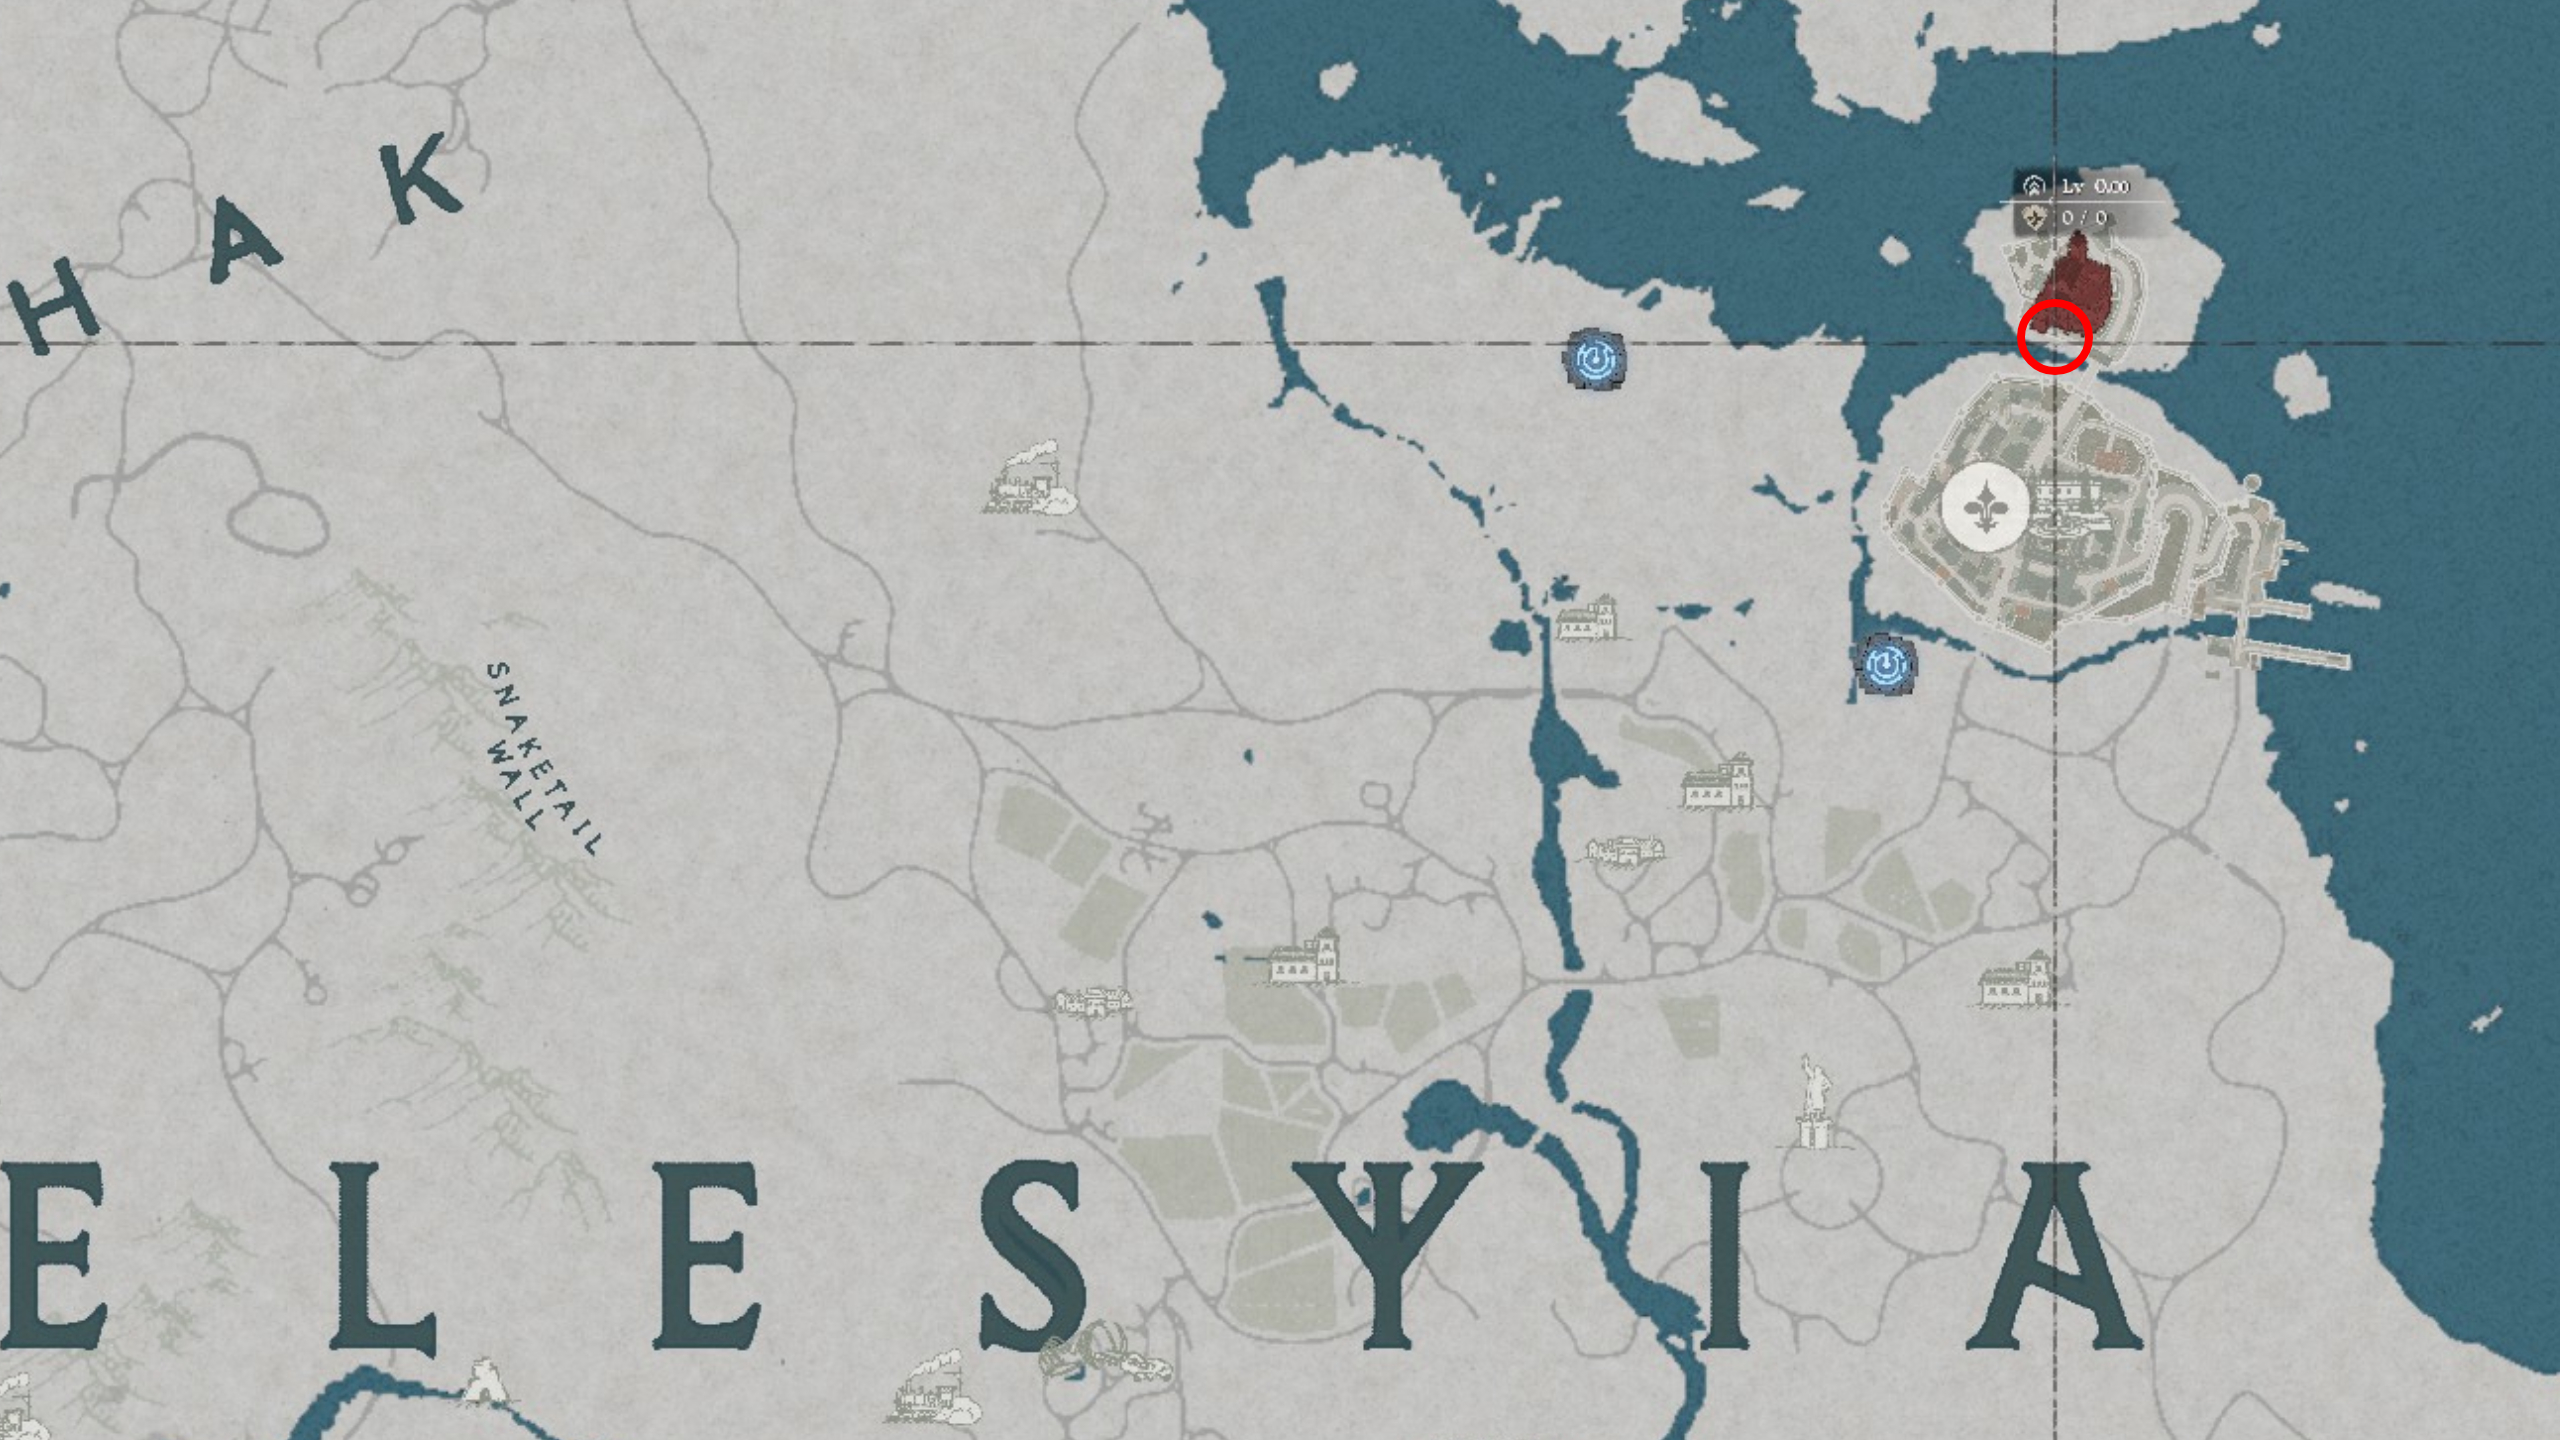

You can find the location depicted on Hidden Treasure Map Piece 7 in Delesyia Castle in Delesyia, the far eastern region of Pywel. Go to the coastal city (located on the coast above the 'A' in Delesyia on the map) and head towards the castle in the east of the city.
Article continues belowTo get into Delesyia Castle, you'll need to gain access using the Visione helmet, which you unlock towards the start of Chapter 2. Don't head here until you have that.
Once through the gate:
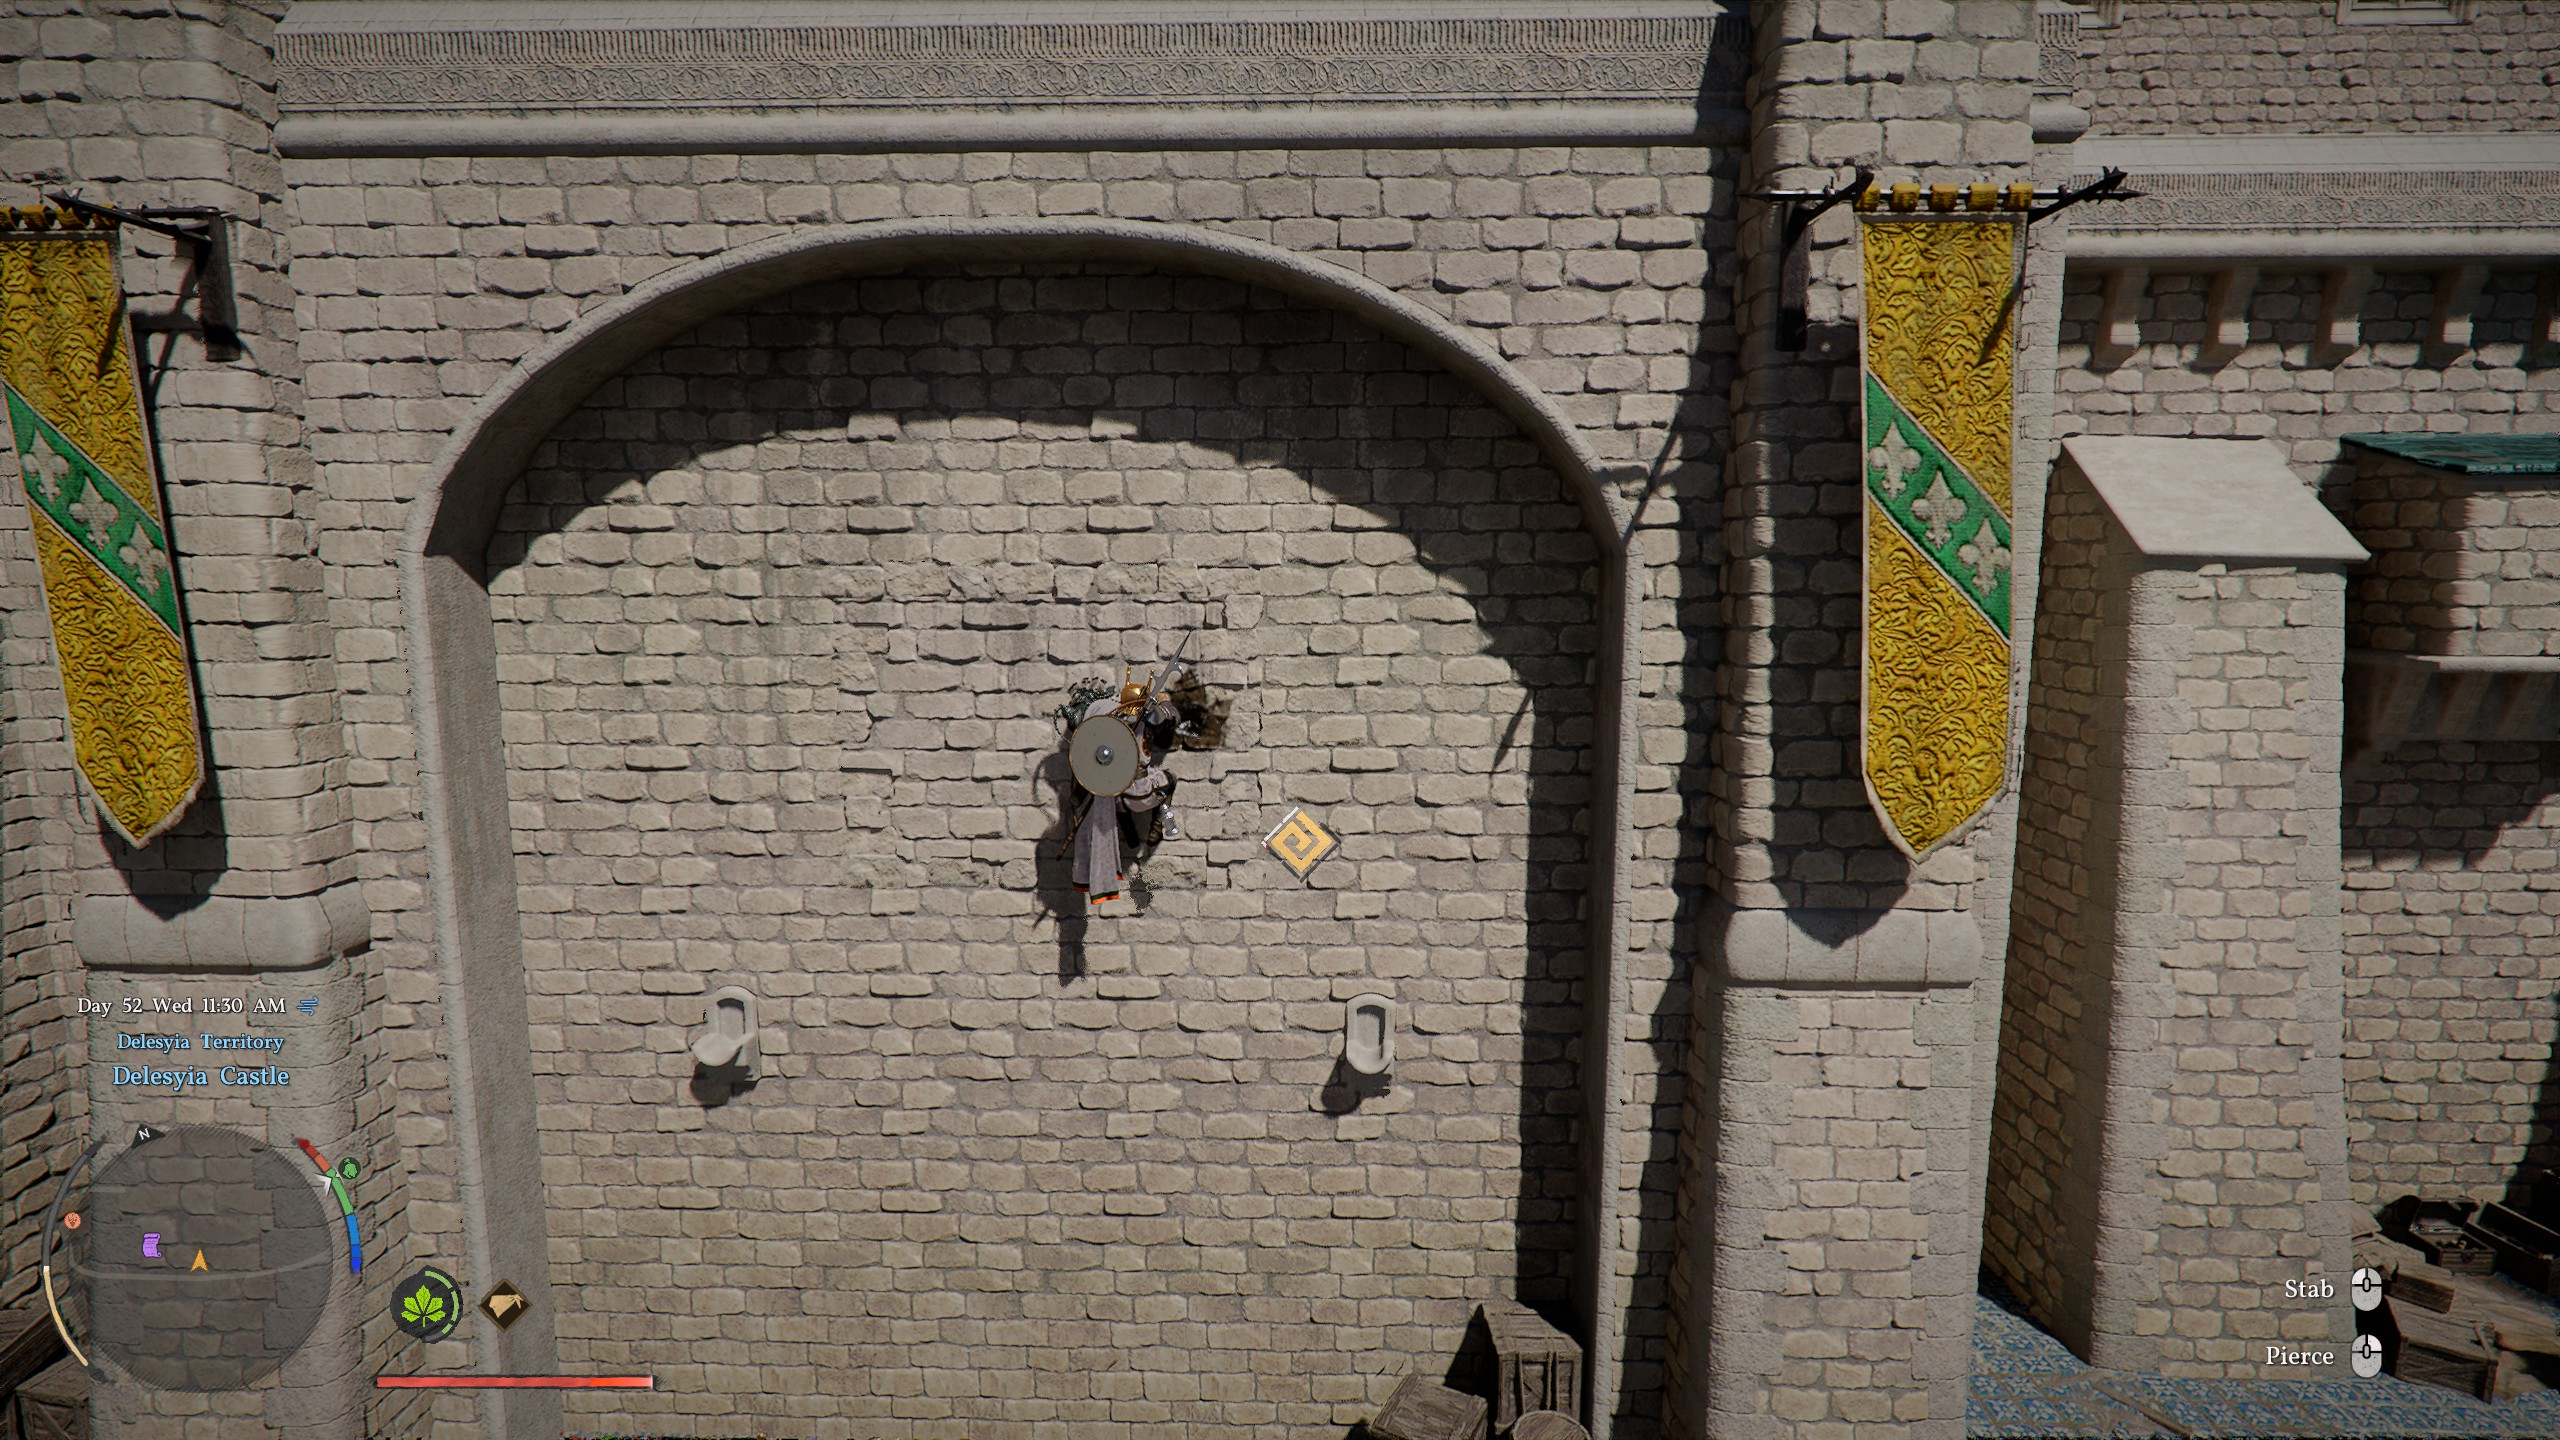
- Go across the bridge into Delesyia Castle, turn left, walk a little way further, and then look at the wall on your right. You'll see that the wall has a similar brick frame as the one in the treasure map with the little torch holders on either side.
- Hold your lantern and you'll see a leaf symbol high up on the right side, marking a suspicious spot in the wall.
- Climb up the wall to reach the spot, use your dagger to Resist and hold onto the wall, and then use Force Palm. This will spin the strange section of the wall, giving you access to a hidden chamber.

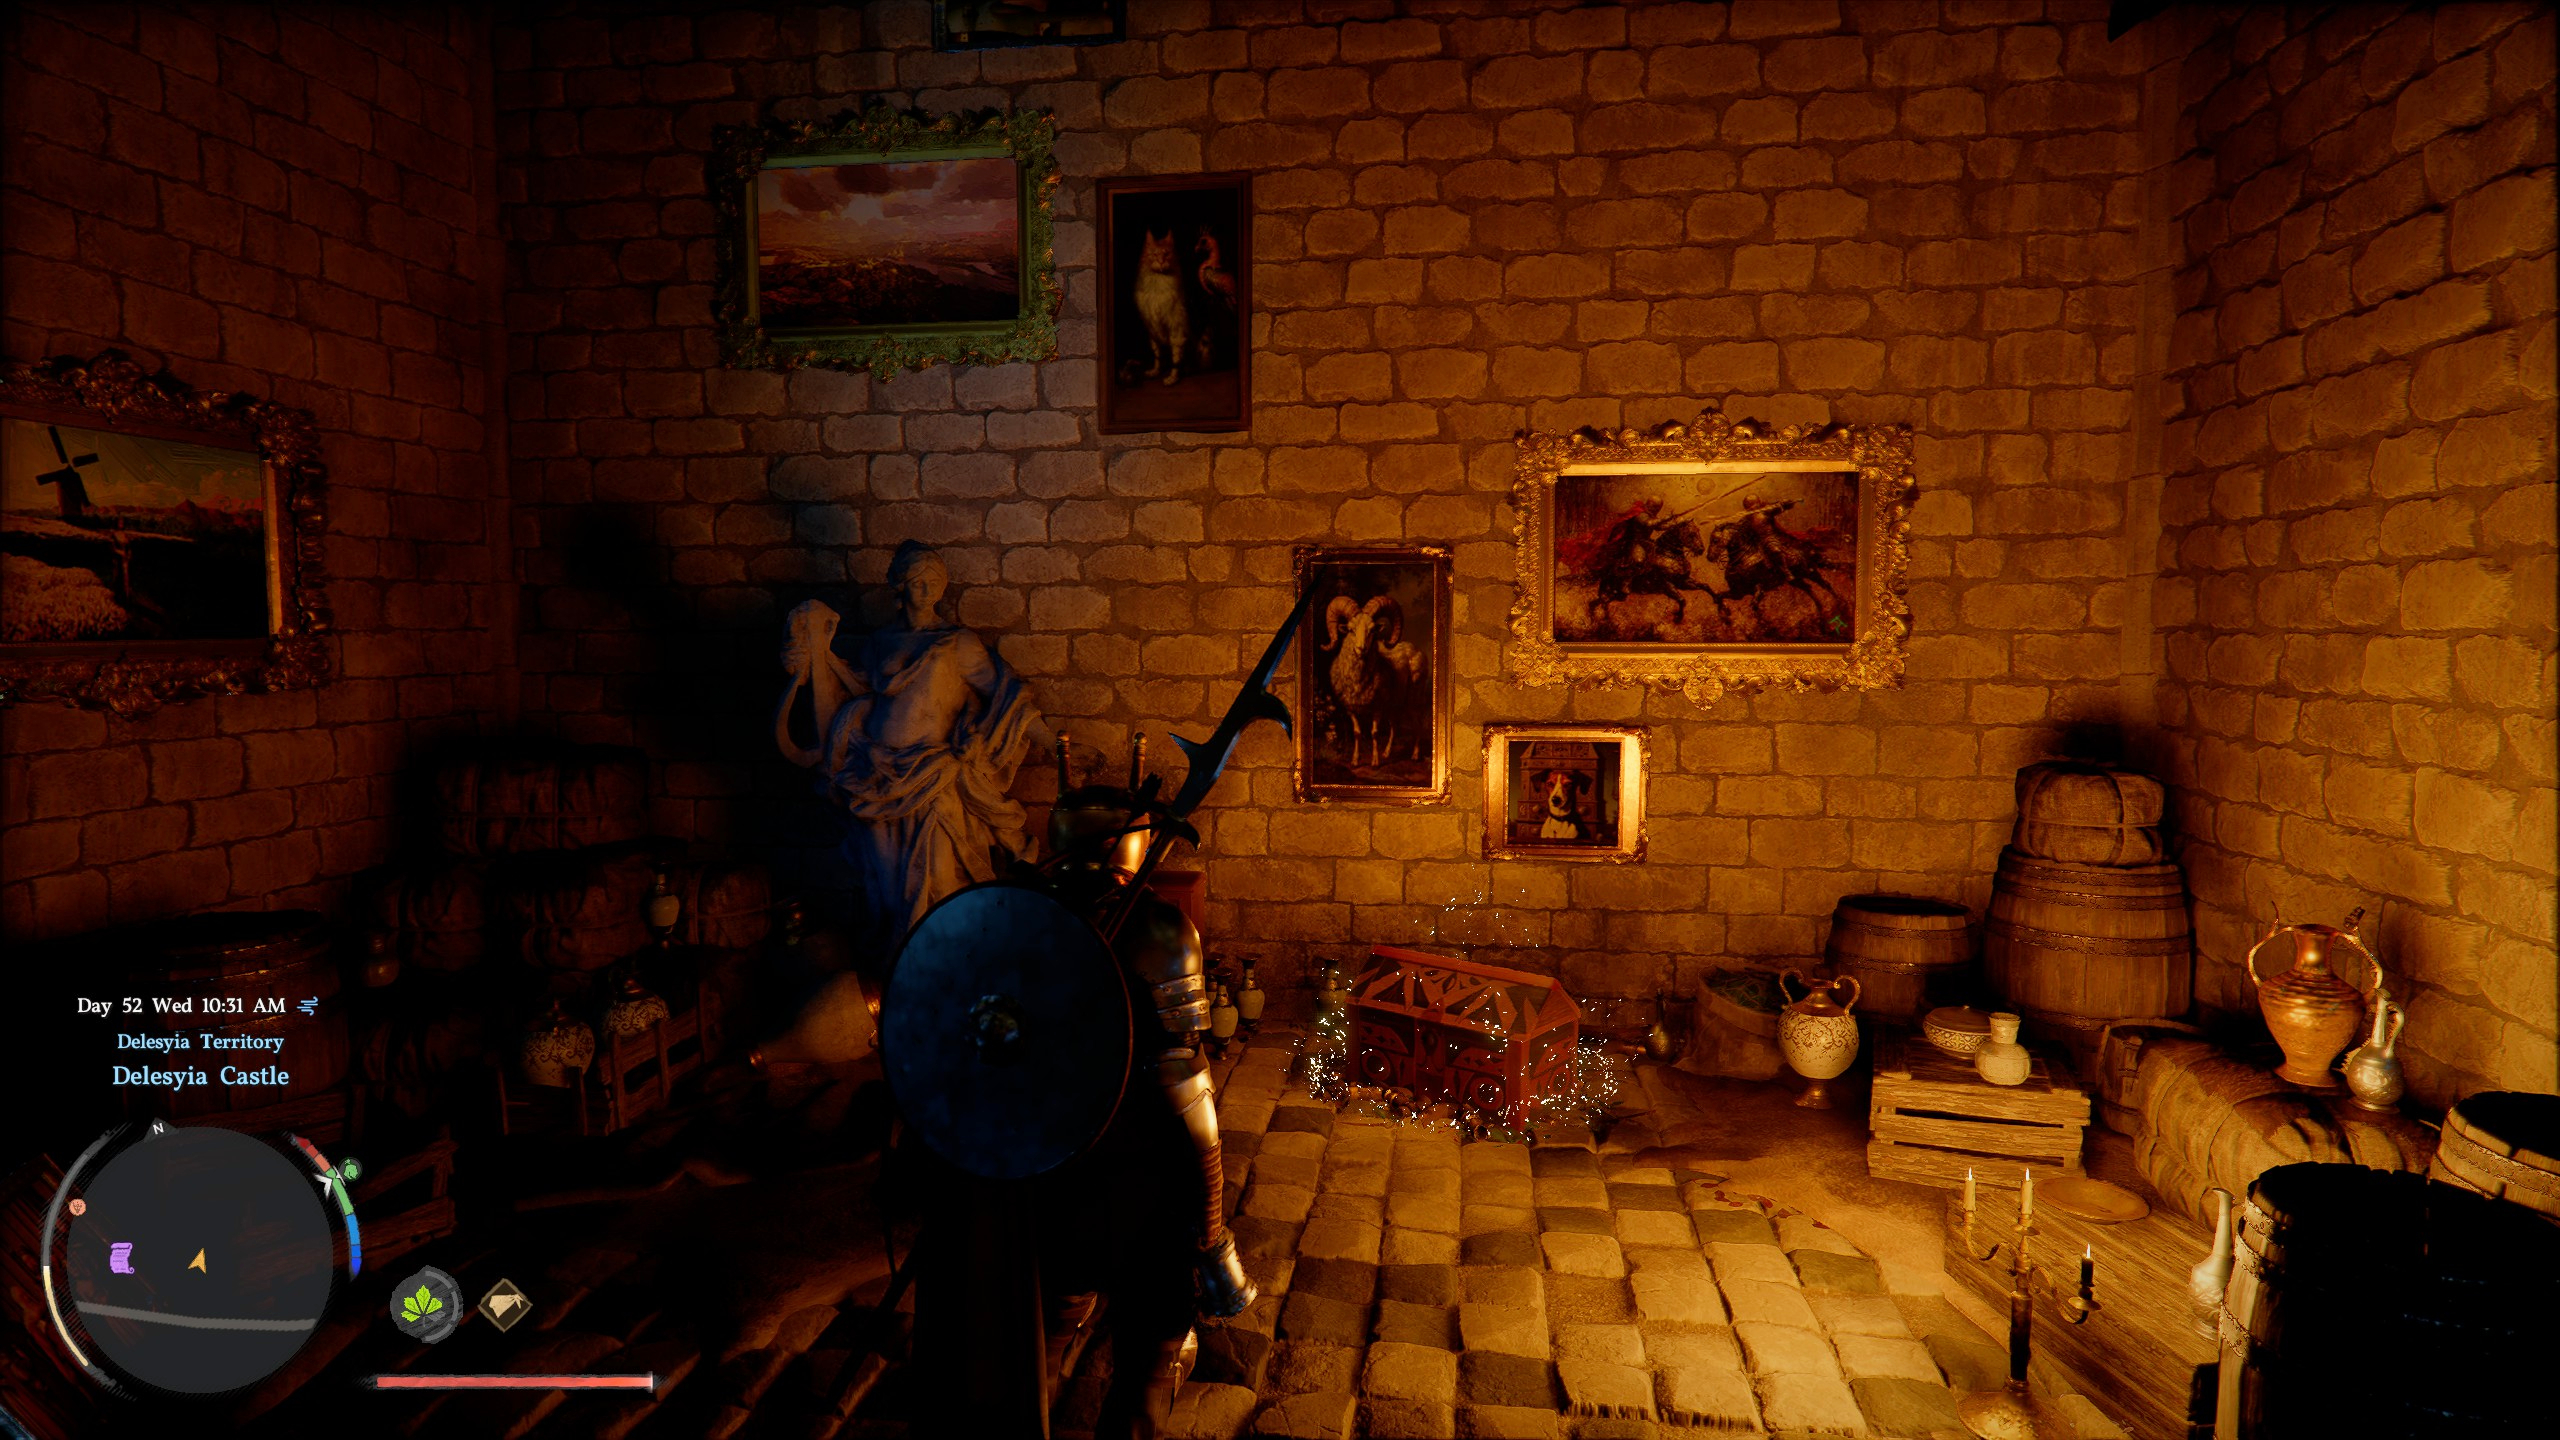
Inside the locked room, you'll find a chest containing Frozen Heart Plate chest armour. This not only looks cool, but it's also got high defence, so it's more than likely an upgrade over whatever you're currently using. You'll have to get out the same way you came in, so simply hold onto the wall again with Resist and Force Palm your way out.


You must confirm your public display name before commenting
Please logout and then login again, you will then be prompted to enter your display name.