How to survive Escape from Tarkov's Customs map
Don’t walk when you should go prone.
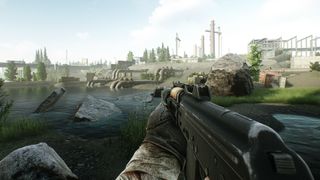
Escape from Tarkov's Customs map is a popular choice in Battlestate Games' FPS sim. Beginners frequent its lush landscape to complete early quests, and it's the perfect environment for learning EFT's basic mechanics. That said, it's still a challenging arena for more experienced players. Offering a mixture of indoor and outdoor combat zones, you'll need to remain cautious at all times.
Realistic shooters are tricky to master, and EFT is no exception. High risks promise plentiful rewards, and as you continue to learn more about Customs' intricacies, watch your inventory expand with quality loot. Holding onto your most prized possessions is a challenge, but that's part of the fun.
These hardcore mechanics are notoriously difficult to adjust to, and the Escape from Tarkov Customs map won't ease the burden. To help get you started, here's a breakdown of the key information you need to succeed on the Customs map. From valuable hidden loot spots to Sniper Scav spawns, I'm here to help you become a seasoned EFT soldier.
What class should you choose?
There are two types of operators: Bear and Usec. Currently, there are very few differences between them, other than the fact that the Bear voice lines are in Russian whereas Usecs are in English. Eventually, each faction will have their own specialities: Usec will focus on AR Systems, weapon modifications and long range optics, with Bear on AK Systems and assault operations. For now, just choose the one with your favourite skins.
After choosing an operator you can enter raids as either a Scav or PMC. Selecting Scav spawns you with random gear, so you won’t have to equip any from your stash and risk losing it. Scavs are the local bandit faction so other AI Scavs in the game will not see you as a threat, unless you attack first. There’s a cooldown on choosing to play as the Scav class, but it’s better than losing your gear and a good way to start for new players.
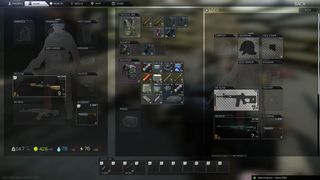
Playing as a PMC launches you into a raid as your main character. Before entering a raid, select Character in the main menu and drag the gear from your stash onto your character model to take it with you. If you die, you lose your gear permanently. However it can be insured and returned to you, if other players in the server don’t take it. Depending on which character you insure it with, the return time can vary, but 24-36 hours is estimated for the default insurer. Before you drop into a map, click next to hit the Insurance menu and tick the items that you want to insure and then click Ready to deploy.
If you're a brand new player, consider playing in Offline mode but turning PVE on. This will spawn Scavs you can fight against but you won't have to worry about enemy players, which is a great way to familiarize yourself with Customs' unforgiving landscape. Just remember that while you won't lose any gear if you die in Offline mode, you also can't take any loot you find with you.
PC Gamer Newsletter
Sign up to get the best content of the week, and great gaming deals, as picked by the editors.
If you’re ready to play with others but still don’t feel confident, select the Scav class to spawn with random gear, instead of risking it all with your own equipment as a PMC.
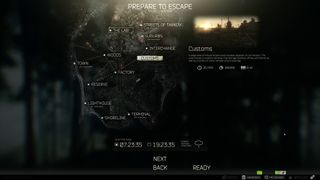
What to do at the beginning of the raid
A raid is a single play session in EFT, and it's marked from when you enter a map to the moment you die or attain extraction. One of the early challenges you’ll face in a raid is recognising where you are on the map. While a compass has been confirmed for an upcoming patch, don’t expect to have a minimap to help you navigate.
Though it's possible for you to purchase a Customs map from The Therapist (select Trading in the main menu), the maps she sells aren't nearly as helpful as ones you can find online and it takes up valuable inventory space. You're much better off heading to the EFT wiki and using one of the detailed community-made maps and keeping it open on a second screen like your phone, tablet, or monitor.
After spawning, get your bearings and plan your route to one of the available extraction points—see more on those below. Key landmarks that indicate you’ve landed on the west side of the map include the Storage Sheds and ‘Big Red’, a sizeable red warehouse. If you can spot the Gas Station, Shipping Yard, or a lot of woodland then you can safely assume you’ve arrived on the east side of Customs.
Players tend to linger around the spawn points, so take cover as quickly as possible when you start. Equally if you hide close to your spawn point, you have the chance to mop up a few choice treasures from downed opponents. You won't win any awards for bravery, but that doesn't matter if it gives you enough loot to set you up for survival.
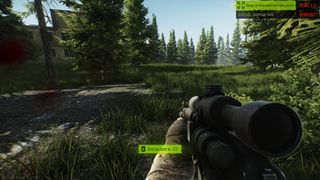
Escape from Tarkov Customs map exits
Exit, or extraction, points are the places in which you can leave with all your loot. Customs’ many extraction points line its exterior and always require you to travel across the map before you can leave. In other words, if you spawn on the west side of the map, your extraction points will be on the east, and vice versa.
Only certain extraction points are active during a raid and they randomly rotate each time you spawn: Double tap ‘O’ to check which points are accessible. Points labelled with a '?' require you to perform an additional action before extracting such as finding a key or paying some roubles.
You have plenty of time to reach your destination, so don’t rush straight towards an extraction point. Invest some time in getting to know a few of the map's points of interest before hopping into a game, such as some handy routes in mind for snagging loot. Trailer Park and Crossroads are the usual extraction points if you spawn in the east of the map, whereas Factory Far Corner and Admin Gate your destinations if you spawned in the west. None of these points require additional actions to facilitate your extraction, but you may find them busier as a result.
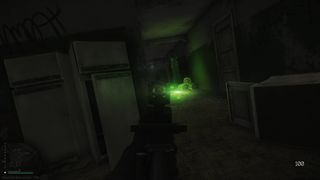
Escape from Tarkov Customs hot zones
Whatever playstyle you choose it’s useful to know where the action happens. As your enemies skitter through the central sliver of Customs, it’s no surprise that Construction and Dorms see loads of traffic. Quests—unlockable rooms filled with loot and Scav spawns—make these locations particularly lively.
Regardless of whether you encounter human or AI foes, you’ll need to take particular care when traversing the bridges, notably Main Bridge and Train Bridge. All players must cross a bridge on their journey towards an extraction point, making these dangerous chokepoints.
How to complete quests on Customs
Completing quests grants you XP, and increases trader reputation, money, and special items. Check in with the traders to see which quests are available to you. New players’ first port of call should be Prapor (found in the Trading menu); here's their first quest to give you an idea of the kind of missions you can expect:
- Quest Name: Debut
- Type: Elimination
- Objectives: Take out five Scavs and retrieve two MP-133 shotguns
- Rewards: 600 XP, 5,000 Roubles, +0.08 rep with Prapor, PM 9x18PM pistol, 3x 90-93 9x18PM magazine for 8 PM rounds and ability to purchase Kalashnikov’s AKS-74U 5.45x39.
Escape from Tarkov Customs loot: where to get the best gear
Loot is everything in EFT. If you don’t have decent loot, fix that. If you have some to spare, flip it to earn some extra cash. Open the Trading menu between raids and click on the Sell tab to start making some money.
While Customs isn't necessarily the best battlefield for a profitable loot run, it still has several lucrative locations. Hot zones such as Dorms are brimming with valuable loot, courtesy of its many unlockable rooms. But tasty loot means lots of other players: unless you know what you're doing, you may want to delay your trip to Dorms. Arriving later reduces the chance of running into enemies, which lets you scoop up any remaining weapons and items. Big Red is also a good loot spot, although you’ll run into similar competition to Dorms.
On the east side of the map, a high concentration of loot can be found at Sub-Station. Admittedly, this is a risky spot to visit if you’re playing as a PMC, as this area is also a Scav spawnpoint.
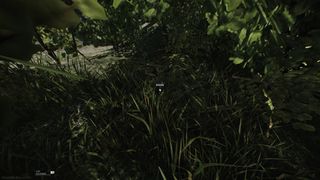
Hidden caches (also referred to as ground stashes) are another means of acquiring valuable items. They come in two forms: a grass-covered hatch—which you can sort of see in the image above—often obscured by bushes, and a buried barrel with just the lid exposed.
Customs is substantially wooded in the north and northeastern portions of its map. So if you’re planning on hitting a few hidden stashes on your extraction route, the tree-filled area between Buses and Gas Station is worth working into your plan.
Best hidden stashes on Customs
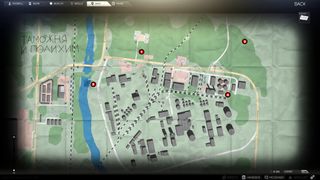
Here are a few ground stashes to add to your looting route, and whether you're looking for barrels or hatches on each. These will always appear in fixed locations and can contain weapons, gear, ammo, medical supplies, and more.
Barrel: North-West of Bus Station, inside the blue crate
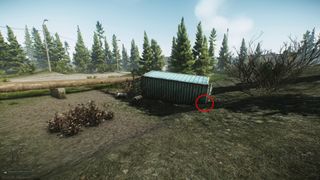
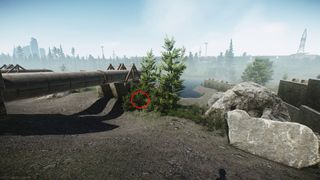
Hatch: South-West of Gate 2, under the foliage next to the large pipes
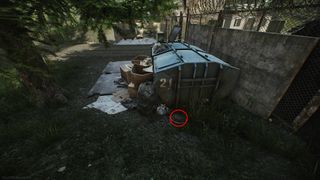
Barrel: East of Military Base Checkpoint gate, next to dumpster 21
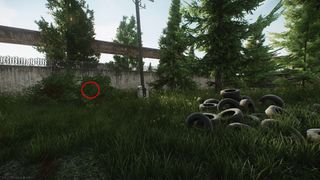
Hatch: East side of Factory Far Corner, next to the wall
Where to find Scavs on Customs
Scavs are locals in Tarkov and can be both AI and player-controlled. Scav AI always spawn into maps at the beginning of a raid and more will continue to appear in waves throughout the session.
Sniper Scavs spawn on Customs in various areas, so stay alert when traversing the following areas to avoid an untimely death. If you manage to kill a Sniper Scav, rewards can include valuable weapons including the SV-98, Vepr Hunter, and Mosin. You can find them in:
- Construction
- Warehouse
- Military Checkpoint
- Woodland east of Military Checkpoint
- Smoke tower close to Factory Stacks
Taking out the Scav Boss, Reshala, should be relatively straightforward, although it’s easy to become overrun by his guards. Off him stealthily before dealing with his entourage. Use grenades to maximise the damage you can deal to the group at once, but be wary of them responding in kind. Avoid remaining stationary for too long as the guards will hunt you down. The risks are greater, but the rewards are, too: here's where to find Reshala and the goodies you can pluck from his corpse:
- Locations: Dorms, Gas Station, tower north of Gas Station and Military checkpoint near Gas Station
- Hostiles: Reshala and four heavy guards
- Top rewards: Bitcoin, Roubles, TerraGroup Labs key card, Golden TT (pistol)
As PC Gamer's guides writer, Emma is usually juggling several games at once. She loves competitive first-person shooters like CS:GO and Call of Duty, but she always has time for a few rounds of Hearthstone. She's happiest when she's rescuing pugs in Spelunky 2.
Most Popular


