All 99 Nights in the Forest classes in an overall tier list for beginners, team players, and solo survivors
Save yourself some diamonds and buyer's remorse.

Keep up to date with the most important stories and the best deals, as picked by the PC Gamer team.
You are now subscribed
Your newsletter sign-up was successful
Want to add more newsletters?
Gems are hard to come by, but maybe a 99 Nights in the Forest class tier list will spare you from making any bad, hasty decisions while browsing the class shop. I've survived well over 1,000 days against the Deer, Crossbow Cultists, and all manner of event creatures—so I've definitely got some thoughts on what class is best and for who.
Whether you want to know what the best singleplayer classes are or need recommendations for big group survival, I've got a handy 99 Nights in the Forest class tier list covering every scenario.
December 21, 2025: The 99 Nights in the Forest Christmas update just added the Snowman (100 Diamonds) and Gifting Elf (900 Candy Canes) classes as part of its Week 2 celebrations. I'm not ranking the Gifting Elf just yet since I haven't had a chance to play it, but the Snowman is officially in our B-tier bracket.
All 99 Nights in the Forest classes ranked
Before making a choice, consider your playstyle and goals. Some classes are great in multiplayer, but a bummer if you're trying to survive alone. Then there's the whole what's the best value consideration when there's a finite number of 99 Nights in the Forest codes, and spending Robux gets expensive.
Big Game Hunter, Cyborg, Necromancer, Vampire | |
Assassin, Beastmaster, Brawler, Chef, Explorer, Fire Bandit, Gambler, Lumberjack | |
Alien, Berserker, Blacksmith, Brute, Poison Master, Pyromaniac, Snowman, Witch | |
Base Defender, Cook, Farmer, Fisherman, Medic, Ranger, Scavenger, Undead | |
Camper, Decorator, Support, Hunter, Zookeeper | |
Santa's Helper, Trick or Treater |
Which 99 Nights in the Forest class should I start with?
I started as a Scavenger since it only costs 25 diamonds, and I love the additional sack space, but you may progress faster with the Lumberjack (70 diamonds), Explorer (80 diamonds), or Alien (100 diamonds). All four are perfectly versatile in solo or group settings, though I'd see Scavenger as a stepping stone to one of the latter classes.
The Lumberjack's Good Axe and buff to log drops make for a strong early game, and its second perk increases chances for extra saplings to plant around your base. I'd say it's the better long-term investment, but more offensive players may prefer the Alien—I'm just not a fan of its kit and found it outclassed by my ultimate goal of obtaining Cyborg.
What's the best 99 Nights in the Forest class for solo survival?
Cyborg is still widely regarded as the best 99 Nights in the Forest class for any circumstance, and I've found it the most consistent for an easy run from start to finish. I'd recommend it first, but Big Game Hunter is good for long runs thanks to its permanent buffs. I'm also starting to think of Necromancer as a late-game runner-up.
Early game Necromancer is rough, but it picks up after summoning a few cultists. Its army of undead can take damage and die (again), but you can always resurrect them with souls from an invasion. The Cyborg is nice since you'll never worry about a source of ammo, but if you can resurrect a Cultist King, it'll kill most foes before they register an attack.
What are the best 99 Nights in the Forest co-op classes?
While a five-player group of Cyborgs sounds nice, it grows harder and harder to survive on limited resources. I find taking a couple of support-style classes, such as the Lumberjack, Chef, Blacksmith, or Base Defender, is the most helpful.
The best choices depend on team composition—for instance, you don't want two Blacksmiths making each other's perks useless—but tossing in a few resource buffs ensures the group won't suffer through the late game. Just remember that difficulty scales based on team size, so don't set up for a five-player lobby with only three people.
S-Tier: The best 99 Nights in the Forest classes

⚒️ Starts with a Rifle, (12) Ammo
Good in both solo and multiplayer games, a late-game powerhouse after acquiring its third perk and stacking permanent buffs. The best choice for amassing higher day counts.
Perk | Description | Requirements |
|---|---|---|
Level 1 | Consumes animal pelts to gain permanent bonuses | Row 0 - Cell 2 |
Level 2 | Higher pelt drop rate | (70) Kill wolves |
Level 3 | Consume infinite amount of mammoth tusks to permanently gain health | (150) Kill wolves |
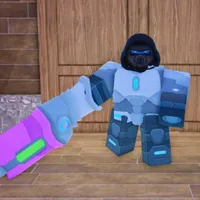
⚒️ Starts with a Laser Canon and Alien Armor
Good for solo and co-op play, offensive playstyles. Strong early to mid-game, but needs to kite stronger enemies much longer in the late game. Beware of overheating and taking extra damage.
Perk | Description | Requirements |
|---|---|---|
Level 1 | Excellent visibility at night, | Row 0 - Cell 2 |
Level 2 | Alien tech deals increased damage | (50) Damage multiple targets with one shot |
Level 3 | Kills restore some alien tech | (100) Damage multiple targets with one shot |

⚒️ Starts with a Cultist Staff
Good for solo and co-op runs looking to last longer in the late game. Not very impressive until resurrecting Cultist Kings, but worth the grind if you can survive long enough. More situational as it's dependent on the volcano biome.
Perk | Description | Requirements |
|---|---|---|
Level 1 | Collects souls to resurrect cultists | Row 0 - Cell 2 |
Level 2 | Resurrected cultists deal more damage | (5,000) Deal damage with pets/summons |
Level 3 | Every cultist improves night vision | (5,000) Deal damage with pets/summons |

⚒️ Starts with a Vampire Scythe, Vampire Cloak
Good for solo and co-op play, but incredibly difficult for players uncomfortable with melee combat. Sustain from their level 3 perk's lifesteal feels great, but doesn't mean you can charge into massive mobs and forgo kiting.
Perk | Description | Requirements |
Level 1 | Gains lifesteal energy when attacking with any melee weapon, Runs faster at night | Row 1 - Cell 2 |
Level 2 | Better vision at night | (450) Healing from lifesteal |
Level 3 | Increased healing from lifesteal | (1,000) Healing from lifesteal |
A-Tier: The best 99 Nights in the Forest classes

⚒️ Starts with a Katana, (120) Throwing Knives
Good for solo and co-op, a competitive alternative to Cyborg, but with limited ammo. Suitable for speedruns and diamond farming. Bad RNG can make late survival harder with limited Throwing Knives and reduced HP.
Perk | Description | Requirements |
|---|---|---|
Level 1 | +10% sprint speed, -15% HP +5% chance Throwing Knives spawn in chests | Row 0 - Cell 2 |
Level 2 | First hit has a chance to strike critically | (100) Kills with no damage taken (2,500) Studs travelled |
Level 3 | +10% chance Throwing Knives spawn in chests | (250) Kills with no damage taken (10,000) Studs travelled |

⚒️ Starts with a Good Taming Flute
Good for solo and co-op play, a competitive alternative to Necromancer that's faster to beef up early on but seems to have less damage potential later. Makes the Hunter class more useful in multiplayer games.
Perk | Description | Requirements |
|---|---|---|
Level 1 | Summons wolves with 3 steak Can have up to 5 pets | Row 0 - Cell 2 |
Level 2 | Tamed wolves run faster while attacking | (5,000) Deal damage with pets/summons |
Level 3 | First wolf summoned is an alpha wolf | (15,000) Deal damage with pets/summons |

⚒️ Starts with Leather Armor
Good for solo or group runs, a late-game monster a good melee weapon like the Morningstar or Cultist King Mace. Can be difficult to see its full potential with greedy teammates, but even weaker melee weapons see meaningful returns.
Perk | Description | Requirements |
|---|---|---|
Level 1 | +40% HP, +30% damage with melee weapons | Row 0 - Cell 2 |
Level 2 | +10% health regeneration / Regen sooner after taking damage | (200) Receive melee attacks |
Level 3 | +5% chance to block incoming damage | (5,000) Regenerate HP |

⚒️ Starts with a Chef's Station Blueprint, Recipe Book
Good for co-op games and easily one of the must-have support classes for bigger groups. Its recipe buffs can provide the team with extra health, speed, and vision. Excellent value at 150 diamonds and worth investing in its perks and talent.
Perk | Description | Requirements |
|---|---|---|
Level 1 | Cook new recipes that give players huge bonuses | Row 0 - Cell 2 |
Level 2 | Unlocks a new recipe | (200) Cook meals on a campfire |
Level 3 | Unlocks a new recipe | (400) Cook meals on a campfire |

⚒️ Starts with Compass, Map
Great for solo runs, and teams will appreciate the Explorer's headstart with the compass and map. The speed boost makes it one of the fastest, if not the fastest, classes in 99 Nights. Incredible value for the low diamond cost.
Perk | Description | Requirements |
|---|---|---|
Level 1 | Gain speed boost after clearing fog, larger map view radius, +2 sack space | Row 0 - Cell 2 |
Level 2 | Hunger drain reduced the more time away from fire | (80) Open chests |
Level 3 | See nearby chests through walls, open chests faster | (200) Open chests |

⚒️ Starts with an Infernal Crossbow, Wildfire
Good for solo and co-op play, and excellent when paired with the Cyborg for AoE damage to Cultist Stronghold mobs. Easily outclasses the more expensive Pyromaniac class for less than half its diamond cost.
Perk | Description | Requirements |
|---|---|---|
Level 1 | Starts with Infernal Crossbow and Wildfire potion | Row 0 - Cell 2 |
Level 2 | Other tools have a chance to set enemies on fire | (100) Kill enemies with fire |
Level 3 | +10% chance to get a Wildfire potion from chests | (250) Kill enemies with fire |

⚒️ Starts with a random item
Good for solo runs, but harder to maximize its potential in uncoordinated big groups. Incredible value at just 55 gems, but extra bad RNG can make some runs painful.
Perk | Description | Requirements |
|---|---|---|
Level 1 | Standard chests have 50/50 chance to upgrade or downgrade | Row 0 - Cell 2 |
Level 2 | Standard chests have 60/40 chance to upgrade or downgrade | (70) Open chests |
Level 3 | +10% chance chests drop coins | (150) Open chests |

⚒️ Starts with a Good Axe
Good for solo and co-op games, and another must-have support alongside the Chef class since it makes farming wood and saplings trivial. Needs its Level 2 perk to see the best value, but easily the best "support" to run singleplayer.
Perk | Description | Requirements |
Level 1 | +20% chance to get 1 bonus log from trees | Row 1 - Cell 2 |
Level 2 | +25% chance for a double sapling drop | (200) Cut trees |
Level 3 | +20% chance to get 1 or 2 bonus logs from trees | (500) Cut trees |
B-Tier 99 Nights in the Forest classes

⚒️ Starts with a Raygun
Good for solo and co-op survival, but beware of overheating when playing alone. A consistent, predictable experience, but Gambler's RNG and cheaper cost may make it the better choice if you're feeling lucky.
Perk | Description | Requirements |
Level 1 | Excellent visibility at night, | Row 1 - Cell 2 |
Level 2 | Alien tech recharges faster | (150) Kills with alien tech |
Level 3 | Sprint faster when alien tech is fully charged | (300) Kills with alien tech |

⚒️ Starts with a Medkit
Good for solo and group play, but a pricey for something that requires heavy investment before it feels satisfying in its role. Auto-revive is great for clutch saves, but its level 3 perk is hard to manage in enemy mobs.
Perk | Description | Requirements |
|---|---|---|
Level 1 | After first death, auto-revive with low HP and hunger | Row 0 - Cell 2 |
Level 2 | Receives strength boost for a short time upon reviving | (50) Have less than 40% HP upon enemy kill |
Level 3 | Deal higher damage as HP gets lower | (150) Have less than 40% HP upon enemy kill |

⚒️ Starts with a Hammer
Good for co-op survival, though its level 3 perk is challenging to coordinate if random teammates grind scraps themselves. All perks are easy to unlock, and the crafting discount can be nice on the right recipe.
Perk | Description | Requirements |
|---|---|---|
Level 1 | Craft items from the next crafting bench tier (up to tier 4) | Row 0 - Cell 2 |
Level 2 | +2 random bench recipes will have discounts | (20) Upgrade the crafting bench |
Level 3 | Chance to get extra scraps from items you put in the grinder | (40) Upgrade the crafting bench |

⚒️ Starts with a Brute Shield
Good for team play, but hard to justify for solo runs. The taunt and damage reduction come in handy when clearing the Cultist Stronghold, so the Brute really needs its second perk to feel useful to the team. It's also worth mentioning that the taunt works on the deer, making you a hero to someone one-shot from death.
Perk | Description | Requirements |
Level 1 | Spawns with damage reducing shield that can taunt enemies | Row 1 - Cell 2 |
Level 2 | Enemies deal reduced damage for a few seconds after being taunted | (100) Taunt enemies |
Level 3 | Shield becomes an Obsidian Shield that charges and creates shockwaves | (250) Taunt enemies |

⚒️ Starts with a Blowpipe, Poison Armor
Good in multiplayer scenarios, but still outclassed by most major damage dealers in its cost range. Its second upgrade can be hard to make use of when other AoE-heavy classes kill mobs faster.
Perk | Description | Requirements |
|---|---|---|
Level 1 | Poison effects are stronger | Row 0 - Cell 2 |
Level 2 | 25% chance enemies spread their poison upon death | (100) Kill poisoned enemies |
Level 3 | Attacks deal increased damage to poisoned enemies | (250) Kill poisoned enemies |
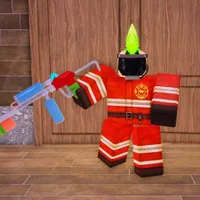
⚒️ Starts with a Flamethrower
Good in solo runs and fine in a coordinated multiplayer group, but you'll want to rush crafting the Oil Drill. It was once the king of speedruns, but it's hard to justify the cost unless you already have the Cyborg and Flame Bandit.
Perk | Description | Requirements |
|---|---|---|
Level 1 | Reload flamethrower with fuel canisters and oil barrels | Row 0 - Cell 2 |
Level 2 | Fuel canisters and oil barrels restore even more fuel | (150) Kill enemies with fire |
Level 3 | You move faster for every burning enemy | (400) Kill enemies with fire |

⚒️ Starts with a Snowball Cannon and Beanie
Fine in both solo play and group settings. The Snowman plays a bit like the Alien, but seems to do slightly less damage in favor of its slow effect after six hits.
Perk | Description | Requirements |
|---|---|---|
Level 1 | Starts with Snowball Cannon and Beanie | Row 0 - Cell 2 |
Level 2 | Hit a target with 6 snowballs to slow it | (500) Hit enemies with snowballs |
Level 3 | Snowball Cannon reloads faster | (1,000) Hit enemies with snowballs |

⚒️ Starts with Witch Potions
Expensive for the time investment to earn, but it's a permanent class from the Halloween event. Poison damage ticks are slow, but it's a great value for a 3-star class since it has unlimited ammo.
Perk | Description | Requirements |
|---|---|---|
Level 1 | Throw potion at enemies to deal damage or apply random effect | Row 0 - Cell 2 |
Level 2 | Throw potion at allies to heal a small amount | (50) Hit enemies with poison |
Level 3 | All poison effects also apply light poison | (100) Hit enemies with poison |
C-Tier 99 Nights in the Forest classes

⚒️ Starts with (2) Defense Blueprints
One of the better cheap 2-star options for a starting support class, but its level 3 perk is useless if random teammates don't allow you to place base defenses.
Perk | Description | Requirements |
|---|---|---|
Level 1 | Starts with 2 Defense Blueprints | Row 0 - Cell 2 |
Level 2 | Can upgrade defenses | (60) Build defenses |
Level 3 | Defenses you place deal higher damage | (150) Build defenses |

⚒️ Starts with Seasoning
An acceptable multiplayer midpoint between upgrades to Chef for its cost, but needs its third perk to cook its healing recipe. The first two only feel helpful in large, uncoordinated groups.
Perk | Description | Requirements |
|---|---|---|
Level 1 | Seasoned food restores more hunger | Row 0 - Cell 2 |
Level 2 | Crockpot cooks 20% faster | (200) Cook meat |
Level 3 | 25% chance to make Hearty Stew | (400) Cook meat |

⚒️ Starts with a Watering Can
Incredibly circumstantial, no singleplayer value, and only an asset to late-game teams of 4-5 players. The increased chance for rare crops comes in handy, but it needs a Chef to fully make use of the buff.
Perk | Description | Requirements |
|---|---|---|
Level 1 | Use watering can to get rarer crops from farm plots | Row 0 - Cell 2 |
Level 2 | Some saplings you plant grow into apple trees | (200) Harvest crops |
Level 3 | Farm plots you water are guaranteed to grow 1 pumpkin | (500) Harvest crops |

⚒️ Starts with a Fishing Rod
Incredibly niche use, but it's good in groups of 4-5 players (preferably including a Chef). Faster fishing is helpful in higher tier fishing holes for bandages, ammo, scrap, cultist gems, and forest gems.
Perk | Description | Requirements |
|---|---|---|
Level 1 | Fishing rods level up faster | Row 0 - Cell 2 |
Level 2 | Fishing rod casts are instant and further | (350) Catch fish |
Level 3 | Fish hook faster | (500) Catch fish |

⚒️ Starts with a Bandage
Only sees value in co-op games and not as strong as other support-style classes. Only worth it if you primarily play with randoms and don't mind being the group ambulance.
Perk | Description | Requirements |
|---|---|---|
Level 1 | 5x faster revives | Row 0 - Cell 2 |
Level 2 | Improved revive on others, restores more health and hunger | (30) Find medical supplies |
Level 3 | One bandage upgrades to a medkit | (50) Find medical supplies |

⚒️ Starts with a Flashlight, Revolver, (18) Ammo
Acceptable in singleplayer or co-op, but another instance where its cost doesn't feel justifiable with such an easy-to-obtain starting kit. Its only significant perk is its second, though it's quite an easy upgrade to make without spending diamonds.
Perk | Description | Requirements |
|---|---|---|
Level 1 | Start with 18 ammo | Row 0 - Cell 2 |
Level 2 | 10% chance to refund ammo on shot | (10) Rescue kids |
Level 3 | Start with 30 ammo | (35) Rescue kids |

⚒️ No starting items
Good for beginners in any context, but its appeal quickly wears off after mastering the basics. The most compelling factor is its cheap diamond cost—a little more expensive than Camper, but half of Gambler.
Perk | Description | Requirements |
|---|---|---|
Level 1 | +2 sack space | Row 0 - Cell 2 |
Level 2 | Opens chests 20% faster | (450) Grind scrap |
Level 3 | Chance to get scrap as bonus drop from chests | (1,000) Grind scrap |

⚒️ Starts with a Bandage
Good in multiplayer situations and a much better choice over Support as a class taking free damage. Needs heavy investment and a worthwhile talent to feel truly satisfying, and its perks are difficult to level in random groups.
Perk | Description | Requirements |
|---|---|---|
Level 1 | Gain a permanent bonus every time you're revived | Row 0 - Cell 2 |
Level 2 | Get revived instantly | (30) Get revived by others |
Level 3 | Move for 8 seconds after death | (60) Get revived by others |
D-Tier 99 Nights in the Forest classes

⚒️ Starts with a Flashlight
A cheap option for beginner players, but for just 15 diamonds more you can grab the Scavenger for a better long-term value. Its only semi-useful perk is its first; the third isn't even worth the hassle.
Perk | Description | Requirements |
|---|---|---|
Level 1 | 10% reduced hunger drain | Row 0 - Cell 2 |
Level 2 | Increased visibility at night | (75) Cook food on a campfire |
Level 3 | Spawn with stew | (150) Cook food on a campfire |

⚒️ Starts with a Hammer, Paint Brush
Functionally useless in both singleplayer and multiplayer games. Despite its significantly cheaper cost, it's better to save for the Blacksmith. Coins are too easy to collect to make the class discount valuable.
Perk | Description | Requirements |
|---|---|---|
Level 1 | Furniture trader offers +1 item per visit | Row 0 - Cell 2 |
Level 2 | Furniture trader always visible when visiting | (30) Buy furniture |
Level 3 | 25% furniture discount | (80) Buy furniture |

⚒️ Starts with a Bandage
Its only justifiable use seems to be for helping new players, but even then it's better to save for heavy damage classes that can survive to escort someone vs. tanking tons of extra damage at risk of death.
Perk | Description | Requirements |
|---|---|---|
Level 1 | Bond with another player | Row 0 - Cell 2 |
Level 2 | Support eats for both players in an 80/20 split | (500) Absorb damage with supported player |
Level 3 | See a beam to supported player at any distance | (1,500) Absorb damage with supported player |

⚒️ Starts with (2) Bear Traps
Only sees value when paired with a Chef or Beastmaster in groups of 4-5 players. Its starting items are cheap defensive crafts with limited durability. Pelt drops help with making bandages, but Fisherman would be a better choice.
Perk | Description | Requirements |
|---|---|---|
Level 1 | Increased meat droprate | Row 0 - Cell 2 |
Level 2 | Slightly higher pelt drop rate | (120) Kill bunnies |
Level 3 | Pelt trader offers an extra wolf pelt trade | (120) Kill alpha wolves |

⚒️ Starts with an Old Taming Flute
Taming is too easy to justify the diamond cost, and its only useful perk is the extra tamed animal upgrade. Cheaper starting classes with two pets ultimately feel more satisfying.
Perk | Description | Requirements |
|---|---|---|
Level 1 | Taming flute levels faster | Row 0 - Cell 2 |
Level 2 | Feeding tamed animals restores more of their health | (30) Tame animals |
Level 3 | Requires one less step to tame an animal | (60) Tame animals |
99 Nights in the Forest event classes
The 99 Nights in the Forest event classes don't fit neatly into our tier list since they're limited time roles that disappear once the event ends. However, they're usually worth getting for farming seasonal rewards, so don't write them off just because they don't include a tiered ranking!

⚒️ Starts with 40 coins
If you're grinding candy canes for the Christmas event, then it's worth picking up Santa's Helper for the extra coins. The class will disappear when the festivities end, but it's a must for farming extra event currency.
Perk | Description | Requirements |
|---|---|---|
Level 1 | Start with 40 coins | Row 0 - Cell 2 |
Level 2 | Items in the Santa Sack are 25% cheaper | (30) Open Christmas gifts |
Level 3 | Gain an extra candy cane for each present | (70) Open Christmas gifts |

⚒️ Starts with nothing
An event-limited class that disappears when the 99 Nights in the Forest Halloween update ends. Its perks only act as buffs to candy drops—though well worth it when farming for the Witch.
Perk | Description | Requirements |
|---|---|---|
Level 1 | Receive 4 candy per house visited | Row 0 - Cell 2 |
Level 2 | Slightly higher chance to receive treats | (50) Trick or treat at houses |
Level 3 | Higher candle drop rate | (100) Trick or treat at houses |
Keep up to date with the most important stories and the best deals, as picked by the PC Gamer team.

Andrea has been covering games for nearly a decade, picking up bylines at IGN, USA Today, Fanbyte, and Destructoid before joining the PC Gamer team in 2025. She's got a soft spot for older RPGs and is willing to try just about anything with a lovey-dovey "I can fix them" romance element. Her weekly to-do always includes a bit of MMO time, endlessly achievement hunting and raiding in Final Fantasy 14. Outside of those staples, she's often got a few survival-crafting games on rotation and loves a good scare in co-op horror games.
You must confirm your public display name before commenting
Please logout and then login again, you will then be prompted to enter your display name.

