Braving the heat of hell to eliminate Ahzrak may be the Doom Slayer's main objective in Doom: The Dark Ages tenth chapter, but it certainly wasn't mine. I was on the hunt for collectibles, and with a large, multi-layered map, The Forsaken Plains secrets are tricky to dig up.
So you can crack on with the hunt for Ahzrak, I've done the heavy lifting to find all the Doom: The Dark Ages secrets in this level. I've organised everything in chronological order so you can easily grab them as you go through the mission.
Doom: The Dark Ages The Forsaken Plains secrets and collectibles
The Forsaken Plains in chapter 10 has ten secrets and four collectibles to find across its open area. Everything except the first secret is located in this big zone—including the rubies, wraithstones, and Demonic Essence—so don't worry about accidentally progressing too far ahead once you've collected the Rocket Launcher.
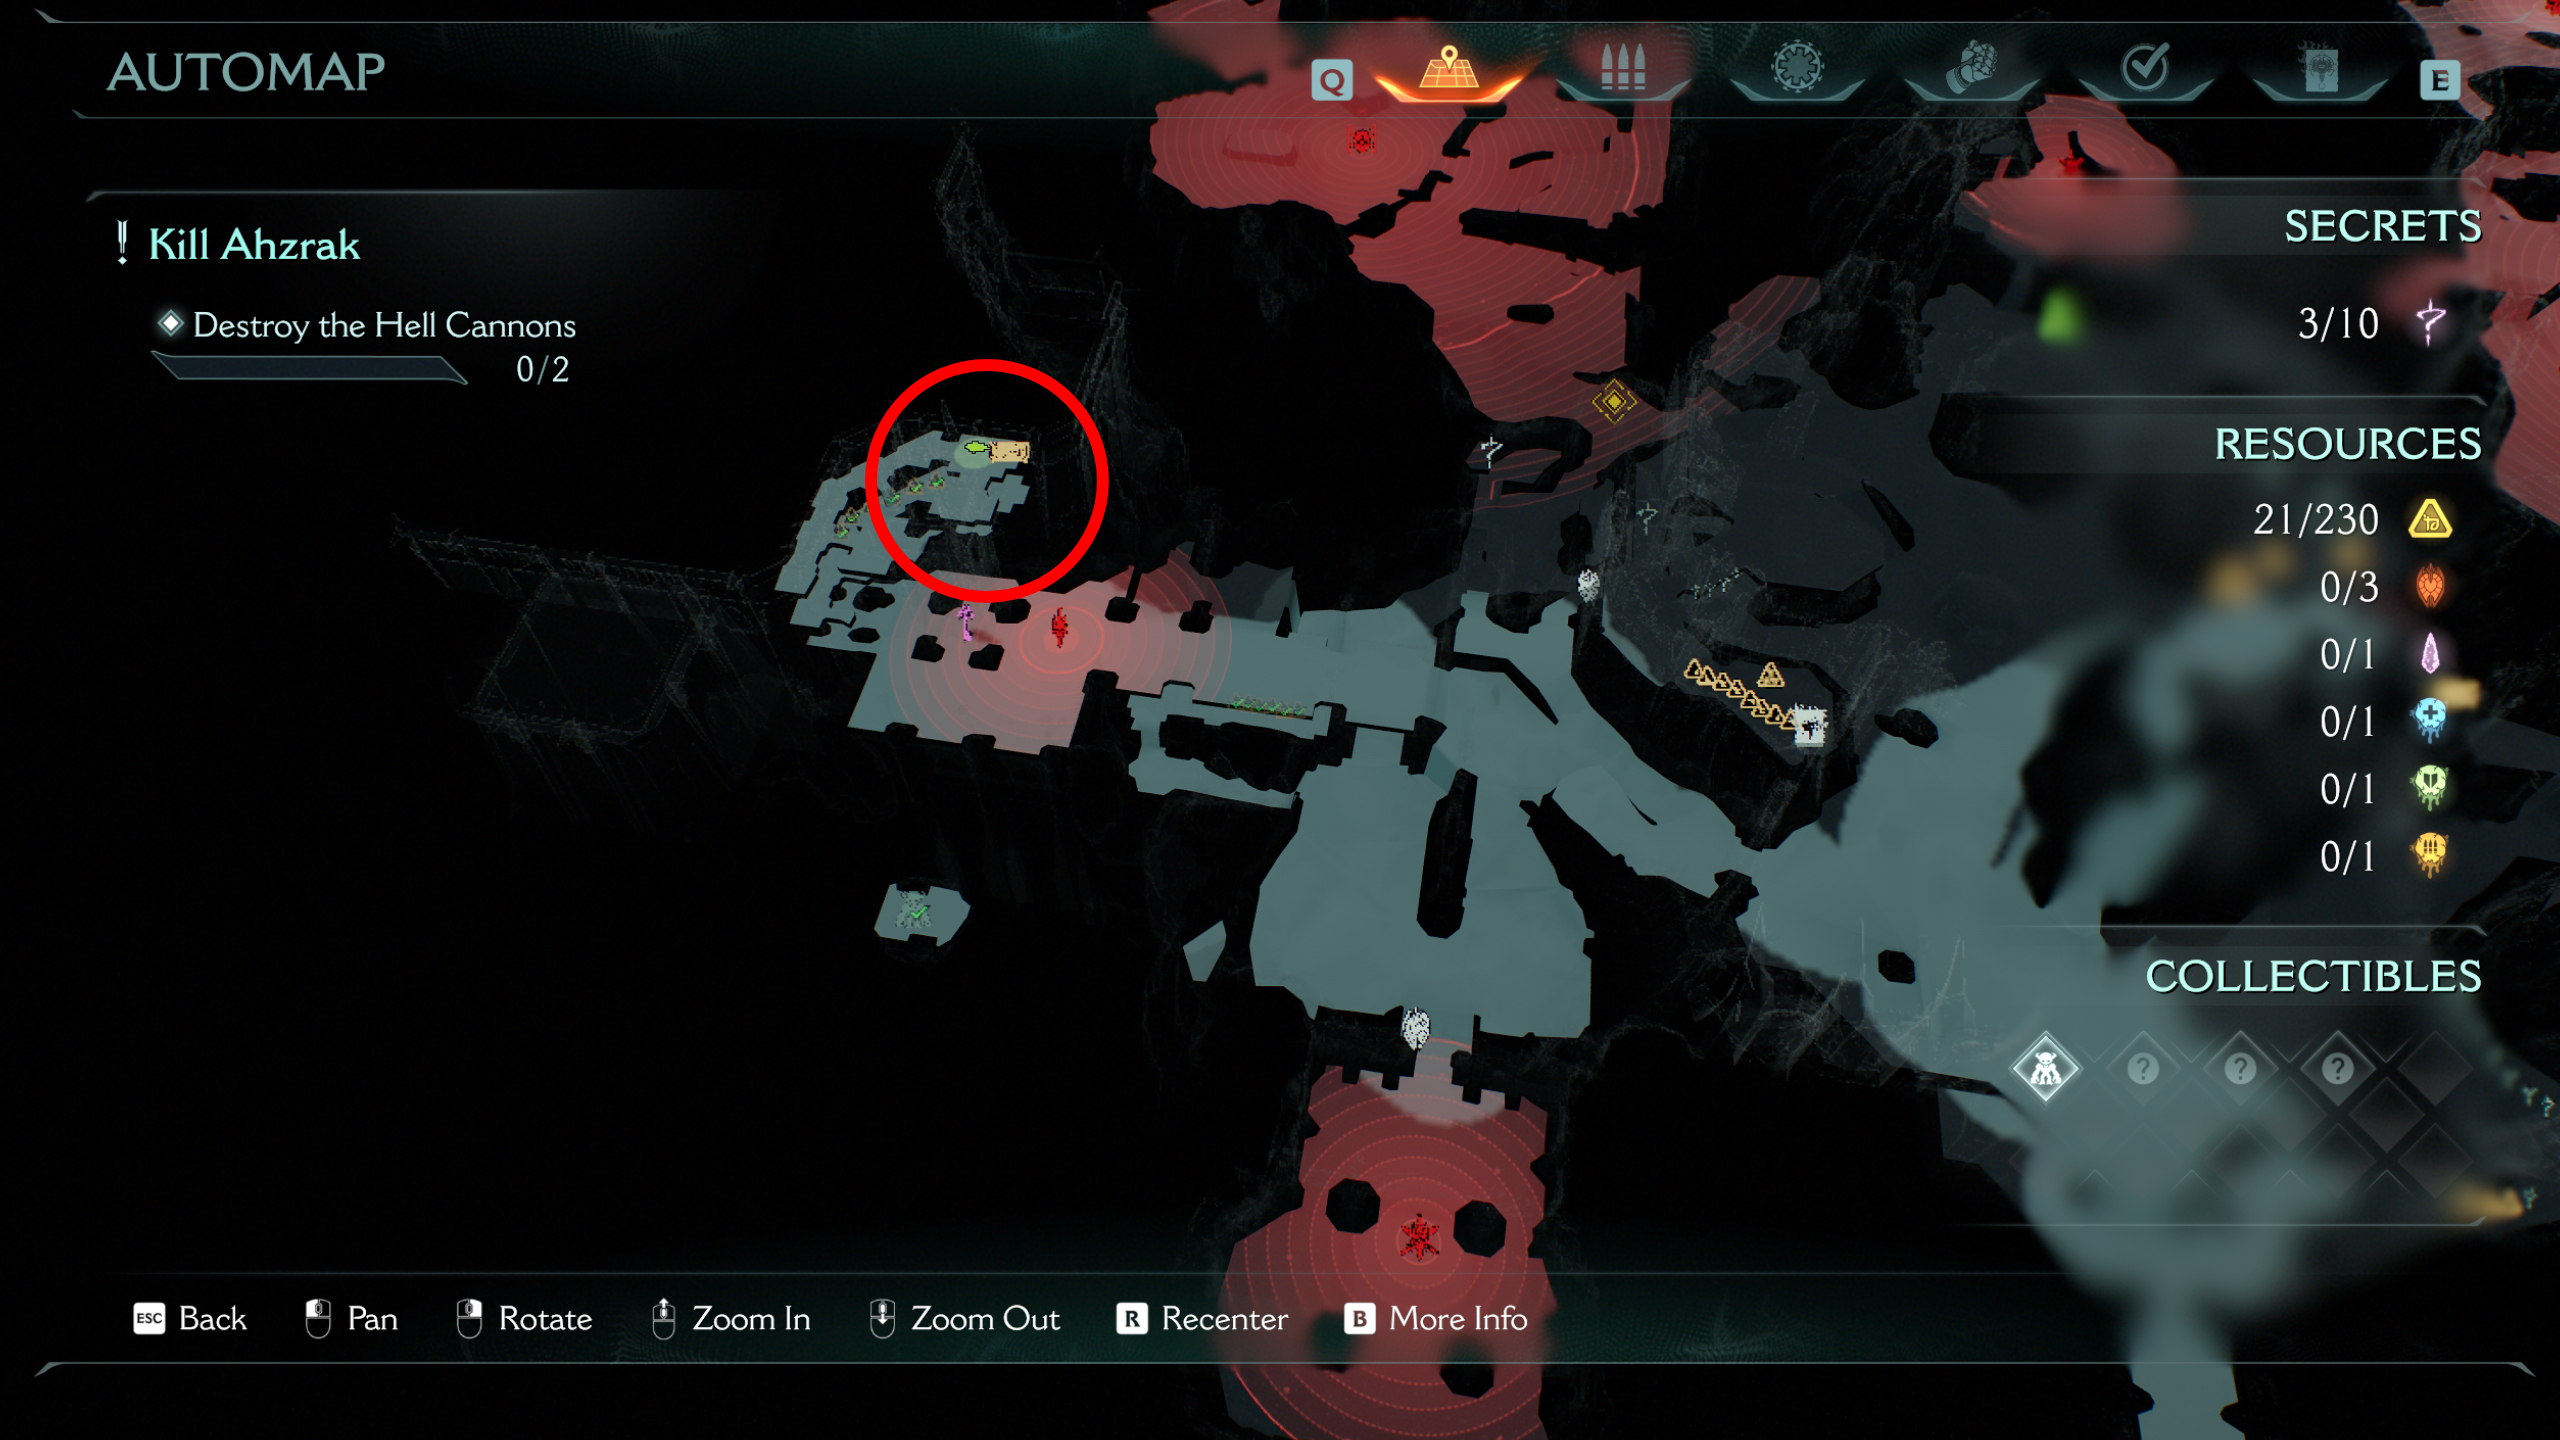
Article continues below1 - Life sigil

The first secret comes just as you reach the weapon pod for the Rocket Launcher. Before grabbing the weapon, look over at the rocky pillars to your left. Shield jump to the lower pillar and then climb up to collect the sigil and gold.
From here, you're safe to grab the Rocket Launcher and enter the open zone where you need to destroy two hell cannons. You'll find the rest of the secrets here.
2 - Cyber Demon toy (collectible)

The Cyber Demon toy is located in the bottom left corner of the map from where you enter. Head towards the shielded ruby statue and use the nearby jump pad to launch yourself to the floating island, directly into the toy.
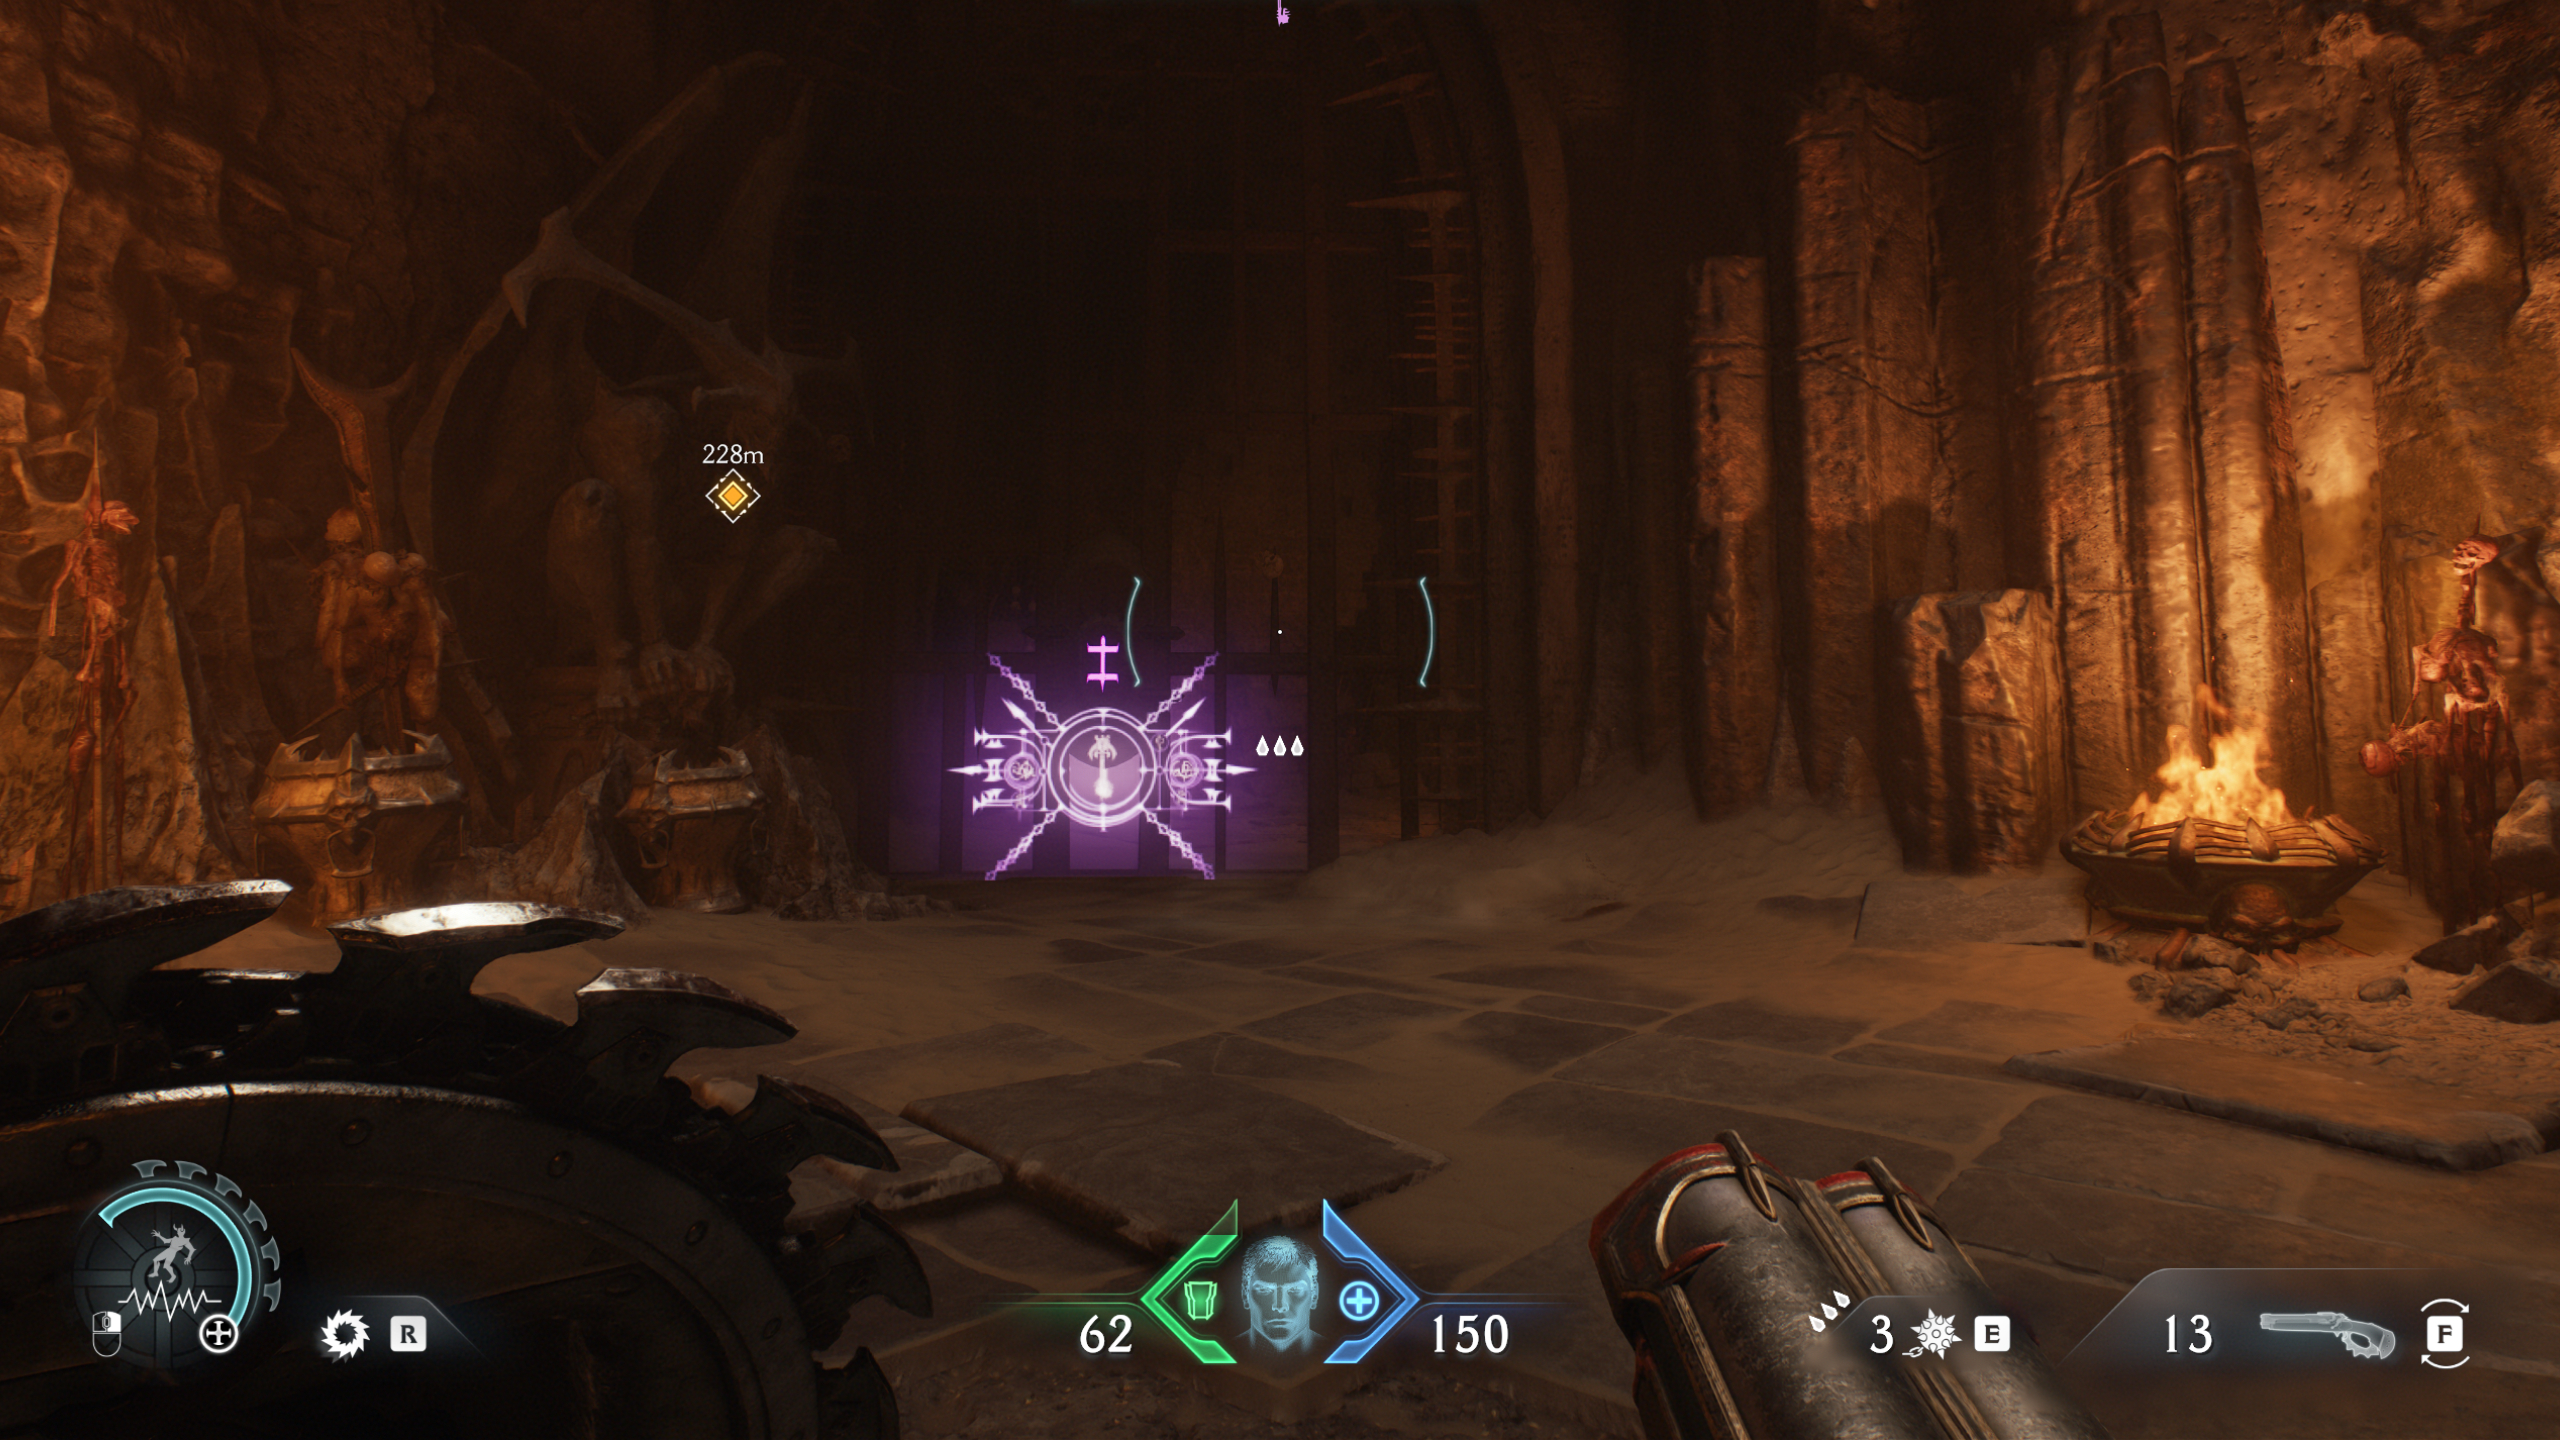
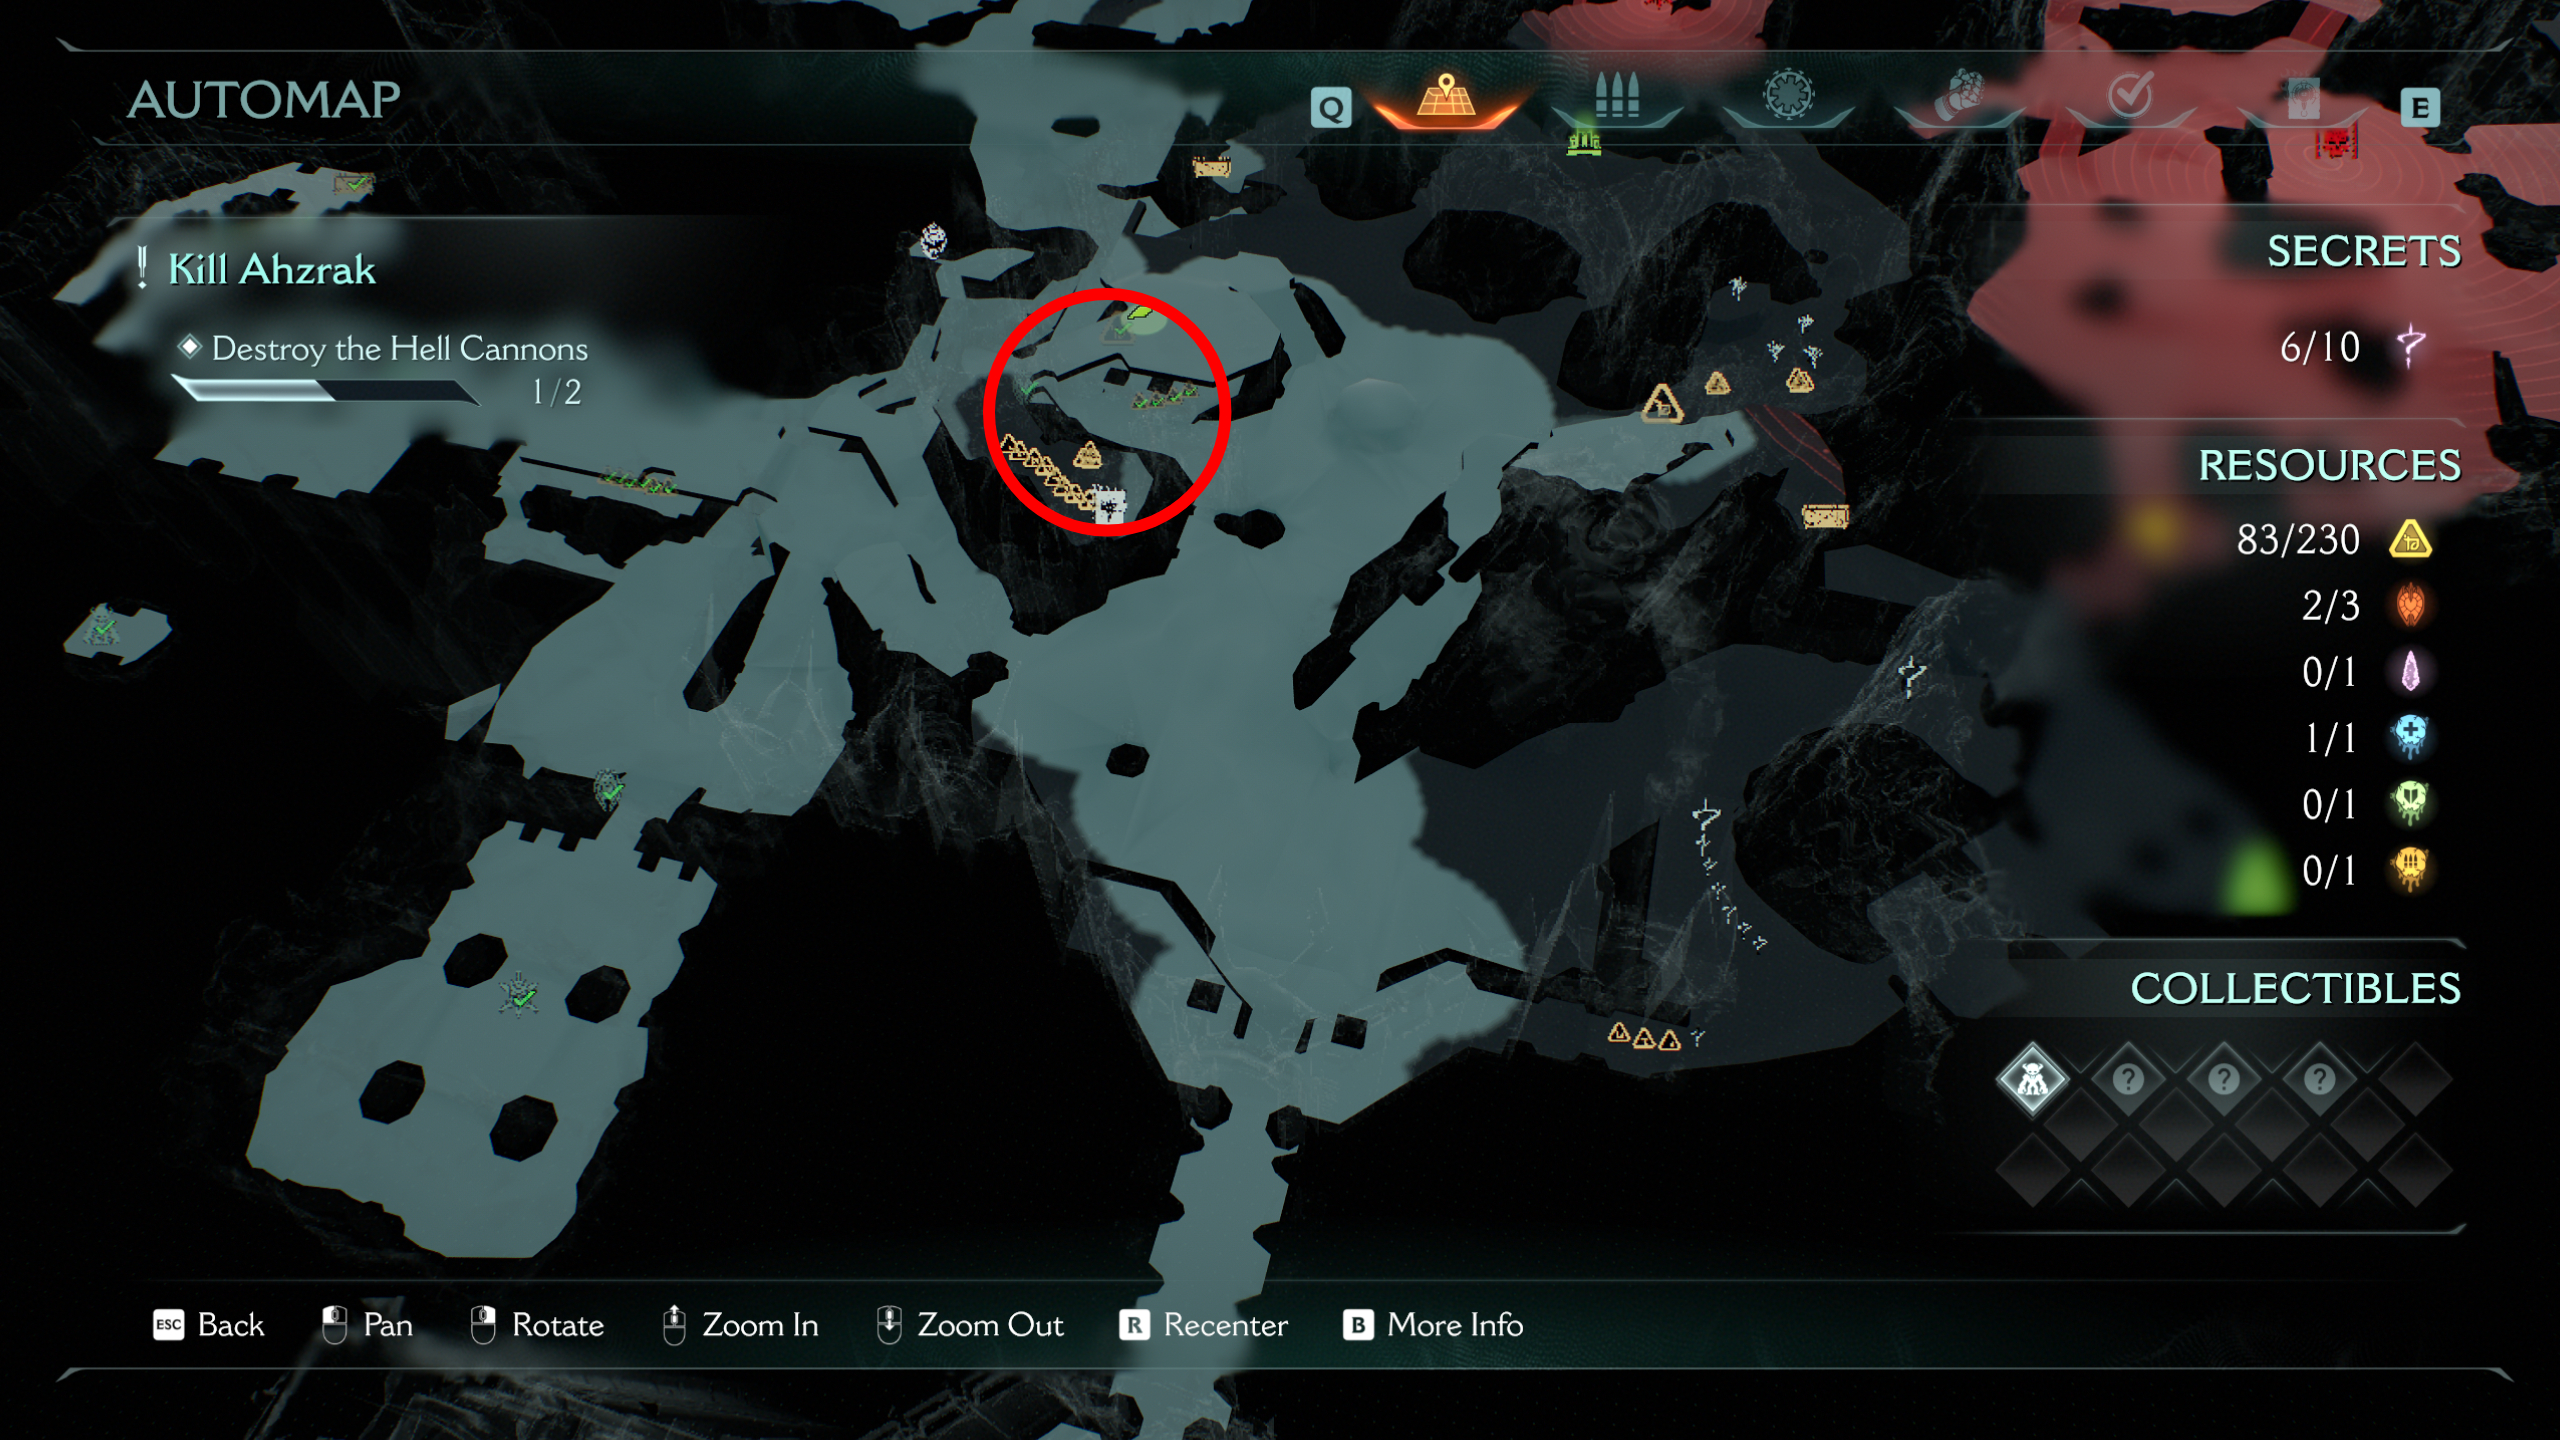
3 - Gold chest
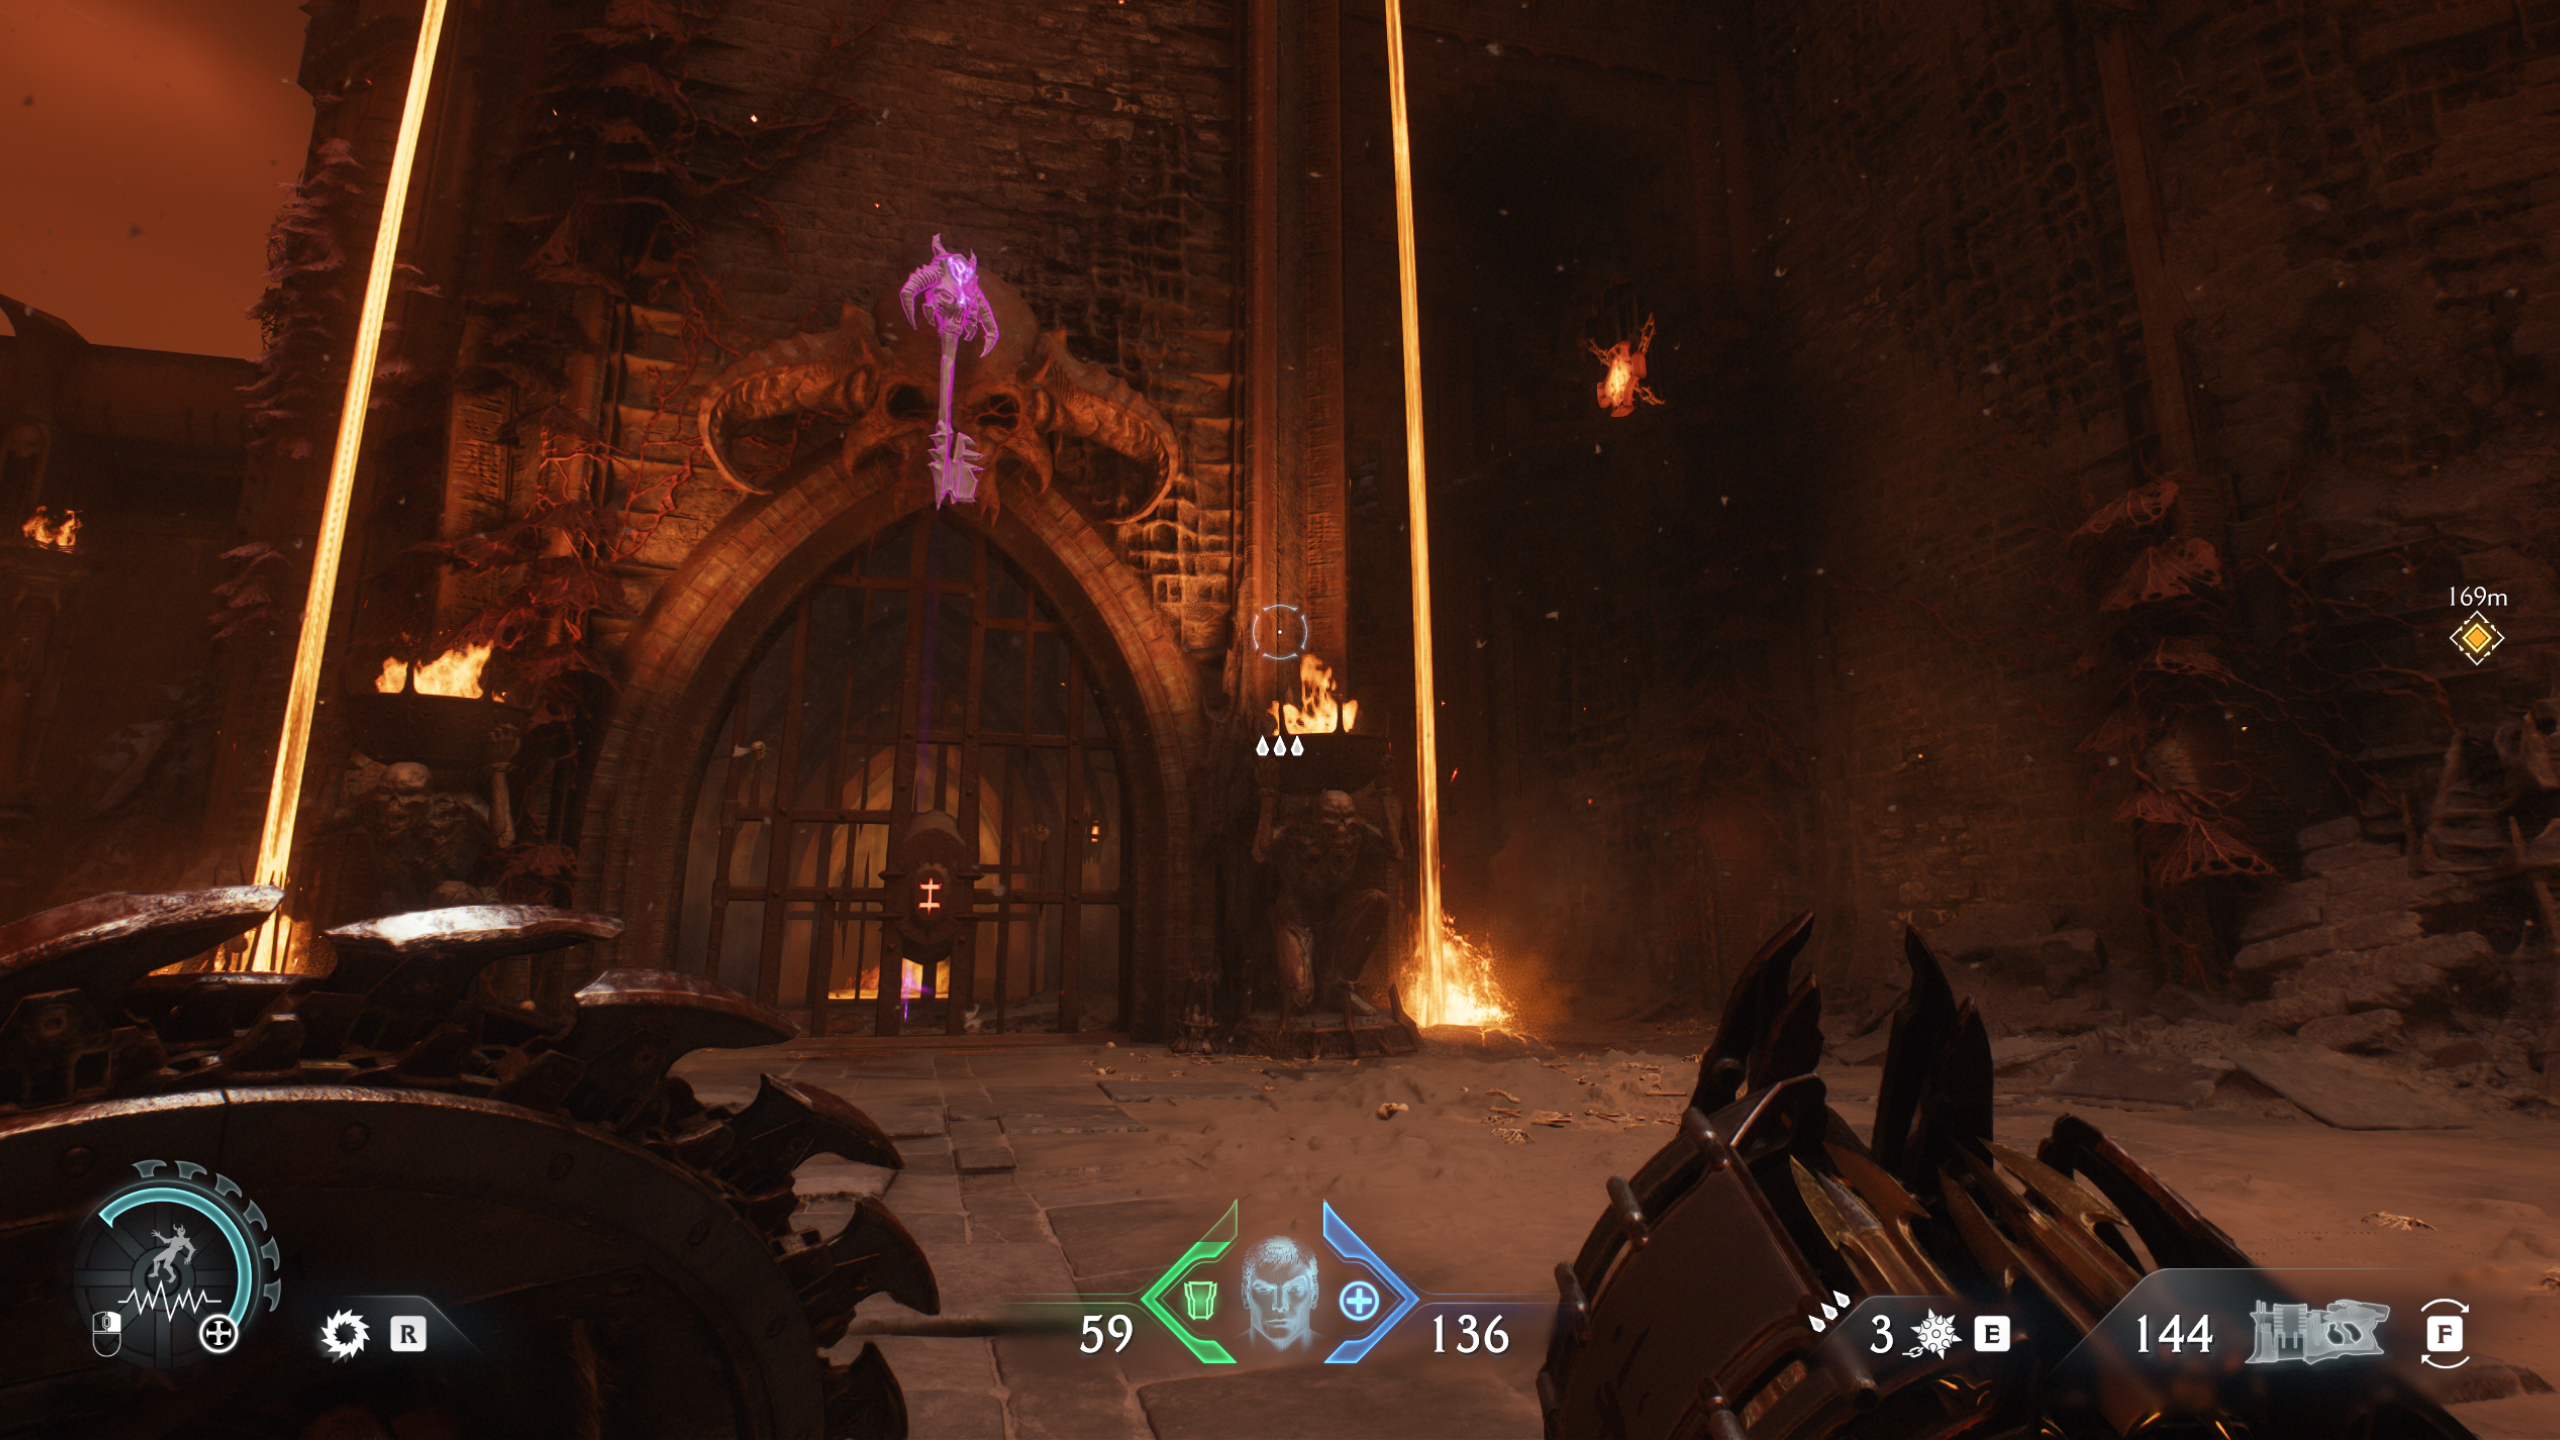
The next secret is in the castle to the far left of the map, just up from the previous collectible. Once you're here, throw your shield at the padlock to the upper right of the main gate, then take the path to the left of the gate and jump to the higher area where you'll find the gold chest.
If you continue up the tower, you'll be able to drop down into the gated room and grab the purple secret key.
4 - Ruby

Using the purple key from the secret above, you can now open the room in the bottom left corner of the map to get the ruby, near the Cyber Demon toy. Enter the gated room and beat the gore pillar challenge to remove the barrier over the statue so you can grab the ruby.
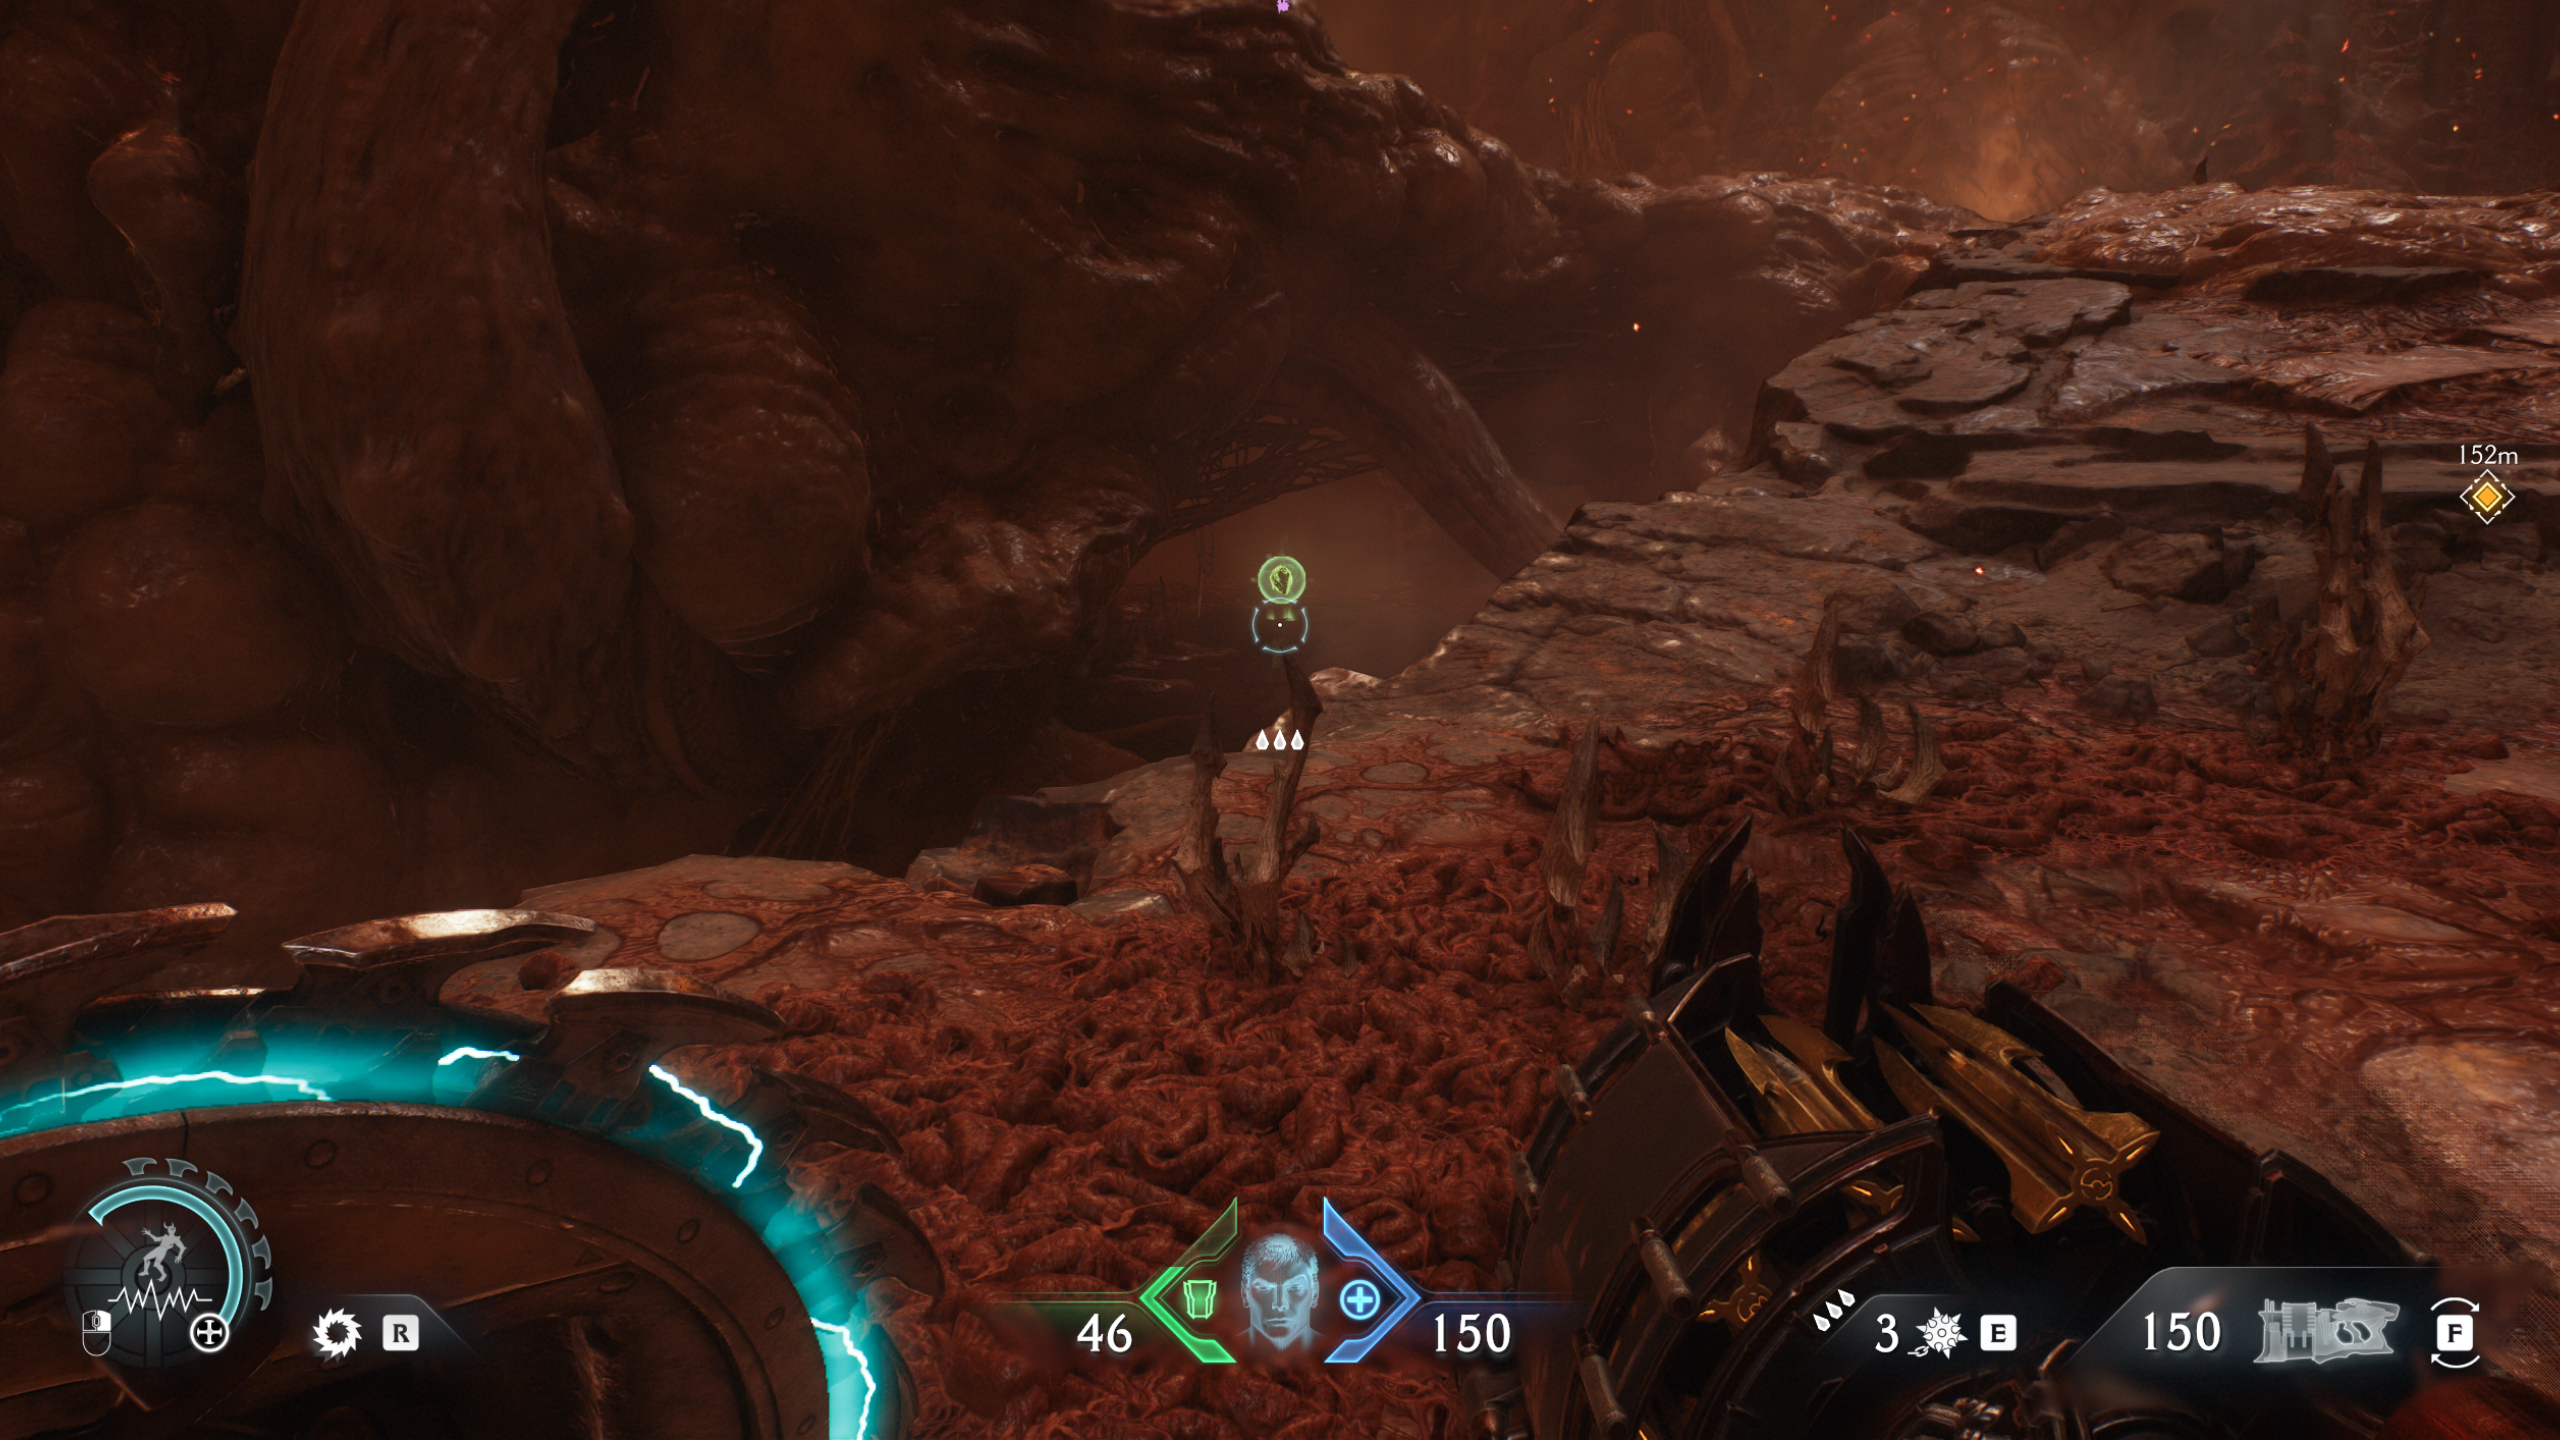
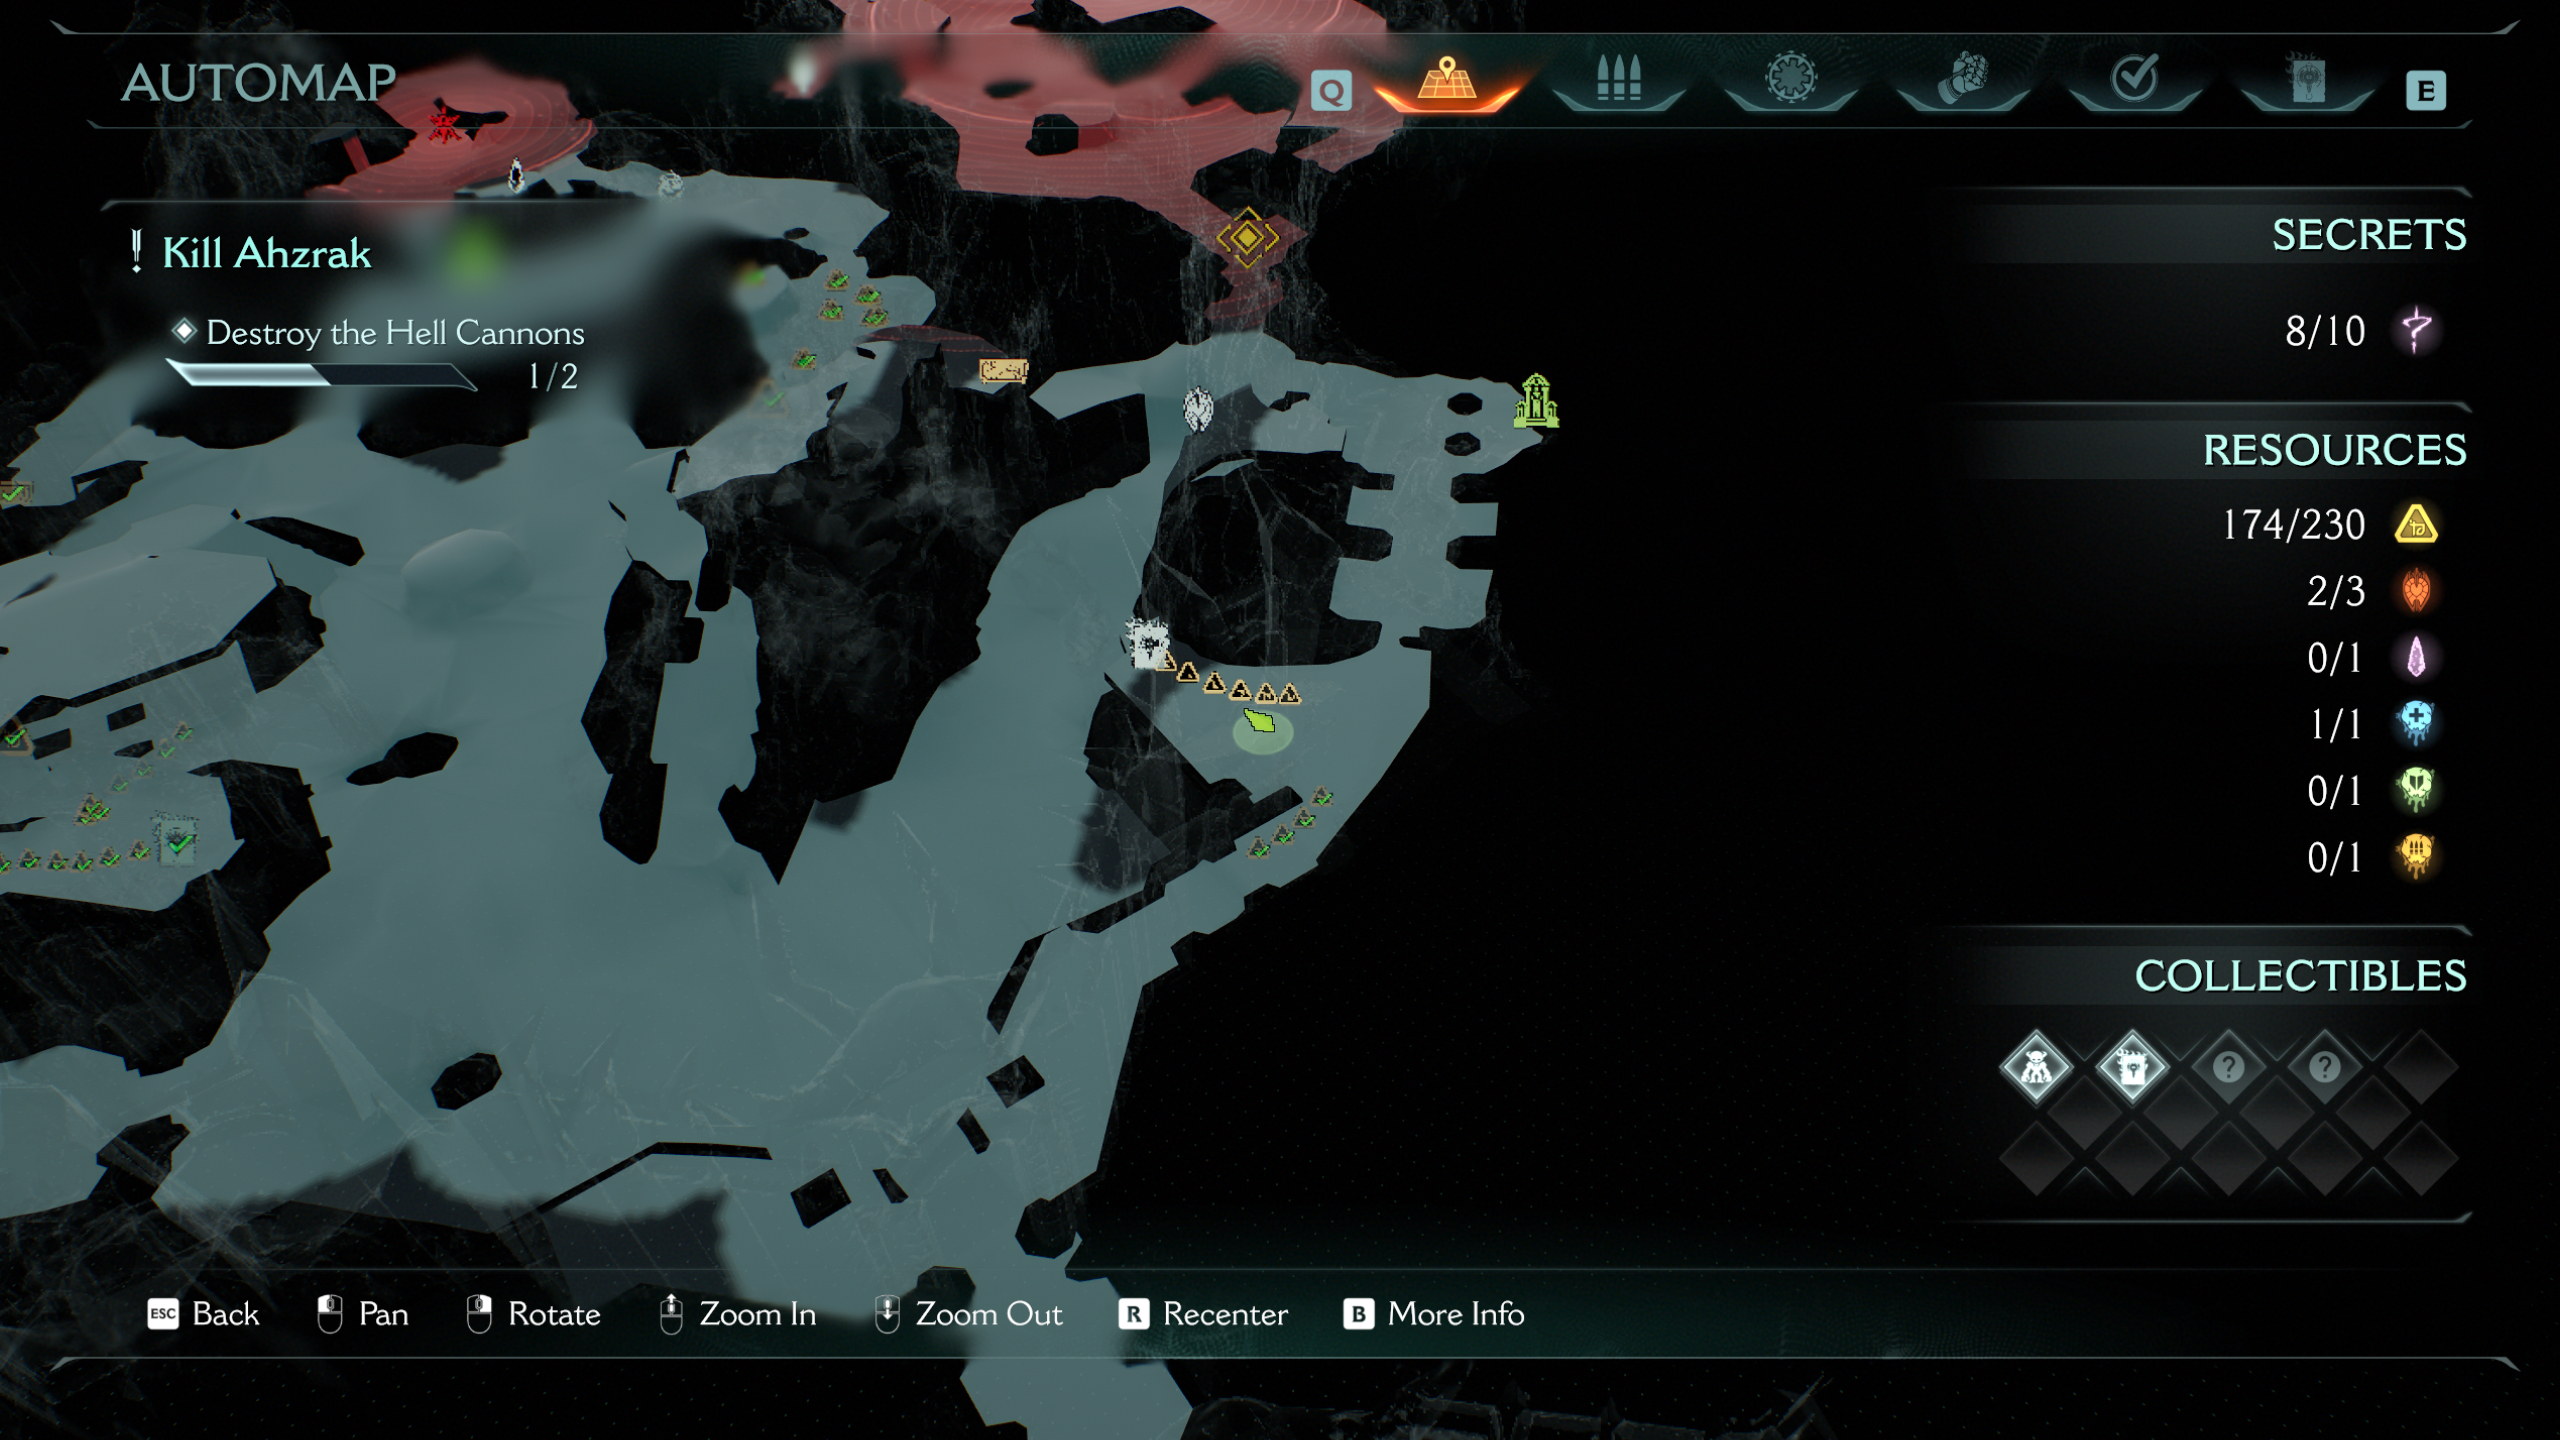
5 - Life sigil
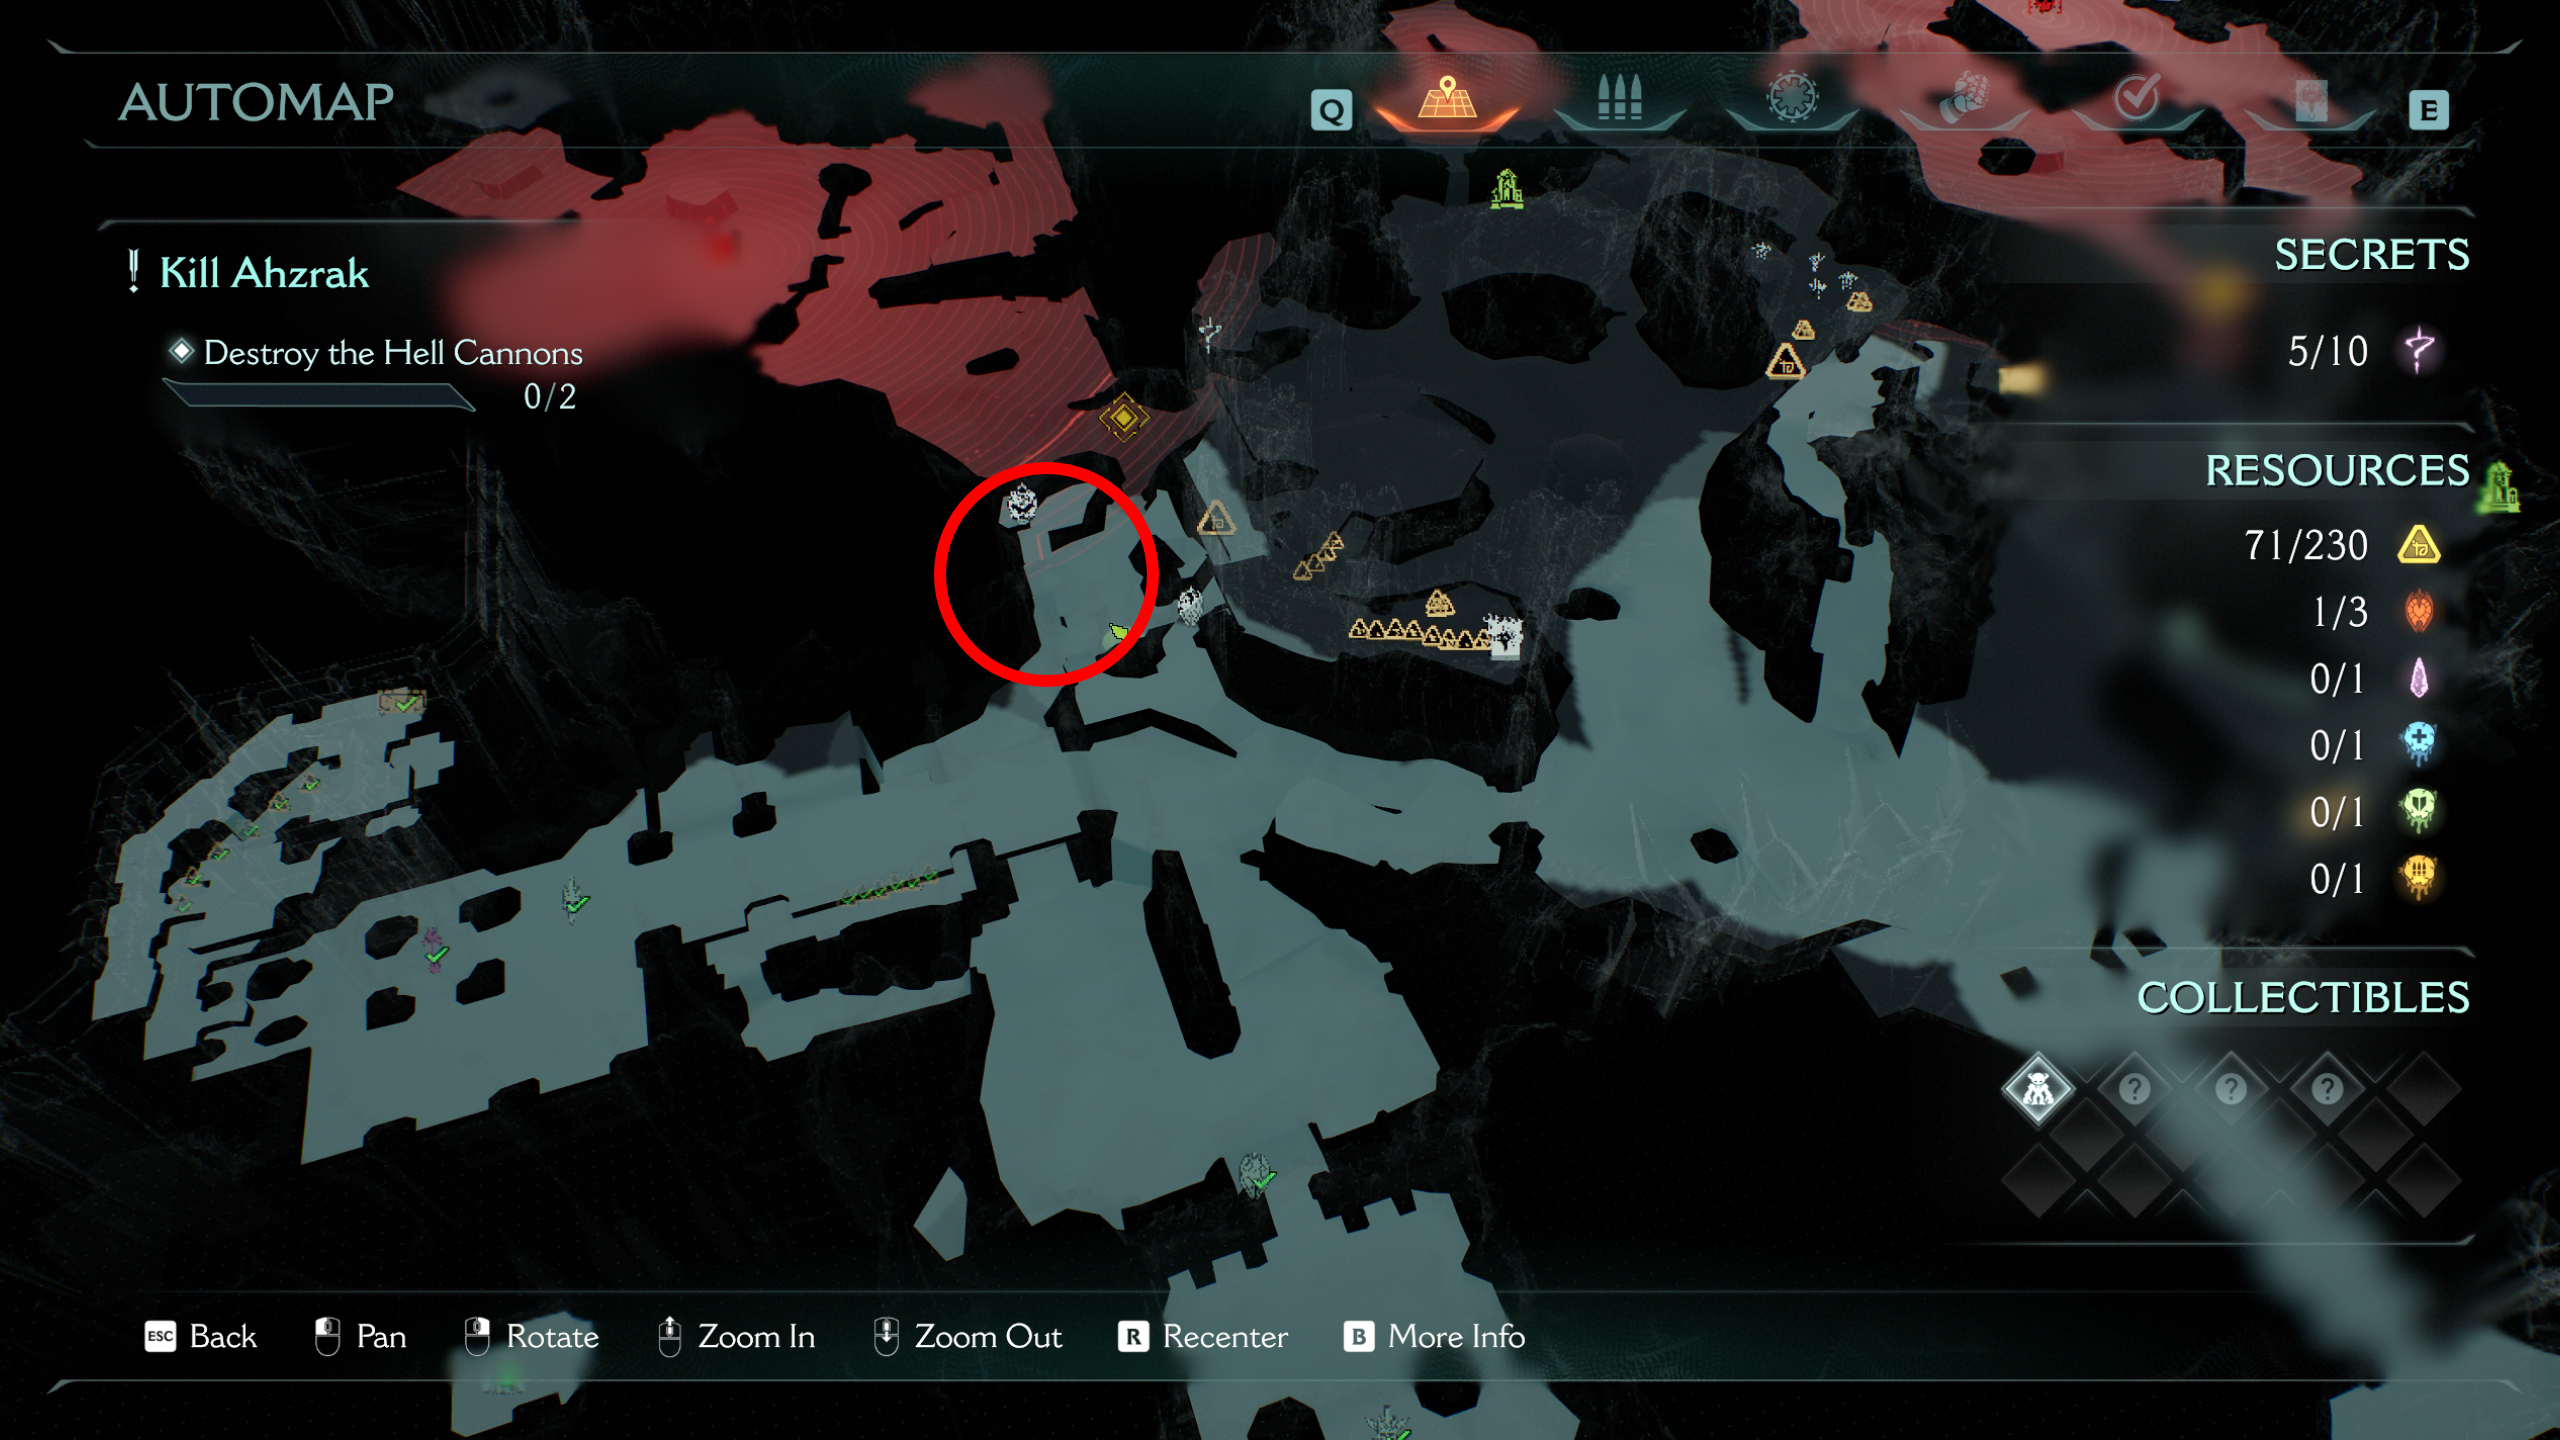

From the previous secret, head into a cave just left of the centre of the map, where you'll be attacked by demons. Clear the room and then shield jump up to the ledge with the sigil.
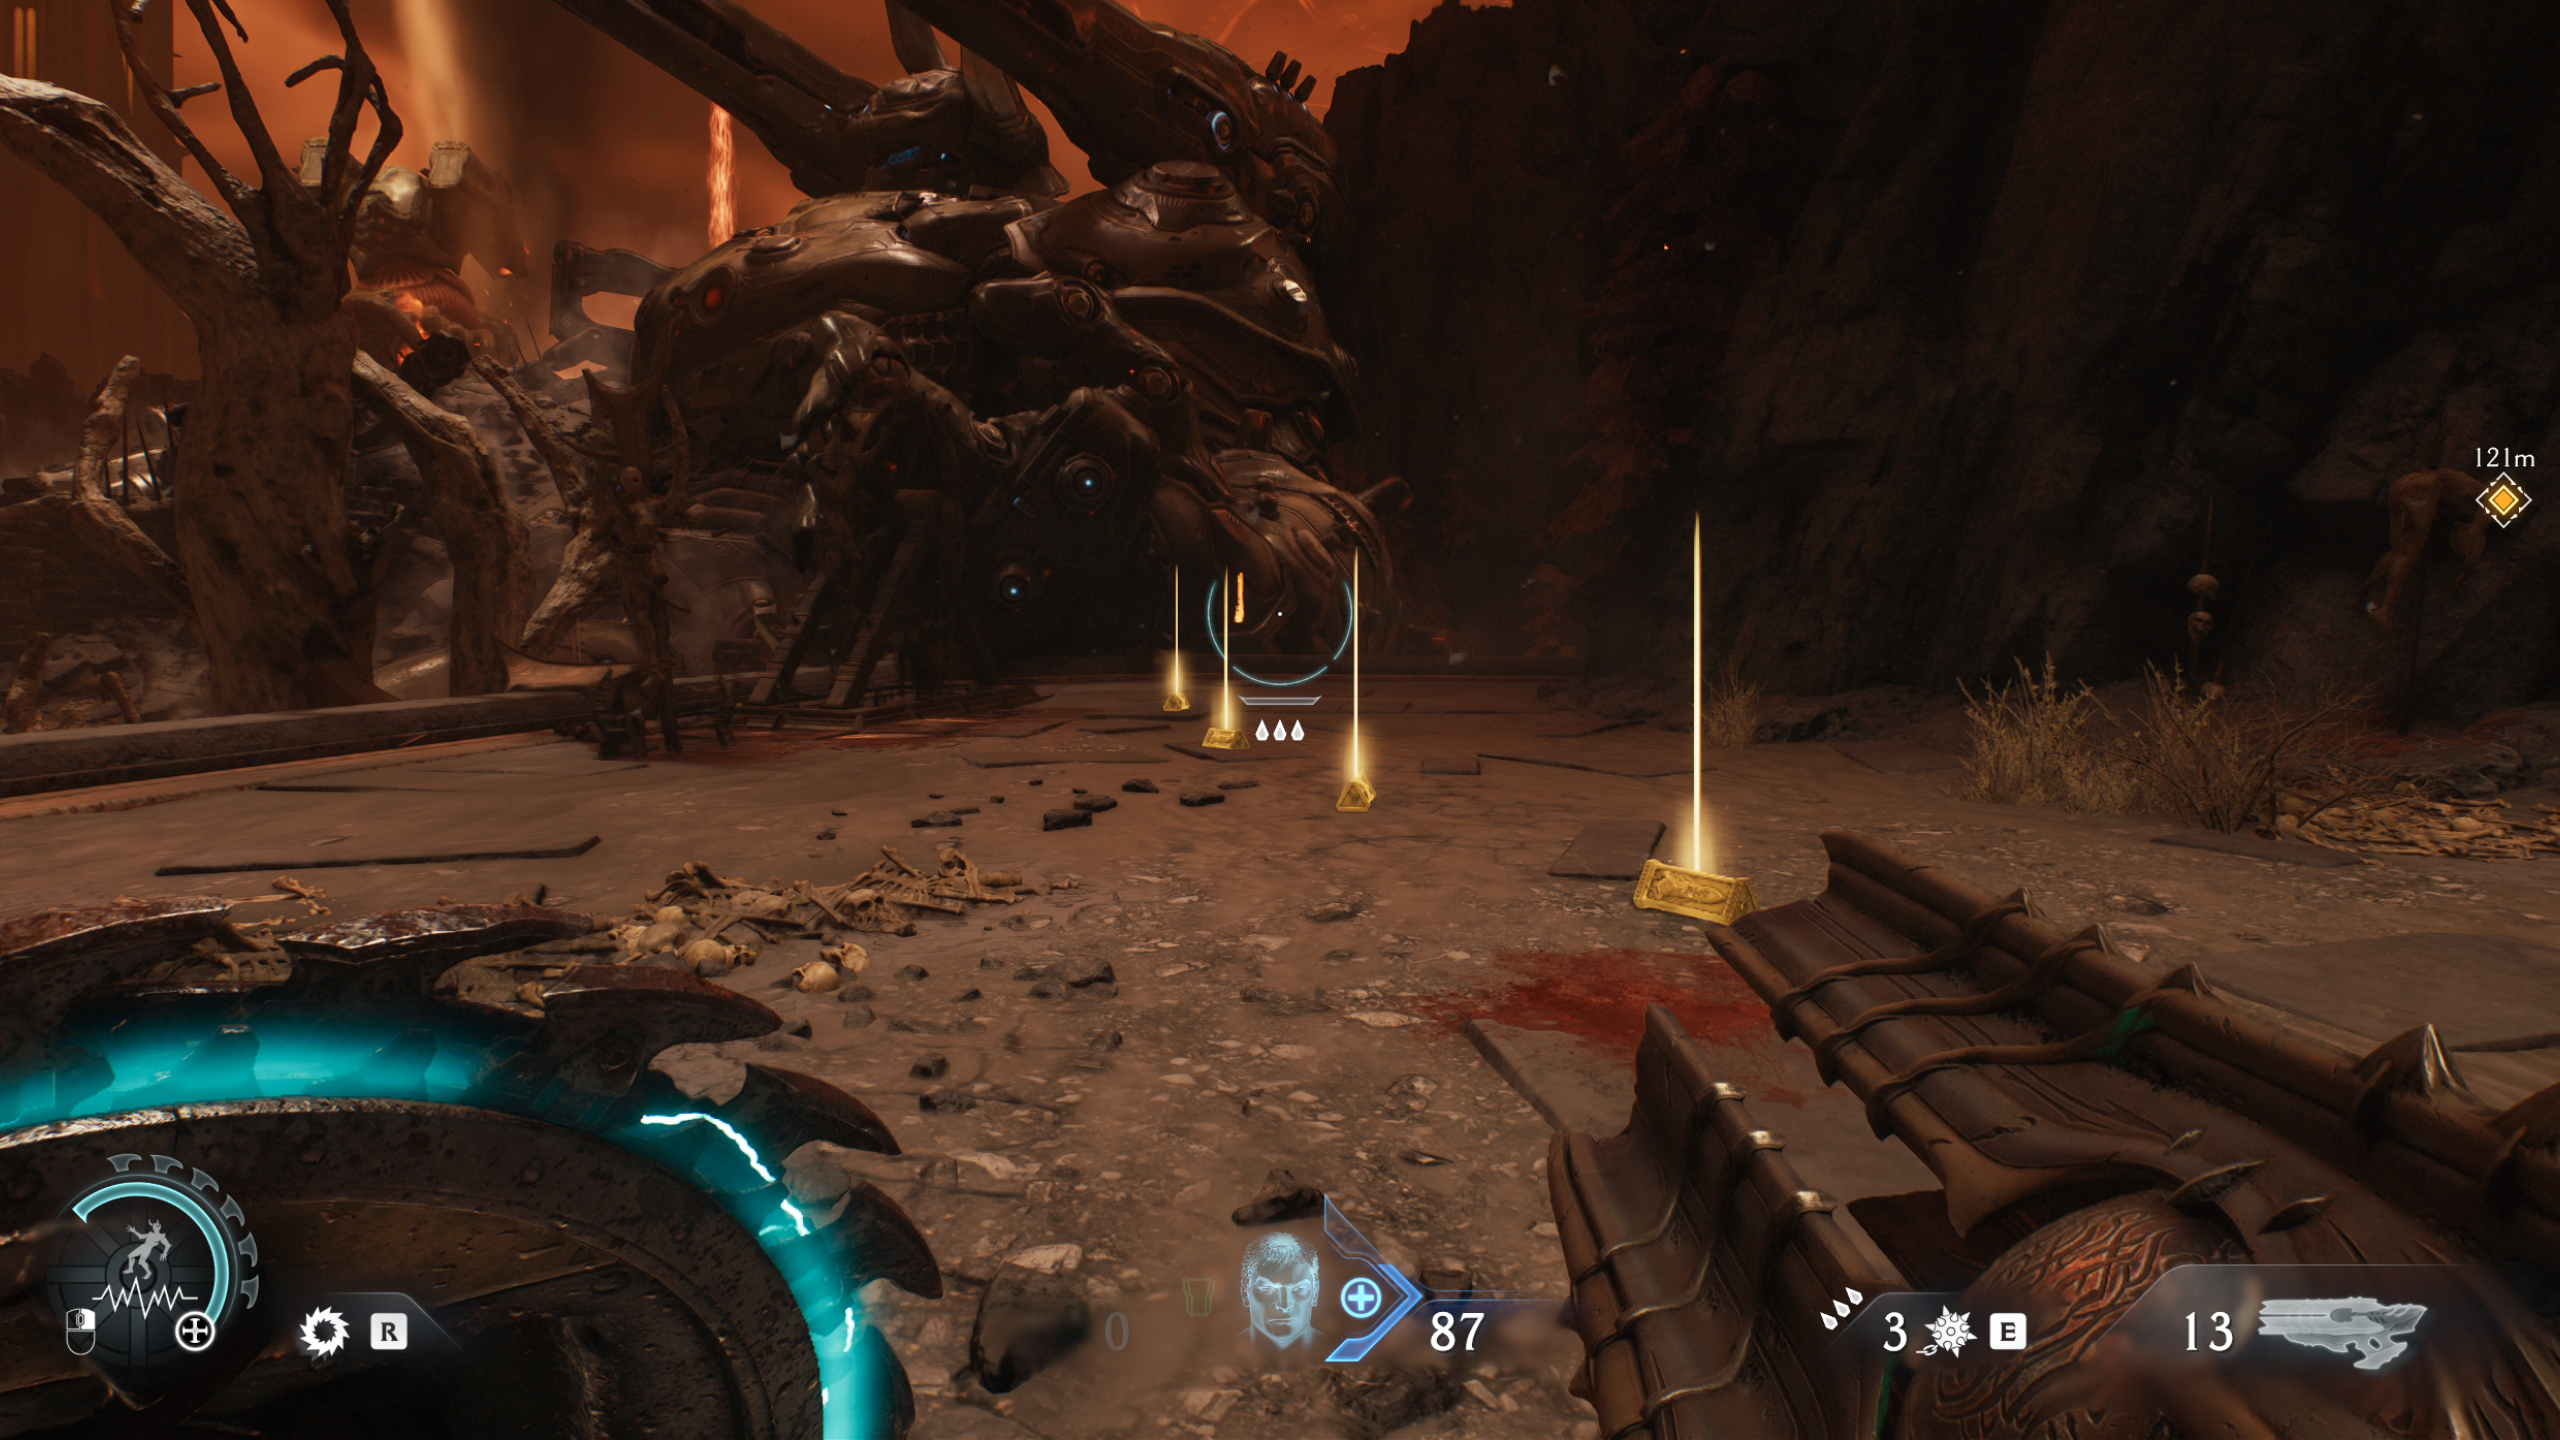
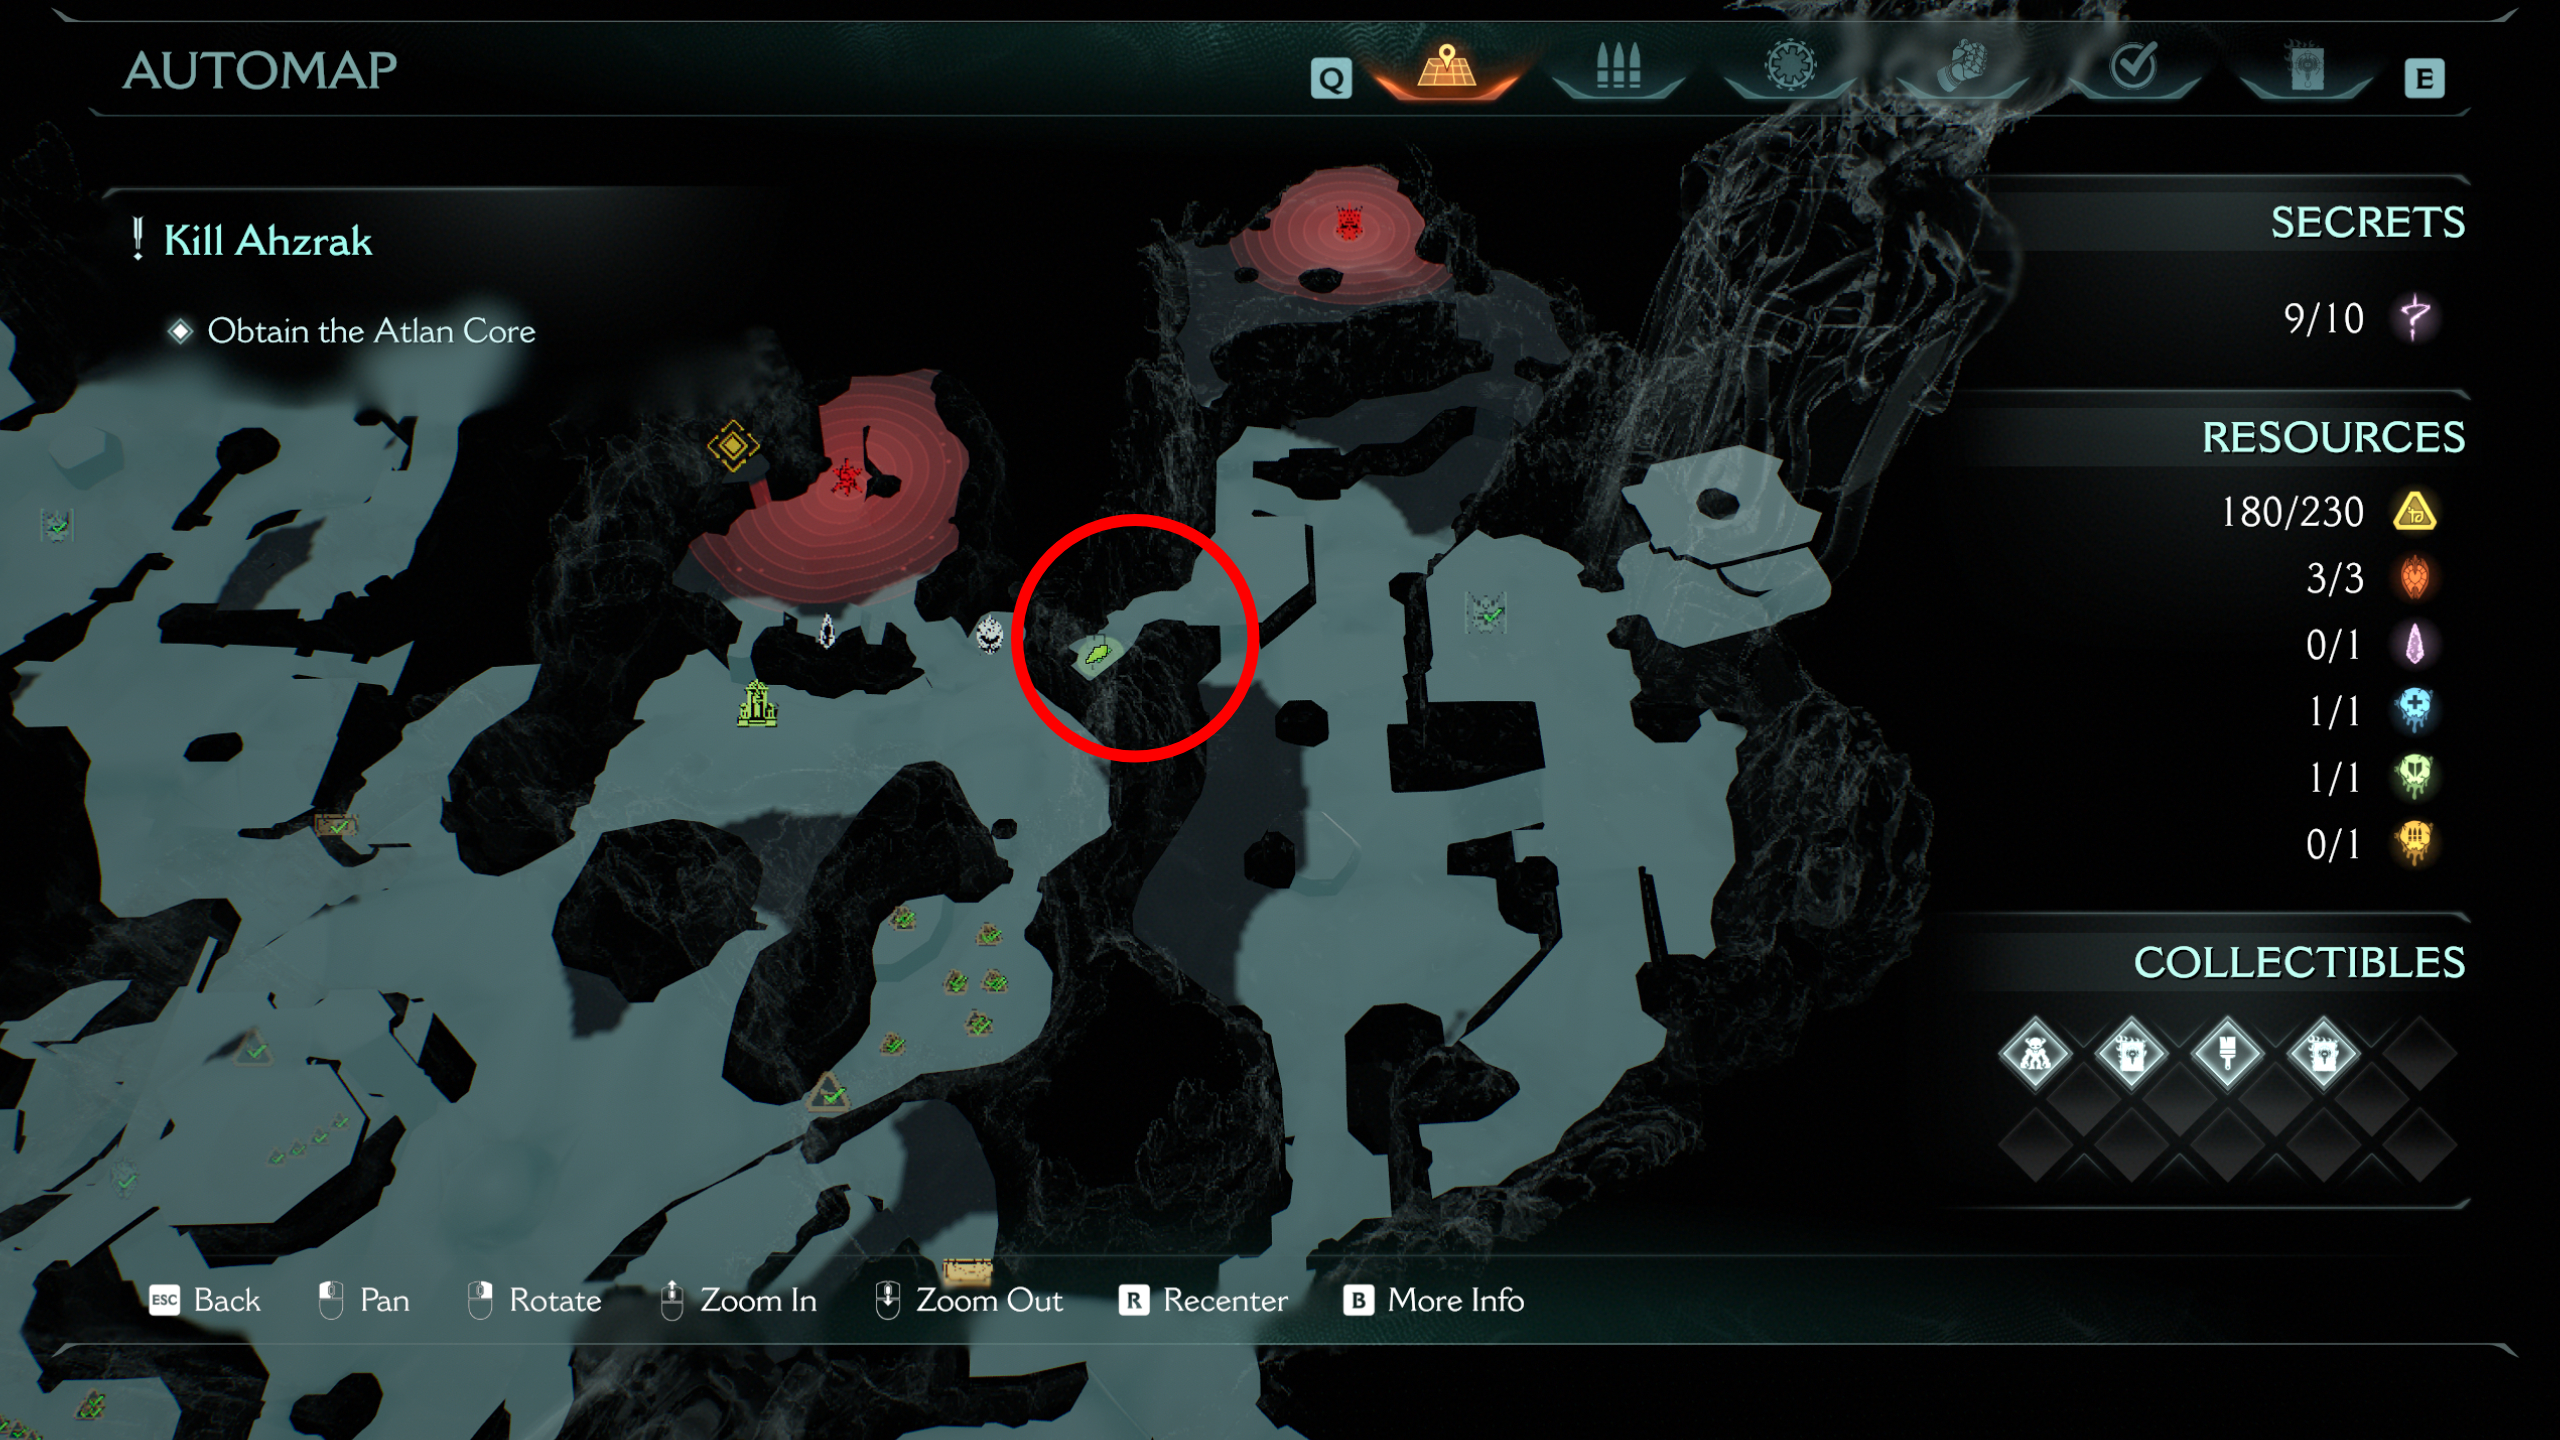
6 - Ruby
Before entering the hell cannon leader boss fight in the top left corner of the map, take the short path to the right, where you'll see a purple key gate. Head inside, kill the enemies, and collect the ruby by the gate leading back into the cave where you found the life sigil above.
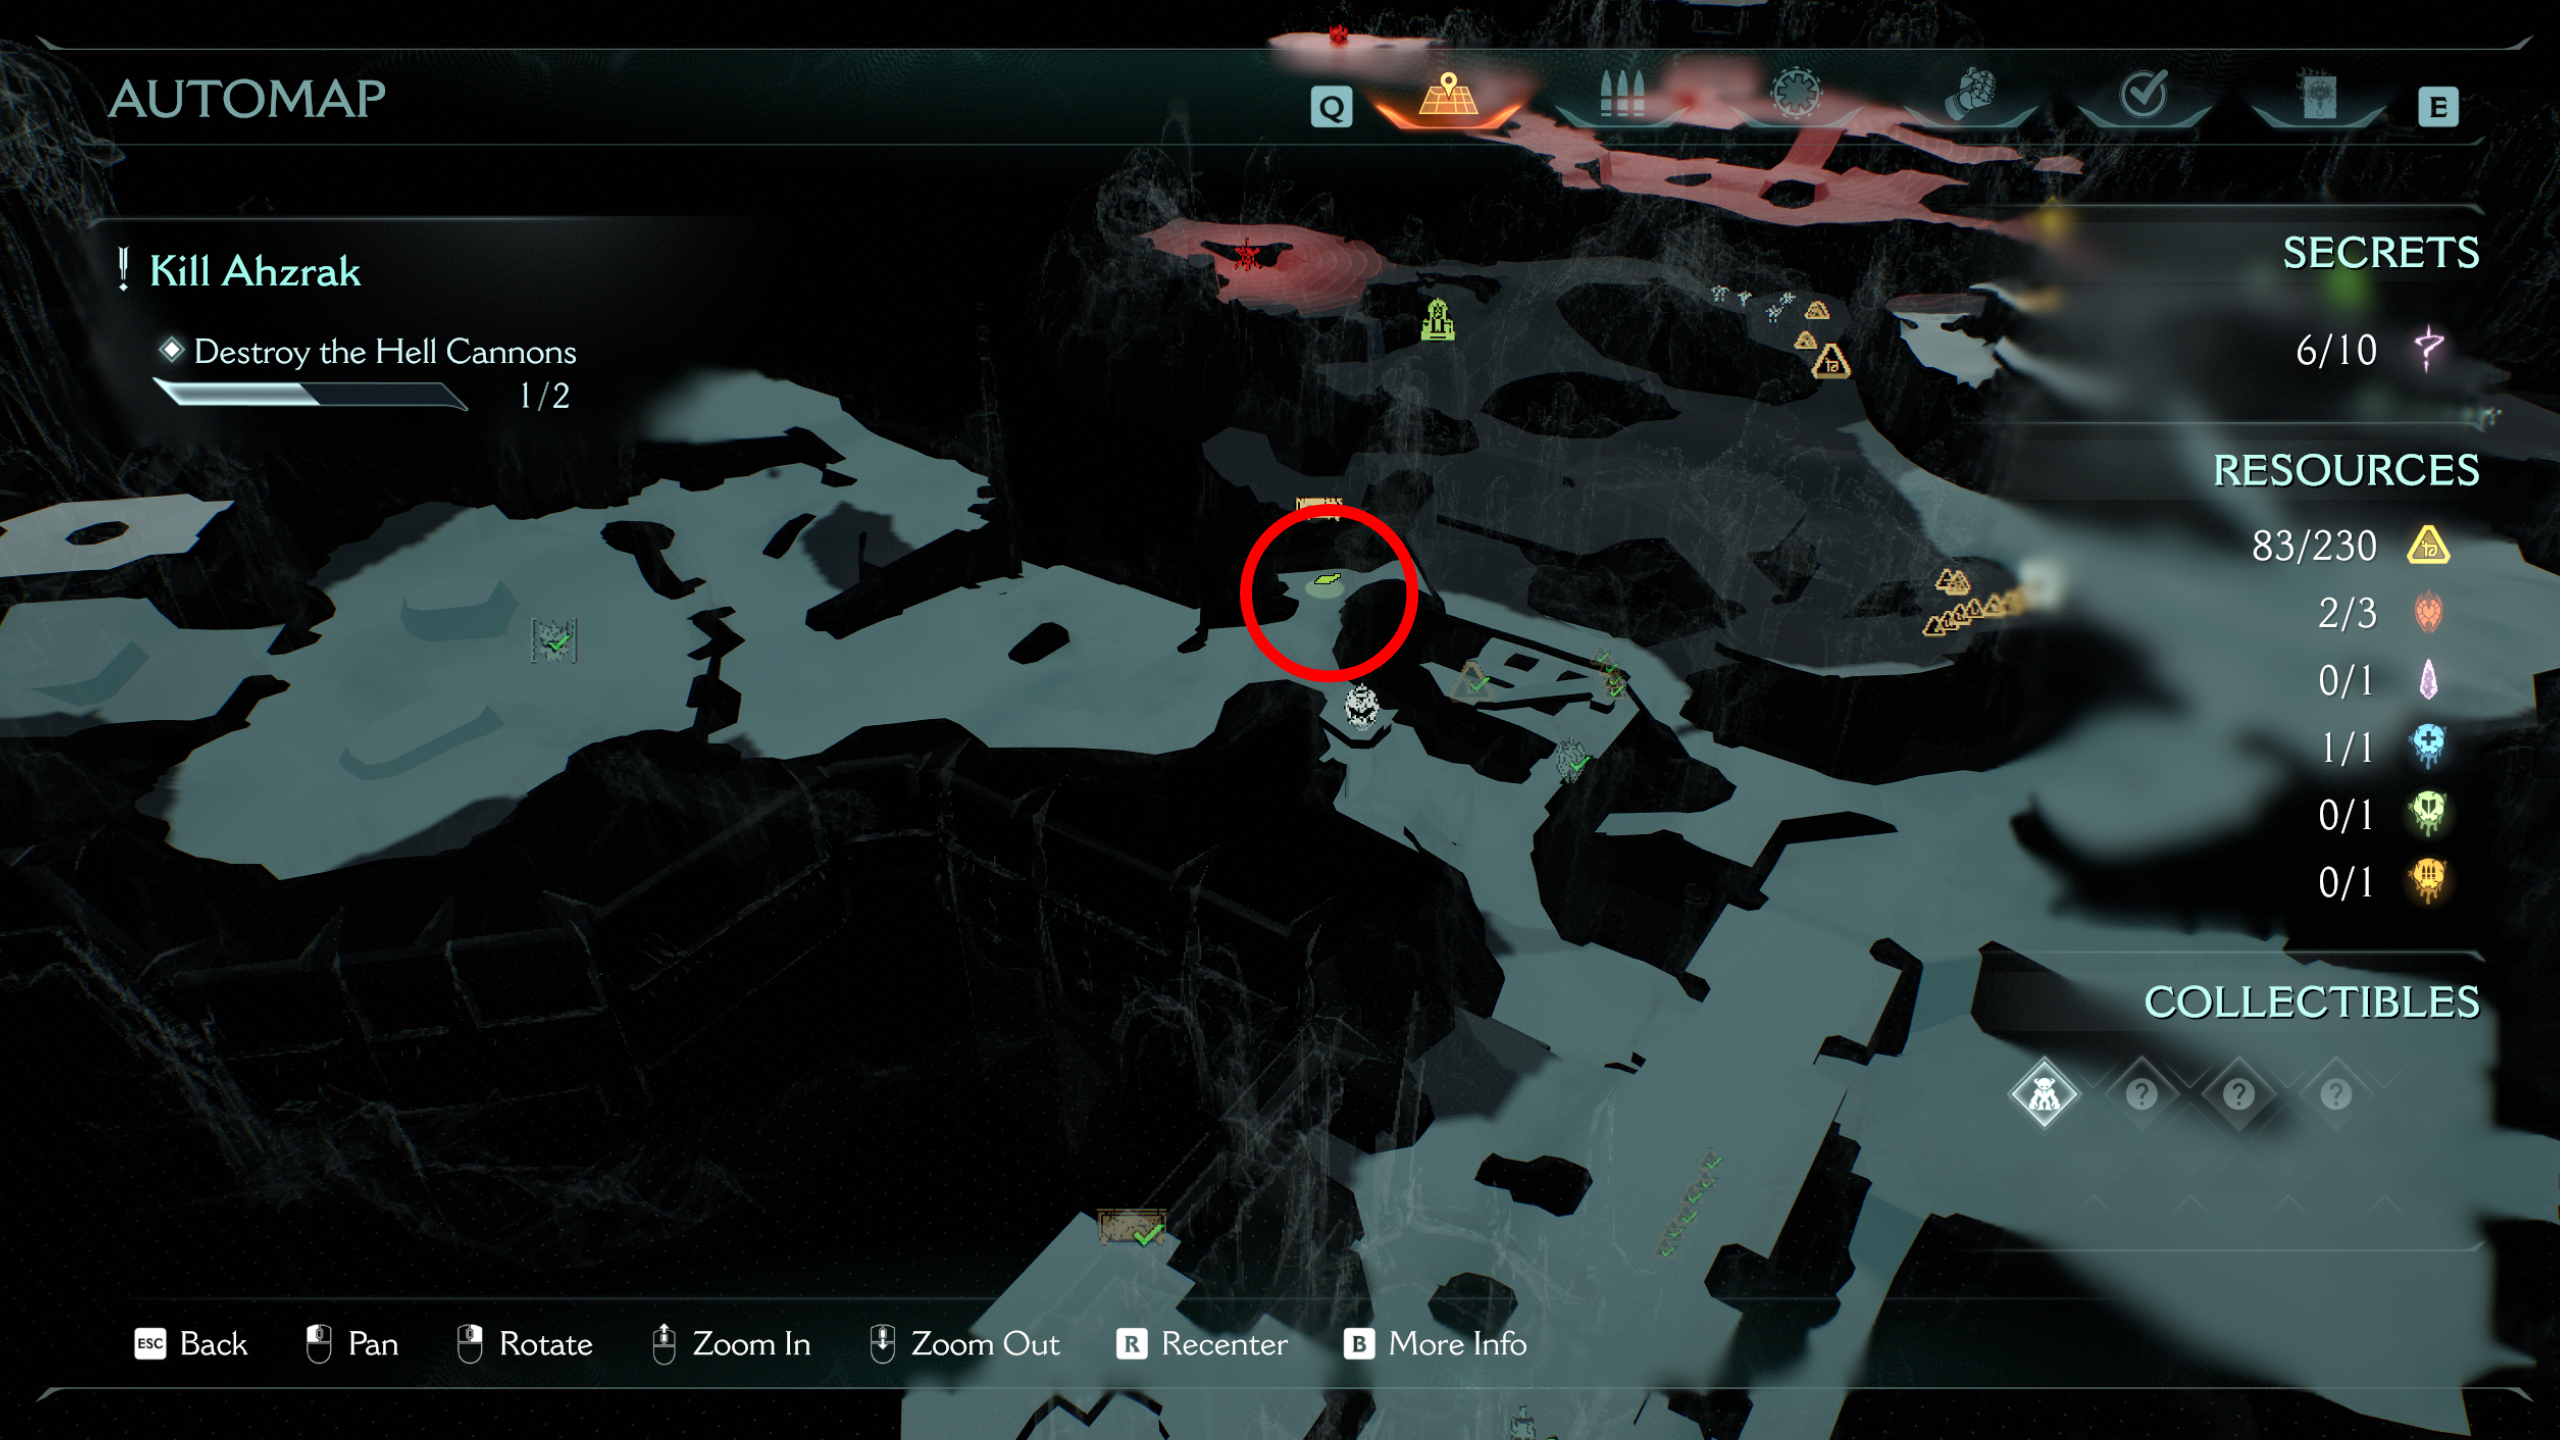
7 - Prince Ahzrak codex entry (collectible)
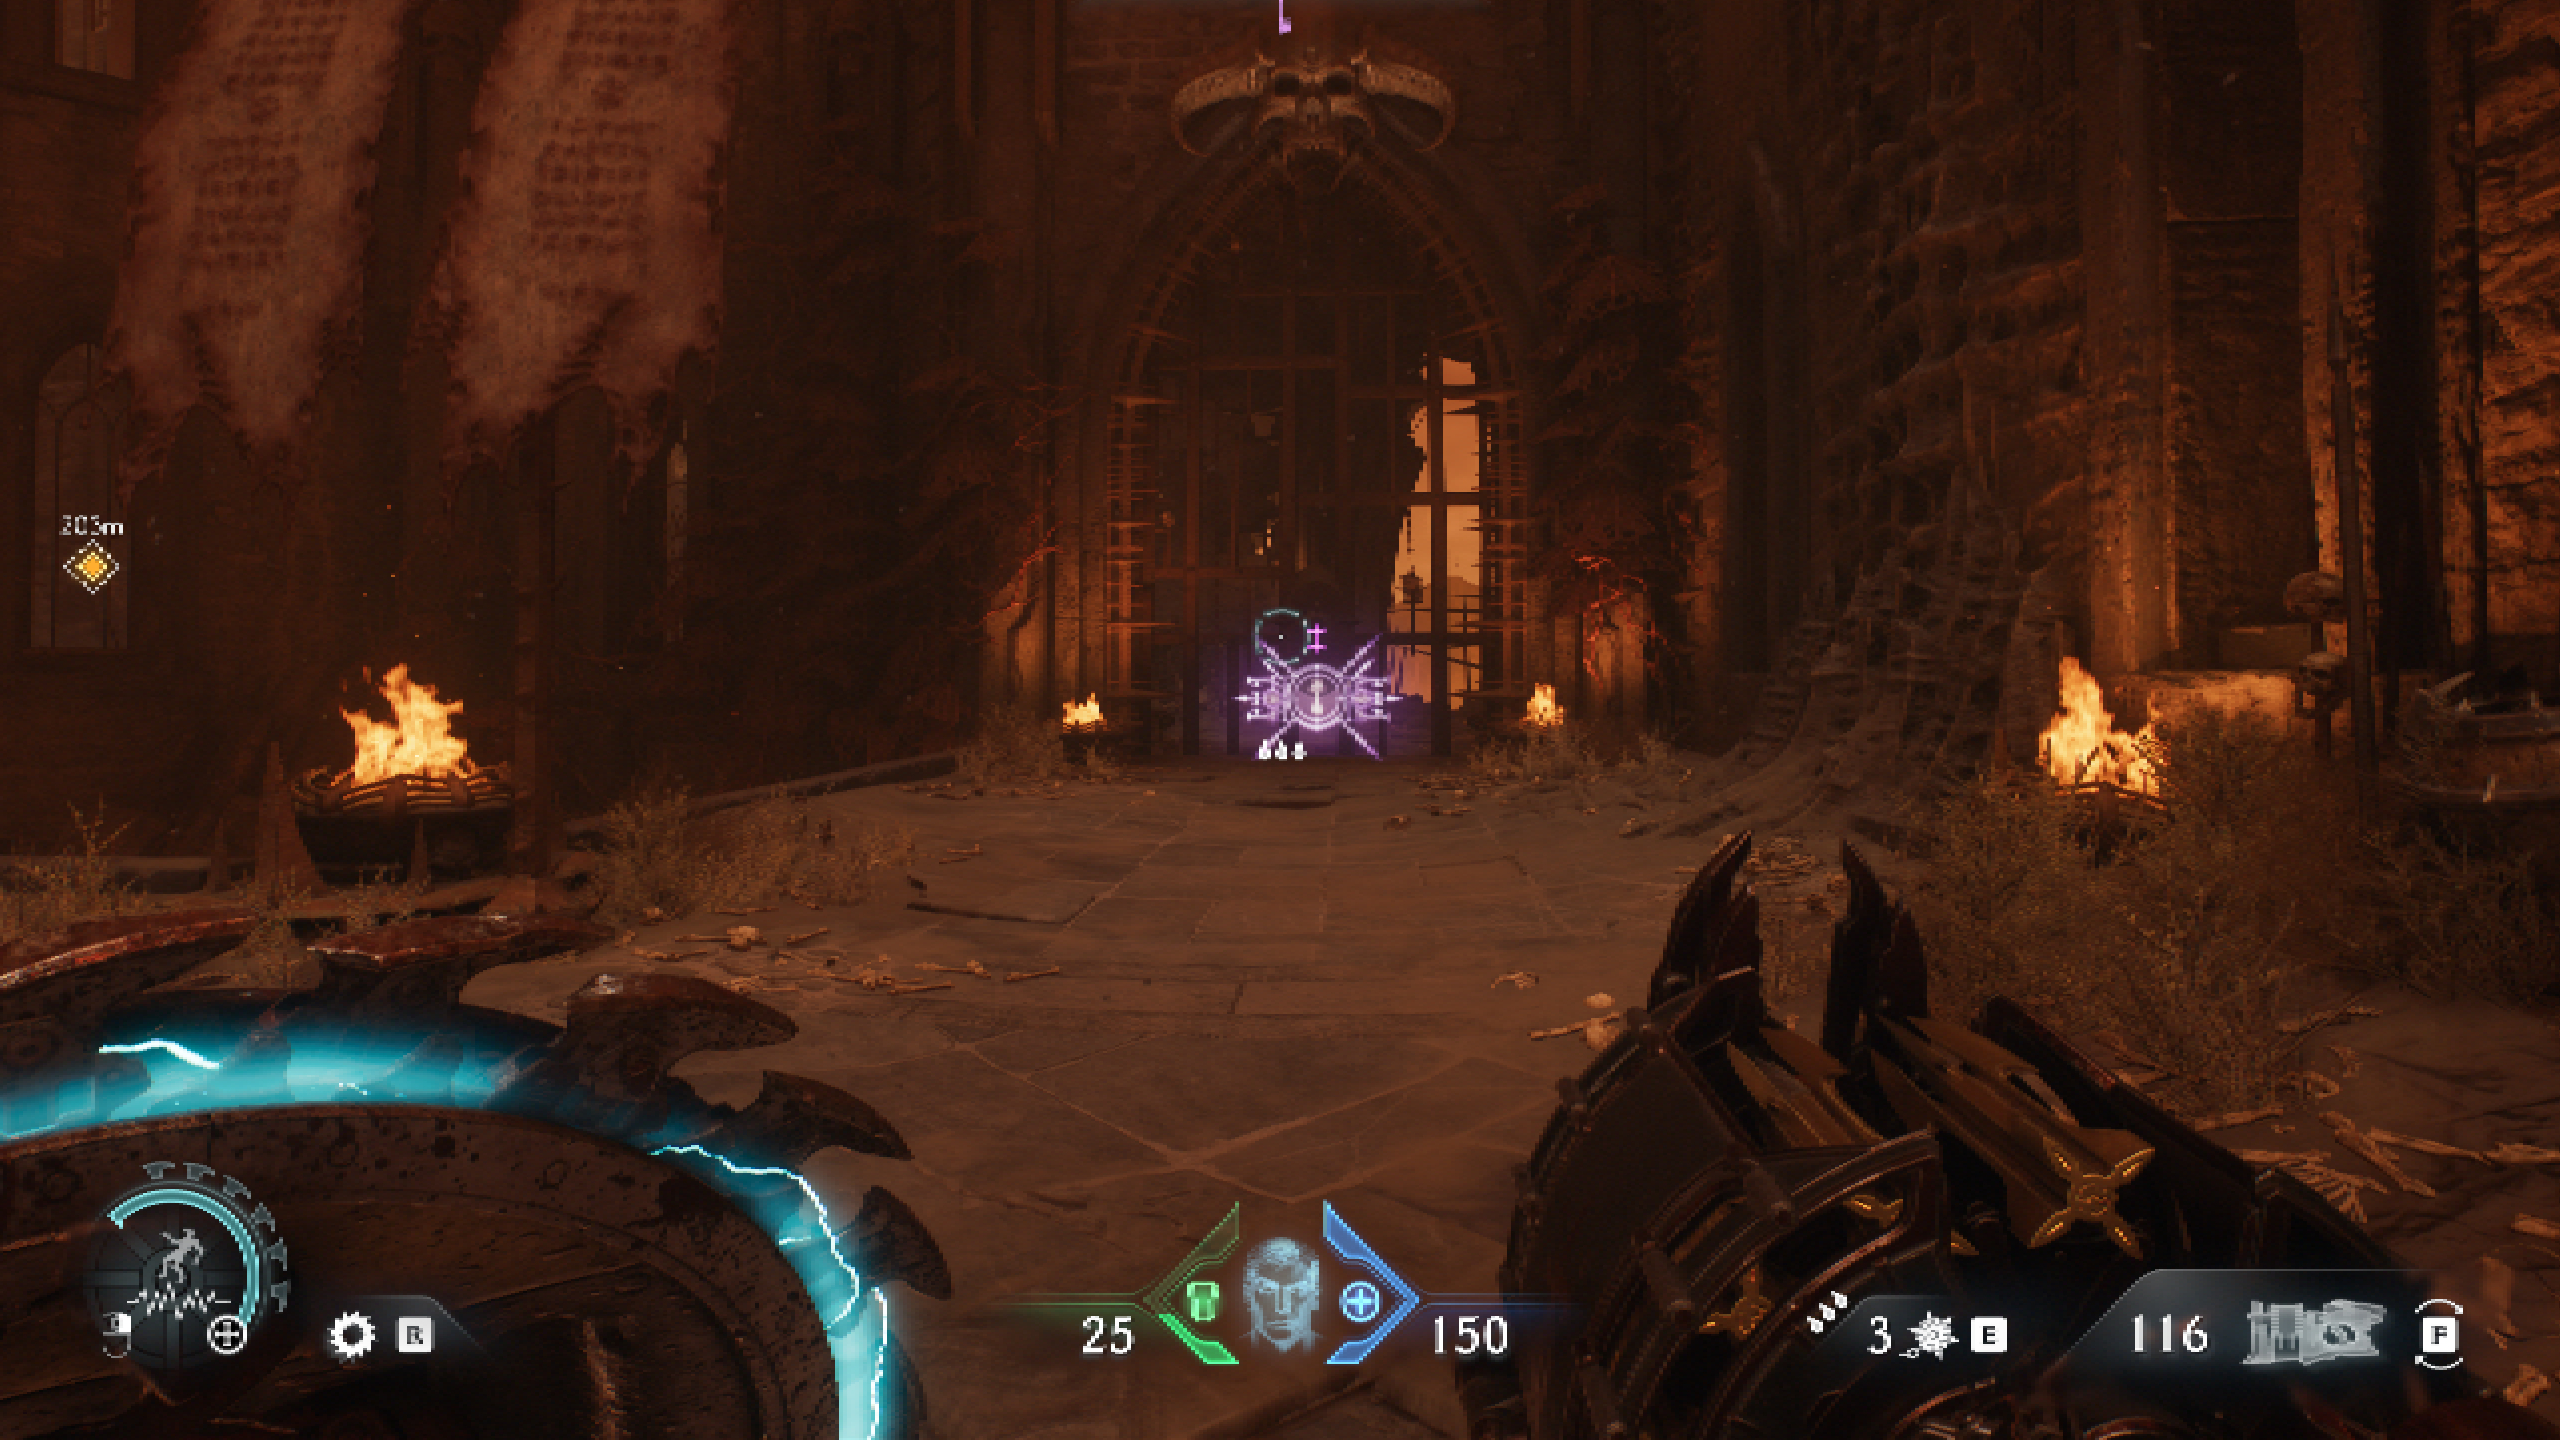
Returning to where you first entered this zone, go straight ahead this time, and you'll soon find a castle on a hill, almost in the centre of the map. Use the purple key to head inside and grab the codex.
8 - Life sigil
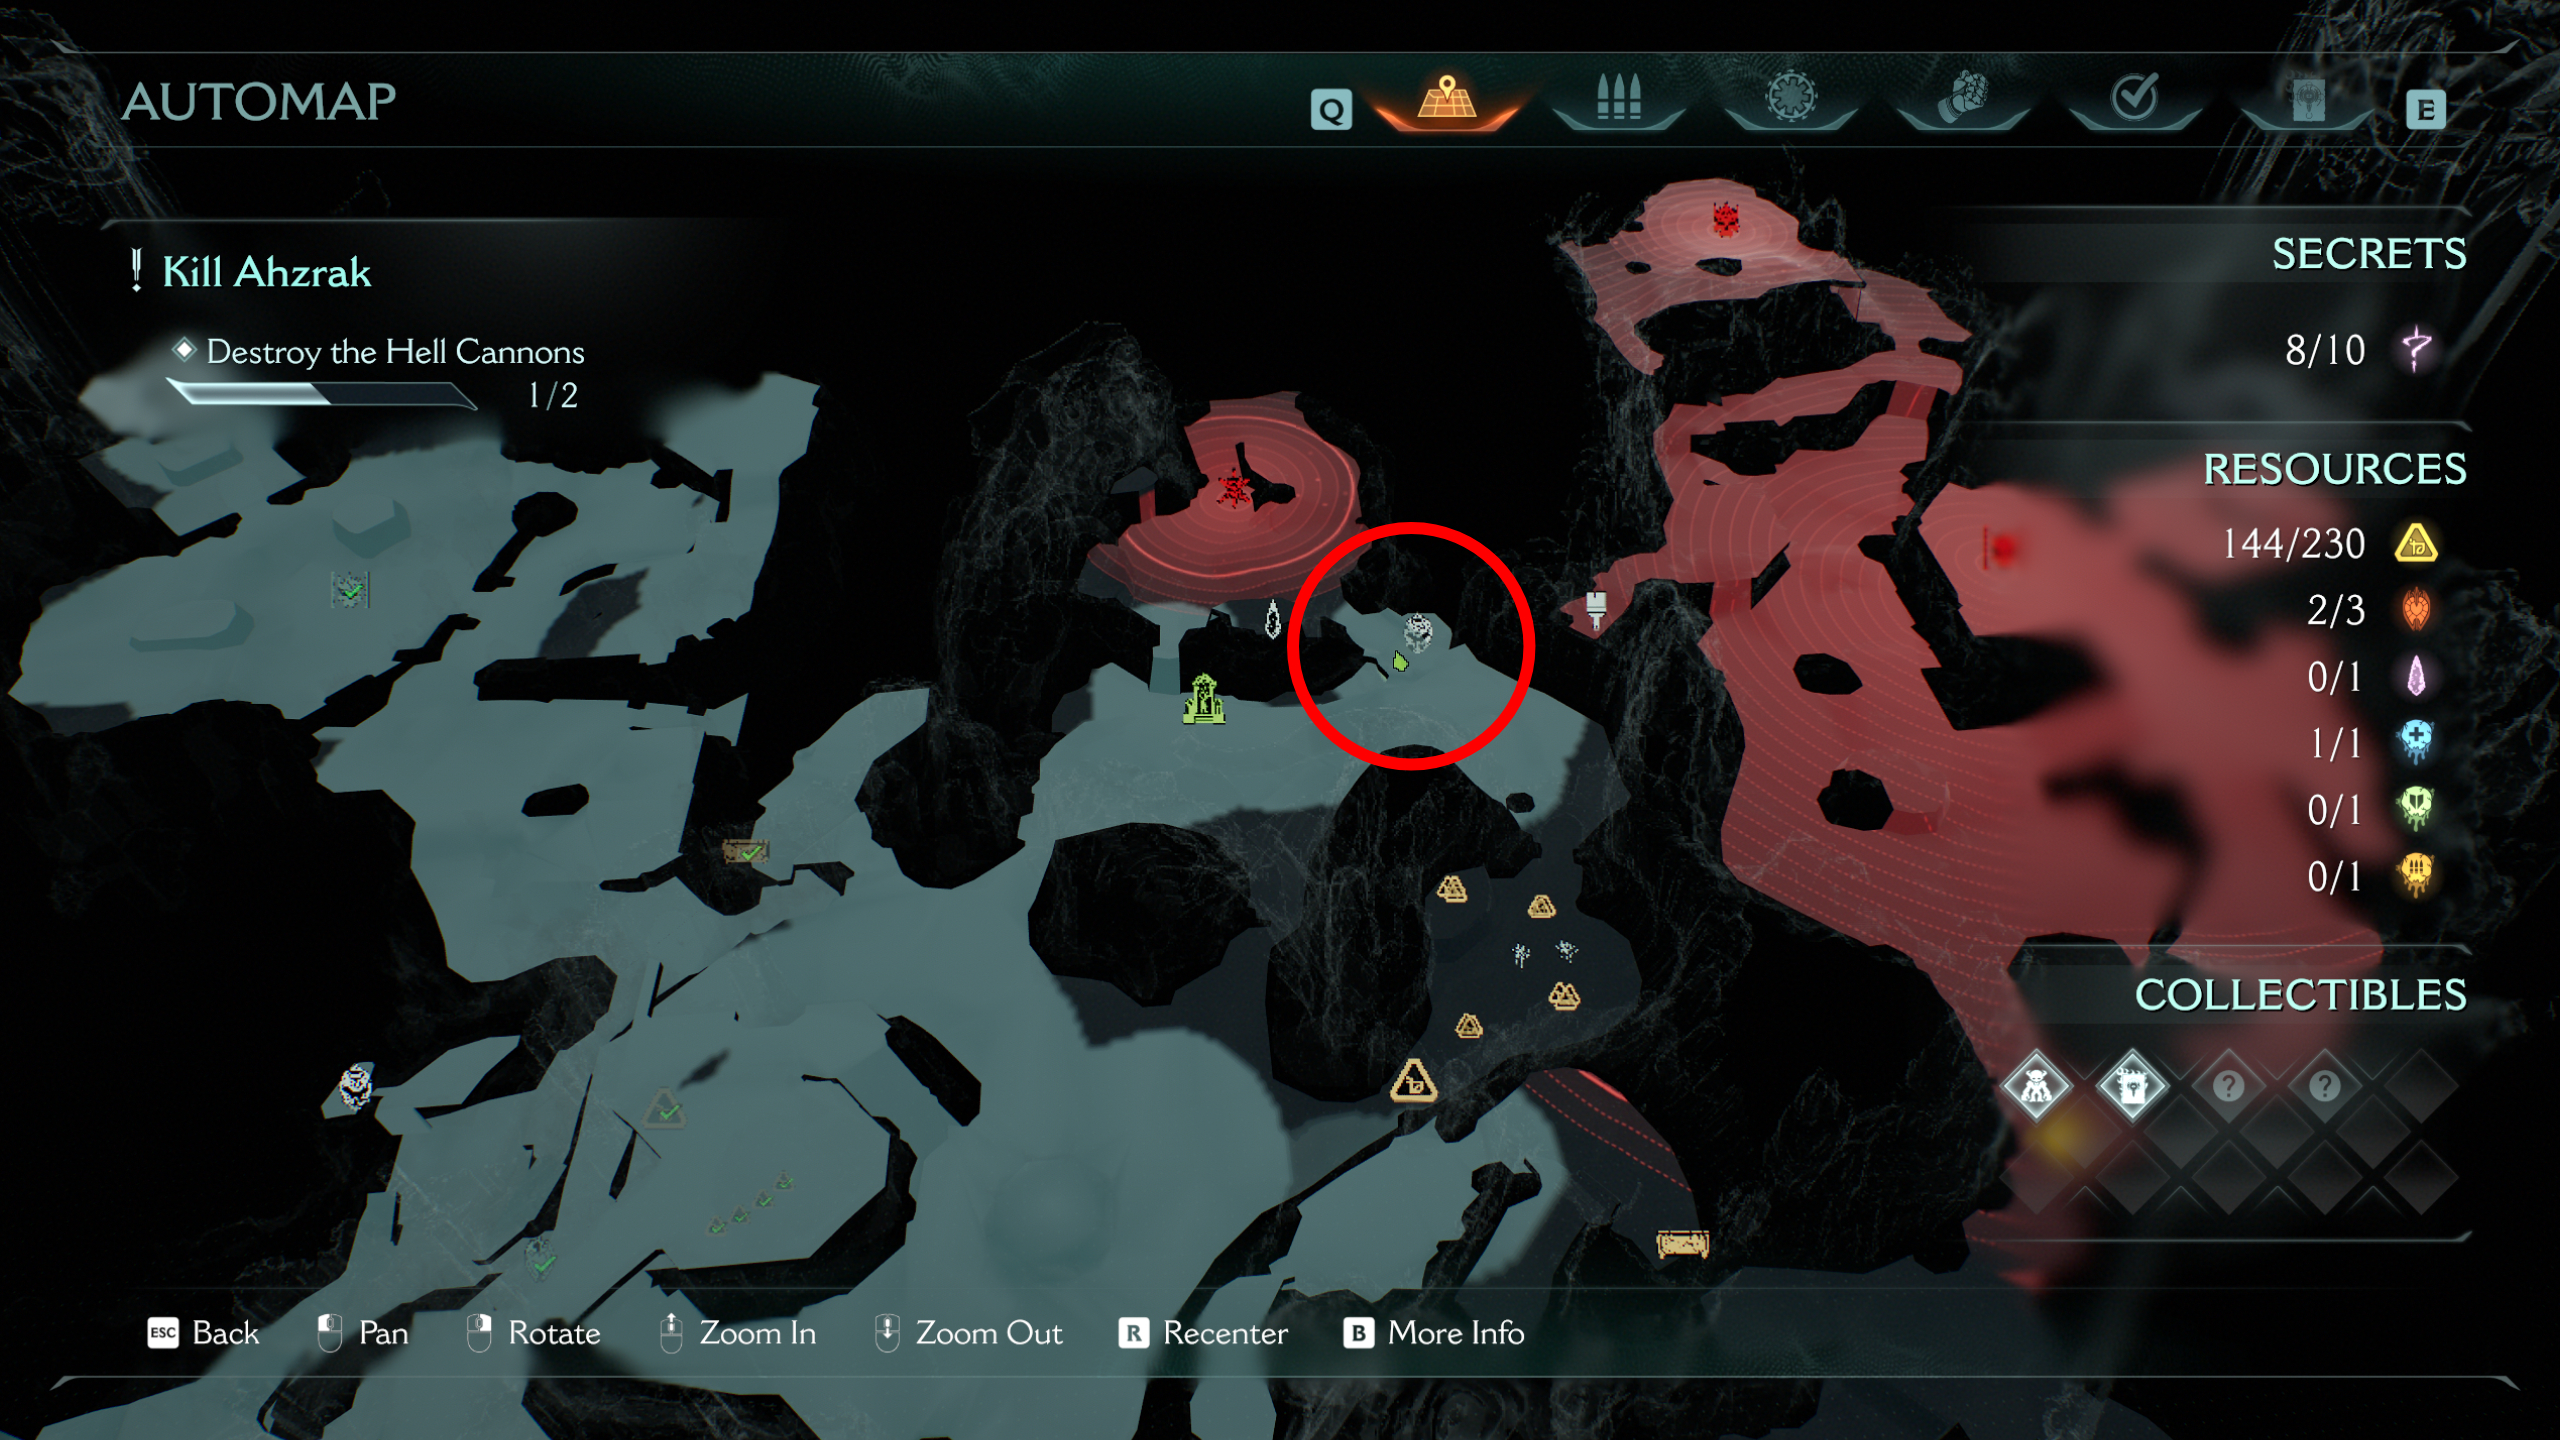
The next secret is on a ledge under the path to the right by the Sentinel Shrine at the very top of the map. This is where you'll later fight the final boss of the mission, so don't worry that you can't access the wraithstone inside quite yet.
9 - The Forsaken Plains codex entry (collectible)
Returning to the zone entrance once more, take the path leading up the hill on the right side of the map. After a short walk up the hill, enter the building on your right with the Sentinel Shrine inside. Pass through the short tunnel, dodging fireballs and killing the demons, until you reach the balcony with the codex.
10 - Ruby

From where you found the codex above, go back into the hallway, but this time you need to jump on top of the spike platform and ride it like a lift. This takes you to a secret room with a ruby statue.
11 - Nightmare Cycler weapon skin (collectible)
You'll find the Nightmare weapon skin for the Cycler in a nook of the hell cannon leader boss arena in the top right corner of the map. Given you'll have just been running around the arena fighting, chances are you've already walked close enough for it to be marked on your map.
12 - Reverent Pulverizer weapon skin

You can earn the Reverent weapon skin for the Pulverizer by completing the Exterminator challenge in this mission, requiring you to clear the two gore nests hidden around the map. You'll have cleared one earlier to get a ruby, but the second one is up the hill from the top right hell cannon.
Unlike the first gore nest, it's not tied to any secrets or collectibles, so it's much easier to miss, but you might as well beat it while you're here. Plus, you'll also get a maximum ammo Demonic Essence out of it.


You must confirm your public display name before commenting
Please logout and then login again, you will then be prompted to enter your display name.