How to build a gaming PC
This is our easy walkthrough to building a PC for the first time, with a video showing each step of the process.
Advanced build tips
So, that’s the basics dealt with, but what about some more advanced tips and tricks for the would-be liquid-cooler, the OCD-oriented cable tweaker, and the avid overclocker? Never fear—we have you covered.
Tip 1: Liquid planning
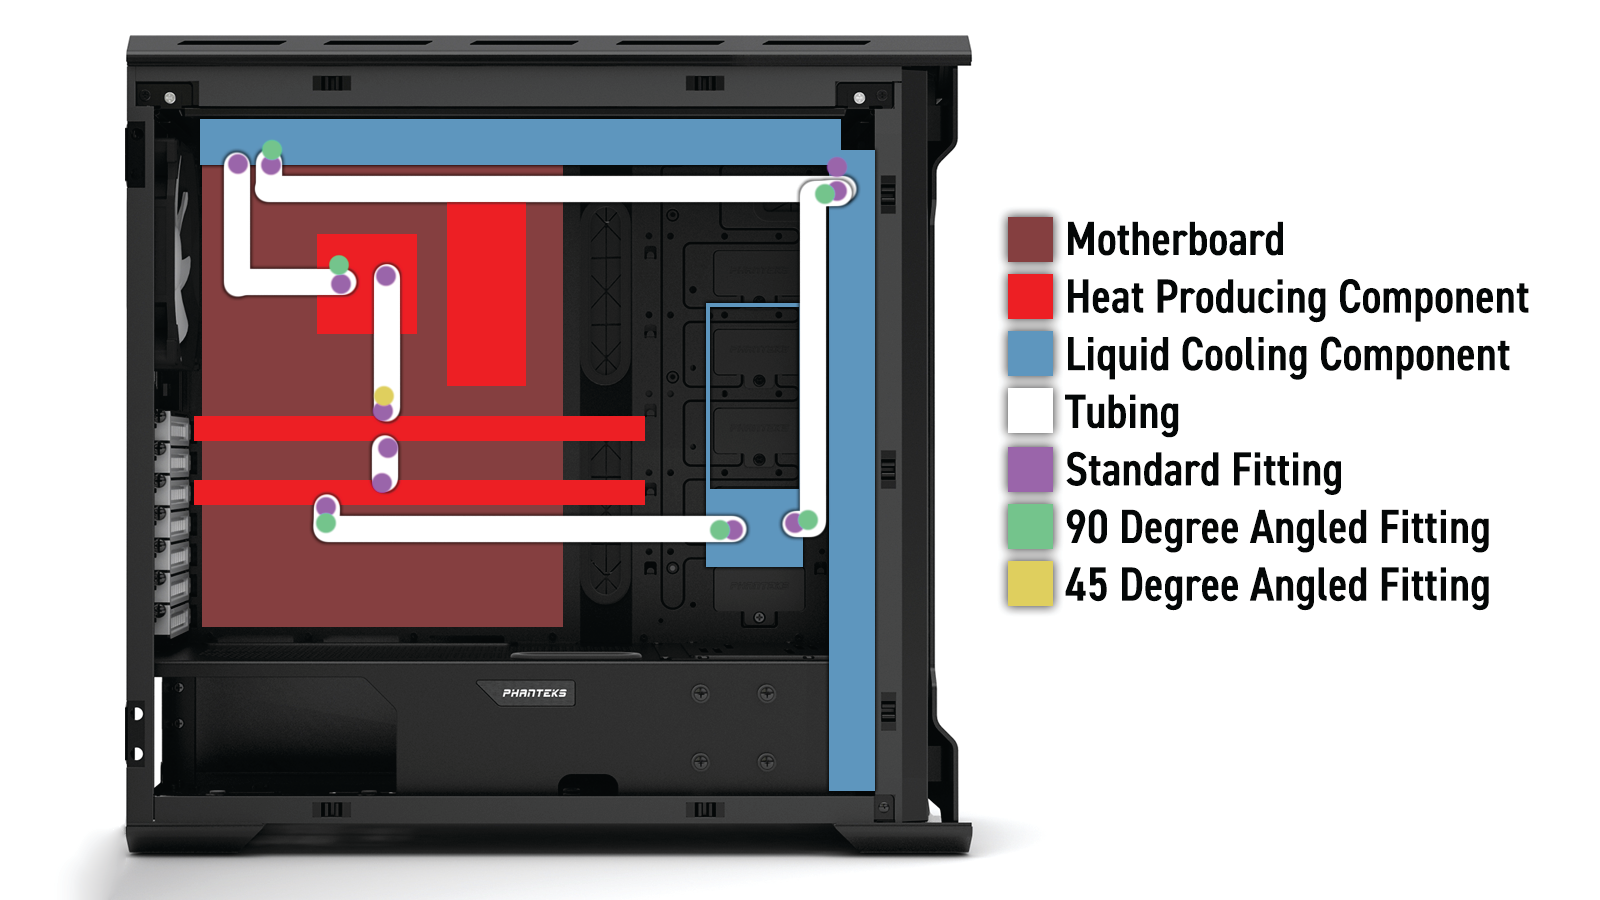
A fully custom loop is something most PC builders aspire to at some stage. Whether you’re keen to try it or not, knowing how to build one successfully is a key piece of knowledge to have. As with most builds, it all starts with a good plan, some acquired knowledge, and a touch of research. There are two basic principles to remember when liquid-cooling. Firstly, your pump must almost always be gravity fed by a reservoir, and secondly, each component you wish to cool must have at least 120mm of radiator to support it—more for overclocking.
Once you’ve got that pinned down, it’s on to the planning stage. Similar to our first plan we did back on page 28, it’s a good idea to use a side-on image of your case, sketch out roughly where your CPU and GPU will be, and work from there. By that we mean decide where to place your radiators, reservoir, and pump (or pumps, if you’re going for dual loops), then figure out how to run your tubing. Visualize your build, understand what direction the coolant will flow, then decide on your tubing runs.
For beginners, we recommend keeping it as simple as you can at first, until you get the hang of it. If you intend to introduce a bend to your tubing, it’s easier to work one into a long length than a short one, and it’s always advisable to use angled fittings wherever possible, to reduce the number of bends you’ll have to produce.
Tip 2: Cable management
Good cable management is all about layering. Identify what cables need to run where, then layer them. Most cases have more than enough room in the back to allow for cable management. Zip-tie bunches of them to the back of the motherboard tray, or use the Velcro straps often included in today’s cases. Tie down your 24-pin and 8-pin CPU power first, then work on PCIe cables, and anything else afterward. Modular power supplies are a must—minimizing the number of cables you have keeps a build tidy.
Keep up to date with the most important stories and the best deals, as picked by the PC Gamer team.
Tip 3: Pro lighting
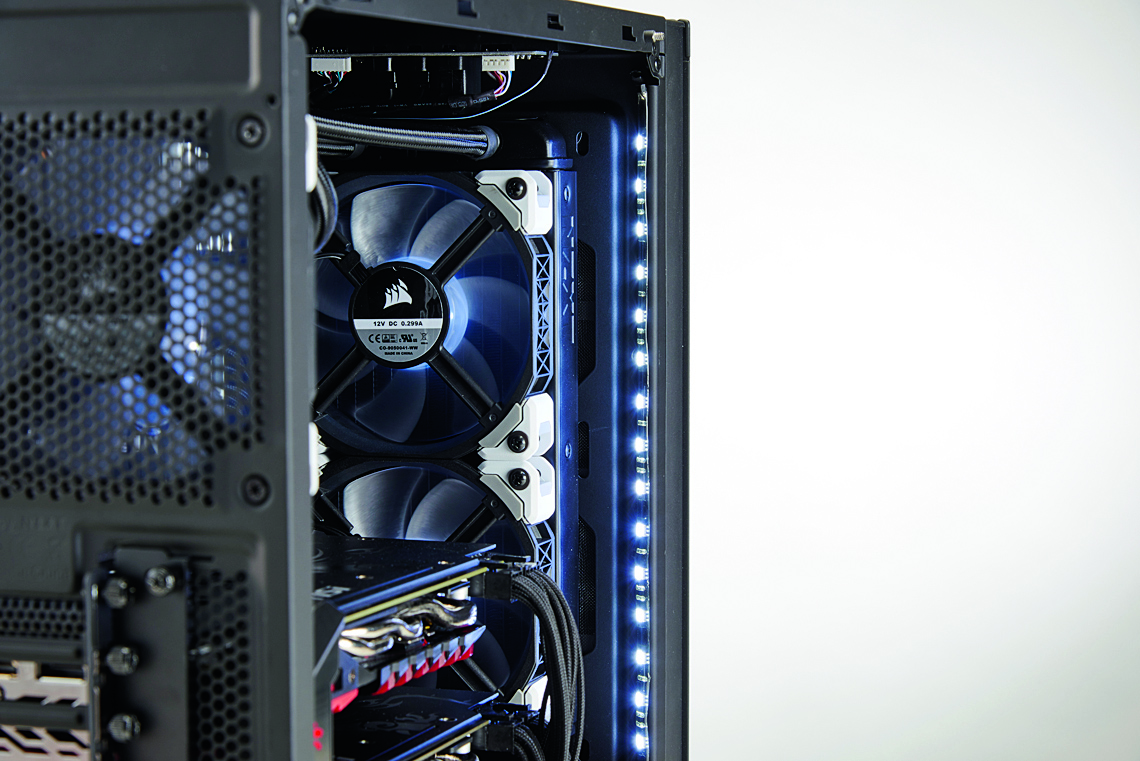
Good lighting is hidden lighting. The aim is simple: Anything that produces light should be hidden, so you can only see the light that is thrown, as opposed to the light source itself. Hiding strips along the edges of cases, hidden by the thick black borders of tempered glass, or along the bottom of a chassis away from prying eyes, is a smart way of achieving this.
On top of that, two strips are often better than one. Put one along the bottom and another along the front side, and you’ll immediately light up two separate angles, producing a more dynamic lighting effect. Additionally, always go for a white light. Single-color strips (red, blue, green, and so on) typically drown out all definition and design on components. If a motherboard has red and black accents, and you throw a red LED strip in there, all you’ll see is red everywhere.
Custom loop costs and myths
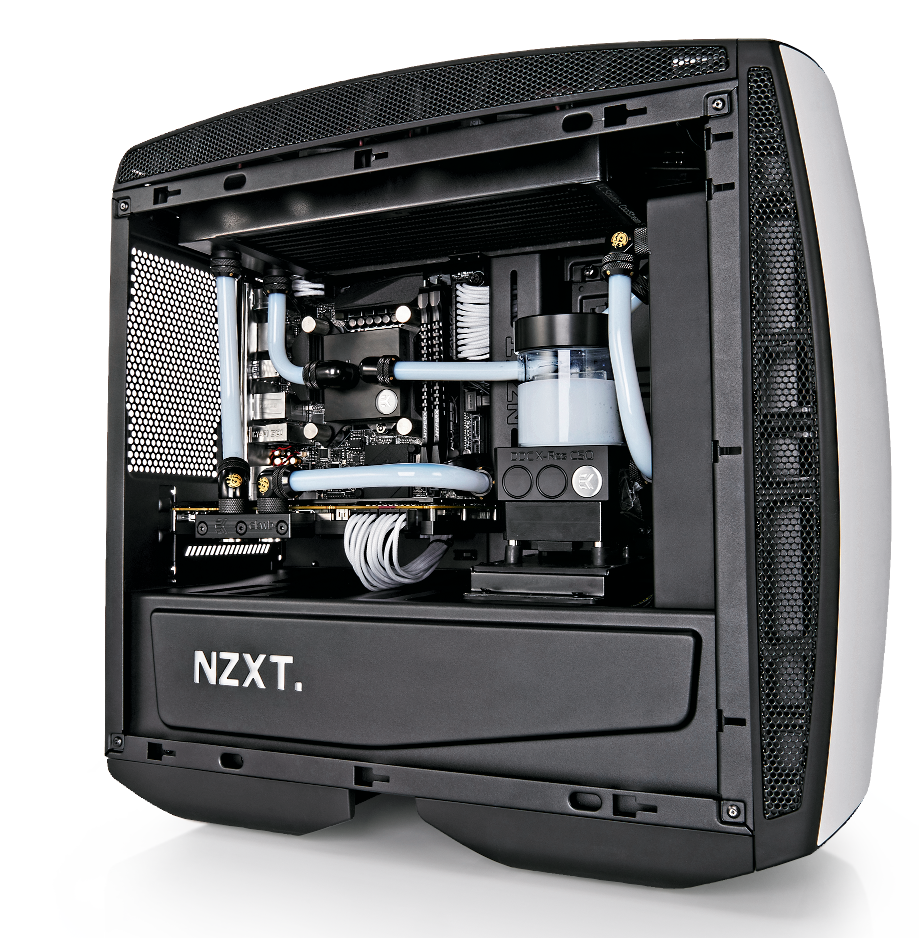
It’s the big question that’s continually asked: Is liquid-cooling worth it? At least on a custom scale? Well, that depends. You’ll definitely get lower temperatures by taking advantage of that thermal heat dispensing method, but your hardware won’t run any faster because of it. The one big advantage is a reduction in overall noise, thanks to the opportunity to run your fans more slowly. However, the cost is huge in contrast to more traditional cooling methods—for a really good-looking loop, you can expect to spend anywhere between $400 and $600 at a minimum.
Compare that to a well-armed AIO, and it immediately becomes less attractive. So, is it worth it? You need to consider your available budget and how much you covet silence and cooling. If the answer is “A lot,” then liquid cooling is for you. If not, a good old air tower or AIO with some quiet fans may be a cheaper solution instead.
Fixing boot issues
We’ve all been there: the panic, the tentative push of the “On” button, the silence of zero boot. Here are a few quick solutions.
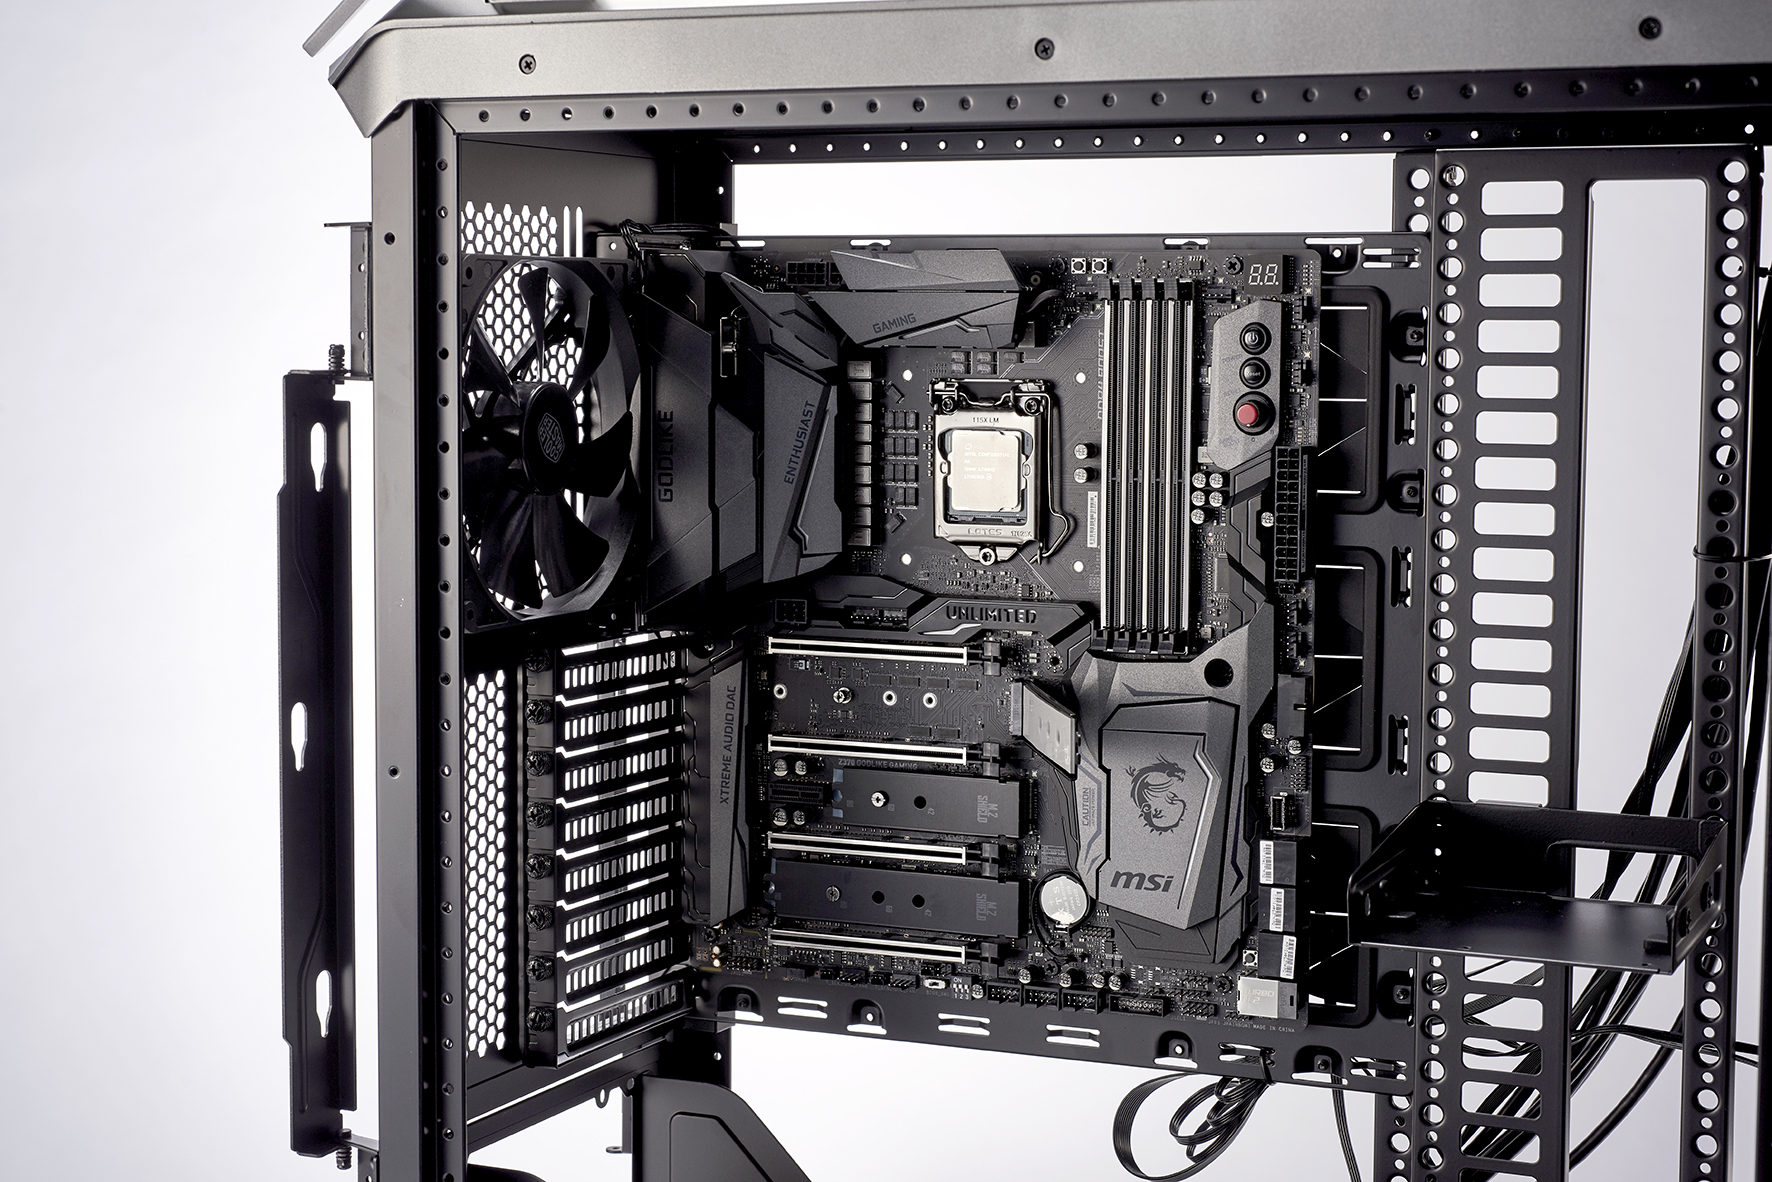
Tip 1: It's probably memory
The number of times we’ve fixed a boot issue due to memory is staggering. A good way to diagnose these conundrums is via the on-board mobo debug code display. It typically displays a number, depending on the running state of your motherboard. If nothing appears on your screen, and everything’s plugged in correctly, check the BIOS debug code for your first hint; 90 percent of the time, it will say it can’t detect the memory. Assuming your power cables are all plugged into their proper places, that is.
Your best bet? Reseat the memory. If that doesn’t work, reseat the processor. And if that doesn’t work, try moving your memory to the additional memory slots. If you’re still not having any luck, it’s time to work out whether your memory is DOA. To do this, you’ll want to try each stick separately. And if you’re still not having any luck, it’s probably time to RMA those suckers.
Tip 2: RMA and returns
There's a reason we suggest going with name brands: warranty. EVGA’s warranties and customer service are legendary, same goes for Corsair. If you’ve got an issue, raise a ticket with the customer support team, and given the evidence, it will likely exchange your part for a fresh one. So, if common sense, the manual, or Google fails you, RMAing might be the way to go.
Tip 3: Fresh install Windows We've also seen our fair share of OS-related issues, especially when transferring old hard drives to new systems. It can be anything from driver conflicts (always uninstall AMD/ Nvidia drivers before swapping to the competitors cards), to corrupt OS files, to program conflicts. Ultimately, we always recommend you do a completely fresh install of Windows on to your SSD—not a refresh, not a reset, but a completely fresh install.
Tip 4: Cables, cables, cables
We've all done it—forgotten to plug in the PCIe power, not attached front panel connectors, had a cheap DisplayPort cable… You can guarantee all of us here have probably built a system and missed plugging a cable in at least once. Display connection cables, in particular, are chronically bad for this—the number of crappy DisplayPort and HDMI cables we’ve handled over the years is horrific. In short, make sure everything’s plugged in where it needs to be, and your system hasn’t gone to sleep in the process.
Auto overclocks
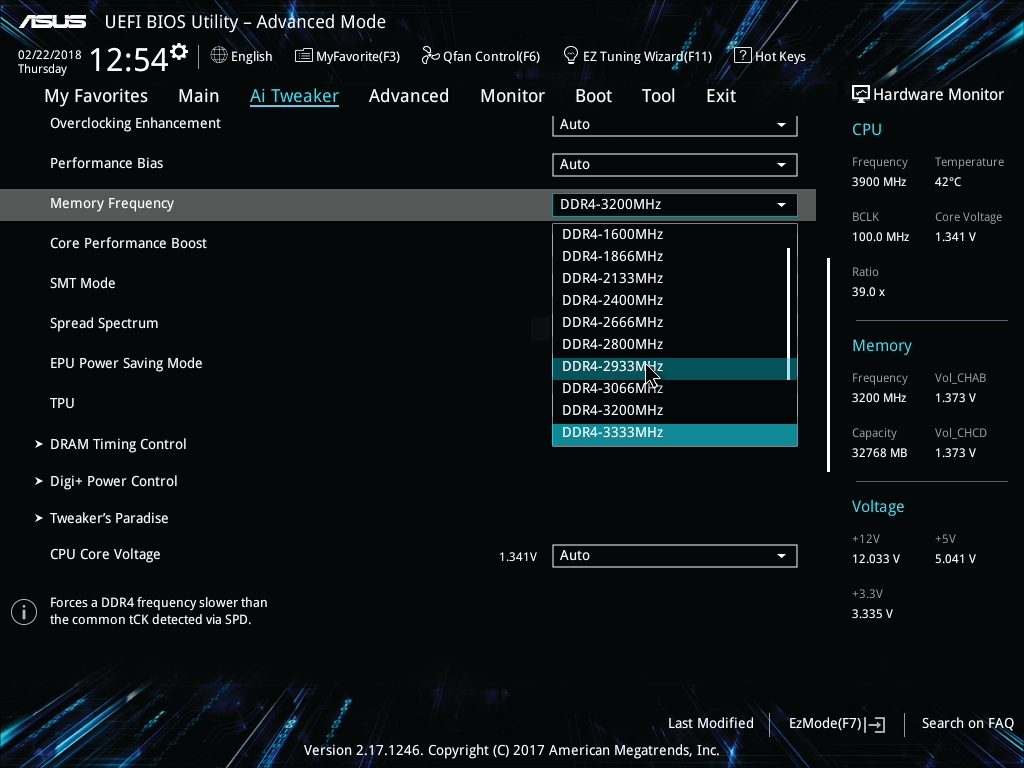
Nothing says “problematic” quite like an auto-overclocking motherboard. We’ve seen it across multiple generations now, as manufacturers try to differentiate their motherboards from each other. It’s pretty prolific with Coffee Lake, as Asus pumps up the default VCore in its motherboards to boost processor performance in benchmarks (in short, enabling more stable turbos at higher frequencies at stock). This is great, up until you start noticing temperature spikes of 20 degrees or more compared to the competition.
We’ve seen this with memory profiles, too. Early on with AMD memory, frequency support was haphazard across a swathe of motherboards, with 2,400, 2,800, and 3,000MT/s causing boot loops and more. Threadripper still can’t support 128GB of DDR4 at 3,200MT/s.
So, what’s the solution? BIOS tweaking. If you’re having thermal issues, check that your heatsink is securely fastened to the motherboard; if it is, adjust the VCore in the overclock settings. Typically, we recommend 1.2V for most Intel Sky Lake, Kaby Lake, and Coffee Lake products. For memory frequencies, try enabling the XMP settings, and dropping the frequency by 200MHz or so to alleviate some overclock conundrums.
Installation protocol
Whether you’re building a brand new rig or refreshing an old one with a clean build of Windows, you’ll find our invaluable installation guide will leave your system running as smooth as silk.
Tip 1: Update the BIOS
BIOS updates used to be a daunting experience, leading to bricked mobos and dead CPUs. Now, it’s really beneficial, and we recommend you update your BIOS whenever a new one launches. Go to your mobo manufacturer’s website, find the page for your model, and head to the support section. Go to driver downloads, and search for the BIOS subsection. Download the latest version. Extract this file on to a 4GB USB stick that’s been formatted to the FAT32 filesystem, then plug it into the back of your motherboard, head into the BIOS, and find the update BIOS tool in the advanced menus. Select the USB stick, find the file, and load it— your motherboard takes care of the rest.
Tip 2: Fan curves
While you're in the BIOS, take a look at tweaking the fan curves. If you’re plugging all your fans into PWM headers, setting a quieter fan curve can reduce noise, and make your PC experience far more enjoyable. It varies from board to board, but we recommend you set a low curve (35 percent power) all the way up until you hit about 60 C, at which point, you can start ramping up those curves.
Tip 3: Installing Windows via USB
Installing a fresh copy of Windows 10 is fairly simple nowadays, especially if you’ve kept your digital key, or your Windows 10 license is linked to your Microsoft account. Head here to download the Media Creation Tool and Create Installation Media, and put them onto an 8GB USB stick. Plug the USB stick into the back of your system, go into the BIOS boot order, and boot from the USB stick.
From there on out, follow the prompts. You’re asked to sign into your Microsoft account during the installation process; you can do this now, or create a local account and deal with it later. Once logged in and on the desktop, you can type “Activation” into the Start menu, and either log in to your Microsoft account to verify your new install, or insert your Windows code—and you’re done. If you have access to the Internet, now is a good time to install any updates.
Tip 4: Installation procedure
What's next? Chipset. Head back to your motherboard manufacturer’s website, head to support and driver downloads, and download the latest chipset driver for your rig. Once you’ve got that, download any additional drivers or utilities you may need. For a lightweight build, all you really need is the LAN and audio drivers. Install the chipset first, then hit “Restart.” Now you can install the rest. Next, grab your graphics drivers. By default, Windows installs an older driver variant through Windows Update. Head here or here, and download the latest driver for your card.
Tip 5: Ninite
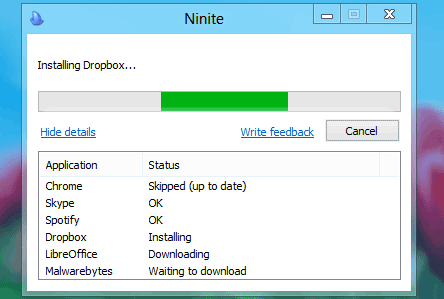
Finally, it's time to install any programs you need. Ninite is our go-to tool for the quick installation of essential apps. Choose what programs you want, and install directly to your C drive. Ninite only installs to C, so if you want to keep Steam on a separate drive, pass on that, and install it separately. Once done, you’ll be good to go.
Jarred's love of computers dates back to the dark ages when his dad brought home a DOS 2.3 PC and he left his C-64 behind. He eventually built his first custom PC in 1990 with a 286 12MHz, only to discover it was already woefully outdated when Wing Commander was released a few months later. He holds a BS in Computer Science from Brigham Young University and has been working as a tech journalist since 2004, writing for AnandTech, Maximum PC, and PC Gamer. From the first S3 Virge '3D decelerators' to today's GPUs, Jarred keeps up with all the latest graphics trends and is the one to ask about game performance.

