Build It: A high-end AMD Ryzen 2 rig
AMD’s 12nm manufacturing process makes its debut in our Build It section.
Budget gaming PC
(~$750/£750) - A good entry-level system.
Mid-range gaming PC
(~$1,250/£1,250) - Our recommended build for most gamers.
High-end gaming PC
(~$2,000/£2,000) - Everything a gamer could want.
Extreme gaming PC
(>$3,000/£3,000) - You won the lotto and are going all-in on gaming.
Prefer to buy a prebuilt than building it yourself? Check out our guide to the Best Gaming PCs.
It's good to have some competition back in PC hardware again. Seriously, how long were we plodding on with mainstream quad-core processors? Over eight years? Staggering. The reality is that the computing industry thrives on competition, and as years pass, and more and more manufacturers hit the dirt, the likelihood of us ever seeing such a large paradigm shift again—certainly when it comes to processor performance—is slim at best.
AMD’s Zen architecture is without a doubt the catalyst for the retirement of that mainstream staple quad-core part. And with it we’ve seen an accelerated processor arms race between the two top chip manufacturers. As Intel scrambles to try to reclaim the consumer multithreaded performance title, with six-core parts on sale now, and eight-core parts rumored to be just around the corner, it does make you question: what exactly was holding Intel back all this time?
Alas, we digress—this isn’t about who did what best, this is about the launch of a new processor generation: AMD’s first foray into its Ryzen refresh. Its original lineup of Ryzen processors rocked the world with their multithreaded price to performance. But single-core? Well, that had problems, serious problems, and those were reflected in game, too. Now, AMD tells us, it has almost entirely remedied that situation, and with our latest Maximum PC Build It, we put that to the test with a brand new rig.
Second-gen joy
So, this system is a little nutty—it doesn’t exactly fall into the category of an efficient gaming machine, nor does it delve into the realms of enterprise workstation. In short, we were given one mission statement for this build: Craft a rig housing Zen+ that looks good. So that’s exactly what we aimed for. Couple that with this particular writer’s high-end balanced approach to hardware selection, and what you’re left with is a top-level machine that’s perfectly optimized for both throwing down in-game frame rates, and ably finishing any editing task you have to hand.
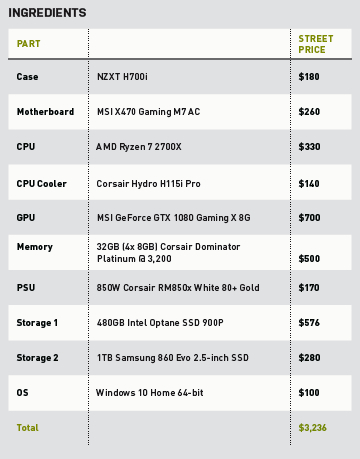
As is typical of us here at Maximum PC, the storage we’ve chosen is, by far, the biggest expense in this build. That’s no chump-change hard drive for the OS there, no sir. That’s 480GB of the finest 3D Xpoint Intel Optane solid-state storage. On tap, ready to deliver premier-level performance for any and all editing applications out there. Unfortunately, it’s not cheap. At $576 for the exotic plug-in PCIe storage stick, it’s well over the $1 per GB mark ($1.20 to be exact). But, oh boy, does it rip up the playbook when it comes to random 4K read and writes—arguably the most important metric when it comes to SSD performance.
On top of that, we’ve thrown in a hefty 1TB Samsung 860 Evo for any additional storage needs, and some (still excessively expensive) Corsair Dominator Platinum DDR4 sticks, which clock in at a total of 32GB (4x 8GB, dual-channel), running at a fairly average 3,200MT/s clock. All of which is ideal for Ryzen’s fabled infinibro fabric. With that out of the way, then, let’s get on to the build.
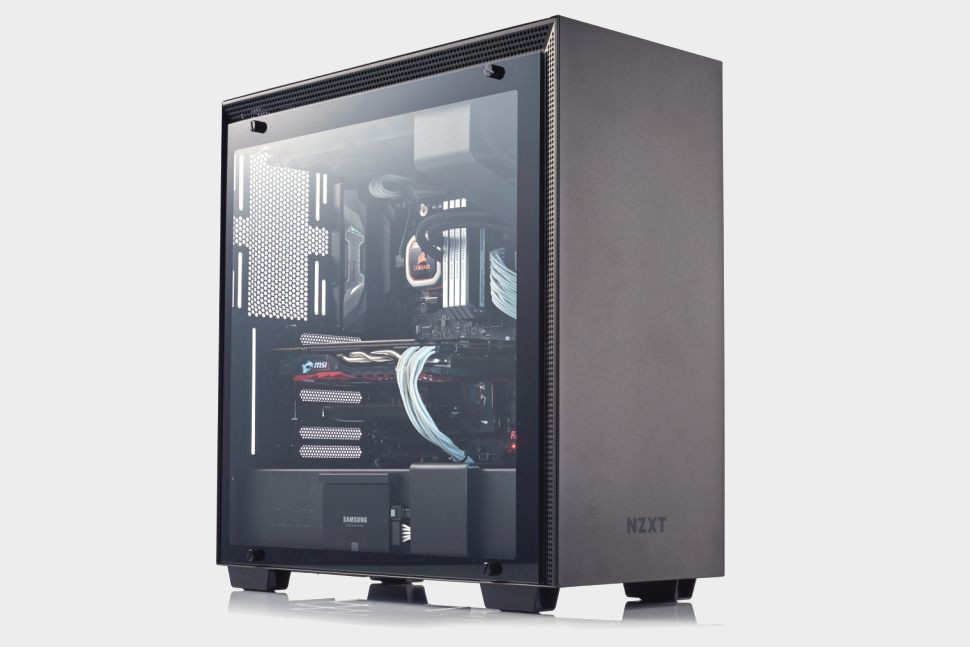
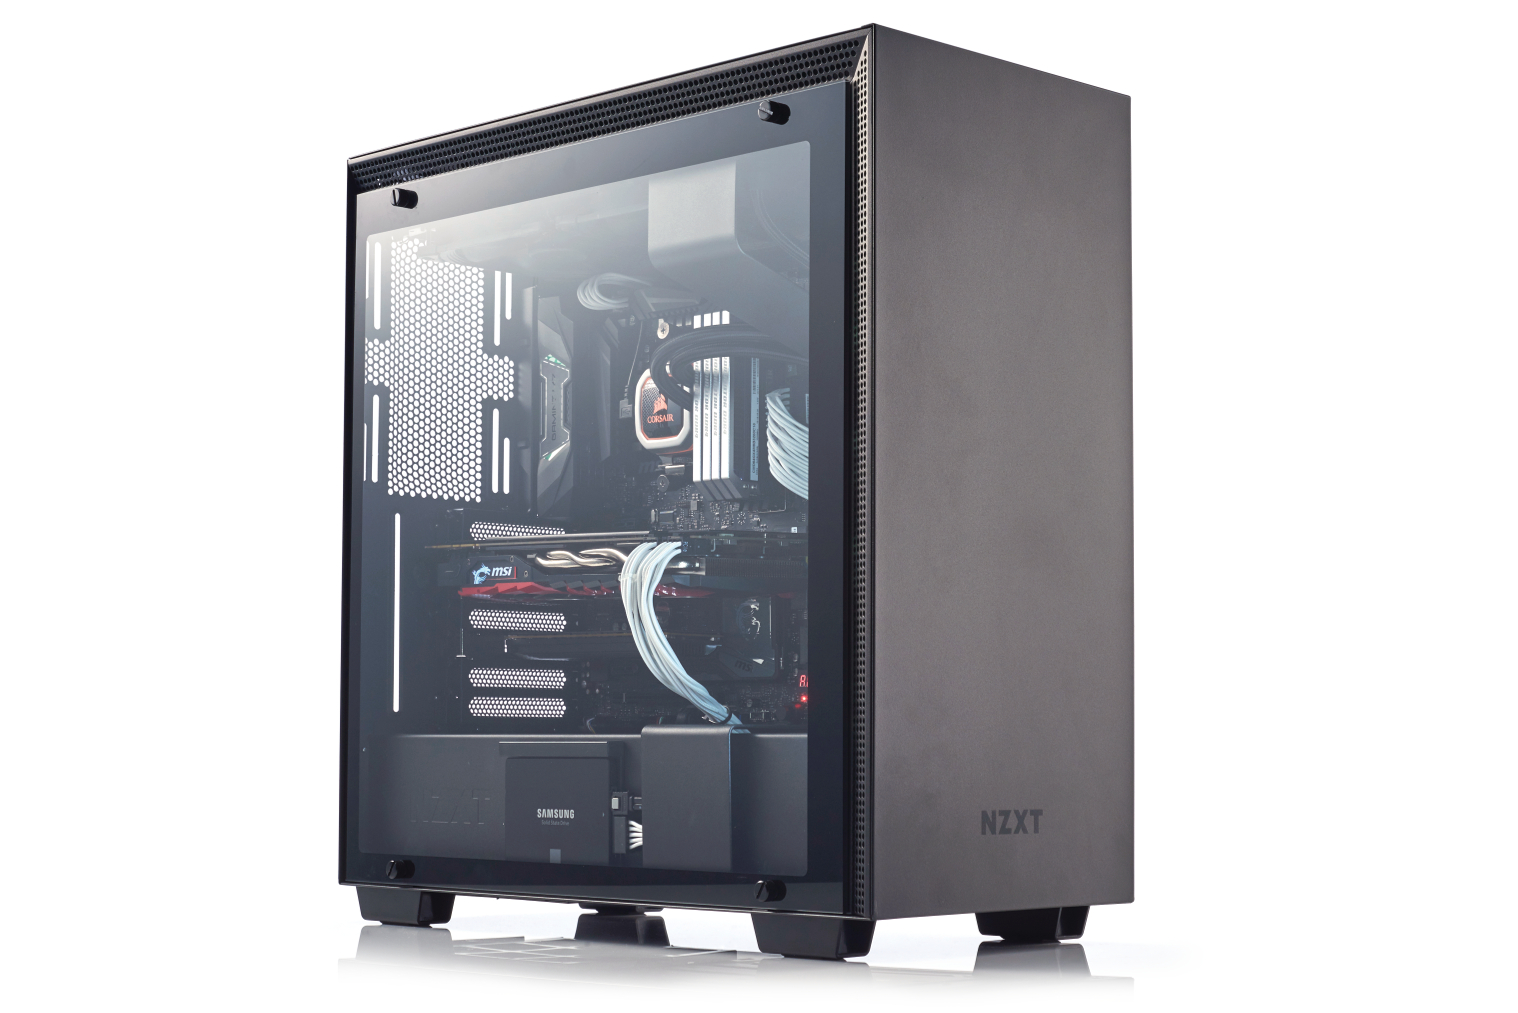
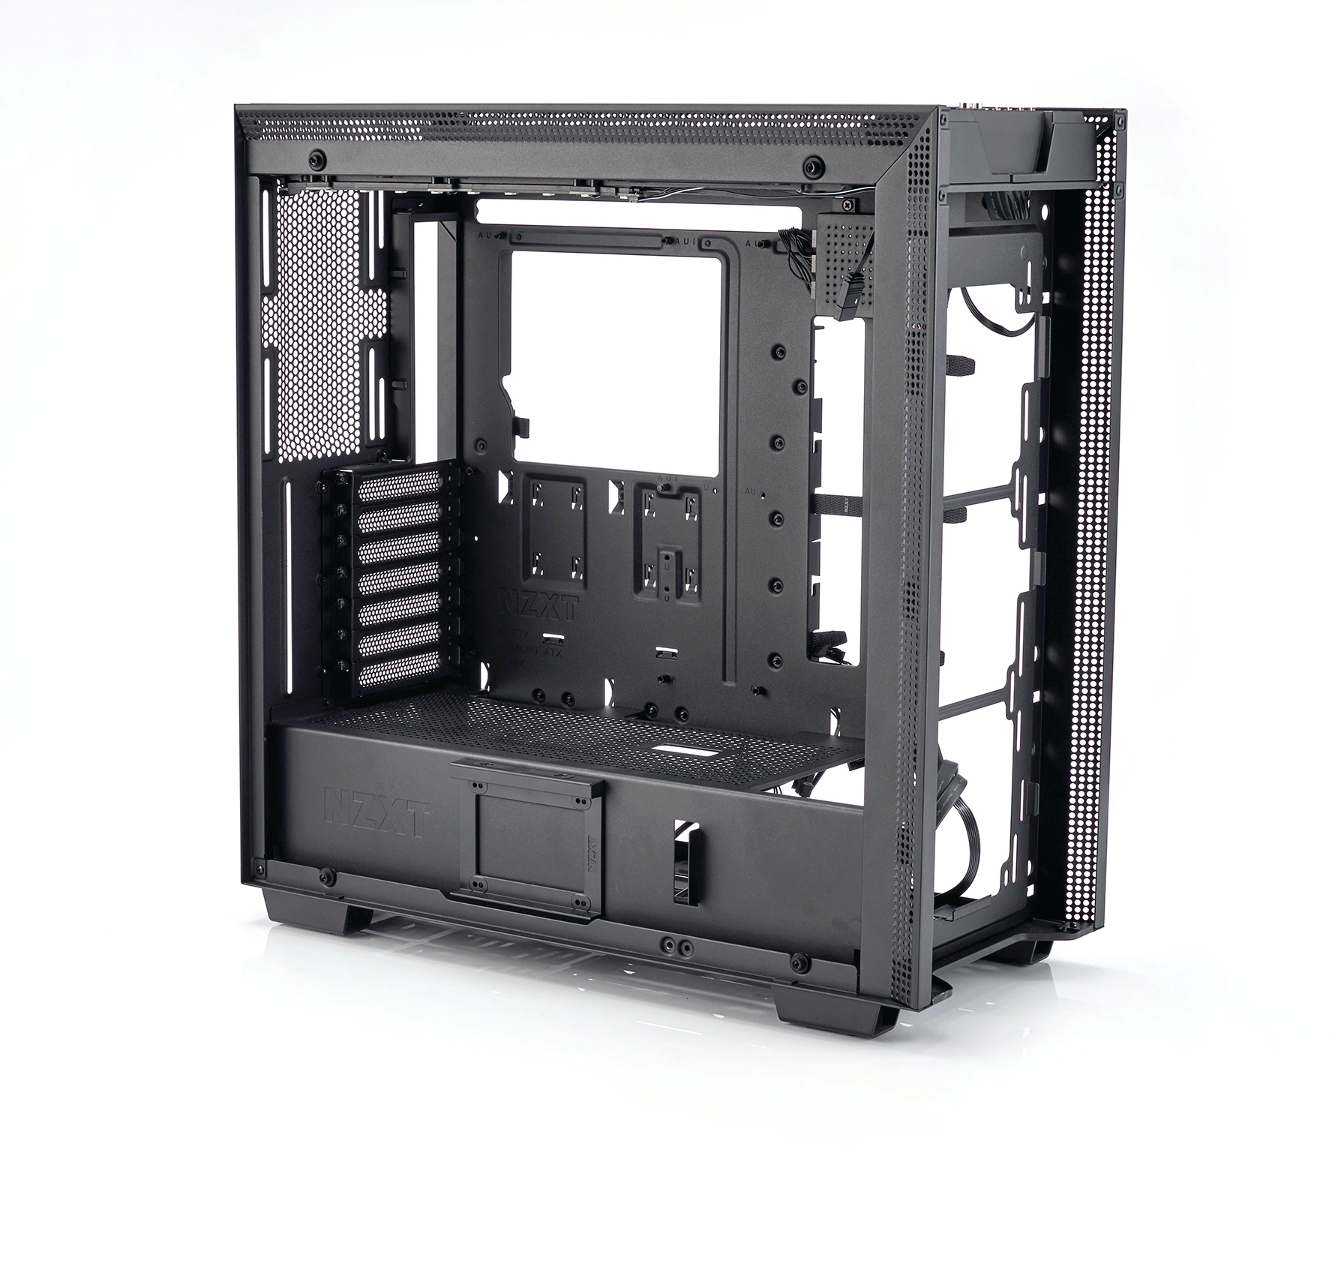
1. H700i laid bare
NZXT's H700i has long been a favorite in the office, mostly because of the premium interior this thing has. Interior? Yup, building in it is a dream; it’s as versatile inside as it is pretty on the outside, with most of the panels easily removable. One thing that is a bit of a disappointment with this chassis is the front SSD mount. If that were just a solid panel, and you mounted the SSDs on the PSU cover, it would have made the build look far cleaner. You could even incorporate some of that super-secret-sauce LED lighting into the NZXT logo, as we saw with the Manta.
Keep up to date with the most important stories and the best deals, as picked by the PC Gamer team.
2. Cooler mounting
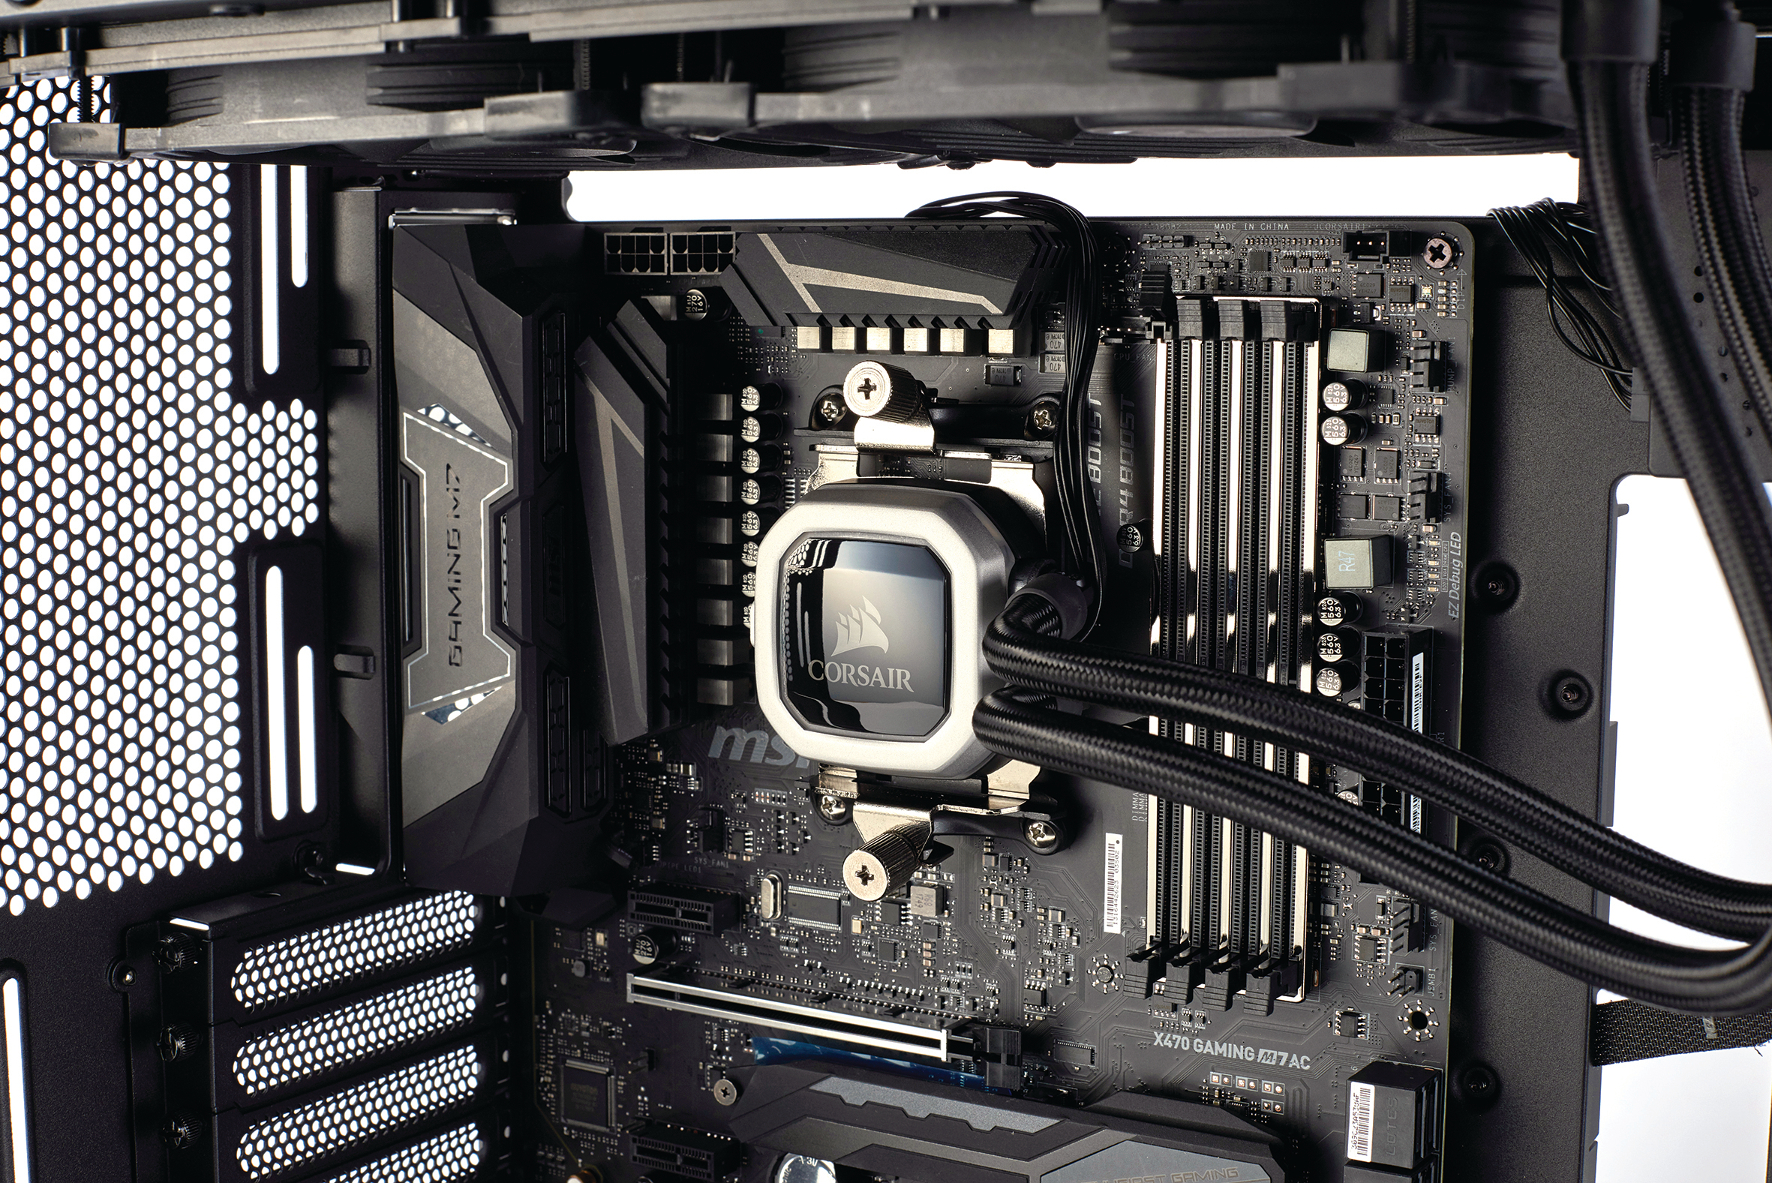
Although Corsair's CPU block may be rather divisive aesthetically, there’s no denying how beautifully easy it is to install it on the chip. Simply replace the stock Intel bracket locking mechanism on the bottom by rotating it to the right, then attach the thumb screws and locking brackets, and mount directly on to the stock AMD mobo brackets. Simple. It’s arguably one of the more secure fitting solutions we’ve seen on the market to date.
3. Radiator brackets
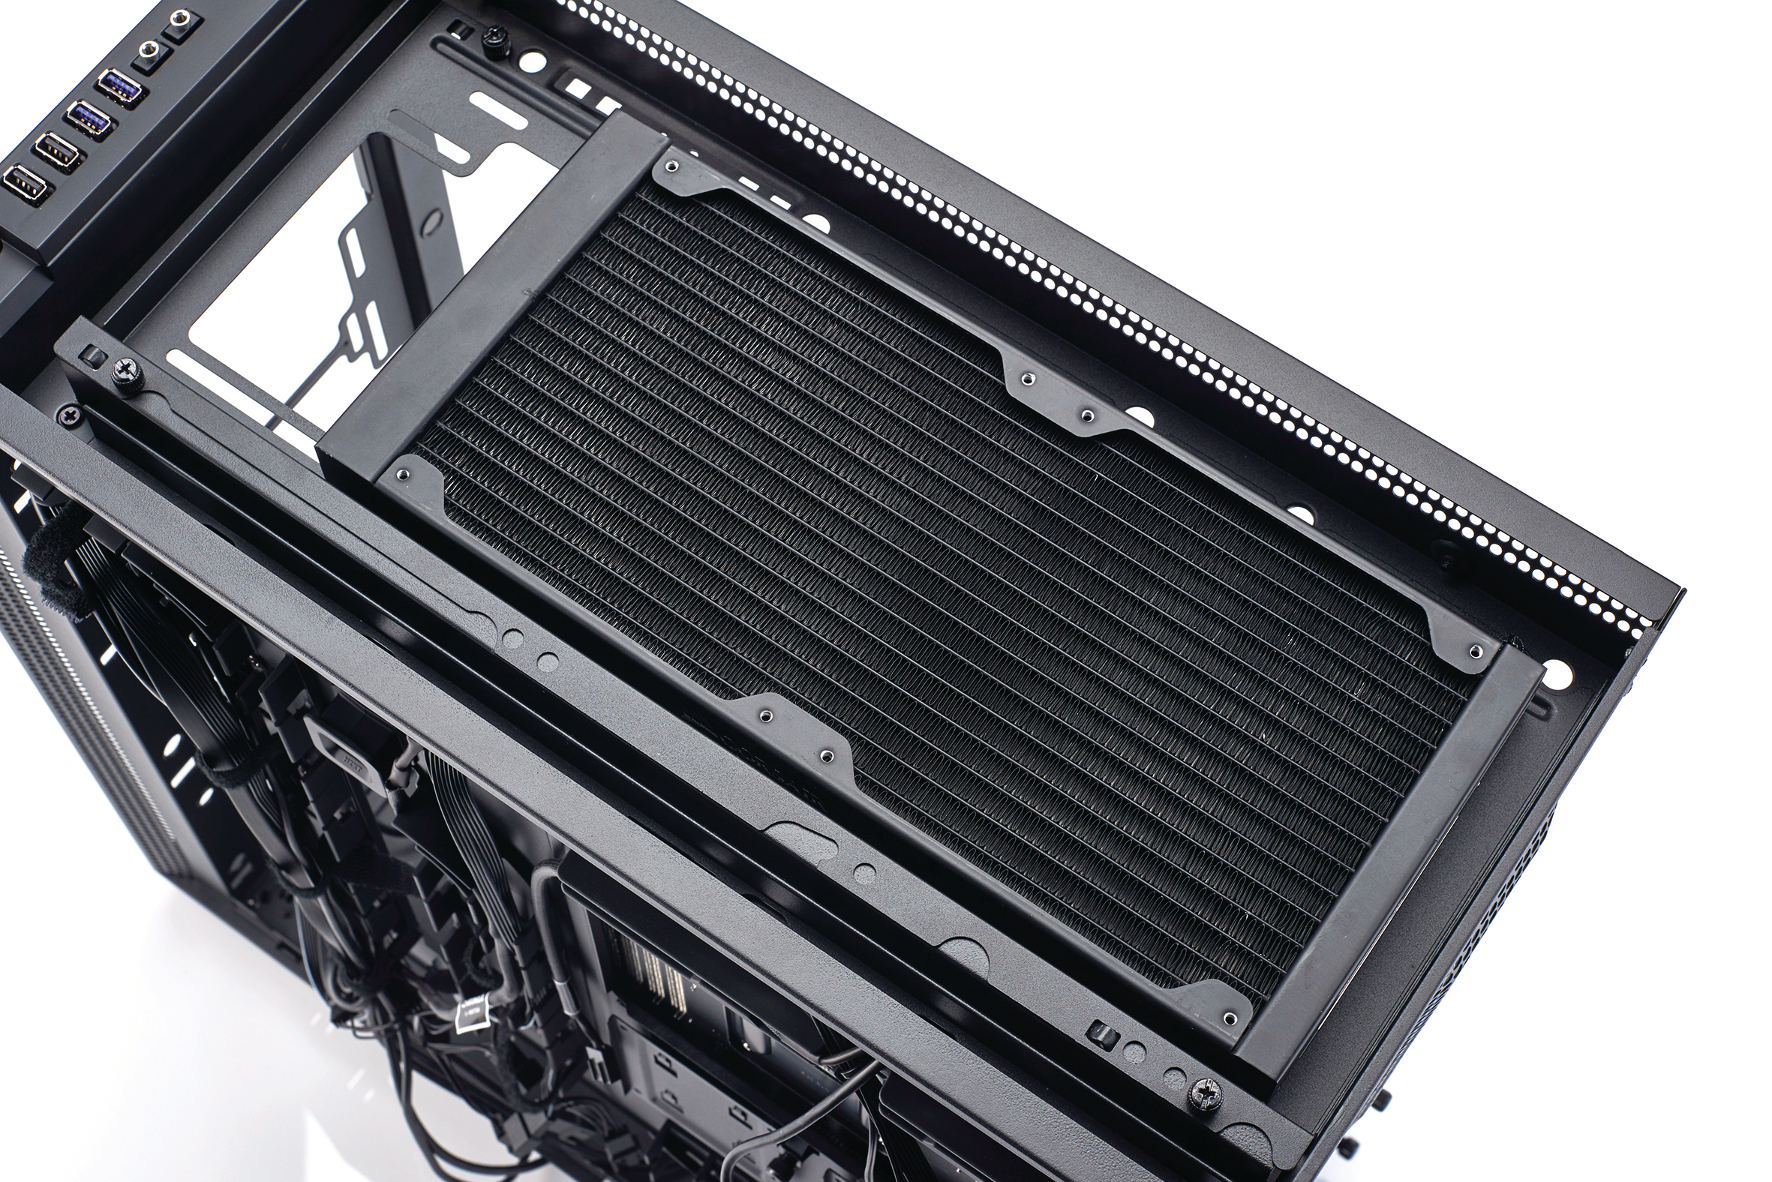
Another neat thing baked into the H700i is this snazzy radiator bracket, situated in the top of the case. Secured down by four thumb screws, you can lift it directly out of the chassis, and pre-install your rad and fans outside of the case. Then all you need to do is slot it back into place, carefully thread your tubing and fan cables through, and you’re good to go. It’s worth noting that we did have a bit of a conflict here with our 140mm fans and the stock LED strip NZXT has baked into the top of the chassis, forcing us to remove the strip.
4. Easy cables
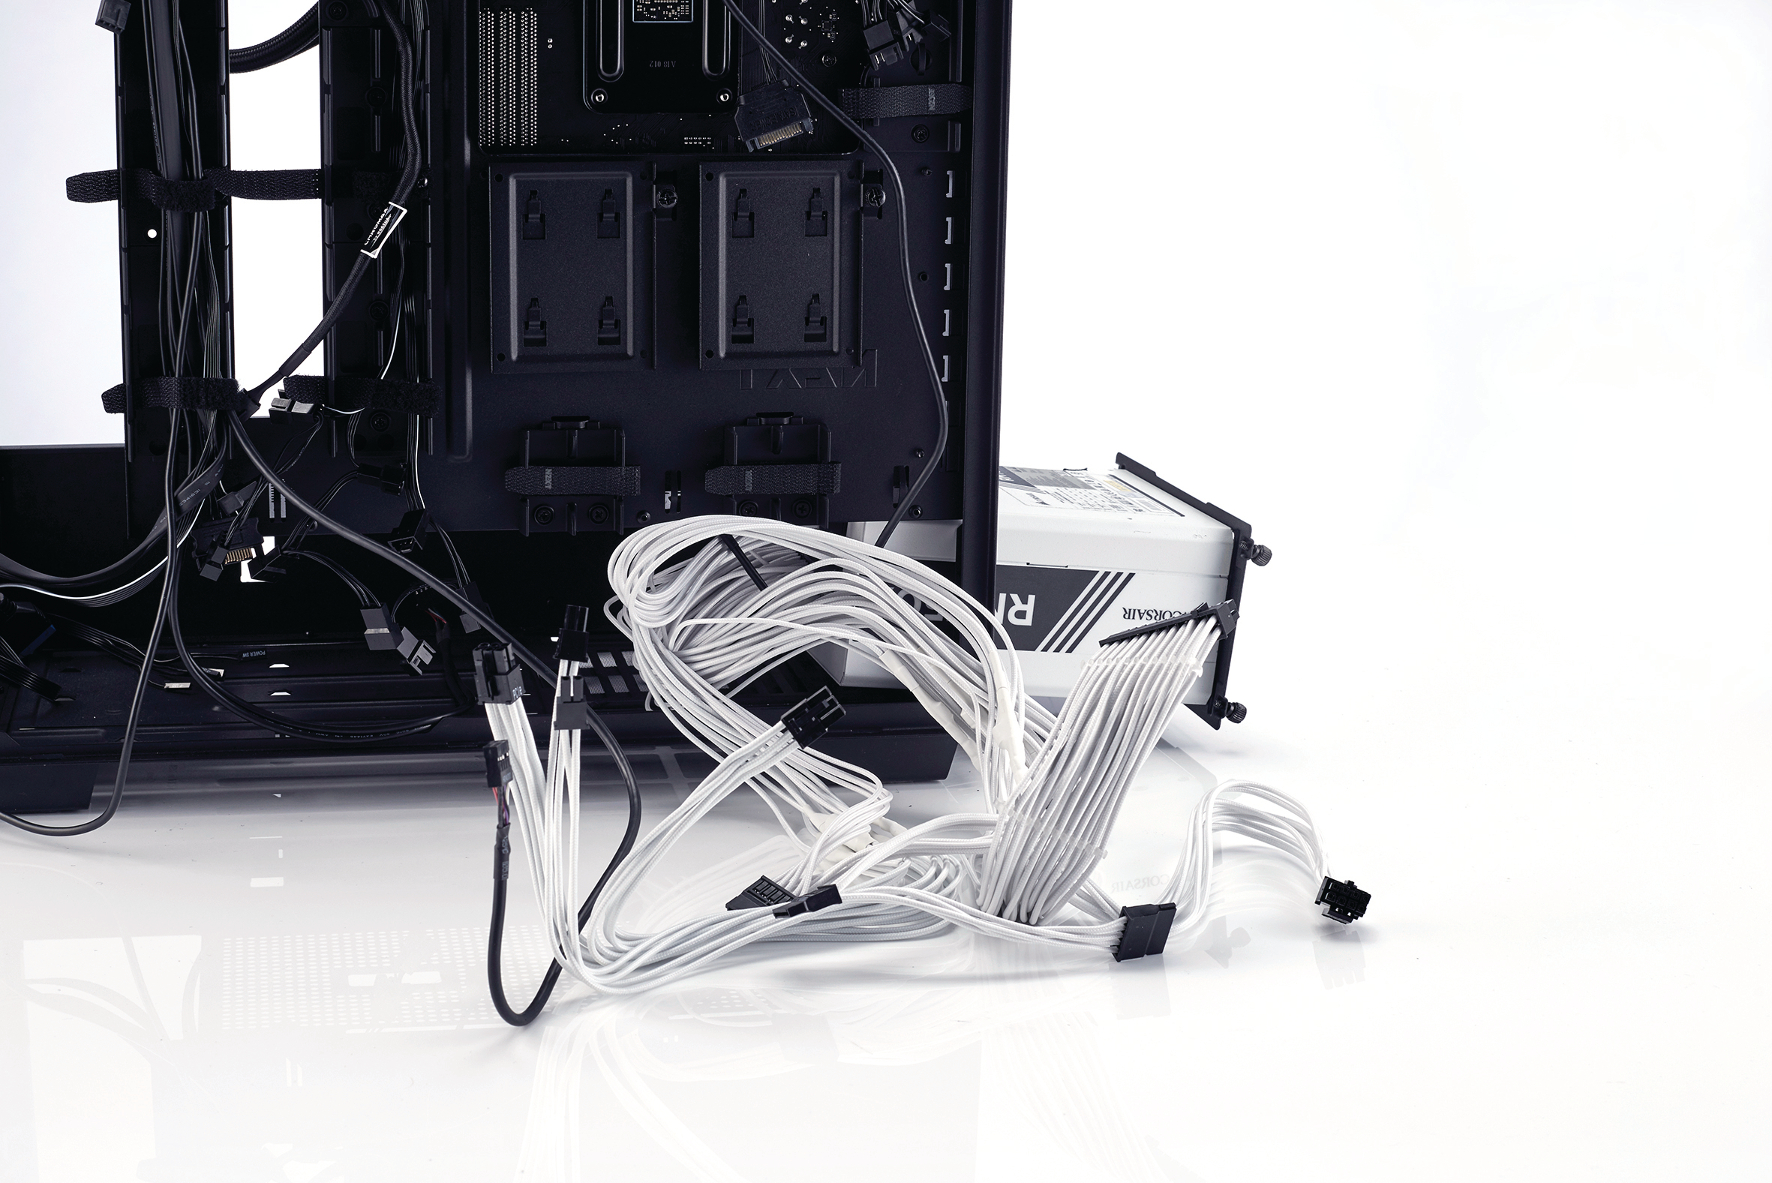
Modular power supplies are great, up to the point where they’re installed in the case. It’s a small tip, but the best thing to do is pre-attach all the cables to the PSU outside of the case first, then thread them through the PSU slot, before securing the power supply in place. The H700i comes with a PSU bracket that you pre-mount to the PSU, then slide it into place, and secure it down first.
5. LED fails, sorta...
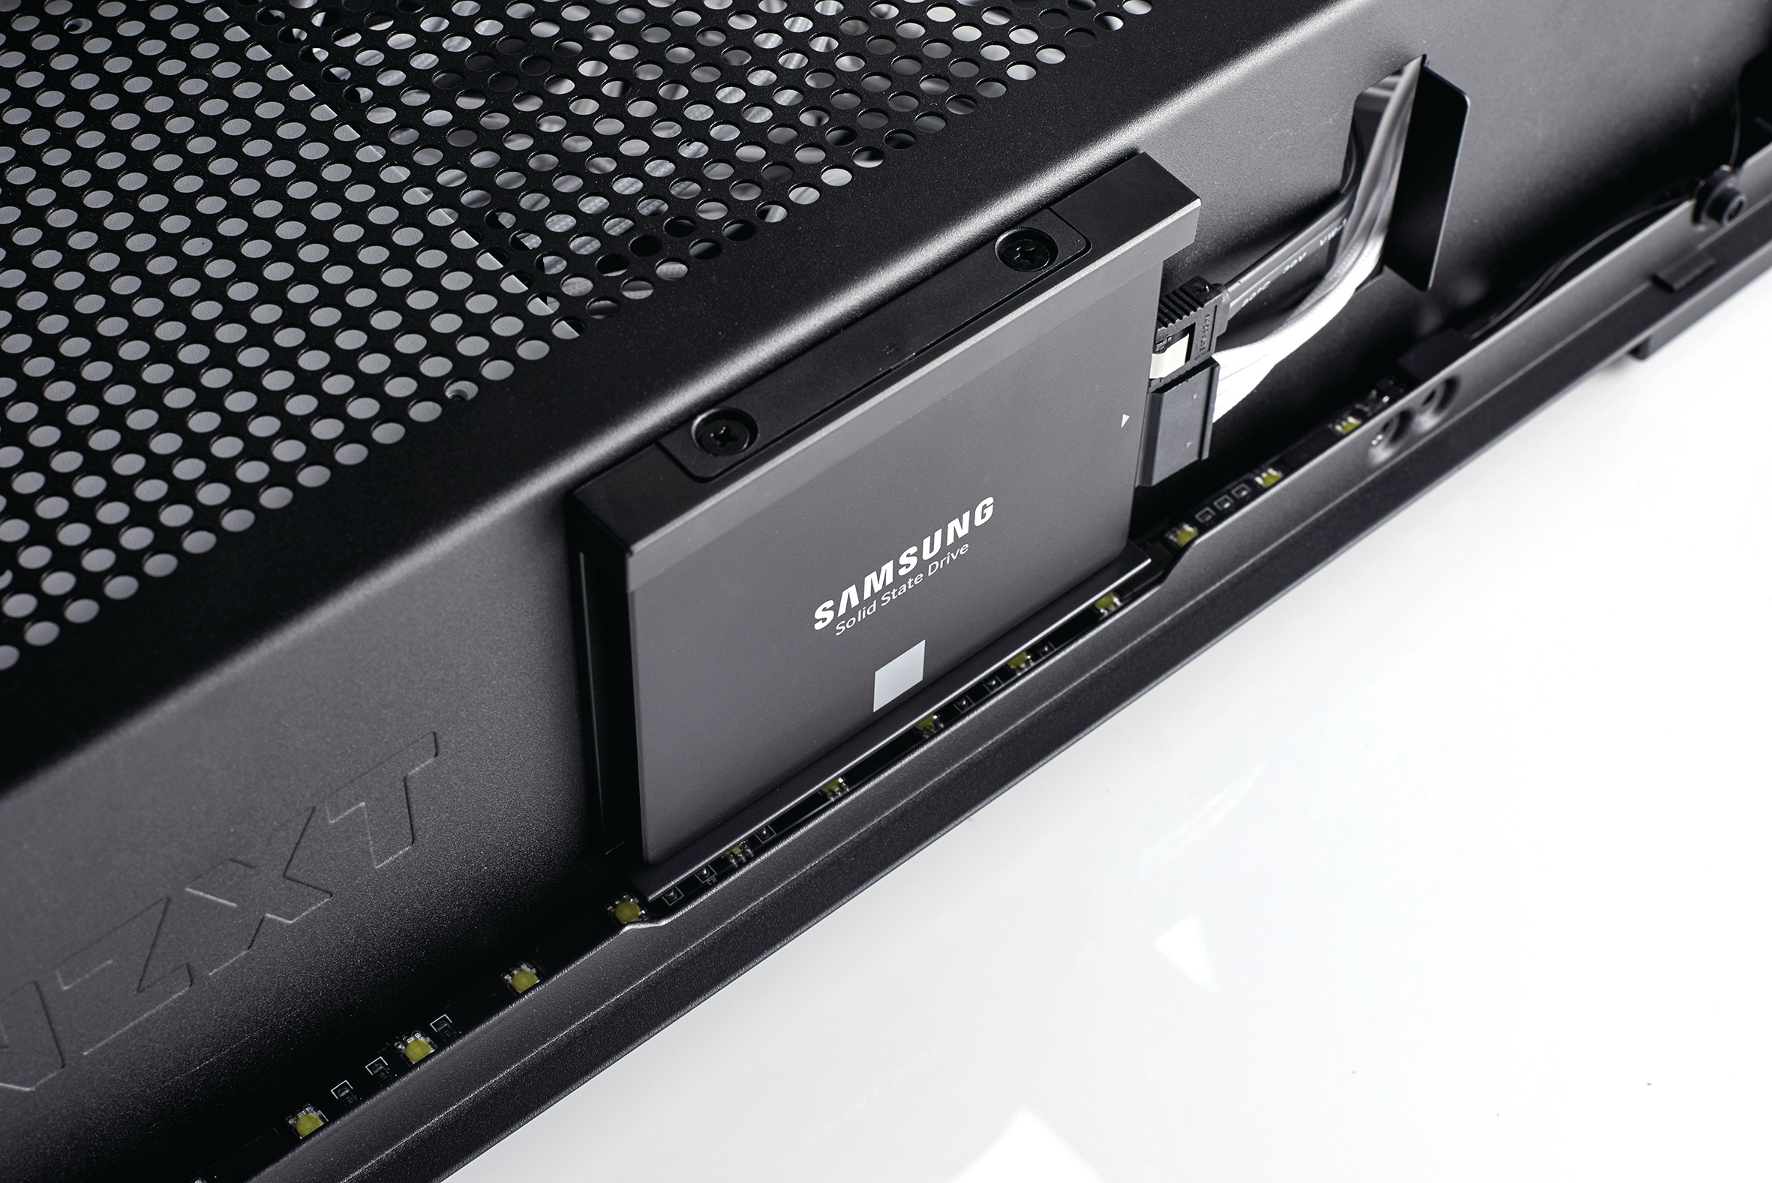
Trying to figure out how exactly to light this case was a challenge. As always, the best kind of lighting is that which is hidden. Keep the emitters out of sight, and just throw the light where you want it to go. We tried throwing it in the bottom first, but that conflicted with the cable hide bar’s mounting points, and was also blocked by the SSD. We tried throwing it up top, but it was in view. So, the only other option was up at the front of the case.
It’s visible with the side panel off, but otherwise it’s kept out of sight fairly well. If we’d have gone with a 240mm AIO in the roof, we might have been able to hide another strip up there, which would have been ideal, if we’re honest. However, with the 280mm, it was just too tight up there.
6. Intel Optane powah!
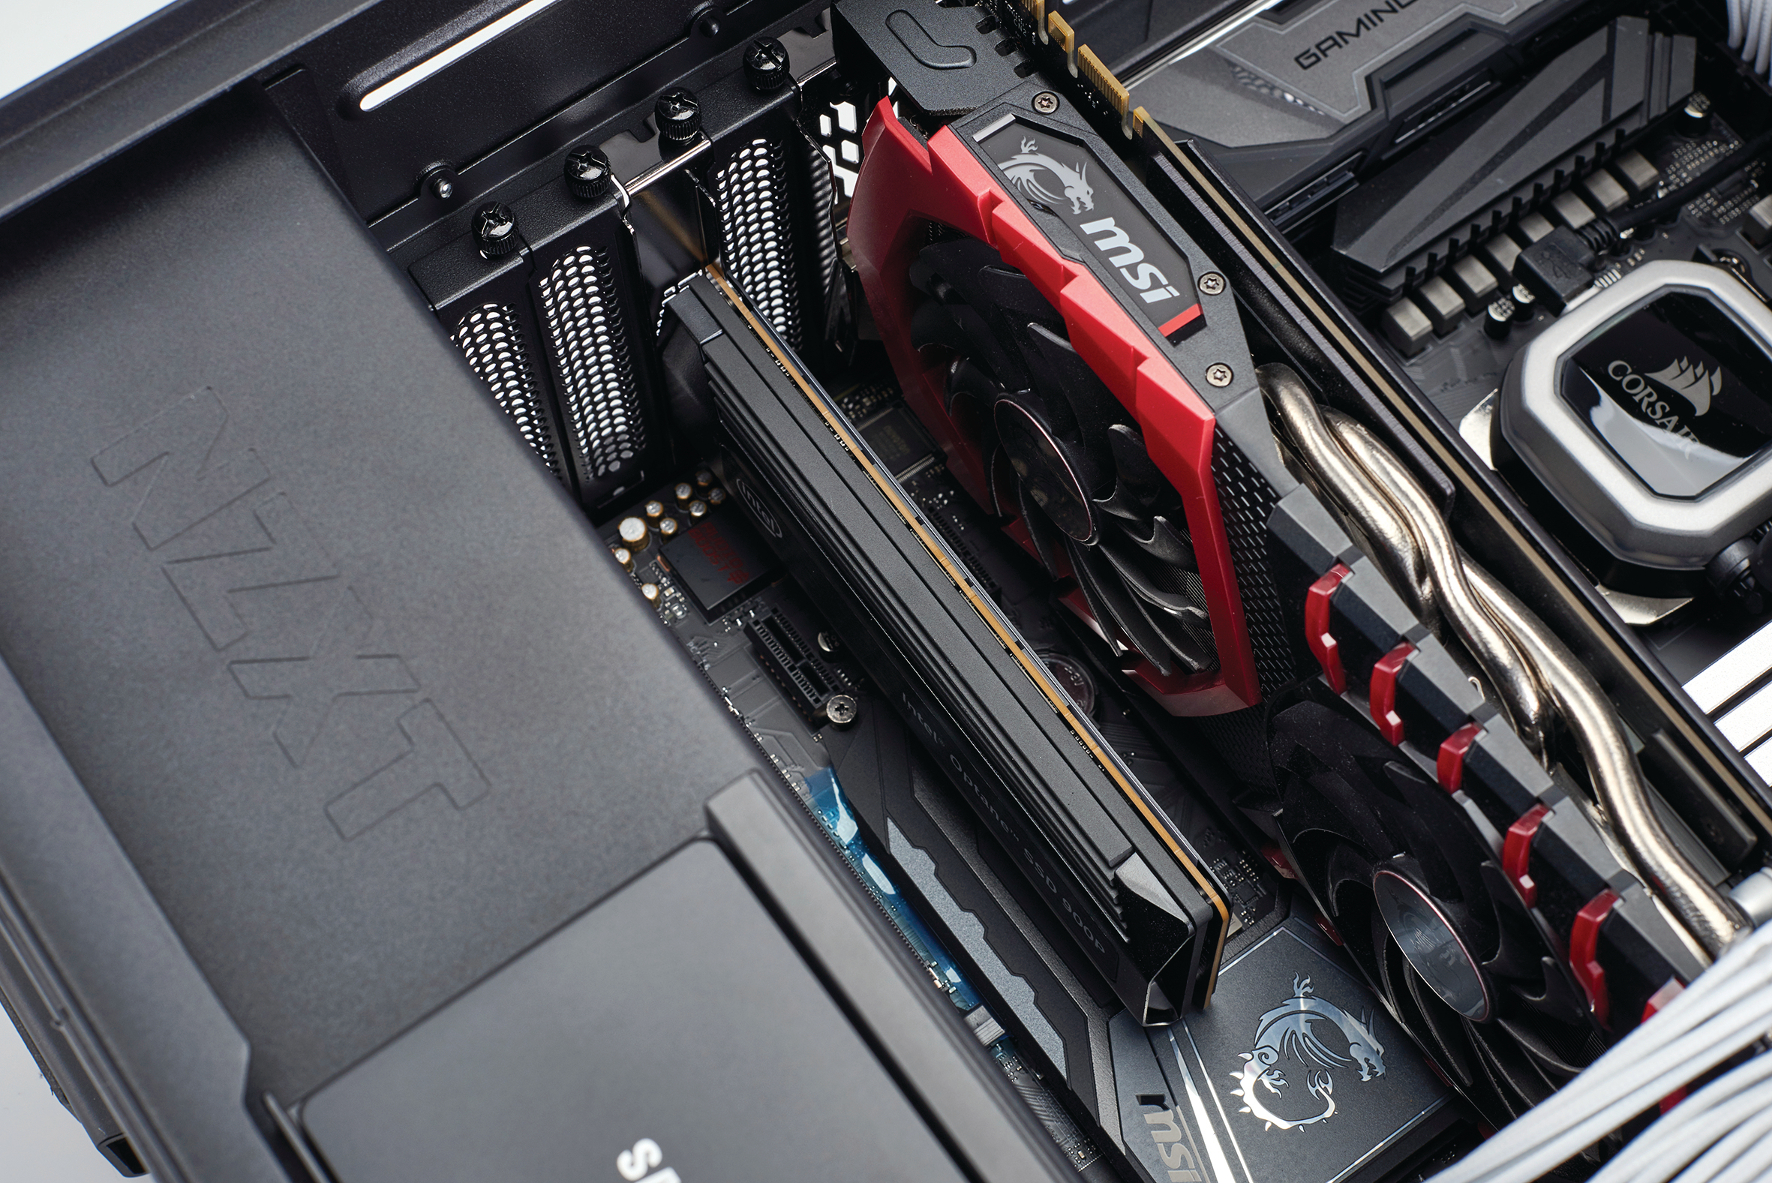
Ahh, the beauty of a joint AMD-Intel partnership. Going with the $580 Optane PCIe SSD was a last-minute decision. In short, it was a toss-up between this and a Samsung 960 Pro, but in the end, we simply couldn’t resist the Optane’s random read and writes. There’s also something strangely satisfying about having a PCIe add-in card SSD in a rig, especially when you’re running a single-card build like this.
Ryzen shine
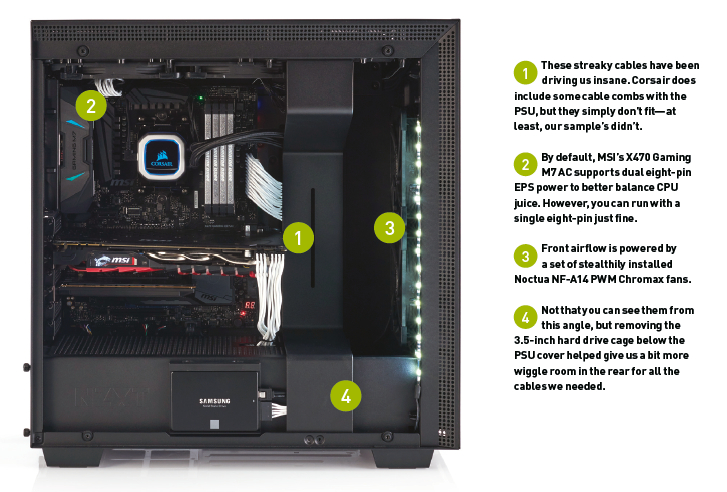
A smattering of lighting, a few braided cables, sexy silver heat pipes, and some sleek tempered glass was all it took to raise this build to the heady heights of a premium PC. The hardware within is powerful, and more than capable of producing the results you need, both in game and out.
But was it a breeze to build? There’s always some pitfall, right? Some unexpected, frustrating anomaly to deal with on these rigs. Surely the H700i isn’t exempt from Murphy’s law? Actually, there weren't many problems this time around.
Admittedly, it did take us longer than usual to put this beauty together, and that came down to two hiccups. First and foremost: the panels. Both the front and top fascias have the traditional plastic locking pins that secure chassis panels in place, which is fine. However, the ones in the H700i are particularly tricky to pop out. Combine their reluctance to budge with their potential fragility, and you suddenly start panicking about the possibility of snapping them off completely.
The second problem came from that radiator bracket we mentioned earlier. The first time we installed the AIO, we forgot to attach and thread through the fan cables on the Noctua AF-14s we were using. The second time, we noticed the thumb screws wouldn’t secure it, because the fans themselves came into contact with the RGB LED light strip NZXT had embedded in the top. The answer in the end was to remove the LED strip entirely (simply two Phillips head screws), then unplug it from NZXT’s integrated CAM fan controller.
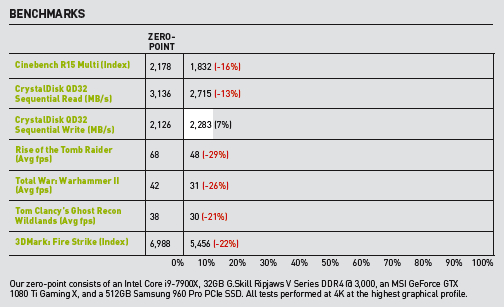
As for performance? Well, we’ll leave the majority of the metrics to speak for themselves, so far as computational performance goes (but more on that in our full Zen+ review on page 74). One thing we haven’t really spoken about is the graphics. We decided to go with an MSI GTX 1080 8G for this rig. You can pick one of these up right now for around $500.
Is there anything we’d change? That depends on the circumstances. Other than adding better cable combs, the only thing that really stands out is the storage configuration. If this were solely a gaming machine, a 500GB SSD up front and a 2TB hard drive in the back would have made much more sense, and save us a fair bit ditching the Intel drive, too. Otherwise, it’s a pretty slick setup for a high-end enthusiast.
Once it was all put together, here's how it ran against our zero-point system.
This article was originally published in Maximum PC's June issue. For more quality articles about all things PC hardware, you can subscribe to Maximum PC now.
Some online stores give us a small cut if you buy something through one of our links. Read our affiliate policy for more info.
After graduating from the University of Derby in 2014, Zak joined the PC Format and Maximum PC team as its resident staff writer. Specializing in PC building, and all forms of hardware and componentry, he soon worked his way up to editor-in-chief, leading the publication through the covid dark times. Since then, he’s dabbled in PR, working for Corsair for a while as its UK PR specialist, before returning to the fold as a tech journalist once again.
He now operates as a freelance tech editor, writing for all manner of publications, including PC Gamer, Maximum PC, Techradar, Gamesradar, PCGamesN, and Trusted Reviews as well. If there’s something happening in the tech industry it’s highly likely Zak has a strong opinion on it.

