Chapter 9 in Doom: The Dark Ages returns you to the more open level design once again, which gives you much more ground to cover. The Ancestral Forge secrets are tricky because you'll need to find a purple key for a few of them, and the wolf statue puzzle from Siege Part 1 reappears.
Don't worry though, I'll guide you through all the Doom: The Dark Ages secrets and collectibles in Ancestral Forge in chronological order, so you won't need to replay the mission.
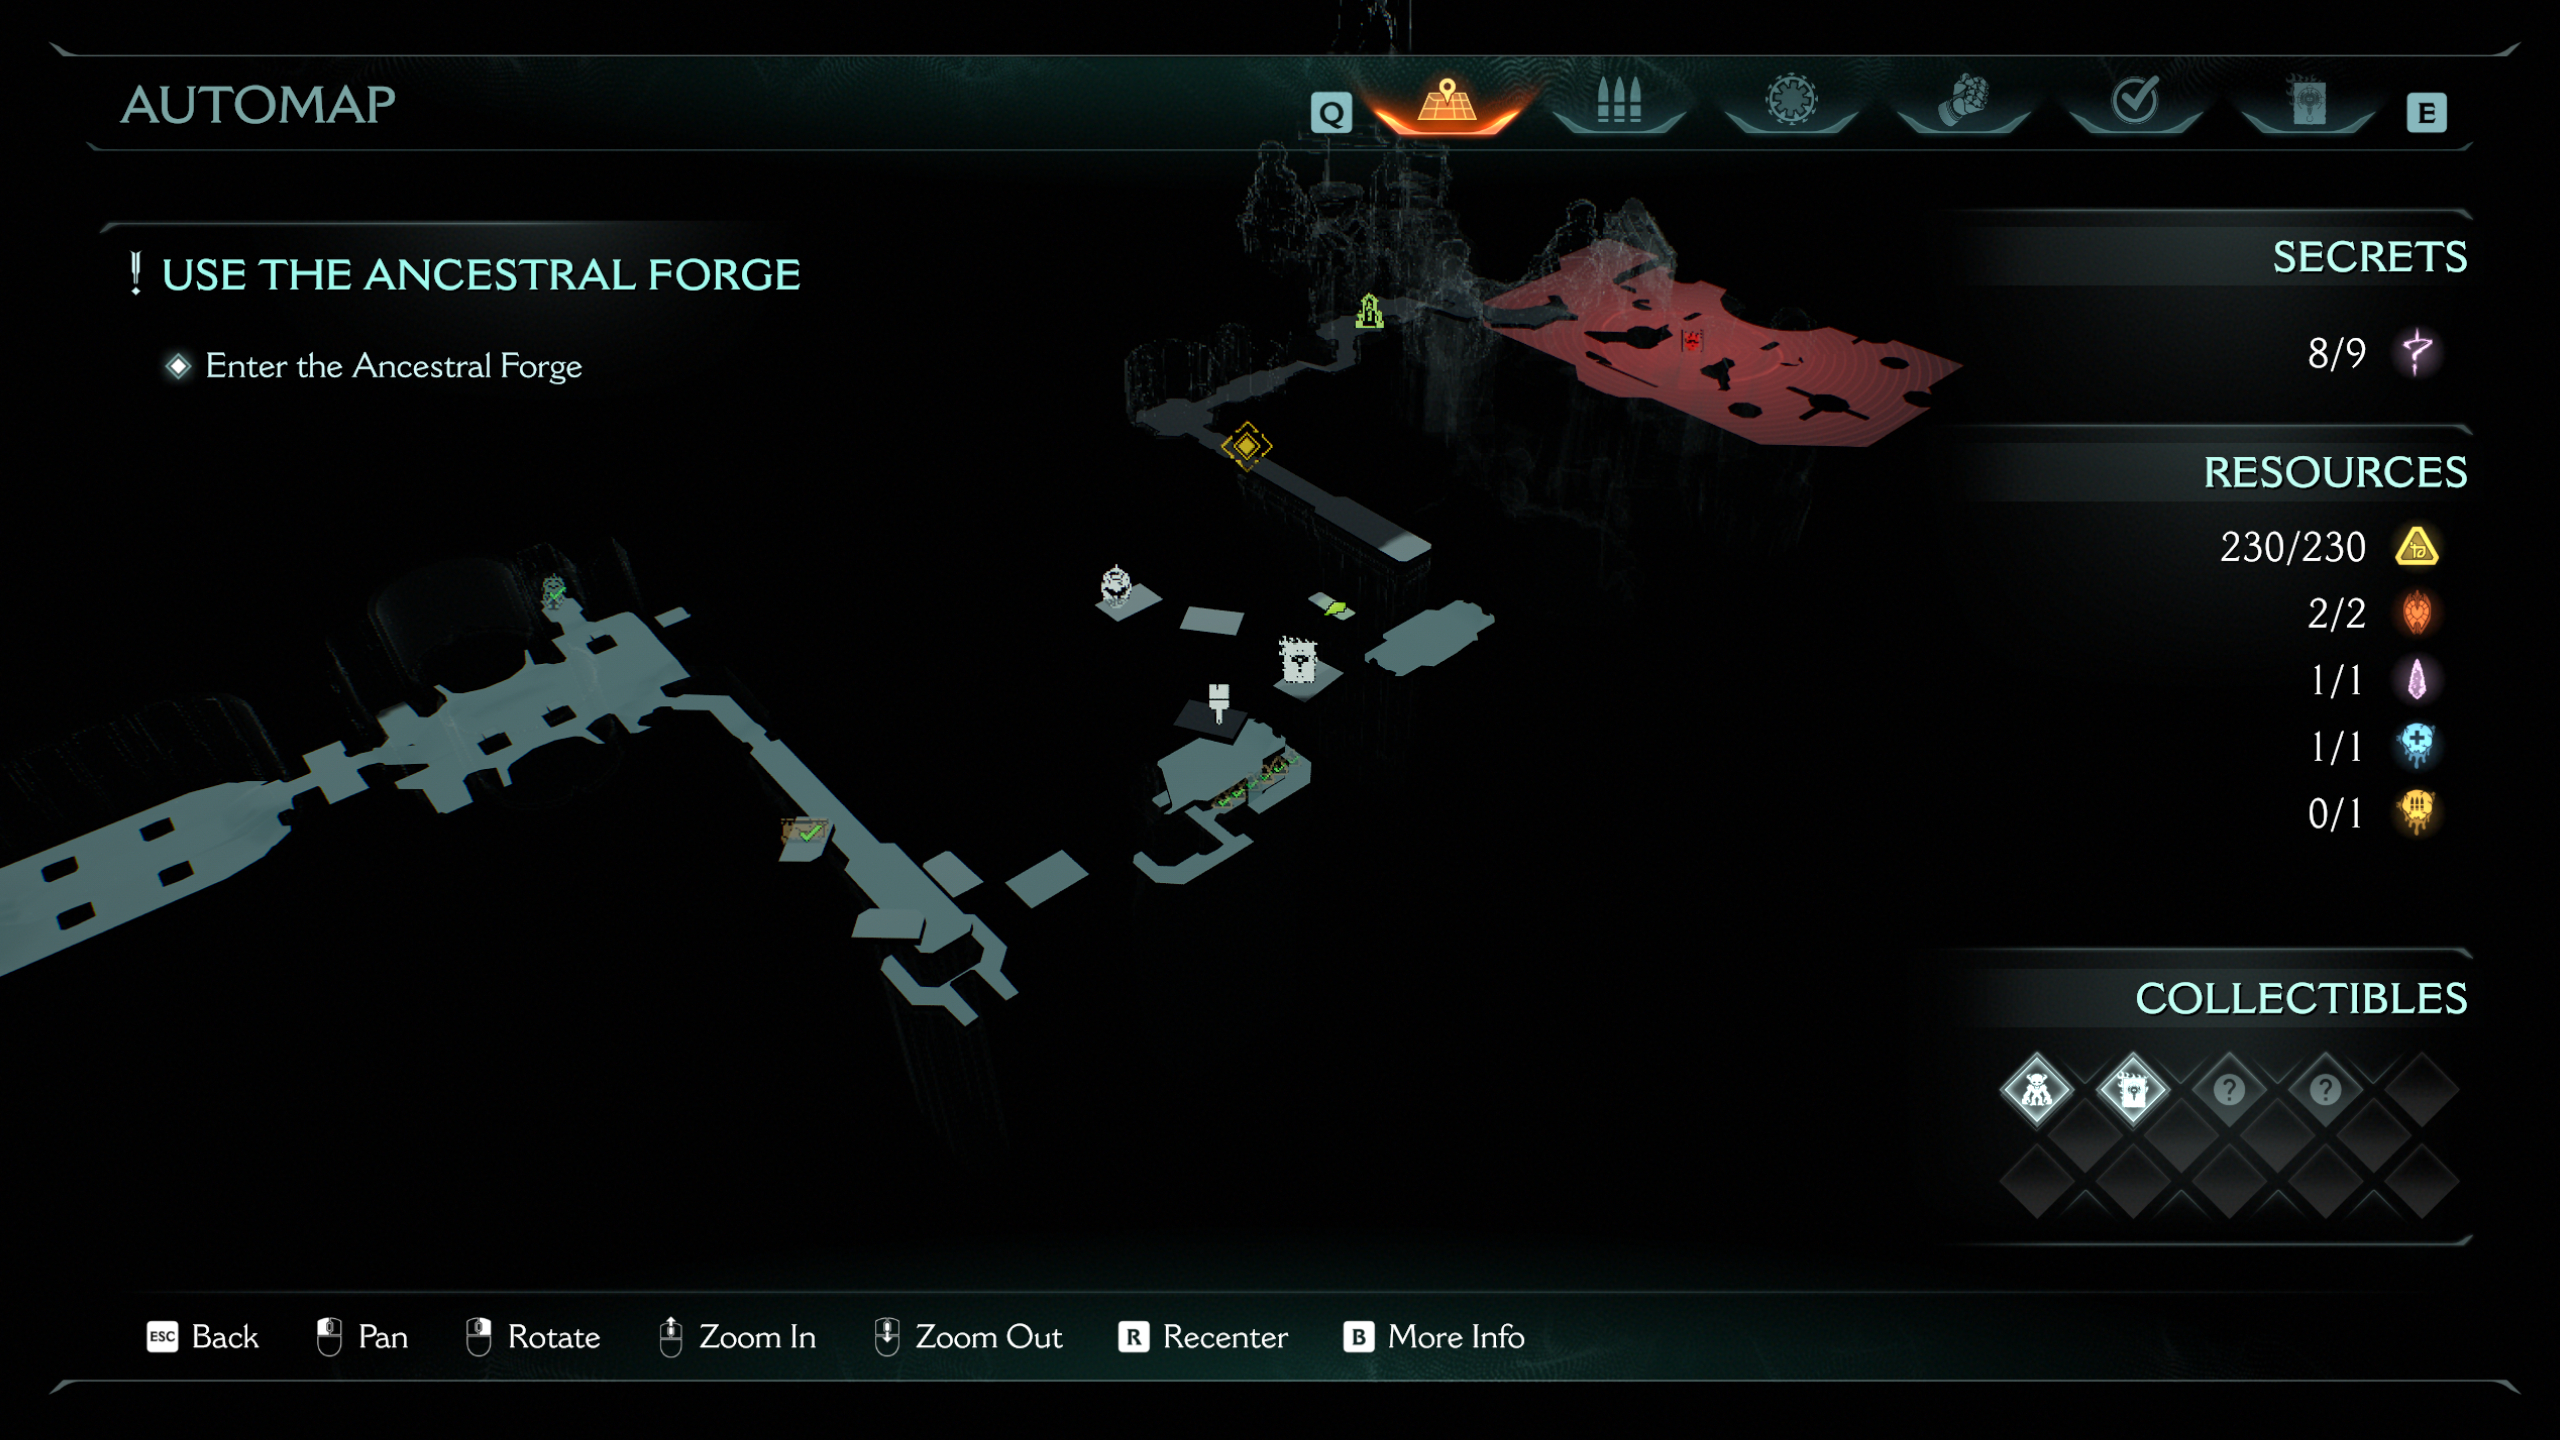
Doom: The Dark Ages Ancestral Forge secrets and collectibles
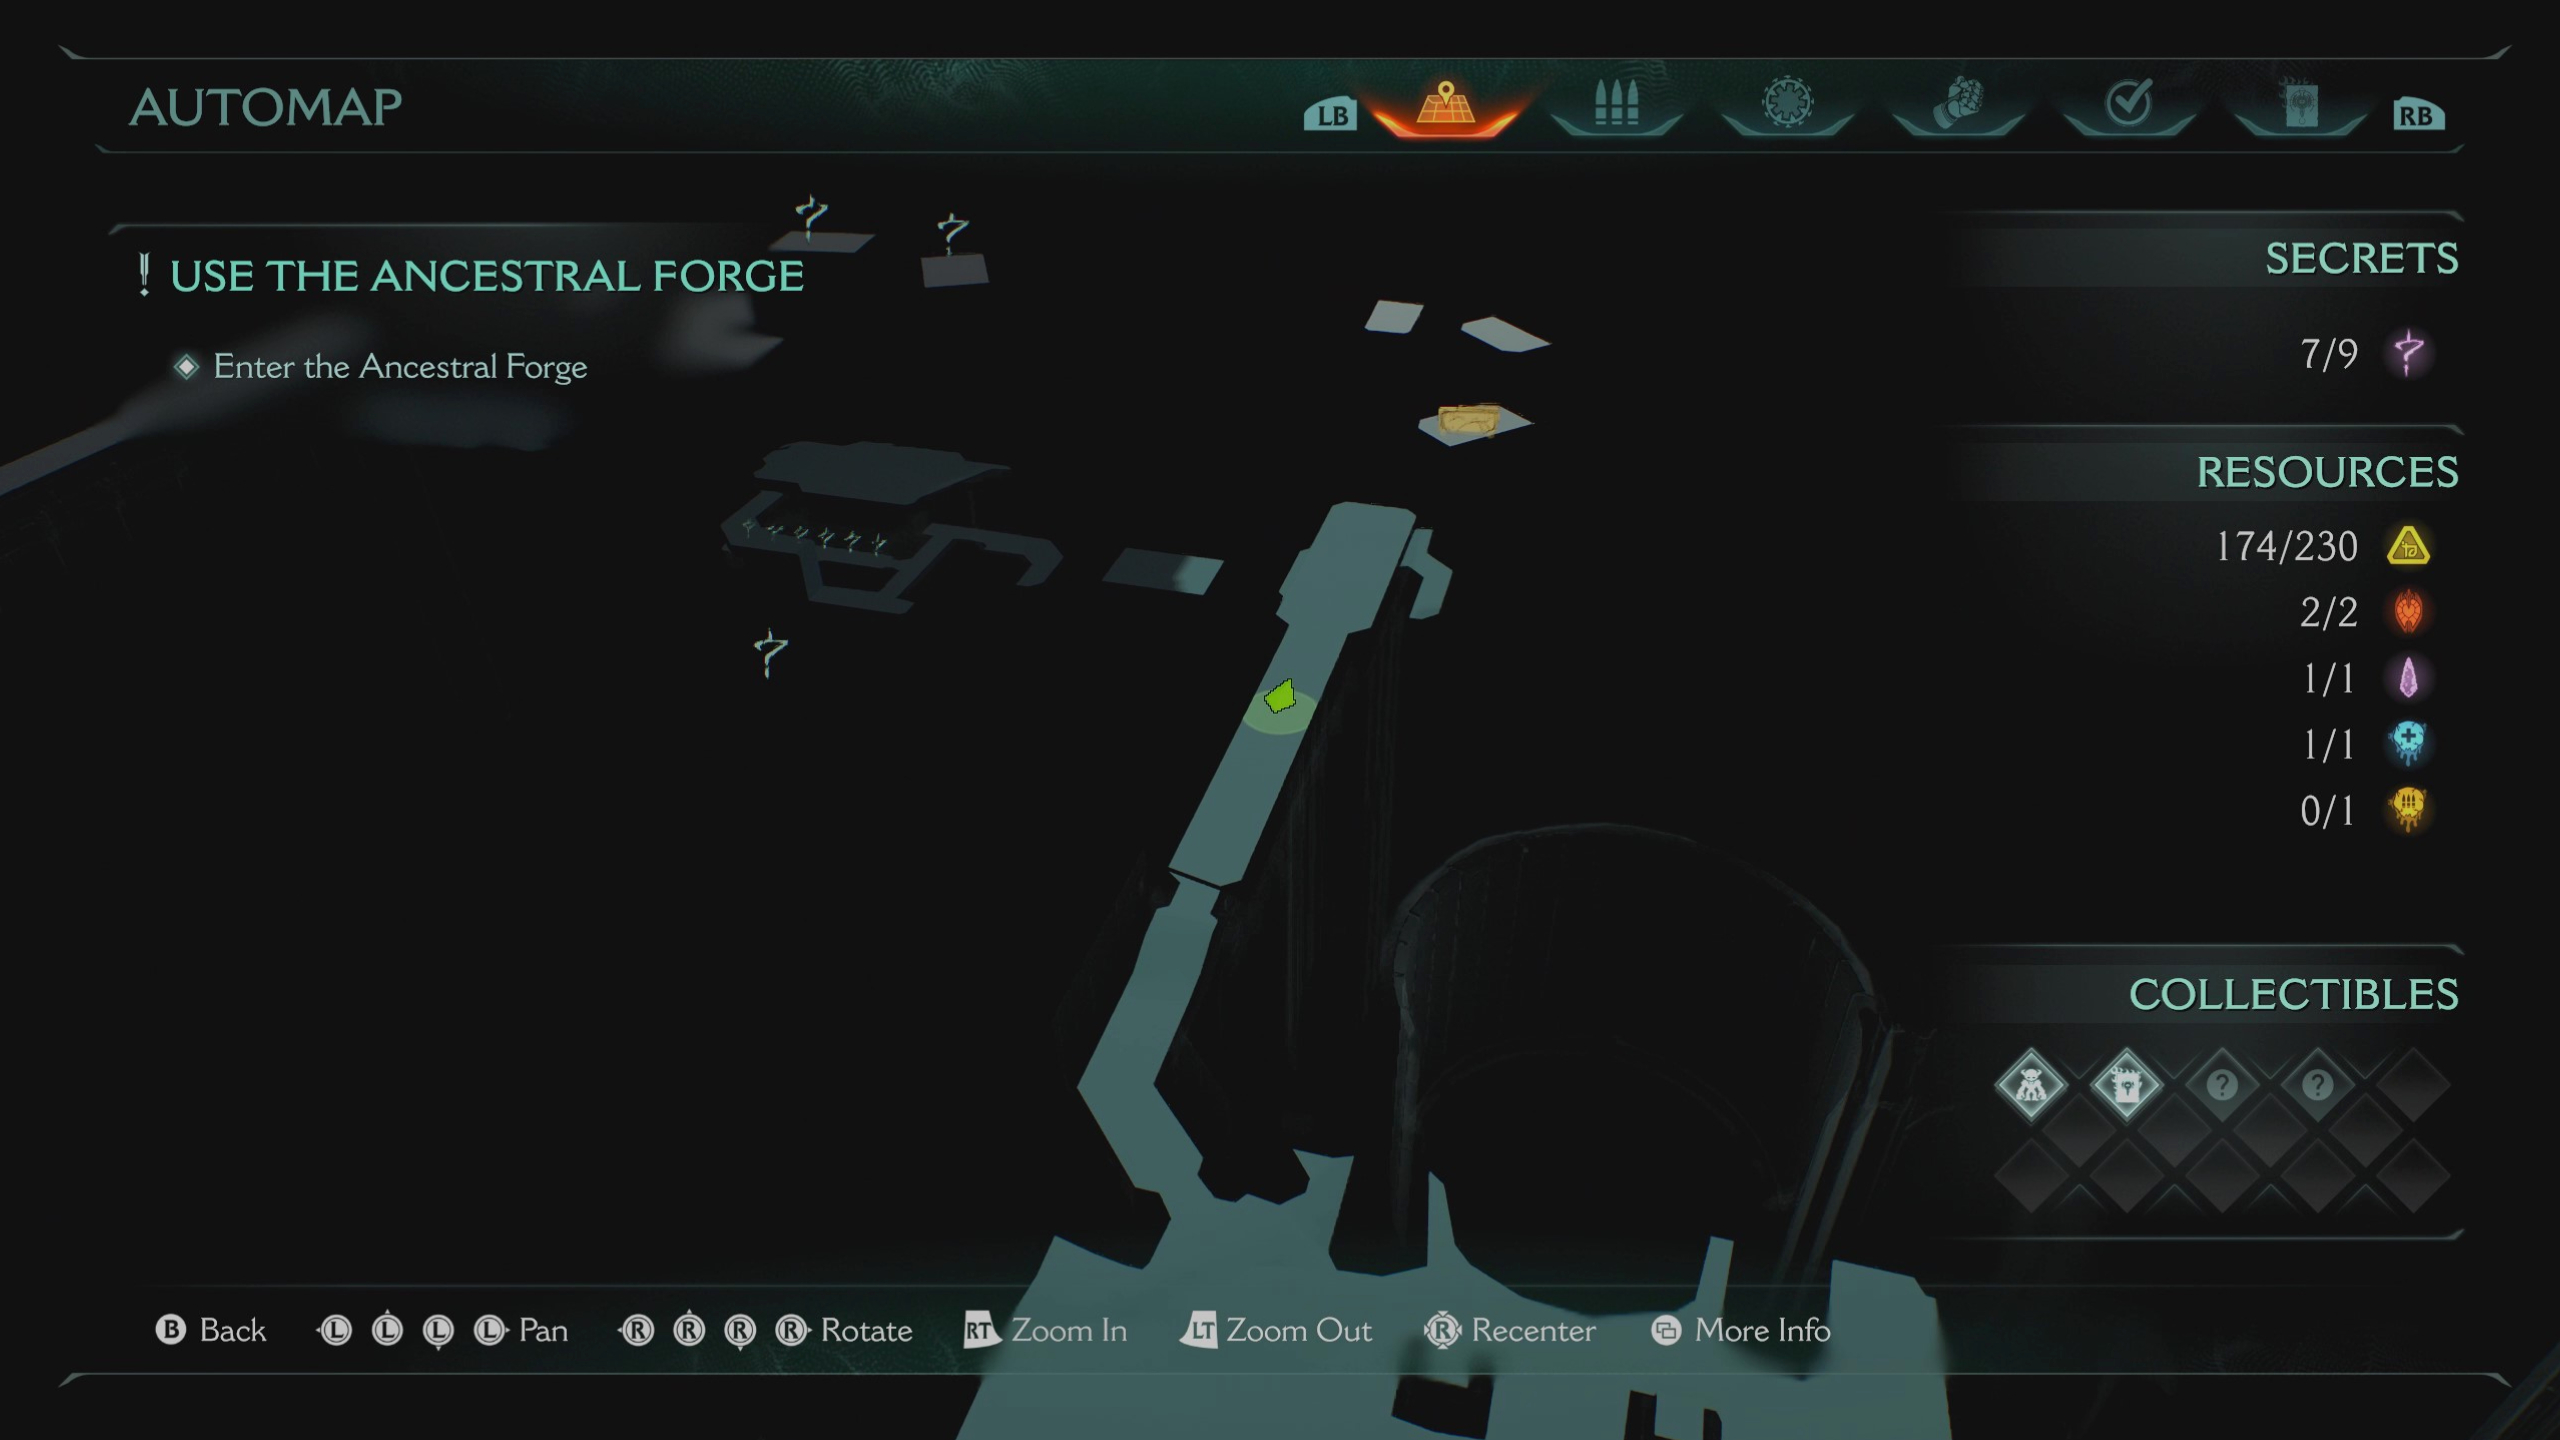
There are nine secrets and two collectibles in the Ancestral Forge mission, though there's also a Reverent weapon skin for the Accelerator that you'll unlock through the Seven Secrets challenge along the way.
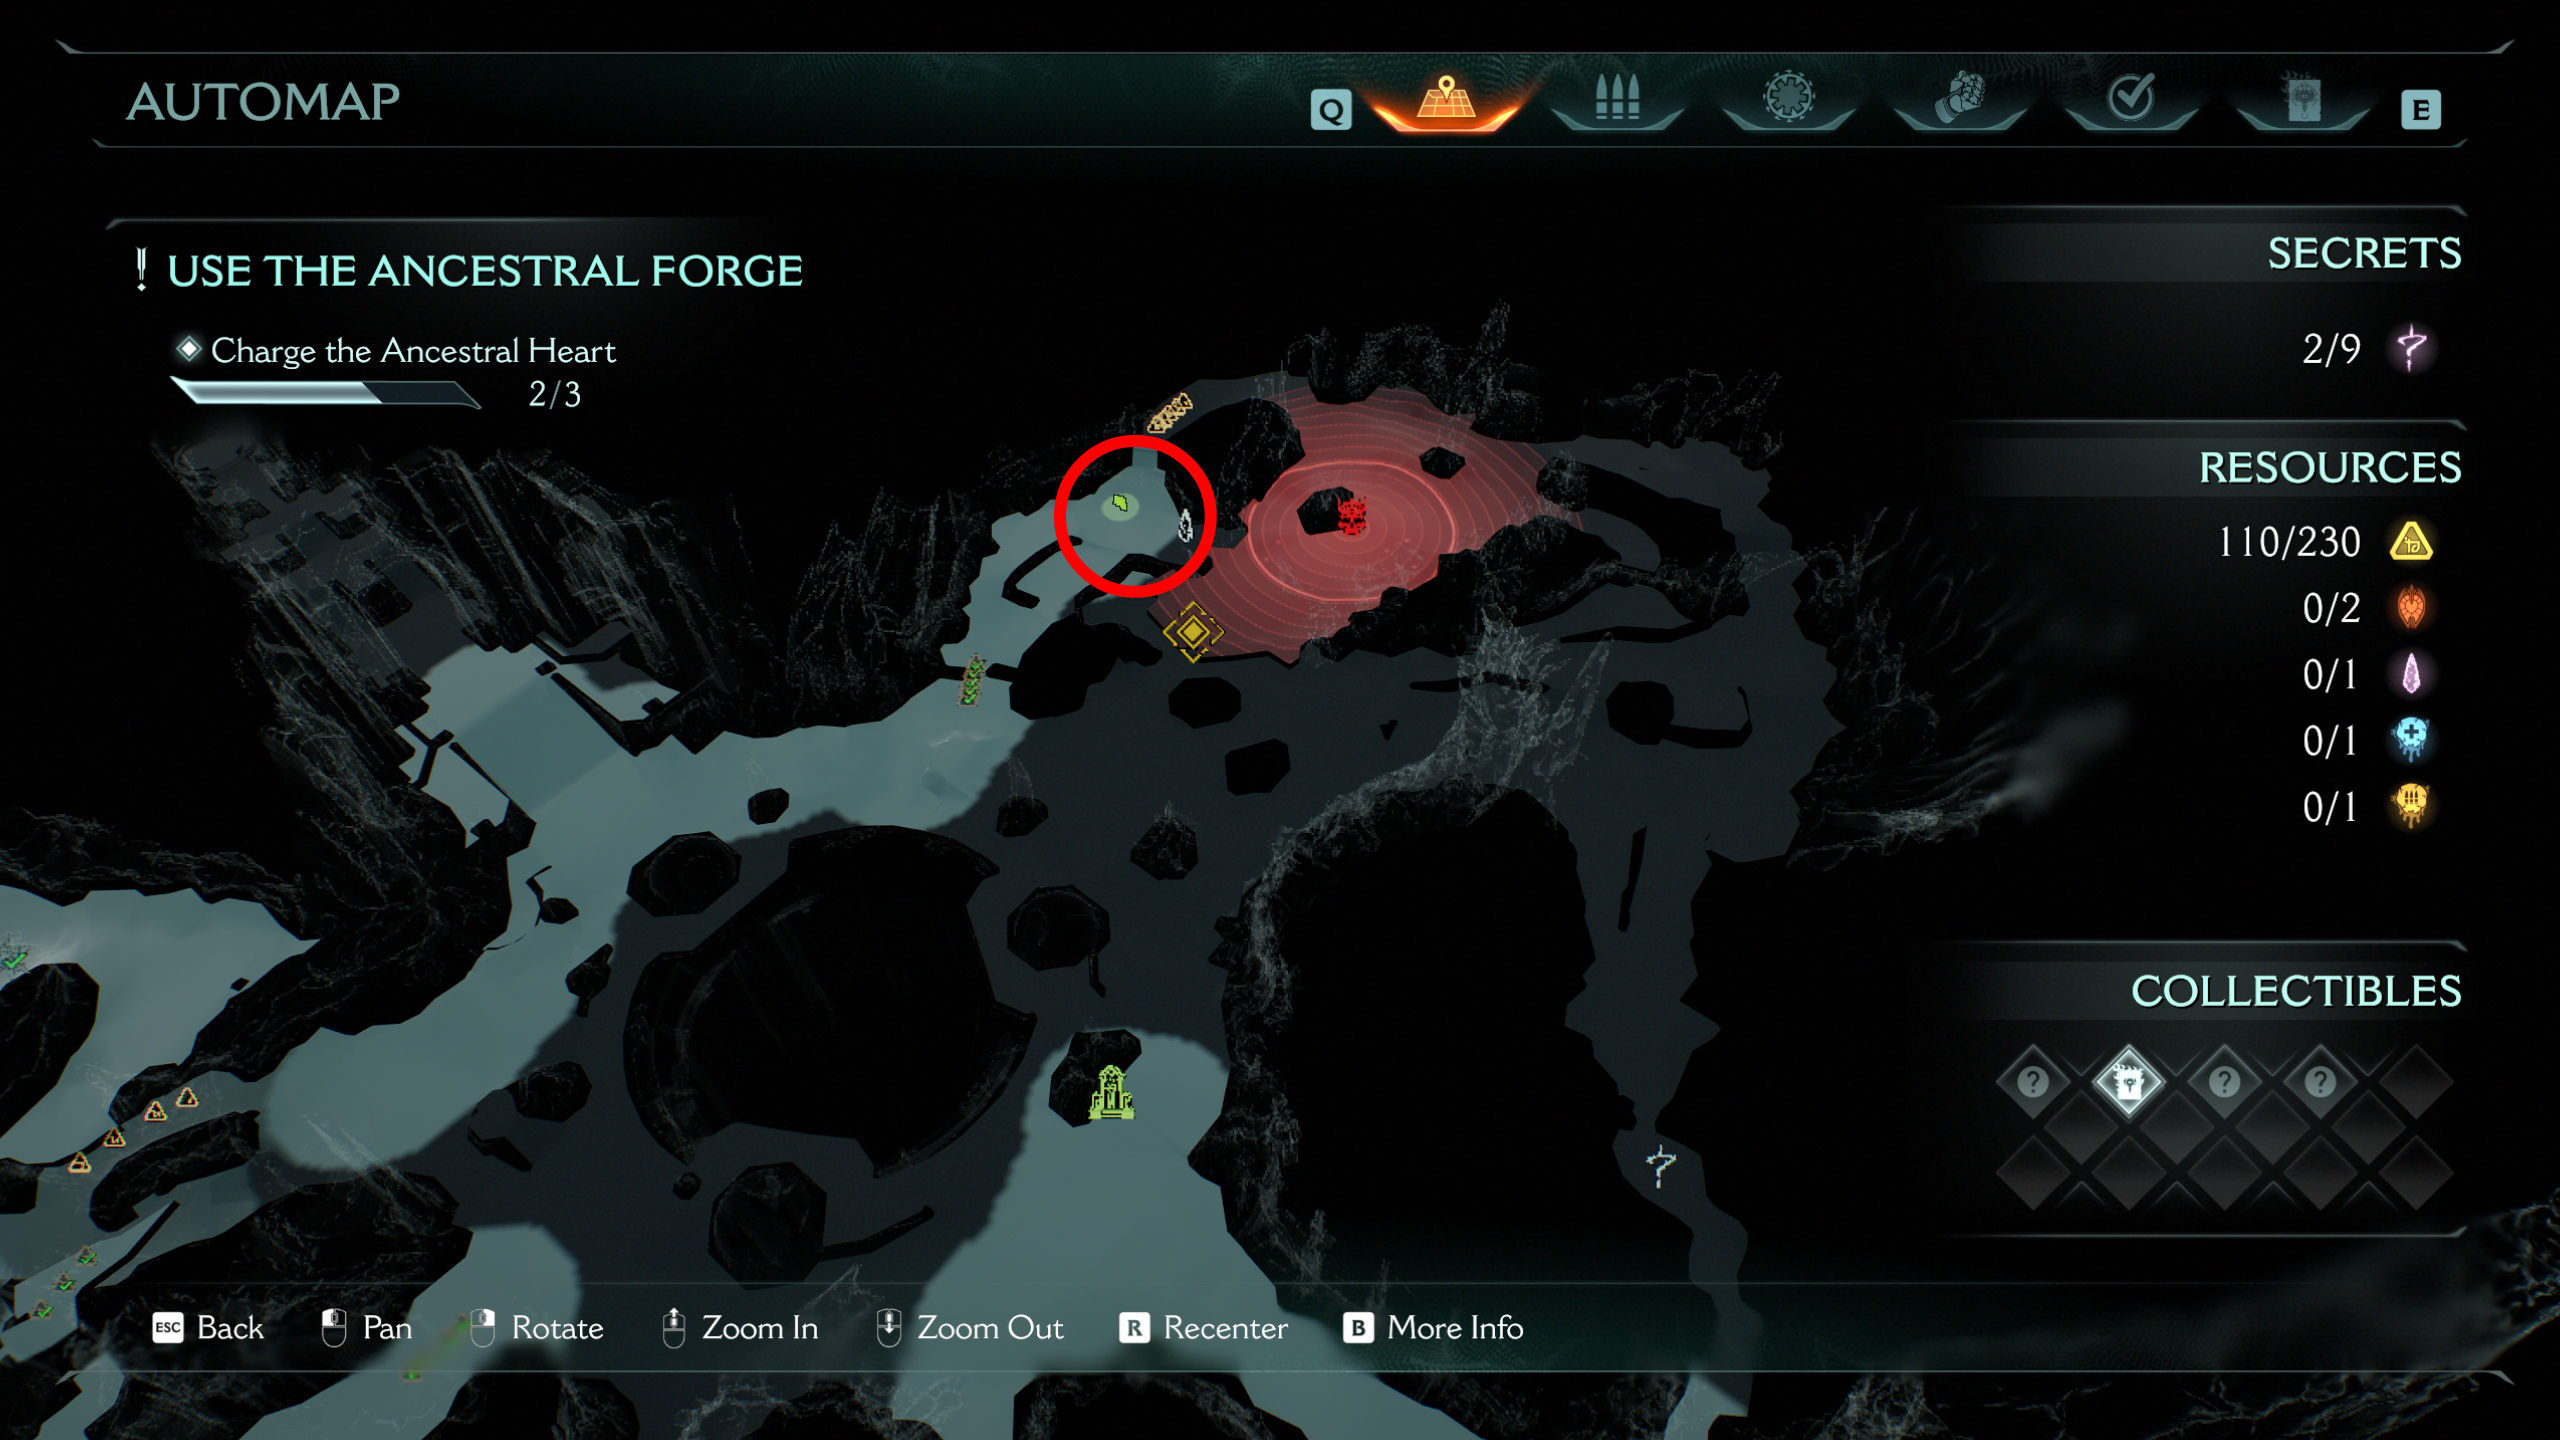
Article continues belowFirst things first, you should grab the purple secret key, as you'll need this for various secrets later on. It's a big map, but it's easy enough to find: Head to the ancestral heart objective in the top right corner and clear it out, then break the wooden barricade off to the side. You'll find the key and some gold hidden behind it.
From here, I'll be scouring the map clockwise, since one of the puzzles will bring you back to the top right corner anyhow.
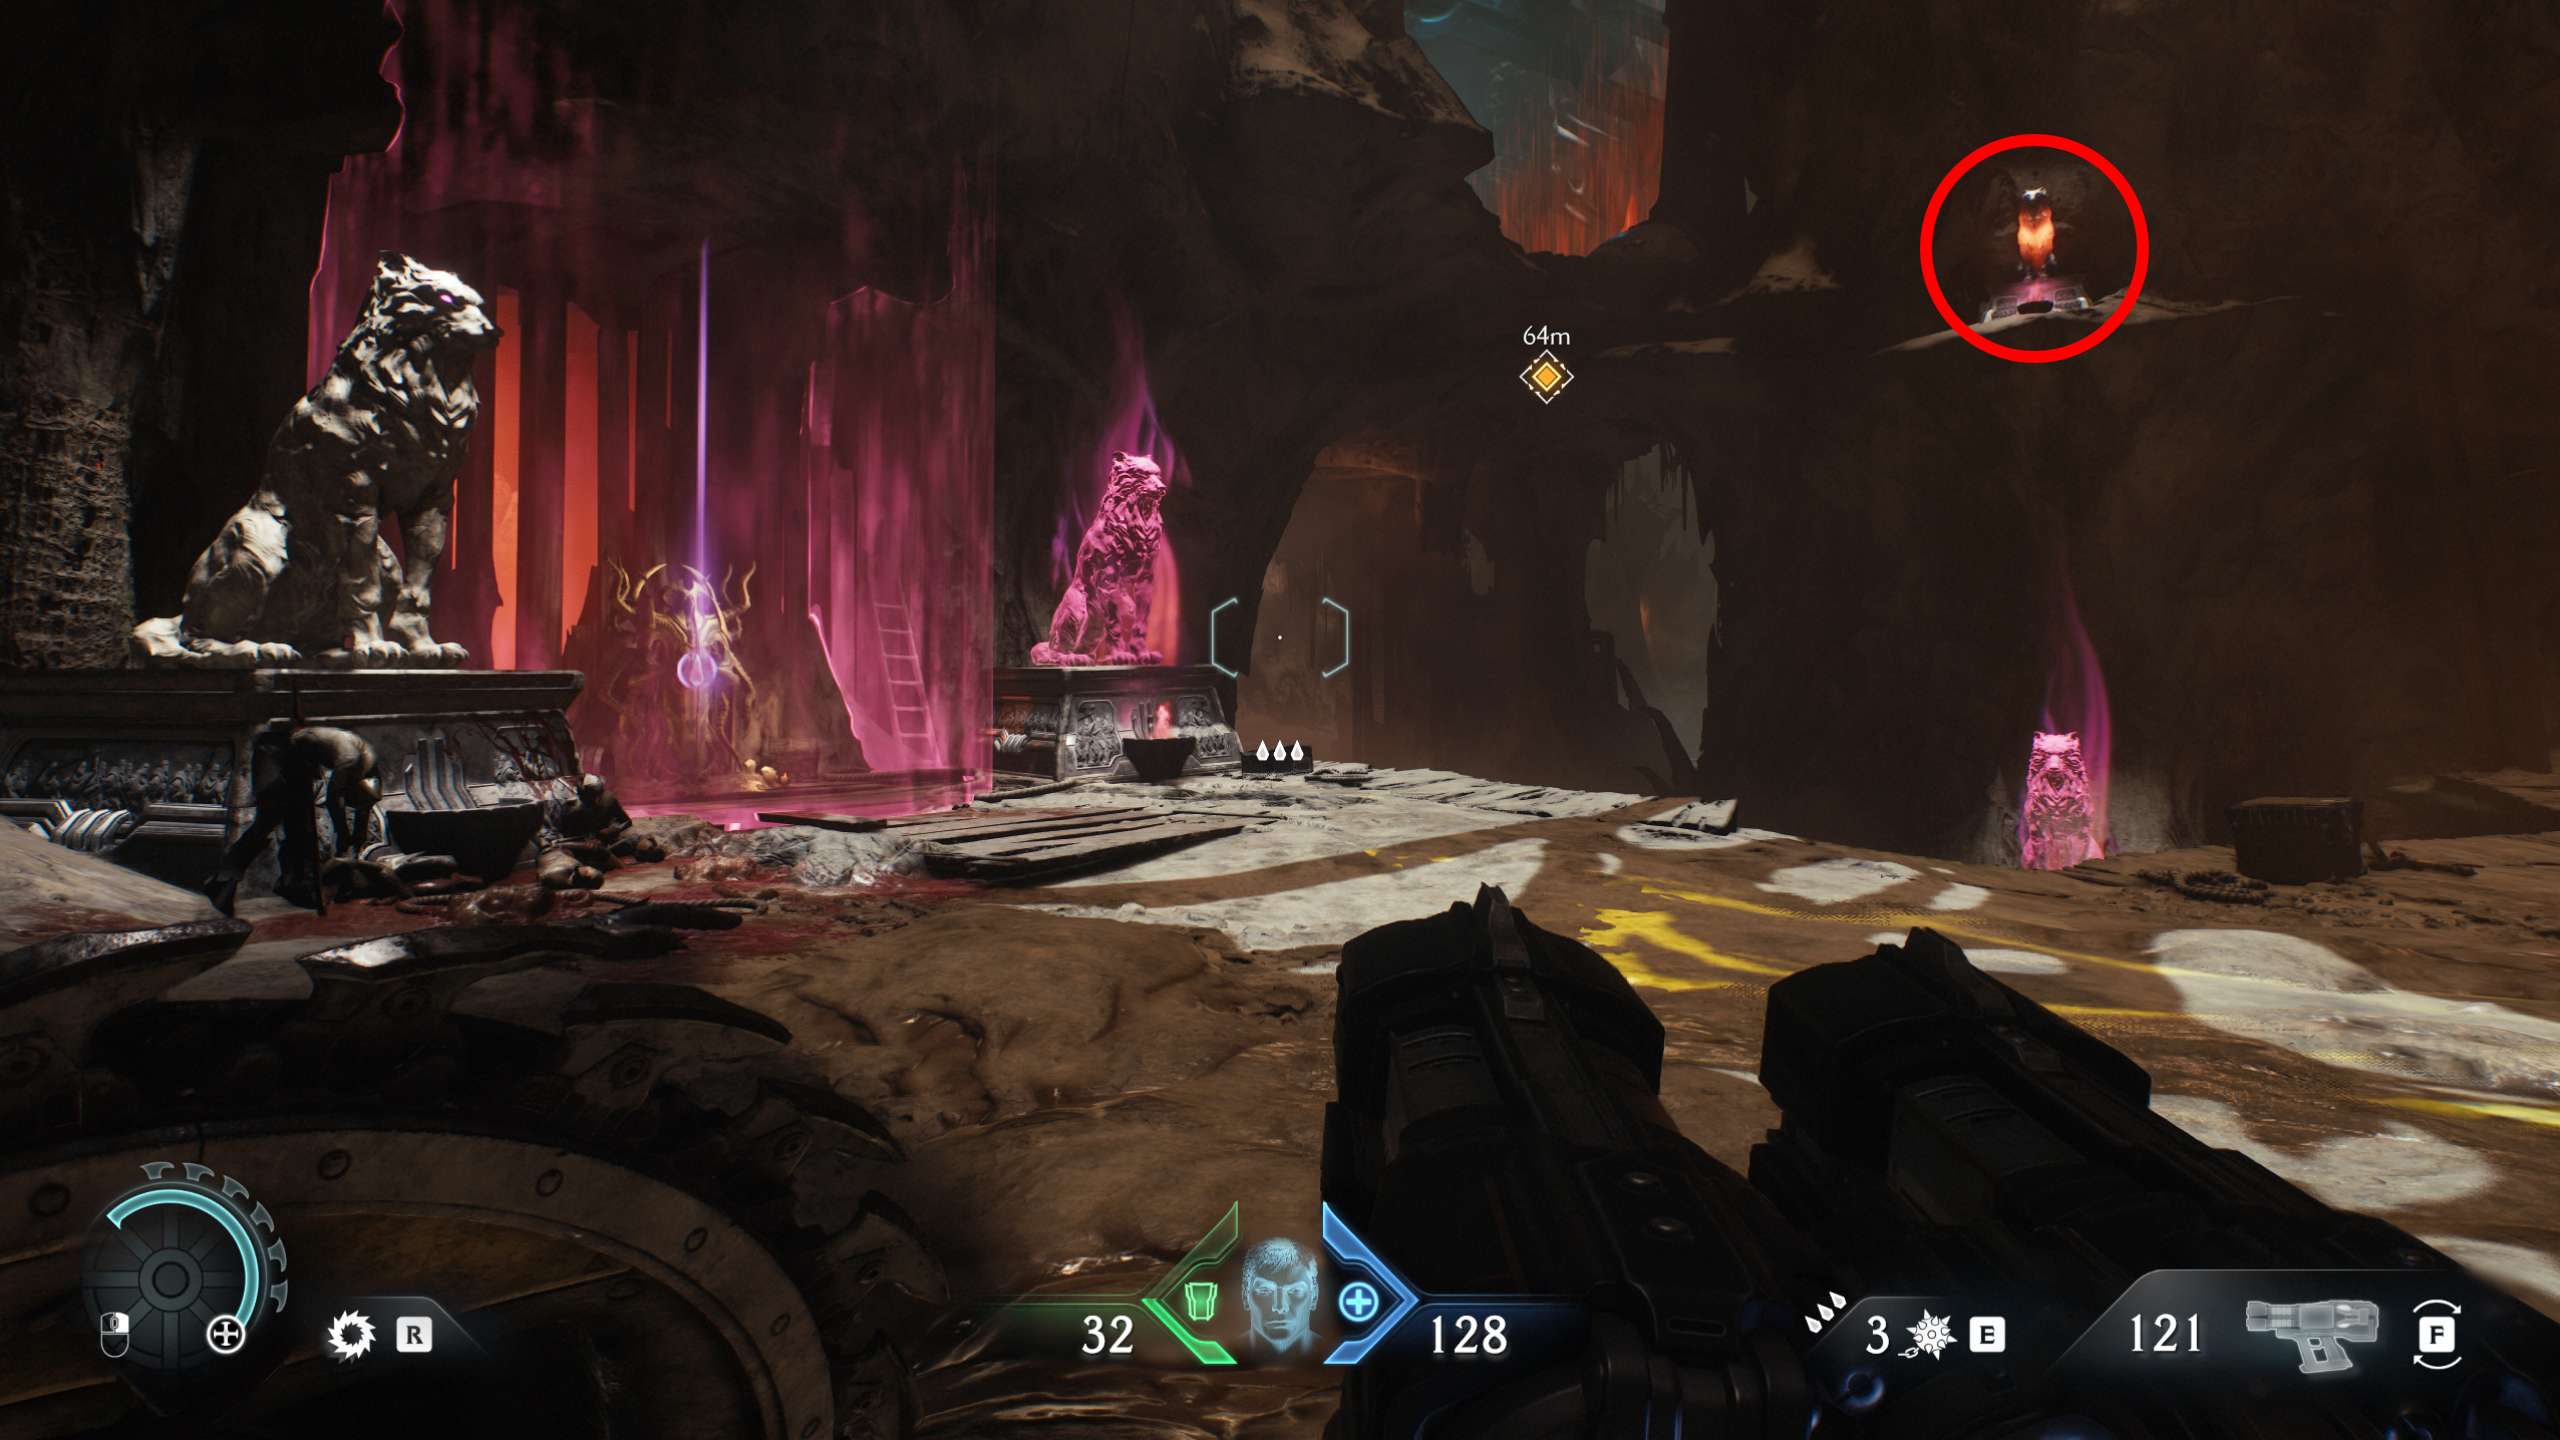
1 - First wolf statue
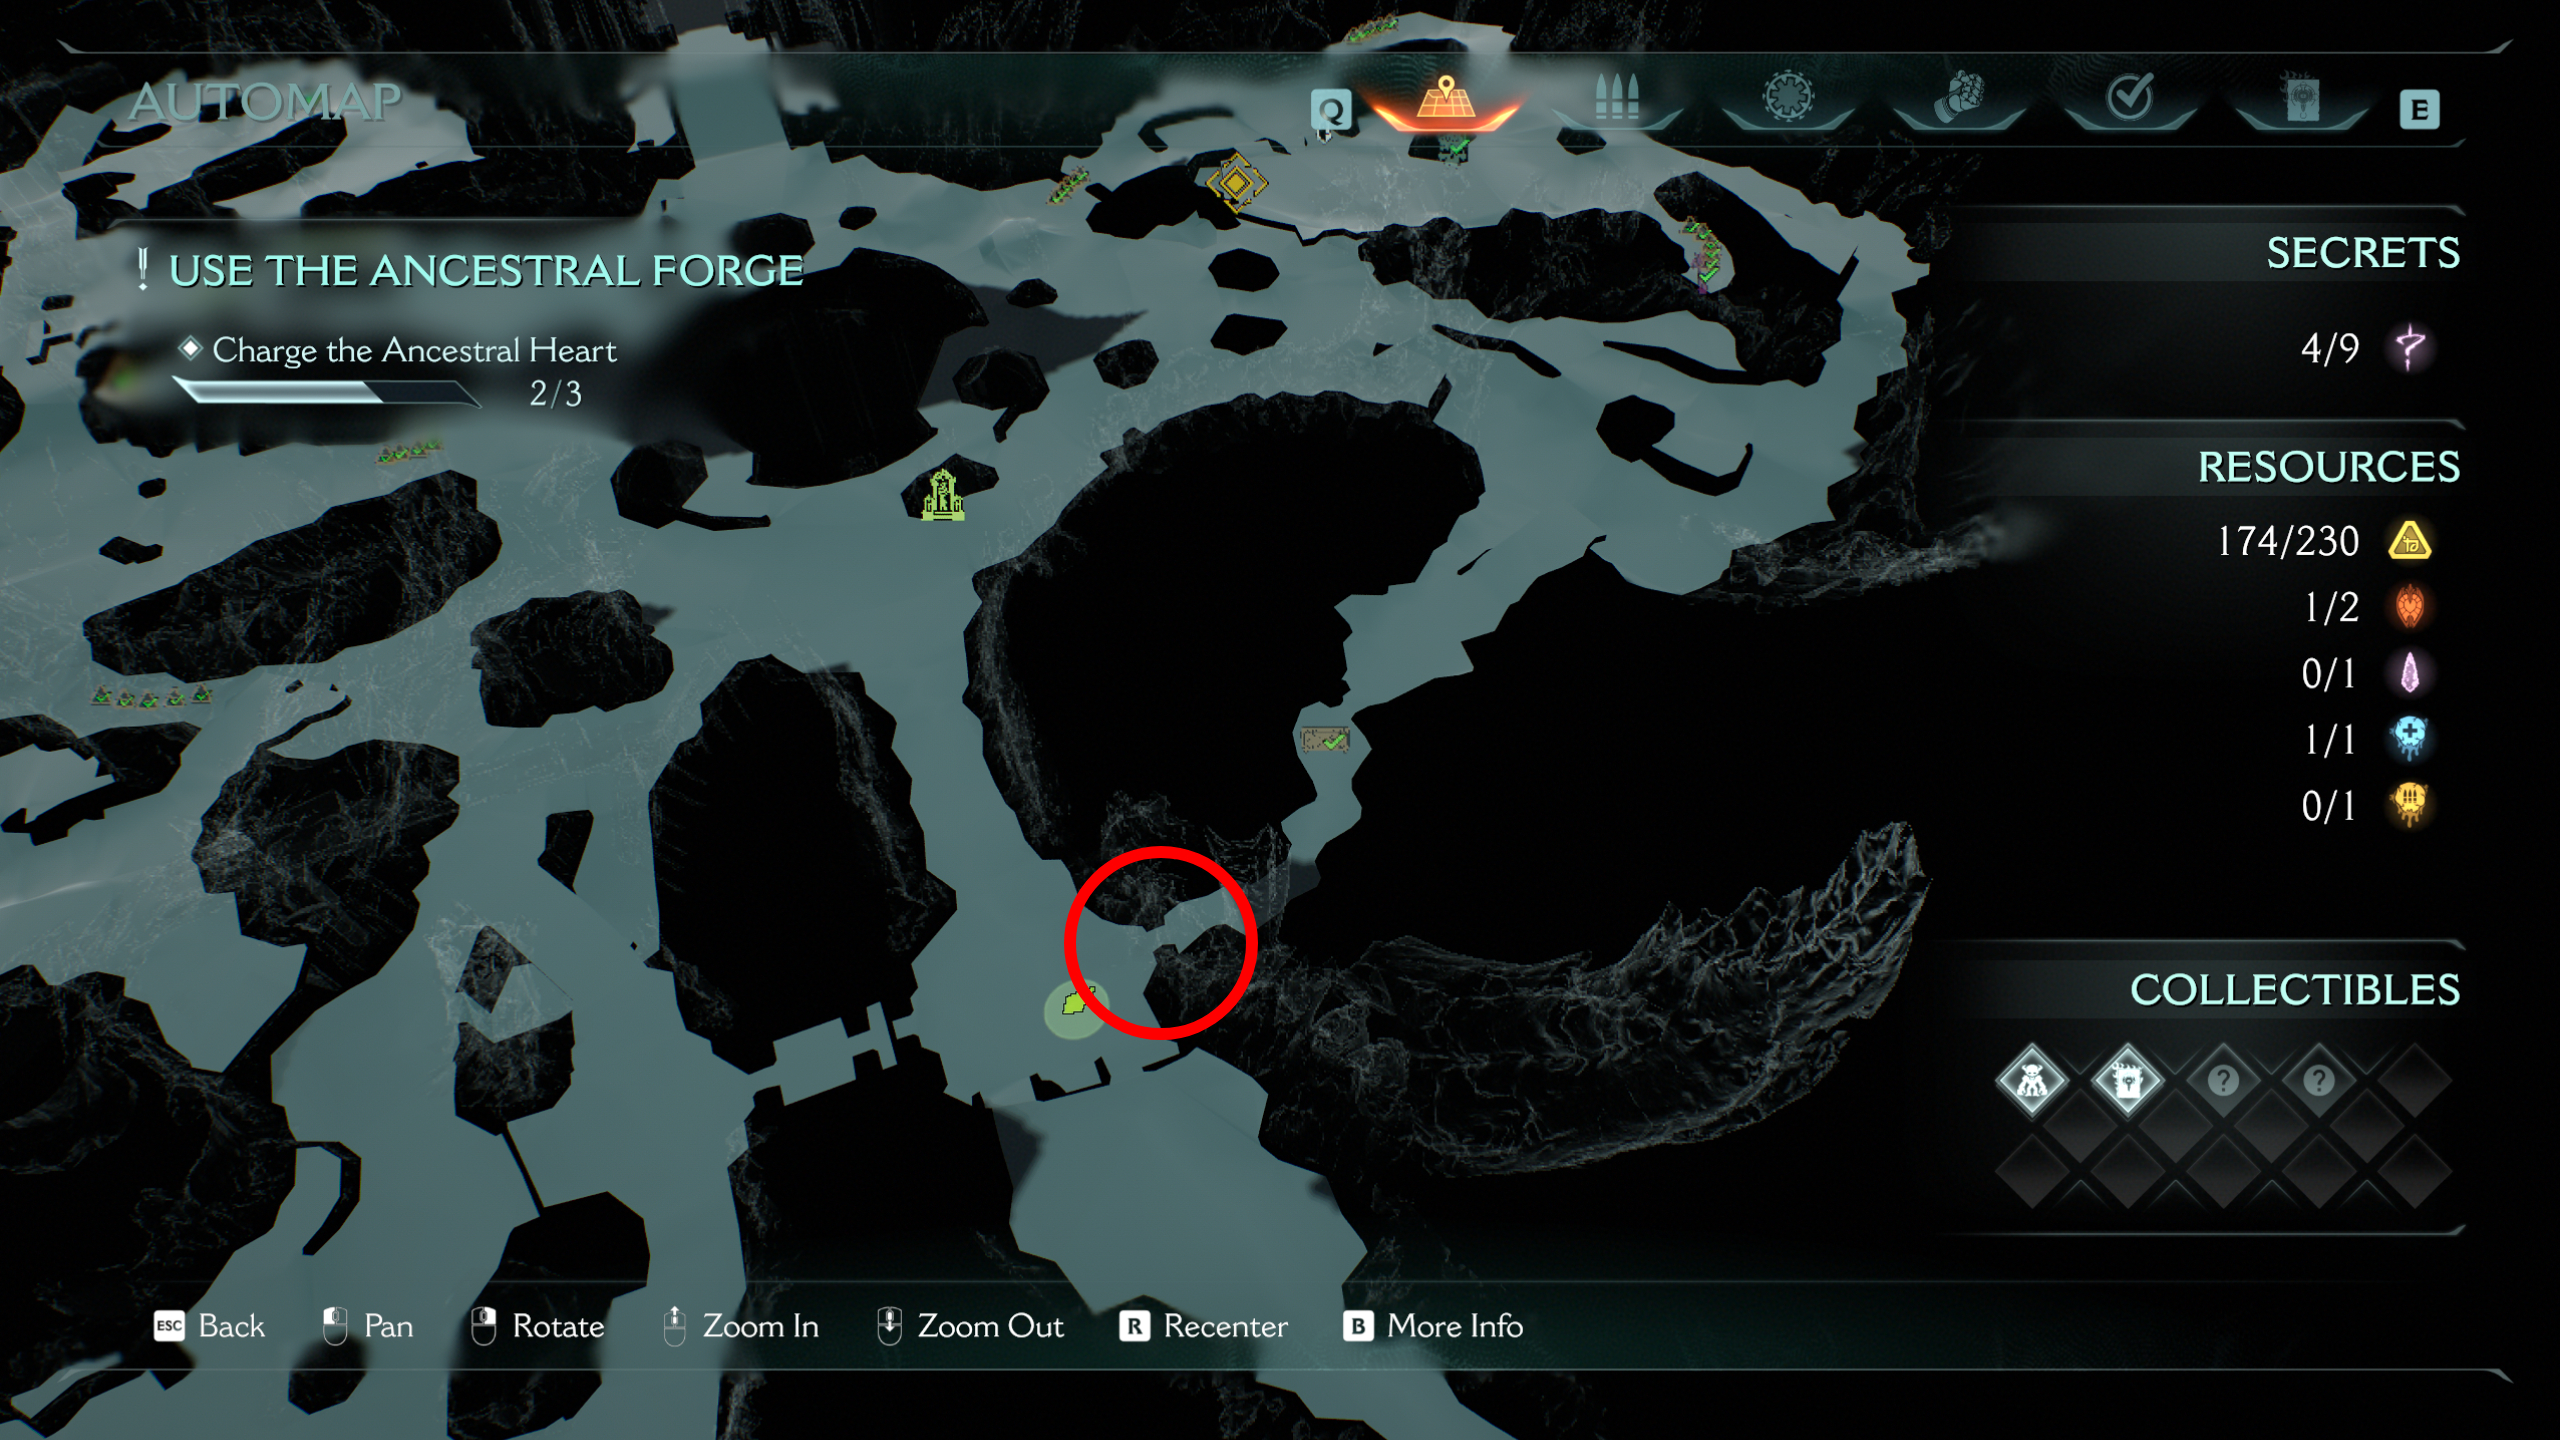
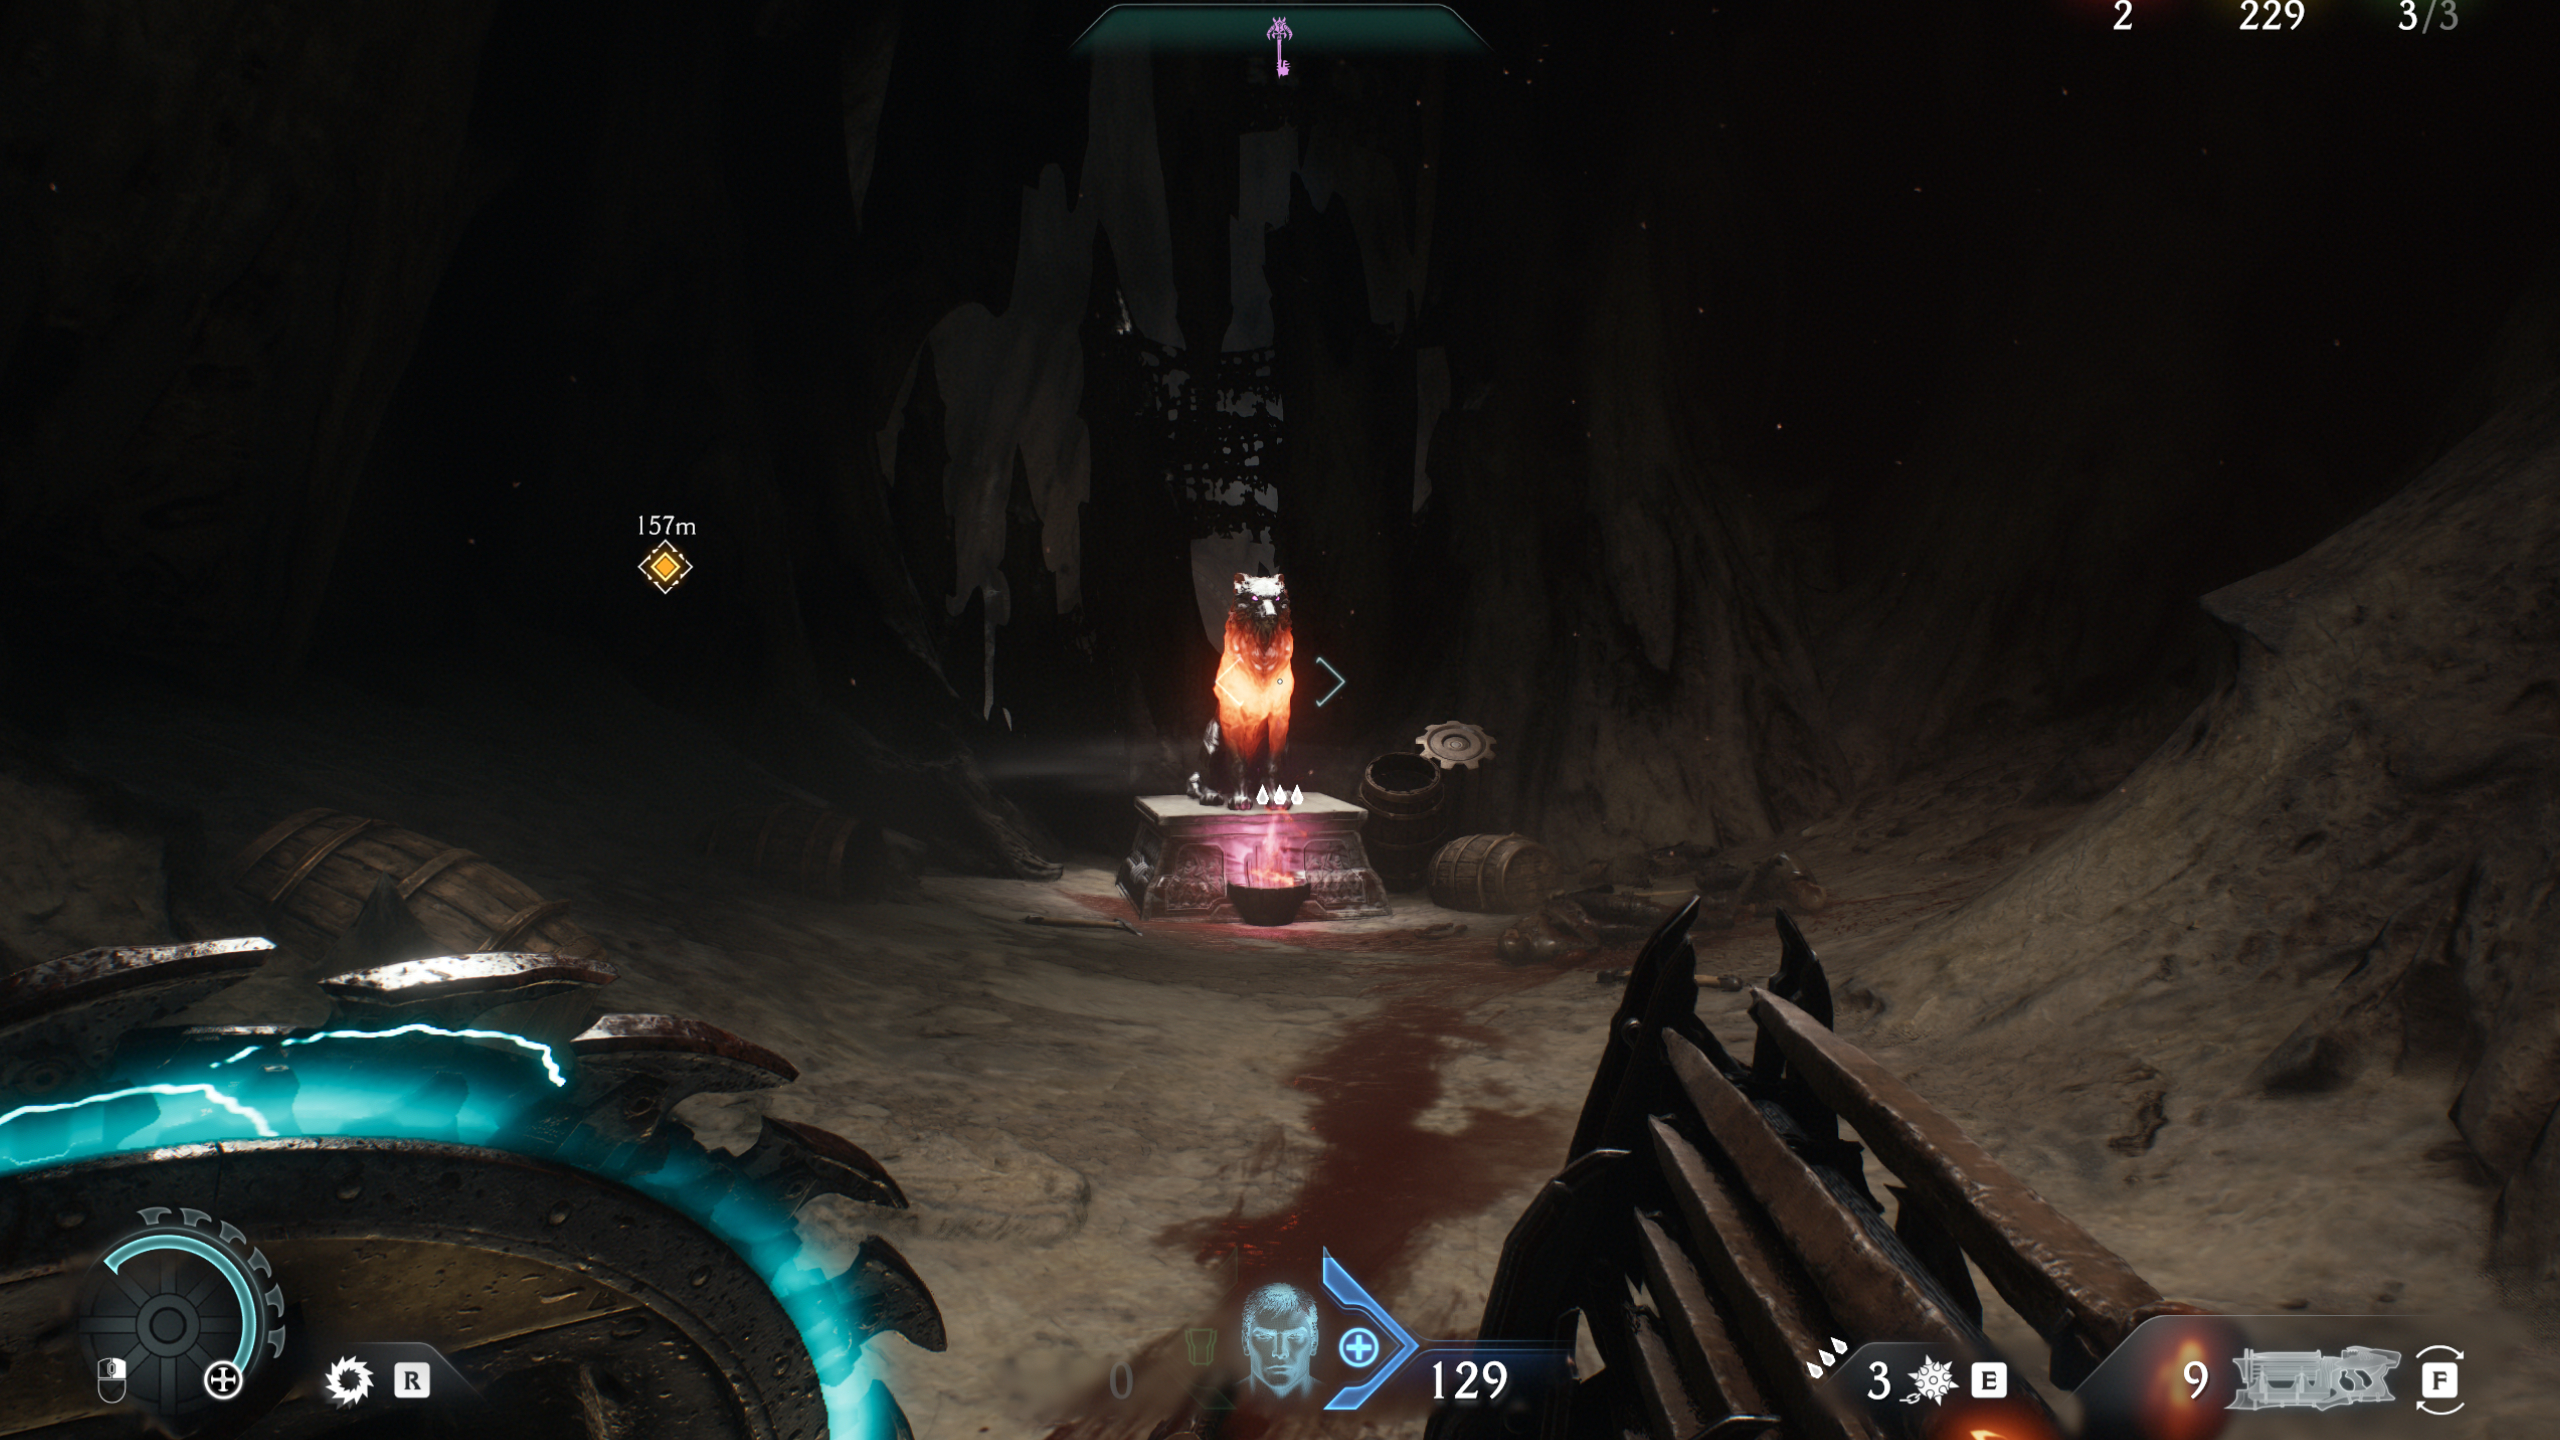
The first secret is on the path where you first enter the open area, near where you start the objective to activate the ancestral hearts, even before reaching the first Sentinel Shrine. Provided you grab the purple key before doing anything else, like I recommend above, you can enter the locked gate on the right side of the path.
Inside this room, you'll find a wolf statue, which you might recognise from the earlier Siege Part 1 level. As in that mission, you need to break three of these wolf statues to unlock a treasure (in this case, a wraithstone, which I'll go over later).
2 - Life sigil

The next secret is hidden on a crane in the bottom left corner of the map from the Sentinel Shrine. Take the path leading to the left corner and you should see the life sigil above you in the grip of the crane. Shield jump up to the right of the crane, leap across the gap, and then activate the switch to release the claw, dropping the sigil on the ground below.
3 - Gold chest

Continue up the path from the first secret until you reach a spooky tunnel, and immediately turn right to drop down into the glowing blue tunnel with the chest sitting at the end.
4 - Second wolf statue

You can find the second of three wolf statues after beating the combat encounter directly left of the first Sentinel Shrine, between the two ancestral hearts on the left side of the map. As before, break it by throwing your shield and you'll be one step closer to unlocking the treasure.
5 - Ruby and Vagary toy (collectible)
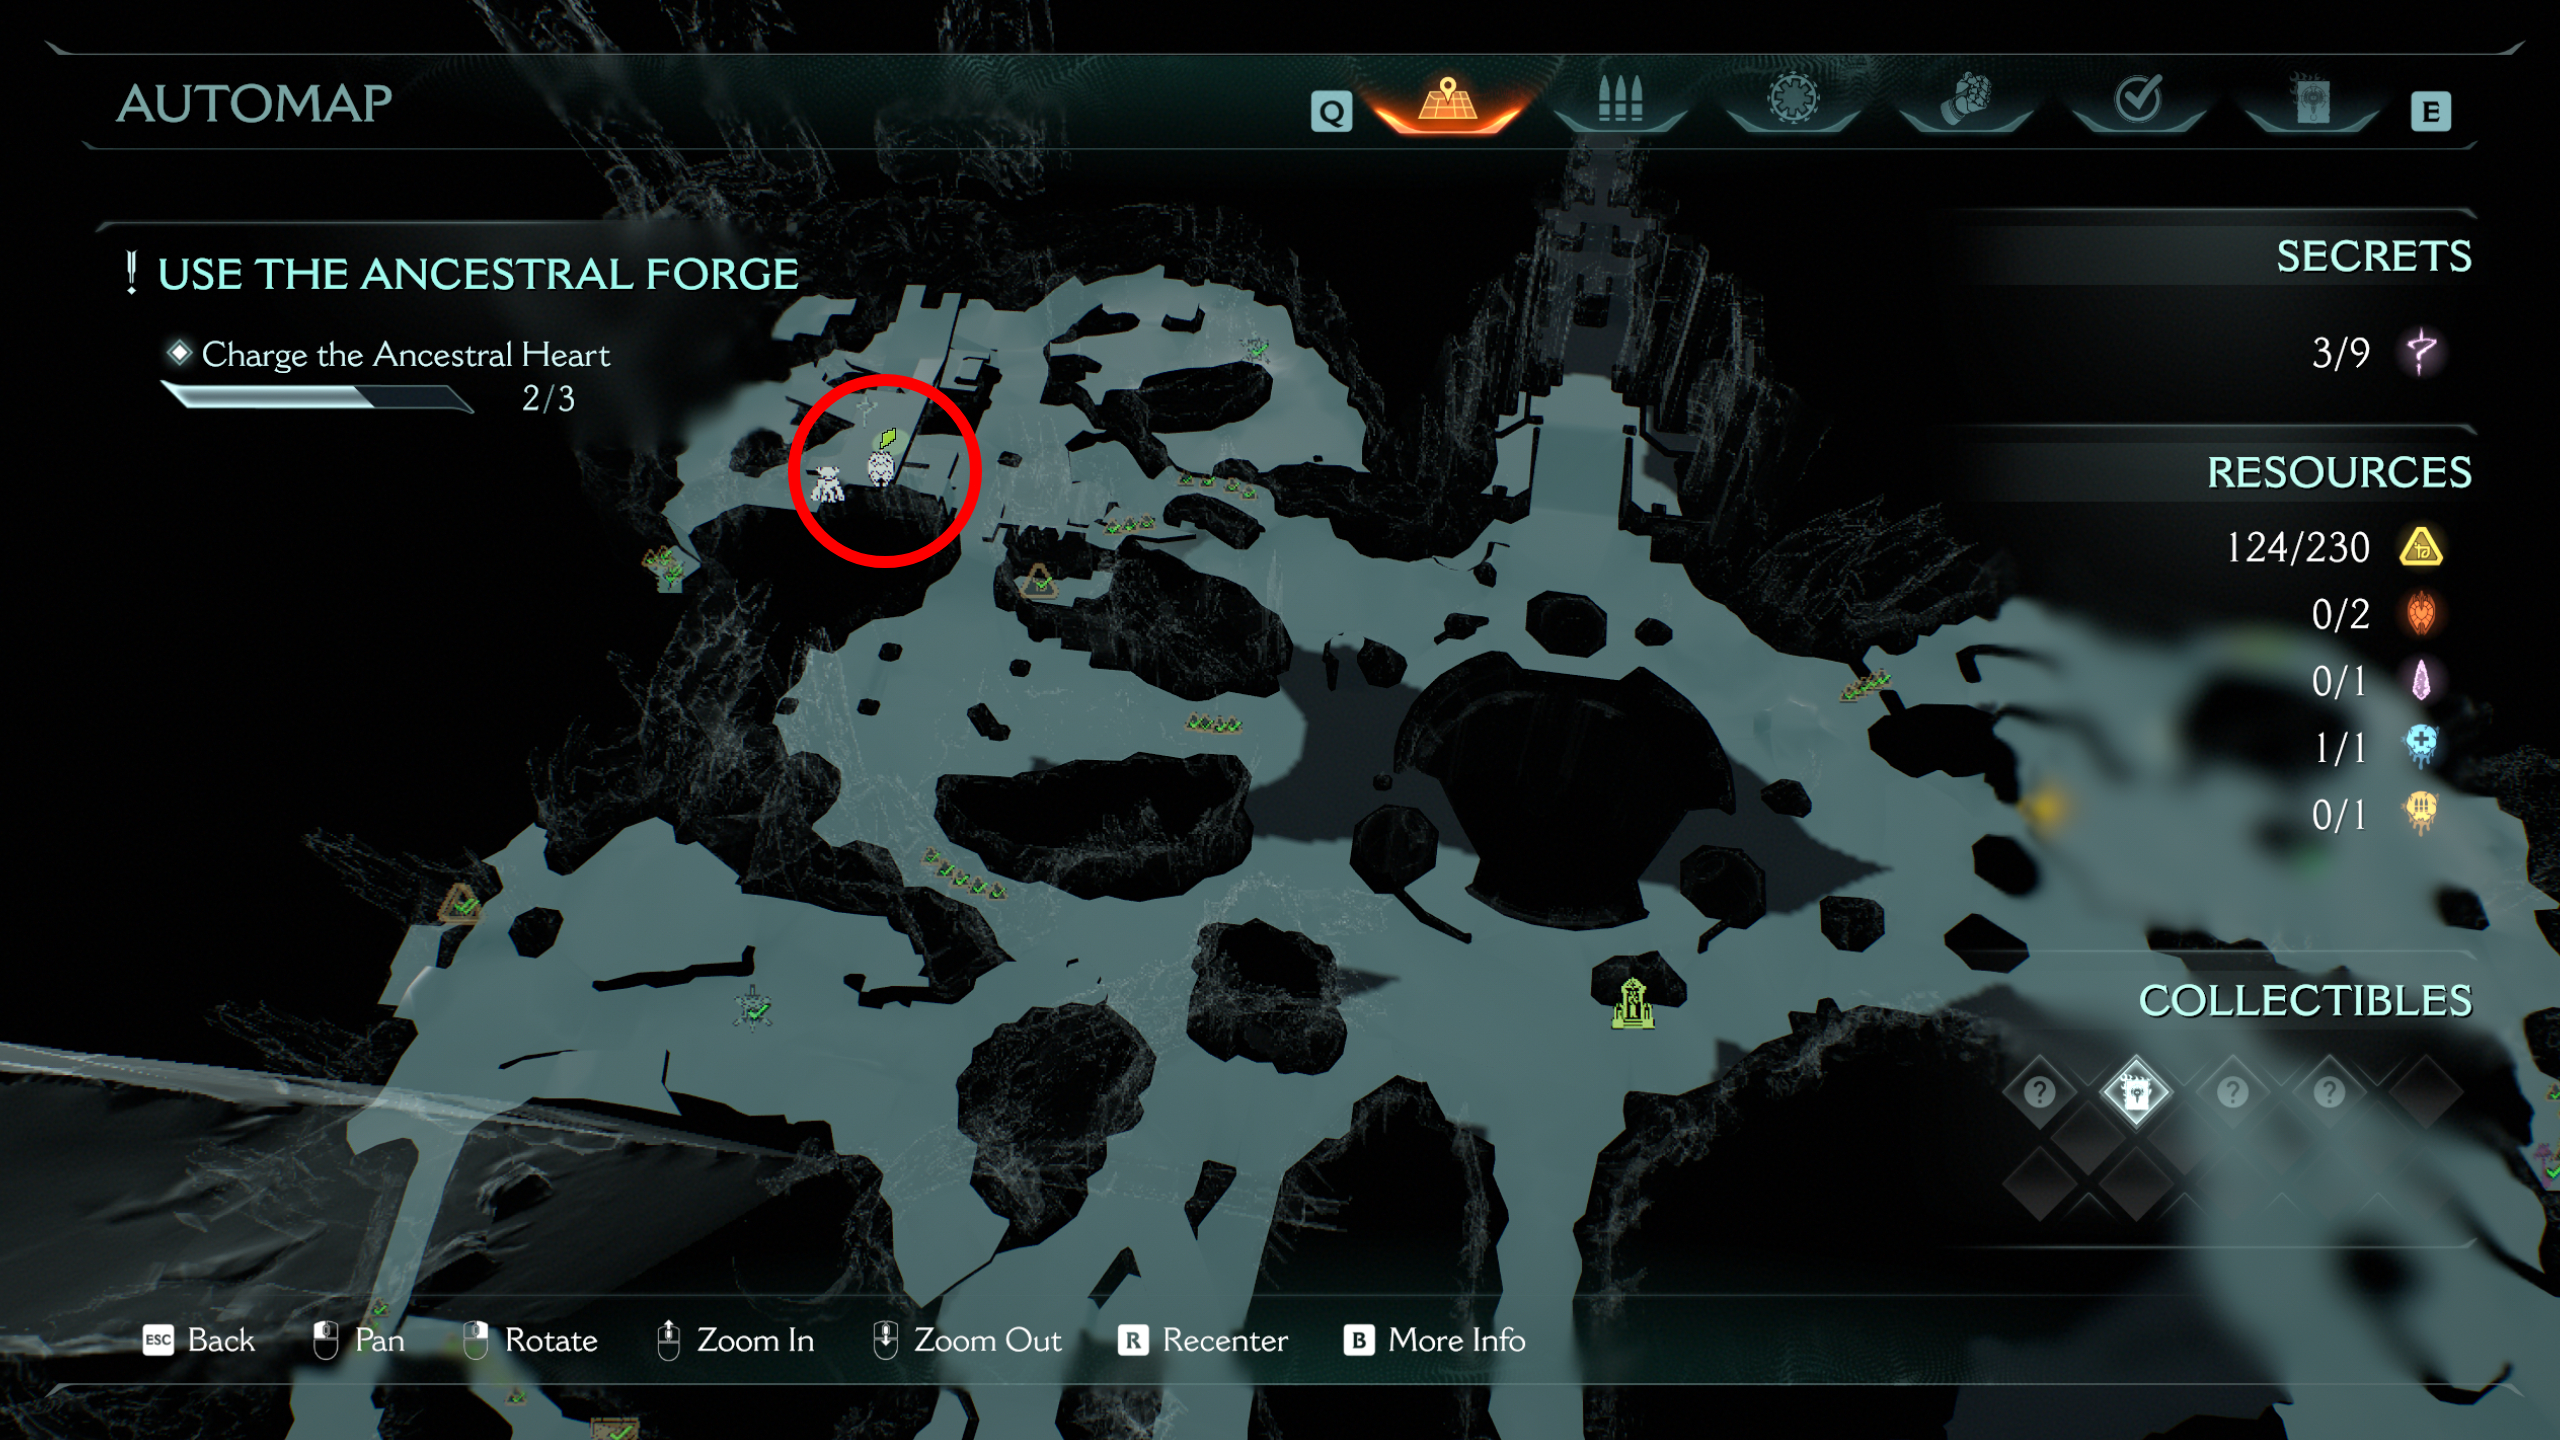

From the ancestral heart console in the top left corner of the map, turn right and jump on the small wooden platform at the base of a tower. Using the purple secret key, enter the building and continue along the platform until you reach an overlook with the ruby and the next secret.
Right next to the ruby you've just grabbed will be a very cute Vagary figurine, ticking off two tasks in one fell swoop.
6 - Ancestral Forge codex entry (collectible)
This next secret is on a wooden platform jutting out perilously into the yellow gas in the top left corner of the map. Look off the cliff edge and you'll see the platform just beneath you with the codex entry on it.
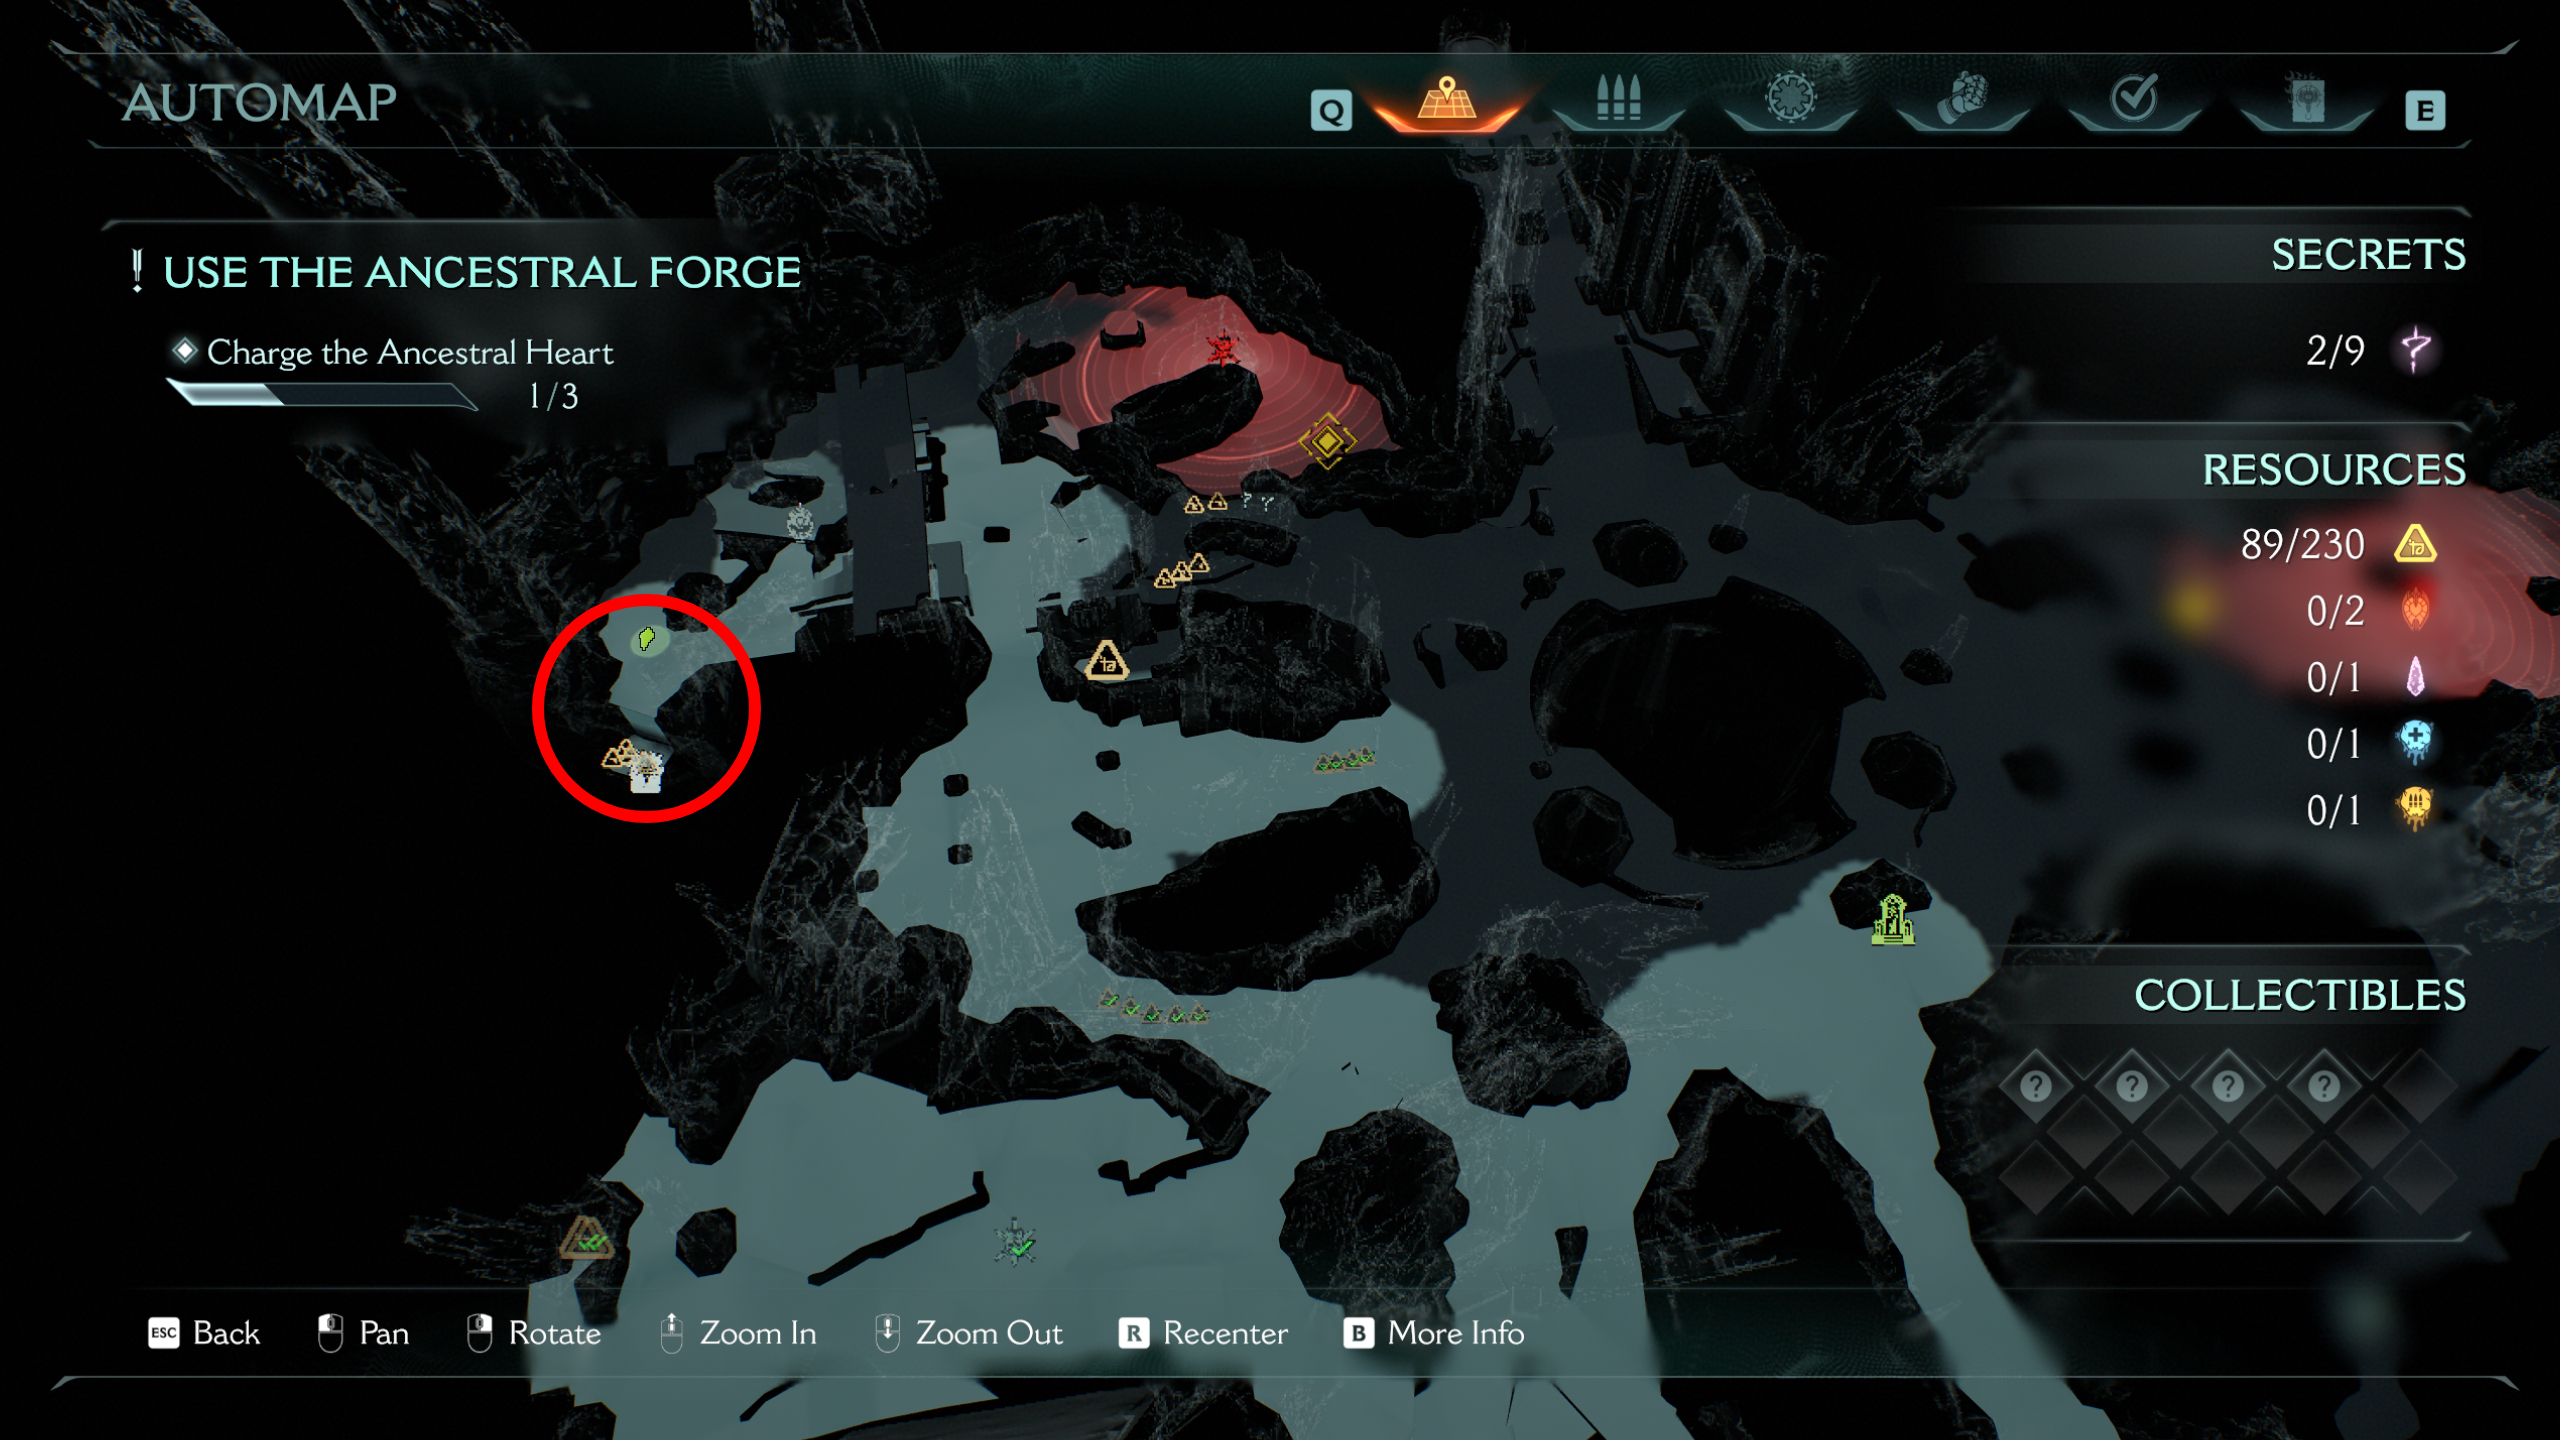
7 - Gold chest

You'll find the next secret area behind a purple key gate that looks like it joins the ancestral heart on the right side of the map to the path where you first entered the open zone at the bottom of the map. It's opposite where you found the first secret (a wolf statue).
8 - Wraithstone
From the previous secret, head to the path in the top right corner of the map, near the ancestral heart, where you'll find the wolf statue shrine and a wraithstone behind a barrier. To lower the barrier, you need to break three wolf statues, two of which you'll have already destroyed. The final wolf statue is to the top left of the shrine, jutting out of the rock face.
9 - Ruby

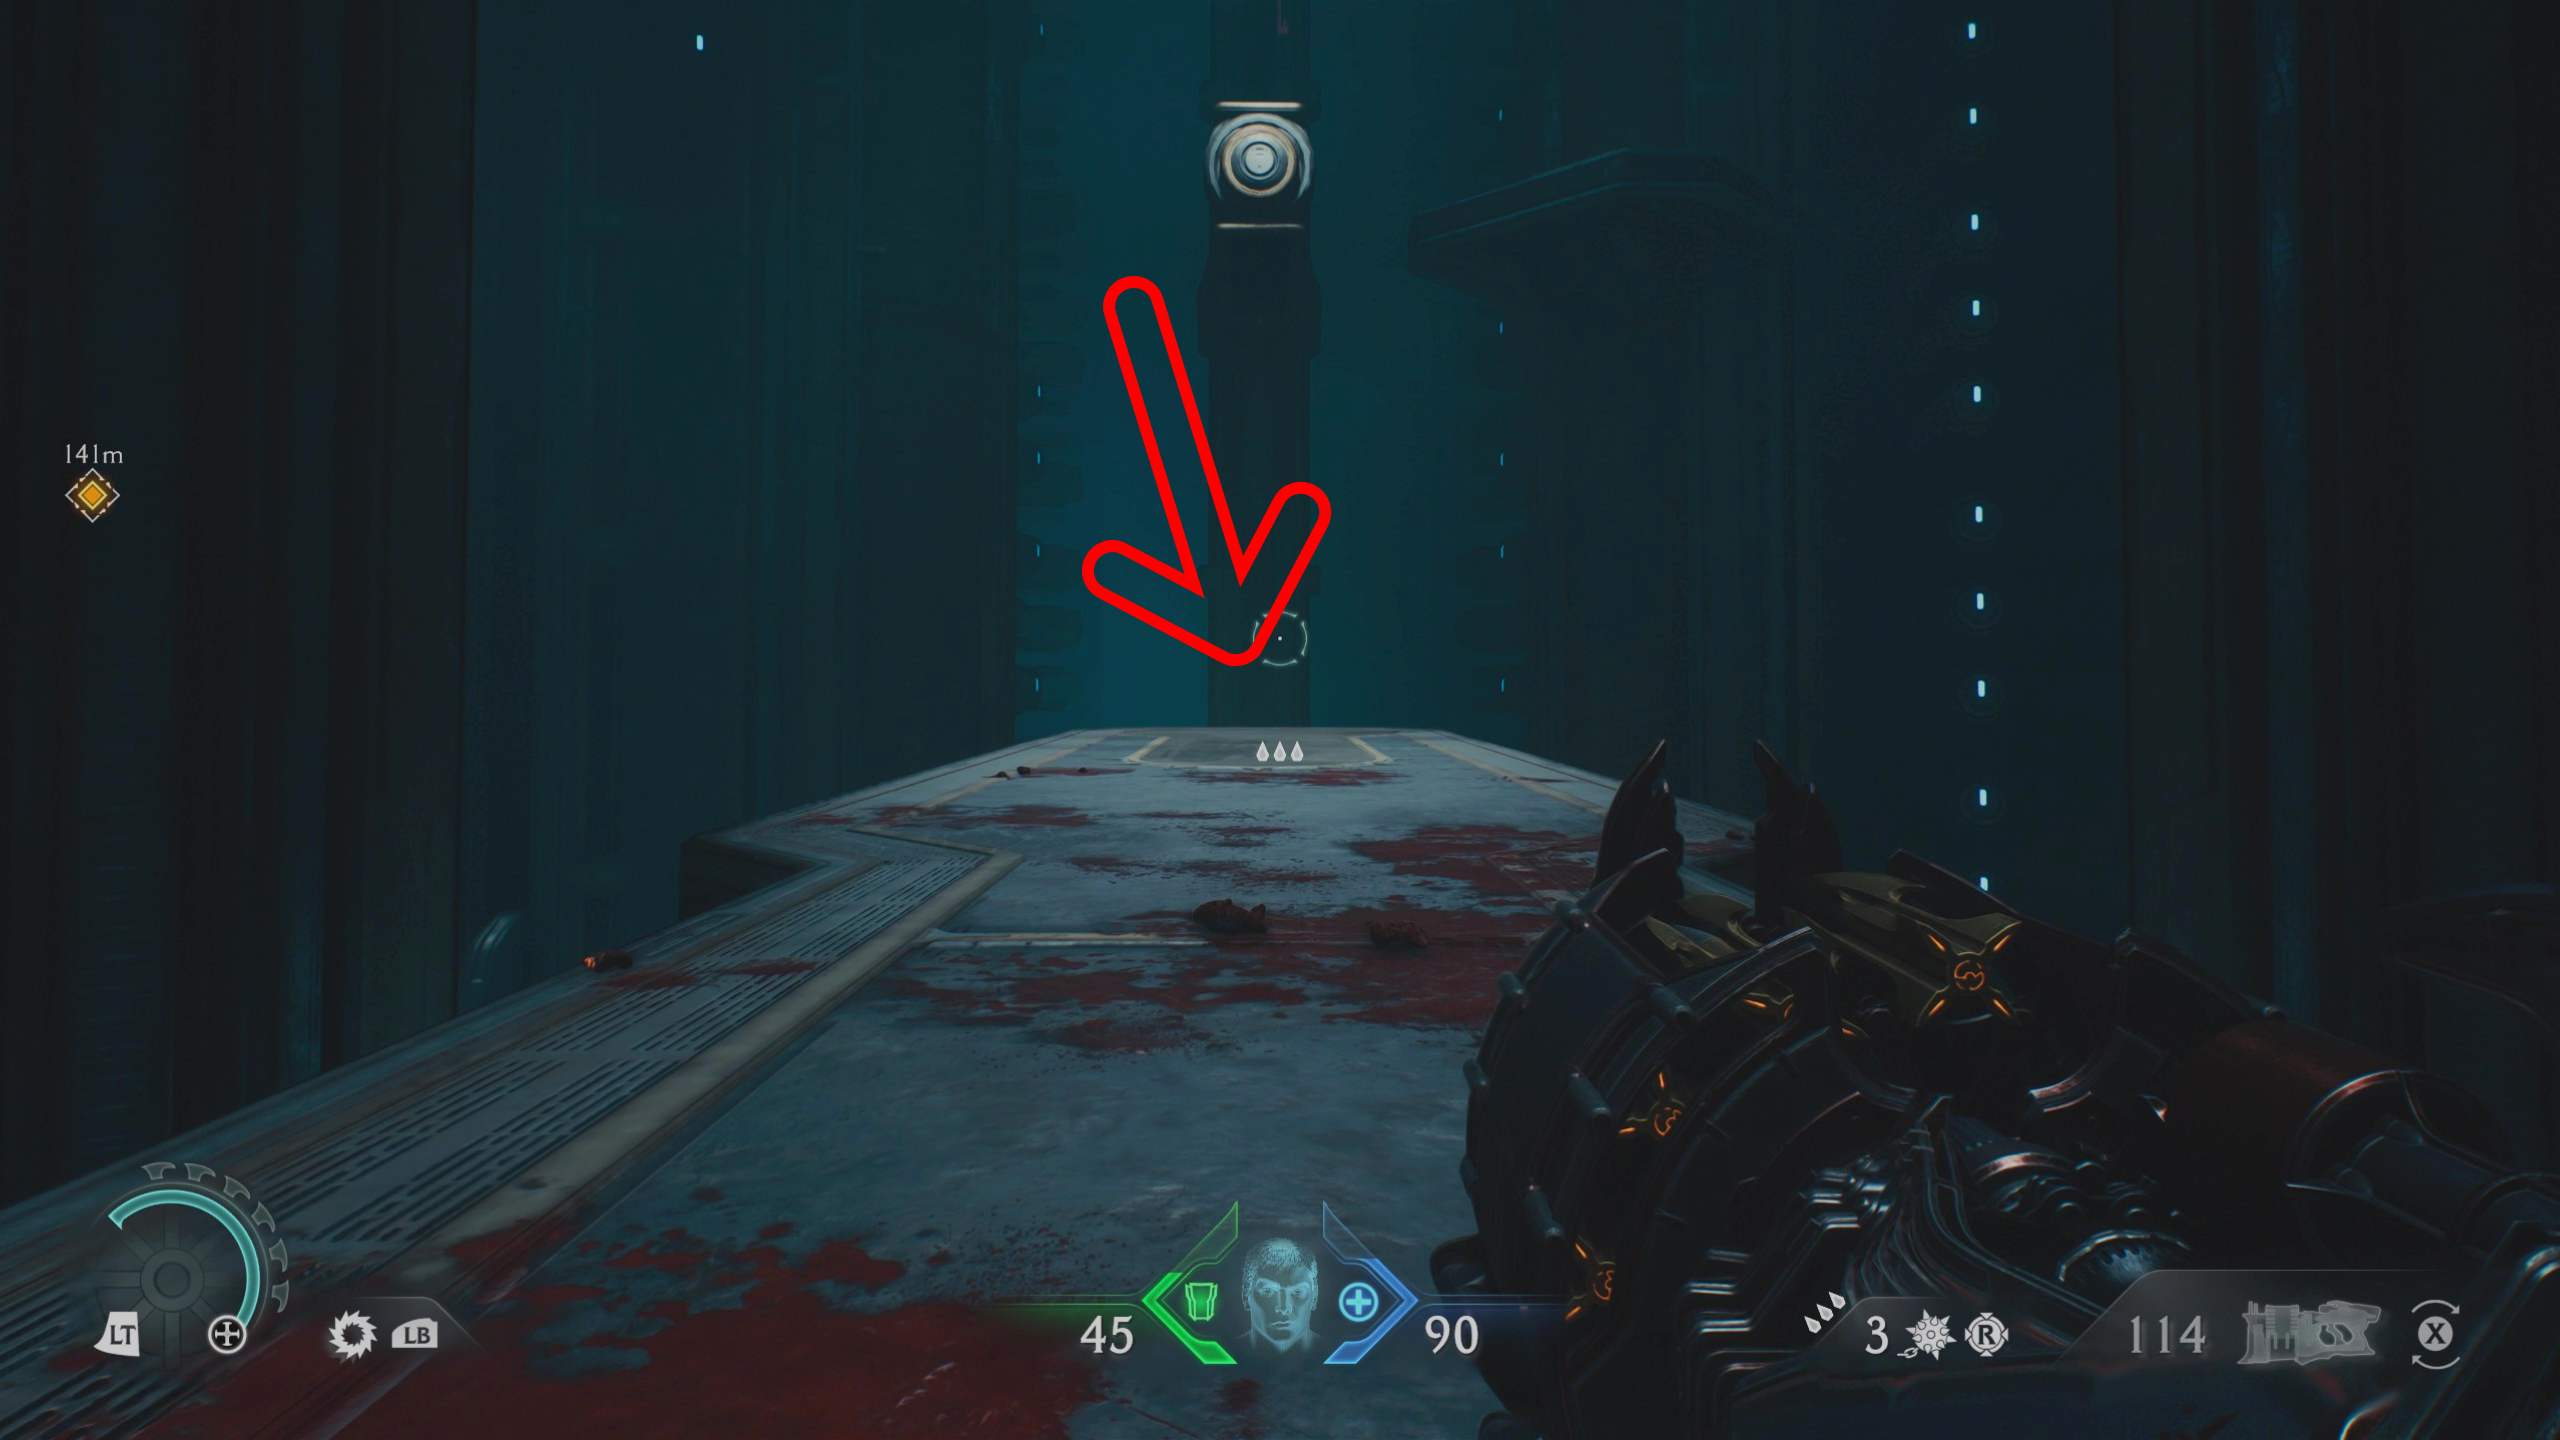
After activating the three ancestral hearts and progressing with the mission into the next area, continue to the end of the corridor where you'll see a ruby behind a gate and a breakable wall. Bash the wall to reveal a chain that you can break with your shield to lower the gate.
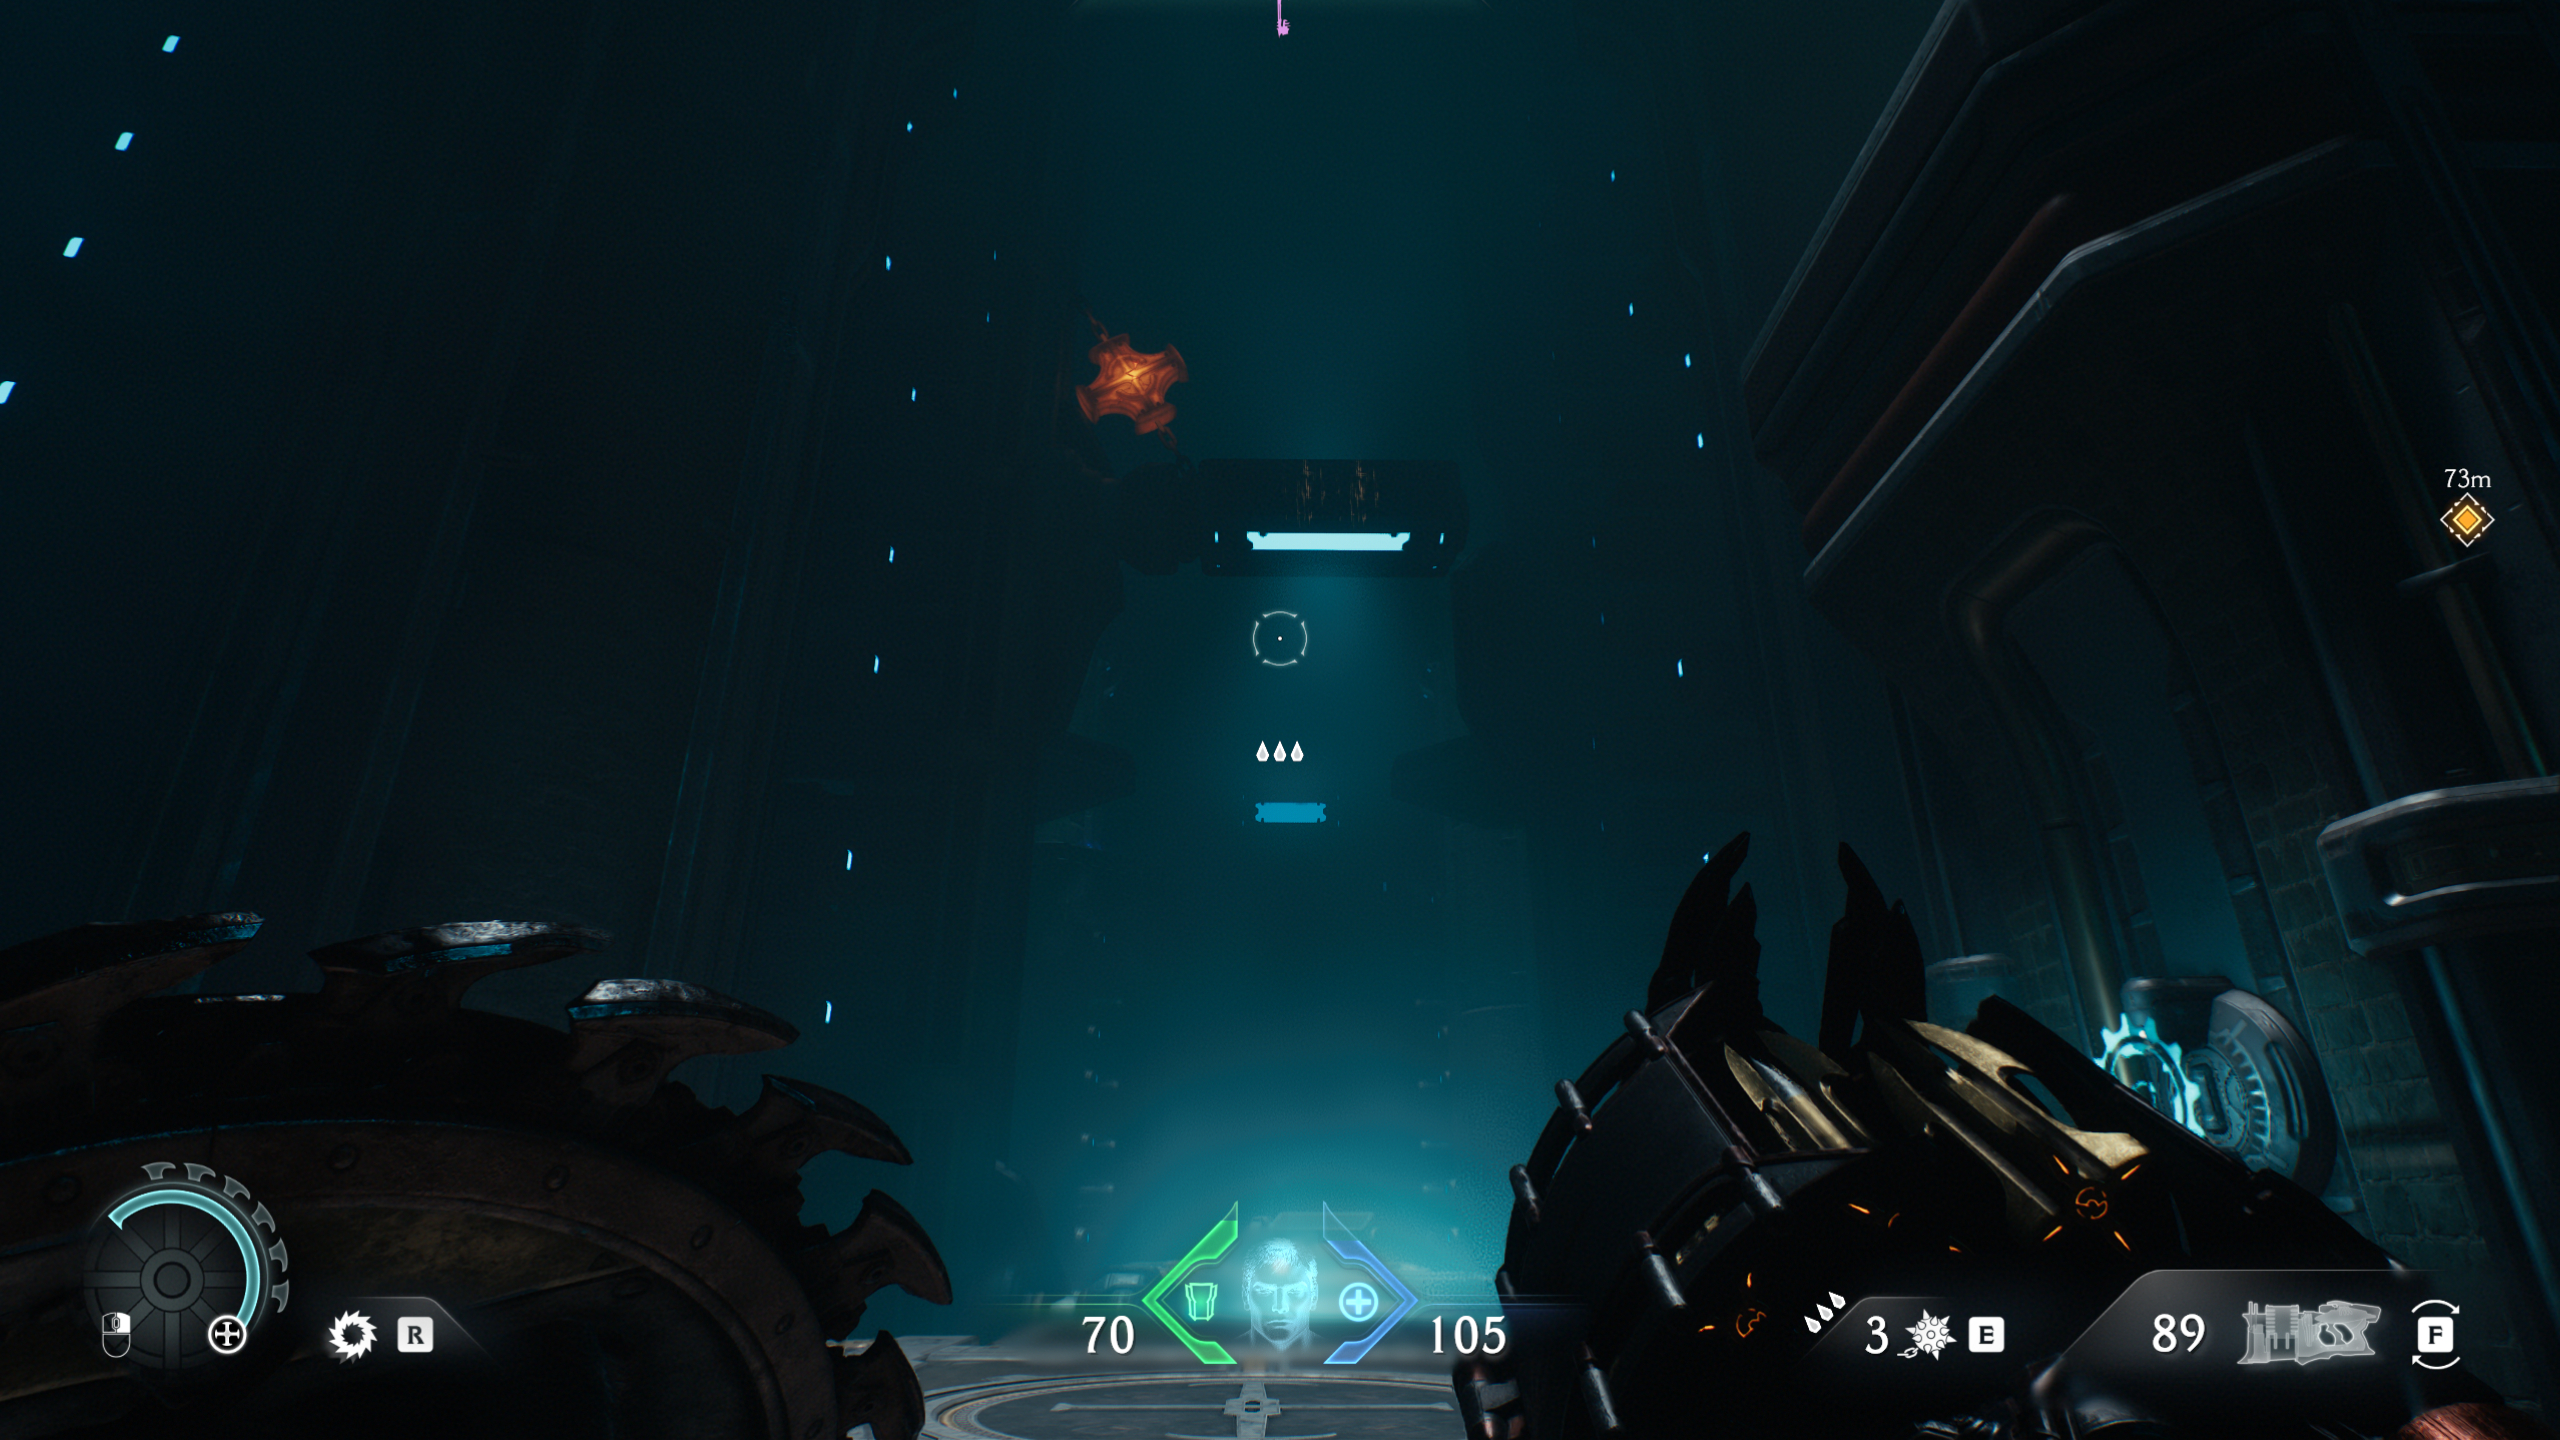
10 - Gold chest
Continue on from the previous secret, leading into a sci-fi-looking room with glowing platforms. Walk straight down the path and drop off the ledge ahead of you, where you'll land on a lift with a switch. Throw your shield at the switch to raise the lift, then jump across the gap ahead of you to grab the chest.
11 - Gold

Directly after the previous secret, continue with the mission and jump onto the next platform where you'll see a locked gate on your right as you pass under the path above you. Walk up to your right, climb up the first wall, then drop off the ledge directly ahead of you to fall behind the gated area and find the gold.
12 - King Novik codex entry and Nightmare Super Shotgun weapon skin (collectibles)
Continue to the next platform from the previous secret, which has a blue switch on it. Before activating it, turn around and throw your shield at the chain holding a small platform to release it. Activate the lift, jump across to the platform you've created, shield jump to the platform on the right, and then finally to the codex.
The fancy Nightware weapon skin for the Super Shotgun is right next to the codex in the entry above. From here, you're safe to wrap up the mission.


You must confirm your public display name before commenting
Please logout and then login again, you will then be prompted to enter your display name.