While the Sentinel stronghold is under siege in Doom: The Dark Ages' sixth chapter, you're going to have to shirk off your responsibilities as the Doom Slayer for a moment if you want to collect everything. Giving you a large area to explore, the Siege Part 1 secrets are spread far and wide.
If this sounds like a lot of running around, you're correct, but I've done all the hard work for you to track down the Doom: The Dark Ages secrets in chapter 6. Below you'll find all the secrets and collectibles laid out in chronological order, though keep in mind that this mission lets you tackle its main objective in roughly any order.
Doom: The Dark Ages Siege Part 1 secrets and collectibles
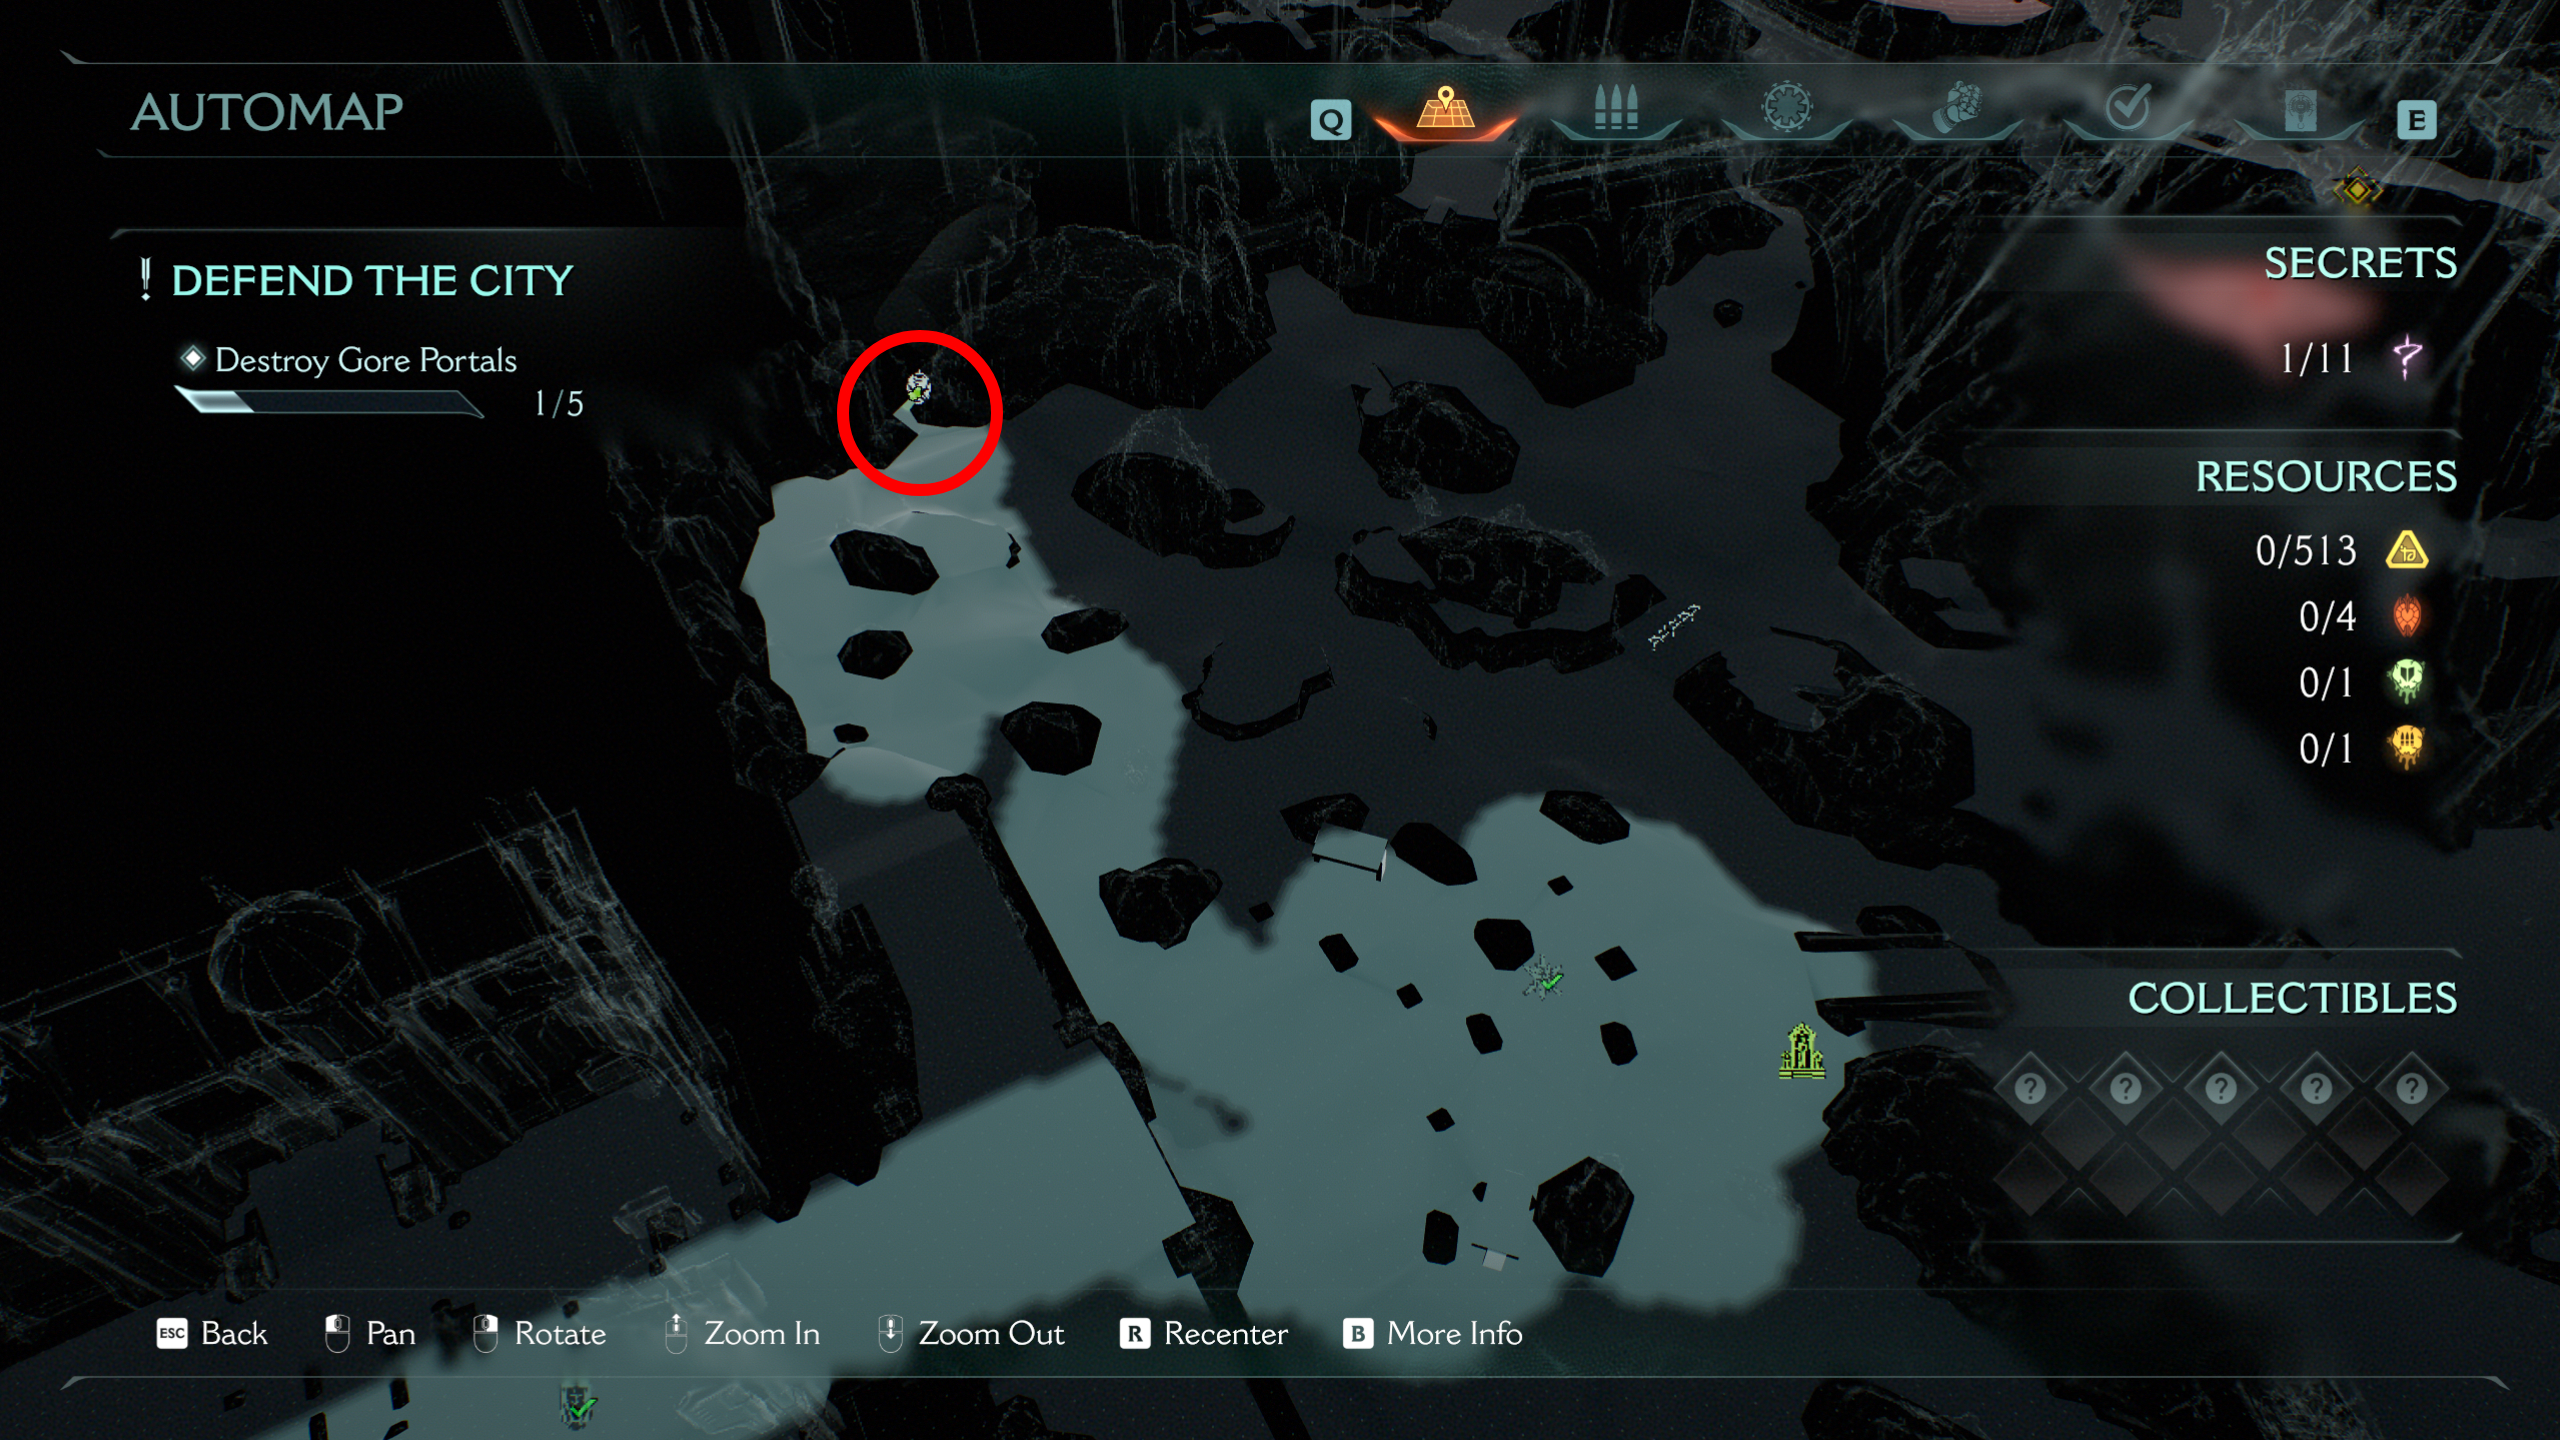
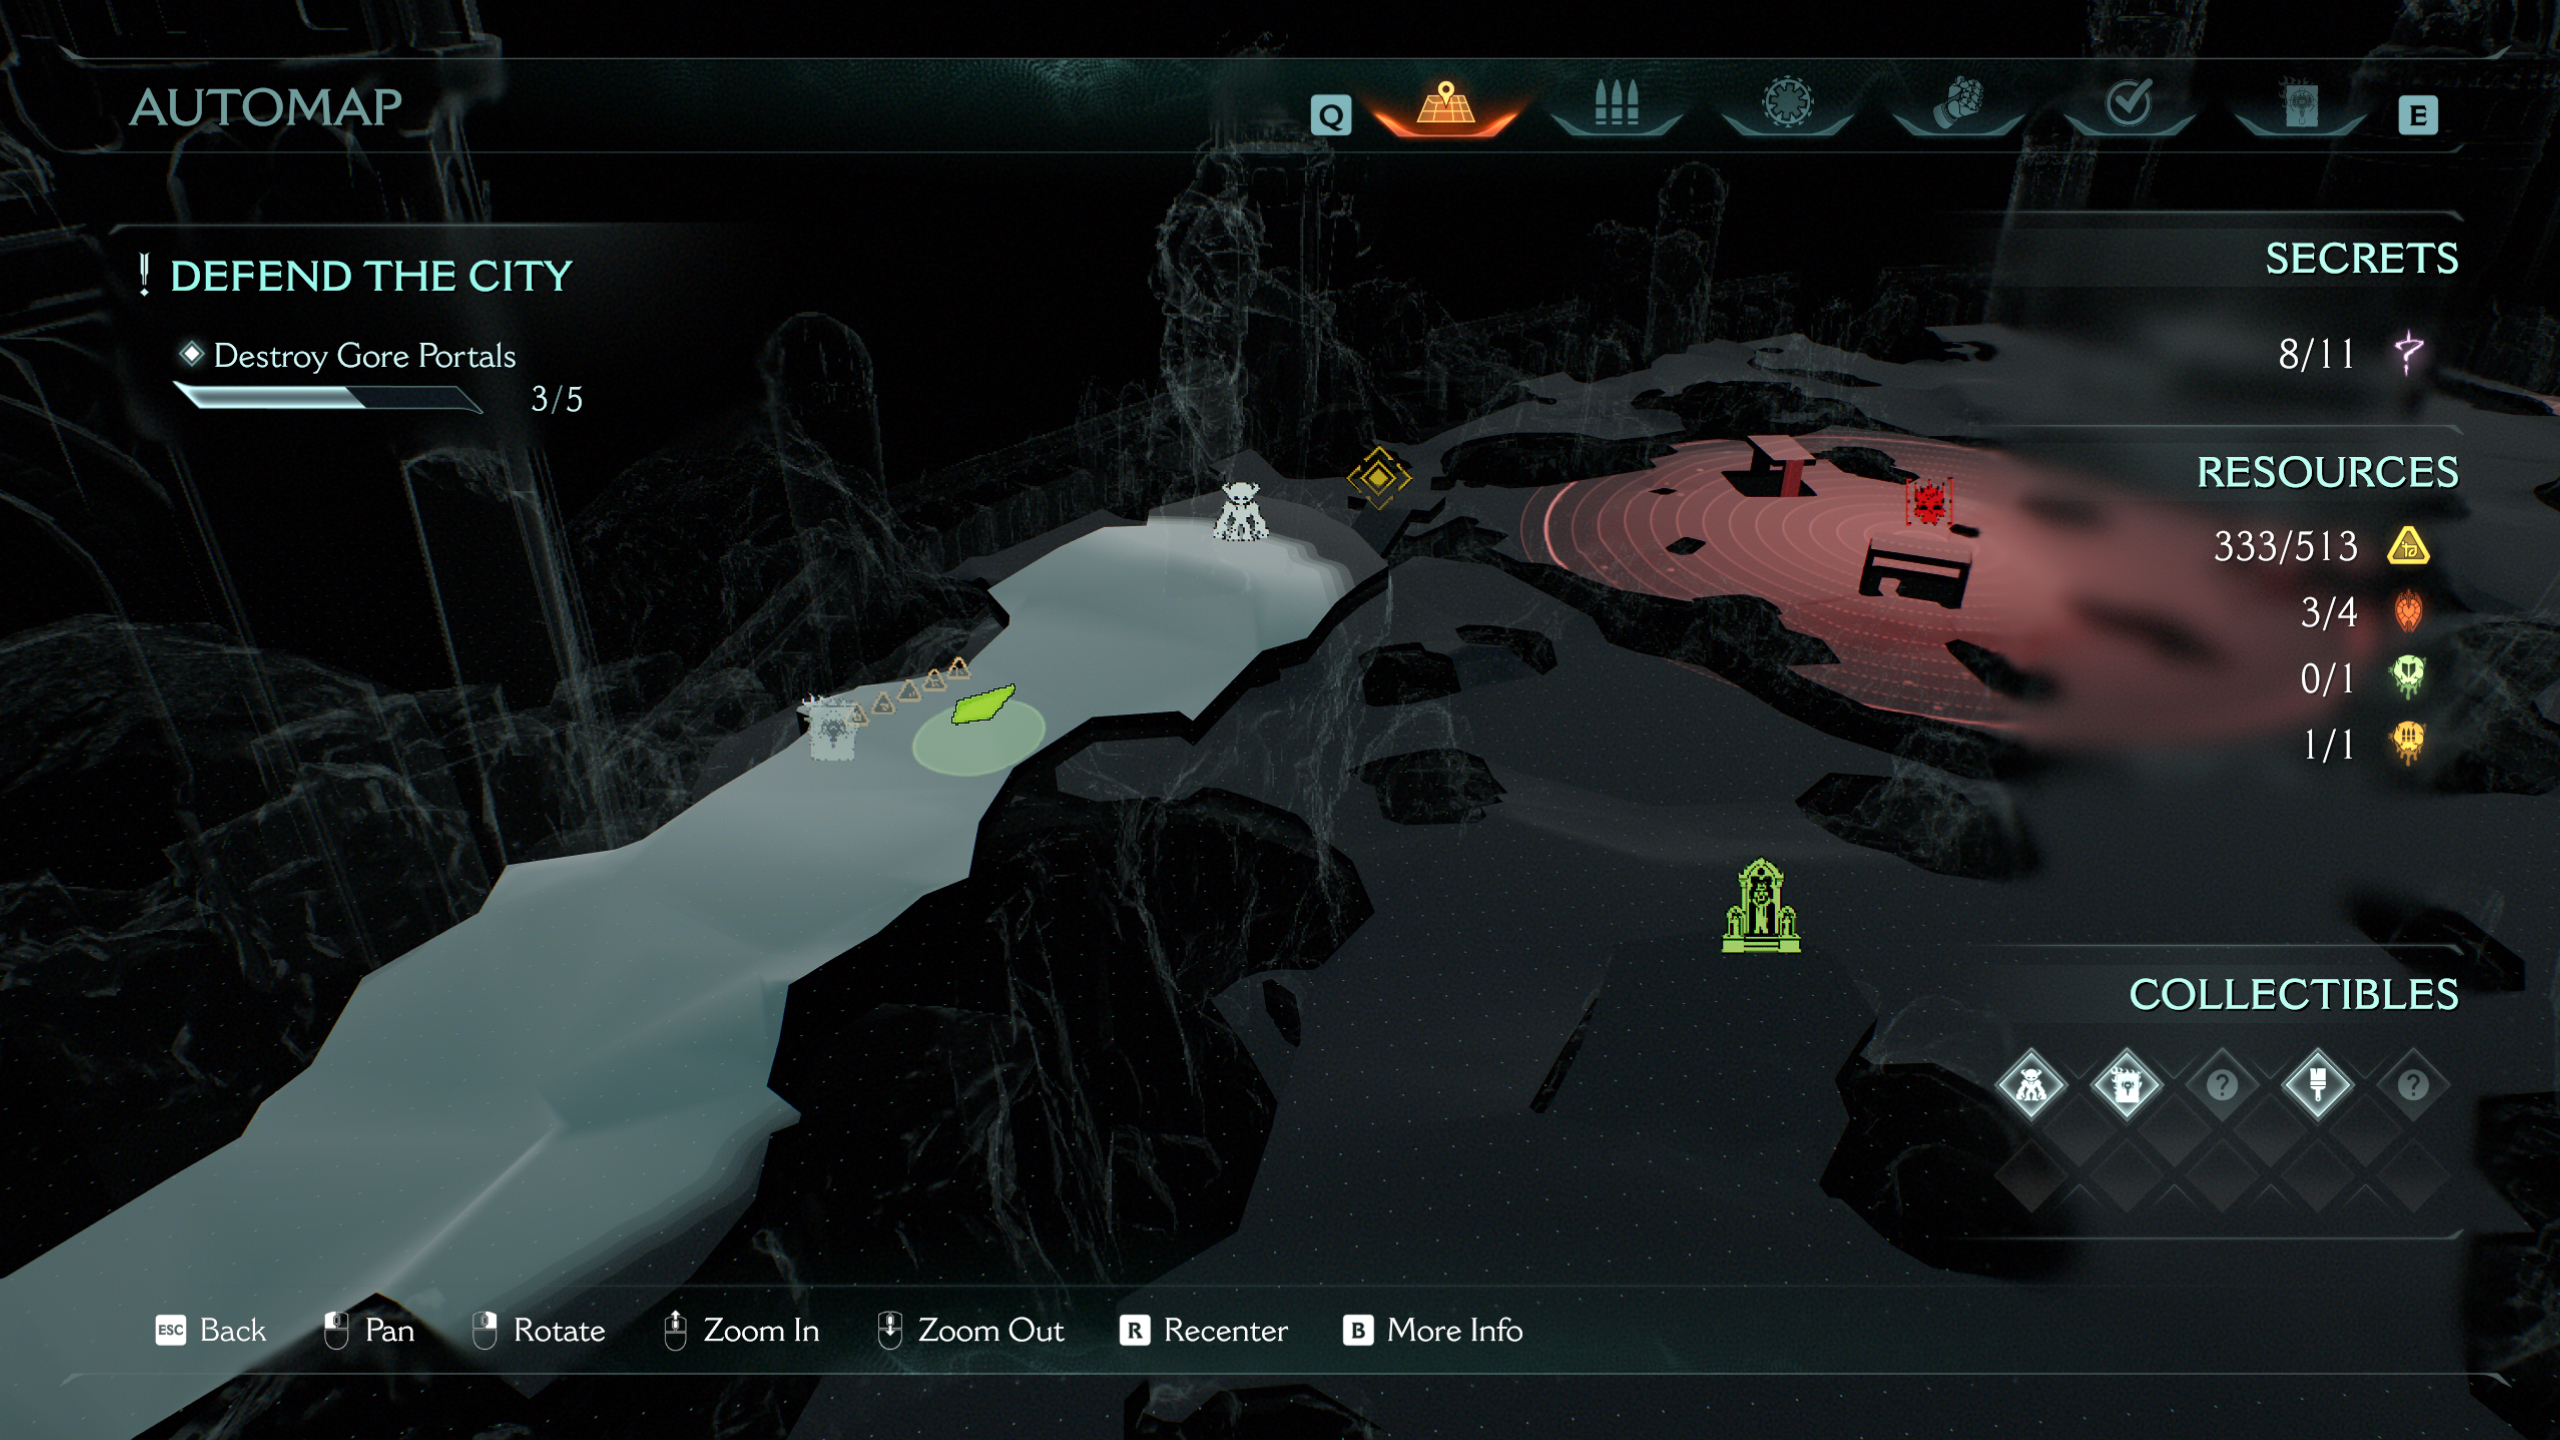
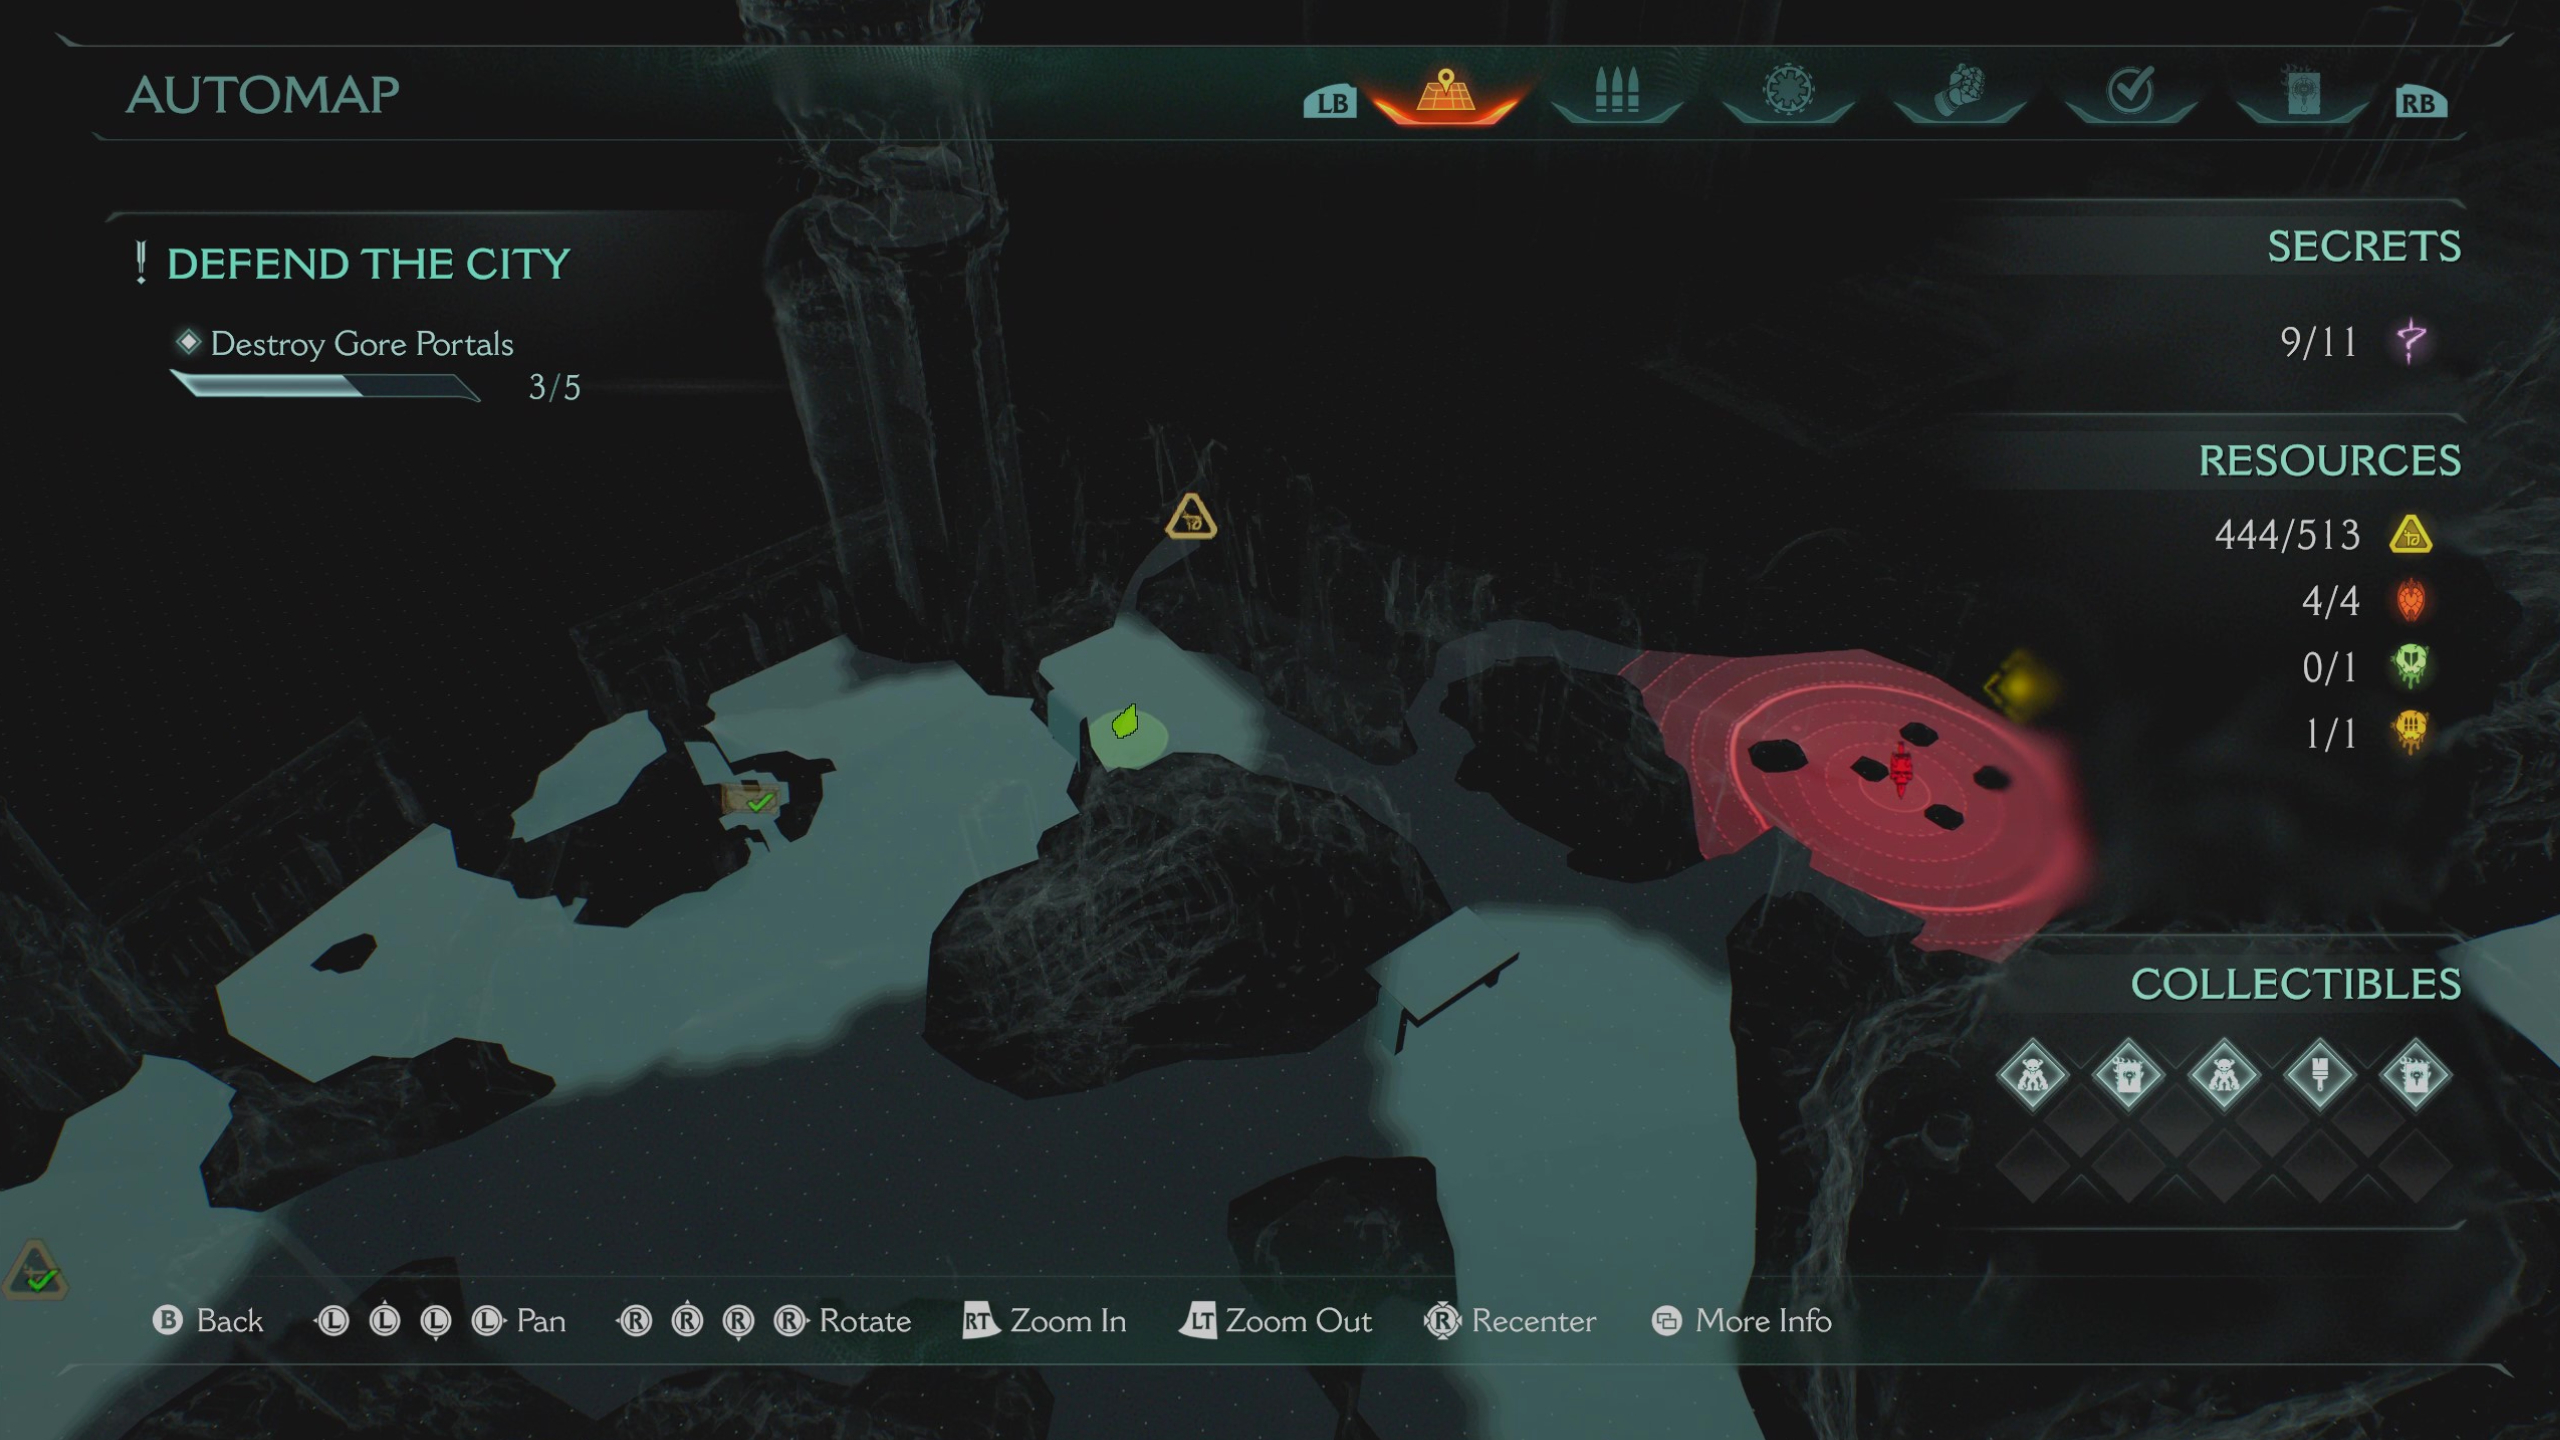
The epic siege battle to defend the Sentintel stronghold takes place over two missions, the first of which is much larger with open objectives and more secrets to uncover. In total, Siege: Part 1 has 11 secrets and five collectibles to dig up.With the scale of the map, I'll tackle this clockwise, starting in the bottom left corner.
Article continues belowBefore tracking down any secrets, make sure to grab the Siege Part 1 purple secret key as you'll need it a couple of times later on, and it's very close to the entrance. To find the purple key, just head north from the first Sentinel Shrine towards the middle of the map. You'll see the key on a wooden platform.
1 - Life sigil
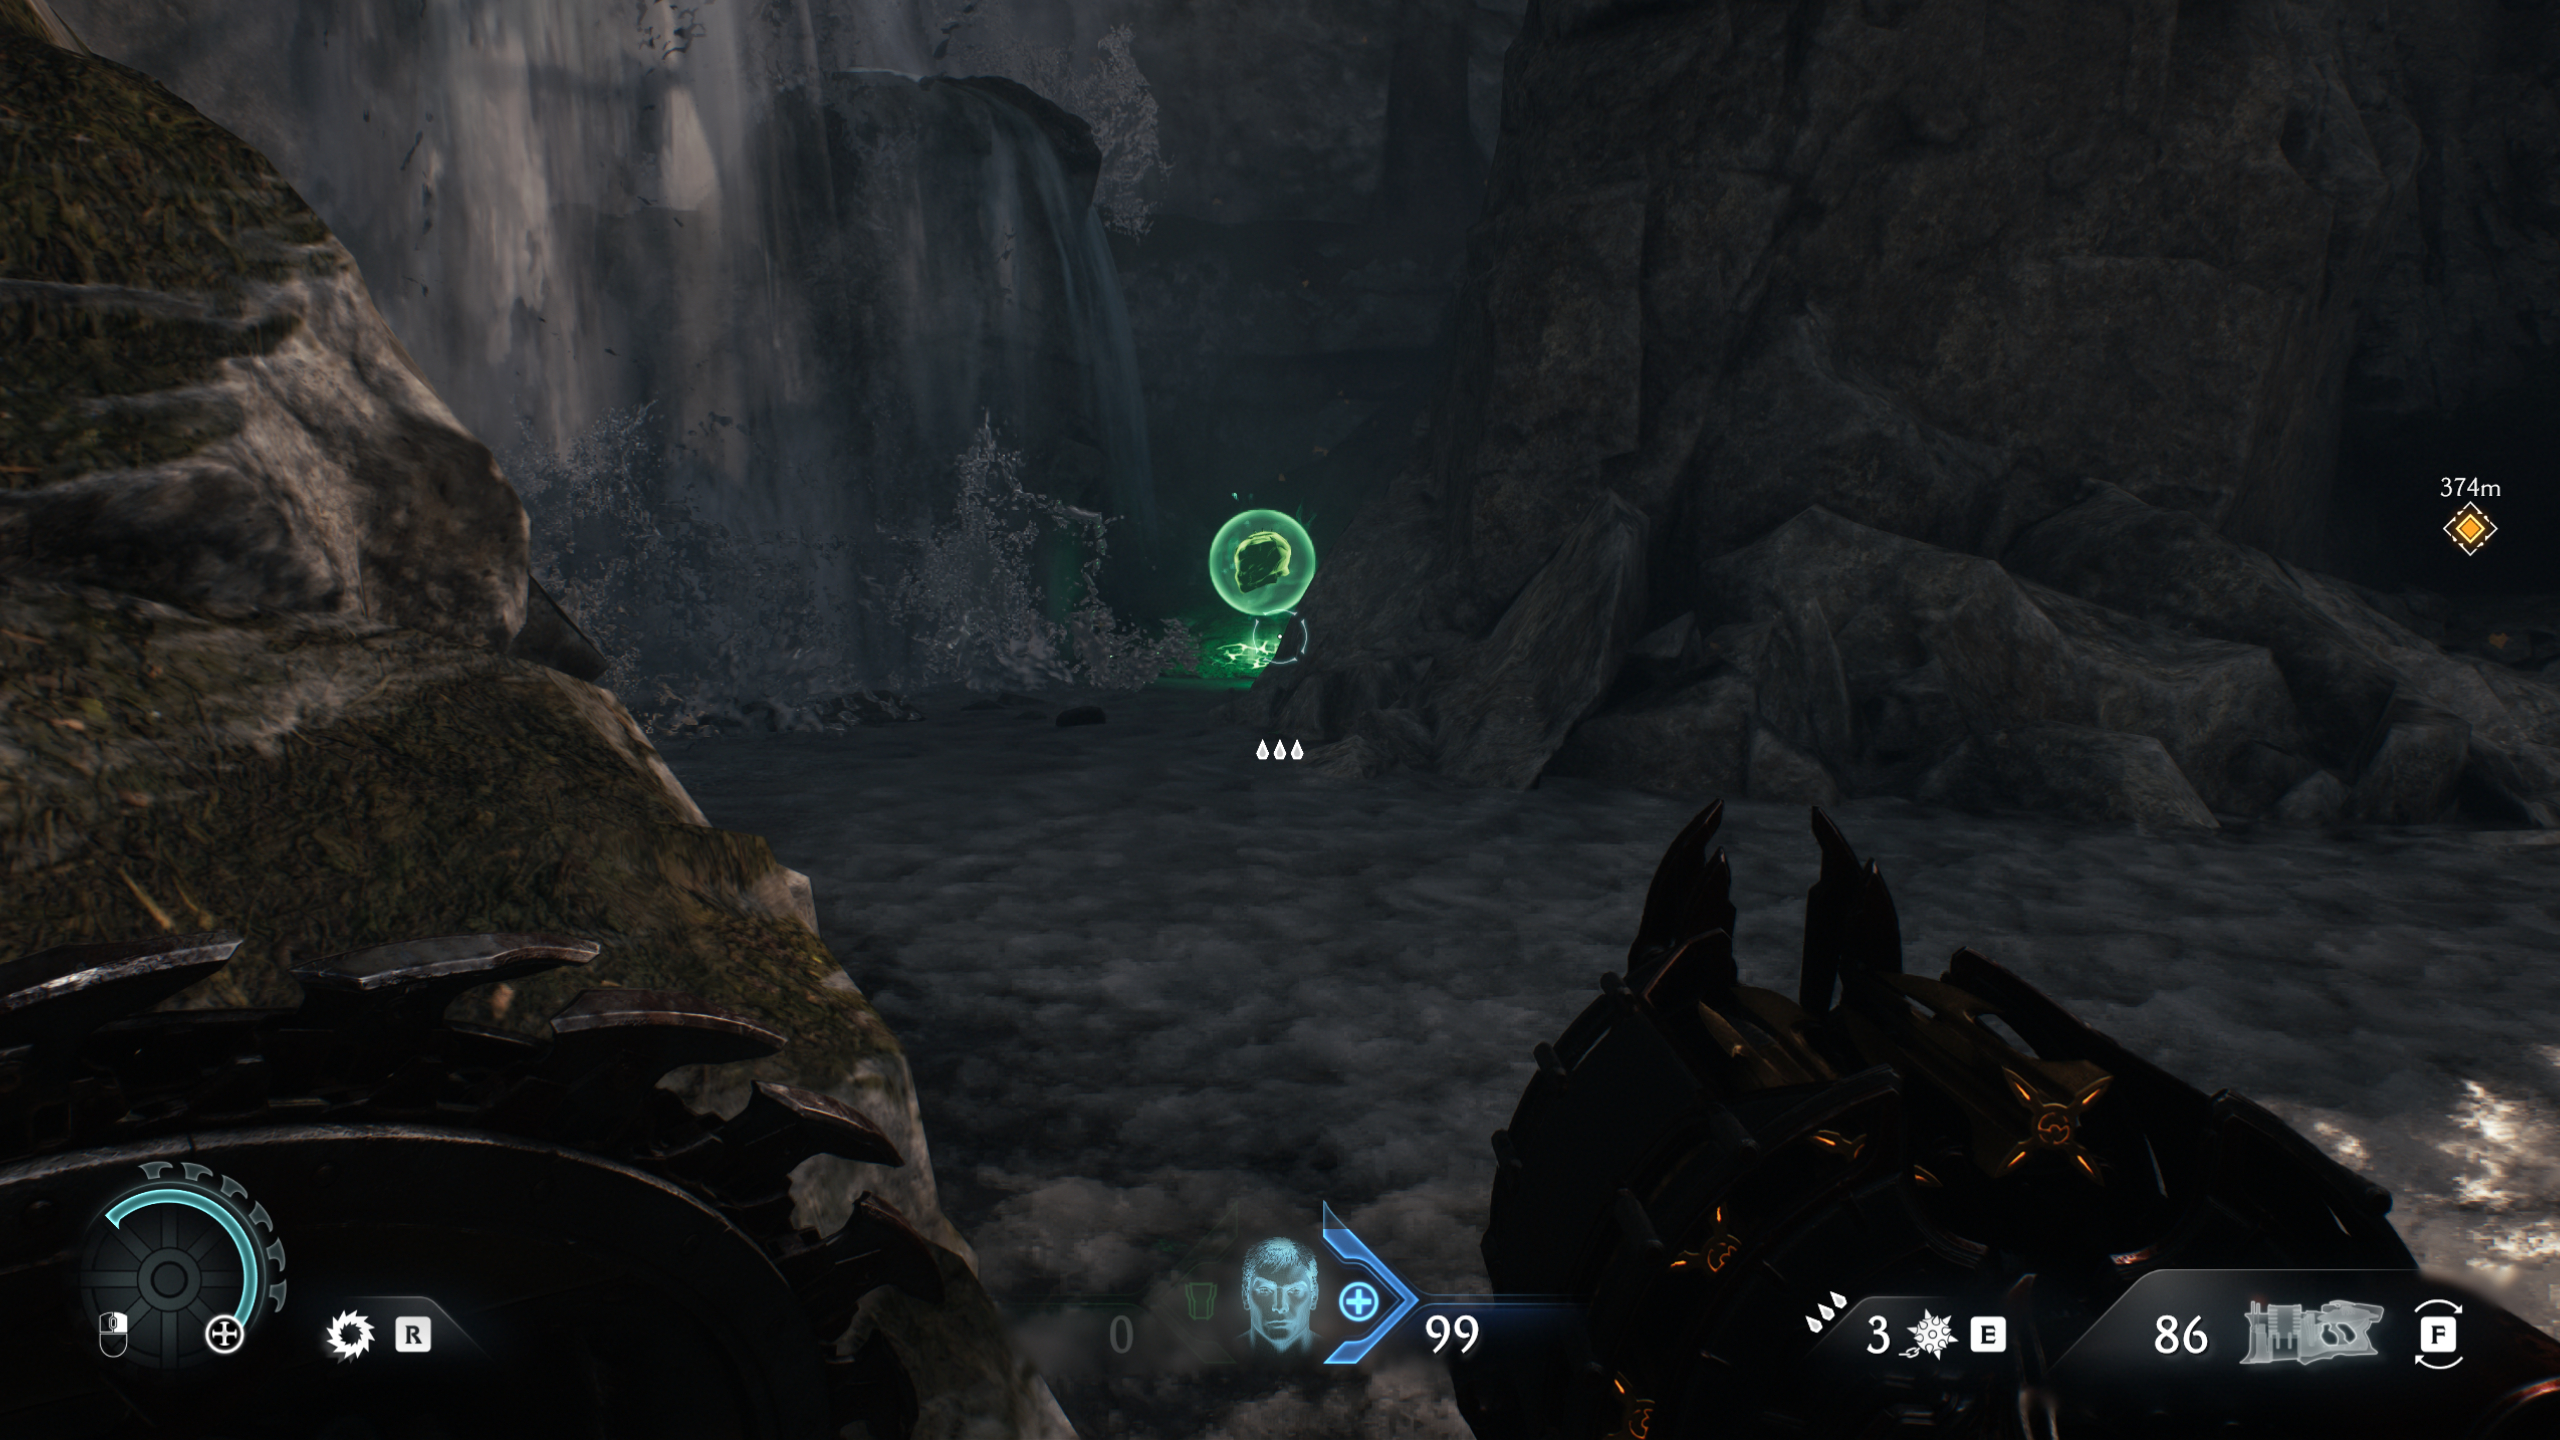
The first secret is admittedly rather bland, but at least it's easy to get. From the city gate where you start the main objective to destroy gore portals, head left to where you'll find a small waterfall, guarded by a tank. Between the rocks is a life sigil.
2 - Ruby

You can earn a ruby from completing the gore pillar challenge on the path leading to the large gore portal in the top left corner of the map. It's just up the hill from the hidden life sigil above. It's technically not considered a secret in the game, but it is required for 100% completion.
3 - Nightmare Impaler weapon skin (collectible)
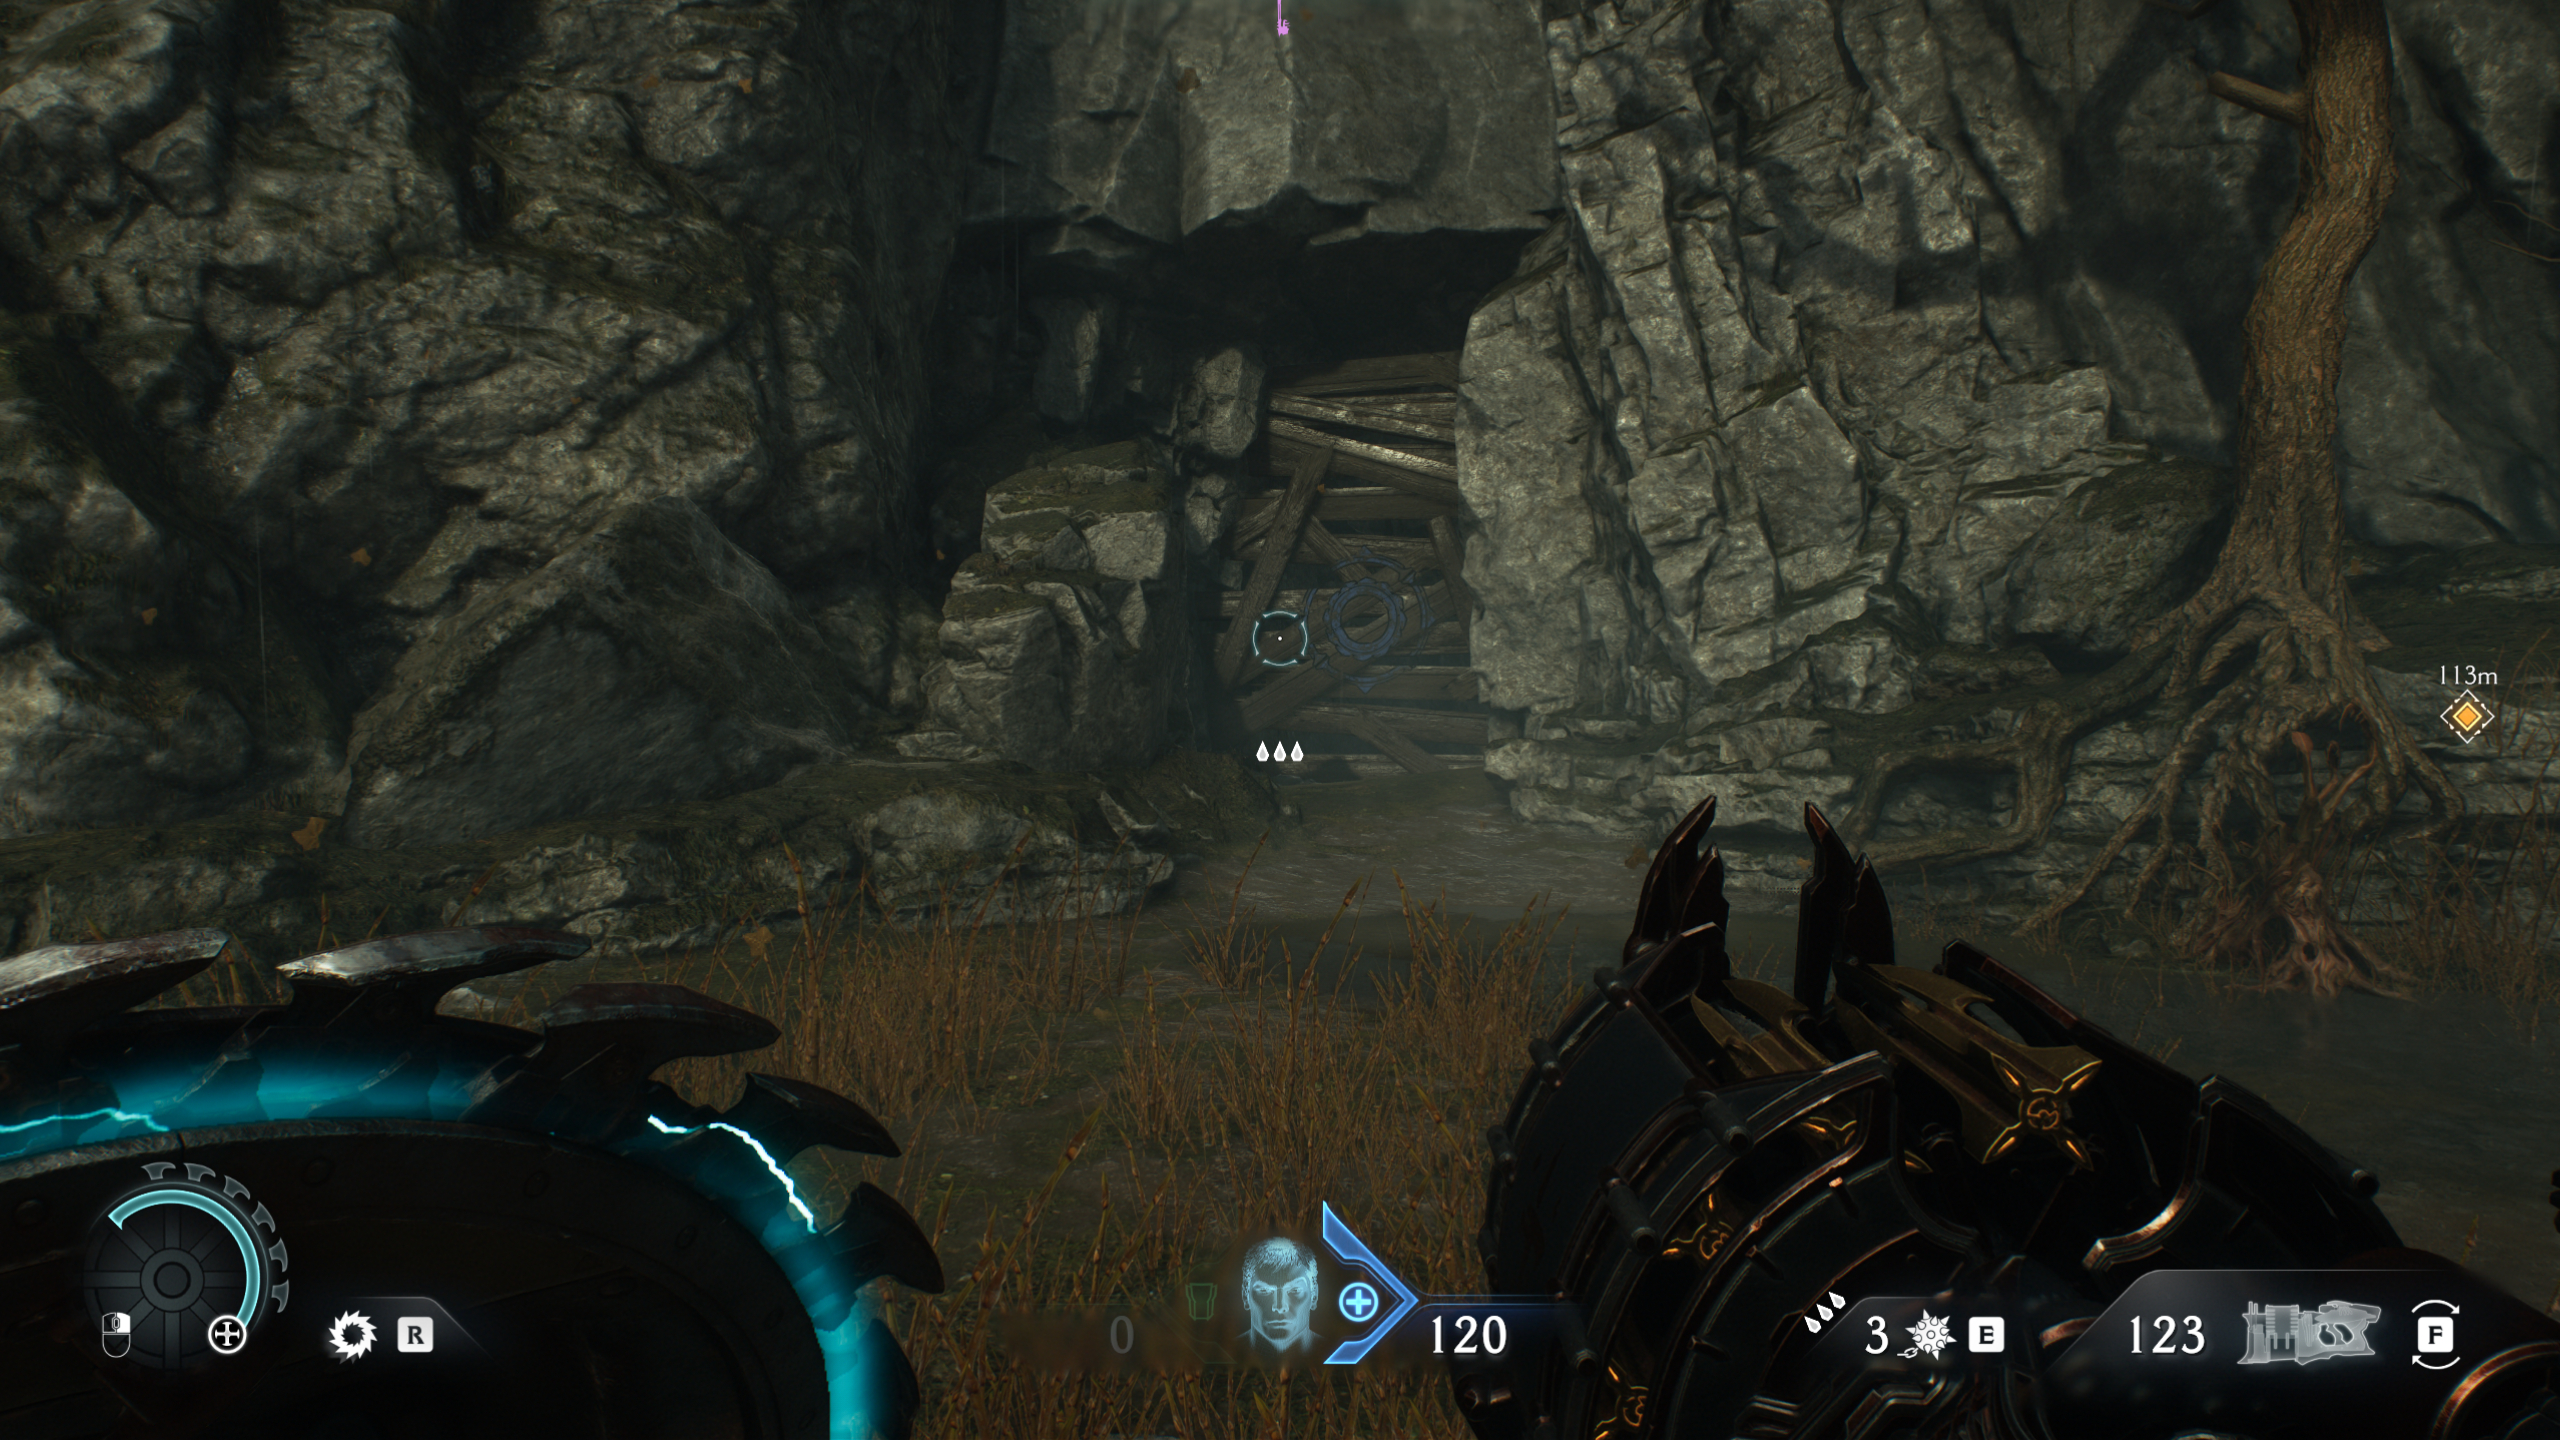
The fancy Nightmare weapon skin for the Impaler is hidden in a cave to the southwest of the large gore portal in the left corner of the map. If you're heading here from the previous two secrets, just follow the path and stick to the left.
Once you enter the cave, simply turn left, where you'll find the item behind a purple key gate. As mentioned above, you'll find the purple key in the middle of the map.
4 - Ruby

In this same cave in the top left of the map, you'll also find a ruby, though picking it up requires a bit of work:
- Dive into the water and take the tunnel to the left until you can resurface
- Climb the wall to reach a ledge
- Shield bash the wooden barricade
- Throw your shield at the switch above the gate to keep it open
- Jump across the water and pull the switch to lower the platform in the main room
- Dive into the water behind you to return to the main room, where you can now swim to the platform and grab the ruby
5 - Gold chest

In the very top left of the map, just above the larger of the two gore portals, you'll find a Sentinel Shrine. Opposite this shrine is a blue portal that takes you to an underground area. When you enter the room:
- Throw your shield at the switch above the door to your right to keep it open
- Shield bash the wall inside the small room to break it
- Shield bash the crate to push it to the other side of the room
- Climb up your makeshift block staircase (where the switch to exit the room also is) and shield bash another barricade before dropping down into the gated room housing the chest
6 - Gold
The next secret is located inside the area you get teleported to after activating the smaller gore portal in the top left corner of the map. To reach the gold, you'll need to complete a bit of the puzzle to unlock the Reaver weapon, so once inside:
- Go down the left hallway and throw your shield at the switch above the door
- Turn left again and activate the switch behind the casket to open the gate ahead of you
- Walk forwards and activate the pressure pad, letting you break the lock in front of you by throwing your shield
- Enter the main room and turn left again, and then right into a small room with a lever, which activates the nearby jump pad
- Take the jump pad to find another pressure pad on the higher level, revealing another lock you can break with your shield
- Jump down into the main room again and climb up the boxes in the far left corner, going through the window
- Shield bash the barricade to your left to find the secret gold
To finish this puzzle and get the Reaver, just turn around and stand on the pressure plate by the entrance, where you'll now be able to break the final lock to release the weapon.
7 - Slayer toy (collectible)

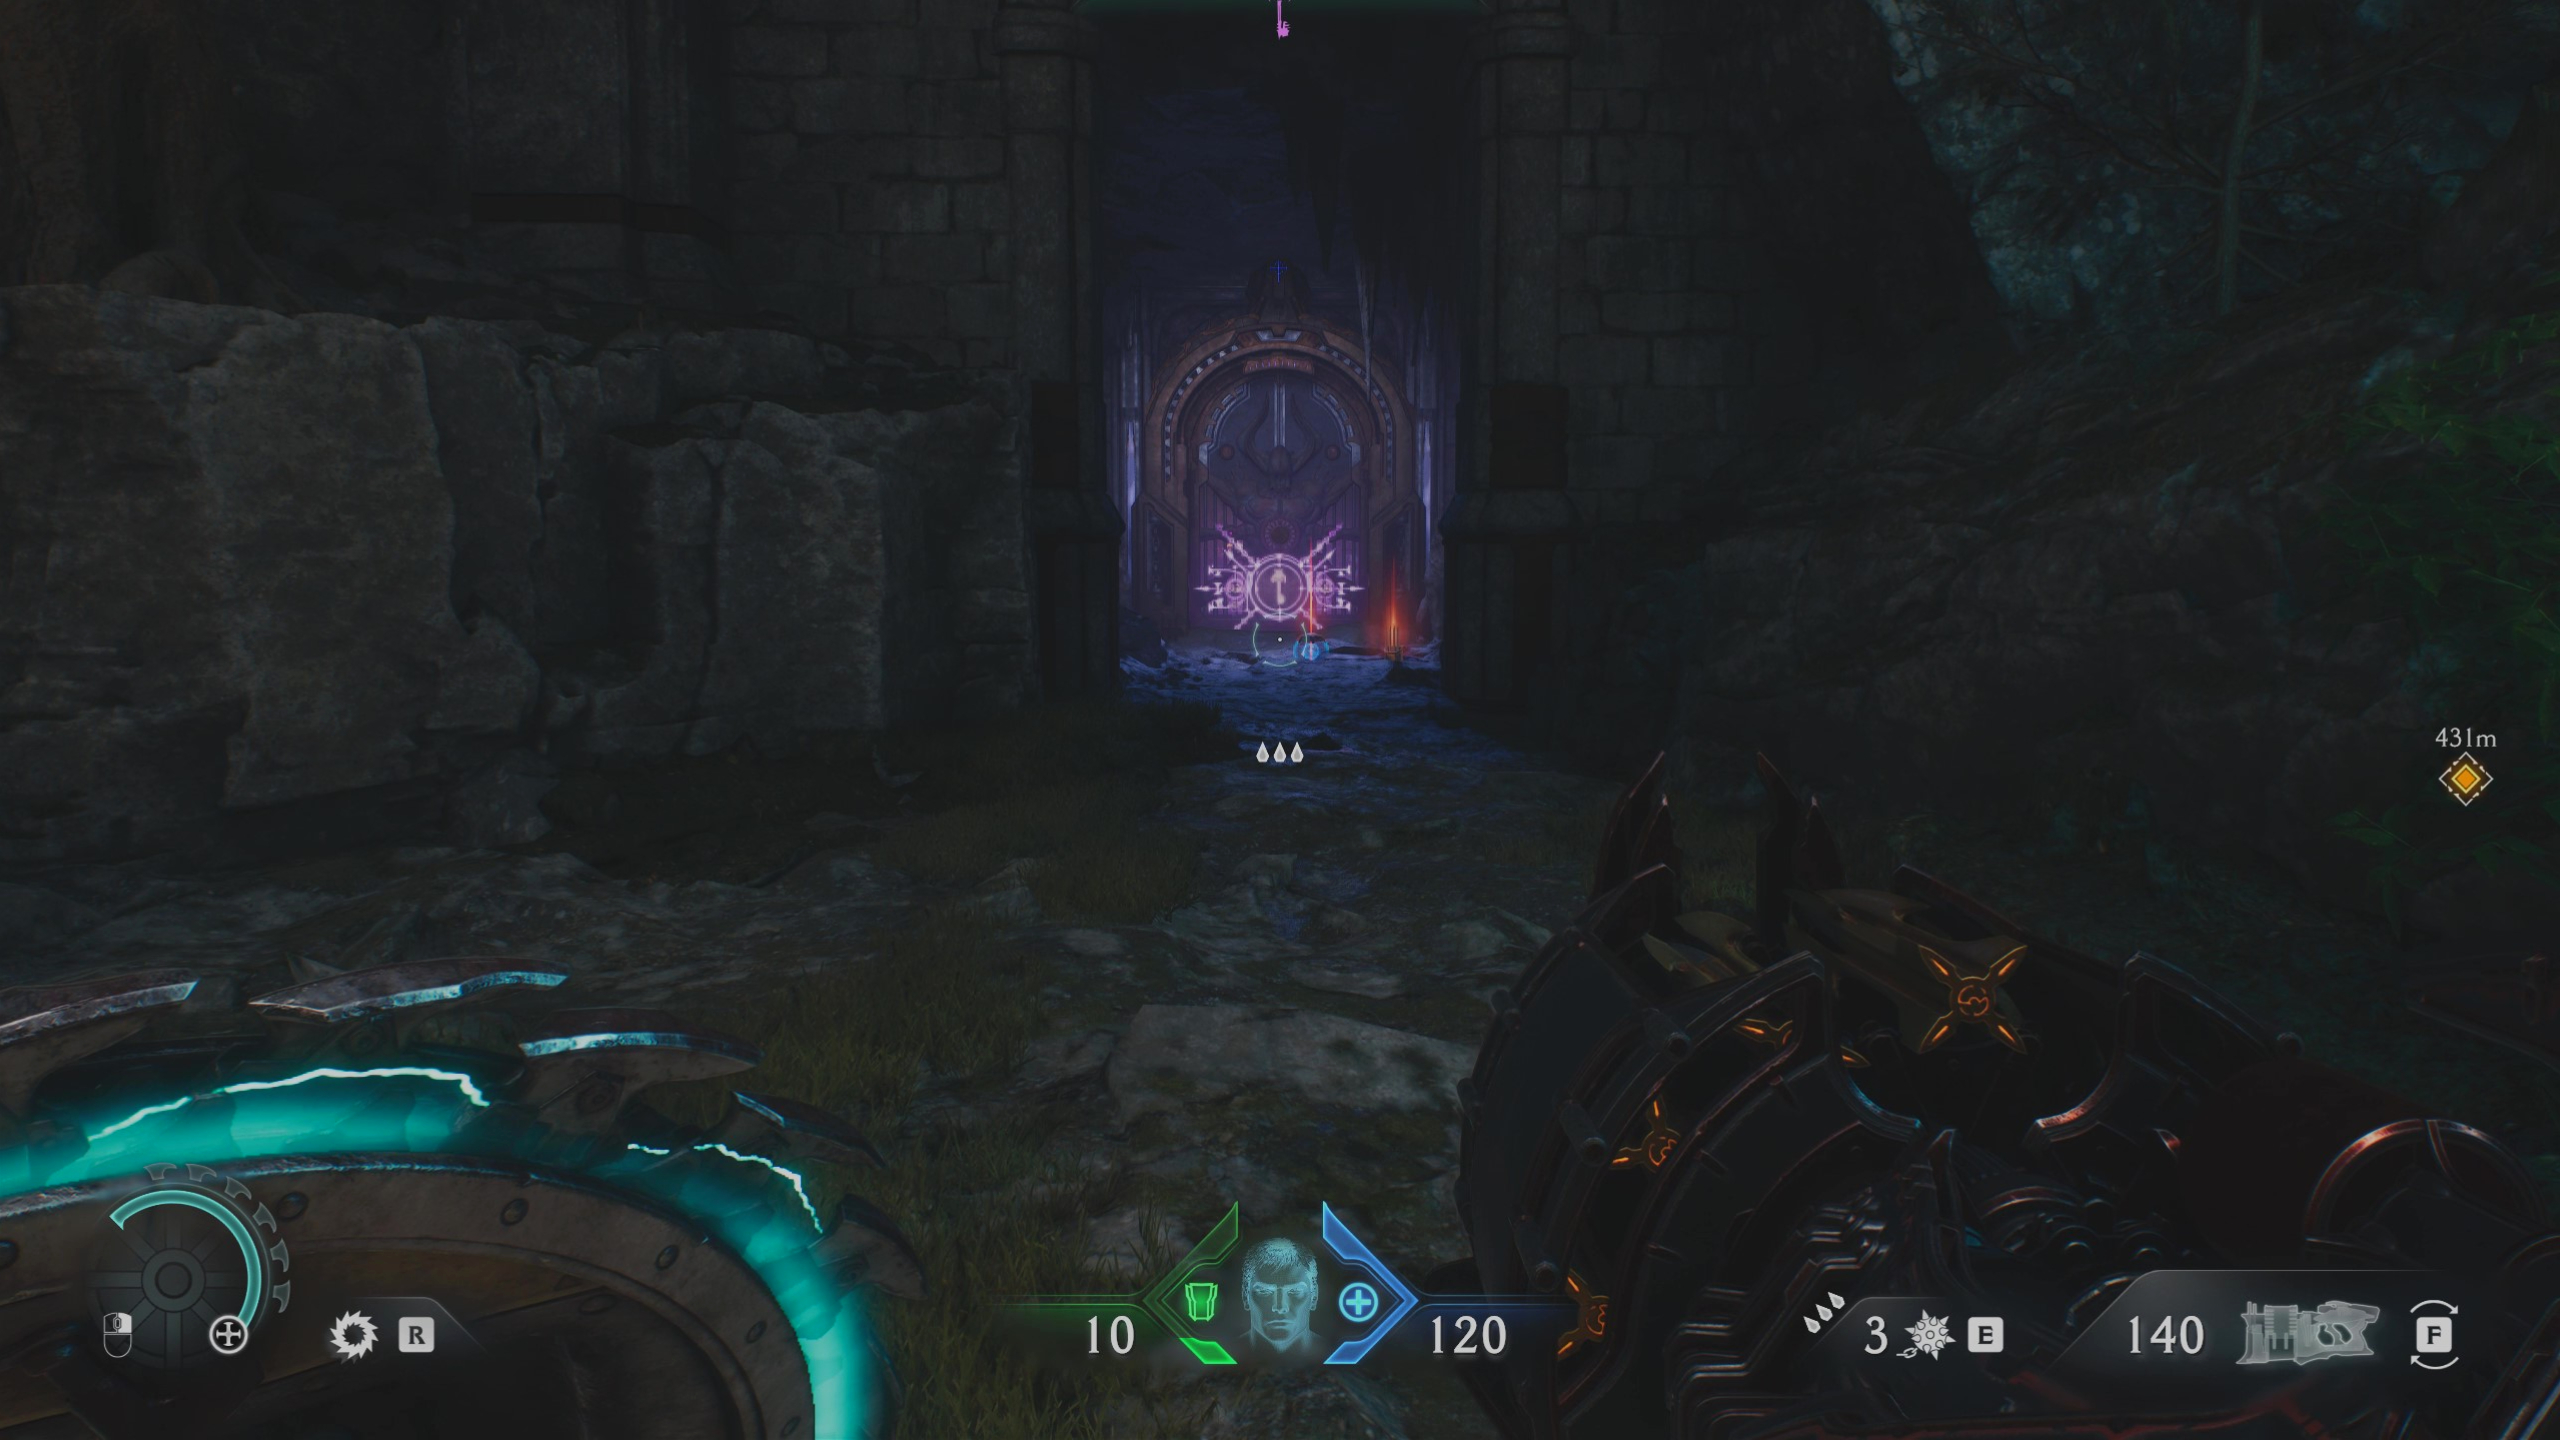
The cute little Slayer toy is, thankfully, very easy to add to your collection. From the purple key location slap bang in the middle of the map, just turn around and you'll see the gate, which requires the key to enter.
8 - Ruby
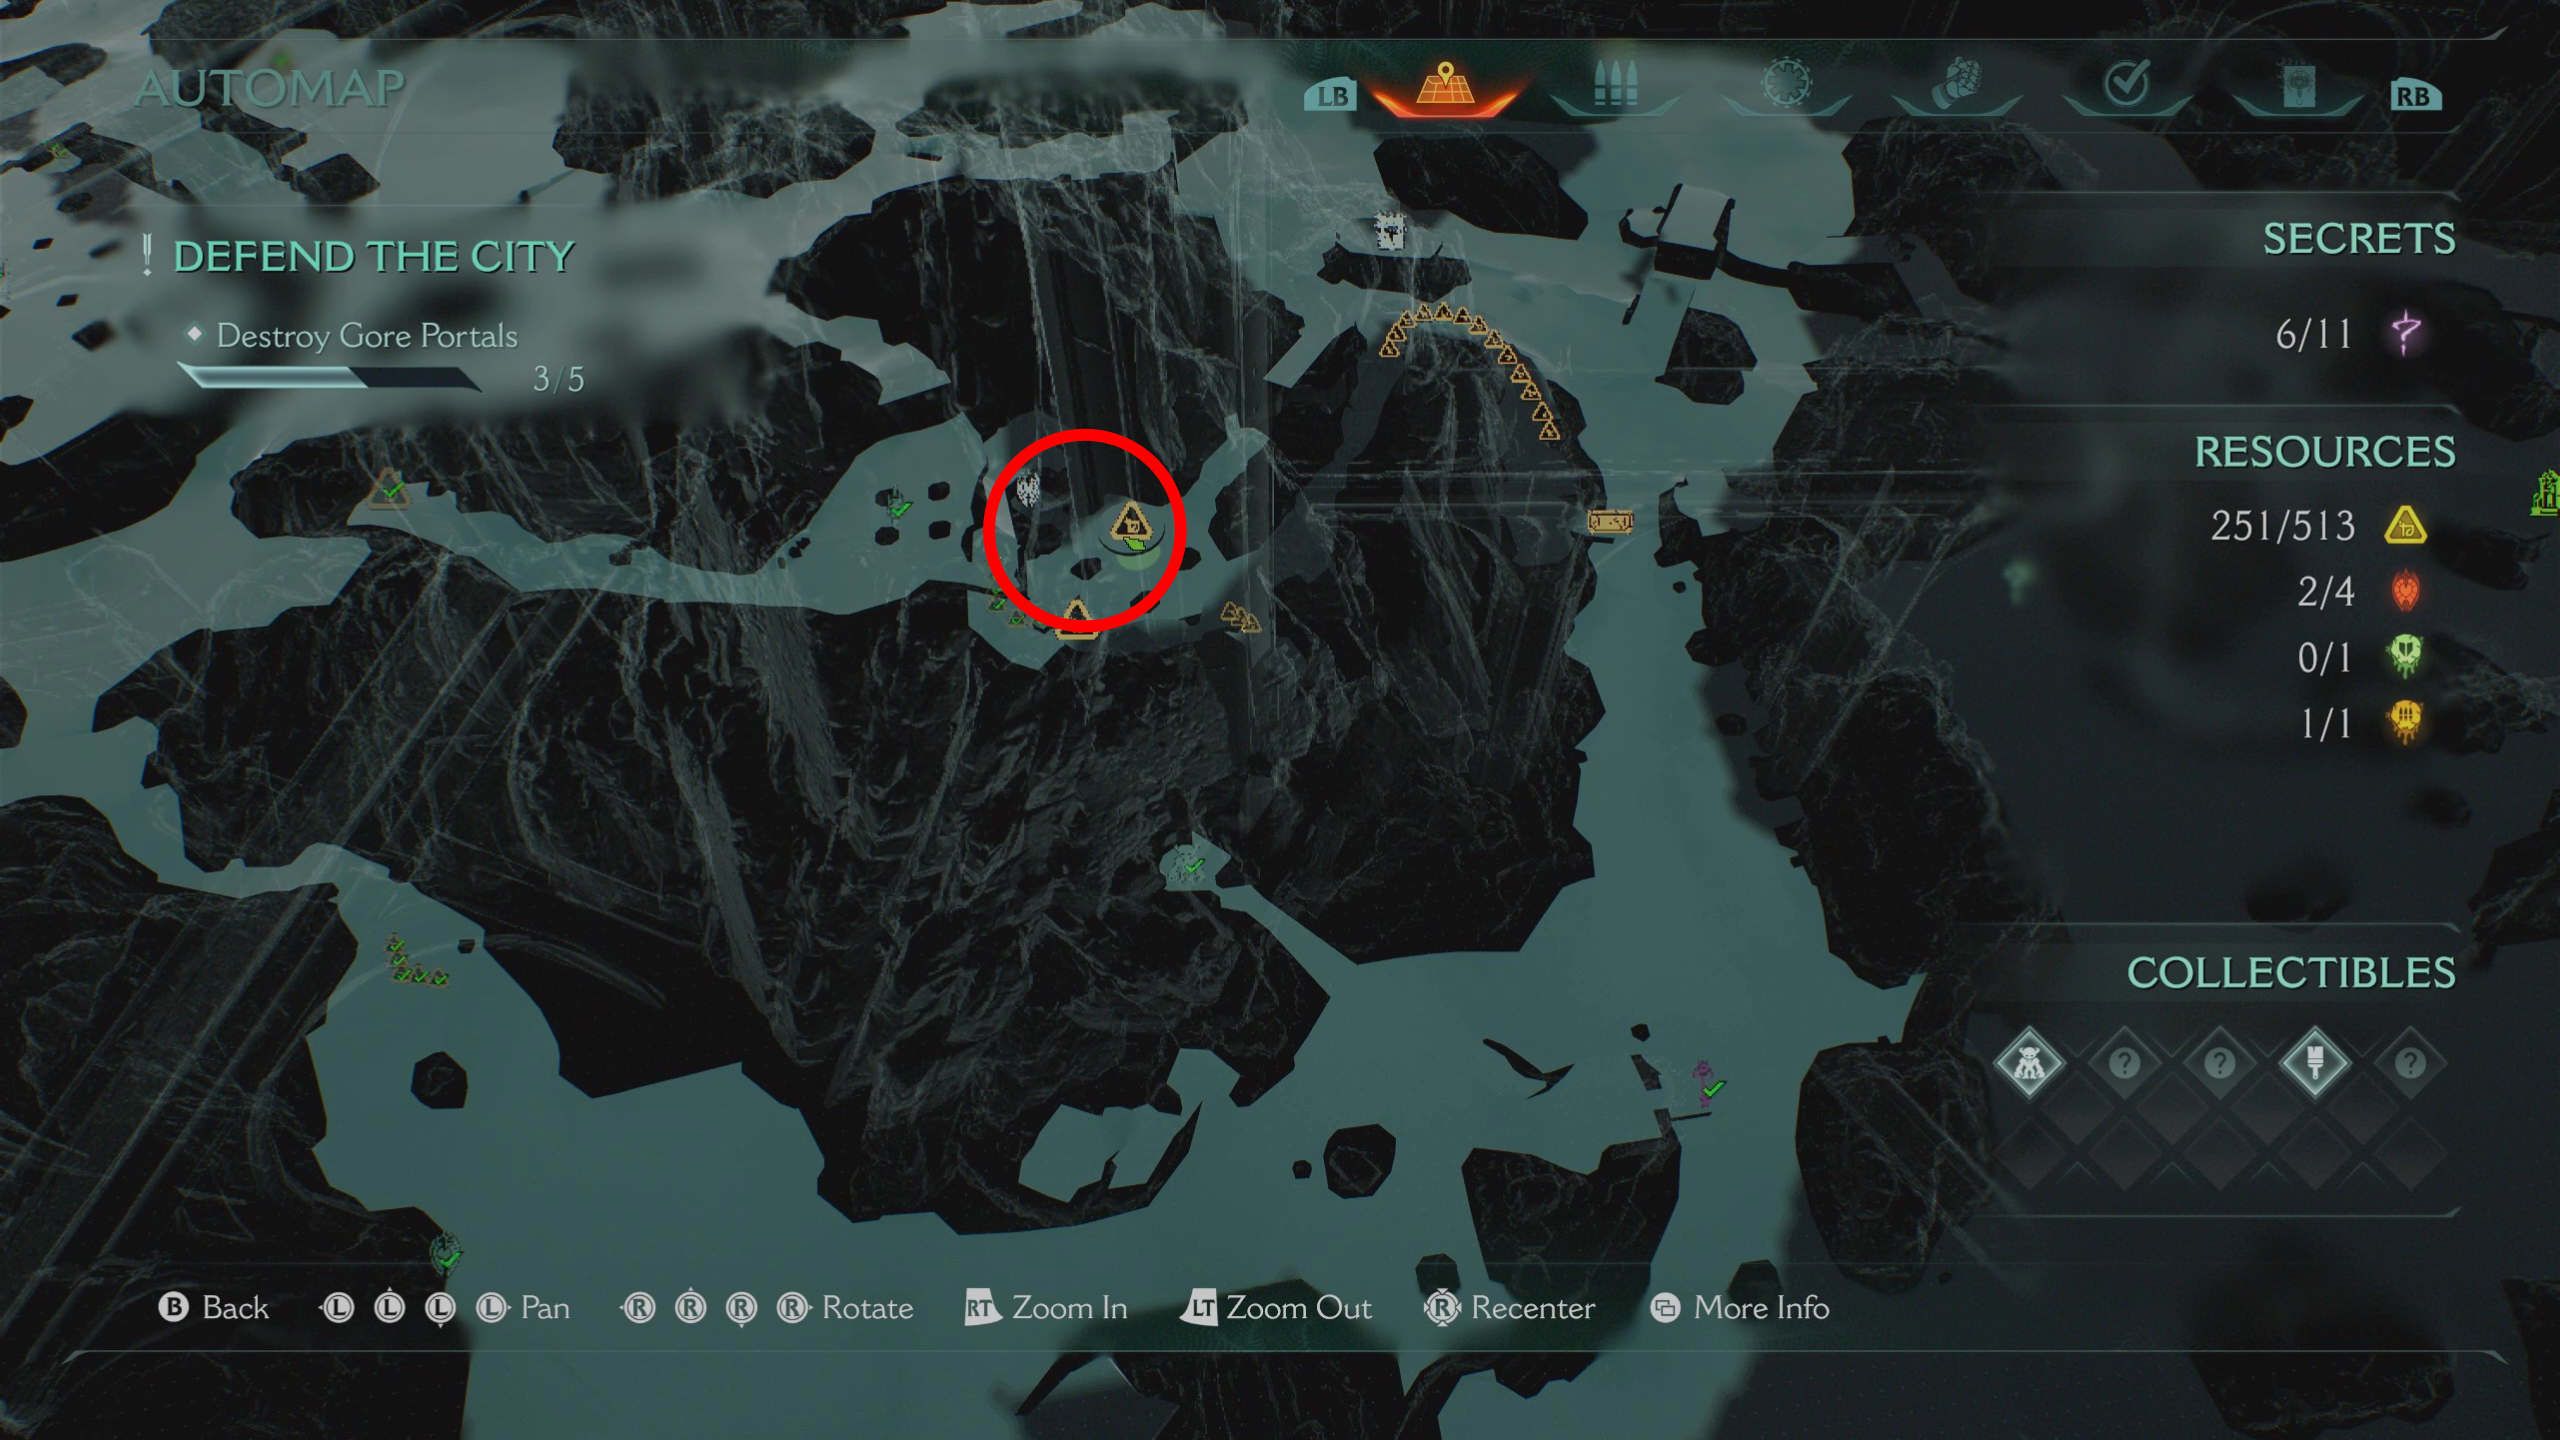

The next secret you should hunt down is a ruby in a cave right in the middle of the map, accessible from the north near a crashed ship. It's marked with two blue torches outside, so it shouldn't be too hard to see.
Enter the cave and drop down into the main room, where you'll find a purple key gate on your right, hiding the ruby.
9 - Siege Part 1 codex entry (collectible)

In the same cave where you found the ruby above, walk further inside and shield jump to the higher level, then:
- Jump onto the raised platform in the middle of the room to lower it
- Walk through the gate you've just opened
- Climb the wall and head right up the hill, dodging fireballs
- At the exit of the cave, jump across the gap to the rocky island ahead of you, where you'll see the codex entry
- Jump back the way you came for the next secret
10 - Gold chest

Returning to the cave exit after the fireball tunnel, instead of jumping straight ahead like you just did to grab the codex entry, turn right and follow the path. At the end, you'll find a gold chest sitting on a ledge.
11 - Mancubus toy (collectible)
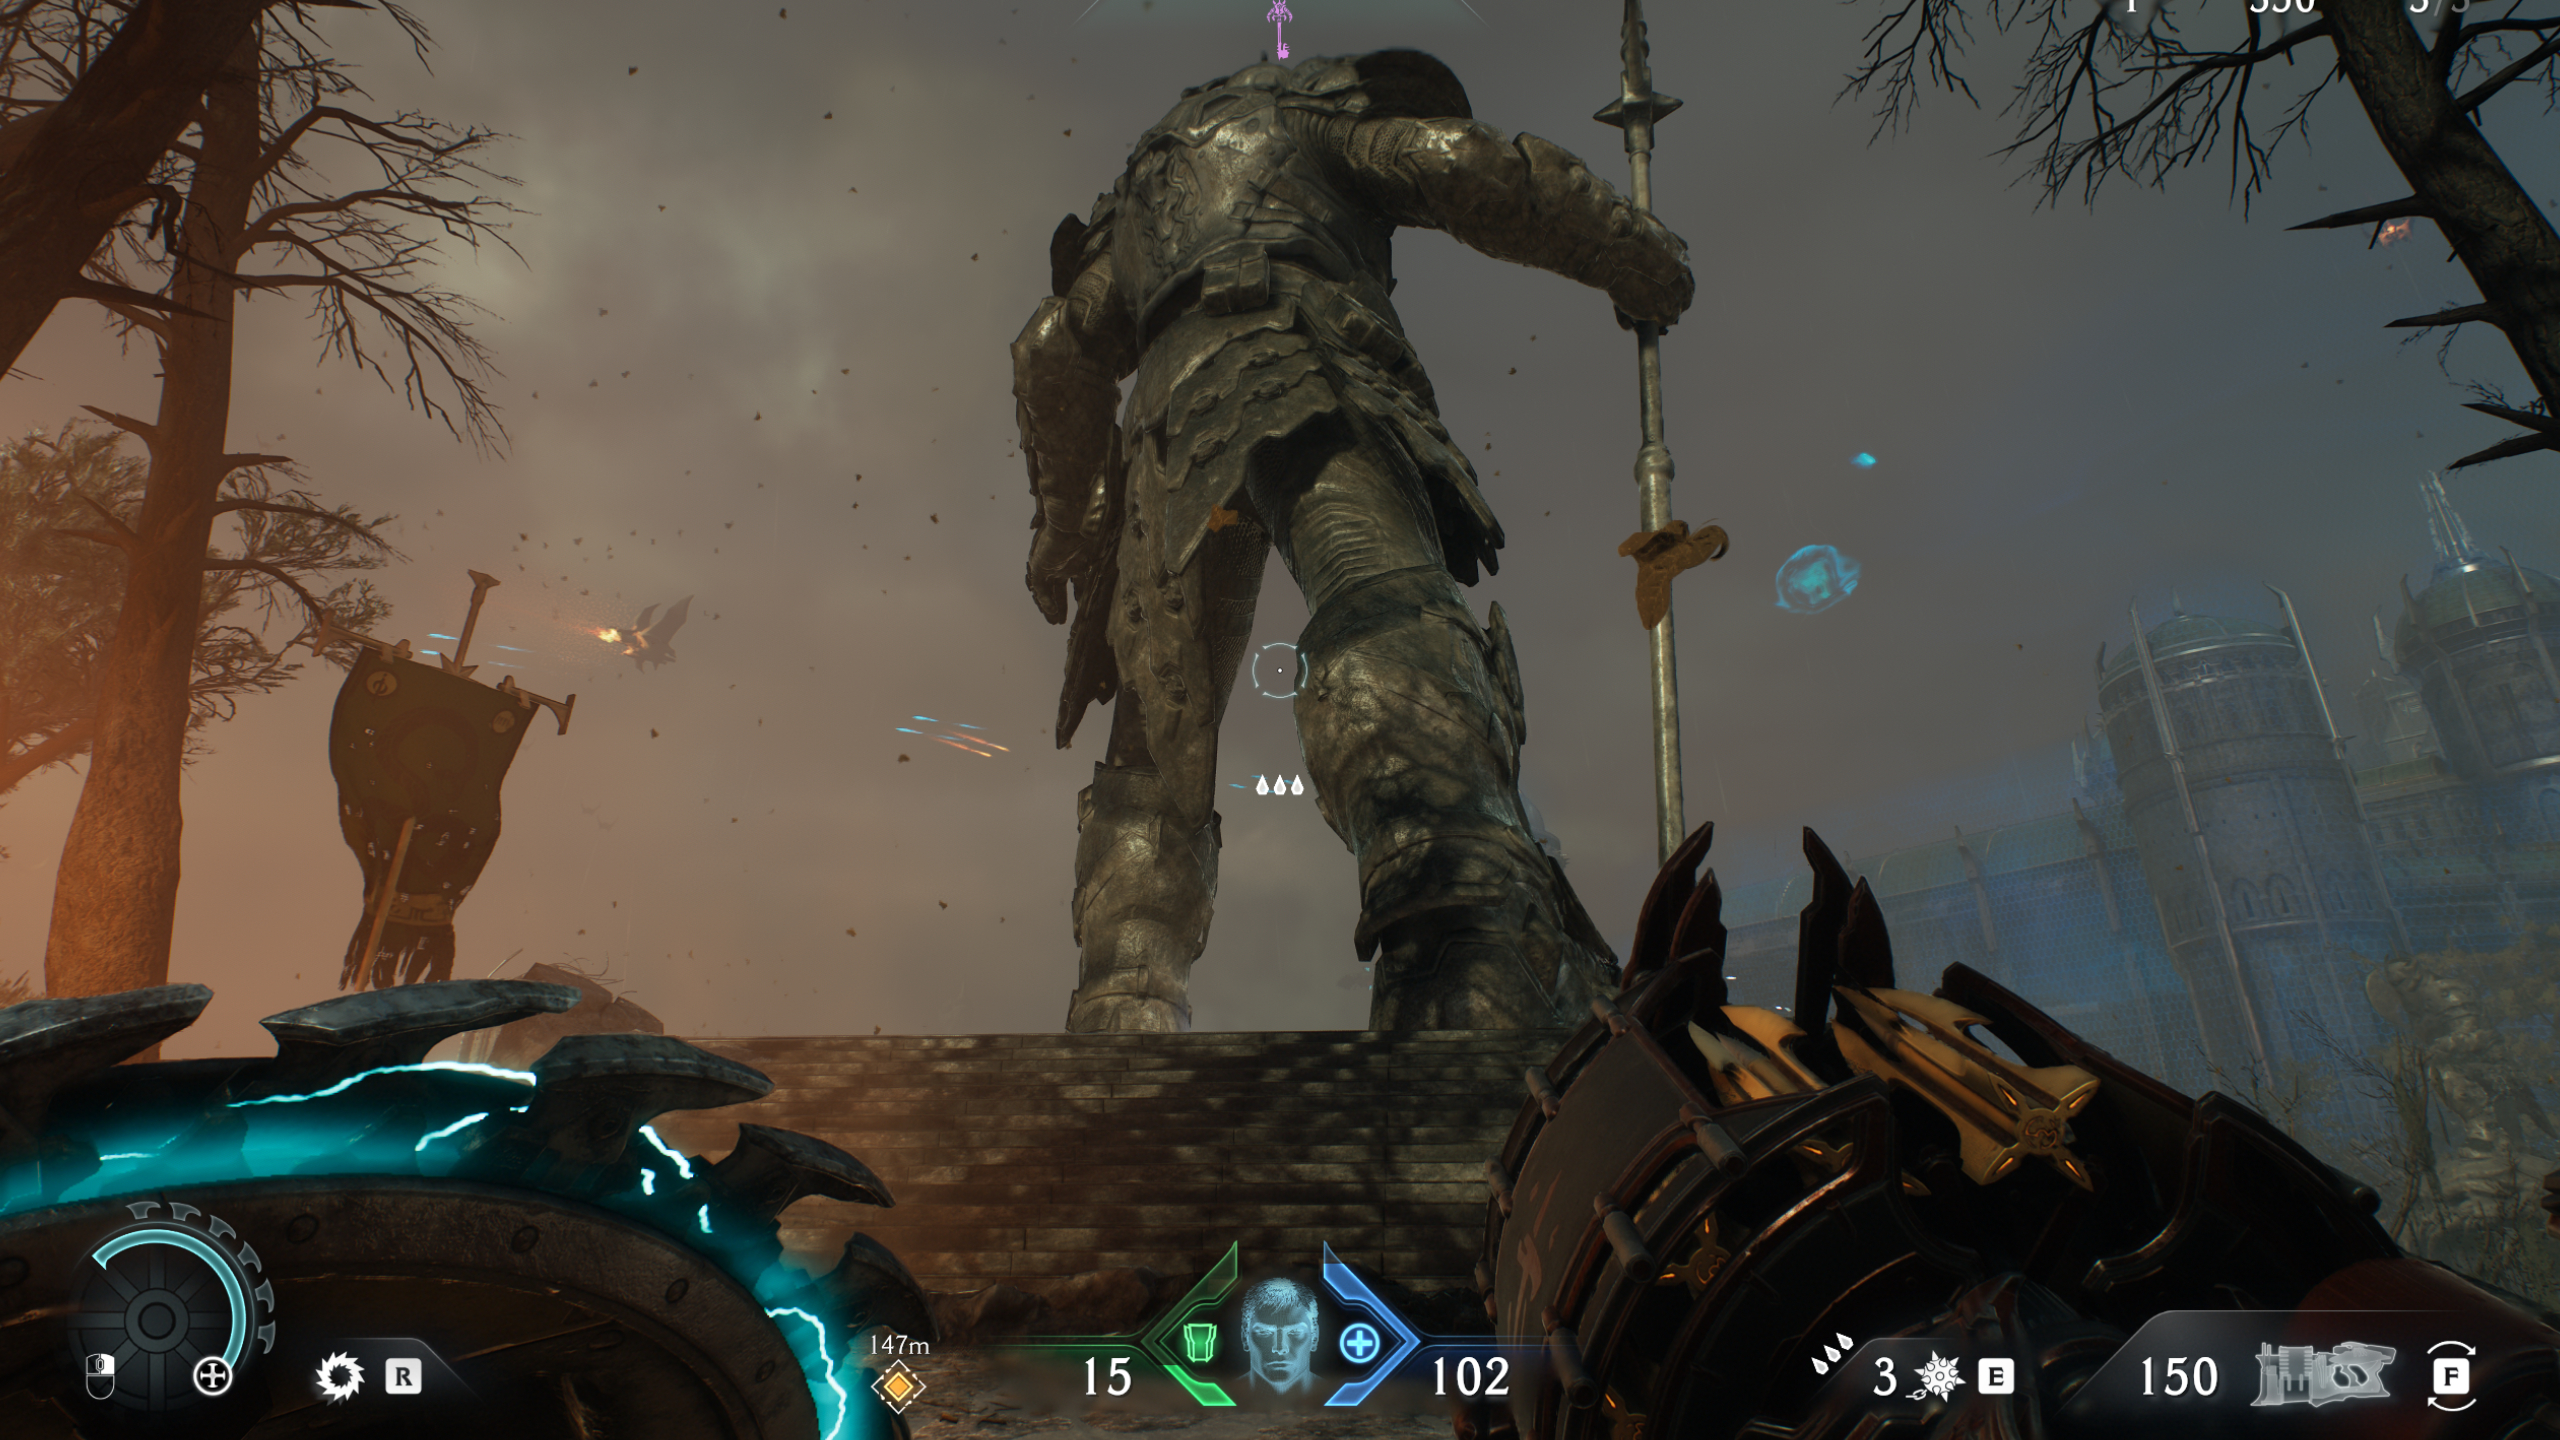
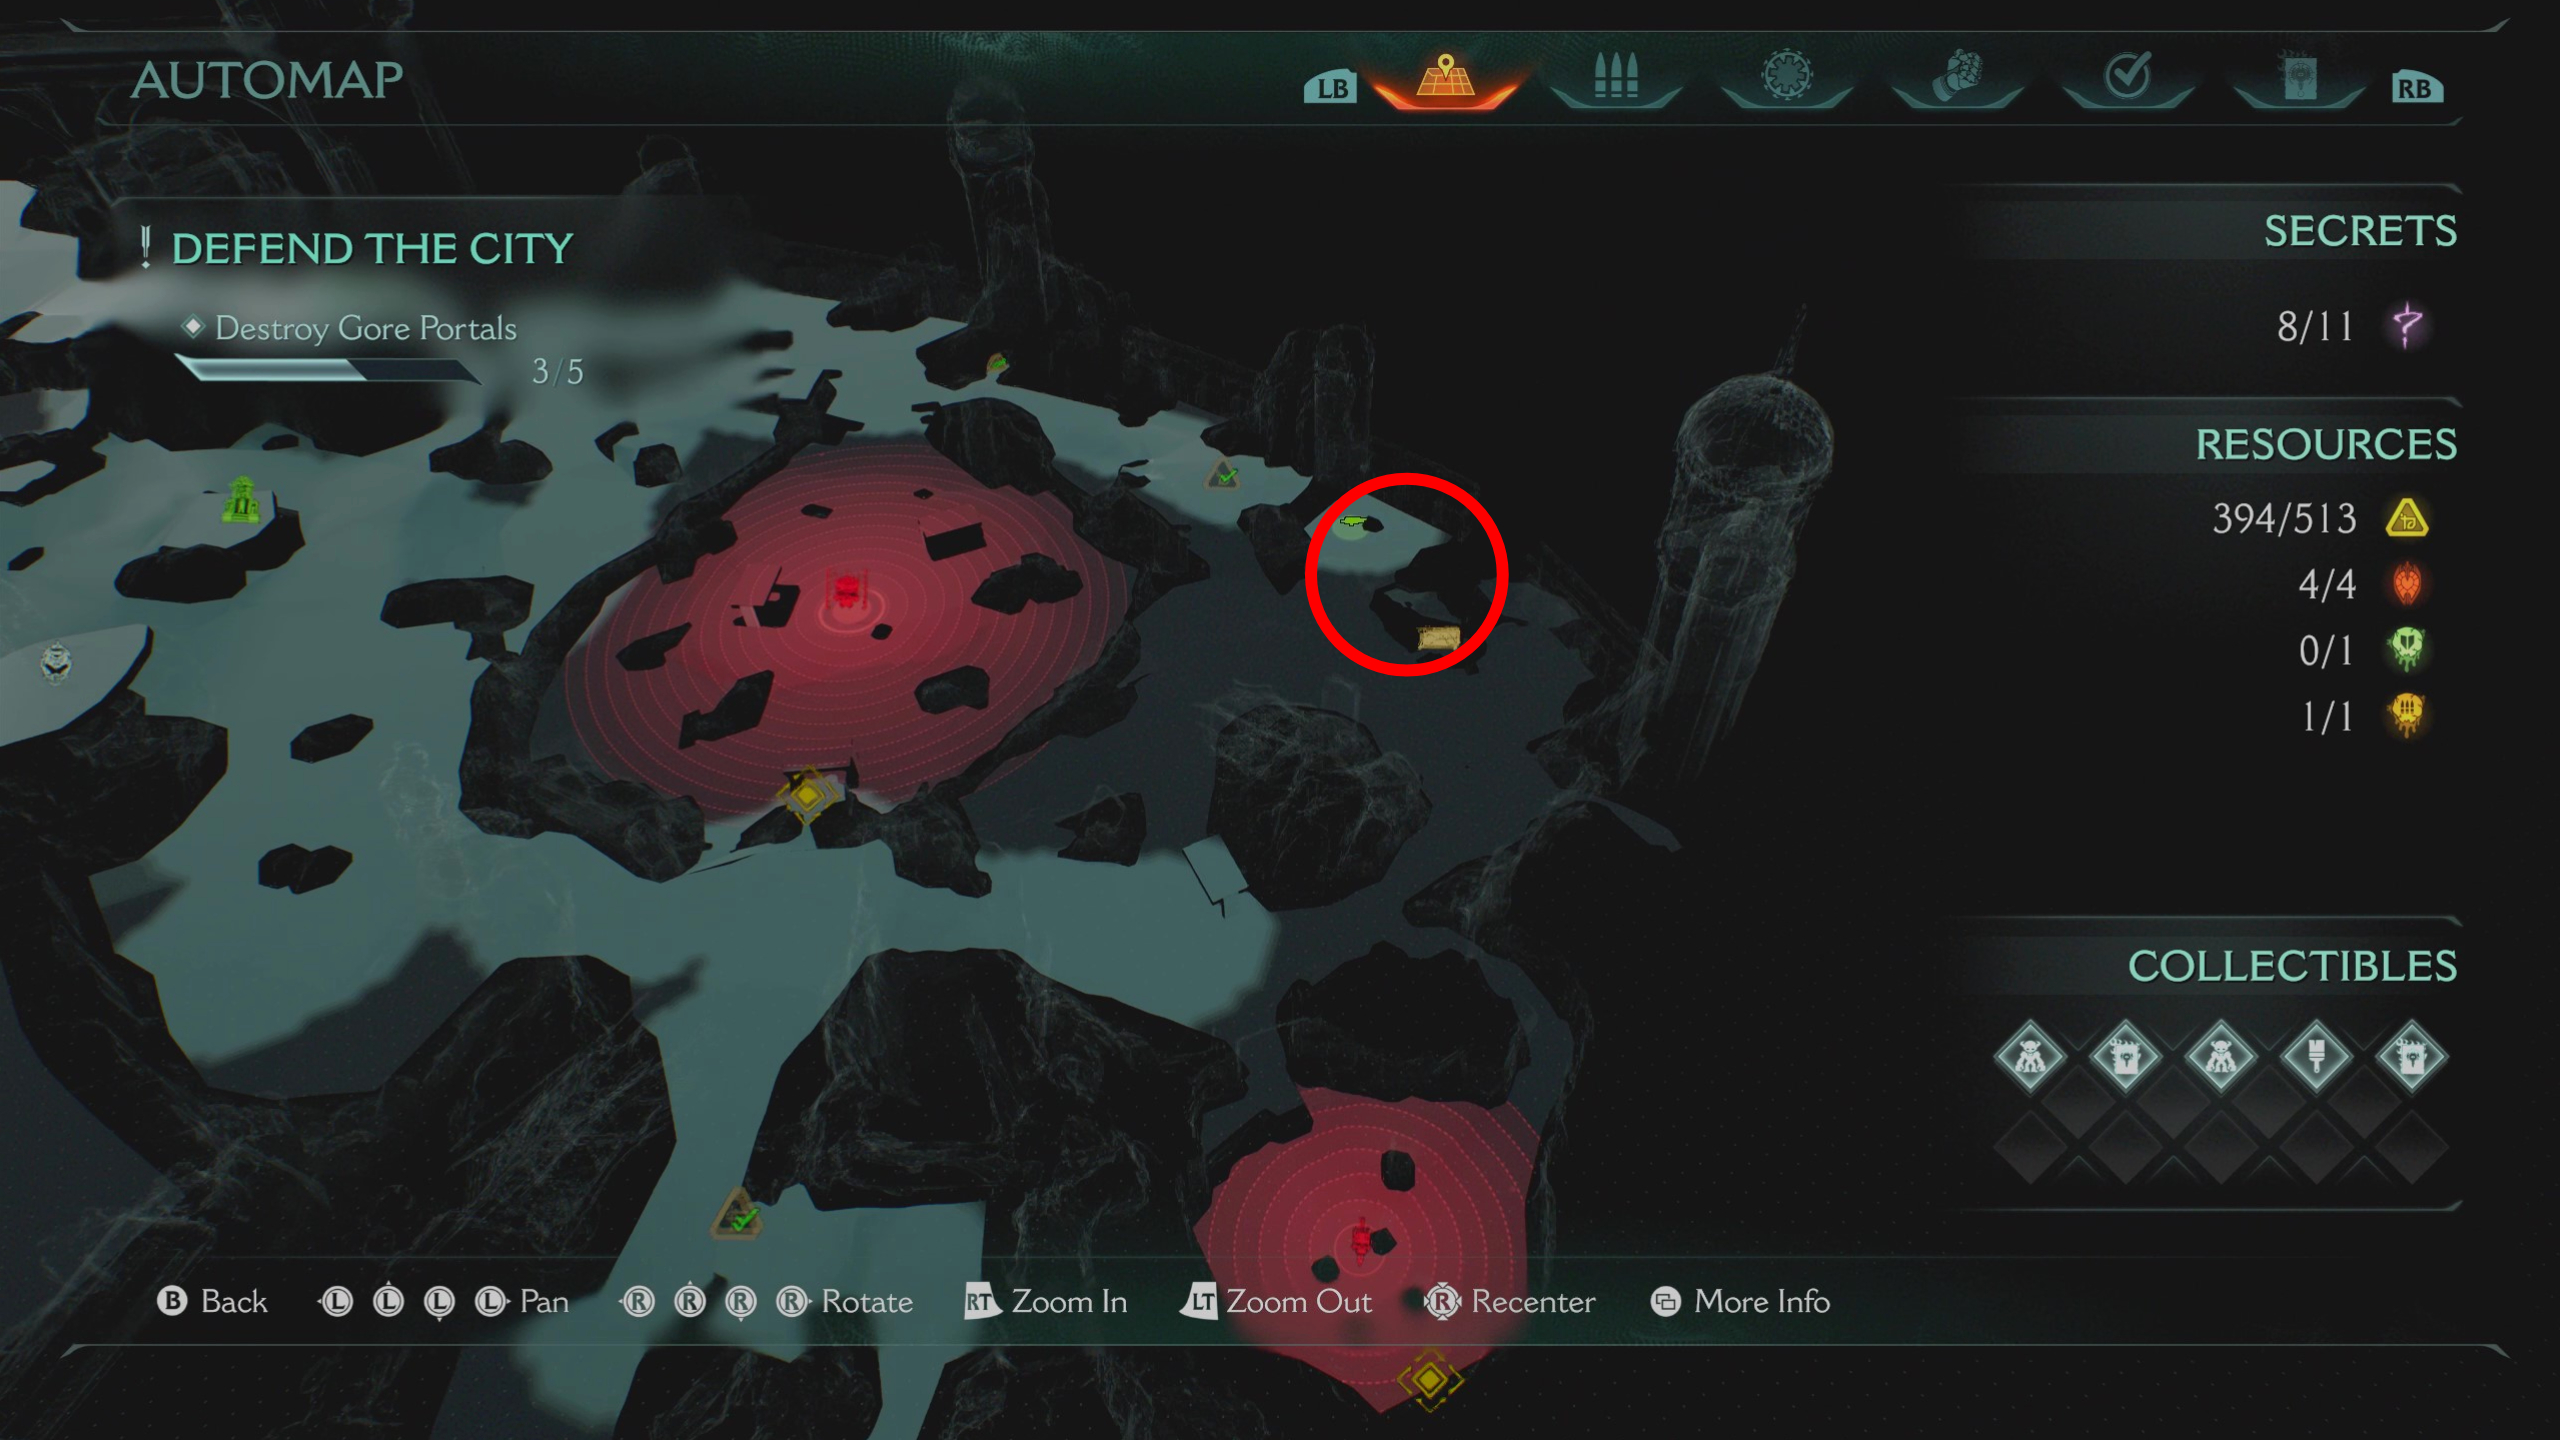
You can find the Mancubus toy between the massive Sentinel statue's legs at the top of the map, near the larger of the two demonic portals on the right side.
12 - Creed Makyr codex entry (collectible)

From the Sentinel statue where you found the Mancubus toy, just drop down to the left where you'll see the orange glow of the codex page. You can also reach this area by climbing the wall near the Sentinel Shrine.
13 - Ruby
Despite being more involved than most secrets, getting this ruby doesn't actually count as a secret in this mission. Nevertheless, it felt worth including. In the bottom right of the map, directly right of the first Sentinel Shrine, you can find a protected ruby with three wolf statues around it. You need to find and break three wolf totems by throwing your shield to unlock this ruby. Facing the ruby and the three main statues:
- Turn directly right and you'll see a wolf totem on a small ledge
- Another totem is directly ahead of you, under a fallen tree trunk
- The last totem is off the ledge to your left, almost looping behind the hill
14 - Gold chest
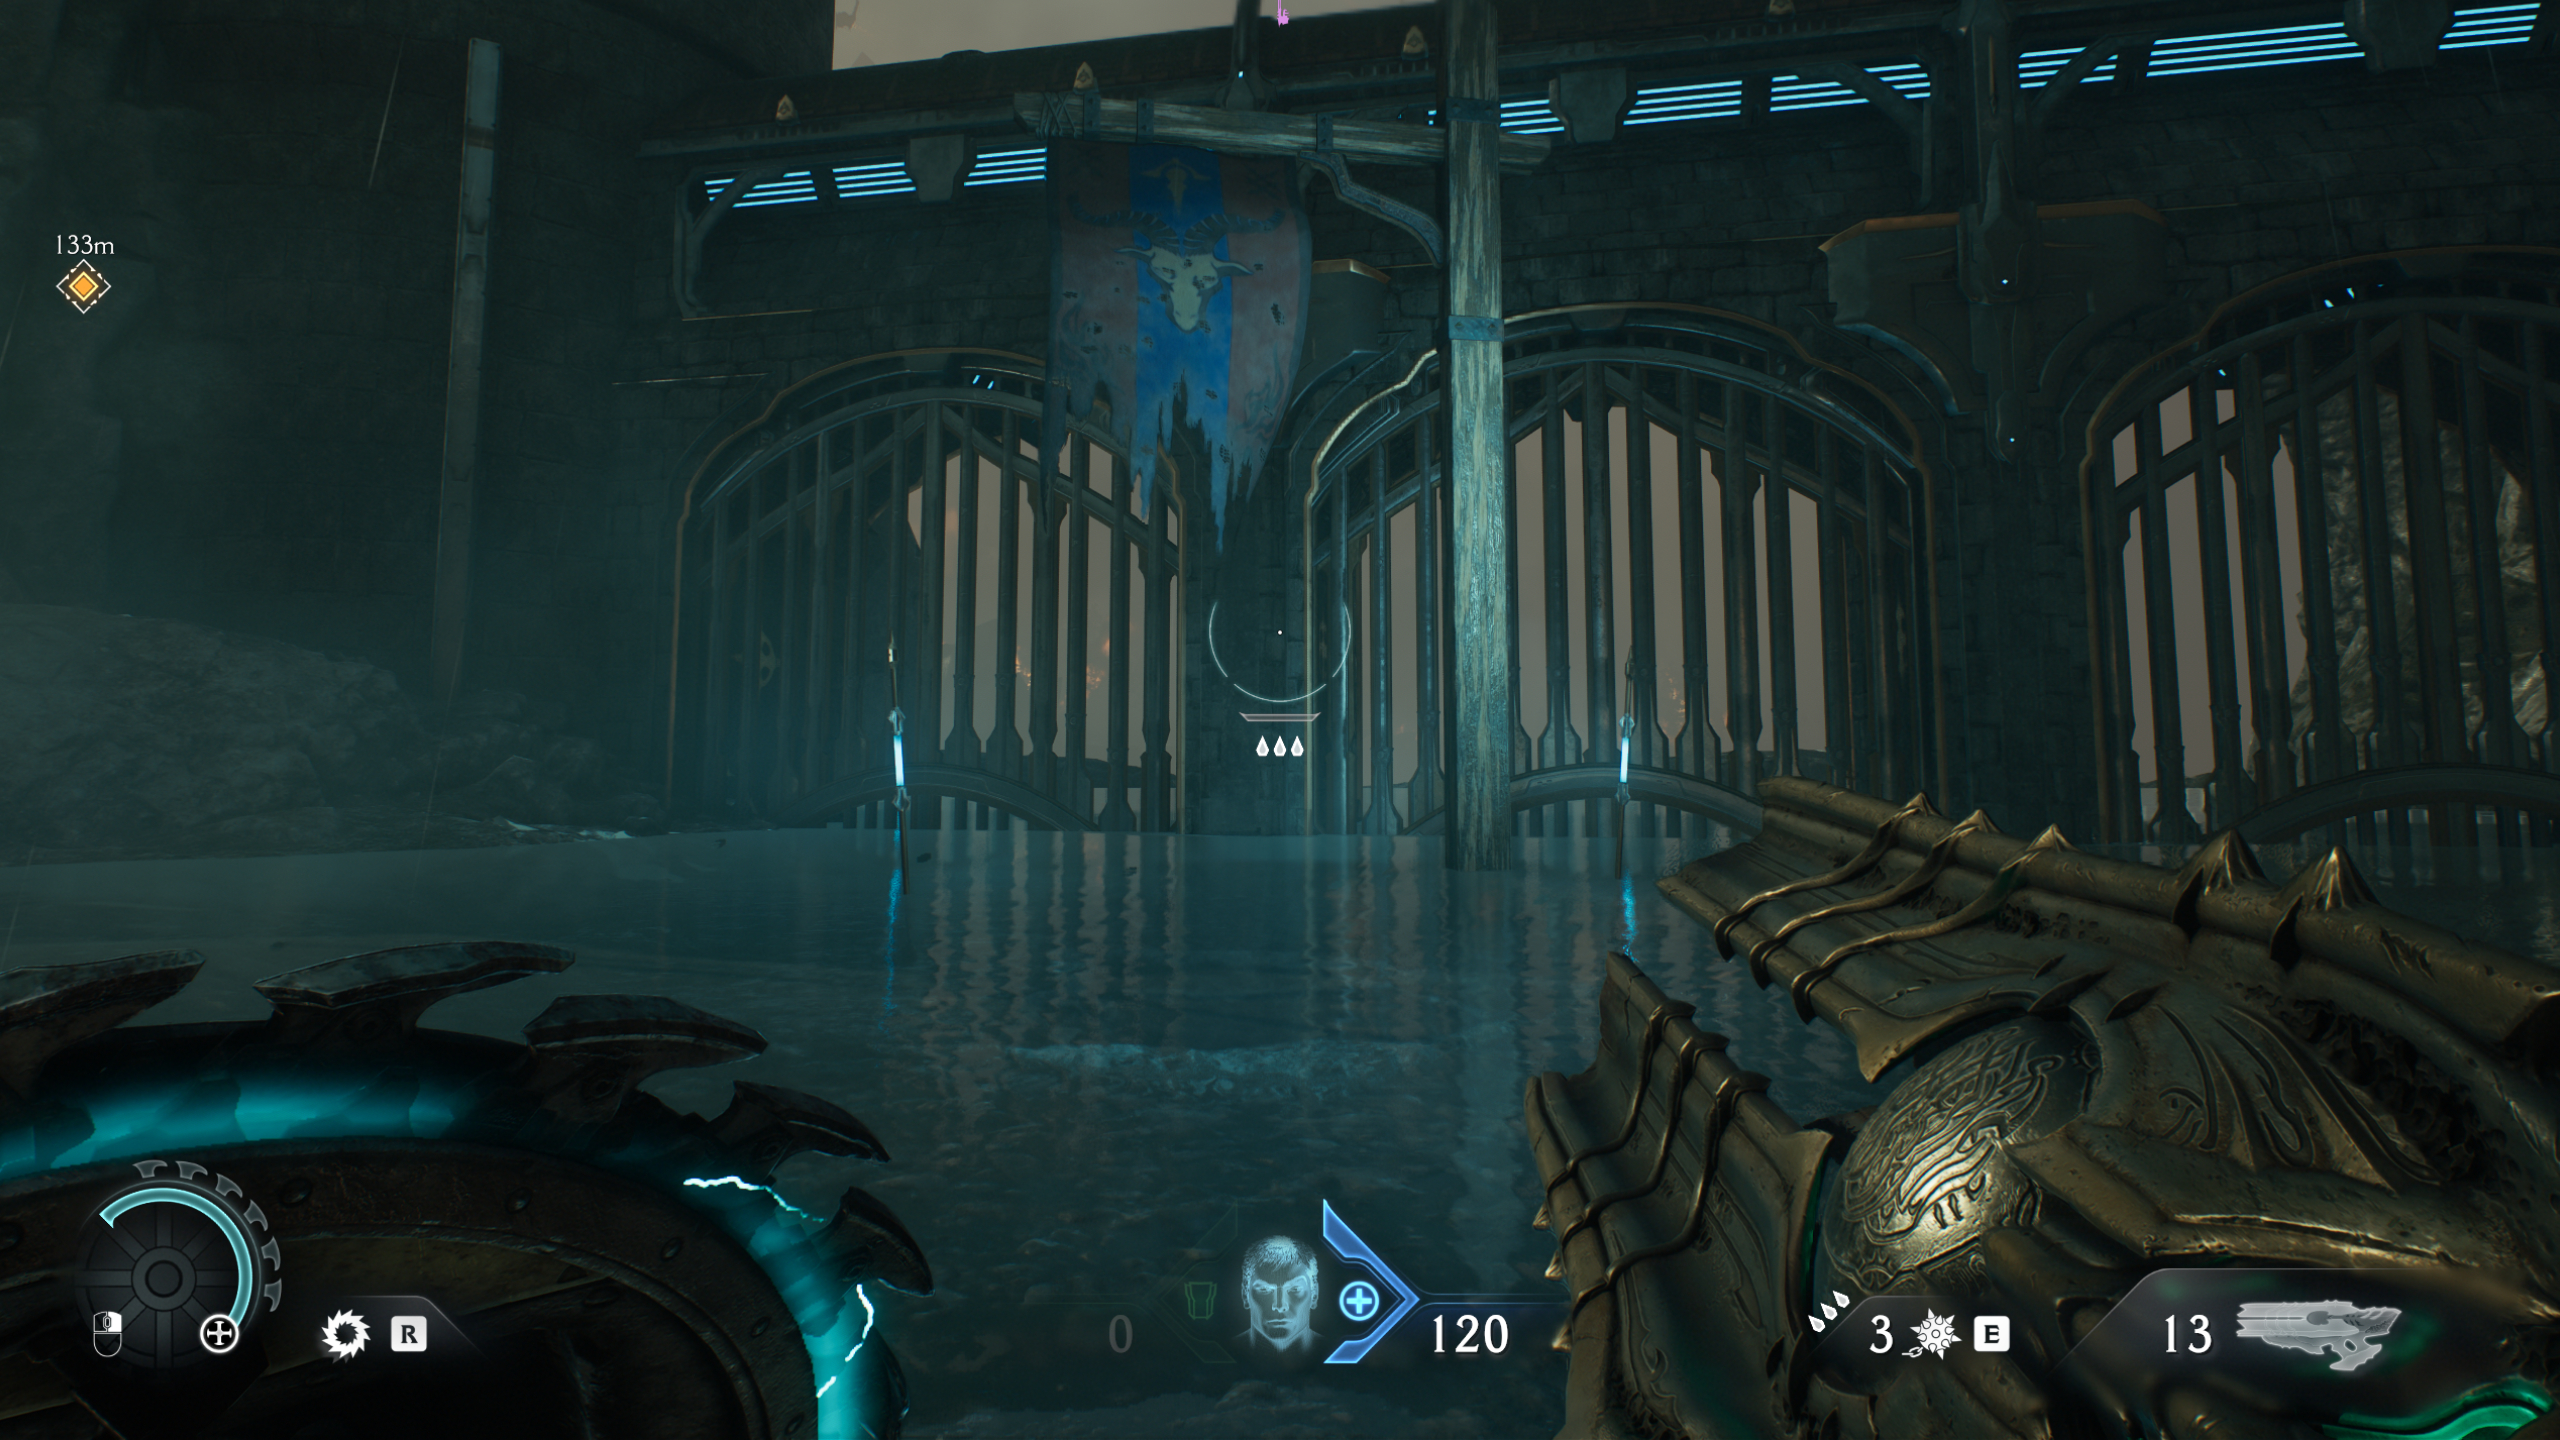
On the far right side of the map, between the two gore portals, you'll find a gold chest locked in a small stone building. To access it, head left of the building to find an underwater cave, marked with two torches and a flag post. Dive down, being careful not to be killed by the fireballs, and you'll emerge on the other side of the gate next to the gold chest.
15 - Gold chest
Just up the hill from the previous gold chest in the bottom right corner of the map, you can find yet another chest. All you need to do is break the wooden barrier and punch the chest.
16 - Gold
The final secret in this mission is a pile of gold bars inside the unique area you're teleported to when clearing the smaller gore portal on the right side of the map. Once inside:
- Turn right and break the wall, continuing down the hallway until you reach the room with the large stone blocks on chains
- Throw your shield at the lock on the chain to lower the block
- Climb on the block and shield jump to the ledge behind you
- Bash the wooden bridge down but instead of jumping through the doorway on the ledge above you, go through the small side door on the right, which will now be open


You must confirm your public display name before commenting
Please logout and then login again, you will then be prompted to enter your display name.