Excuse us for being a little excitable, but you want the best server. A server that can do it all. A single machine, ready to give you everything you need: media, ad blocking, file serving, the works. But man, what a drag it is to put something like that together—installing all the software, getting it all working with your hardware, balancing the load so that one thing doesn’t completely neuter another. Nobody in their right mind would choose to do that if there were a better alternative. And there is. So, while this is a look at creating the best server, we’ve skewed it as a look at the right way to go about it. Once you have the tools, adding something new to your server will take, literally, a couple of minutes.
Even better: you don’t really need any heavyweight silicon. Sure, some apps (we are looking at you and your transcoding, Plex) would like more CPU cycles than you may be willing to offer, but for the most part, you could run a server full of apps on $35 hardware. Install the right thing, and you can keep tabs on all of the apps on your server, no matter what they are, through a single web interface, accessible from anywhere on your home network.
So, building the best server isn’t about the apps. It’s about being able to do it properly, finding the right enabler, and using it the right way. We’ll take you through everything you need to know to construct a modern, scalable server using enterprise-class software components, without spending a cent on software. And yes, we’ll suggest some awesome things you could be running on it, but this isn’t our server, it’s yours, to do with as you will.

We’re not going to stop you building your server in any way you see fit. If you want to install everything traditionally, and run it in the same way you’d fire up software on your desktop, by all means go ahead and do that. But in the enterprise, server technology has moved on. As chipsets improved, RAM increased, and processor overheads exploded, the market moved first toward virtualization and, more recently, toward containerization. And why should the enterprise have all the fun?
It’s important to outline the distinction between the two. Virtualization, in the virtual machine sense, is big and heavy. It’s a whole operating system in a hefty chunk, and a virtualized system either places the entire demands of an OS on its host, or is forced to scale itself back if the resources aren’t available. A virtual machine relies on chipset trickery for intercommunication with shared hardware, and can get its hooks in pretty deep—it’s not unreasonable to get performance close to bare metal with a VM.
Containerization is not virtualization in the same sense. A container isn’t an OS—it’s software, everything that software needs, and nothing more, bundled up in a universal package. While VMs represent hardware-level virtualization, containers act at operating system level. Each container on a system relies on an engine layer, which in turn relies on a bunch of kernel components from the base OS—so they’re not entirely isolated, although they can get away with some high-level operations. They’re super-lightweight, quick to roll out, and can pull off native performance without the overhead of a VM. Indeed, they’ll work perfectly happily within a VM; try nesting a bunch of virtual machines inside another VM if you want to hear your hardware cry out in terror.

Getting started
If we’re using containers (and, for all the options we offer here, we are definitely doing that), probably the best way to look is in the direction of Docker, the platform that broke the back of the concept, and turned it into a reality. Docker is immensely popular, which means there are tons of pre-built containers available, and it scales very well, to the point where you can realistically (albeit sluggishly) containerize a Raspberry Pi (see “Serving Up Pi,” below). We’re going to run through Docker on a bare-metal Ubuntu installation; you could equally set up a VM and fill it with your own containers, if you don’t have the hardware to spare, and don’t mind ignoring the point of a server.
Keep up to date with the most important stories and the best deals, as picked by the PC Gamer team.
What we don’t recommend is running Docker on Windows. While containerization forms a big official part of Windows Server 2016, and there’s support for it built in to the Pro and Enterprise editions of Windows 10 post-Anniversary Edition (and also through a combination of VirtualBox and Docker Toolbox), it’s a lot more mature on Linux. Admittedly, we’re not super-worried about too many of the specifics, or about creating our own super-bespoke containers—basically, we’re using an advanced enterprise tool meant for DevOps deployment as an excuse to lazily create a home server, which is cool but not entirely taking full advantage of it. Nonetheless, we still recommend sticking to Linux, and Ubuntu is as good an OS as any.
So, grab the ISO of your preferred flavor of Ubuntu, write it to a USB drive (use Rufus, it’s great), and install it on your server machine. Make sure, during the installation, that you include the Samba and SSH server portions, just so it’s easy enough to control from another machine on your network. You’ll be glad of this once your server is disconnected from peripherals and shoved under the stairs. Once it’s running, open up a terminal, and begin the process of installing the stable thread of Docker Community Edition.

Get Docker set
We want to grab the latest version of Docker from its own repository, but in order to do that, we need to start by installing the prerequisites for adding that repository as a source. Run:
sudo apt-get updateto get your Ubuntu installation up to speed, then:
sudo apt-get install apt-transport-https ca-certificates curl software-properties-commonto ensure you have all the relevant tools. Now use:
curl -fsSL https://download.docker.com/linux/ubuntu/gpg | sudo apt-key add -to grab Docker’s GPG key, followed by:
sudo add-apt-repository "deb [arch=amd64] https://download.docker.com/linux/ubuntu $(lsb_release -cs) stable"to add the repository itself. Run 'sudo apt-get update' again to refresh Ubuntu’s package list and, if all has gone well, you can run:
sudo apt-get install docker-cewhich will pull down and install Docker Community Edition, along with all its dependencies.
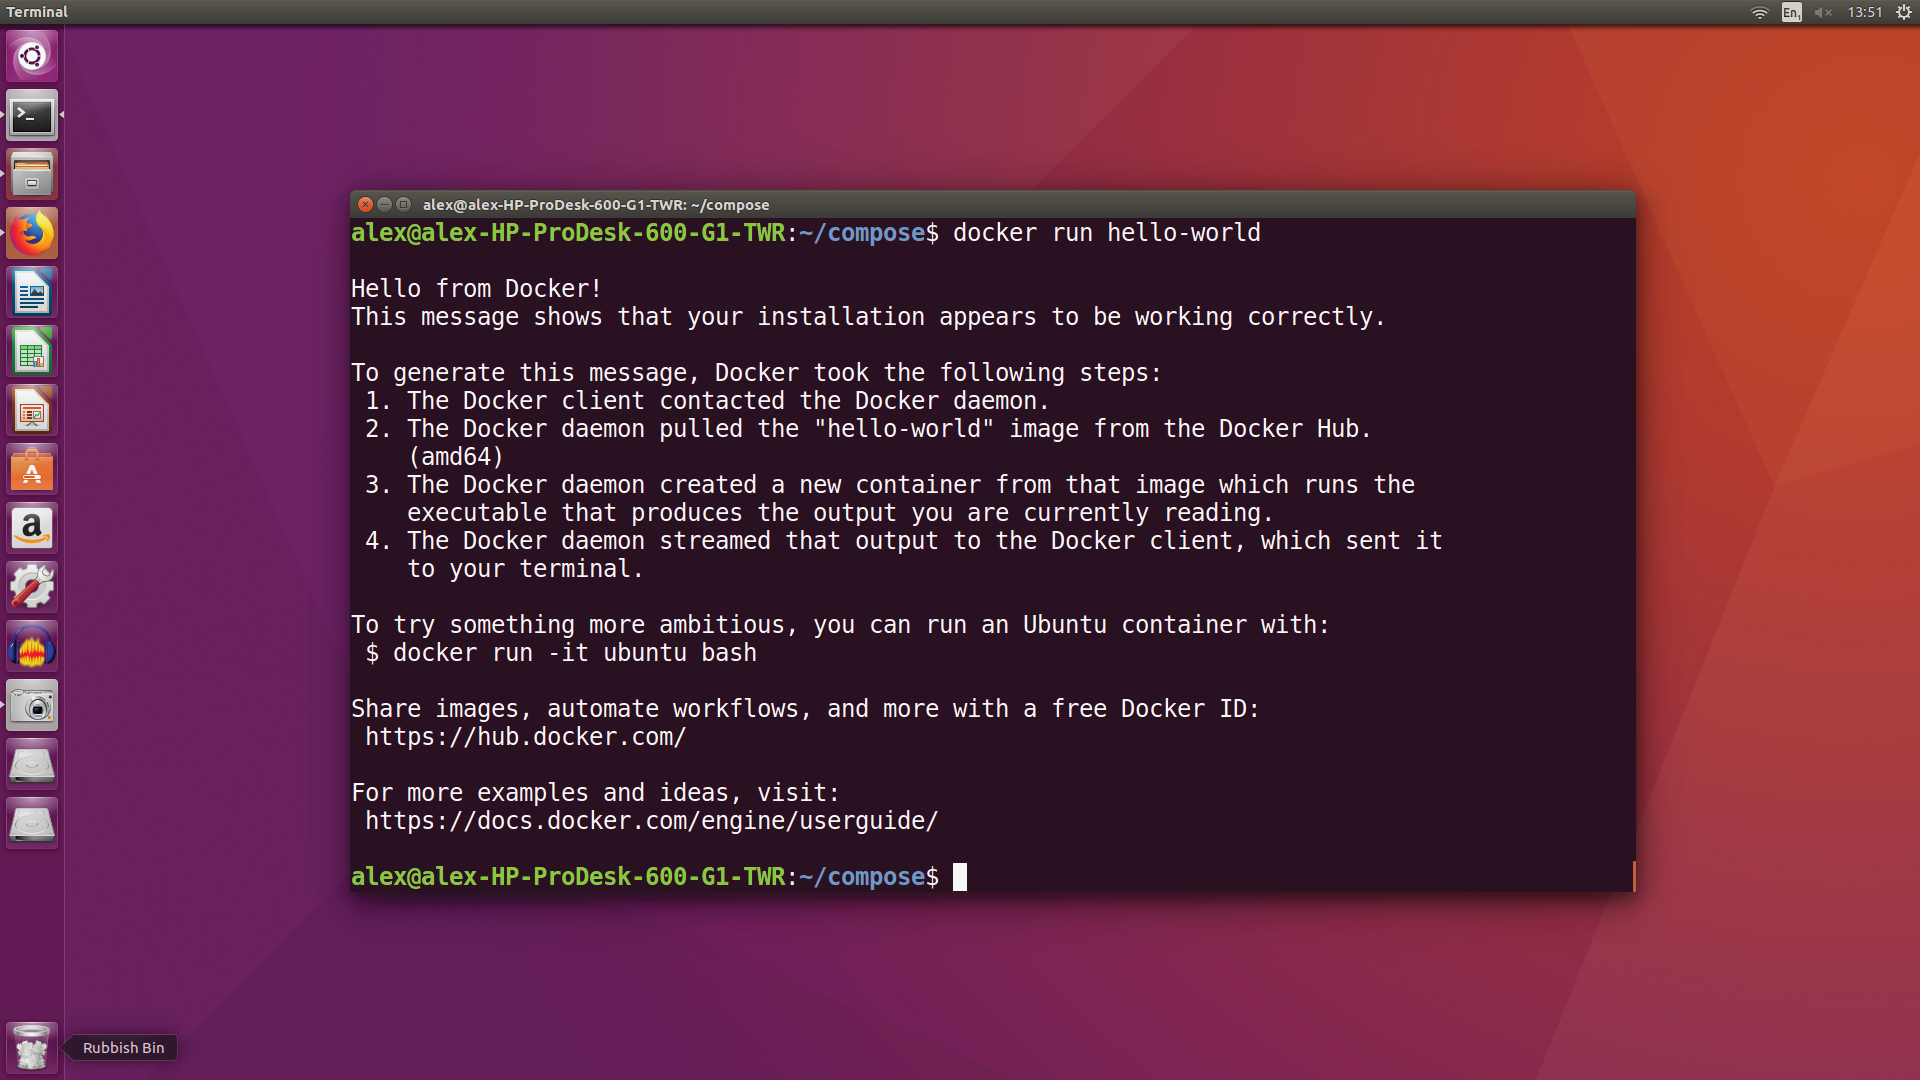
With that done, it’s time to show just how incredibly easy it is to get things running with Docker, by pulling down a complete image from its servers and running it in a container. Ready? Run:
sudo docker run hello-worldand see what happens. That’s it. The whole thing. Docker has contacted its servers, pulled down the image “helloworld,” started a new container based on that image, and piped its output into your terminal. You’ve run a containerized application, however useless it may be, and you can call 'sudo docker info' to prove it: It’ll list one stopped container. We recommend following the steps in the Quality of Life section now, so you don’t have to append “sudo” to the start of every command that follows.

