Adding containers
Running other containers isn’t always as straightforward as that “Hello World” example, but it’s not necessarily far off. Try, for example:
docker run -d -p 80:12345 owncloud:8.1to start a container with an image of the OwnCloud file server within, then open up a web browser on your server machine, and go here to see the results. It’s pretty immediate, although we’ve had to add a few additional parameters this time.
For example, '-d' tells Docker to run the container in detached mode, managing it in the background, rather than filling your console with status messages, and '-p' tells it to pass the port of the container to the host machine—'80:12345' is our port mapping, piping port 80 of the container to port 12345 of the host machine. When you’re running multiple containers with a web interface, you’ll want to map them to different ports.
That image, after first running, has been cloned to your system. Reboot your machine and run:
docker image lsto list all the containers that exist on your system, and you’ll see it there; run the same command as before to start it up, and Docker won’t re-download it—it runs the local version instead. But now, before we start wantonly installing the apps that are going to make our server so great, it’s time to up the complexity a little, and look at running and configuring a proper collection, and for that we need docker-compose, which combines a bunch of containers into a single application.
Going multiple
Time for a little admin. Install Docker Compose with:
sudo curl -L https:// github.com/docker/compose/releases/ download/1.21.2/docker-compose- $(uname -s)-$(uname -m) -o /usr/local/ bin/docker-compose(replacing that version number with the very latest version, which you can find at this link), then give it the permissions it requires with:
The biggest gaming news, reviews and hardware deals
Keep up to date with the most important stories and the best deals, as picked by the PC Gamer team.
sudo chmod +x /usr/local/bin/docker-composeWorking with Docker Compose is, like its sibling, ridiculously easy. Basically, you need to build a configuration file that tells it which containers you want to run, and feeds in the parameters they need to operate properly, then it goes off and does its thing. To make that even simpler, most applications offer a template for precisely what needs to go into the configuration file, and all you need to do is fill in the blanks. So, let’s walk through a simple Docker Compose installation, using ad-blocking DNS manager Pihole as an example.
To do so within Docker Compose, you first need to generate the configuration file; make a new directory for it with:
sudo mkdir ~/composeand change to it with 'cd ~/compose'. Create a working folder for Pihole with:
sudo mkdir /var/piholegive it permissions using:
sudo chown -R <your username>:<your username> / var/piholethen run 'sudo nano dockercompose.yml', and enter the following into the file, switching “LANIP” for your server’s IP address, and paying special attention to the spacing—each tab should be two blank spaces:
version: ‘2’
services:
 pihole:
  restart: unless-stopped
  container_name: pihole
  image: diginc/pi-hole
  volumes:
   - /var/pihole:/etc/pihole
  environment:
   - ServerIP=LANIP
  cap_add:
   - NET_ADMIN
  ports:
   - “53:53/tcp”
   - “53:53/udp”
- “80:80”
Now just run 'docker-compose up -d', and Pihole should be up and running—if not, it could be conflicting with another process (such as dnsmasq) that takes control of port 53. To kill that off, run:
sudo sed -i ‘s/^dns=dnsmasq/#&/’ /etc/ NetworkManager/NetworkManager.confto remove it from the relevant config file, then:
sudo service network-manager restart /and 'sudo service networking restart', followed by:
sudo killall dnsmasqto make sure it’s really, truly dead. You can check your results by heading to this link in a web browser. Adding further containers to your combined application is just a case of adding their parameters to the 'docker-compose.yml' file, then running it again. To use Pihole’s DNS sinkhole facilities properly, you now need to configure your router to route DHCP clients through your server.
The power pack
So that’s the how. What about the what? Start digging through http://hub.docker.com, because just about everything you could possibly want has been put in a neat package for you. File management, for example: OwnCloud, as mentioned before, offers up a Dropbox-esque way of managing your files, with a web interface that offers simple password-protected access to a bin of files from every device in your home—including mobile clients. Nextcloud does much the same job as OwnCloud, but if you’d like to go more raw, you could fire up an SFTP server (try the atmoz/sftp image), or containerize a Samba installation (kartoffeltoby/docker-nas-samba) to give your server fuss-free NAS capabilities.
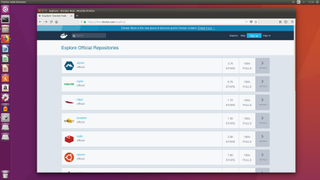
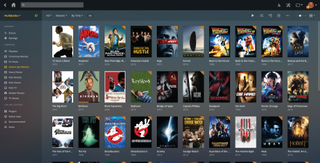
Media next, and you’re spoiled for choice. Plex, using the officially sanctioned plexinc/pms-docker image, is our top choice for home (and beyond) media server duties, but you don’t have to run it alone. There are various tools that can enhance your media-getting capabilities, although we can’t say too much about them here. Head here and check out the most-downloaded images if you’d like to see which are the most popular. Once you’re all lined up, be sure to add the excellent linuxserver/plexpy, which helps you keep tabs on precisely what’s going on with the traffic and files running through your Plex server. The back end portion of Kodi is also a solid choice, although in our opinion, Plex is a much more adept file-wrangler.
Your server could perform more esoteric archiving and organizational duties, too. Try Mediawiki to get an instant home wiki up and running, perfect for recording significant information, or Photoshow (linuxserver/photoshow) to quickly install a database-free photo gallery with drag-and-drop uploading. Vault isn’t pretty, but it’s a great place to hide secrets, giving you a sealable safe for passwords, keys, and other critical security information. Home Assistant (homeassistant/homeassistant) can, after a bit of wrangling, take control of all your smart gear in one place.
Most Popular


