Using FreeNAS to build a DIY home server
We haven’t checked in with FreeNAS , the FreeBSD-based DIY NAS OS, in quite some time. The OS has been completely overhauled, plugin support has been added, and it now works with even more hardware.
Since the last time we built a FreeNAS box, back in January 2010, the OS has been through some changes. It switched developers, nearly switched platforms, removed media streaming, added it back in via plugins, added better ZFS management, and more. FreeNAS promises near-endless customization and hardware support, enabling nearly anyone to build a highly moddable NAS from off-the-shelf parts. I’ve been promising an updated FreeNAS build for quite a while, and now’s the time to deliver. I assembled a cream-of-the-crop batch of hardware, got the latest version of FreeNAS, and got cracking.

Choosing the Hardware
The beauty of FreeNAS is that it’ll work with just about any old hardware you have lying around—you don’t need to build a special box for it. This “build” is more about exploring the new version of FreeNAS than it is about the hardware itself. I took the opportunity to build a pretty powerful system, but you don’t have to take my hardware choices as your minimum recommended specs or anything like that. I just wanted to see what would happen if I gave it beefy hardware to play with.
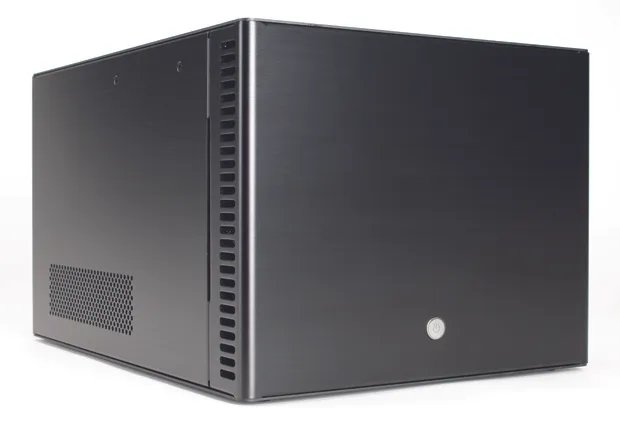
I chose a Fractal Array R2 chassis , which has six drive bays and an integrated PSU. I had a Mini-ITX FM1 board and an AMD A8 APU lying around and decided to use those, because a more capable CPU in your NAS means better transcoding and streaming. You could just as easily use any Mini-ITX board with a PCIe slot, maybe one with an integrated Atom or Brazos chip, if you want to save some money.
Four Western Digital Caviar Red NAS drives at 3TB each give me a theoretical 12TB of capacity if I were just going to make a RAID 0, which I’m not. Because I’ll be using a filesystem called ZFS , which does all its volume management in software, I want a good host-bus adapter that doesn’t insist on imposing its own hardware RAID over it—just something to pass the commands from the OS to the drives. I picked LSI’s SAS-9207-8i , which can control up to eight 6Gb/s drives and runs on a x8 PCIe 3.0 bus. Because I want to use the case’s SATA power connectors, I also bought a HighPoint Mini-SAS-to-SATA breakout cable rather than use the included connectors, which run on Molex power.
Because ZFS loves RAM and wants as much as you can throw at it (the specs recommend at least 1GB per TB of storage), I used two 8GB DDR3 DIMMs from G.Skill .
FreeNAS won’t mount any storage on the boot drive, and only takes up about 2GB total (with another 2GB swap), so there’s no point wasting a hard drive on it. It’s perfectly happy booting from a flash drive. I just used an 8GB drive left over from a CES press kit.
Set it Up
Since this is a very straightforward build but a complicated software install, I’ll skip the step-by-step build entirely, and start with the software configuration. It’s a bit of a doozy. Thankfully, I have the excellent instructions on Freenas.org and the FreeNas Quick Start Guide to help. Here’s how to set up FreeNAS; create volumes; set up users, groups, and sharing; and install a few streaming plugins.
1. Install the OS
To create the bootable OS image (from a Windows machine), you’ll need the aforementioned USB drive, the programs 7-Zip and Win32 Disk Imager , and the img.xz file for your install. We’re using FreeNAS 8.2.0 Release 1. Download the FreeNAS-8.2.0-RELEASE-p1-x64.img.xz file from SourceForge . Extract the img.xz file using 7-Zip to turn it into an .img file, then burn that file onto your USB key with Win32 Disk Imager. This might take a few minutes. Once it’s ready, plug the USB key into one of the FreeNAS box’s rear USB ports and turn on the machine. You’ll need a keyboard and a monitor for this, but only for a few minutes. Make sure the FreeNAS box is connected to your network via Ethernet. Make sure the system is set to boot from USB. The system will spend a few minutes doing a self-test and then dump you at a screen called Console Setup. At this point, under a list of 11 options, you should see the phrase “You may try the following URLs to access the web user interface,” followed by an IP address. Go to another computer on your network and enter that address into the web browser; you should be able to get right into the web console, which will make this whole process a lot easier ( image A ).
| | PART | URL | Price |
|---|---|---|---|
| Case/PSU | Fractal Array R2 w/300W SFX PSU | www.fractal-design.com | $200 |
| Mobo | Asus F1A75-I Deluxe | www.asus.com | $175 |
| CPU | AMD A8-3850 2.9GHz APU | www.amd.com | $100 |
| Cooler | Stock AMD | www.amd.com | $0 |
| RAM | G.Skill RipjawsX | www.gskill.com | $105 |
| Boot Drive | 8GB Flash Drive | various | $8 |
| Hard Drives | 3TB WD Red NAS drive (x4) | www.wdc.com | $880 |
| Drive Controller | LSI SAS 9207-8i | www.lsi.com | $305 |
| SAS-to-SATA cable | HighPoint Int-MS-1M4S | www.highpoint-tech.com | $10 |
| OS | FreeNAS 8.2 Release | www.freenas.org | $0 |
| Total | $1,783 |
You’ll notice a blinking Alert light on the upper right. Click it and you’ll see that you need to change the admin password. Hit the Account button to the left of the Alert button, then select Change Password. Changing the admin username from “admin” can help with security too. You should also set up an email address for the root account, so FreeNAS can email you with admin alerts. Go to Account, then Users, then View Users, and click Change Email on the root account. You should also set up console logging by going to System > Settings > Advanced and selecting Show Console messages in footer.


