Build Your Own Home Server
6. Map the Drive
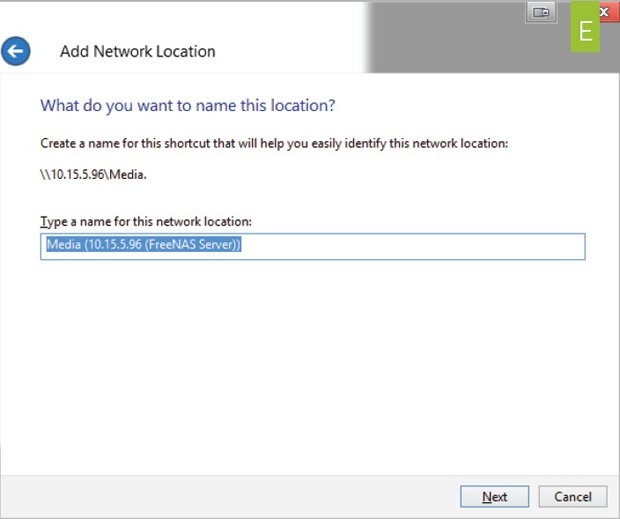
Now you can map the Windows share you’ve just created. Go to My Computer, right-click, and select Add Network Location. Plug in the IP (the same one in your web console) and share name, as shown in the image ( image E ). Give it a fancy name. Note that you’ll have to configure permissions so that users have write access if you want to be able to add files and folders via Explorer.
7. Set Up the Plugins Jail
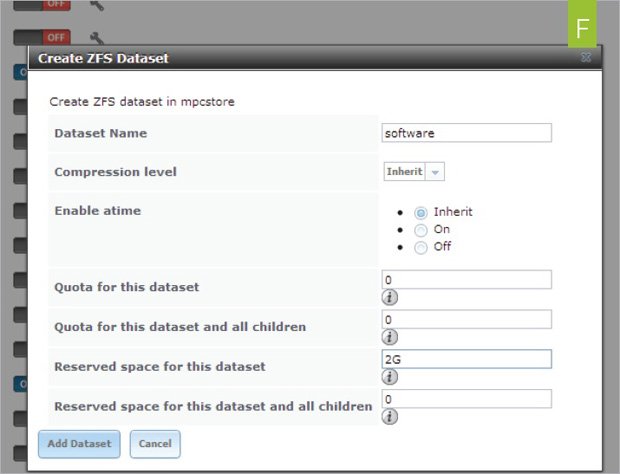
Earlier versions of FreeNAS contained robust streaming options, such as iTunes , uPnP, and BitTorrent clients. FreeNAS version 8.2 restored that functionality via the use of plugins. The word “plugin,” however, dramatically overstates the ease of using these. To install and set up these plugins, first go to your storage volume and create two ZFS datasets, one of at least 2GB called Jail and another called Software ( image F ). The plugin system basically creates a virtualized FreeBSD system inside your FreeNAS system, and by this point if you’re tearing your hair out, you’re not alone.
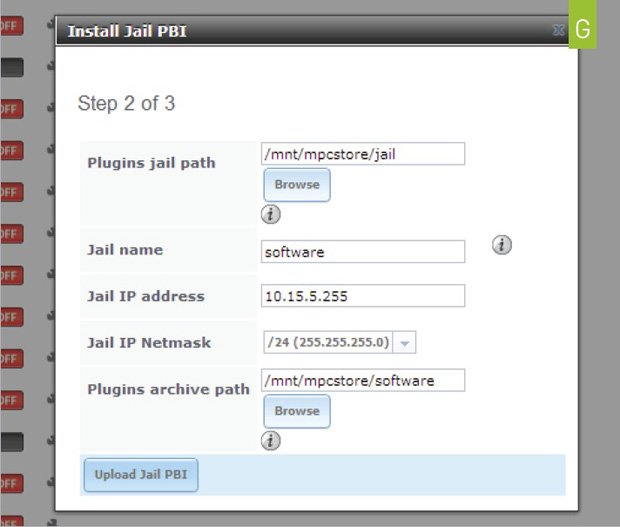
Next, go back to SourceForge and find the plugins_Jail.pbi file for the release you’re running. In our case, that’s at http://sourceforge.net/projects/freenas/files/FreeNAS-8.2.0/RELEASE/x64/plugins/ . Download the PBI file to your computer. Now click the little wrench icon next to Plugins in the Services menu. That’ll put you through a three-part setup screen. The first one will give you a temporary place to store the PBI you’re about to upload. I just used the root of my mpcstore. The second lets you set up the paths to your jail and software datasets. Point the plugins jail path to the jail dataset and the archive path to the software dataset ( image G ). The third step is to upload the plugins jail PBI file from your desktop.
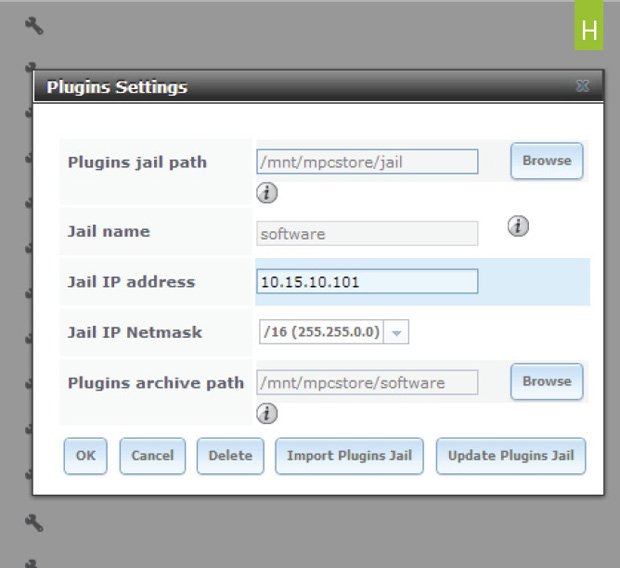
You’ll also need to create a separate pingable IP address for the software jail, distinct from your FreeNAS IP address ( image H ).
Keep up to date with the most important stories and the best deals, as picked by the PC Gamer team.
