How to partition your Windows boot drive
Partitioning the drive you keep your OS on can prevent disasters and let you recover quickly in the event of one.
Creating a partition on your Windows boot drive is one useful feature many aren't even aware of, and yet the function has been around for years. Windows 10 supports it, and Windows 11 has continued to allow users to separate their main drive into sections.
Windows' built in disk partition tool gives you the ability to organize your data across different drive partitions, and offers convenience when trying to find your personal files. Separating your data from your Windows installation is also a quick way to protect your important files in the case that your Windows installation fails.
You also gain the ability to do a clean install without first having to back up your data. This, however, does not mean you should stop doing regular backups; should your hard drive fail, separate partitions will do nothing to protect you.
What you can also do is create separate partitions for programs, projects, or anything else you access regularly. If you find that page file is taking up too much space on your Windows drive, you can even create a separate partition on a secondary drive just for that. This is a great way to free up the space without disabling it entirely.
Creating a new OS drive partition
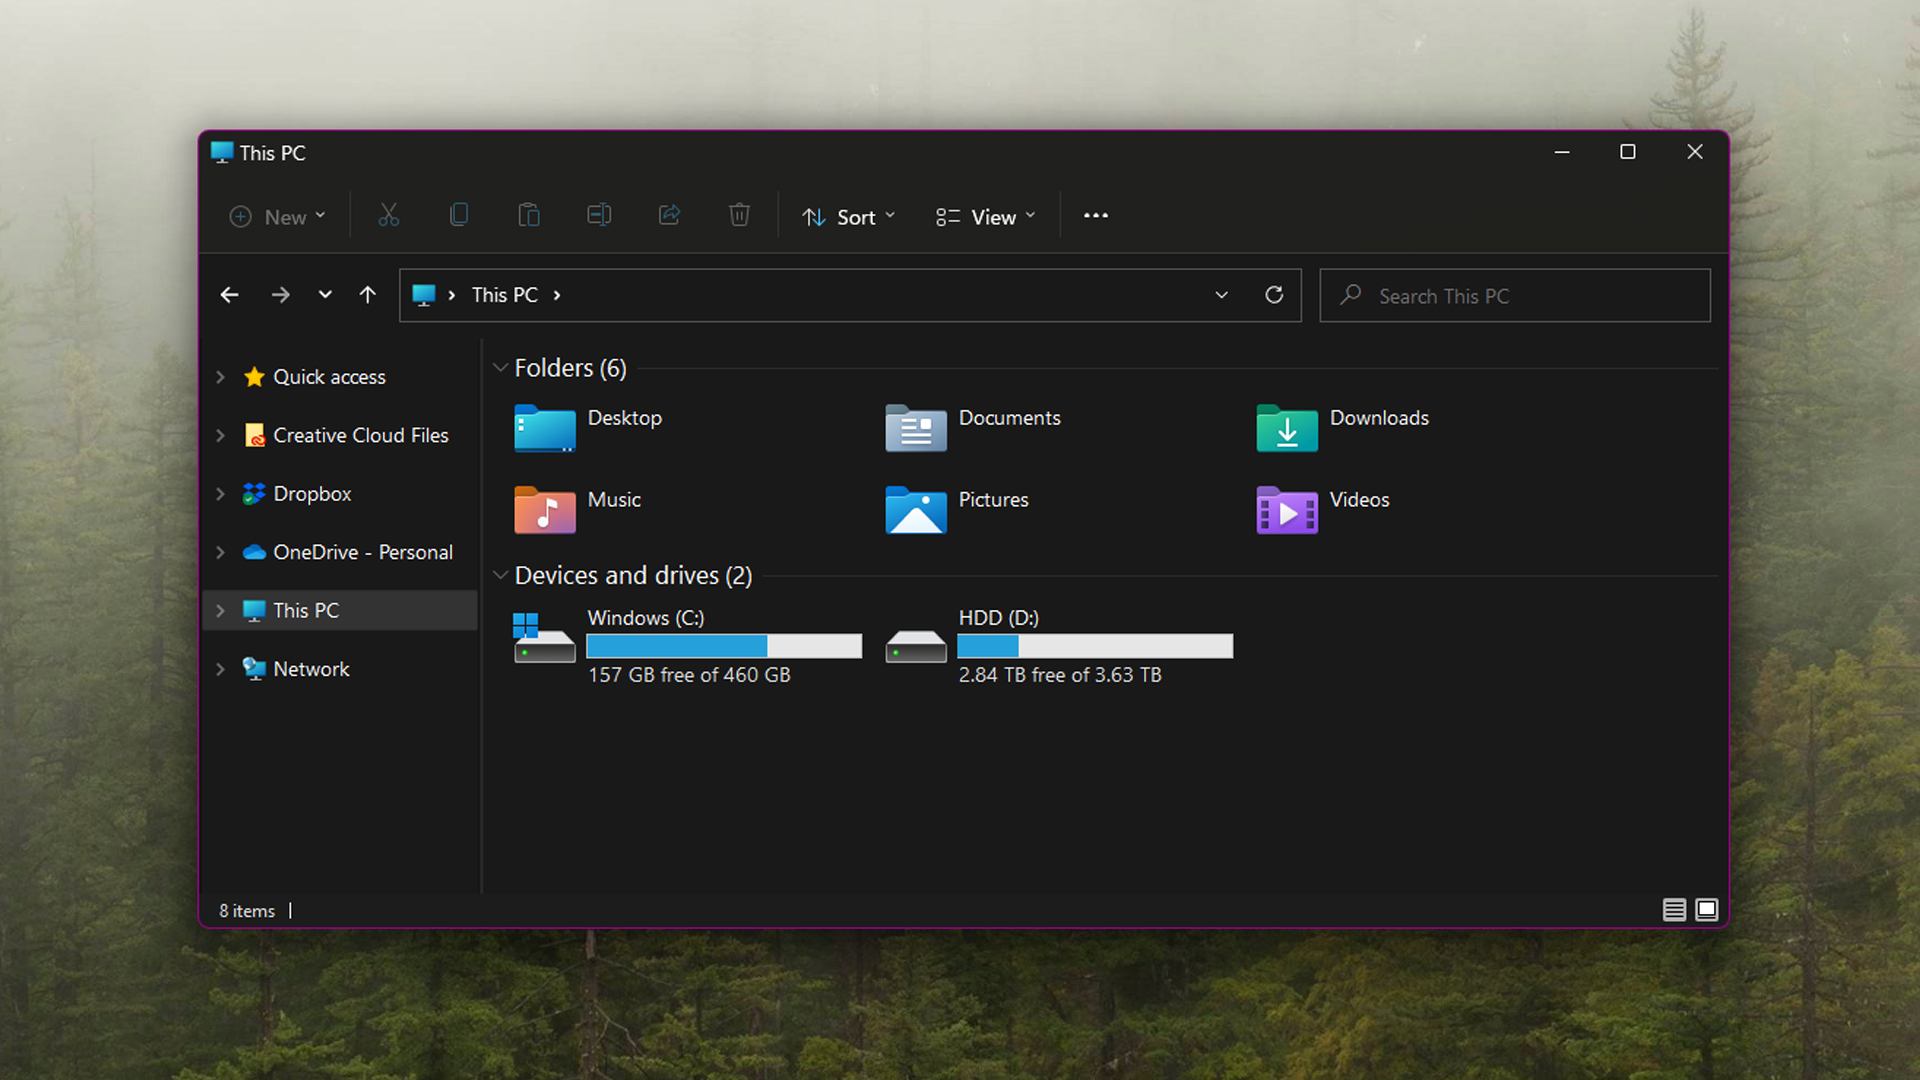
Before you can start moving your data, you will need to do some magic on your existing drive. Mostly that's a case of shrinking the current partition Windows is parked onto create space for some new ones—Disk Management to the rescue.
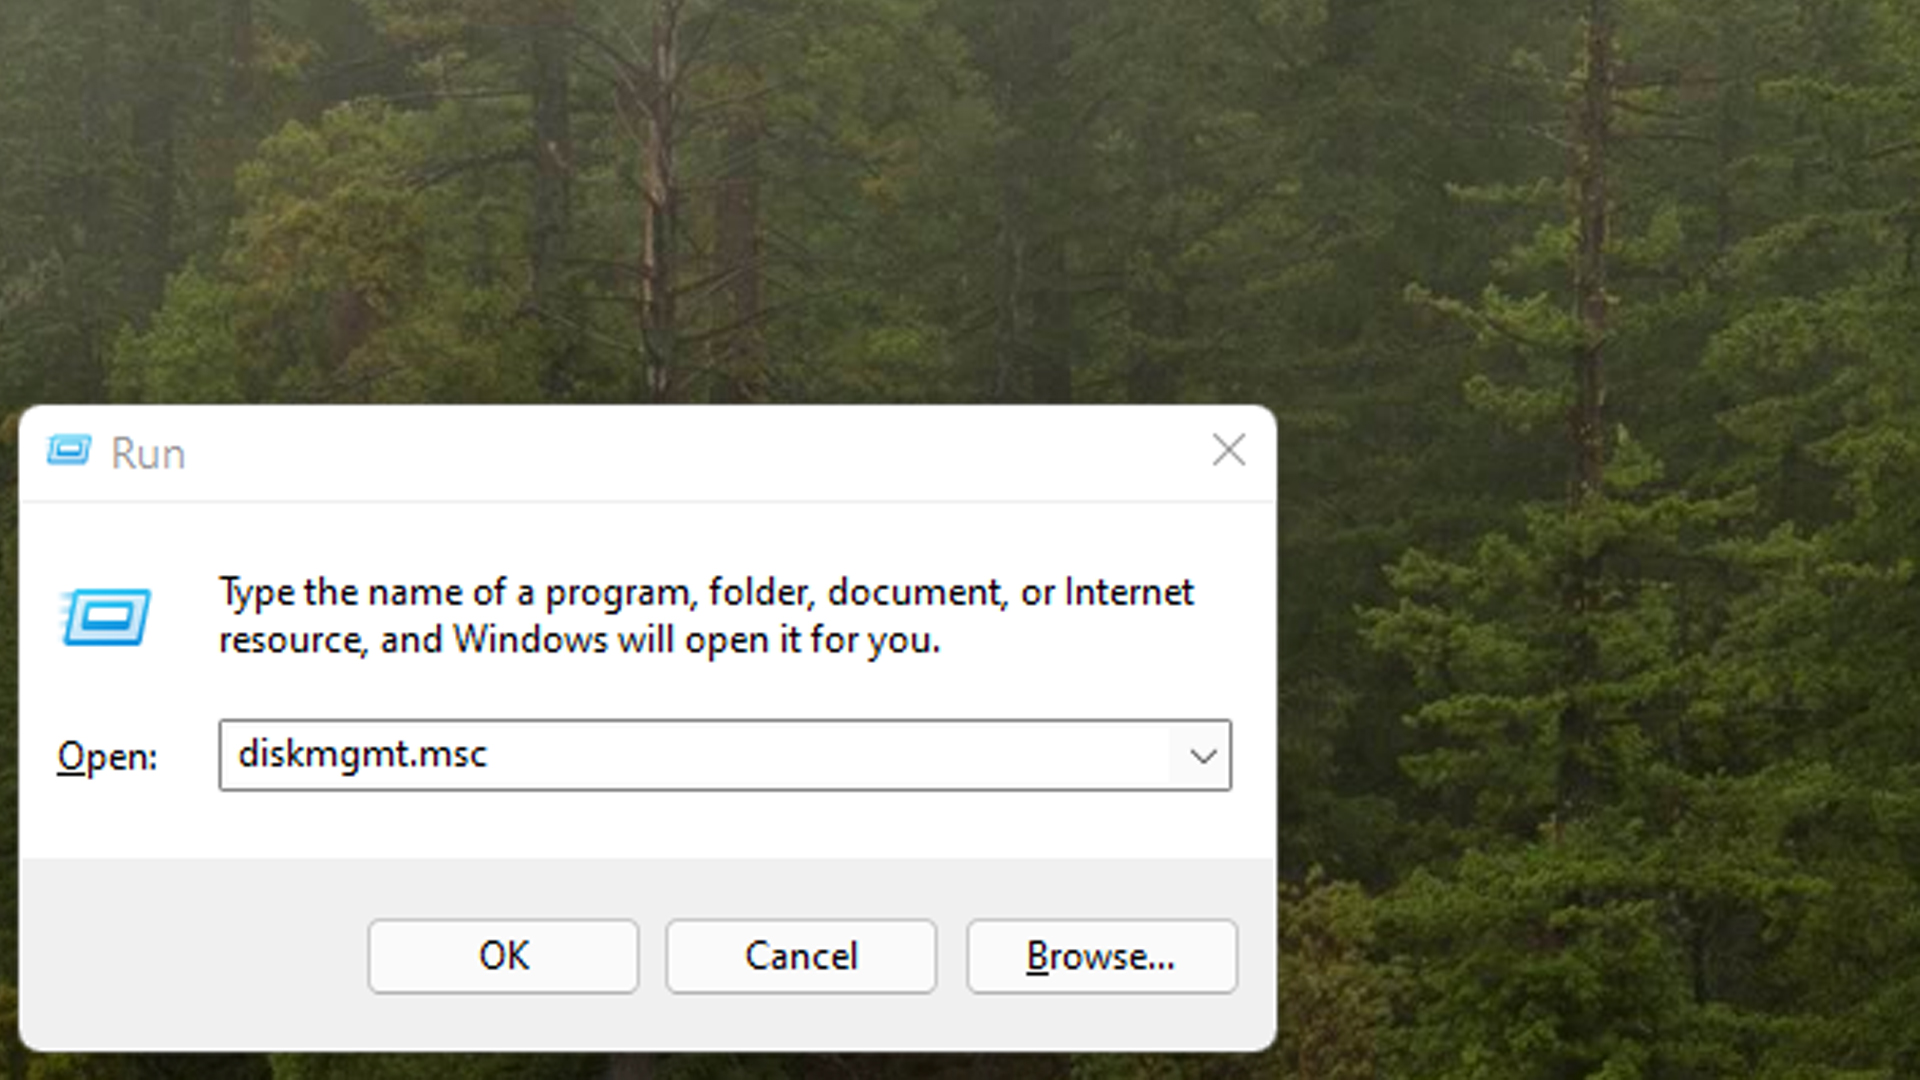
Either hit start and search for Disk Management, or hit Win key + R and type diskmgmt.msc into the box, then hit enter.
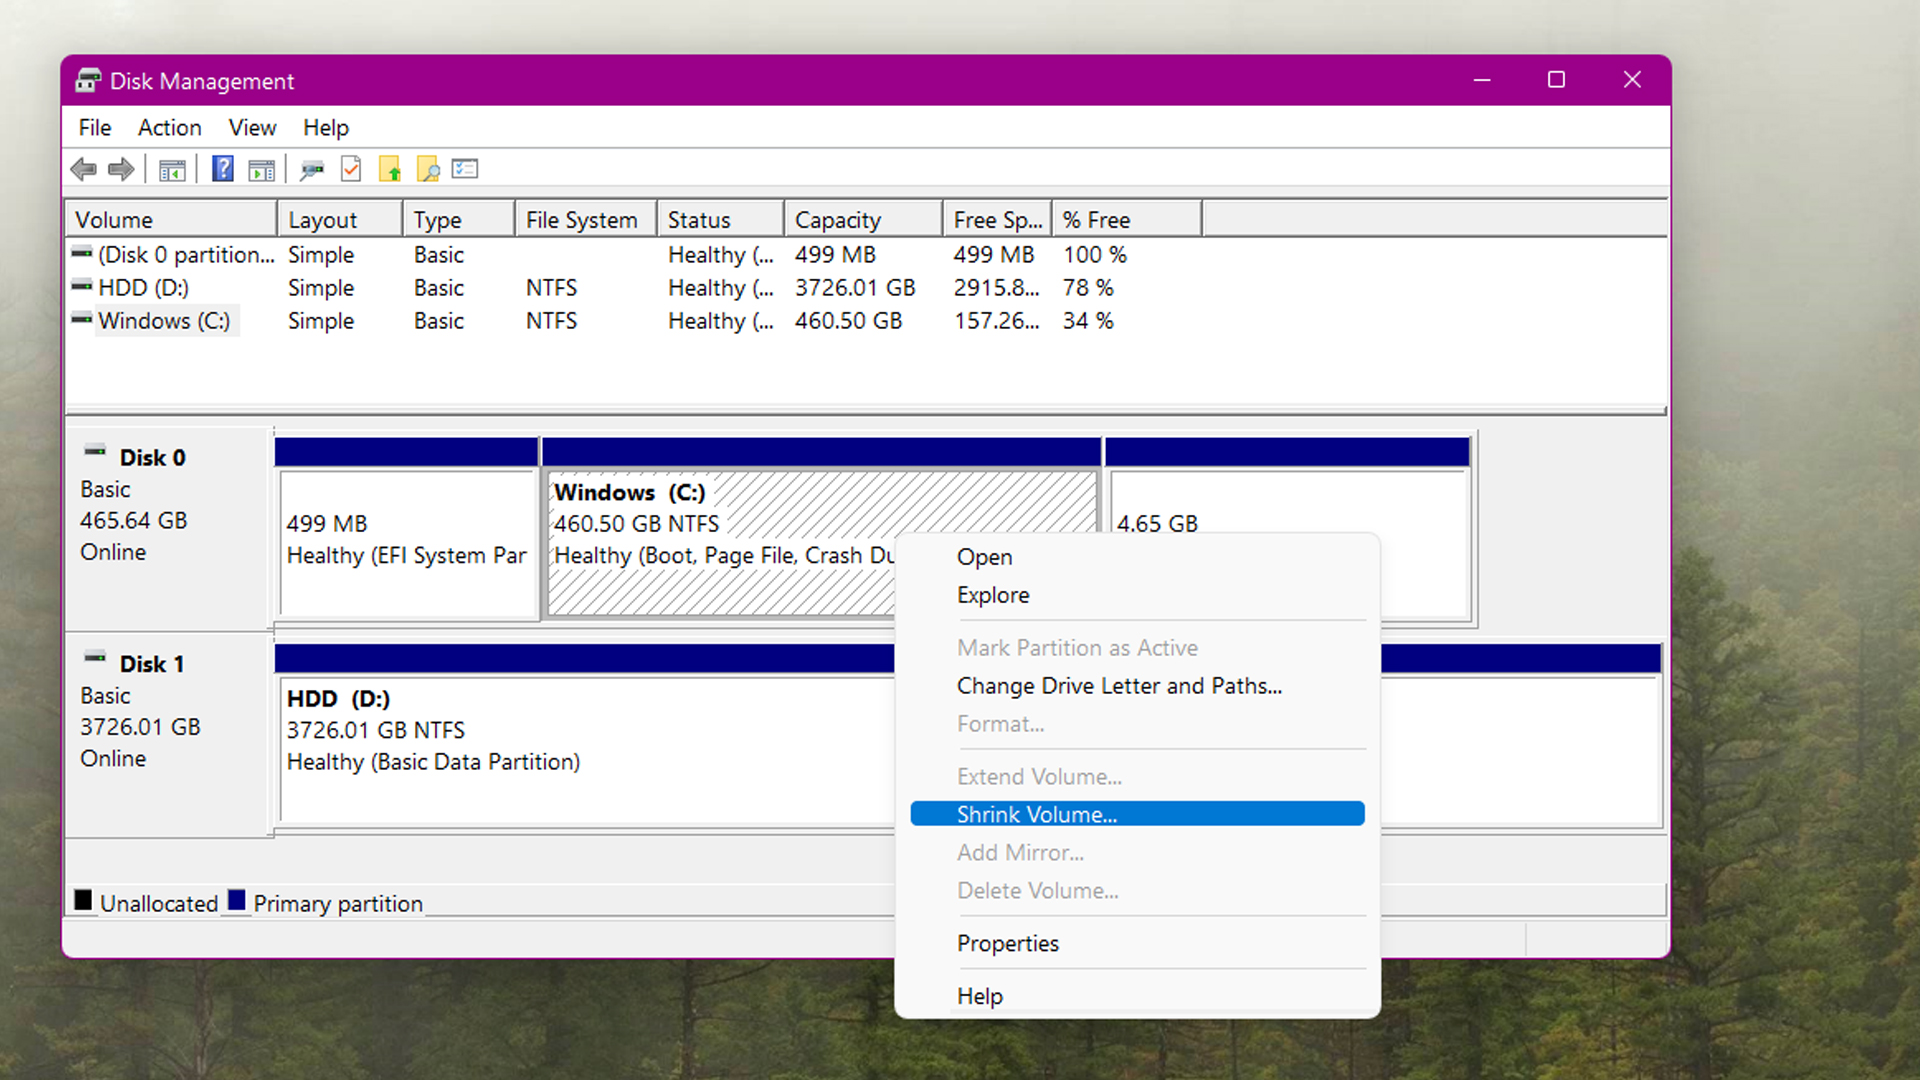
Right click on the drive you wish to create the partition on and select Shrink Volume. In this case, I will be creating my partitions on my secondary drive. If you only have one drive then you will be using the drive labeled C.
Keep up to date with the most important stories and the best deals, as picked by the PC Gamer team.
By default, Windows will shrink the volume by the maximum space available—best not do that unless you are sure you won’t be writing additional data to the existing partition. Which you kinda can't be given that Windows is always going to want to update, so best leave it some room to breathe.
So yes, if you are using your installation drive, you should definitely set the amount manually and leave plenty of extra space for your OS. When you are ready, hit Shrink and prepare to wait. Depending on how much data is on the existing partition, it may take several minutes for Windows move stuff around.
Don’t rage quit.
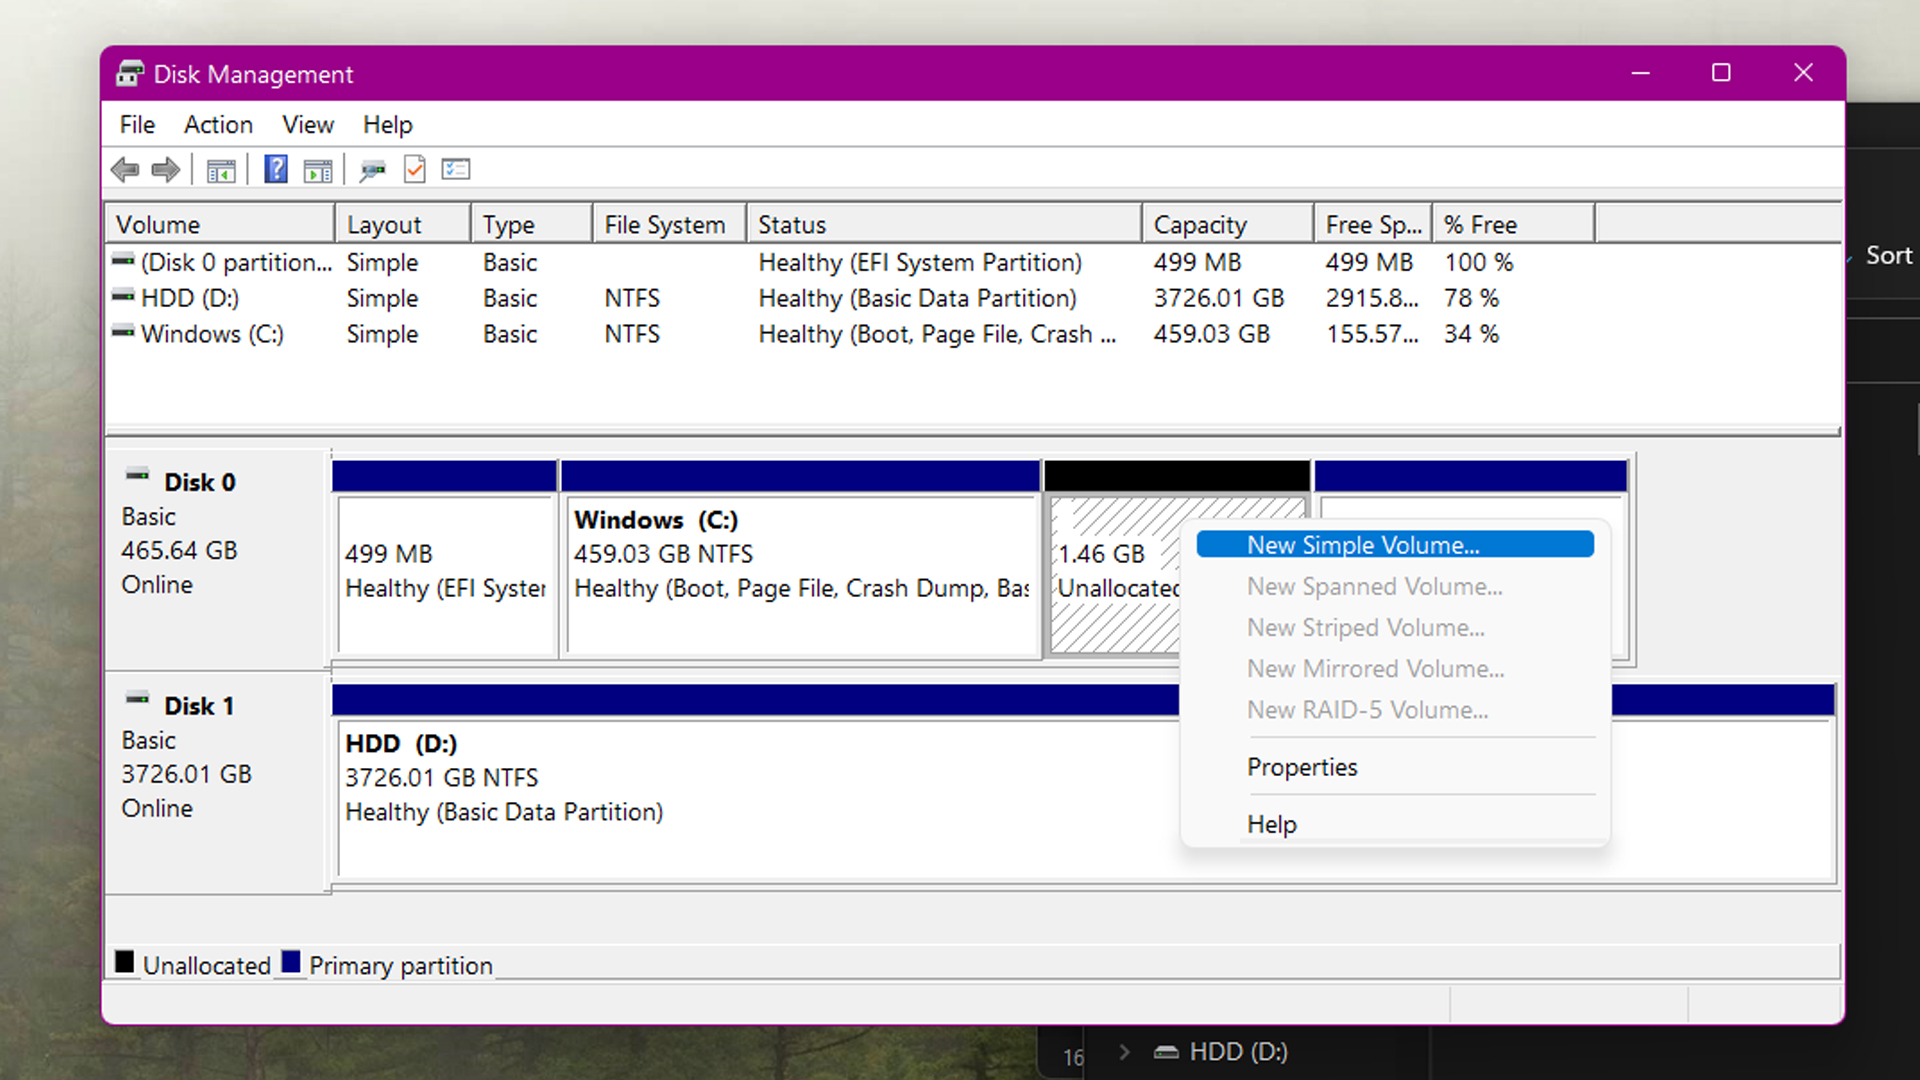
Once the partition has been shrunk, you will be presented with some newly unallocated space. Right click it and create a New Simple Volume.
In the spirit of consistency, Windows will try and utilize the maximum space available for your new partition. If you plan on creating additional partitions on the same drive, you are better off limiting the size of this one than having to shrink it again later on to create more unallocated space to work with.
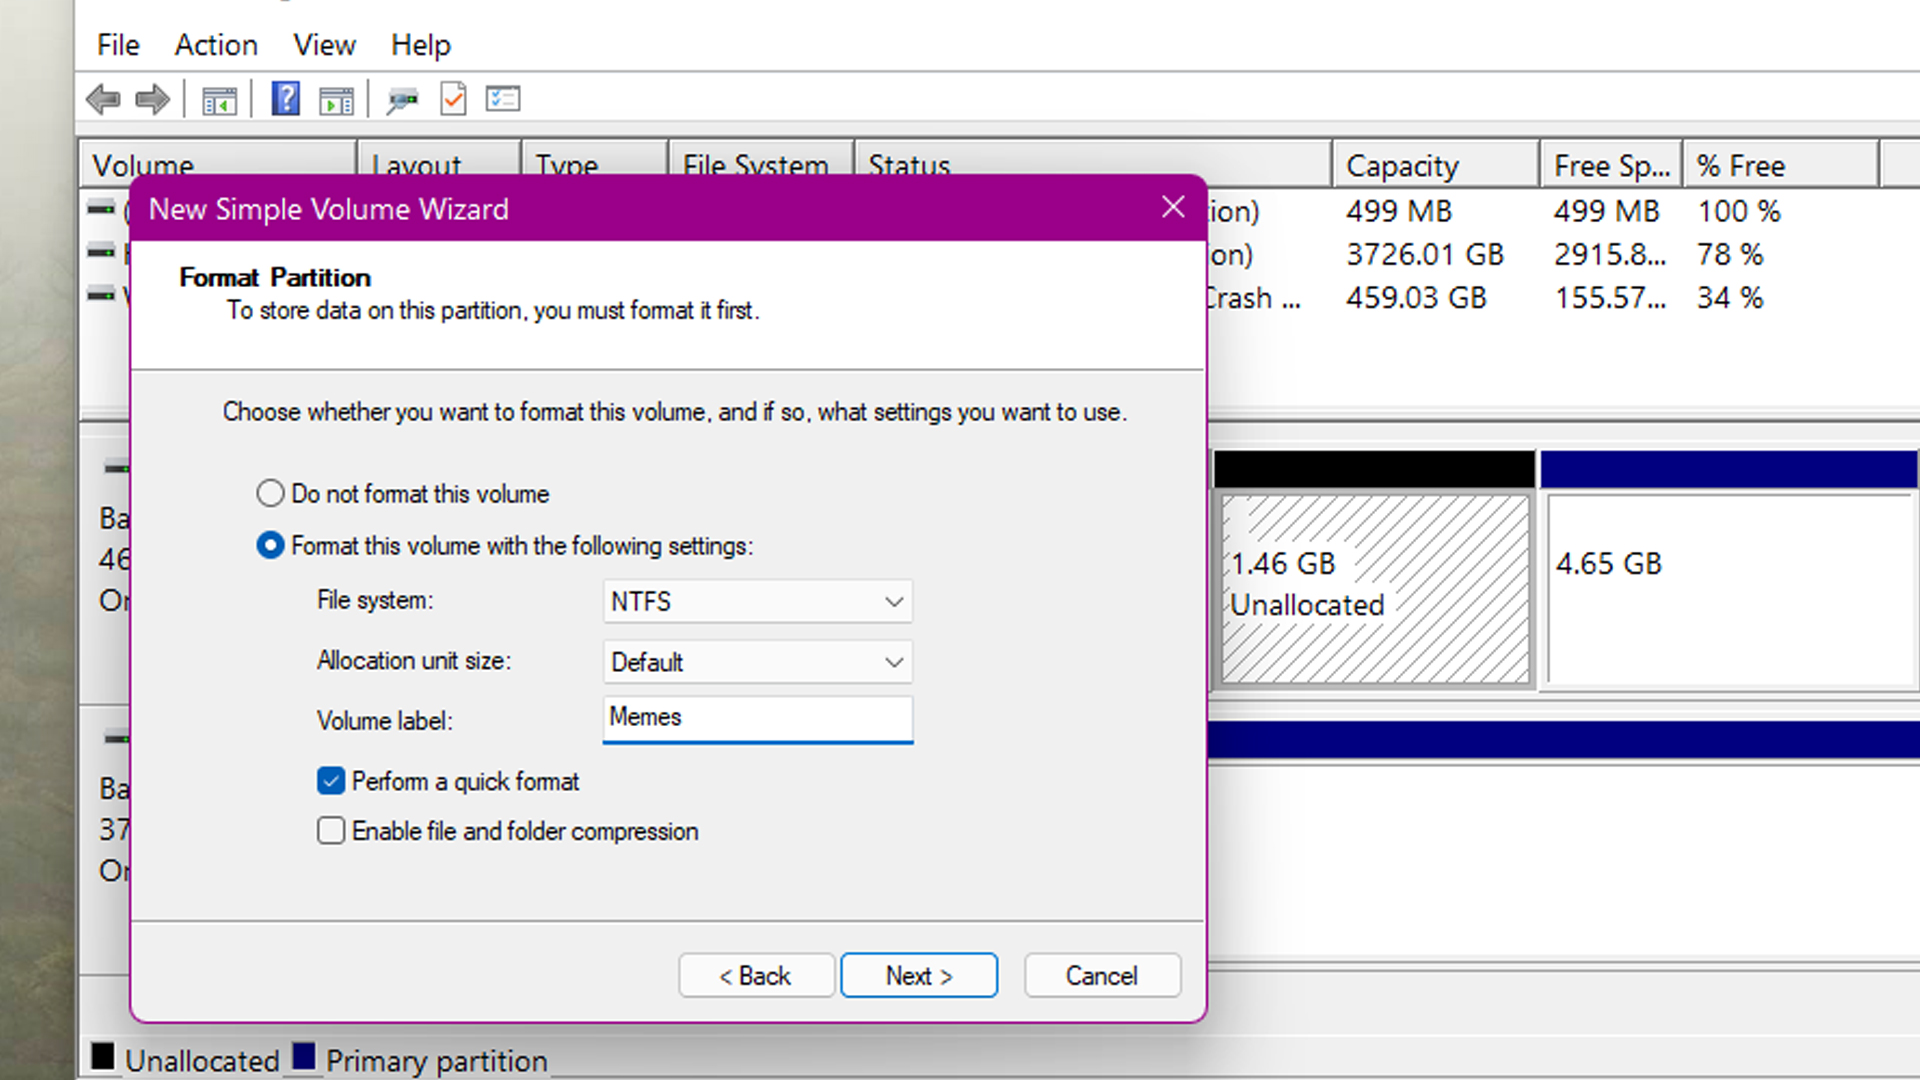
Selecting a drive letter for your new partition is optional, but will help you identify it among any others. Then you'll be prompted to name your drive. Leave the allocation size and file system alone for now. Once you’re satisfied, you can click through to the finish line.
Not all data moves equally
If you want to get the most out of your organizational efforts, you will want to move your personal libraries—Documents, Downloads, Pictures and Desktop. Moving these requires a bit more work than regular old data; copying and pasting won't cut it.
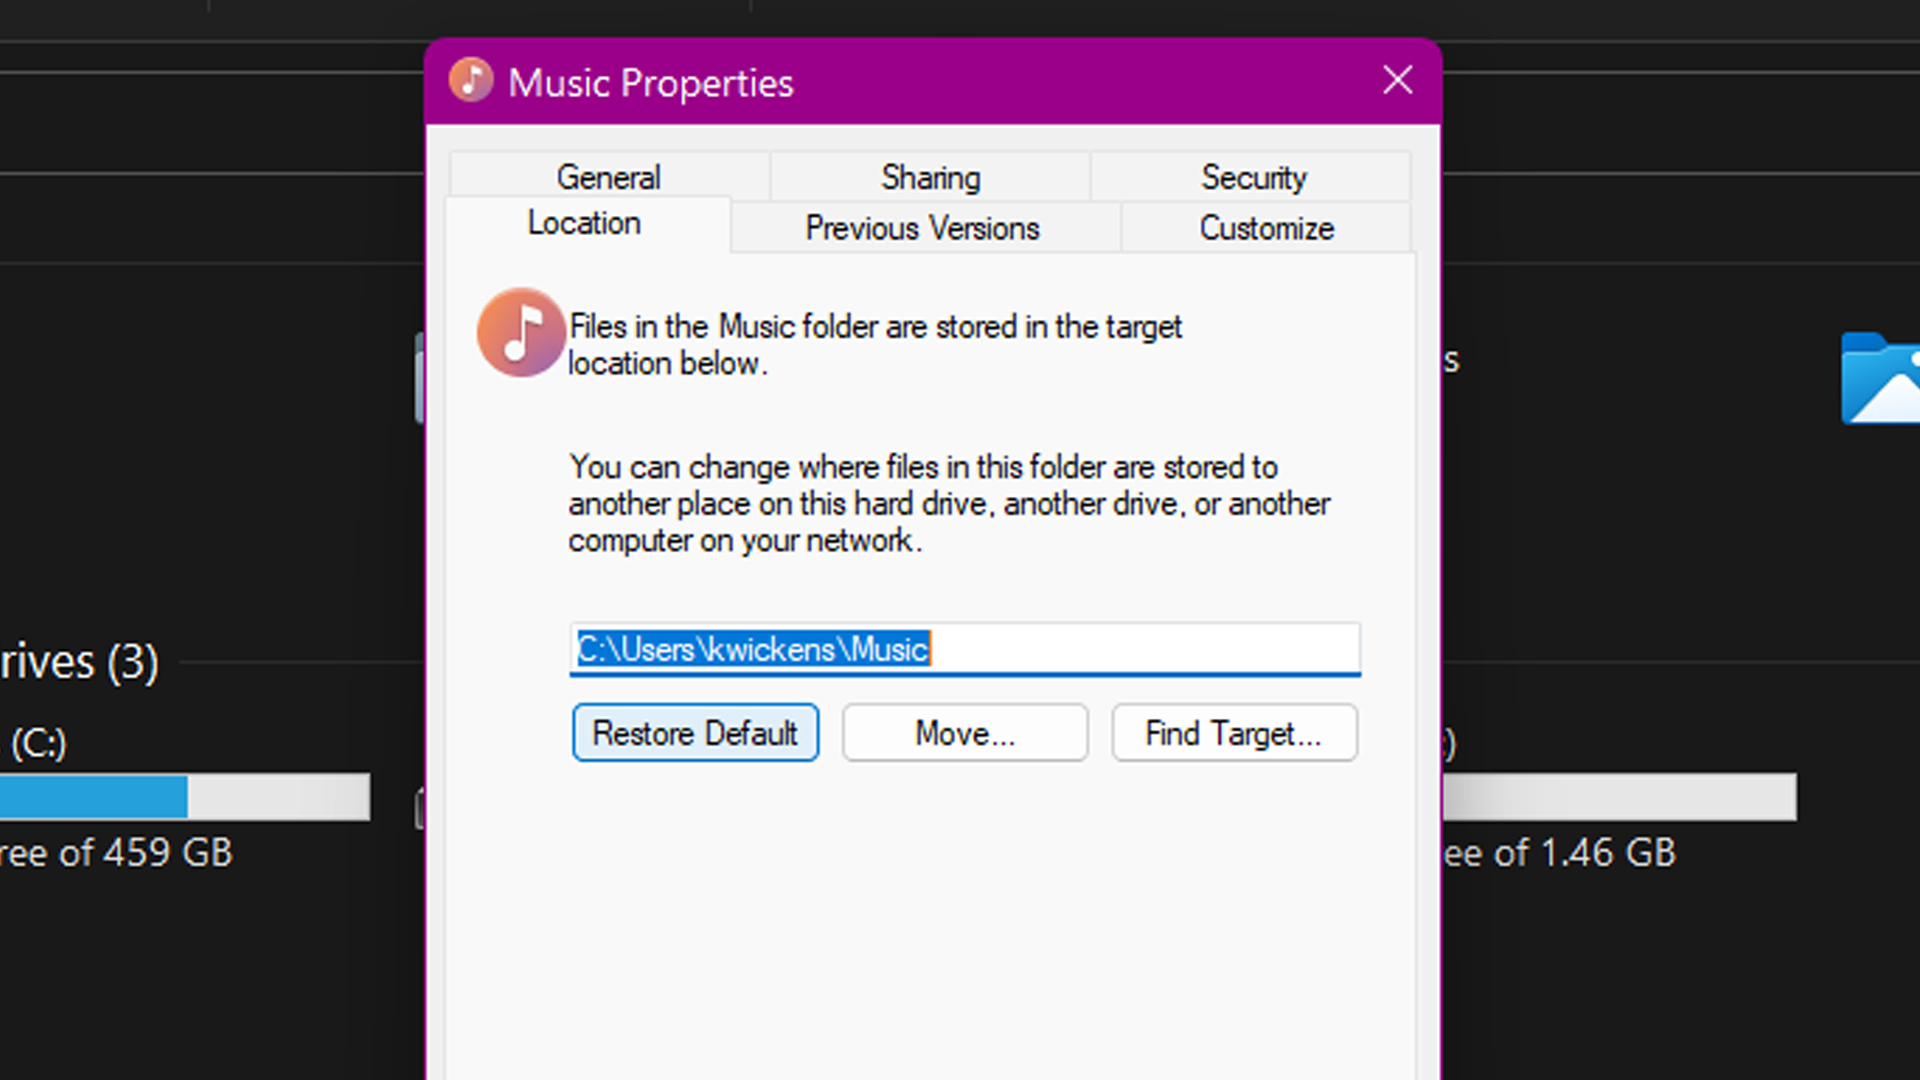
First create any new folders you want under your new drive partition. Then navigate to This PC in file explorer, right click and select Properties on the file you want to move over. Under the Location tab, select Move.
Take note of the first option, too: Restore Default. If you decide you no longer wish to have your user data separate from the windows drive, there is a convenient option to dump the folder back to the default location.
Browse for the new location, and the folder you created for it, and select the new folder destined to hold your personal libraries from now on. Click Yes on the following dialogue box to move all existing files to the new location and that’s it!
Change page file location
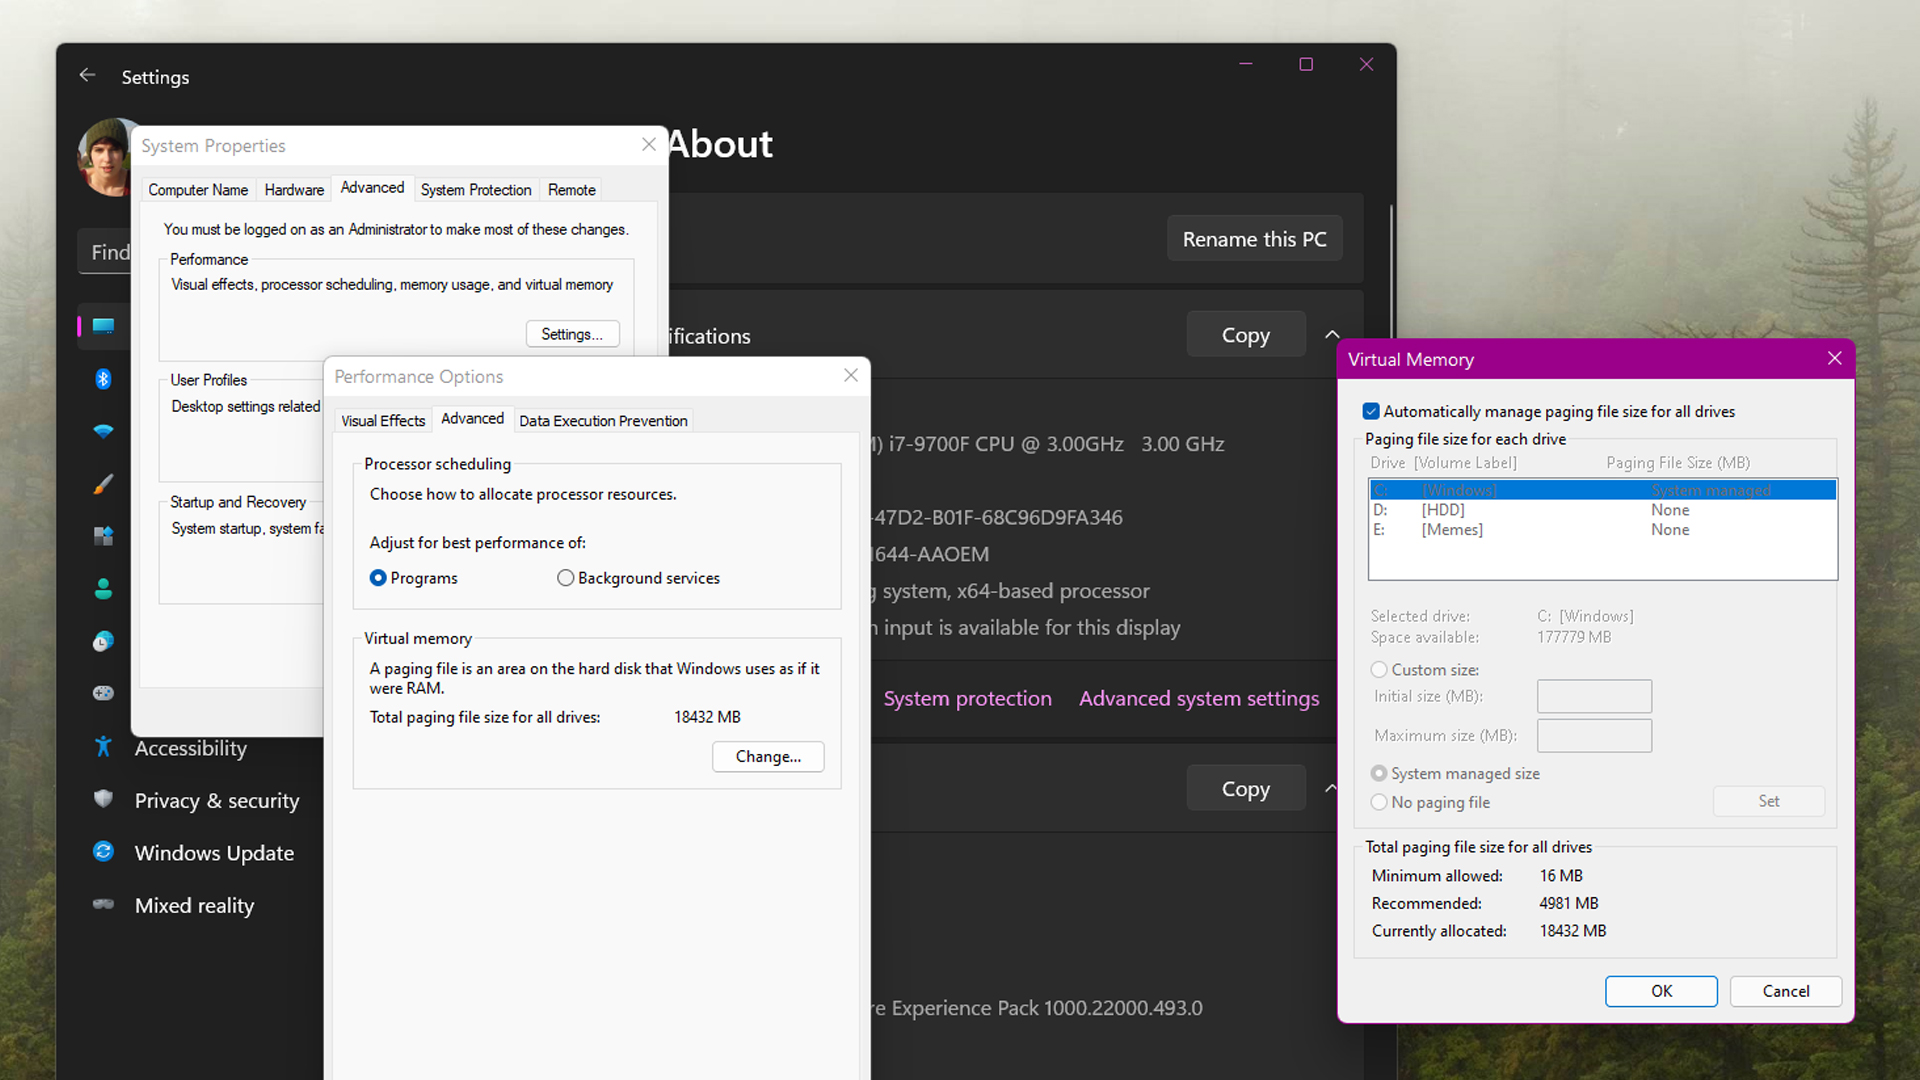
Changing the drive that Windows uses for virtual memory can be done in a few clicks. This is for those times when you run dry of system memory and have to start borrowing from your storage memory. It's slow, and not something you want to happen, but it can be useful on lower-spec rigs.
First navigate to This PC in file explorer and choose Properties (hidden under the ellipsis in Windows 11). Click Advanced system settings then click the Advanced tab, then Settings under the Performance header. Click the Advanced tab on the next window, too.
Now all you need to do is select the new drive you wish to hold your page file.
Select System Managed Size and click set. Then choose your C drive and select No Paging File and set it. A restart will be required for the changes to take effect.
You've now mastered the awesome power of Disk Management and now that you know how to organize, you are officially one step closer to taking over the world.

Having been obsessed with game mechanics, computers and graphics for three decades, Katie took Game Art and Design up to Masters level at uni and has been writing about digital games, tabletop games and gaming technology for over five years since. She can be found facilitating board game design workshops and optimising everything in her path.
