Great Scott! Asus' Back to the Future cable-hiding system is no gimmick, it's the future of gaming and enthusiast PCs
It's not cable-less, it's cable-hidden, and it's flipping brilliant.
If you've ever built a gaming PC or just looked inside one, you won't have missed the fact that everywhere you look there are cables. Wires to supply power, data, or both; wires to switch things on and off; wires to change the colour of lights; wires to attach chassis ports to the motherboard. At the very least, they're fiddly to fit and route, but if you're serious about your PC's looks, then they're a major pain to manage. Enter stage left Asus and its BTF ('Back to the Future') range of motherboards, graphics cards, and cases where cables are very much not the centre attraction.
A few weeks ago, our hardware overlord Dave asked me if I fancied building a PC and then reporting back on what the whole experience was like. At first, I was a bit bemused, given that we all do this kind of thing on a regular basis in the office. Then he mentioned that it was a couple of things from Asus, all hallmarked with three letters: B, T, and F.
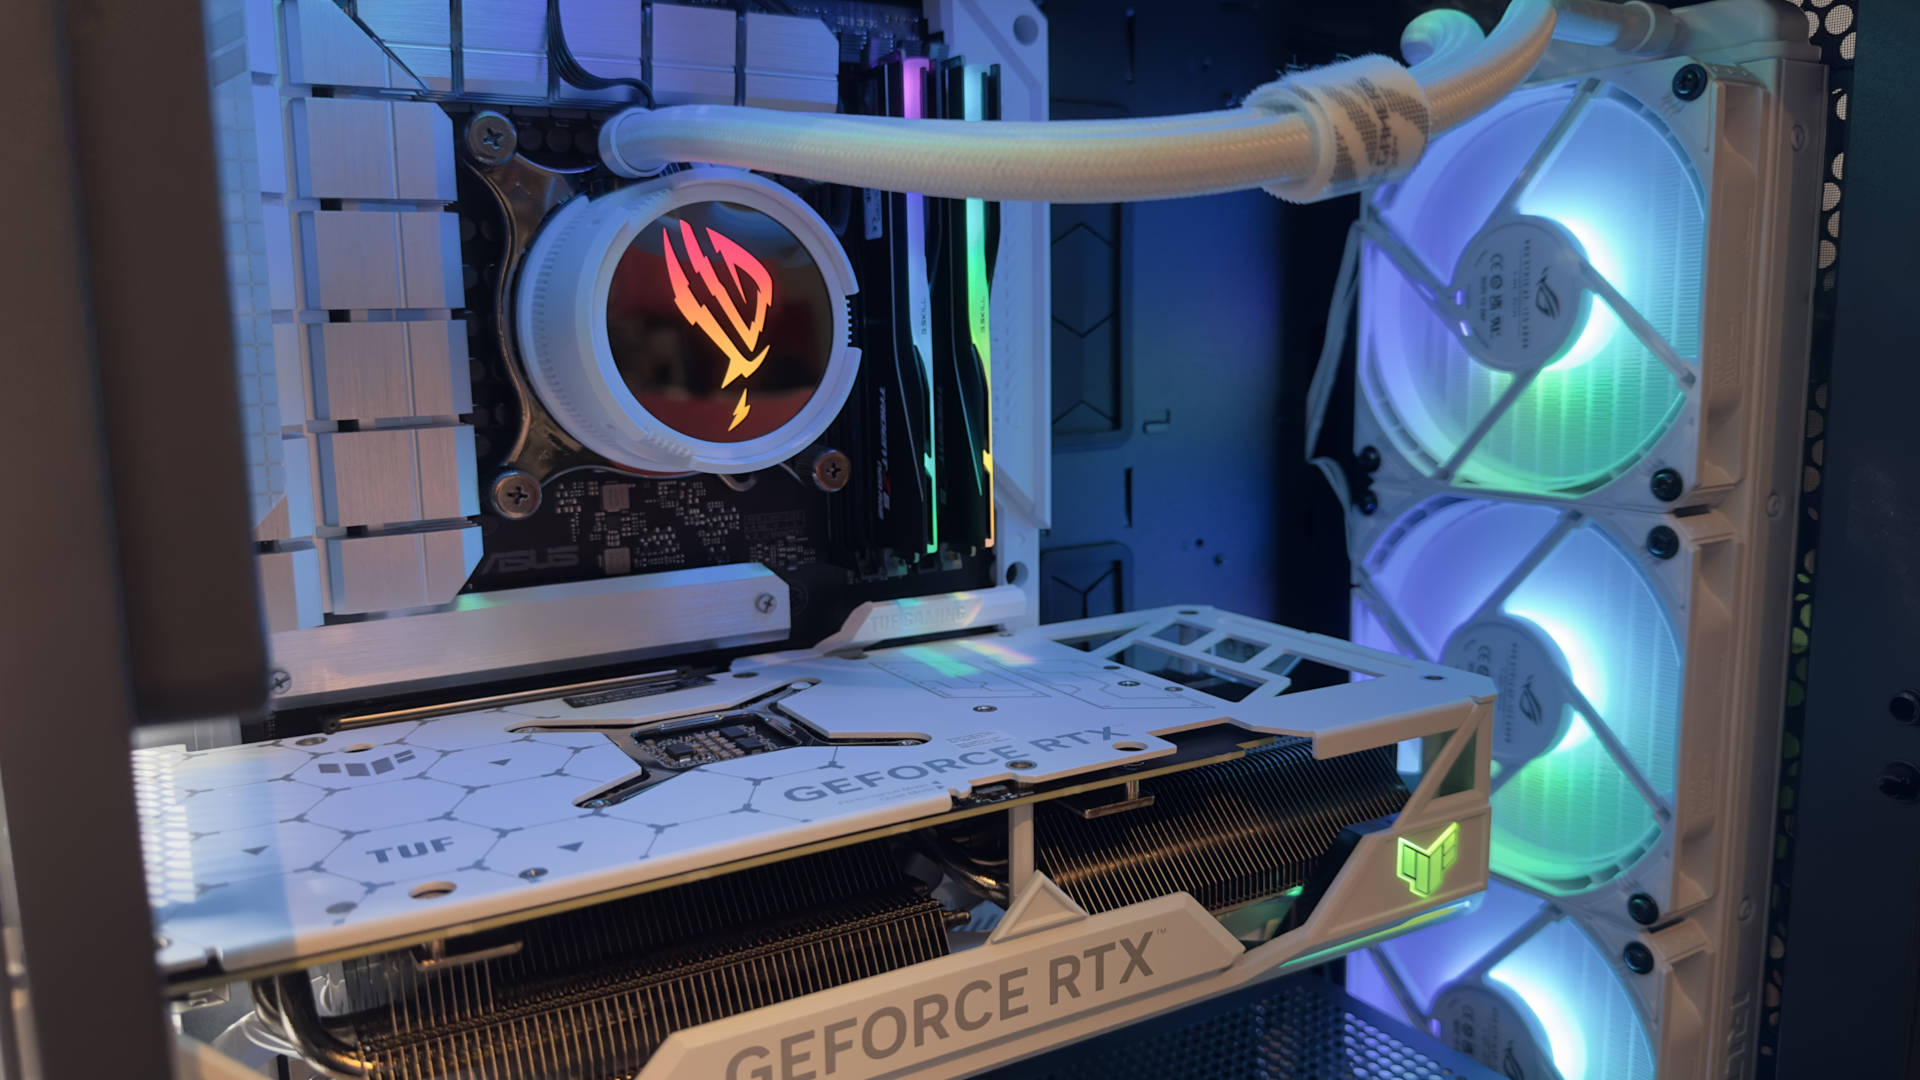
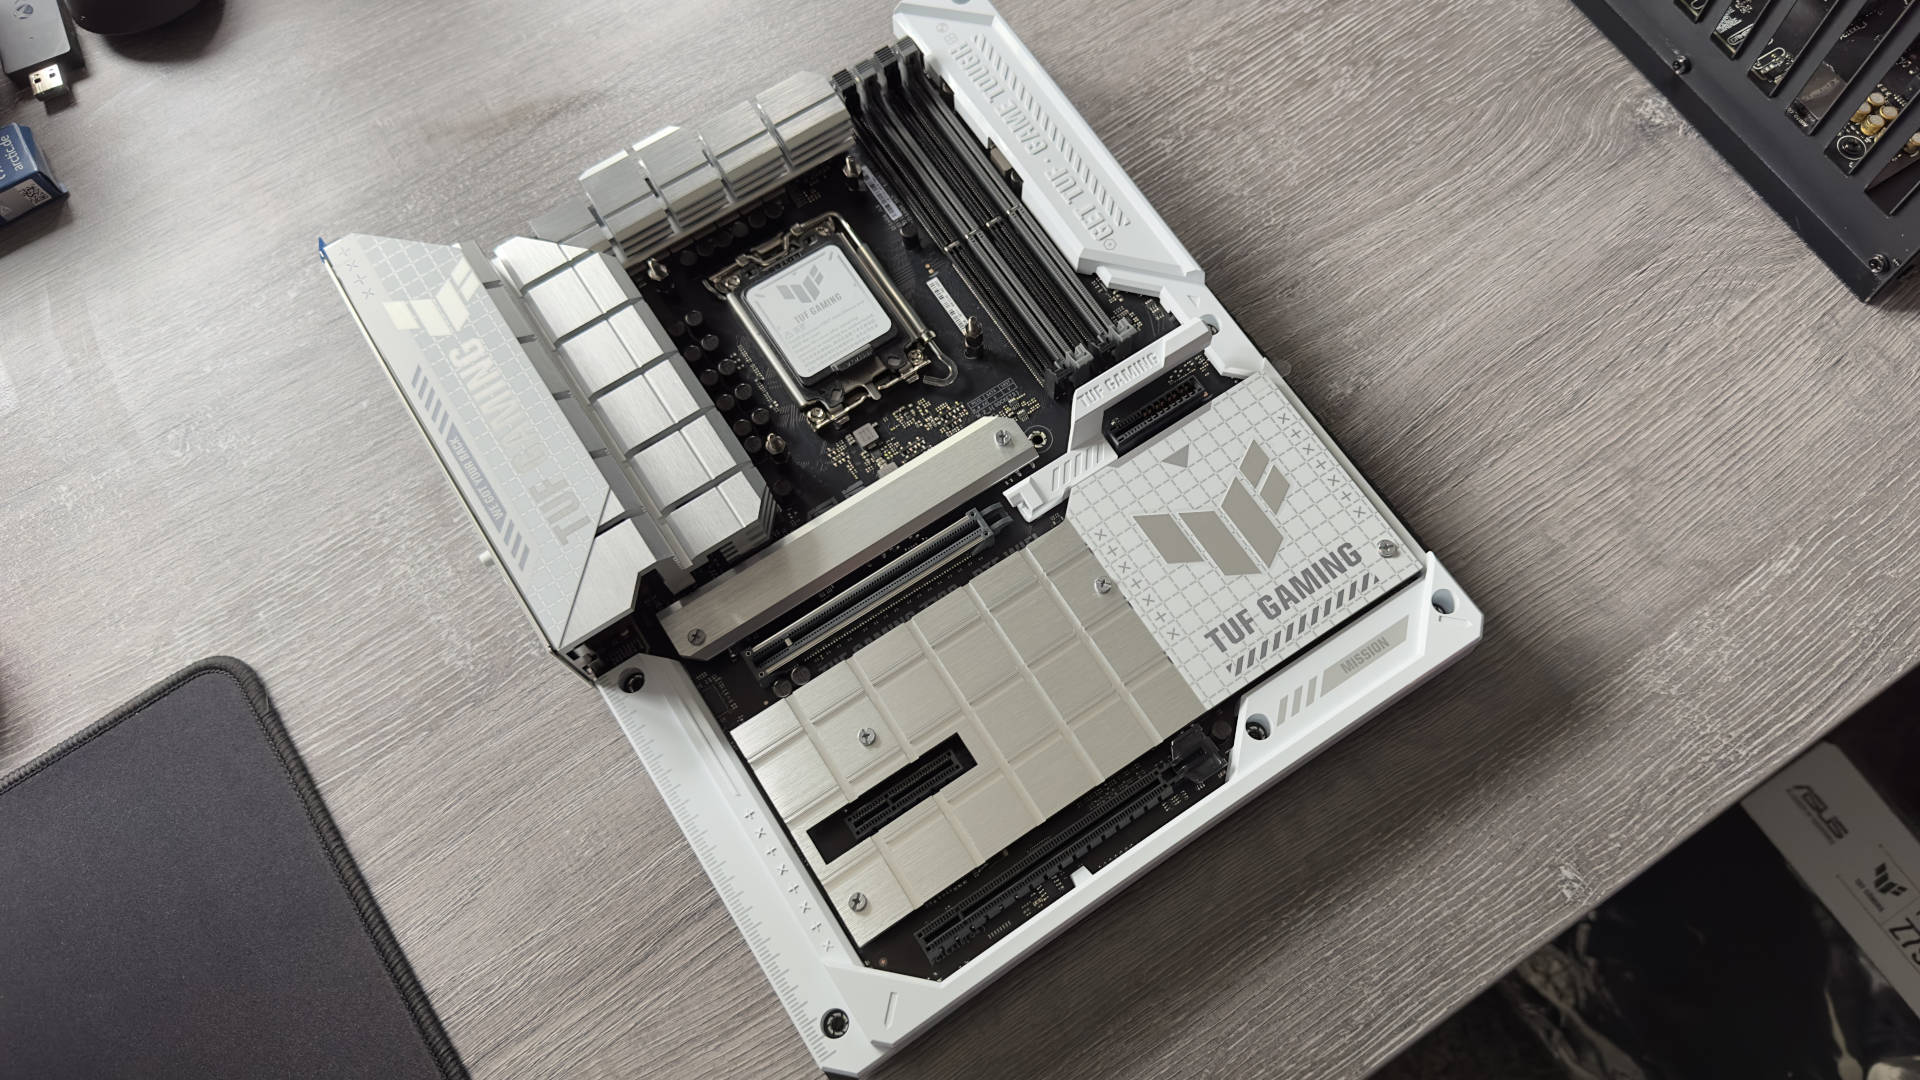
Specifically, it was a TUF Gaming Z790-BTF motherboard and TUF Gaming GeForce RTX 4070 Ti SUPER BTF White OC Edition graphics card, with the latter clearly targeting the world record for the number of letters one can use in a product's name. The principle behind the BTF platform is simple—hide as many cables as possible from the main area inside a typical, glass-panelled gaming PC.
In the case of the motherboard, that means shifting all bar one of the cable sockets to the back of the circuit board. They're all in the usual locations, just on the other side.
But for the graphics card, Asus had a much harder task—how exactly does one hide the power cables? Every GPU needs at least one and it's not like there's one side of a graphics card that's both hidden but still accessible. The solution comes in the form of a proprietary connector, looking very similar to the PCI Express one all cards have.
Where that connector supplies data, instructions, and up to 75 W of power, this new one is equivalent to the much-maligned 12VHPWR socket—up to 600 W of power, via 12 wires, and status information through another four. At the moment, Asus' system can't be used alongside a traditional power socket, so BTF graphics cards will only work on a BTF motherboard. You can use any GPU with the latter, but the former is very restricted.
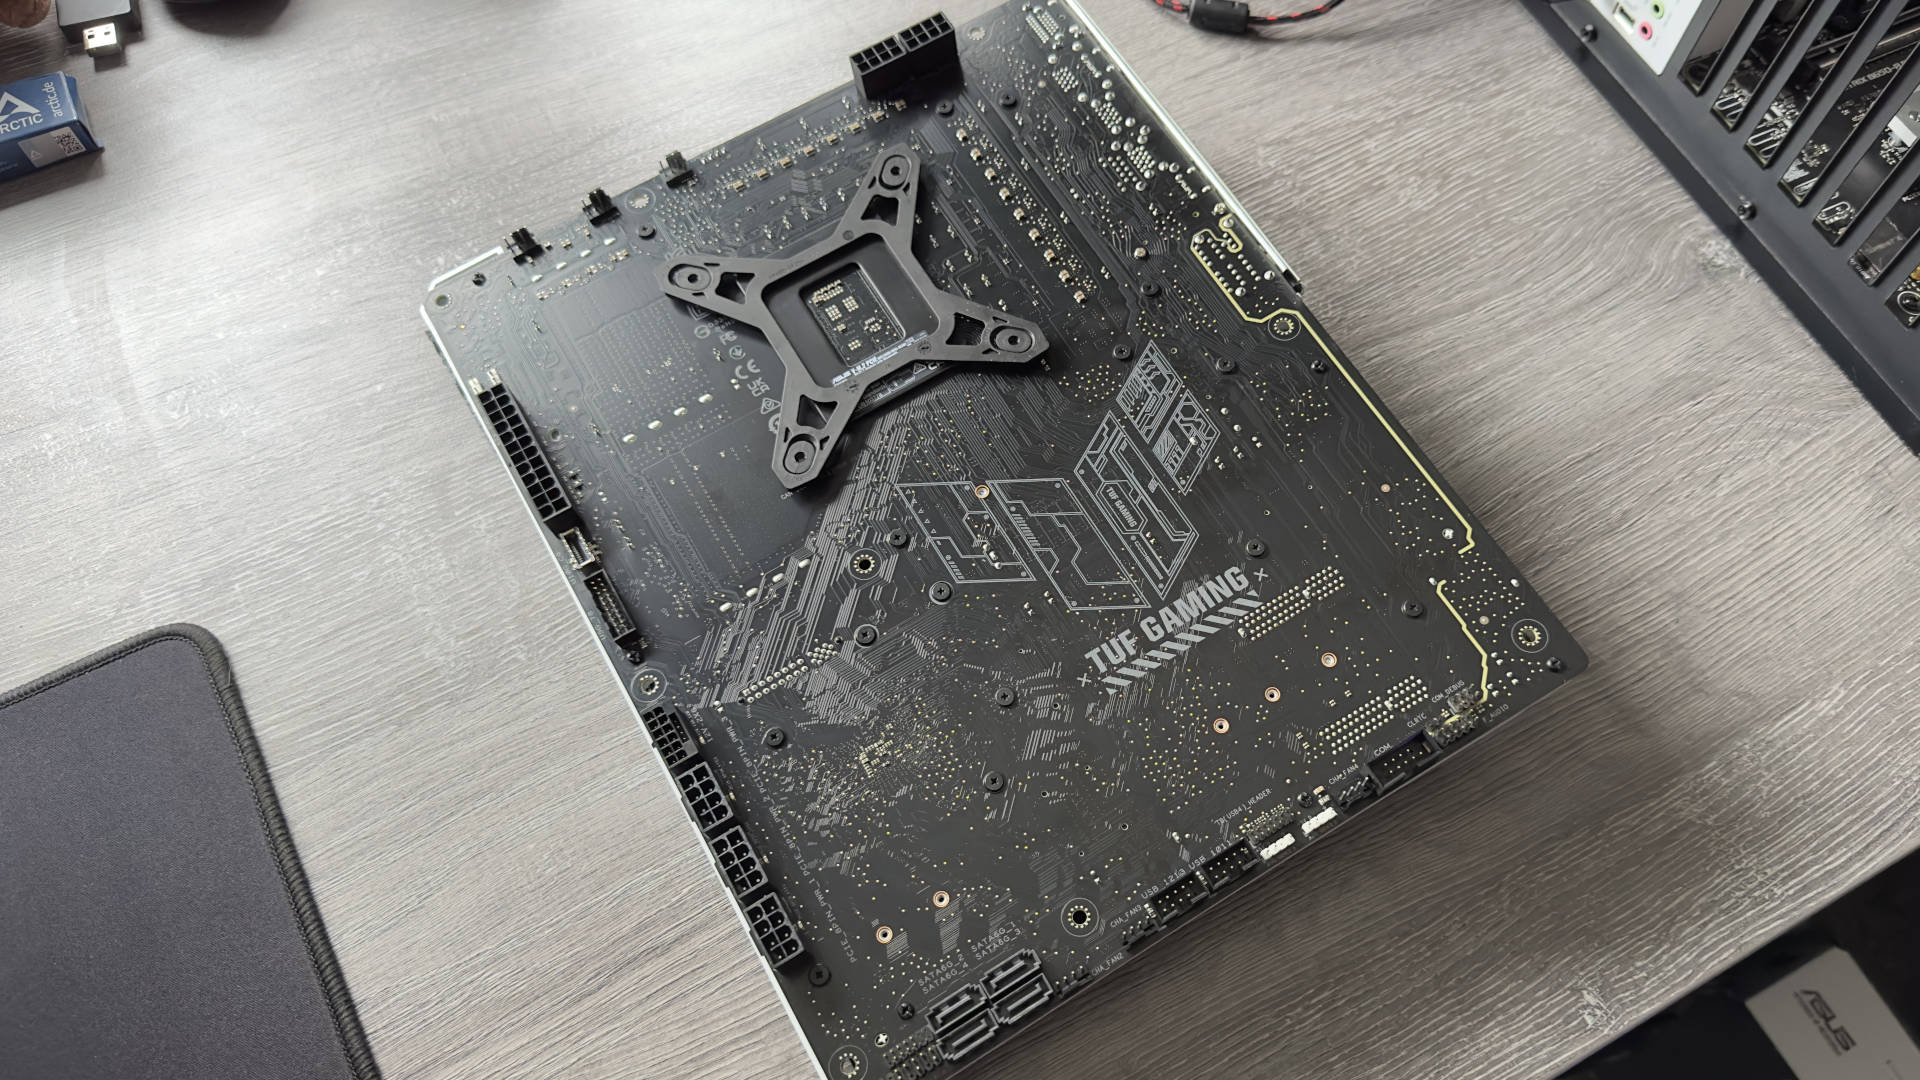
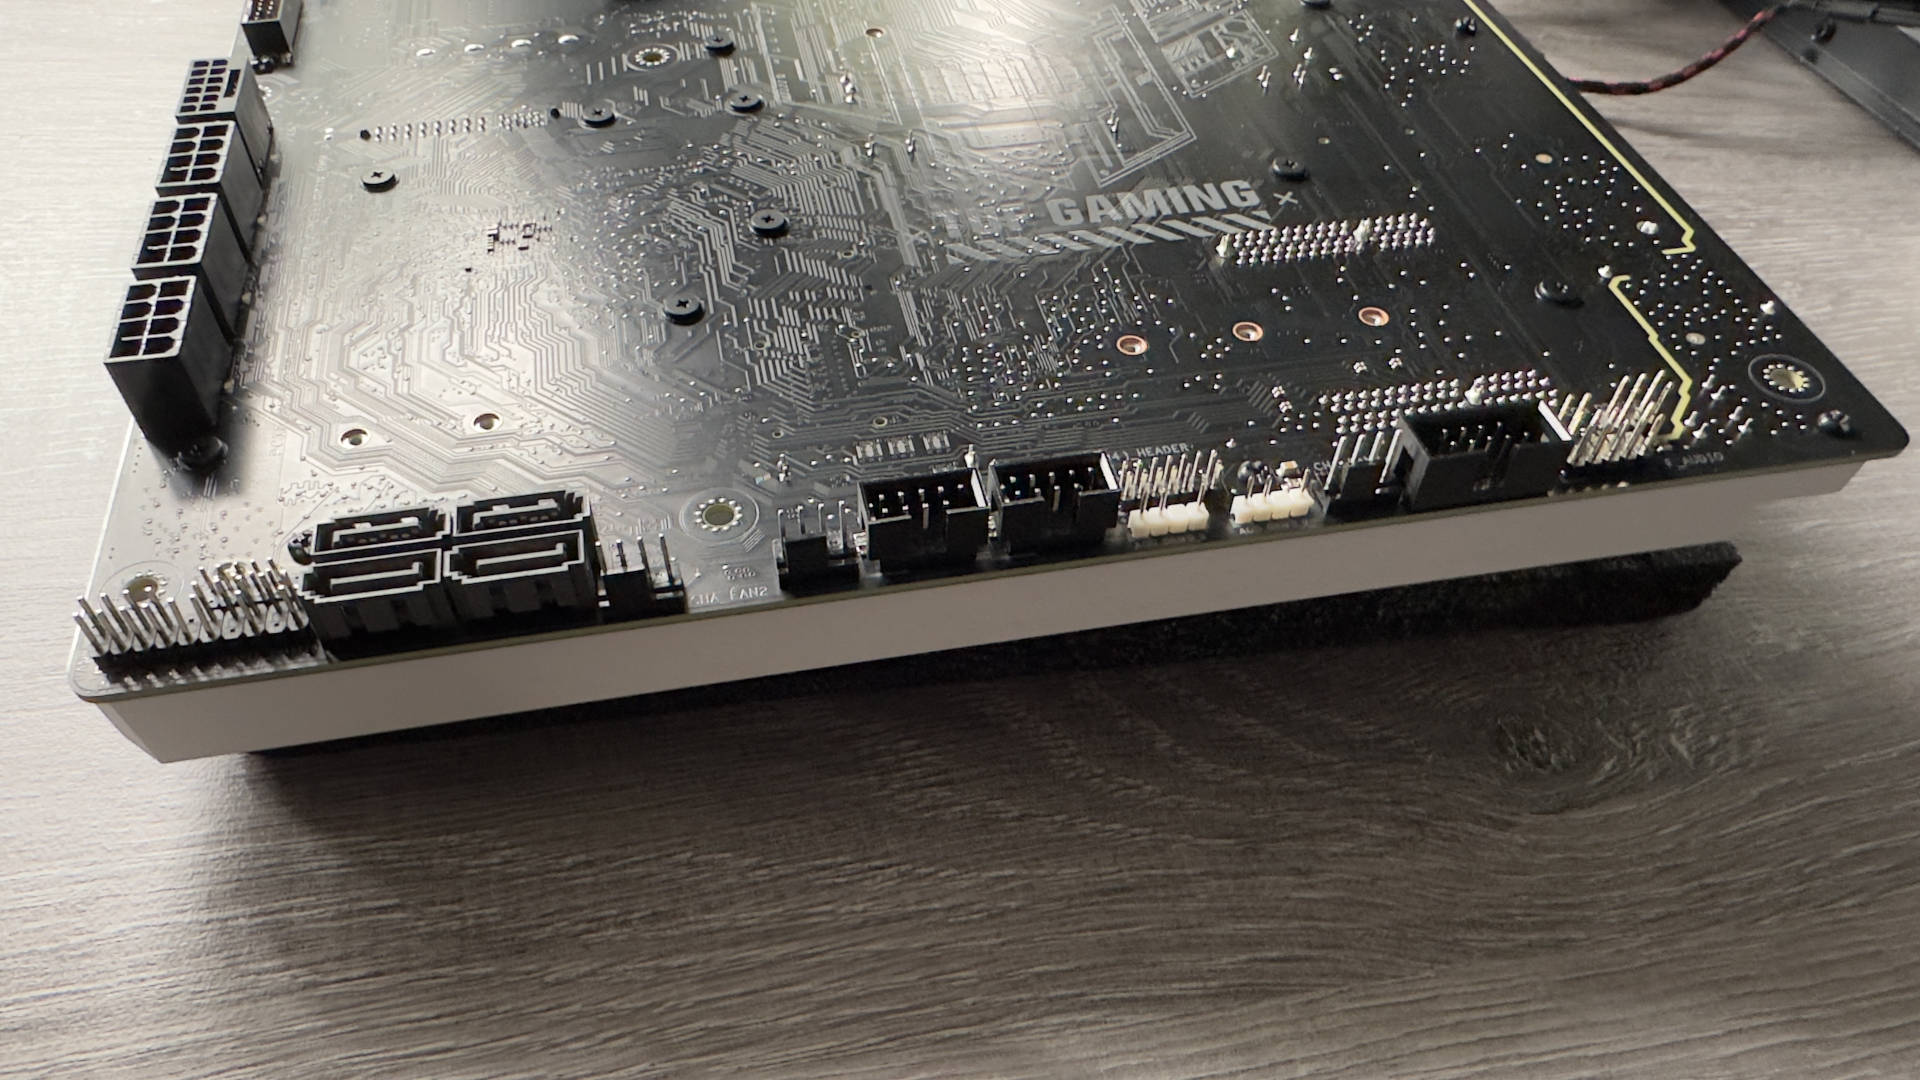
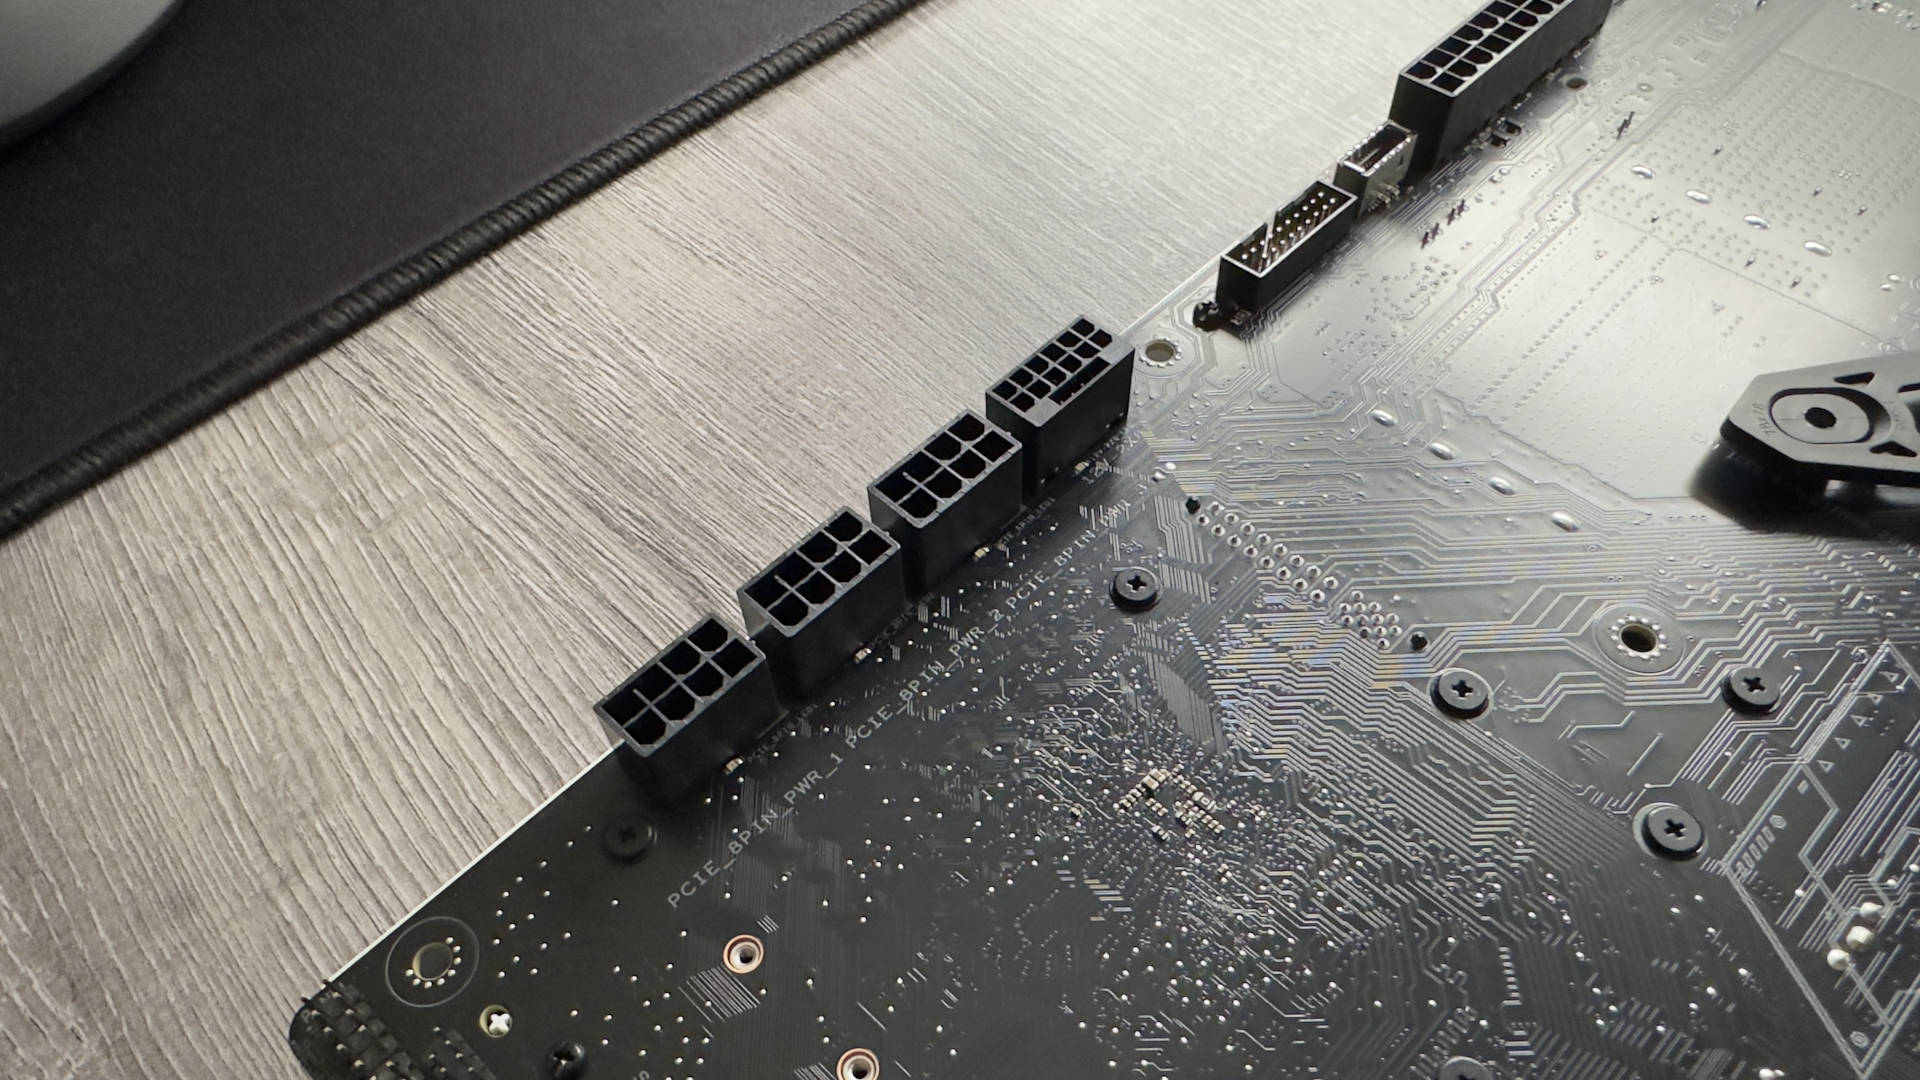
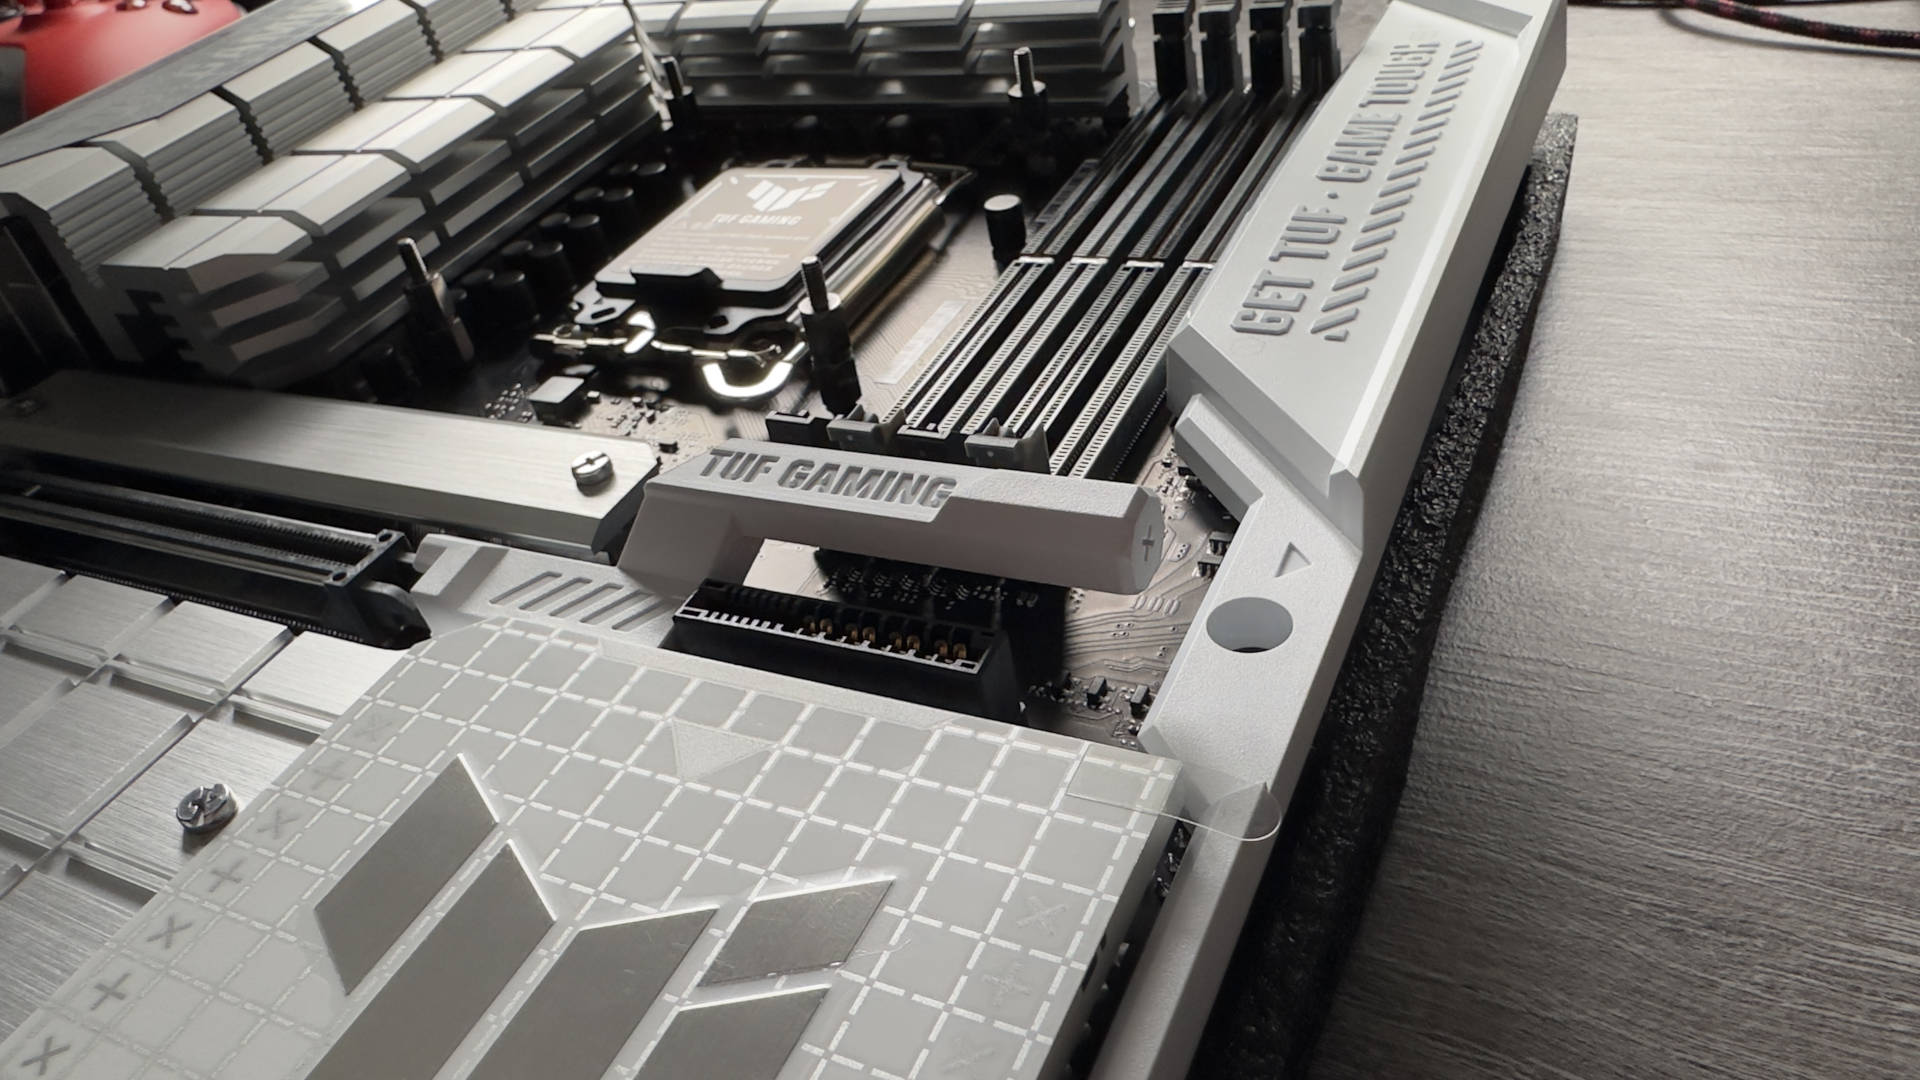
Anyway, to get the whole build done, Thermaltake kindly set us one of its Ceres 330 TG ARGB cases, one of the few models out there that officially supports Asus BTF motherboards. It doesn't technically have anything special for this, it's simply a matter of the chassis having enough space in the right places. Asus also sent us a ROG Strix LC III 360 ARGB White Edition AIO liquid cooler and I had a rummage through my drawers for everything else.
Keep up to date with the most important stories and the best deals, as picked by the PC Gamer team.
My first impressions of the Z790-BTF motherboard were 'Ouch, that's spikey!' Years of handling normal boards meant that my fingers immediately caught all of the connectors around the back, so I left it resting on its packaging for most of the time. It honestly just looks like the majority of Asus' mid-range motherboards, and I was initially a bit disappointed by how cheap some of the plastics felt. For a Z790 board, there's also a poor number of USB ports on the rear.
Then I tried the graphics card release mechanism and this alone is worthy of all the praise you could muster. Why so many vendors think we all have digits the size and strength of nanofibres is beyond me and I hate having to swap cards around on boards that bury the latch mechanism underneath the card itself.
Not so here, as a simple prod of the lever pops the card right out. If Asus adds this to all of its motherboards, then it'll be a blessed relief to countless system builders and testers.
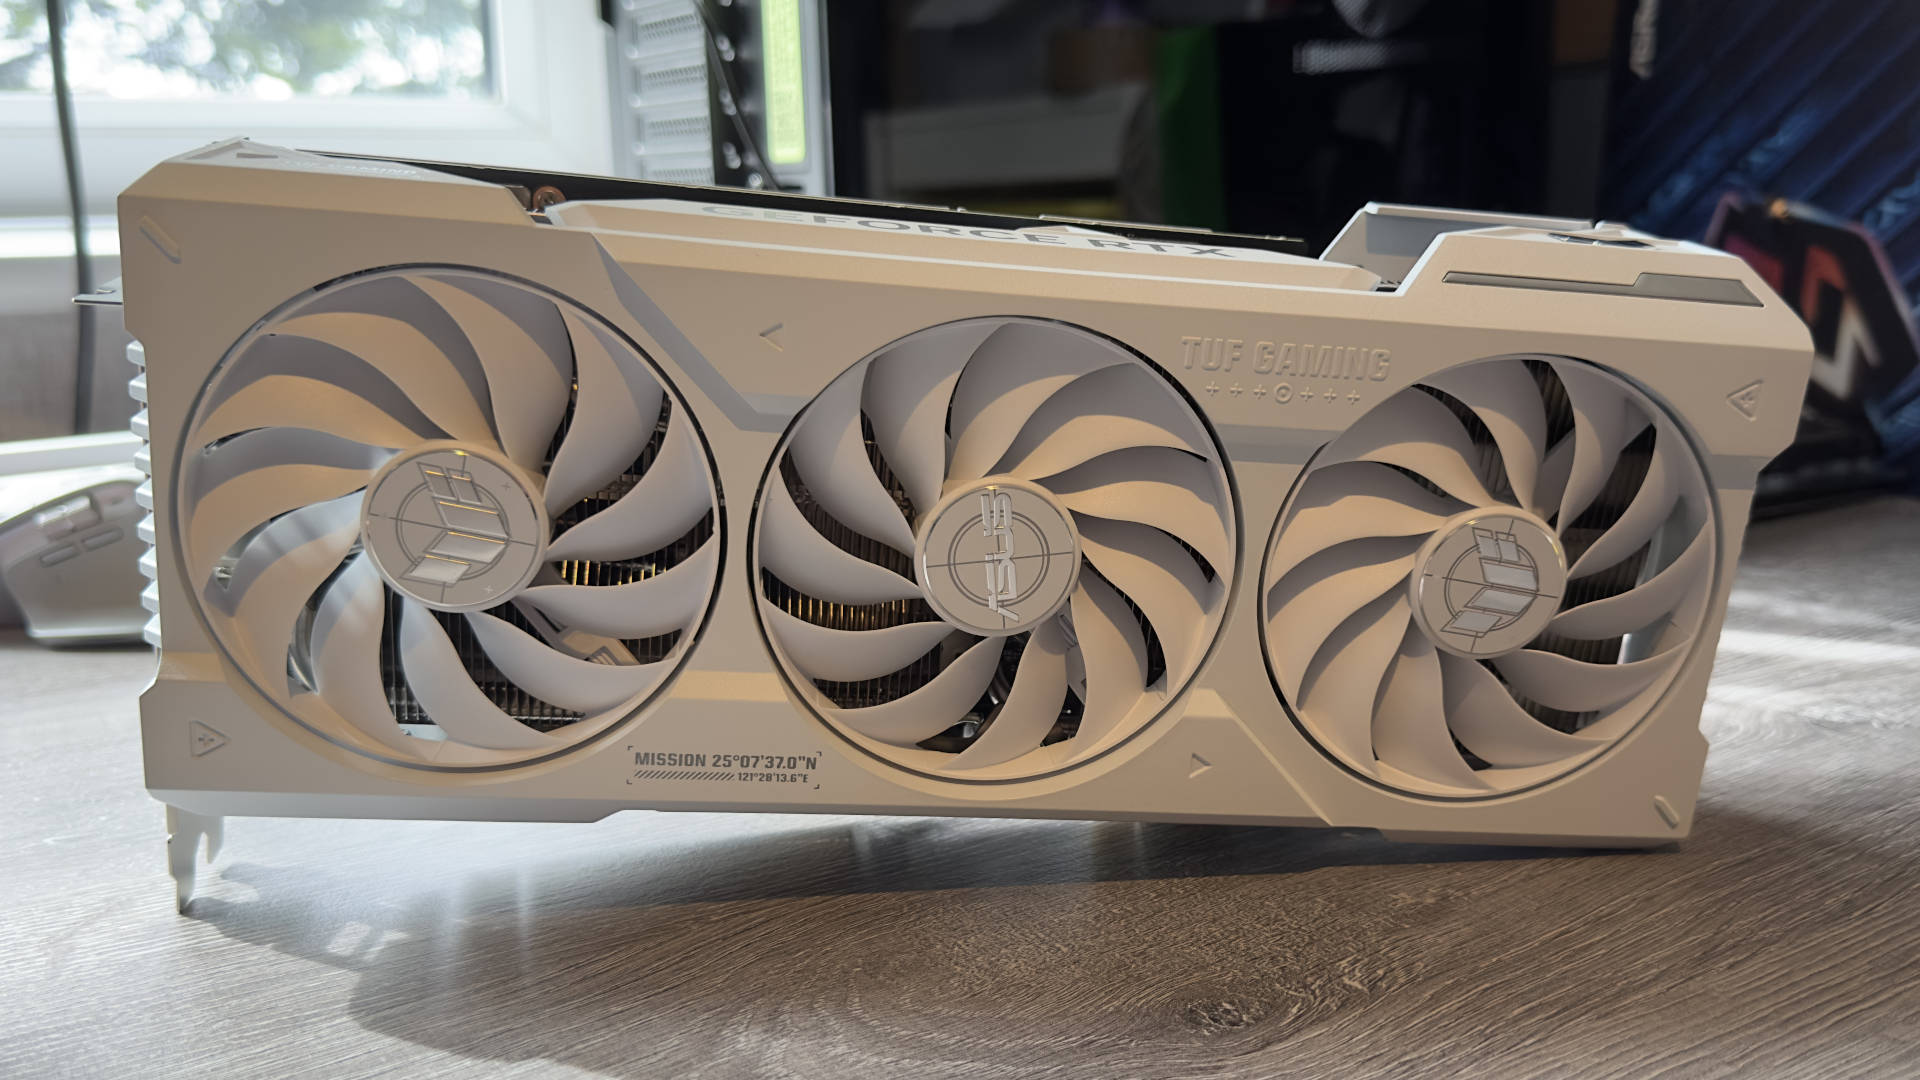
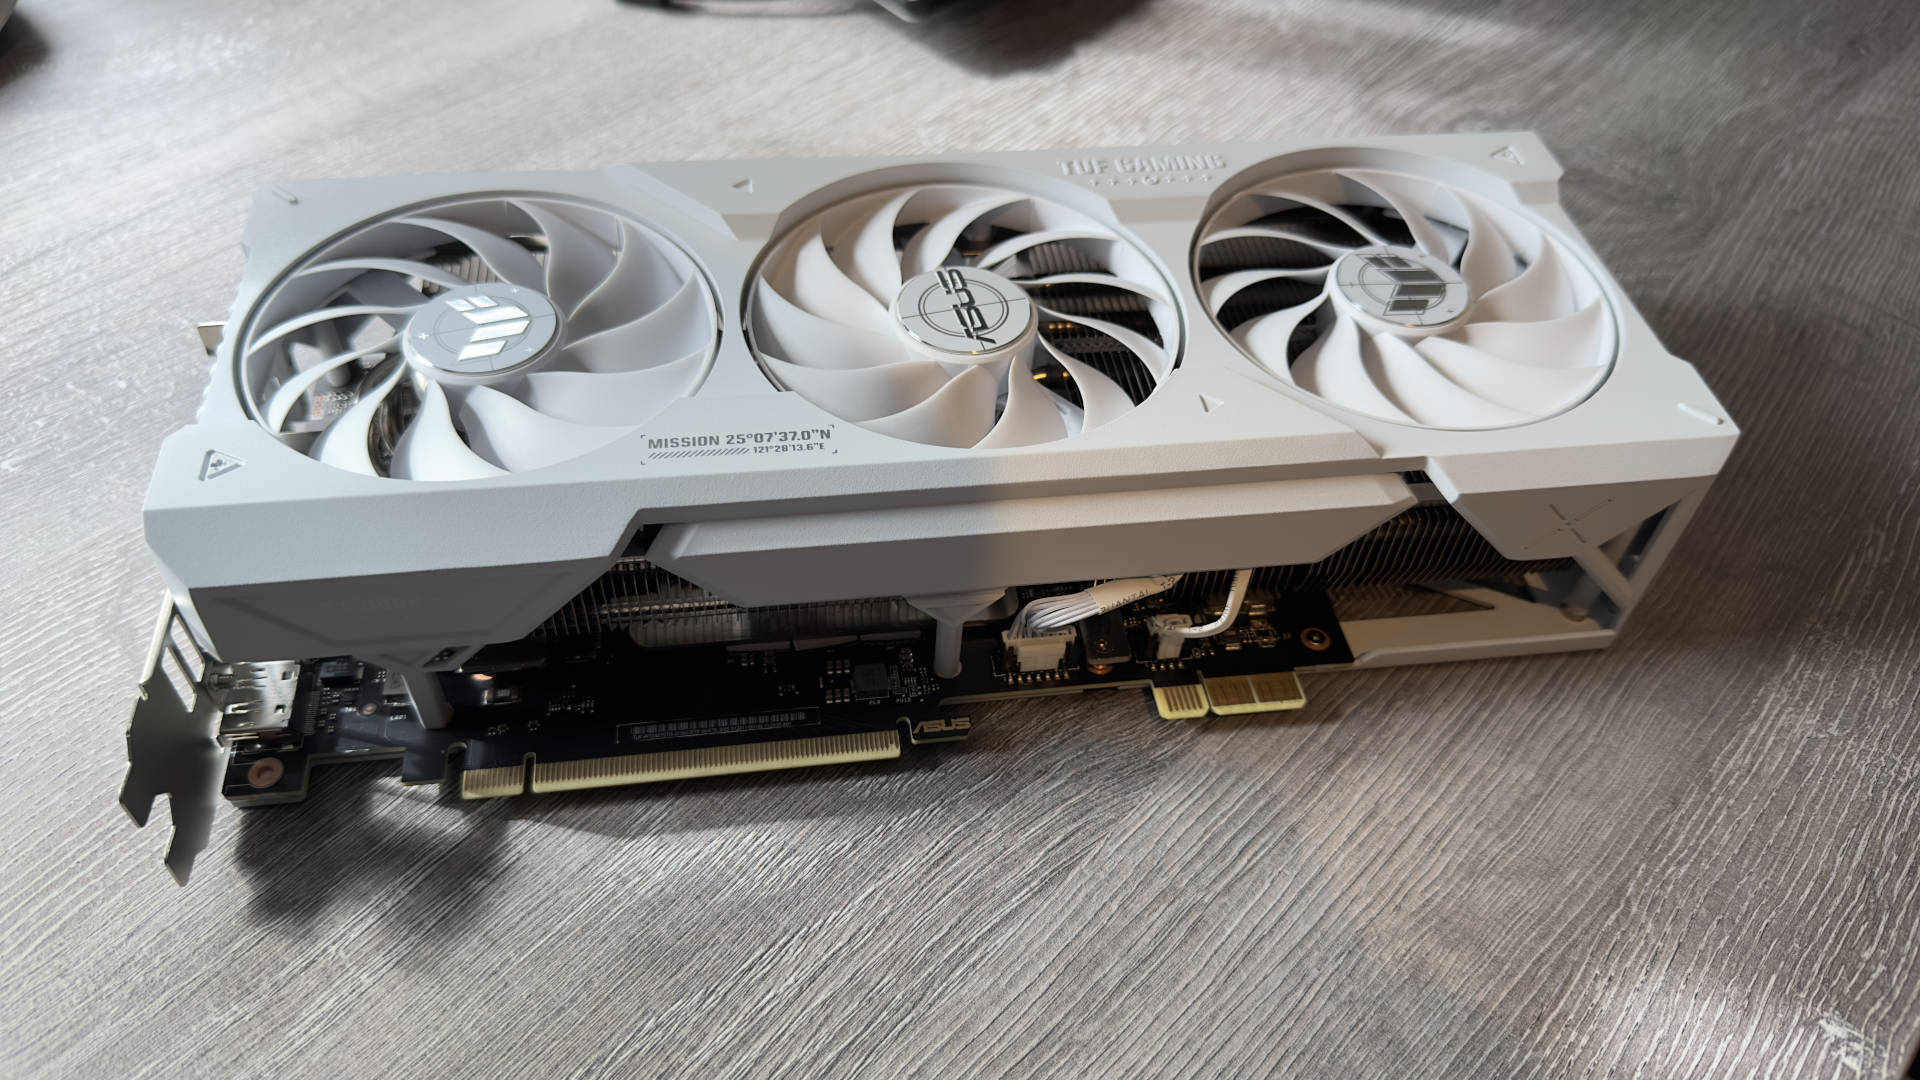
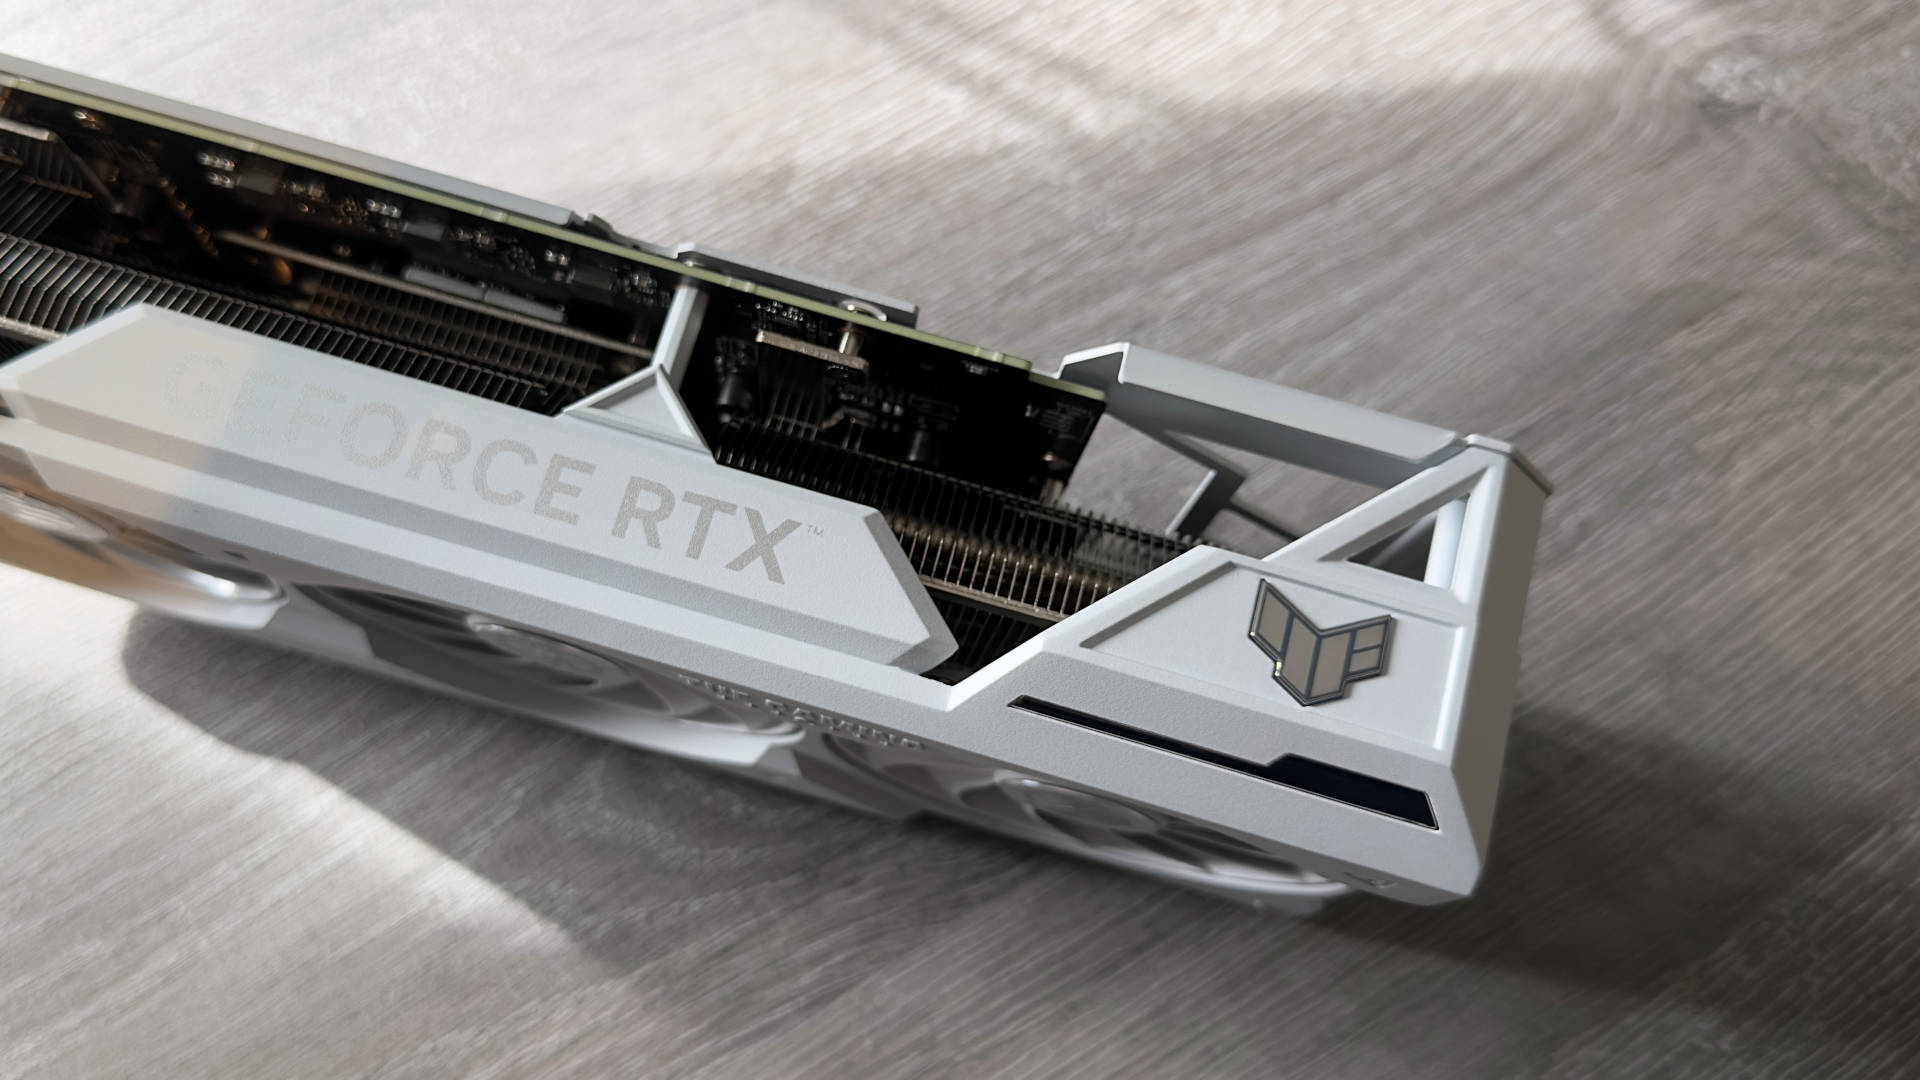
So far, so good. Or at the very least, nothing bad. Out next came the RTX 4070 Ti Super BTF graphics card and apart from looking very nice and impressively imposing, it's just like any other chonkingly large GPU. The BTF power connector is quite discrete but oh boy does it look odd not seeing a 12VHPWR or other socket along the edge of the circuit board.
And finally, the Thermaltake Ceres 330 TG. It's quite understated in terms of looks but it's pretty roomy inside. As with all my builds, I stripped the case down to a relatively bare chassis, to give me plenty of working space, and then set about thinking about how to put this all together.
I tried the graphics card release mechanism and this alone is worthy of all the praise you could muster.
I like to do 'dry' runs with new equipment, just placing parts inside the case to see how things all generally fit, but here it all went so well that I had the motherboard (all loaded up with the CPU and SSD) screwed down in a matter of minutes. That cheap plastic surround is actually very useful, as it acts as a handy guide for the tiny mounting screws that came with the Thermaltake case. In went the PSU, followed by all of the power cables, which just plug into the relevant sockets on the back.
For the BTF power connector, you can either choose the 12VHPWR socket or attach up to three 8-pin PCIe power cables. For the sake of simplicity and ease of cable management, I went with the former.
Buoyed by my rapid success, I added the RAM (snick, snick) and moved on to the cooler. I used a Core i5 13600K for the CPU, and normally I'd pair it with a decent air-cooled system or a top-mounted 240mm AIO liquid cooler. The problem here is that the Ceres 330 TG doesn't support 360 mm ones in the top, but that's okay, I thought. I'll just front-mount it.
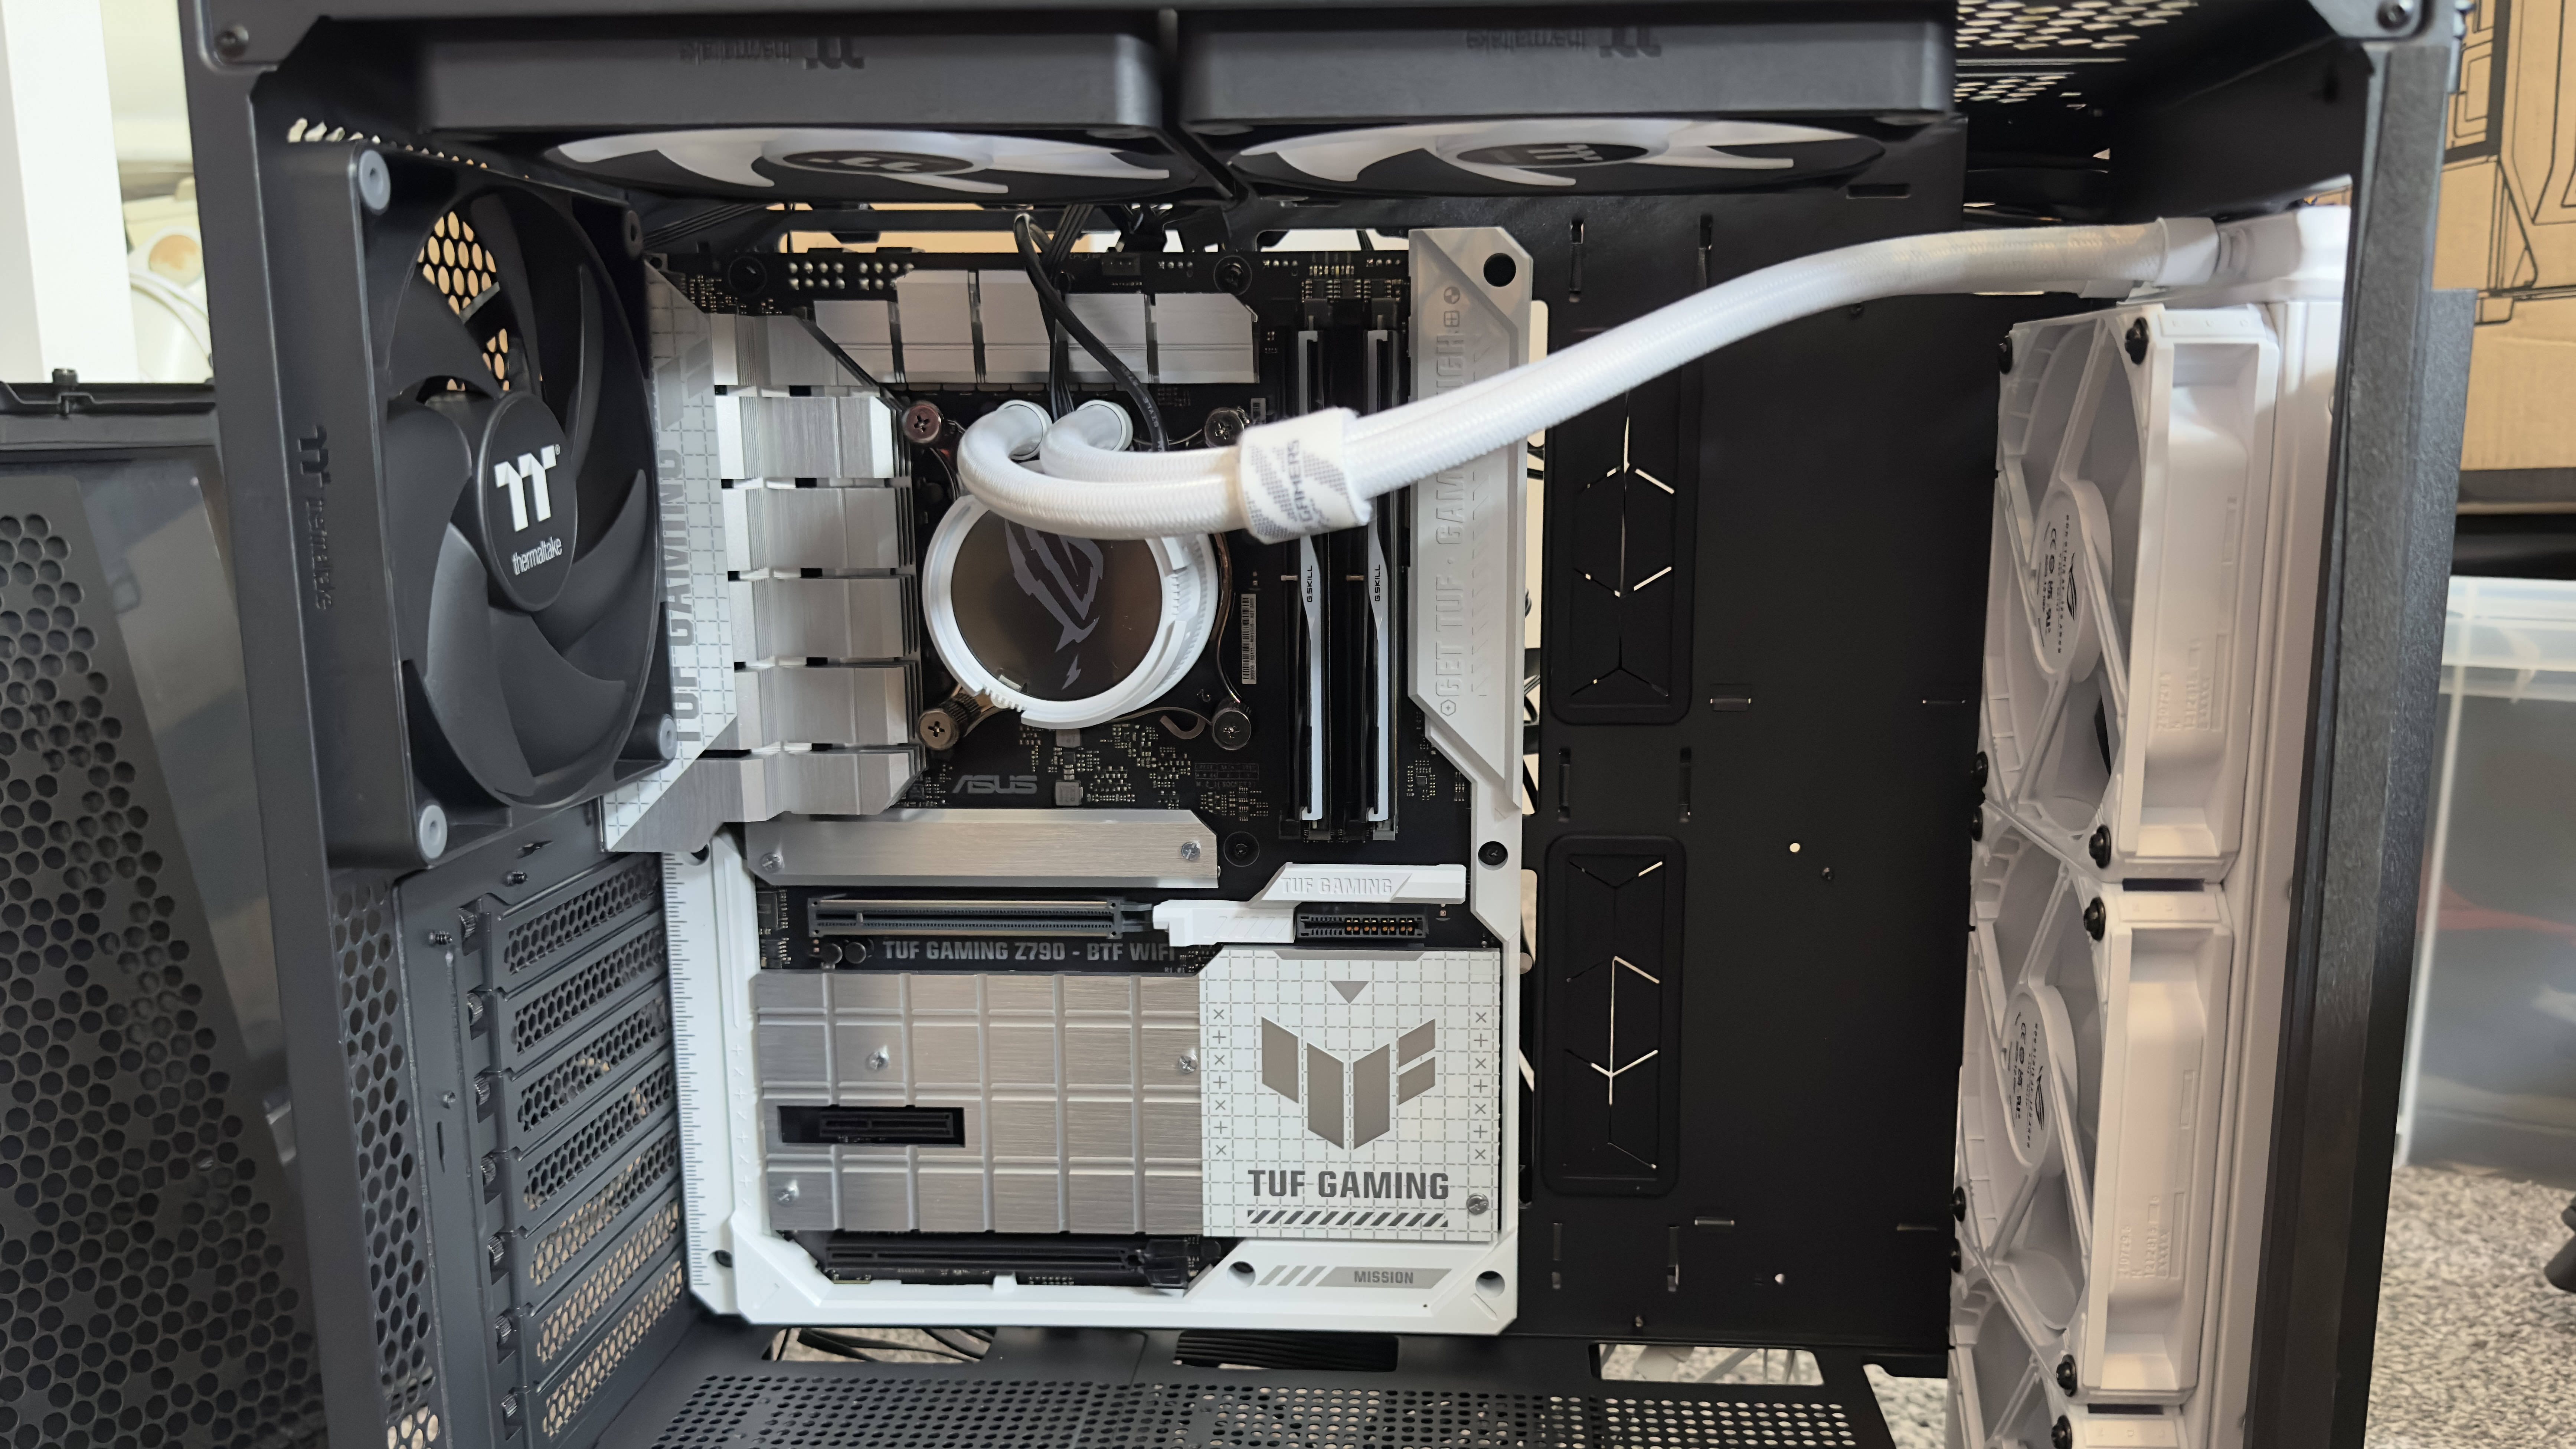
That proved to be rather awkward, thanks to the stiff cables protruding from the I/O ports and power switch on the top of the case. There also wasn't room at the bottom of the case to have the water lines running downwards, but at least the top of the radiator could be mounted higher than the pump head.
But with a fair amount of gentle persuasion, I managed to get the radiator in, the pump unit on the CPU, and the cables hooked up. I could have used the sole front-mounted CPU fan header, but I opted to have everything rear set, to go for the cleanest-of-clean looks.
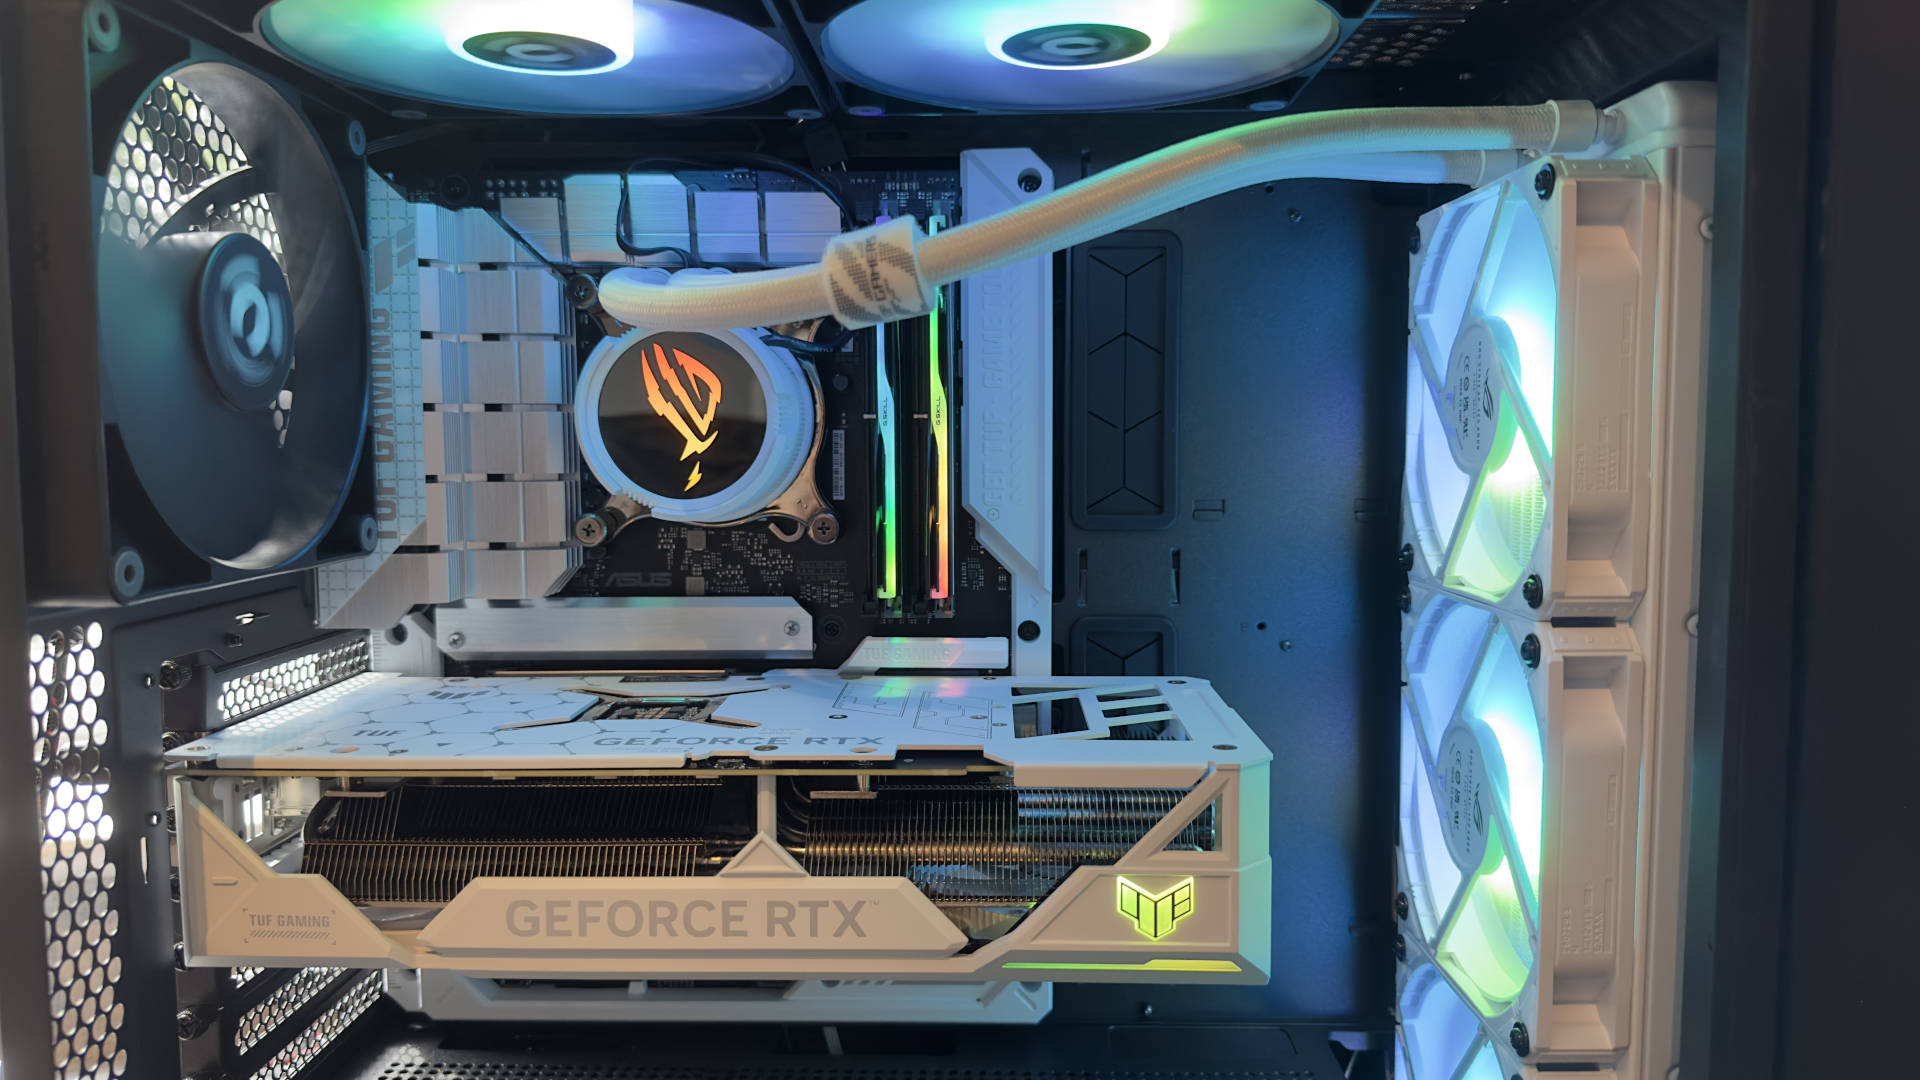
The final piece of the equation was the BTF graphics card and other than requiring a somewhat firmer-than-usual shove to get both connectors firmly in place, it just felt like a normal build. It was genuinely very easy, ridiculously so to be honest. The whole thing booted first time, the Asus UEFI handled some of the driver installations by itself, and in less than 10 minutes, I had a fully working gaming PC, with nary a cable in sight. See for yourself.
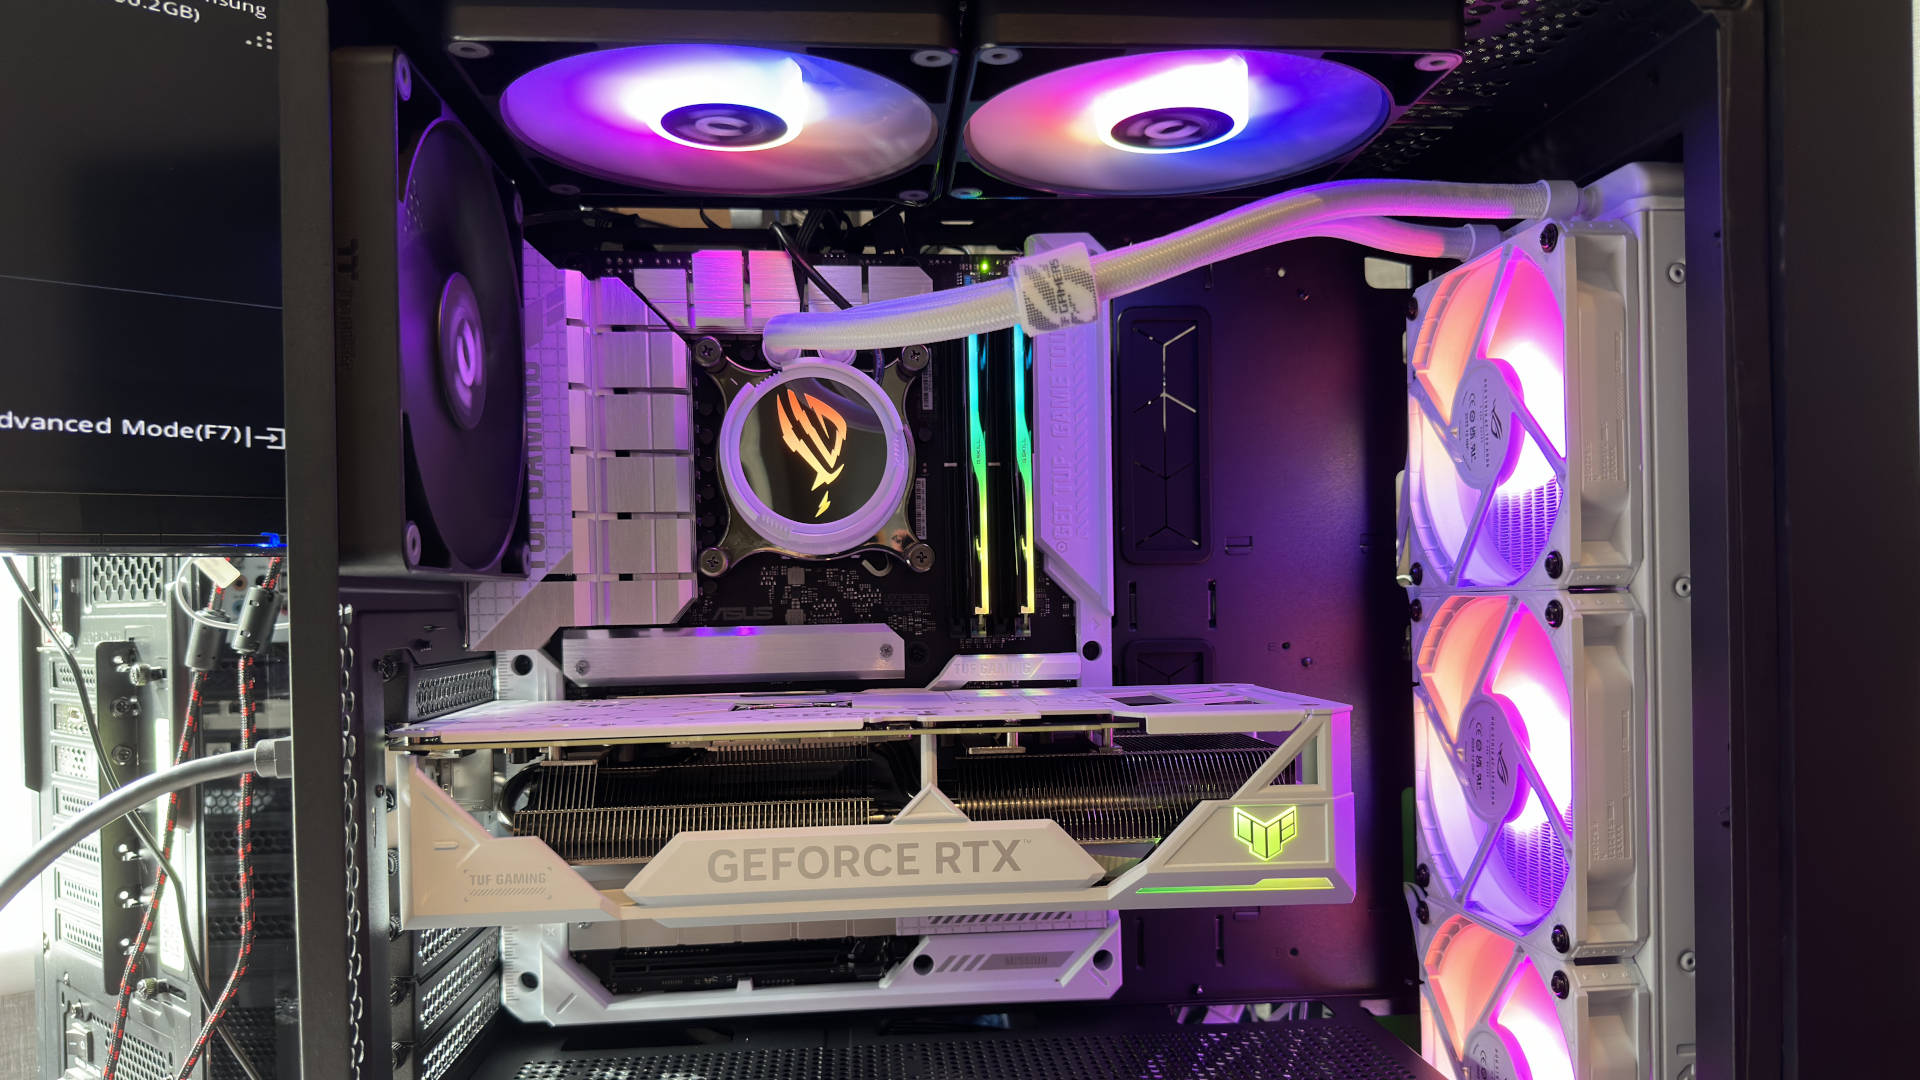
It was genuinely very easy, ridiculously so to be honest.
It actually looks cleaner and more spacious than the images suggest. In terms of airflow along, it's like a multilane freeway from the front to the rear. I've gone off RGB stuff of late, preferring a minimal amount of lighting in my own systems, but without trying to sound hyperbolic, this Asus BTF build was one of the prettiest I've done in a very long time. Sure, the white version of the Ceres 330 TG would be a better match, as would a white rear case fan, but these are minor things.
The ROG Strix LC III cooler did a great job of managing the 13600K's thermals, even accounting for that that Asus insists on defaulting to using 'BIOS optimised' power settings or in plain English, PL1/PL2 values of 4,075 W. No, that's not a typo.
I honestly don't know how well the Asus BTF platform will catch on or whether other vendors will follow a similar route. MSI has, of course, but its Project Zero system isn't entirely cable-hidden as you still need to use a normal power cable for the graphics card. Asus' is the first one to shove it all out of view. And I think it's absolutely brilliant.
Except for one thing—cable management around the back is now worse than ever.
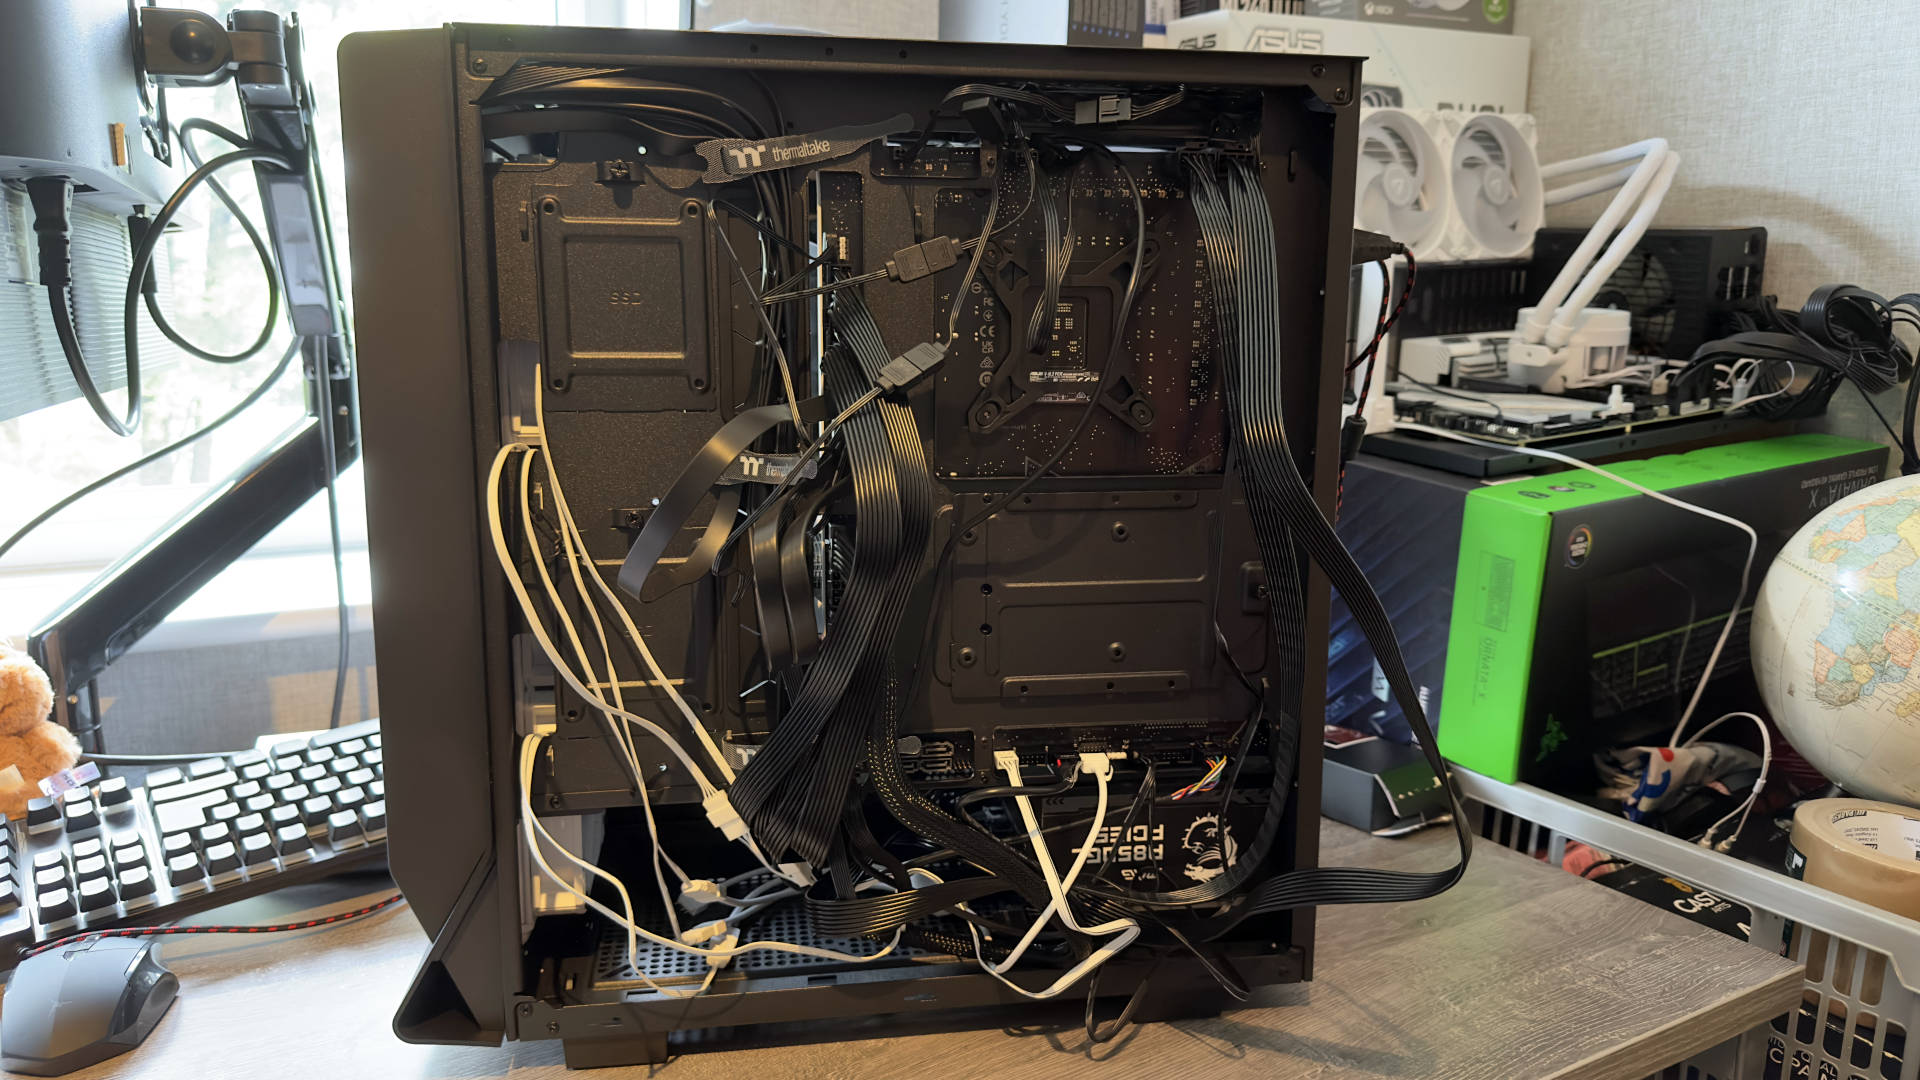
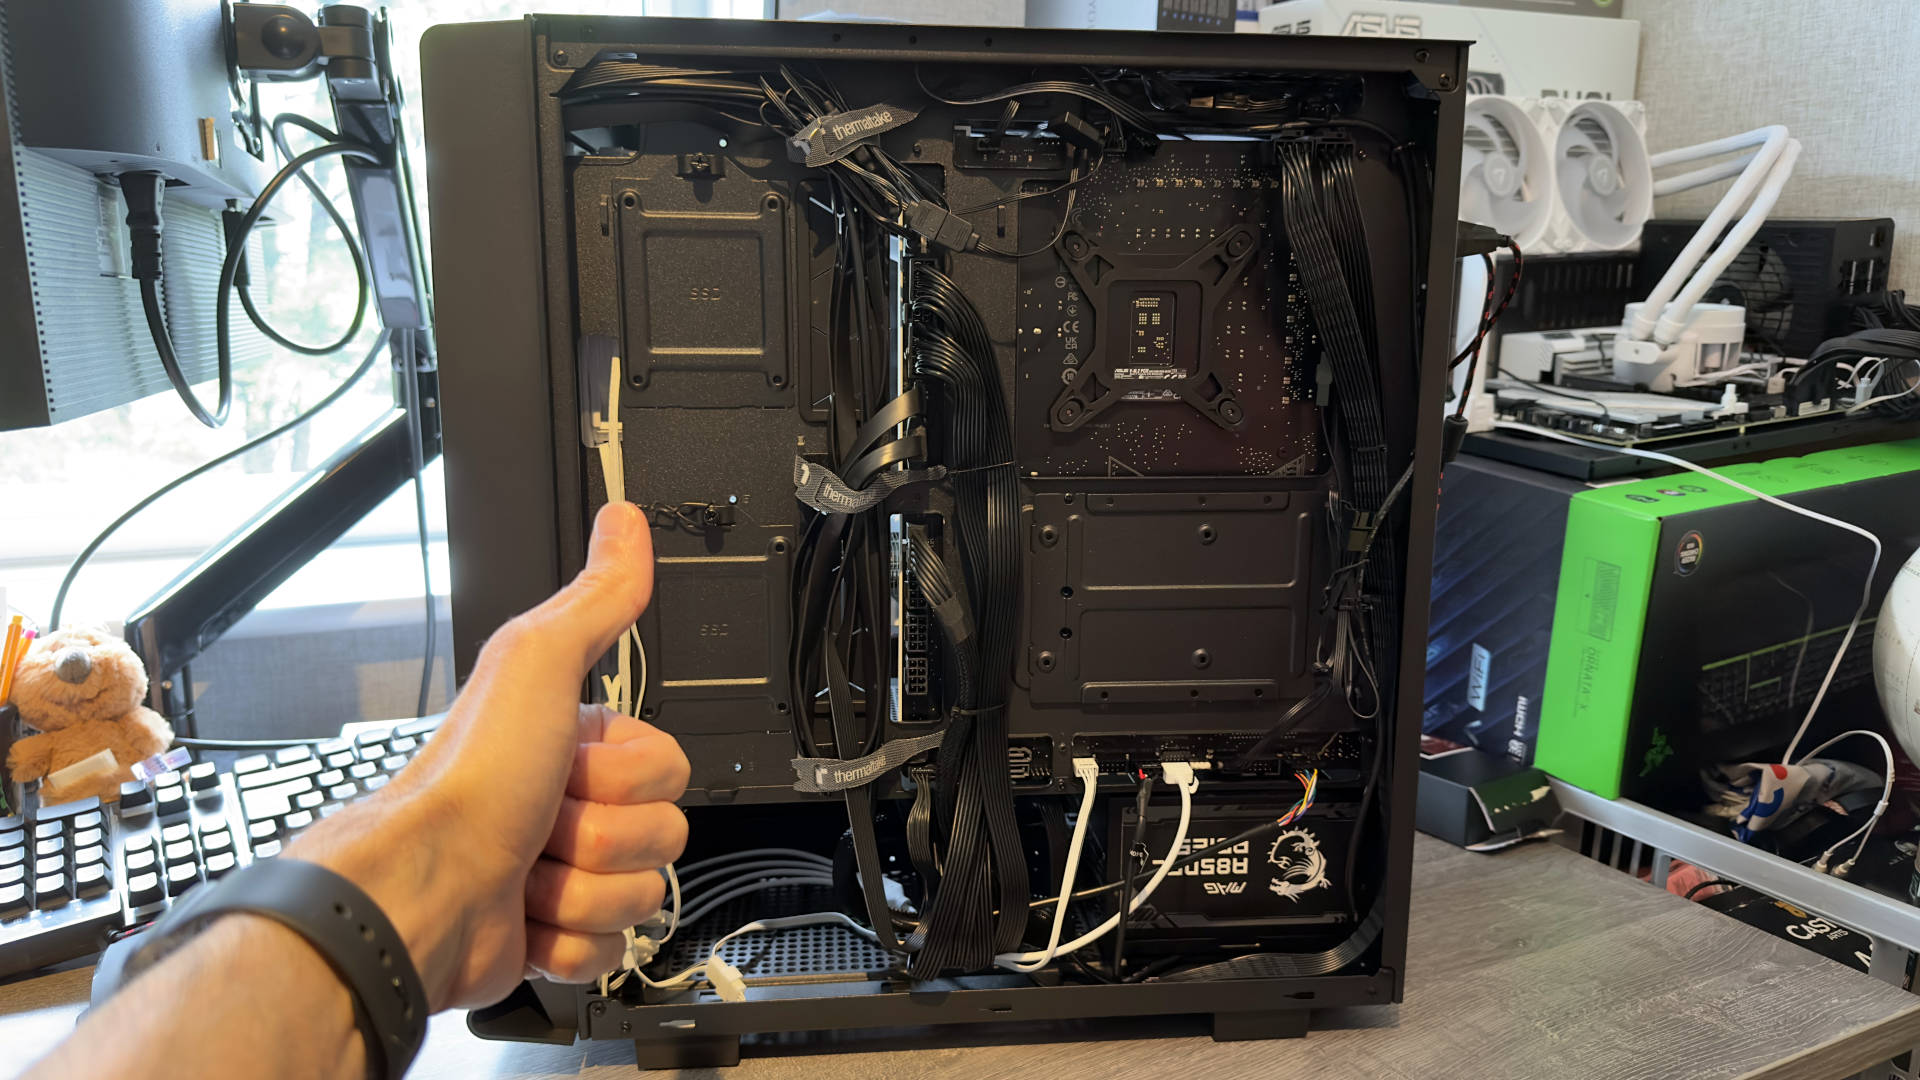
It's mostly down to the fact that everything is now back there, from the weedy cables for the fans and cooler, through the stiff and awkward power lines running from the PSU. Add in all of the I/O stuff and switches for the case and it's a veritable bird's nest of wires. Compounding the issue was the fact that while Thermaltake's Ceres 330 TG is compatible with BTF, it doesn't have much depth behind the motherboard tray.
Mindful of the fact that little of the hardware used was mine, I had to be as gentle as possible with all the cable routing and even then, it was a tight fit to get most of it locked down. As you can see, I didn't do a particularly good job, but as all of this will have to be taken apart and shipped off again I didn't want to make things especially difficult for myself when it comes time to disassemble it all.
Cable management around the back is now worse than ever.
Cable management aside, I genuinely believe that the Asus BTF platform is a step in the right direction, and the future of gaming and enthusiast PCs will undoubtedly go down this route. And it's not just about how clean the interior all looks—that extra power connector on the graphics card adds a decent amount of support and the card's rock solid in the board. It should also go some way to alleviate concerns over melting power sockets and wires, although how well it copes with the full 600 W is another matter entirely. The RTX 4070 Ti Super uses less than half that figure so the system isn't being remotely stressed.
But sticking all of the power sockets and USB/audio/case headers onto the rear of the motherboard does make it much easier to put it all together. I have to say that some of the connections do feel very flimsy, especially the ARGB ones—it's probably more a case that Asus needs to develop better connectors on its coolers rather than having stiffer pins on the board, though having them would certainly help.
Right now, the whole BTF platform is rather niche, or at least it is with regard to the graphics card. The motherboard is a somewhat average Z790 model and although I've not gone into any depth testing it (which I may do, time depending), if you were looking for something to really make a new build visually stand out, you could do an awful lot worse. Of course, Z790 is a dead-end as far as longevity is concerned, as Intel's next round of desktop CPUs will all be using a completely new socket.
But even so, if you were looking to do a new Z790 build right now and wanted the cleanest-looking PC possible, then this BTF is certainly worth considering.
On the other hand, while the RTX 4070 Ti Super BTF is impressively powerful and very quiet, I couldn't recommend it. Not until there are far more BTF options out there, anyway. Because if you buy one right now, it could have almost no second-hand value, as it's entirely useless to the millions of PC gamers out there who don't have a BTF motherboard.
If you buy one right now, it could have almost no second hand value.
Buy one now and you're pretty much stuck with it, possibly forever if Asus' tech doesn't catch on. You can't vertically mount the card, either. Asus may produce a system to permit this in the future but I suspect that will depend heavily on how well BTF sells.
And speaking of sales, that's another sticking point—the cost of it all. Unique products are always going to be more expensive than standard ones but the BTF stuff isn't remotely cheap. The Z790 motherboard is listed at £214 on Asus' eShop and UK retailer AWD-IT lists the BTF RTX 4070 Ti Super at £930, though both are out of stock. Trying to find any BTF stuff available for purchase is quite a challenge.
All issues aside, I'm really encouraged by what Asus has done and I hope it expands the range to include cheaper parts and AMD motherboards and graphics cards, to give BTF the chance it deserves to be accepted by the PC community. Back to the Future is an expensive gamble for Asus, but it's certainly the shape of things to come.

Nick, gaming, and computers all first met in 1981, with the love affair starting on a Sinclair ZX81 in kit form and a book on ZX Basic. He ended up becoming a physics and IT teacher, but by the late 1990s decided it was time to cut his teeth writing for a long defunct UK tech site. He went on to do the same at Madonion, helping to write the help files for 3DMark and PCMark. After a short stint working at Beyond3D.com, Nick joined Futuremark (MadOnion rebranded) full-time, as editor-in-chief for its gaming and hardware section, YouGamers. After the site shutdown, he became an engineering and computing lecturer for many years, but missed the writing bug. Cue four years at TechSpot.com and over 100 long articles on anything and everything. He freely admits to being far too obsessed with GPUs and open world grindy RPGs, but who isn't these days?
