How to solve the Headlong puzzle in Destiny 2: Lightfall
Open the way to the next Strand lesson.

Stuck on the Headlong puzzle in Destiny 2 Lightfall? While the Neomuna campaign isn't quite as packed with puzzles as the Witch Queen—Calus ain't no god of trickery after all—there are still a few moments where you have to don your thinking cap and unravel a good old-fashioned riddle.
For those who are used to Destiny's more cryptic raid and dungeon encounters, the puzzle likely won't trouble you for long, but if you're new to Destiny 2, then it might halt your progress for longer than you'd like. If you haven't dipped into the new season yet, you might want to know how to get Defiant Keys, too. Otherwise, here's how to solve the Headlong puzzle in Lightfall so you can continue with the campaign.
How to solve the Headlong mission puzzle

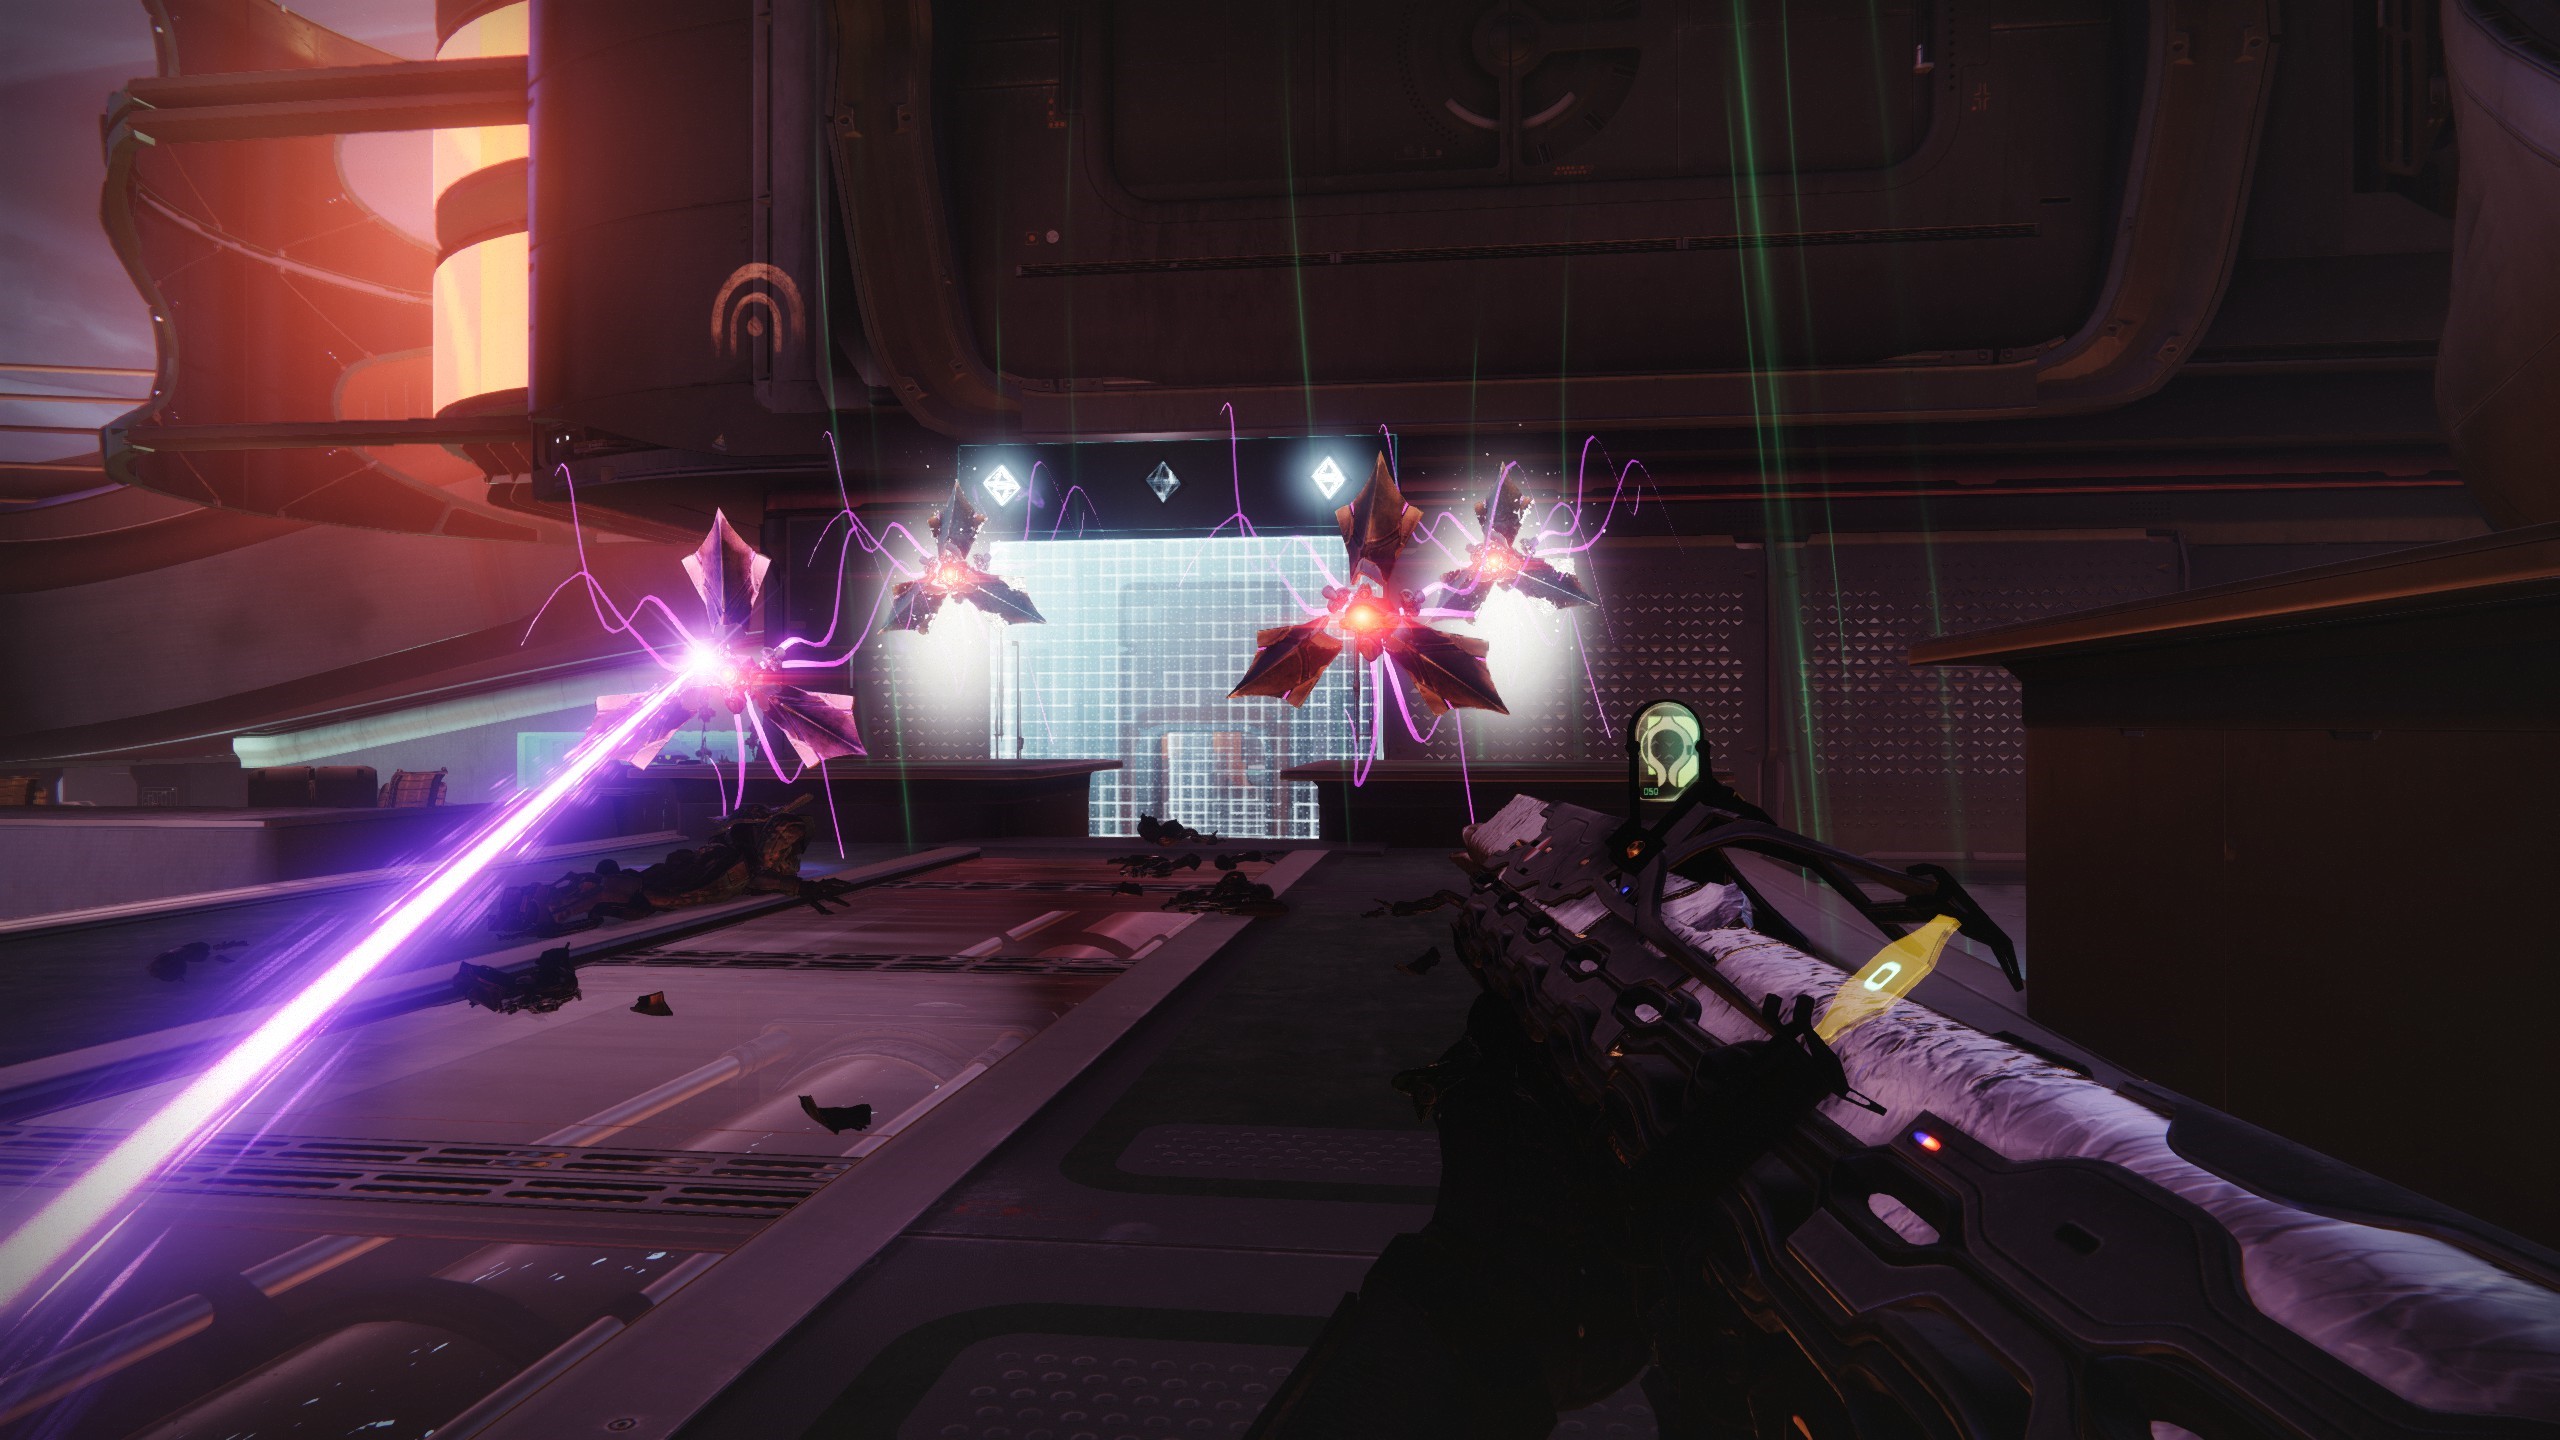
During the Headlong mission, you'll find yourself in the Liming Harbor area of Neomuna, near the entrance to the Thrilladrome Lost Sector. However, the entrance is sealed by a Vex barrier and you have to solve a little puzzle in order to get past it. After you've defeated the Vex minotaur and goblins hanging out at the entrance, four harpies will spawn, but don't kill these just yet.
Instead, look above the barrier-covered entrance and you'll see three crystals, each either glowing or not glowing. You'll also notice that some of the harpies are glowing, and others aren't. The crystals above the door show the order you need to kill the harpies in going from left to right. So, for instance, if the order of crystals was glowing, non-glowing, and glowing like mine was, you need to kill a glowing harpy, a regular harpy, then another glowing harpy.
It takes a little while for each crystal to register you've done it, but when it does it'll disappear, showing that you can move on to the next. After all three are done, the barrier opens and you can continue with the mission. A little later on you'll encounter another barrier and some more harpies, but simply follow the same method as the first to get past.
The third puzzle in the mission is a little bit more complex than the previous ones, since there are regular harpies mixed in with the glowing Cation harpies, and the non-glowing Anion harpies. As before, follow the order from left to right as shown above the barrier, killing the two different types of harpy and avoiding the regular ones.
Keep up to date with the most important stories and the best deals, as picked by the PC Gamer team.

Sean's first PC games were Full Throttle and Total Annihilation and his taste has stayed much the same since. When not scouring games for secrets or bashing his head against puzzles, you'll find him revisiting old Total War campaigns, agonizing over his Destiny 2 fit, or still trying to finish the Horus Heresy. Sean has also written for EDGE, Eurogamer, PCGamesN, Wireframe, EGMNOW, and Inverse.

