Dawn of War 3 multiplayer beginner's guide
Learn what's what in Power Core multiplayer.
Keep up to date with the most important stories and the best deals, as picked by the PC Gamer team.
You are now subscribed
Your newsletter sign-up was successful
Want to add more newsletters?
Join the club
Get full access to premium articles, exclusive features and a growing list of member rewards.

Dawn of War 3 is out, which means millions of power cores are about to die. Dawn of War 3's signature multiplayer mode is designed to drive huge forces towards vital objectives, encouraging enormous battles, particularly in 3 vs 3. It's a daunting prospect for new players, and though the structure of the mode is simple, there are hidden quirks and complications that I wish I had known before I started playing.
With that in mind, I've decided to try to clear up the game's clutter and demystify a few things rather than focus on unit and army strategies. There's little I can say about the factions that will help you learn them faster. Every RTS has a bedding-in period when you learn the units and their abilities, and for this Dawn of War 3's tooltips, and the singleplayer campaign, are your friends. Instead I have decided to focus on elements that will hopefully help you through those early games, and clear up a few questions you might have, like 'what do all these slightly different-looking circular capture points actually do?' and 'why is the power core a wobbly blob of energy one minute and dormant the next?'
Let's talk about Power Core
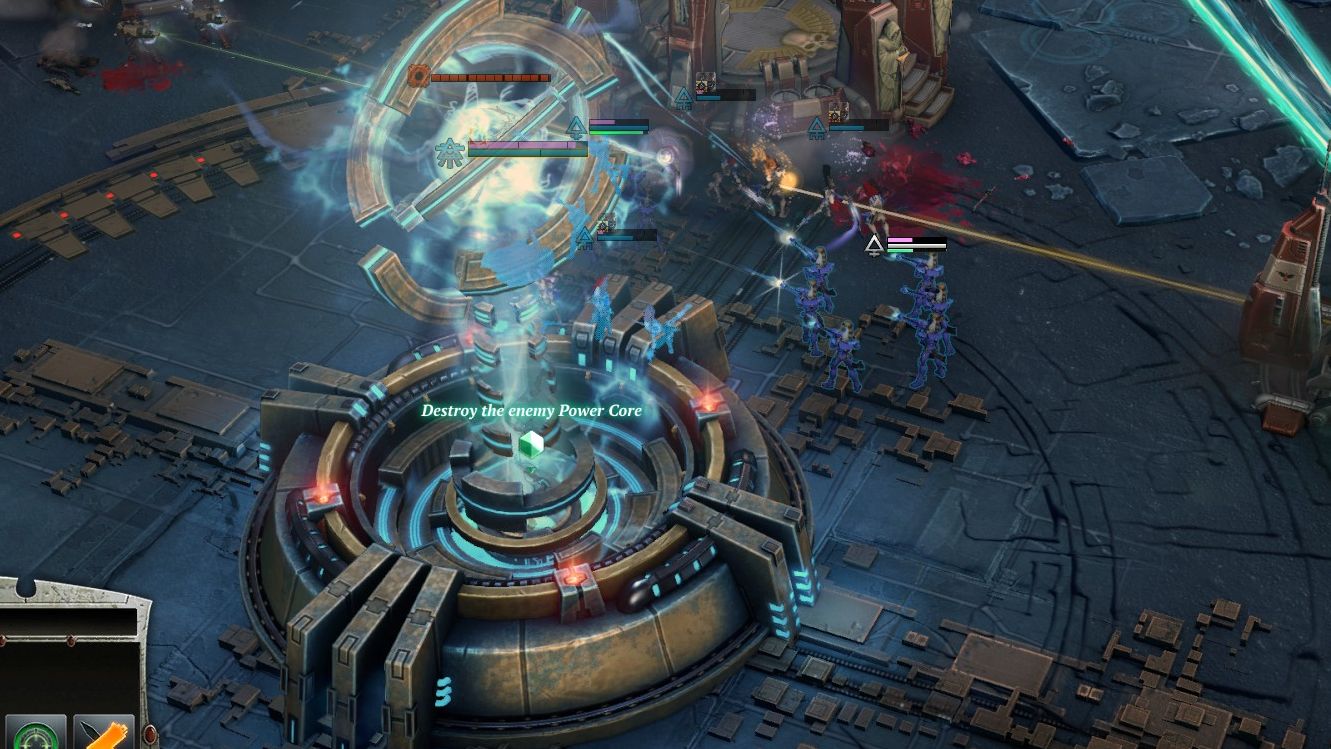
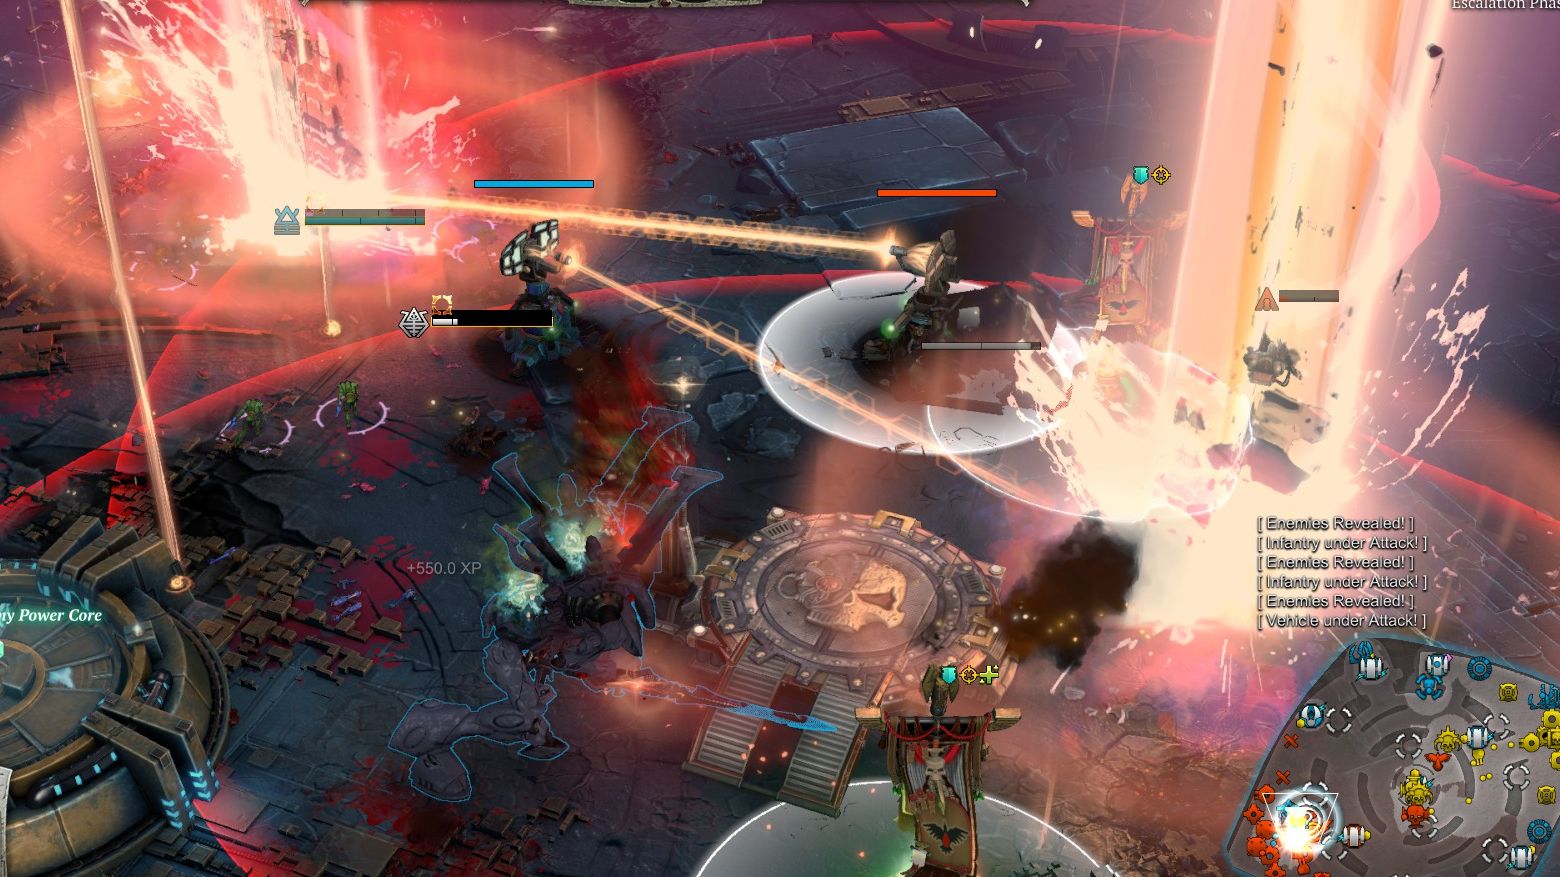
The game does a good job of teaching you how this works. Kill the shield generators, kill the turrets, kill the power core. There are some rules I wish I knew from the start, however.
Article continues belowFirstly, shield generators are pretty weak. You can kill them with some focused infantry effort in the early game quite easily. However, they act as heavy cover points for allied units stationed within the outer ring of the shield generator, and while the cover shield is up the shield generator itself is invulnerable. This means that as a defender it really pays to get at least one unit right on top of the shield generator in a fight. As an aggressor, you'll need close-combat units to get under the shield and clear the area out. One more little thing that's worth knowing: shield generators detect stealthed enemies within a considerable radius. Click on the shield generator and mouse over the 'detector' icon at the bottom left of the screen to see that radius in blue.
You need a proper force to take out a turret, and be sure to spread your forces as you move in. The turret can do two things: shoot in a straight line, or pulse to temporarily freeze enemies withing an area-of-effect. When you box-select and move in Dawn of War 3 the army tends to coalesce into a narrow clump that turrets love to toast. Manually spread your squads as you move in to minimise damage.
Power cores have two abilities you should know about. 'Power core shelter' lets the enemy lock down the power core for a duration—the vulnerable lightning core goes back into the shell and you can't damage it. The passive 'power core repairs' ability causes the lightning ball to go back into the shell after a while if the core is not attacked within a certain radius. The rule essentially stops you from shelling the core from miles away to keep it 'awake'. You would want to do that because before the 40-minute mark, the core heals up while dormant.
Grab those resource points
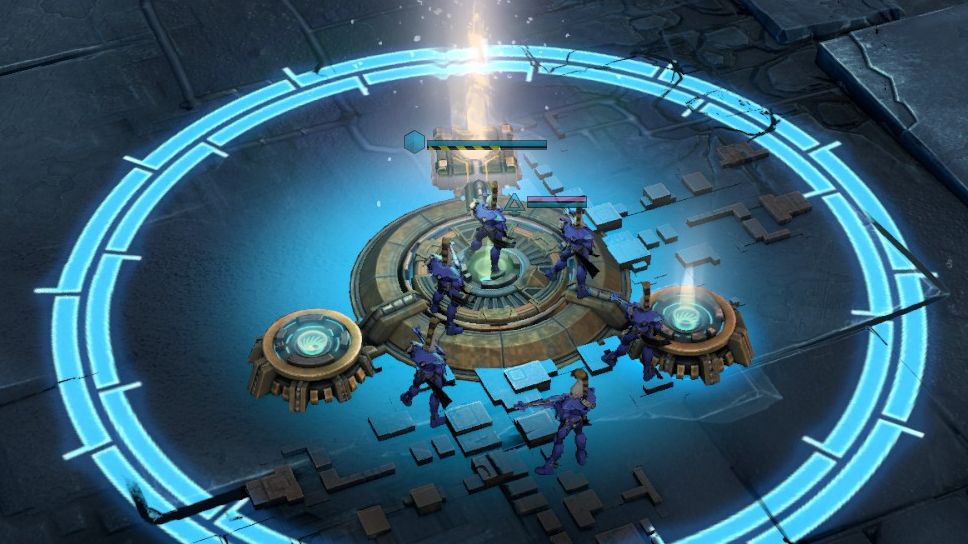
There are a lot of objectives on a Dawn of War 3 battlefield and unfortunately they are all circular bits of machinery that look quite similar if you are completely new to the game. Shown above, the small circles of tech with attached coloured blobs are resource nodes. Capture them by moving troops into the circle, and then build on them to start generating requisition and power.
Keep up to date with the most important stories and the best deals, as picked by the PC Gamer team.
Generally you need requisition to build infantry, and power to build advanced infantry, vehicles and walkers. Vehicles tend to come in during the mid-game, so you probably want to focus on requisition in the very beginning so you can build some basic squads to scrap for resource points.
Listening posts are turrets that your builder units can build on resource points. They're extremely useful, and they grow more powerful as the game progresses through each escalation phase. It is a good idea to build them first on your most exposed or precious points.
Know your nodes
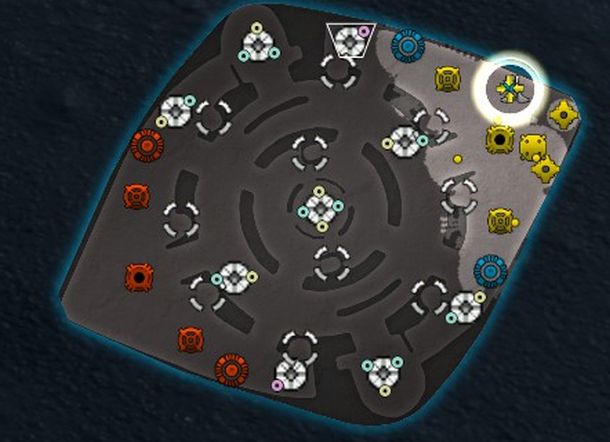
Resource points have different numbers of yellow and blue nodes. When you upgrade a point you're building a little generator on one of these nodes to produce requisition from yellow points, and power from blue points. With this in mind, we start to see how Dawn of War 3's maps a little differently. On the huge 3 vs 3 map above there is a four-node point in the middle, which makes it worth as much as two smaller two-node points. If you want to calculate whether you have a resource advantage, count the nodes rather than the resource points themselves.
Don't forget hero points
But wait, there is one more type of node! It is purple, and it generates hero points. These tick up slowly over time, and you spend them to unlock your powerful hero units. Anything you can do to bring out your elites a little earlier is useful. If you're banking on getting a hero into the fight soon and you're one point out, know that you can mouse over the purple diamond resource icon at the bottom left of the screen for a countdown timer.
Use stealth, and take cover
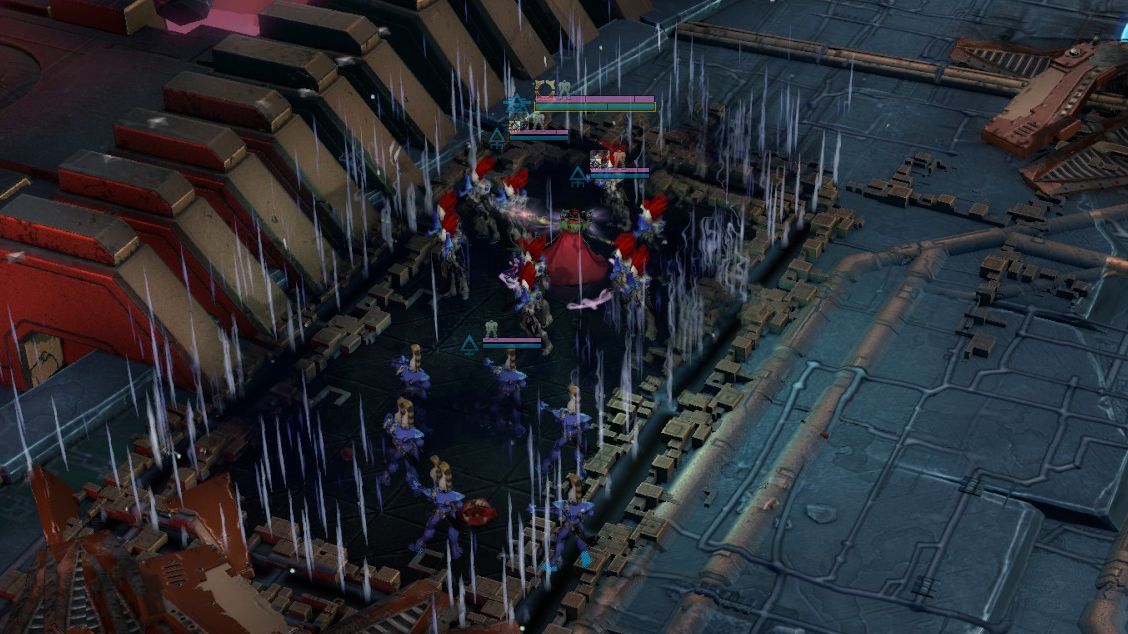
There are two other vital map elements you need to know about. Stealth cover is arguably the most important. These dark, glittering rectangles will hide any troops and buildings to everything that isn't standing within that space. You can use them creatively. Ork Gretchin can stealth temporarily, so move them invisibly between patches of stealth cover to scout. Eldar buildings have a small footprint, so you can teleport them into stealth cover to attack from surprising angles.
Heavy cover can be useful occasionally. You can capture these circular barricades to throw up a shield that resists gunfire. In my experience they are unreliable because it's trivially easy for a mobile assault unit to get in there and shut down everything you have garrisoned, and cover tends to get crushed when the serious walkers and artillery pieces come out. Still, put some snipers in one and they can do a lot of damage to passers-by while also providing some map visibility.
Take heed of status effects
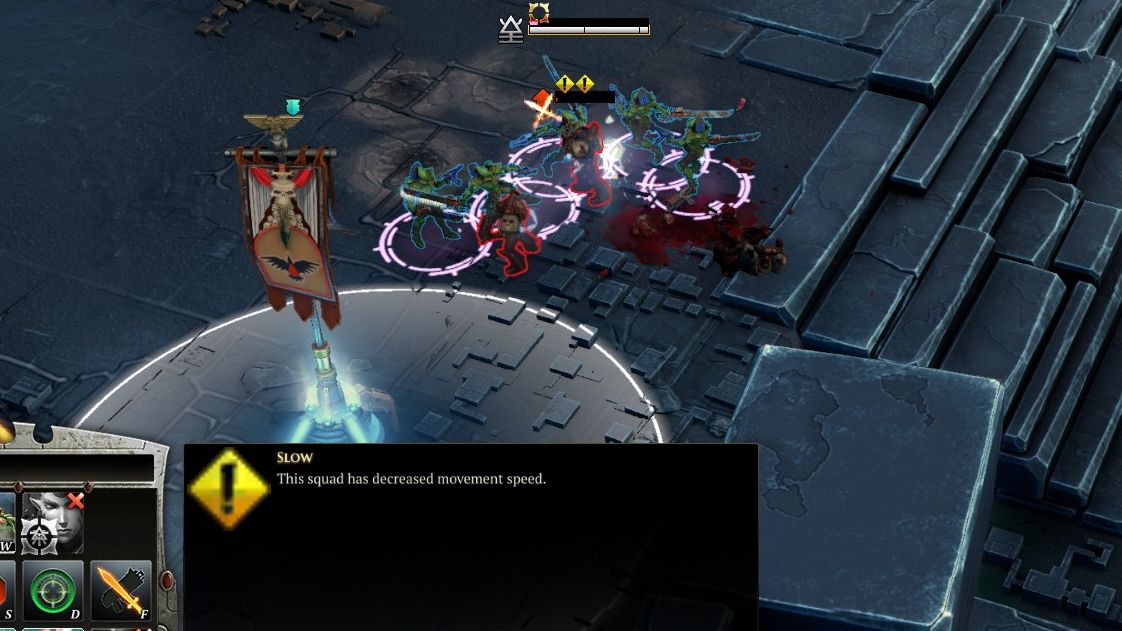
Status effects are displayed as small square icons that sit above a unit's health bar. You can mouse over them for a tooltip that explains what they are, but in the heat of battle there is rarely time.
The one you will see most often is an exclamation mark in a yellow diamond. This means the unit has been slowed. If you see two of these the unit has been doubly slowed, and is probably in trouble if it's facing any significant fire. This replaces the suppression system in previous games. Empty brackets seem to reflect passive benefits that the unit is receiving from a doctrine or a hero's buff. A purple silhouette of a Space Marine means the unit is stealthed.
Don't give up
I have won a bunch of Dawn of War 3 games by being so aggressive with Eldar in the early game that my opponent simply quit. Don't quit. Dawn of War 3 battles go through three escalation phases that soften your losses in the early game and give you more resources in the late game—the escalation phase is displayed at the top right of the screen. In matchups where you're being beaten back for the first ten minutes, losing every skirmish and leaking resources to the opponent, sit tight. A hard game of survival can dramatically turn as you start bringing out your late game units, especially if those units include the brilliant Space Marine walkers.
If in doubt, kill it with lasers
Even if you're definitely about to lose, fire all your lasers. The endorphins this releases will ease the pain of defeat.

Part of the UK team, Tom was with PC Gamer at the very beginning of the website's launch—first as a news writer, and then as online editor until his departure in 2020. His specialties are strategy games, action RPGs, hack ‘n slash games, digital card games… basically anything that he can fit on a hard drive. His final boss form is Deckard Cain.

 Join The Club


