The best Helldivers 2 loadouts
Deck out your diver with the very best armour, weapons, and Stratagems.

Recent updates
August 2, 2024: We updated our best loadouts for bugs and bots plus added new Stratagems and weapons to a number of others.
Working out the best Helldivers 2 loadout for your galactic freedom fighter is a bit of a puzzle at first, as you gradually unlock new weapons and armour you can try. The sheer variety in terms of the best weapons alone makes it tough to know what to bring, especially when you only have four slots to work with when you head out for a mission.
With the Escalation of Freedom update soon to drop alongside the Freedom's Flame warbond, we can expect new weapons and Stratagems to experiment with. So, if you're looking for a variety of loadouts to try, see our selection below. My favorite meta loadouts for bots and bugs are listed at the top, then there's a selection of other builds you can try lower down.
Best loadout for bugs

- Primary: SG-225 Breaker or SG-225IE Breaker Incendiary
- Secondary: GP-31 Grenade Pistol or P-19 Redeemer
- Grenade: G-16 Impact
- Armour Perk: Democracy Protects (50% chance to not die on lethal damage)
- Stratagems: LAS-99 Quasar Cannon, Shield Generator Pack, Orbital Railcannon Strike, Eagle Cluster Bomb
Even after all this time, the SG-225 Breaker is still a fantastic weapon against bugs, capable of dealing big damage at quite a generous distance, while the Incendiary variant deals damage-over-time against swarms. While the P-19 Redeemer remains the perfect backup weapon, my new favorite secondary for fighting bugs is the GP-31 Grenade Pistol—having a secondary that can close bug holes and get more grenades from regular ammo boxes is very handy.
The G-16 Impact may be a bit trickier for closing bug holes, but it will instantly kill a Bile Spewer—or group of Bile Spewers—if you hurl one at its face, which more than makes up for it. In terms of Stratagems, the Quasar Cannon is a little slower at killing Bile Titans than some AT weapons, but it's still the go-to for quickly killing Chargers, which are generally more numerous. The Quasar can also destroy shrieker nests and spore stacks at a distance, and even close a bug hole if you're out of options. The Orbital Railcannon Strike gives you at least one speedy method to deal with Bile Titans anyway.
My last two picks are the Shield Generator Pack for its amazing survivability and the Eagle Cluster Bomb for its generous number of uses and deadliness against large swarms. You could also swap this out for the Orbital Laser if you don't mind its limited uses, or the Orbital Precision Strike, if you trust your aim enough to hit Chargers and Bile Titans with it.
Best loadout for bots

- Primary: PLAS-1 Scorcher
- Secondary: P-19 Redeemer
- Grenade: G-16 Impact or G-23 Stun
- Armour Perk: Democracy Protects (50% chance to not die on lethal damage)
- Stratagems: Autocannon, Orbital Laser, Orbital Precision Strike, Eagle Airstrike
Though you might prefer a precision weapon, the PLAS-1 Scorcher's ability to easily take down shielded Scout Striders and decimate most bots at range with its explosive AoE effect makes it the best pick against Automatons. As ever, you can pull out the P-19 Redeemer in emergencies to easily kill any Berserkers or melee bots who get close. You can also switch it to semi-auto fire for an ammo efficient way to deal with regulars bots—when carrying an objective for instance.
It's hard to throw the G-16 Impact grenade into fabricator vents, but it will do a lot of damage to tightly packed patrols and dangerous enemies advancing towards you. The G-23 Stun is another option if you'd prefer to stop said enemies in their tracks so you can deal with them. The Autocannon continues to be the best all-round AT weapon against Automatons, able to deal with Hulks, Gunships, and even Factory Striders.
For air support, I recommend the Orbital Laser, both as a way to deal with single targets and as a stratagem you can quickly hurl into the middle of a big Automaton base to take it down. Both the Orbital Precision Strike and Eagle Airstrike will also give you additional means to destroy fabricators, outposts, tanks, and all of the wide-ranging Automaton structures that you encounter when fighting them.
All Rounder
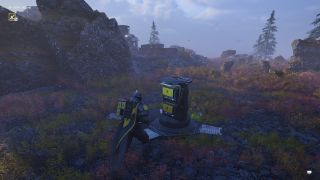
- Primary: AR-23 Liberator
- Secondary: P-2 Peacemaker
- Grenade: G-12 High Explosive
- Armour Perk: Med Kit (stim inventory and second stim duration +2)
- Stratagems: Orbital 120MM HE Barrage, Eagle Strafing Run, Machine Gun, Supply Pack
If you don't have a particular enemy in mind when devising a loadout, then you're a lot like me. Sometimes I want to set one loadout and then stop thinking about it, and for that, I always fall back on the default Liberator assault rifle. Pick off bugs from a distance in ADS, stall a charging Stalker at full-auto, or hipfire in a desperate escape—the Liberator can do it all well.
When I don't want to think particularly hard about Stratagems, I default to becoming the ammo mule. The Supply Pack is my single favorite item in Helldivers 2 because it's always useful. Not only can you resupply your entire loadout at the press of a button, but you can also be a hero to your squadmates when they're running dry. The Supply Pack pairs especially well with one of the best, ammo-hungry support weapons in the game (the standard machine gun) and the Med Kit armor perk that can keep your stims topped off at all times. Big damage and high survivability are a winning combo in any scenario.
Pathfinder

- Primary: R-63 Diligence or CB-9 Exploding Crossbow
- Secondary: P-19 Redeemer or SG-22 Bushwhacker
- Grenade: G-16 Impact
- Armour Perk: Scout (Markers placed on the map generate radar scans every two seconds. Reduces range at which enemies can detect you by 30%)
- Stratagems: Jump Pack, Anti-Material Rifle, Autocannon Sentry, Eagle Cluster Bomb
Sussing out where the secondary objectives are in Helldivers 2 can be difficult, so sometimes it's worth bringing someone as a scout who can explore and stray from the team a bit but still extricate themselves in a bad situation. Light armour, the Scout perk, and a Jump Pack will help you move fast, detect objectives on the map, and boost away from any situation where you might get swarmed.
The R-63 Diligence and CB-9 Exploding Crossbow, plus the Anti-Material Rifle, will help you pick off targets at a distance, while the P-19 Redeemer or SG-22 Bushwhacker can be that emergency pull if you do get swarmed and don't have the Jump Pack charged. The Autocannon Sentry is also perfect for baiting away enemies, while the Eagle Cluster Bomb is easy to chuck down behind you as you're retreating to waylay any swarms that might be hot in pursuit. If you don't feel you need this then you could bring an Orbital Precision Strike, use the sentry to bait in a tough armoured target, then call down the strike to deal with them.
Nest Buster

- Primary: SG-225 Breaker or SG-225 Breaker Incendiary
- Secondary: GP-31 Grenade Pistol
- Grenade: G-12 High Explosive
- Armour Perk: Engineering Kit (reduces recoil when crouching or prone by 30% and gives two extra grenades)
- Stratagems: LAS-99 Quasar Cannon, Shield Generator Pack, Eagle Airstrike, Eagle 500kg Bomb
If you're doing blitz missions against bugs or just want to be able to take out lots of nests super quick, this is the build I recommend. The SG-225 Breaker—or Breaker Incendiary variant—are both great against bugs, while the GP-31 Grenade Pistol gives you a secondary that can quickly close bugs holes. I'd recommend light armour so you can maneuver quickly while running through bug nests and tossing grenades into holes, plus the Engineering Kit perk for some extra grenades. Bringing a Shield Generator Pack will also help you survive while running said gauntlet.
Lastly, I recommend the LAS-99 Quasar Cannon for dealing with Chargers, but you can also destroy bug holes with it if you run out of grenades, plus other troublesome structures like shrieker nests and spore stacks. The Eagle Airstrike and and Eagle 500kg Bomb also give you another way to easily wreck nests.
Bot Cruncher

- Primary: R-63 Diligence or LAS-16 Sickle
- Secondary: P-19 Redeemer or SG-22 Bushwhacker
- Grenade: G-16 Impact
- Armour Perk: Extra Padding (provides extra armor rating)
- Stratagems: Autocannon, Eagle Airstrike, EMS Mortar Sentry, Orbital Laser
Fighting bots is a very different experience to bugs. Where you can often spray and pray when it comes to Terminids, killing Automatons quickly often requires precision weapons you can use to shoot them in a small crit spot, such as a Devastator's head, or a Hulk's little red face visor. Though not the very best weapons for bots, the R-63 Diligence is great for precision damage, while the LAS-16 Sickle's infinite ammo makes it perfect for mowing down regular bot enemies.
Both the P-19 Redeemer and the SG-22 Bushwhacker are the perfect last resort when you're being closed down by Berserker enemies or melee bots, while the G-16 Impact is easy to toss into an advancing bot patrol for maximum damage. The Autocannon is a fantastic pick for hitting all of those tiny bot crit spots, the Eagle Airstrike lets you easily take out fabricators, and the EMS Mortar Sentry will slow down large waves of Automatons so you can pick them off.
Lastly, the Orbital Laser is very useful for taking down big Automaton bases or structures, since you can just hurl it in and let it go to work.
Pyro Specialist

- Primary: SG-225IE Breaker Incendiary
- Secondary: P-19 Redeemer
- Grenade: G-10 Incendiary
- Armour Perk: Engineering Kit (reduces recoil when crouching or prone by 30% and gives two extra grenades)
- Stratagems: Flamethrower, Eagle Napalm Airstrike, Incendiary Mines, Shield Generator Pack
Fire is really strong against bugs and so I put this build together as a fun way of fighting insects on jungle planets—though it'll work just about anywhere there's stuff to torch. Essentially this build is about cramming as much fire as you can onto one Helldiver. The SG-225IE Breaker Incendiary gives you a spray and pray shotgun that burns enemies, while G-10 Incendiary Grenades will let you burn specific areas, plus you'll two extra grenades from your Armour Perk.
In terms of Stratagems, the Flamethrower is an obvious pick for torching everything in sight, while the Eagle Napalm Strike and Incendiary Mines will give you even more area denial with fire. Lastly, though it's a high level unlock, I'd recommend the Shield Generator Pack, since it'll help reduce the damage you take when accidentally burning yourself. With the Freedom's Flame warbond soon to release, I'll update this loadout with even more fiery goodness once it's available.
Shock Trooper
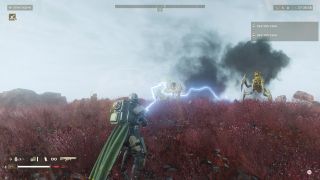
- Primary: LAS-16 Sickle or SG-225 Breaker
- Secondary: P-19 Redeemer
- Grenade: G-16 Impact
- Armour Perk: Electrical Conduit (Provides 95% resistance to arc damage)
- Stratagems: Arc Thrower, Shield Generator Pack, Orbital Laser, Tesla Tower
The Arc Thrower has always been a topic of debate in Helldivers 2; it's a strong heavy weapon, but its tendency to zap team members makes it a slightly troublesome pick. However, the new Cutting Edge Warbond has three suits of armour available with the Electrical Conduit passive, reducing arc damage by 95%. It'll still hurt you if it hits, but provided your whole team is wearing this new armour, it won't straight up kill you anymore, letting you all run Arc Throwers and fry everything in sight.
Obviously this arc resistance is also a great opportunity to bring the Tesla Tower, and you can further mitigate all of the damage by bringing a Shield Generator Pack. For when you're not using the Arc Thrower, the new LAS-16 Sickle primary is pretty decent; it's kind of like an energy-based AR-23 Liberator with infinite ammo that you have to heat up a little bit before you start firing. Either that or just bring the SG-225 Breaker to quickly whip out and blast anything getting too close.
Helldivers 2 weapons: Best guns of Super Earth
Helldivers 2 stratagems: Understand the ordinance
Helldivers 2 loadouts: Finest kits for bug-killing
Helldivers 2 armor: Which suits to wear
Helldivers 2 medals: Where to claim more currency
The biggest gaming news, reviews and hardware deals
Keep up to date with the most important stories and the best deals, as picked by the PC Gamer team.

Sean's first PC games were Full Throttle and Total Annihilation and his taste has stayed much the same since. When not scouring games for secrets or bashing his head against puzzles, you'll find him revisiting old Total War campaigns, agonizing over his Destiny 2 fit, or still trying to finish the Horus Heresy. Sean has also written for EDGE, Eurogamer, PCGamesN, Wireframe, EGMNOW, and Inverse.
- Morgan ParkStaff Writer
