10 Sweet GIMP Photo Editing Tricks to Wean You Off Photoshop
Convert Photos to Sketches (without a Plugin)
Not all of us have an inner Rembrandt to work with, but we do have a PC. As it turns out, that's all you need to make realistic looking sketches, which you can then hang on the wall and dupe visitors into thinking you're a virtuoso with a pencil, or print out for your kids to color. But be warned - we've added some steps that were left out of the original tutorial and there isn't much room for error, so follow along closely.

Pick out a photo and open it in GIMP. Try to avoid overly cluttered backgrounds, as they end up difficult to discern when converted to a sketch.
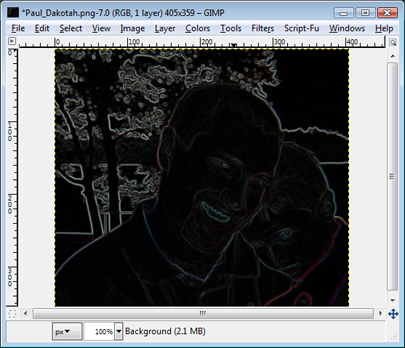
Navigate to Filters>Edge-Detect>Sobel. Make sure all the checkboxes are selected and hit OK. It may look like we just irreversibly ruined the image, but rest assured, we're just getting started.
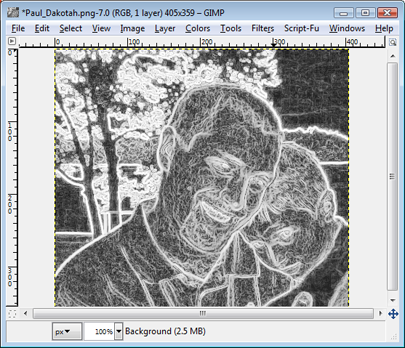
We need to highlight the details, and to do that, go to Colors>Auto>Equalize. Because we want a black & white sketch, we now need to get rid of the colors that were just drawn by converting them to gray. To do this, click on Colors>Desaturate and hit OK.
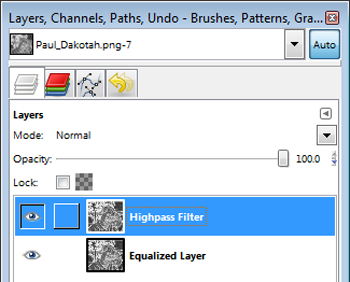
Create a duplicate layer (Layer> Duplicate Layer, or press Shift+CTRL+D). To make things easier as we go, double-click the original layer (the one in the bottom on the Layers panel) and rename it 'Equalized Layer.' Now double-click the layer you just created (the one on top) and rename it 'Highpass Filter.'
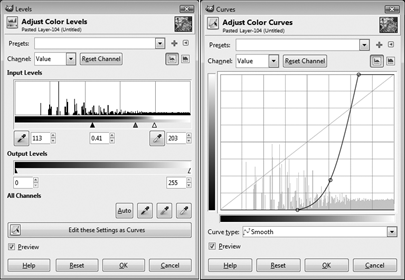
Nw we need to bring out the details of our sketch-in-progress. Part of this entails darkening the blacks and lightening the whites, and there's two ways you can go about doing this. The first is by going to Colors>Levels and adjusting the Input Level sliders until you're happy with the results. Alternately, you can apply a high-pass filter using GIMP's Curves tool (Colors>Curves).
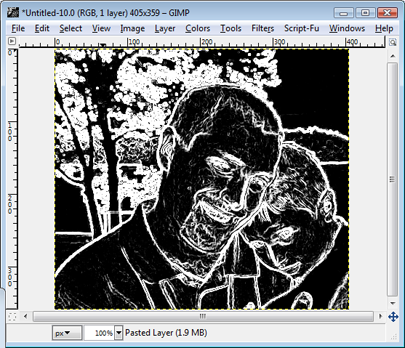
No matter which one you use, the finished product should look the same, as depicted above.
Keep up to date with the most important stories and the best deals, as picked by the PC Gamer team.
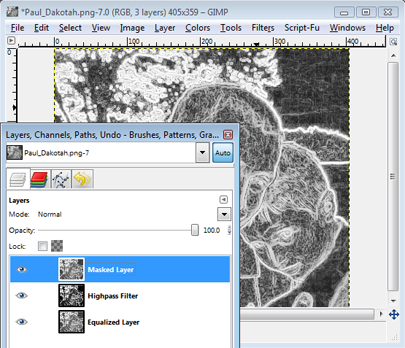
Here's where things get a little tricky. Make a duplicate of the Equalized Layer by clicking on it and selecting Layer>Duplicate Layer. Move this layer to the top (click and drag), double-click, and rename it 'Masked Layer.'
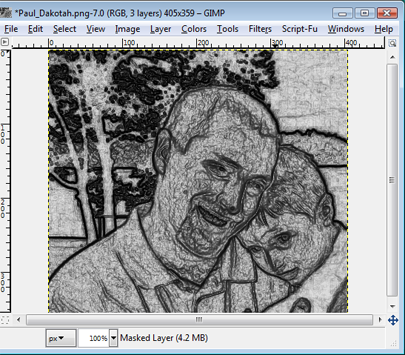
We need to invert the colors on this new layer. Click on the newly created masked layer (which should be on top), and select Colors>Invert.
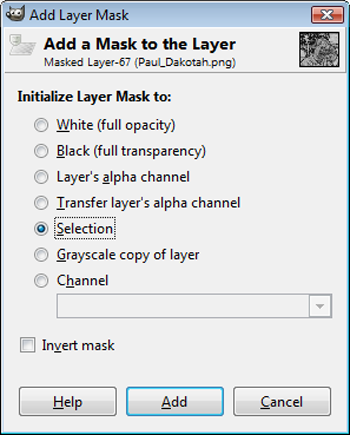
Next we're going to apply our highpass layer as a mask. Highlight the Highpass Filter layer and select Edit>Copy. Now highlight the Masked Layer that you just inverted, right-click, and select Add Layer Mask. In the dialog box that pops up, check the Selection radio button, then press Add.
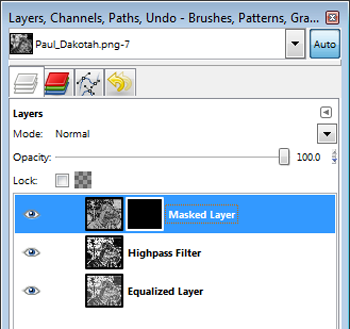
If you followed the steps correctly so far, your Layer box should look like the above. Select the Masked Layer you just created and click Edit>Paste. Right-click the 'Floating Selection' layer that appears in the Layer box and click Anchor Layer.
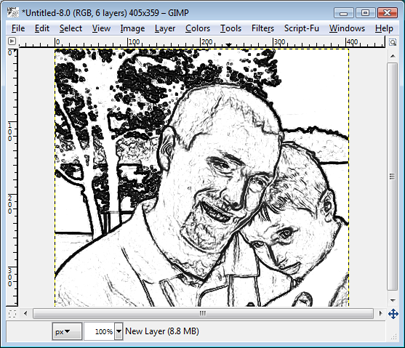
You're almost finished! For the last step, you need to create a new, white layer (Layer>New Layer), then drag it underneath the Masked Layer. If you didn't make any mistakes, your sketch should look similar to our example.
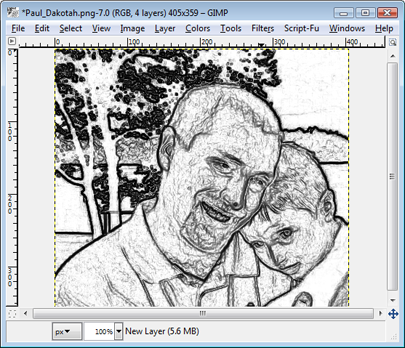
If you want your sketch to show more details and shading, play around with the input levels or curve tool when manipulating the high-pass filter and lessen the black level, allowing more highlights to show.
