10 Sweet GIMP Photo Editing Tricks to Wean You Off Photoshop
Create a Swirly Wallpaper or Water Drop Effect
Grown tired of the stock wallpaper that ships with your OS? You can hit up Google Images until you stumble upon one that fits your mood, or better yet, create your own one-of-a-kind wallpaper. Forum member acm321 on CrystalXP.net came up a easy-to-learn technique for making swirly wallpaper using GIMP, and we want to expand on that. Here's how you do it.
Decide what resolution you want your wallpaper to be. For this example, we're going to create a background that measures 1680x1050. Open a new image (File>New) sized to whatever resolution you're running, or go even larger if you think you might upgrade to a bigger LCD down the line.
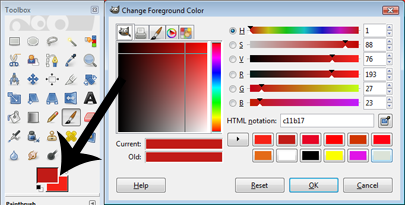
Pick out a color and then choose a dark shade for the foreground and a light one for the background. You can change these by clicking on the two squares in the middle of the Toolbox window (if you need help choosing contrasting dark and light colors, see here ). In this example, we chose Firebrick3 (#C11B17) for the foreground and Red1 (#F62217) for the background.
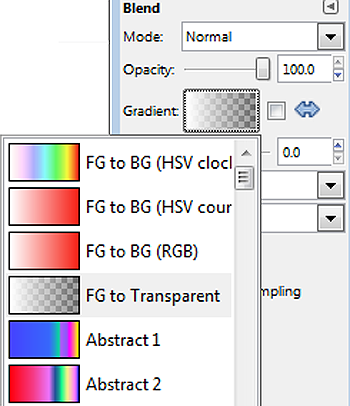
Click on the Blend tool in the Toolbox and verify that the Gradient is set to FG to BG (RGB) and the Shape set to Linear. With the Blend tool, draw a line from the top to bottom, bottom to top, or from corner to corner.
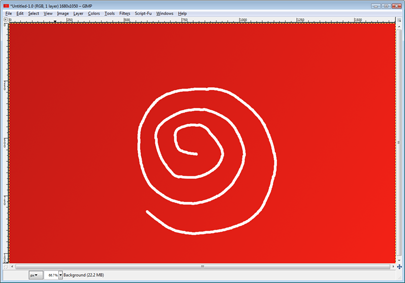
Change the foreground to white, then draw a swirl in the middle of your image using the brush tool. Don't worry if the swirl isn't perfectly uniform.
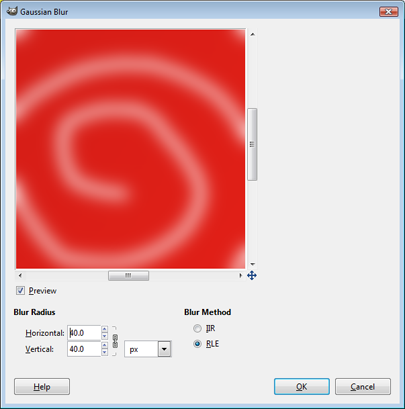
Next, navigate to Filters>Blur>Gaussian Blur and set both values to 40, then hit OK. You should have an image that looks similar to the above.
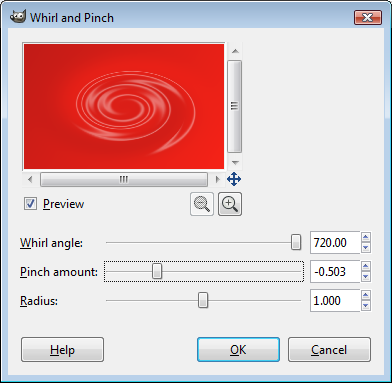
Navigate back to the Filters menu and select Distorts>Whirl and Pinch. Crank the Whirl angle slider all the way to the right and the Pinch amount slider about three-quarters to the left. Leave the radius at 1.00..
Keep up to date with the most important stories and the best deals, as picked by the PC Gamer team.
Go back into the Filters menu and select Distorts>Waves. Make sure that the Smear radio button is selected. Play around with the amplitude, phase, and wavelength sliders until you're happy with the result (for our image, we set the amplitude to 75, phase to 140, and wavelength to 45).
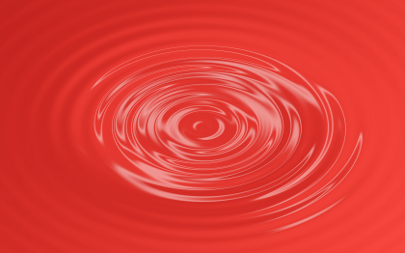
We're almost finished, but first, we want to make the ripple effect stand out a bit more. Go to Filters>Artistic>Softglow and adjust the sliders to your liking. For our finished image above, we set the Glow radius to 1.00 (move the slider all the way to the left), Brightness to 0.25, and Sharpness to 1.00 (move the slider all the way to the right).
And that's it! If you're not happy with the color, there's no need to start over. Instead, go to Colors>Hue-Saturation and adjust the Hue slider.
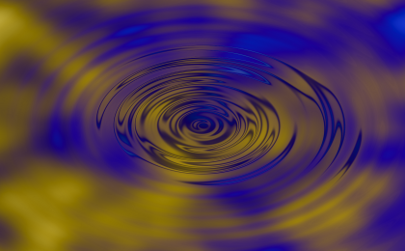
When you're finished, play around with the other filters and see what different effects you can come up with (Hint: Go to Filters>Render>Clouds>Difference-Clouds).
