Where to find Manuscript Fragments in Alan Wake 2
Find these scraps to upgrade your weapons.

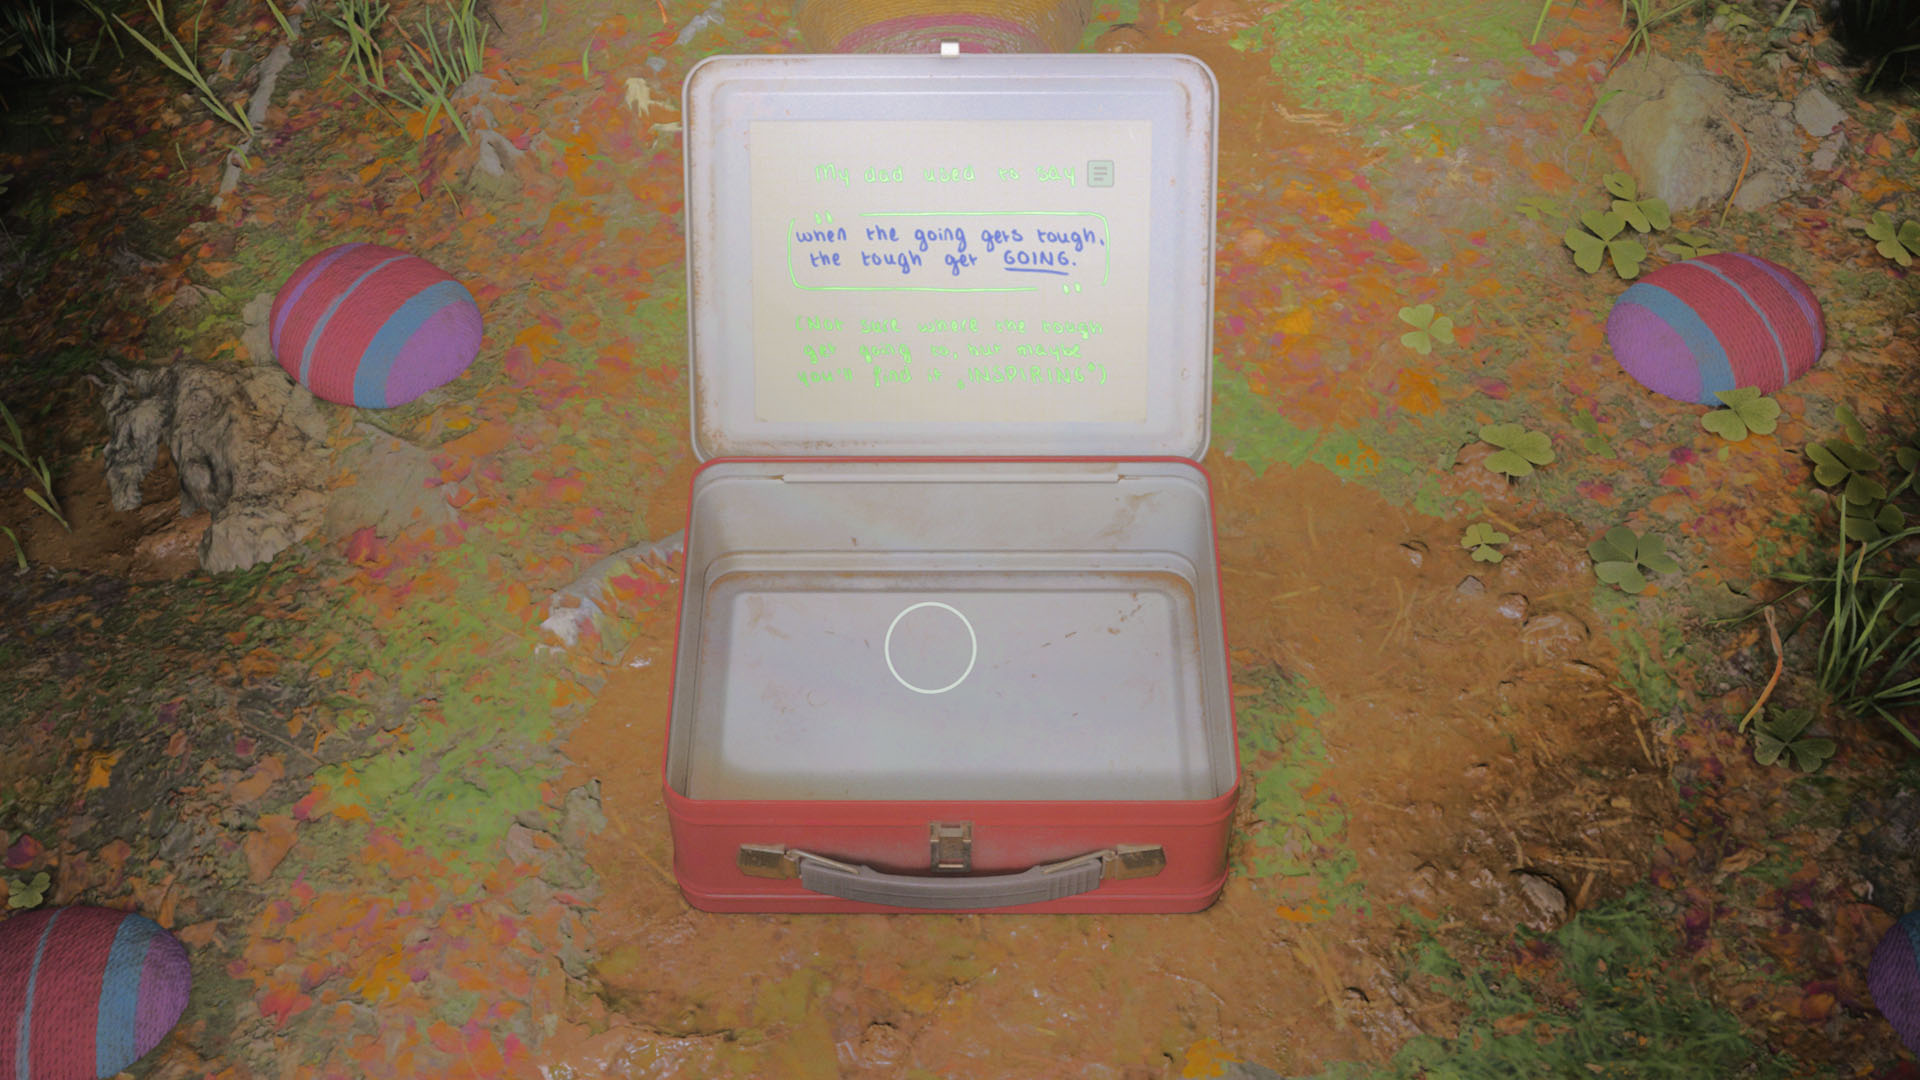
You'll find Manuscript Fragments fairly early on in Alan Wake 2 and these little scraps of paper are needed to upgrade your weapons. The fragments are always hidden inside colourful lunchboxes and the amount you get from each will vary, so don't be disappointed if you only get one as the next might give you way more.
The lunchboxes are usually tucked out of the way so you'll need to explore off the main path if you want to locate them. You can tell when one is close by the small colourful beanbags or other decorative objects hanging from trees or on the ground nearby: it's well worth giving the immediate area a thorough search if you start seeing brightly-coloured items. With that said, here are all the Alan Wake 2 Manuscript Fragments I've found so far.
Alan Wake 2 Manuscript Fragment locations

Cauldron Lake
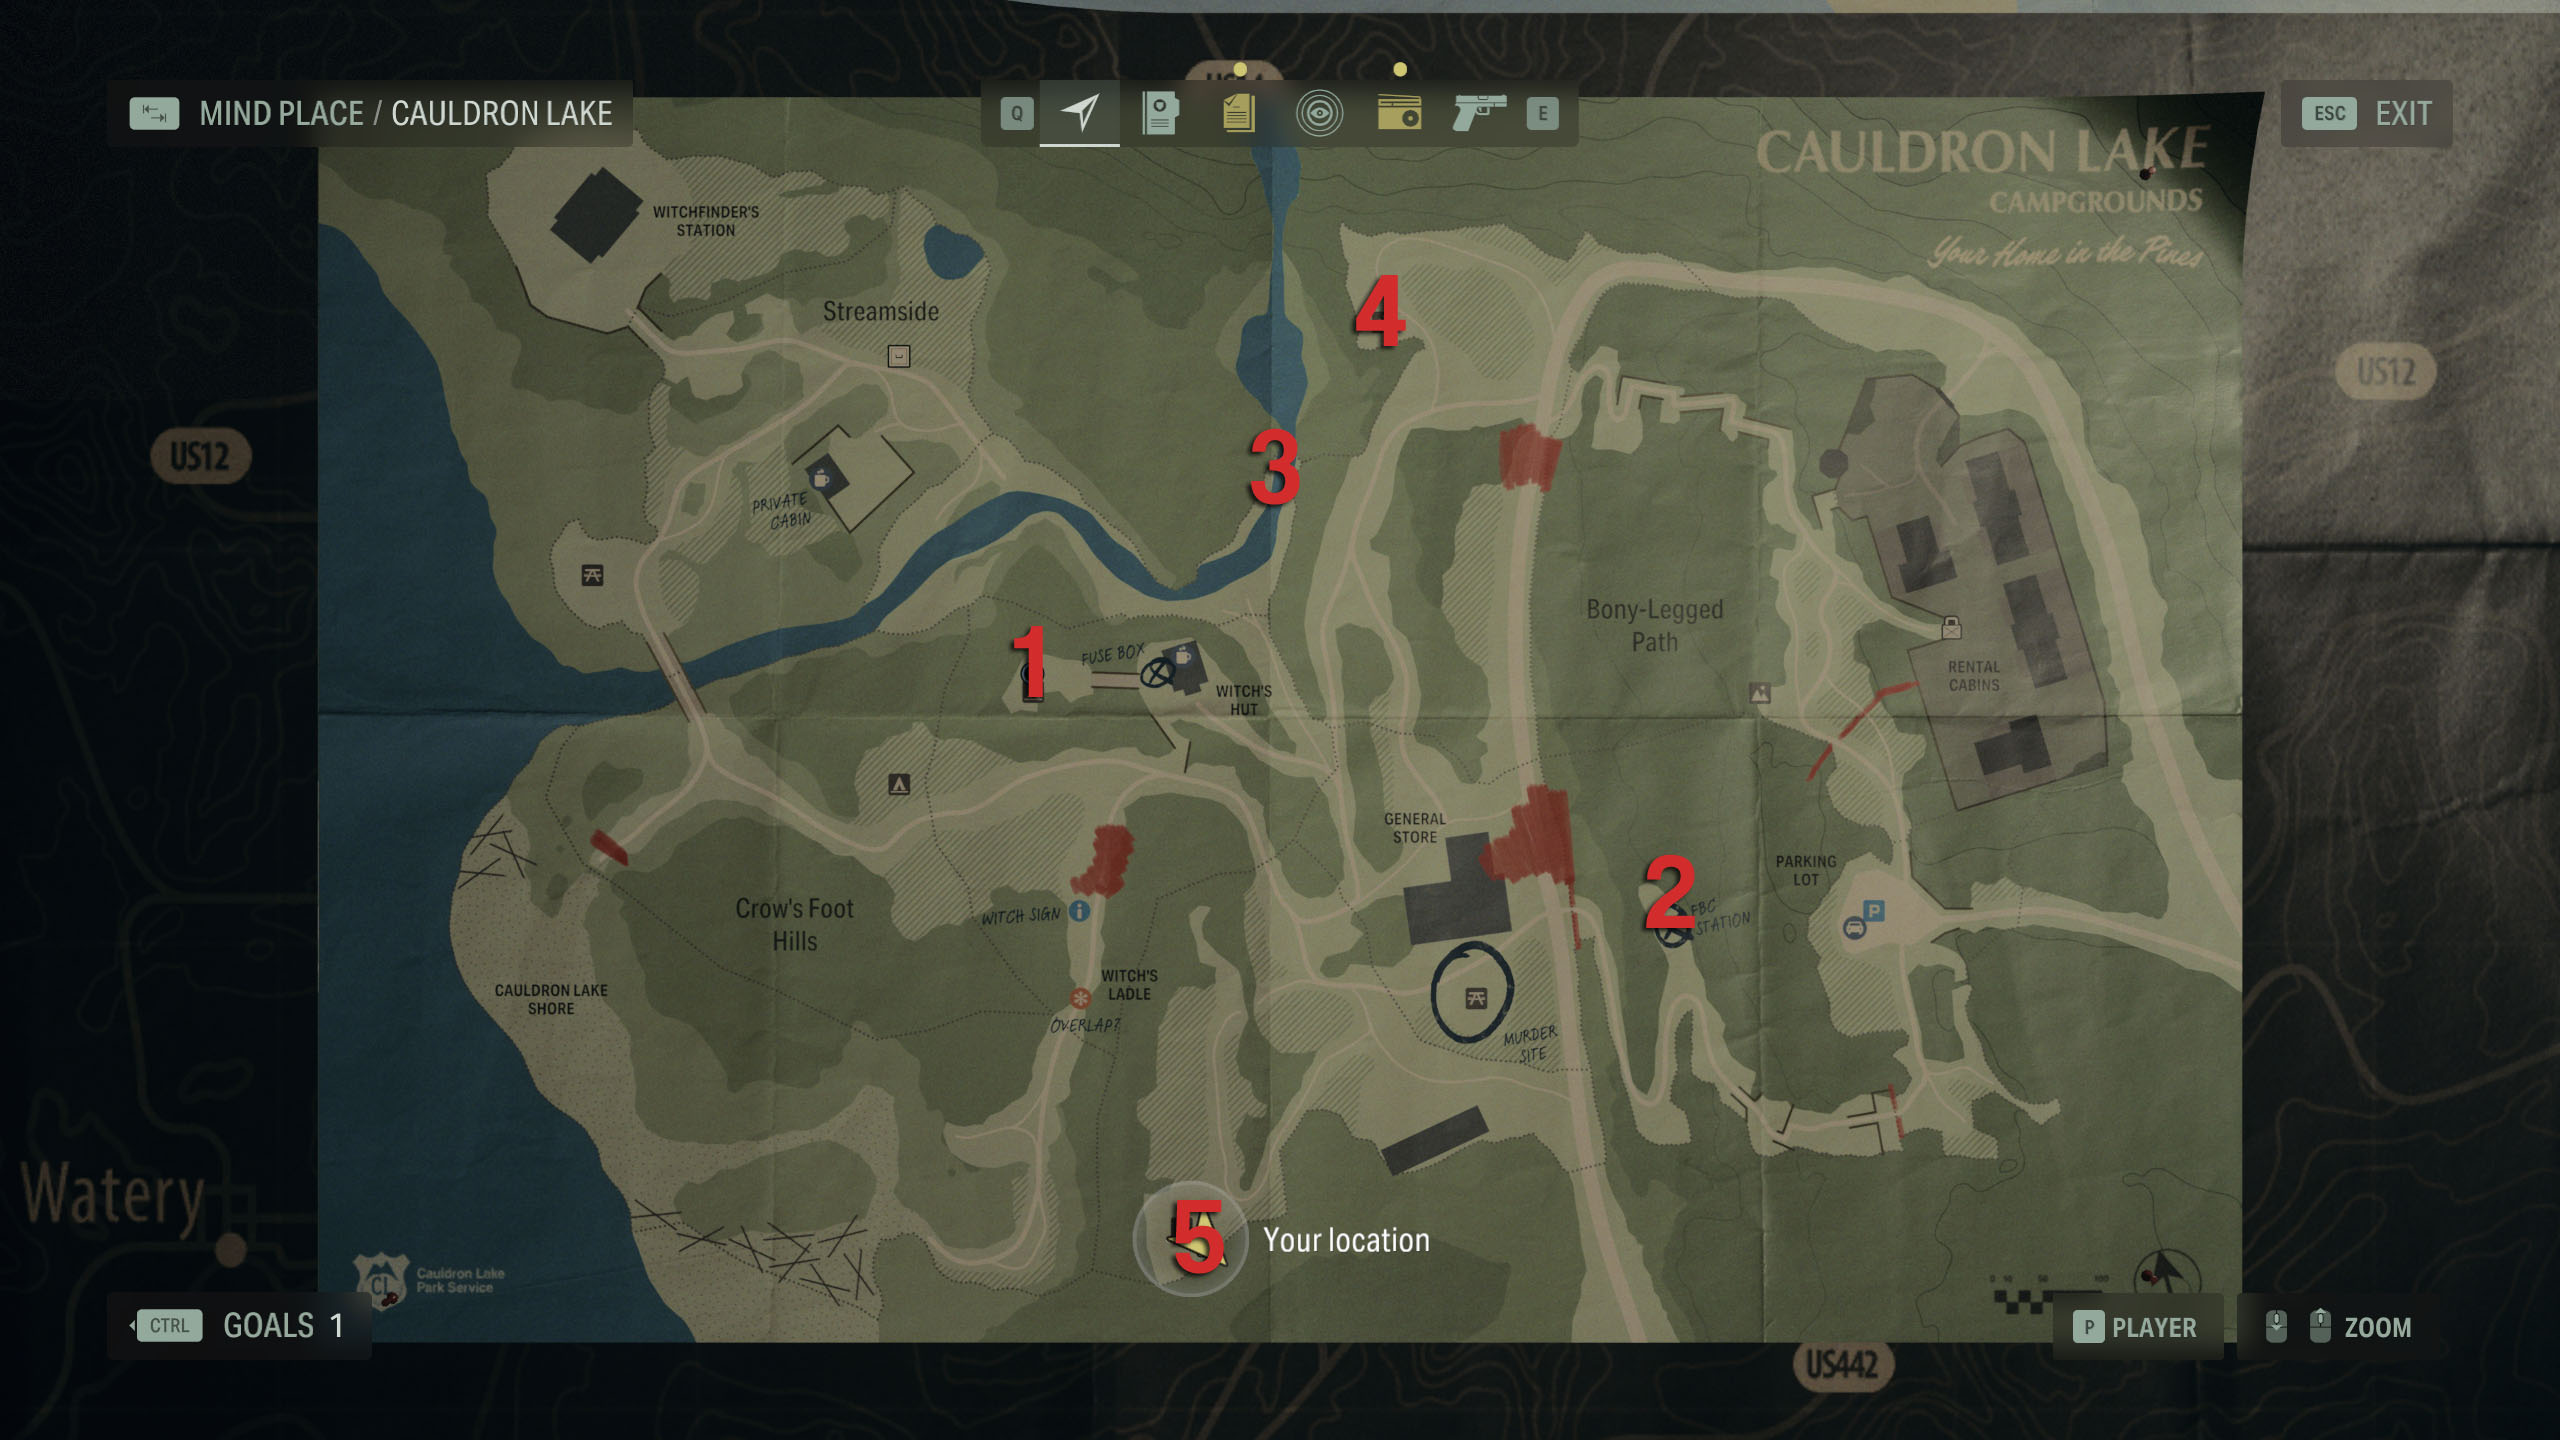
- Witch's Hut (1): Across the bridge from the hut. There's a chair and a cooler box nearby.
- FBC Station (1): On a small ledge behind the station.
- Waterfall (9): At the bottom of the waterfall north of the Witch's Hut. You get nine from this one.
- North of the waterfall (2): Find this one at the point of interest marked on the map to the far north.
- Murder Site (3): Follow the path to the southwest of the Murder Site to find three in a lunch box at the picnic area.
How to upgrade weapons
Once you've collected enough Manuscript Fragments, you can head to the Mind Place and use them to upgrade your weapons. The system is pretty simple: you need to spend a certain number of fragments to upgrade specific aspects of your weapon, such as reload speed or damage. It's generally 12 or 18 fragments per upgrade and you can see how many you've collected in the top left corner of the upgrade screen.
Here are the upgrade options for each weapon, as well as the Manuscript Fragment cost:
Pistol
- Again and Again (18): Hold the fire button to activate auto-fire mode. This significantly increases the rate of fire.
- More Bullets (12): Increases the magazine size by 50%.
- Another Headshot (12): Land two headshots in quick succession to stun an enemy for an extended duration.
Shotgun
Keep up to date with the most important stories and the best deals, as picked by the PC Gamer team.
- Fluid Motion (16): Increases reload speed.
- Out of Action (14): Deals increased damage to enemies that are stunned, blinded, or knocked down.
- Ready for More (18): Kill an enemy to restore health. The amount of restored health depends on the strength of the enemy.
Rifle
- Feedback Loop (12): Consecutive successful hits will significantly reduce the time between shots.
- Kill Shot (15): Stand still to enter an improved focus mode. This mode grants perfect accuracy, pulls shots toward enemy weak spots, and deals increased damage.
- Way Home (18): Bullets penetrate the enemy's Darkness Shield.
Crossbow
- Pull the String (15): Hold the fire button to draw the crossbow further for increased damage and a straighter arc.
- Two Shots (18?): Fires two bolts before needing to be reloaded.
- Magnetic Pull (12): Bolts lodged into enemies will attract bullets fired near them.

Sarah started as a freelance writer in 2018, writing for PCGamesN, TechRadar, GamingBible, Red Bull Gaming and more. In 2021, she was offered a full-time position on the PC Gamer team where she takes every possible opportunity to talk about World of Warcraft and Elden Ring. When not writing guides, most of her spare time is spent in Azeroth—though she's quite partial to JRPGs too. One of her fondest hopes is to one day play through the ending of Final Fantasy X without breaking down into a sobbing heap. She probably has more wolves in Valheim than you.

