9 Kick-Ass DIY Projects to Get Your Hack On
Build a Netbook Picture Frame
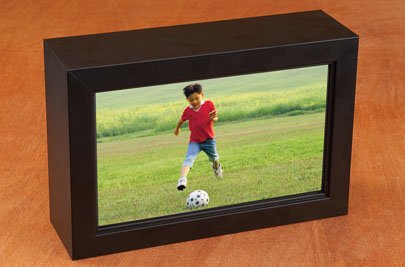
Considering that netbooks get outdated by model refreshes every few months, it’s quite likely you’ll find yourself with an old netbook lying around the house, catching dust. But there’s no need to let it go to waste. Instead, turn it into a Wi-Fi-enabled digital picture frame! We used an old Acer Aspire One for this project, but it should work with most netbooks.
Disassemble the Netbook
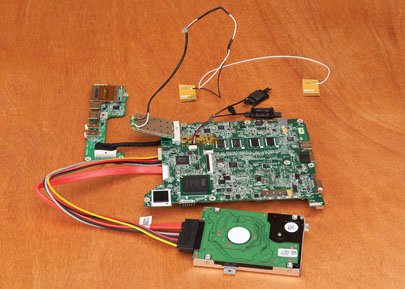
The disassembly process will be different for each netbook model, but generally, you need to remove all the screws on the netbook’s underside (which are sometimes hidden under rubber pads) to free the motherboard from its plastic shell. Be careful not to cut any wires, and make note of where you disconnect cables. The important components to extract intact are the motherboard, hard drive, Wi-Fi card, and LCD screen, of course. We also kept the small daughterboard, which houses two extra USB ports and the power button (image A).
(image A)
Choose a Frame
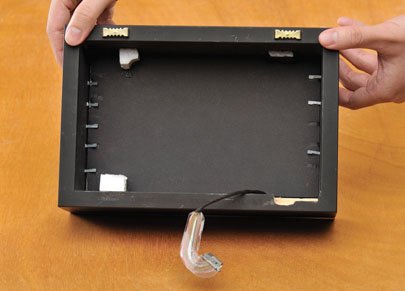
It took us quite a bit of time to decide on where to purchase a frame and how the LCD would be fitted inside. We unsuccessfully searched for a premade shadowbox frame that matched the dimensions of our netbook’s 8x4.5-inch LCD panel, an unorthodox size for picture frames. You may have more luck with your own netbook (check http://www.frameplace.com/xshdboxs.htm for cheap shadow box frames), but we had to have our frame custom made at a local shop for $100.
(image B)
Assemble the Frame
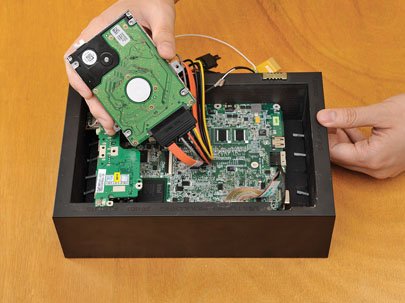
With a well-made, well-measured frame, the actual assembly of the photo frame shouldn’t be much of a challenge. First, make sure all of the motherboard cables are attached, including the LCD ribbon, the HDD SATA cable, the connection to the I/O board (if there is one), and the power cable. To mount the motherboard into the case, you’ll need to create some small spacers so that it doesn’t sit directly on the LCD screen’s backing. You can use whatever’s handy; we cut ours out of dense packing foam. With a netbook motherboard, heat shouldn’t be much of an issue, but just in case try to place the spacers under screw holes near the corners, away from the CPU. To fix everything in place permanently, glue the spacers to the frame and use pins through the screw holes to hold the motherboard down.
(image C)
Keep up to date with the most important stories and the best deals, as picked by the PC Gamer team.
Set up the Slide Show Software
To configure your picture frame, plug a USB keyboard and mouse into the motherboard (alternately, you could do your entire software configuration on the netbook before you take it apart). Remove any unnecessary software, such as image editors, office suites, and antivirus applications, and sweep your hard drive. You’ll also need to download and install a slide show application to display photos you have stored on either your hard drive or USB thumb drive, or accessed via an RSS feed.
We used Flickr as our photo storing service; we chose this service because you can update your feed remotely, from almost any Internet-capable device that can send picture attachments. There are actually several programs that can run a Flickr slide show, though we picked Google Photo Screensaver ( http://pack.google.com/screensaver.html ).
Once you’ve downloaded and installed the screensaver, either run the application straight from the installer or right-click your Desktop and select Properties. Then, under the Screen Saver tab, choose Google Photos Screensaver and go into Settings. From here, you can configure whether to stream your photos from a list of RSS feeds, Picasa, or a specific folder on your computer.
To run the screensaver from Flickr, go to your photo stream (flickr.com/photos/yourusername), scroll down to the bottom of the page, and find the RSS icon. Copy the RSS address and paste it under the Configure option in your Google Photos Screensaver preferences. Click OK, and you’re all set up.
In addition to the slide show, you can set your frame up as a digital wall clock, have it stream daily headlines from a news RSS feed, or hook it up to a set of speakers and run an Internet radio portal. To control the frame, you can hook up a wireless keyboard and mouse. Our netbook had Bluetooth capabilities, so we used Bluetooth peripherals, including the Wii Remote!
