9 Kick-Ass DIY Projects to Get Your Hack On
Get Stereoscopic 3D with Your Existing Hardware
Stereoscopic 3D is the Next Big Thing™ for PC gaming, at least if you believe Nvidia’s marketing department. But not everyone has $200 to spend on Nvidia’s 3D Vision kit, let alone a new 120Hz LCD monitor required to display it. Thankfully, there’s a way for you to play your games in 3D without buying any expensive new hardware. Nvidia’s 3D Vision drivers actually include an anaglyph mode so you can experience 3D gaming with red/cyan 3D glasses. The one caveat: This method only works if you have an Nvidia GPU and are running Windows Vista or Windows 7. Here’s how to get anaglyph 3D up and running in less than 10 minutes.

Download the Drivers
First, you need to download Nvidia’s 3D Vision drivers. Head over to the download page ( http://www.nvidia.com/Download/index.aspx?lang=en-us ) and select 3D Vision as the product type, along with your operating system. If you aren’t running Nvidia’s latest GeForce videocard drivers (version 186.18 at press time), you’ll have to download and install those, as well.
Turn on 3D Vision
After you’ve installed the 3D Vision drivers, launch the Nvidia Control Panel from the Windows Control Panel menu. You should see a section labeled Stereoscopic 3D. Expand that menu and click “Enable Stereoscopic 3D.”
Enable Anaglyph Mode
In the following pop-up window, click “Enable 3D Vision Discover.” This is the option that switches Nvidia’s 3D Vision settings from 120Hz shutter-based 3D to anaglyph (red/cyan) that can run on any normal 60Hz monitor.
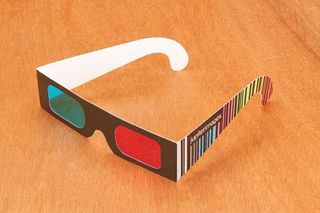
Rock the Retro 3D Glasses
The next time you launch a 3D Vision–compatible game, you’ll be able to play it in 3D with any pair of generic red/cyan glasses—the set Intel gave away for viewing this year’s 3D ads during Super Bowl works perfectly, for example. You can also purchase a pair for less than $2 online ( http://www.3dstereo.com/viewmaster/gla.html ). During gameplay, you can toggle anaglyph view with the Ctrl+T shortcut.

Control Your PC with a Wii Remote
While some of us who jumped on the Wii bandwagon have a great time with Super Mario Galaxy and Cooking Mama, there are undoubtedly a few regretful gamers who just can’t get the hang of Nintendo’s waggle-based gaming console. But there’s no need to chuck that Wii out the window yet—you can use the Wii Remote as a wireless pointer for your PC!
Find a Compatible Bluetooth Adapter
The Wii Remote uses Bluetooth to connect to the Wii, but Windows will also recognize it as a Human Interface Device. To connect the Wii Remote to your PC, you’ll need a compatible Bluetooth receiver. Most new laptops have integrated Bluetooth, but you can also purchase a USB Bluetooth receiver online for less than $25. Check the Wii Brew wiki ( http://wiibrew.org/wiki/List_of_Working_Bluetooth_Devices ) for a list of compatible adapters.
The biggest gaming news, reviews and hardware deals
Keep up to date with the most important stories and the best deals, as picked by the PC Gamer team.
Pair the Wii Remote with Your PC
We paired the Wii Remote with our Dell laptop using the “Add Bluetooth Device” option in the Windows Control Panel. For the laptop to recognize the controller, we also had to press the red sync button in the Wii Remote’s battery compartment. Your PC should detect it as Nintendo RVL-CNT-01. No Bluetooth passkey should be required.
Run WiinRemote Software
Now, download and launch the latest version of WiinRemote ( http://onakasuita.org/wii/index-e.html ). If you successfully paired your Wii Remote, the program will let you calibrate the motion sensor and assign buttons. By default, the program uses the controller’s gyroscope to control your mouse cursor. The Wii Nunchuck peripheral’s analog stick will also control mouse movement. You can achieve more accurate control by activating the IR sensor, but you’ll need to mount two infrared light sources above your monitor for this to work. The Wii’s IR light bar is suitable, and we powered it by splicing its proprietary plug into a USB cable.
Most Popular


