Team Fortress 2 guide - conquering Mann vs Machine's expert mode
Heavy: Brass Beast, Sandvich, Fists of Steel
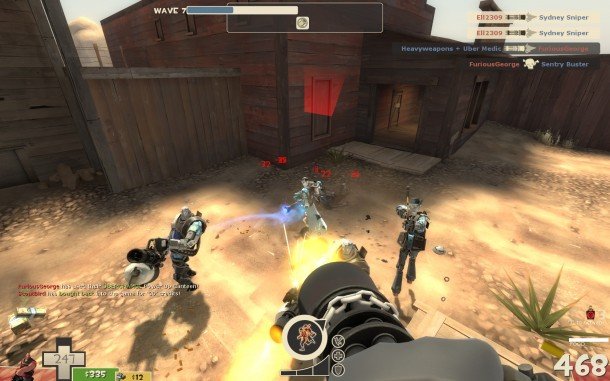
If you have a Heavy on your team, you can guarantee massive quantities of sustained damage and the Brass Beast has been chosen to play to this strength. While you have much less mobility than any other class, the extra damage that the Brass Beast can dish out makes a big difference in the long term. If you can sweet talk an Engineer into placing his dispenser next to you on Decoy or Coaltown, you're effectively a human turret. If you have a Kritzkrieg Medic or even a Buff Banner Soldier nearby, you can make short work of just about everything in front of you.
With that in mind, you won't need a secondary weapon, so having the Sandvich available for emergency healing of yourself or your team mates is a good idea.
The Fists of Steel will protect you from some incoming ranged damage, but not for too long. Only use them as an escape mechanism. Alternatively, the Gloves of Running Urgently can be used but they're best used if your team lacks an Engineer and his teleporters. As you shouldn't be upgrading either of them, you can swap between the two as often as you like.
Upgrades: Whatever primary weapon you use, build up your ammo capacity because you can't always guarantee that you'll be next to a dispenser. You can also upgrade your firing speed and invest in Destroy Projectiles, which is disappointingly inconsistent but will ultimately help you more often than not. Consider buying some crit and fire resistance, but by all means avoid buying the Knockback Rage ability. It costs too much money and takes too long to fully charge to be worth purchasing. Spend a point in Projectile Penetration instead.
Engineer: The Rescue Ranger, Wrangler, Jag
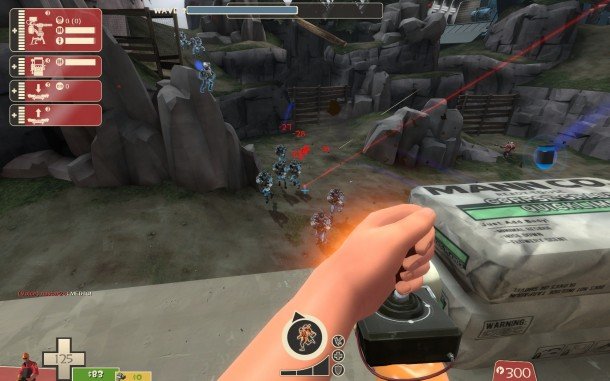
An Engineer has arguably the most complex and important role in Mann vs Machine, emphasised to a huge degree in expert mode. If you haven't played Engineer in an advanced difficulty mission then this is not a good environment to be learning what to do. You and your sentry are the epicentre of your team's defensive front and if you both die, your team could be in trouble. Sentry placement and protection is hugely important, as are dealing with the main threats that you'll face: Sentry Busters and Spies. If a Sentry Buster is approaching, pick up your sentry and get into its melee range. It will start to play its explosion animation, aurally signalled by rapid beeping. At this point you should be running back to your original position, ready to resume the mowing down of robots. Detonating a Sentry Buster in this way will keep your team and your buildings safe, but it can be challenging to maintain sentry damage on the robots as well as safely dispose of the busters before they get close to your nest. In these cases, communication with the rest of your team is vital. When Spies are prowling, watch your back and shoot anything suspicious with your shotgun, don't get into a melee fight with them.
As the responsibility of shooting stuff is normally with your sentry or the rest of your team, you should be prioritising utility over damage when it comes to your weapons. The Engineer's newest shotgun, The Rescue Ranger , is the best shotgun available to you. The Rescue Ranger's ability to let you pick up and repair buildings from range can be invaluable while you're away from your sentry nest. Be aware, however, that as you upgrade building health, the healing output from the gun gets less effective.
The Wrangler is essential to your loadout. Even a level three sentry has a limited range, which the Wrangler eliminates. Use it at the start of each wave to support your team mates or to shoot at non-Uber Medics (remember that Uber Medics will just deploy their Uber if they're damaged. Not a good outcome if you have a Demoman available).
Keep up to date with the most important stories and the best deals, as picked by the PC Gamer team.
The Jag is the best wrench available to you, and there are some you should totally avoid equipping: The Eureka Effect, which doesn't allow you to move buildings, and The Gunslinger, which won't let you build a full strength sentry. The Southern Hospitality is similarly frowned upon for its unnecessary vulnerability to fire that it gives you. The Jag's only downside is its lack of damage, which you won't miss because you shouldn't be getting into melee fights with anything.
Upgrades: As an Engineer you're going to be spending more money on upgrades than the rest of your team, so spend wisely. You'll need to invest in Maximum Metal Capacity while also increasing building health and sentry firing speed. At some point you should get the Disposable Sentry for 500 credits too while also upgrading your Jag's attack speed, otherwise you won't be able to repair the constant damage from giant rapid fire bots later on. You also need to ensure that you have 50 credits to spare for when you need to buy Building Upgrade canteens. The Two-Way Teleporter upgrade is a luxury that you should only buy if you can spare the 250 credits and haven't bought the aforementioned upgrades.
Medic: Overdose, Kritzkrieg, Ubersaw
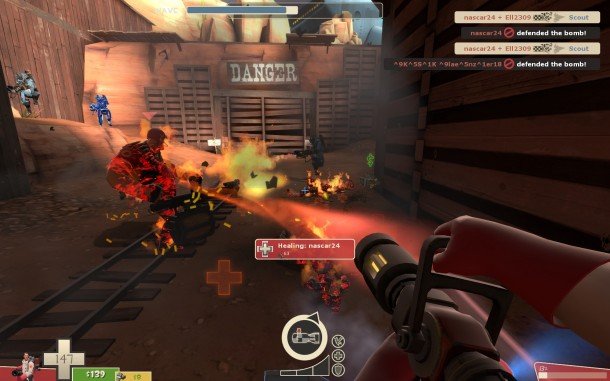
A Medic can be a risky addition to your team, given that you will lose the benefit of having another direct damage class with you. But if that risk is balanced with competent, powerful classes around you then it can have great rewards. A Medic is best played as part of a coordinated team where everyone is willing to consistently communicate with each other. If you have a Medic and a Demoman on your team, use each wave's setup time to lay some crit stickybombs at each robot entrance point and use them to deal with any Uber Medics or get a lot of initial damage onto a tank.
You won't be using any needle guns to deal damage to robots, so you might as well use the one that grants you the most utility, which is the Overdose . While you're charging your Uber The Overdose will boost your movement speed by up to 10%, which could easily be the difference between staying alive and losing that Uber, which is a cardinal sin in any form of TF2.
The Kritzkrieg is brilliant, it charges faster than the regular Medigun by default and will provide a team member with 100% crits for several seconds. If you can use it on a competent Heavy, Soldier, Demoman or even Pyro, you're going to wreak havoc. The damage boost it provides combined with the fact that it takes less time to charge makes it superior to a regular Uber.
The Ubersaw is an uncontested choice for your melee slot. If you pick your opportunities carefully, you could use it to smack a giant robot whose attention is focused elsewhere and generate 25% charge from it. Caution is definitely the best policy here though, because at any moment they could turn round and obliterate you. Examine your surroundings, have an escape route and preferably a team mate nearby as well. Don't get ahead of yourself and start chasing what you think might be disguised Spies either. If you hit them while disguised, you won't generate any charge from them and there's a chance that they could kill you with a glitchy backstab. Instead, communicate their position to your team, watch your back and stay mobile.
Upgrades: The Kritzkrieg will be the focal point of your upgrades, so work on building up Ubercharge Rate and Heal Rate in equal measure. As a mission progresses you should buy the Share Power-Ups upgrade and combine it with Uber canteens to save a team mate close to death, but the 600 credit pricetag makes it a tad too expensive to afford in the early game. Invest in Uber Duration and by all means spend a point or two in +25% Max Overheal and +50% Overheal Time because of how cheap they are.
Sniper: Sydney Sleeper, Jarate, Bushwacka
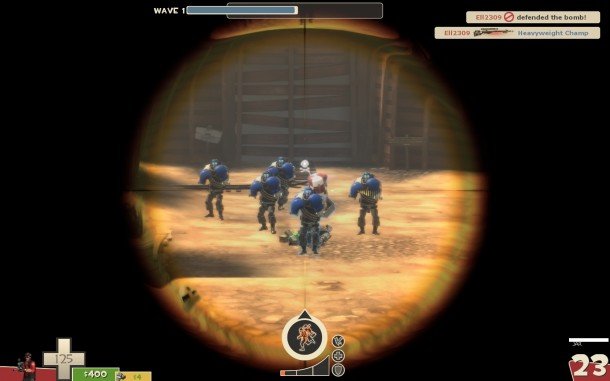
You will struggle to find a group willing to accept a Sniper as part of their team in an expert mission. The perception of Snipers is that their aim is not consistent enough and they don't bring enough damage to the table. Like a Medic, they can make up for that lack of damage with utility, but for the requirements of expert mode it's not enough utility. A Sniper with this loadout and a Soldier with a Buff Banner will provide similar ways to help a team, but a Soldier will typically be preferred because they'll deal more direct damage and charge their Buff Banner quickly. Having said that, you may be feeling adventurous and willing to experiment, so here's why this would be your best Sniper loadout in expert mode:
The Sydney Sleeper is a surprisingly solid choice for a rifle. It doesn't rely on excellent aim because it deals no extra damage for a headshot without upgrades. This means you only need to aim for the body to apply Jarate to targets, which is simple for most giant robots and will substantially boost your team's damage on them. Other rifles rely too much on headshot damage to be consistently effective.
Jarate is a standard choice for a secondary, no other item comes close to offering its utility for your whole team. You can even upgrade it to slow down robot movement speed, just like the Mad Milk.
The Bushwacka is your best option in your melee slot, although you'll very rarely use it. If the opportunity arises, use it to deal crits to jarate soaked giant robots. The fire vulnerability aspect to the Bushwacka is unimportant because if you get into a close quarters battle with a Pyro, you're going to die anyway thanks to the Sniper's low health pool and the Pyrobots' immense power.
Upgrades: 25% Faster Charge is a very good upgrade for the Sydney Sleeper, reducing the time you have to wait to apply Jarate to targets. Ammo Capacity is worth putting a couple of points into, as is Reload Speed and Damage. Also consider buying the -35% Speed on Target upgrade for Jarate. You may be tempted into prioritising resistances, but each map provides you with enough cover for long range shooting, so you shouldn't need them initially.
Spy: Revolver, Knife, Dead Ringer, Sapper
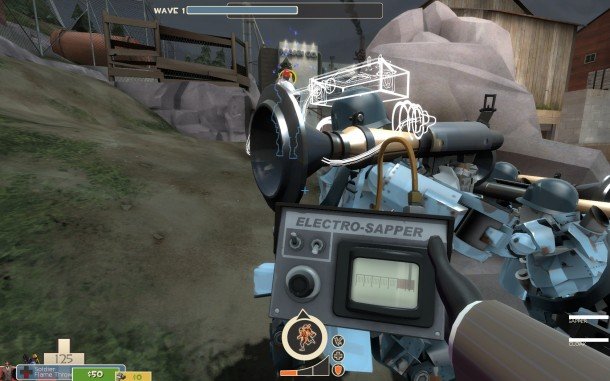
The Spy, just like the Sniper, is a class frowned upon in expert mode. The main reason for this is the amount of downtime that the class has in between waiting for their Sapper to recharge and running away while under the effects of the Dead Ringer. A Spy will struggle to deal enough direct damage to be useful in most missions but an upgraded Sapper is a thing of beauty when applied to a group of robots, particularly Medics. Once again you might be feeling reckless, so here's why the above loadout is your best option:
The Revolver is simple yet effective. You may be wondering why, with all the sapping that a Spy does in Mann vs Machine, the Diamondback hasn't been selected. This is because destroying robots with a Sapper doesn't grant you crits and there aren't any buildings for you to destroy. So instead of the Diamondback being one of the best pistols, it's actually one of the worst. The Ambassador isn't a great option either because of the amount of damage you lose when you don't headshot a robot, which is very tricky to do consistently.
You're also best off sticking with the original Knife because every other knife is a poor alternative, especially Your Eternal Reward.
The Dead Ringer is also the only sensible choice for cloaking, always giving you license to play aggressively and get out alive, something which other cloak devices can't give you.
Finally, for the Sapper , there's only one possible alternative in the whole game: the recently added Red Tape Recorder. It's designed with buildings in mind and remember, robots are not buildings. The fact that it does no damage whatsoever makes it an appalling option.
Upgrades: As mentioned before, an upgraded Sapper is brilliant, the number of robots you can sap at a time is increased as well as its duration. On the Knife, the +2 seconds crits on kill upgrade is worth a couple of points for situations where you can finish something off with your Revolver. With this in mind, you can also upgrade attack speeds on both of those weapons. Armor Penetration is nice, but it's a luxury if you have enough damage elsewhere in your team, considering your role as a Spy will mostly be to clear out other smaller bots.
On the next page for map and final wave advice.
