I was so bored in self-isolation I built a mini PC I don't need
Some people build Lego sets. I build mini-ITX PCs.
I have too many computers in my house. In my room I have a desk for my gaming PC, which I boot up a few nights a week after work hours to play games with friends. I started working from home long before the pandemic made us all shut-ins, so I have another PC set up as my dining room table "office." There's a home server in my garage, a Hackintosh in storage that I salvaged from the old PC Gamer office, and my laptop that lets me work or kill time on the couch. That's five before we count game consoles and Kindles and smartphones and plenty of other things that are basically computers. This is all to say that I have no need for another computer, but it turns out that if I can't go outside, I start dreaming about PC builds. I can't help it.
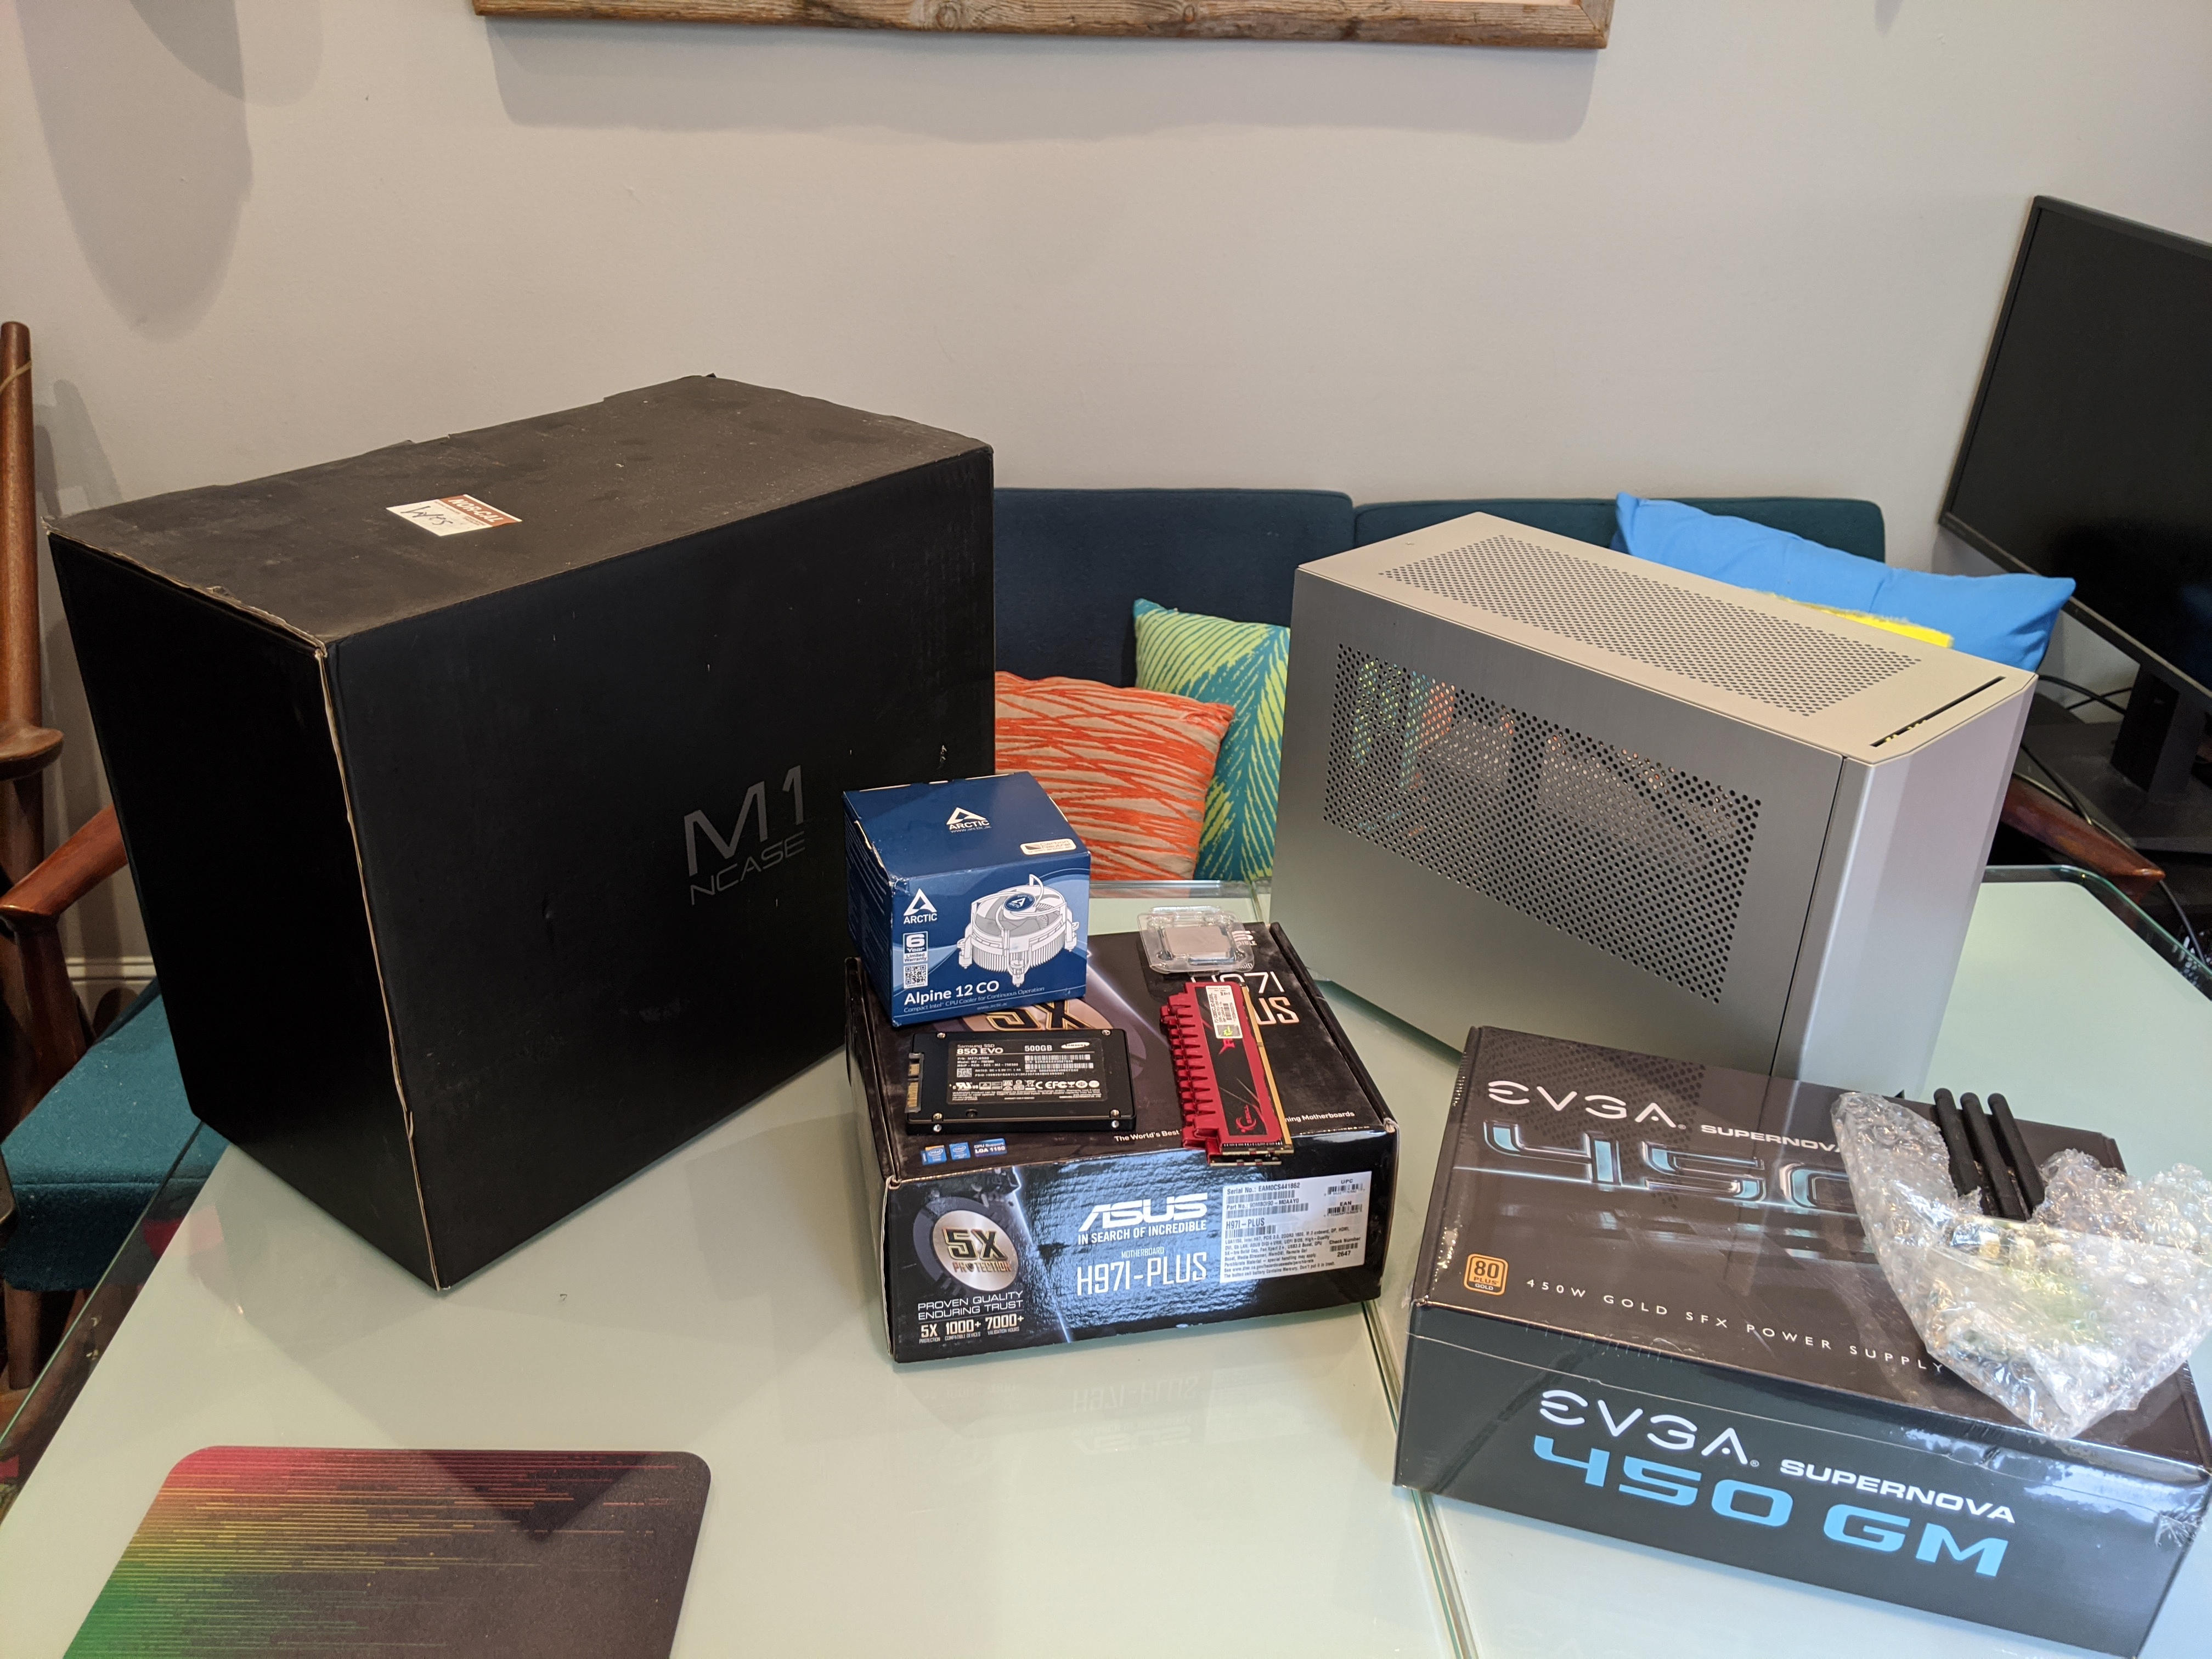
As justification, I decided to rope in my partner, who's never built a PC before. Because I took home a lot of spare parts from PC Gamer's old office, I had almost everything I needed to cobble together a PC. It's definitely not top-of-the-line, but it'll handle everyday work hunky dory.
Here's the build:
- NCase M1 - A super compact Kickstarted mini-ITX case.
- Intel i3-4130 - A six-year-old Haswell CPU I bought for my home server, before upgrading in 2018.
- Asus H97-I Plus mini-ITX motherboard - I keep old motherboards, because you never know when they'll come in handy.
- G.Skill DDR3 RAM - Pretty sure I bought this RAM for a PC build in 2011?
- Samsung 850 EVO SSD - A spare SSD I had lying around.
- Arctic Alpine 12 CO cooler - The cheapest SFF cooler I could find with decent reviews. It cost $11.99.
- EVGA 450 GM SFX power supply - I didn't have a compact power supply, so I spent about $100 on a nice one. I don't recommend spending $100 purely to cure your boredom, but on the whole this build still came out cheap.
- PCIe Wi-Fi card - I didn't have a graphics card to put in this PC, so I threw in this wi-fi card for the hell of it. In the future I might add a budget GPU and a USB wi-fi adapater instead.
- Noctua NF-P12 fan - Overkill for this build, but since the NCase M1 didn't come with any installed fans, I decided to add this one for ventilation over the CPU.
Building in the NCase M1 was a learning experience for me. It's a fabulously compact little case, but it comes with no fans and no documentation. The version I have is also quite old, and the case has gone through many tweaks in the past few years that make it easier and more intuitive to build in. For example, there's really no obvious place to mount an SSD in my case, something most modern cases offer in abundance. The latest edition of the M1 was modified to let you mount SSDs in its HDD cage.
But I didn't mind running into minor stumbling blocks with the M1, because they let me teach my partner my go-to line when PC building: Eh, good enough! This philosophy has served me pretty well, so far. Even when you make a mistake, it's pretty hard to cause any real damage.
Here are some pictures of the build in progress, with some tips and observations from each step.
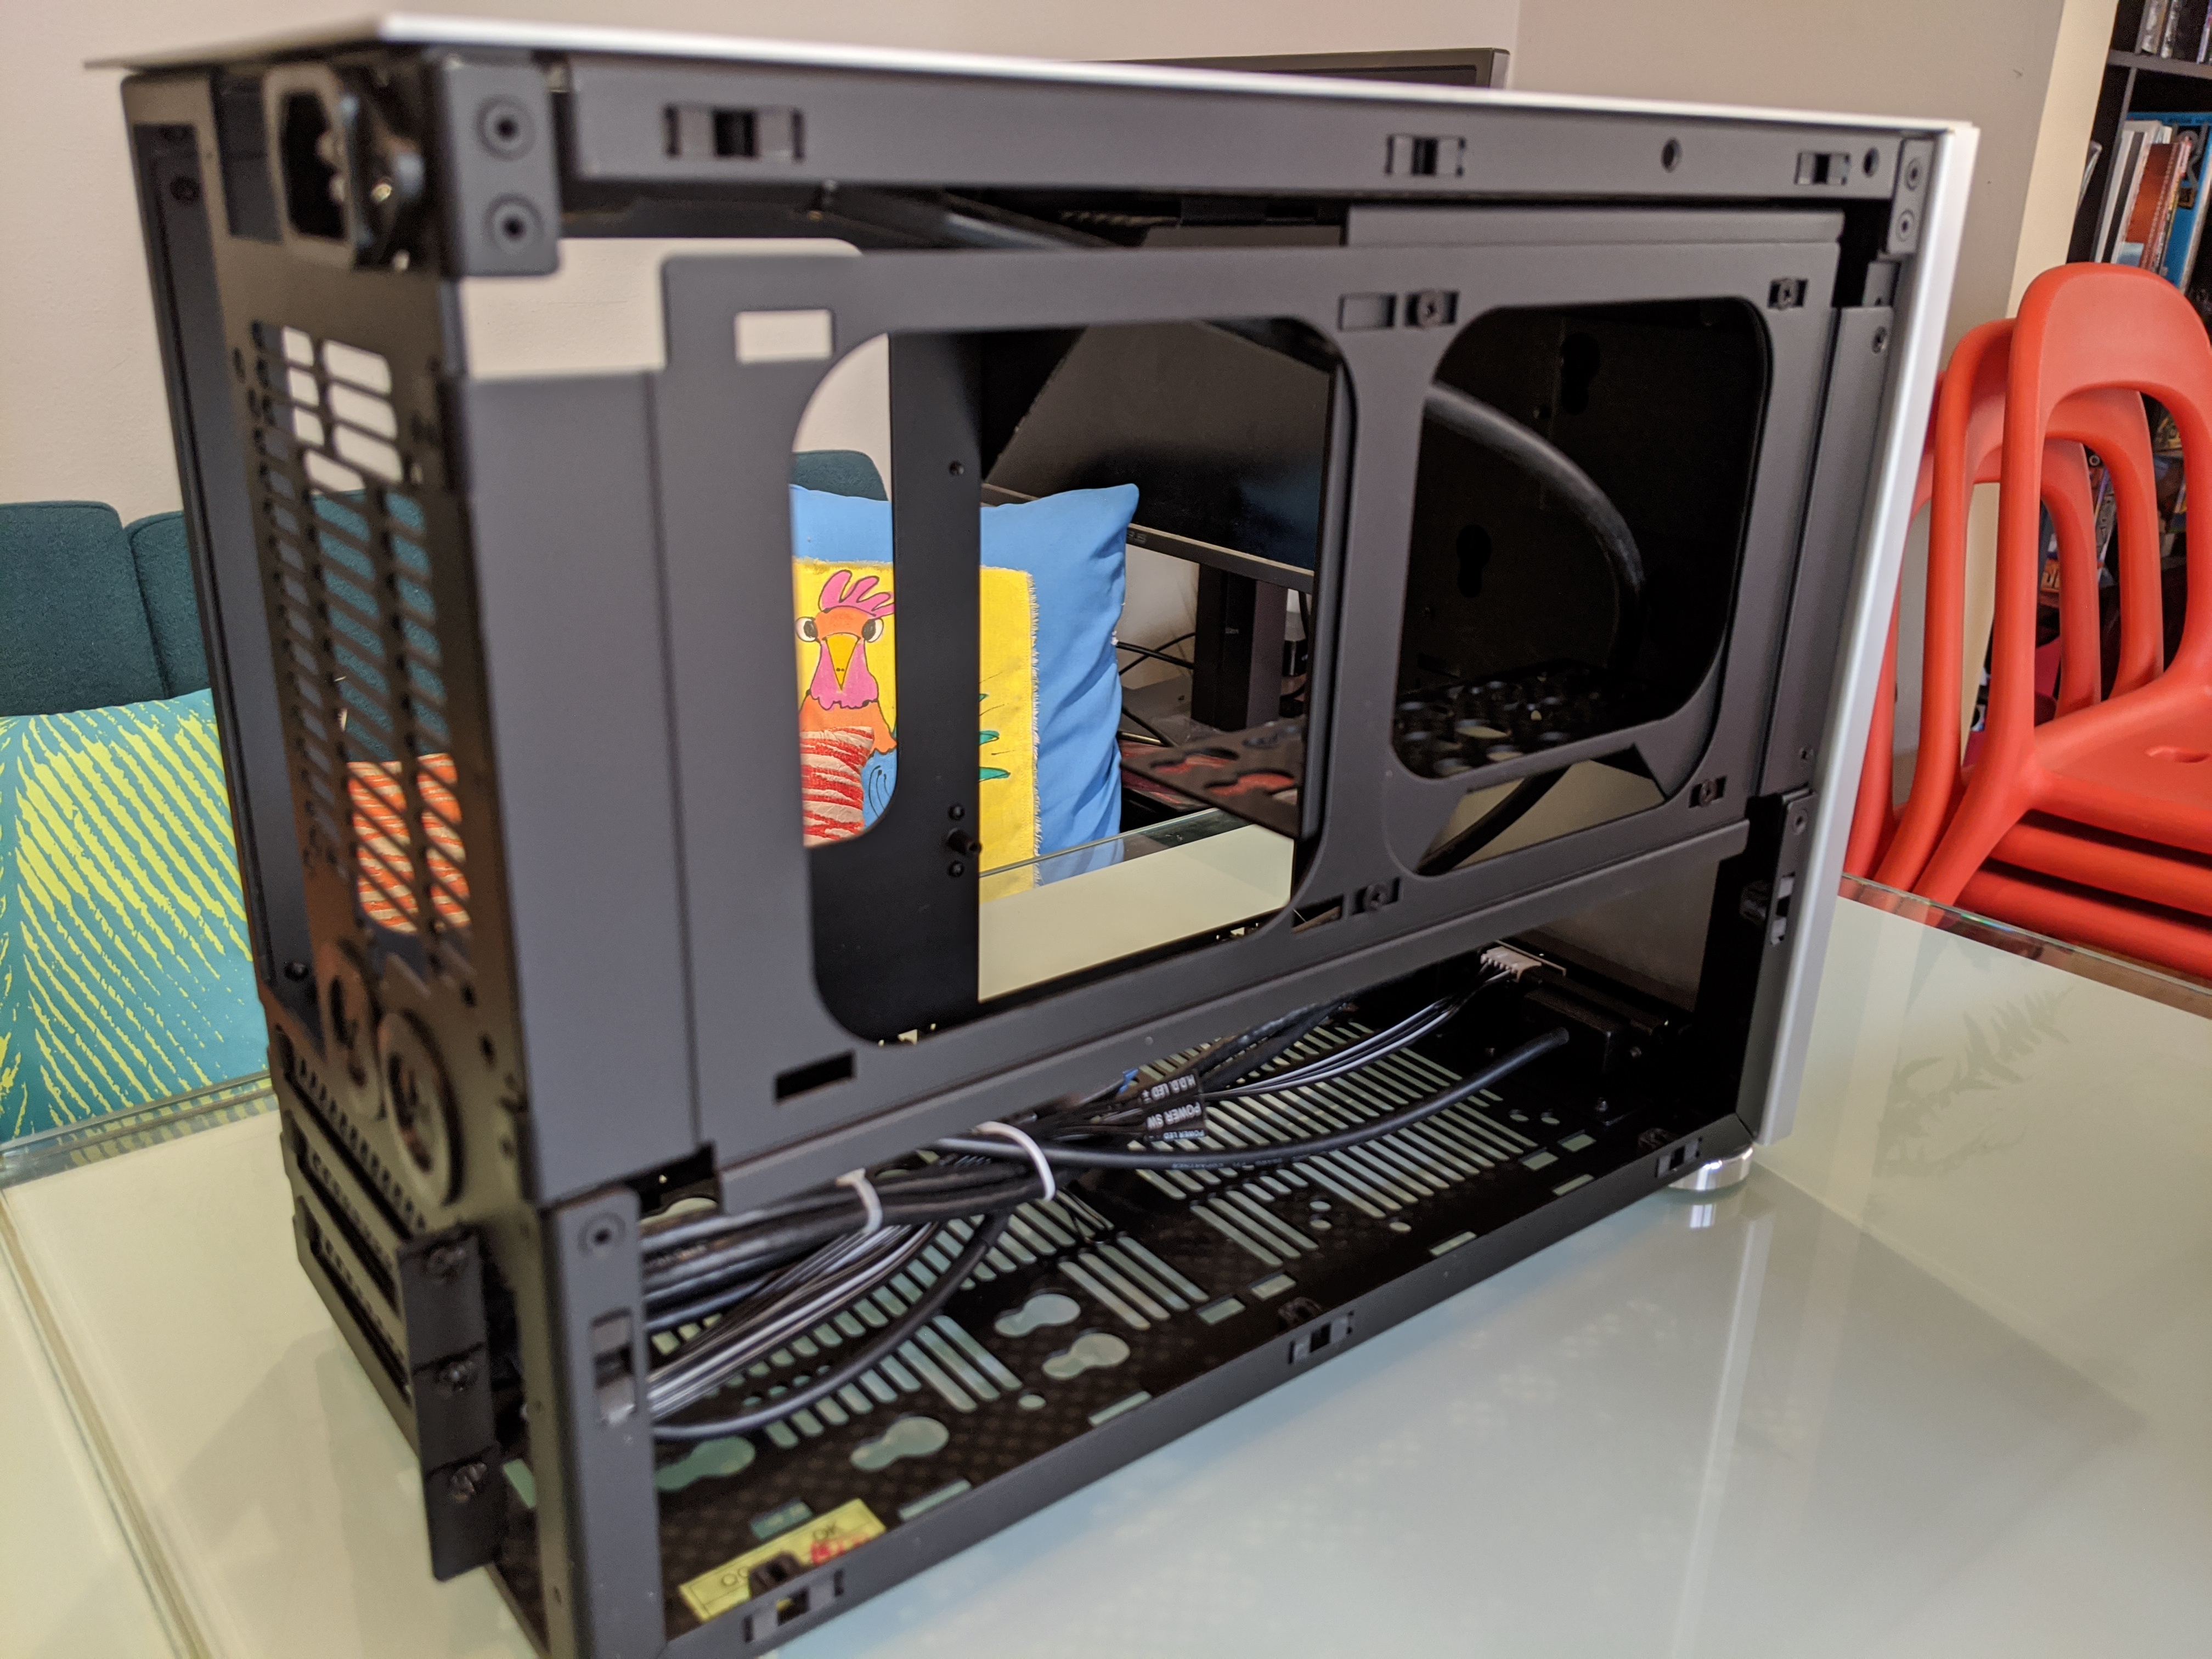
Here's what the NCase M1 looks like with its side panels removed. While many cases these days have moved to thumb screws and trays and convenient latches, the M1 (at least my older iteration) still involves a lot of manual unscrewing. As always, you'll want a good screwdriver handy. I can't recommend a magnetic ratcheting screwdriver enough. Save time, and your wrist!
Keep up to date with the most important stories and the best deals, as picked by the PC Gamer team.
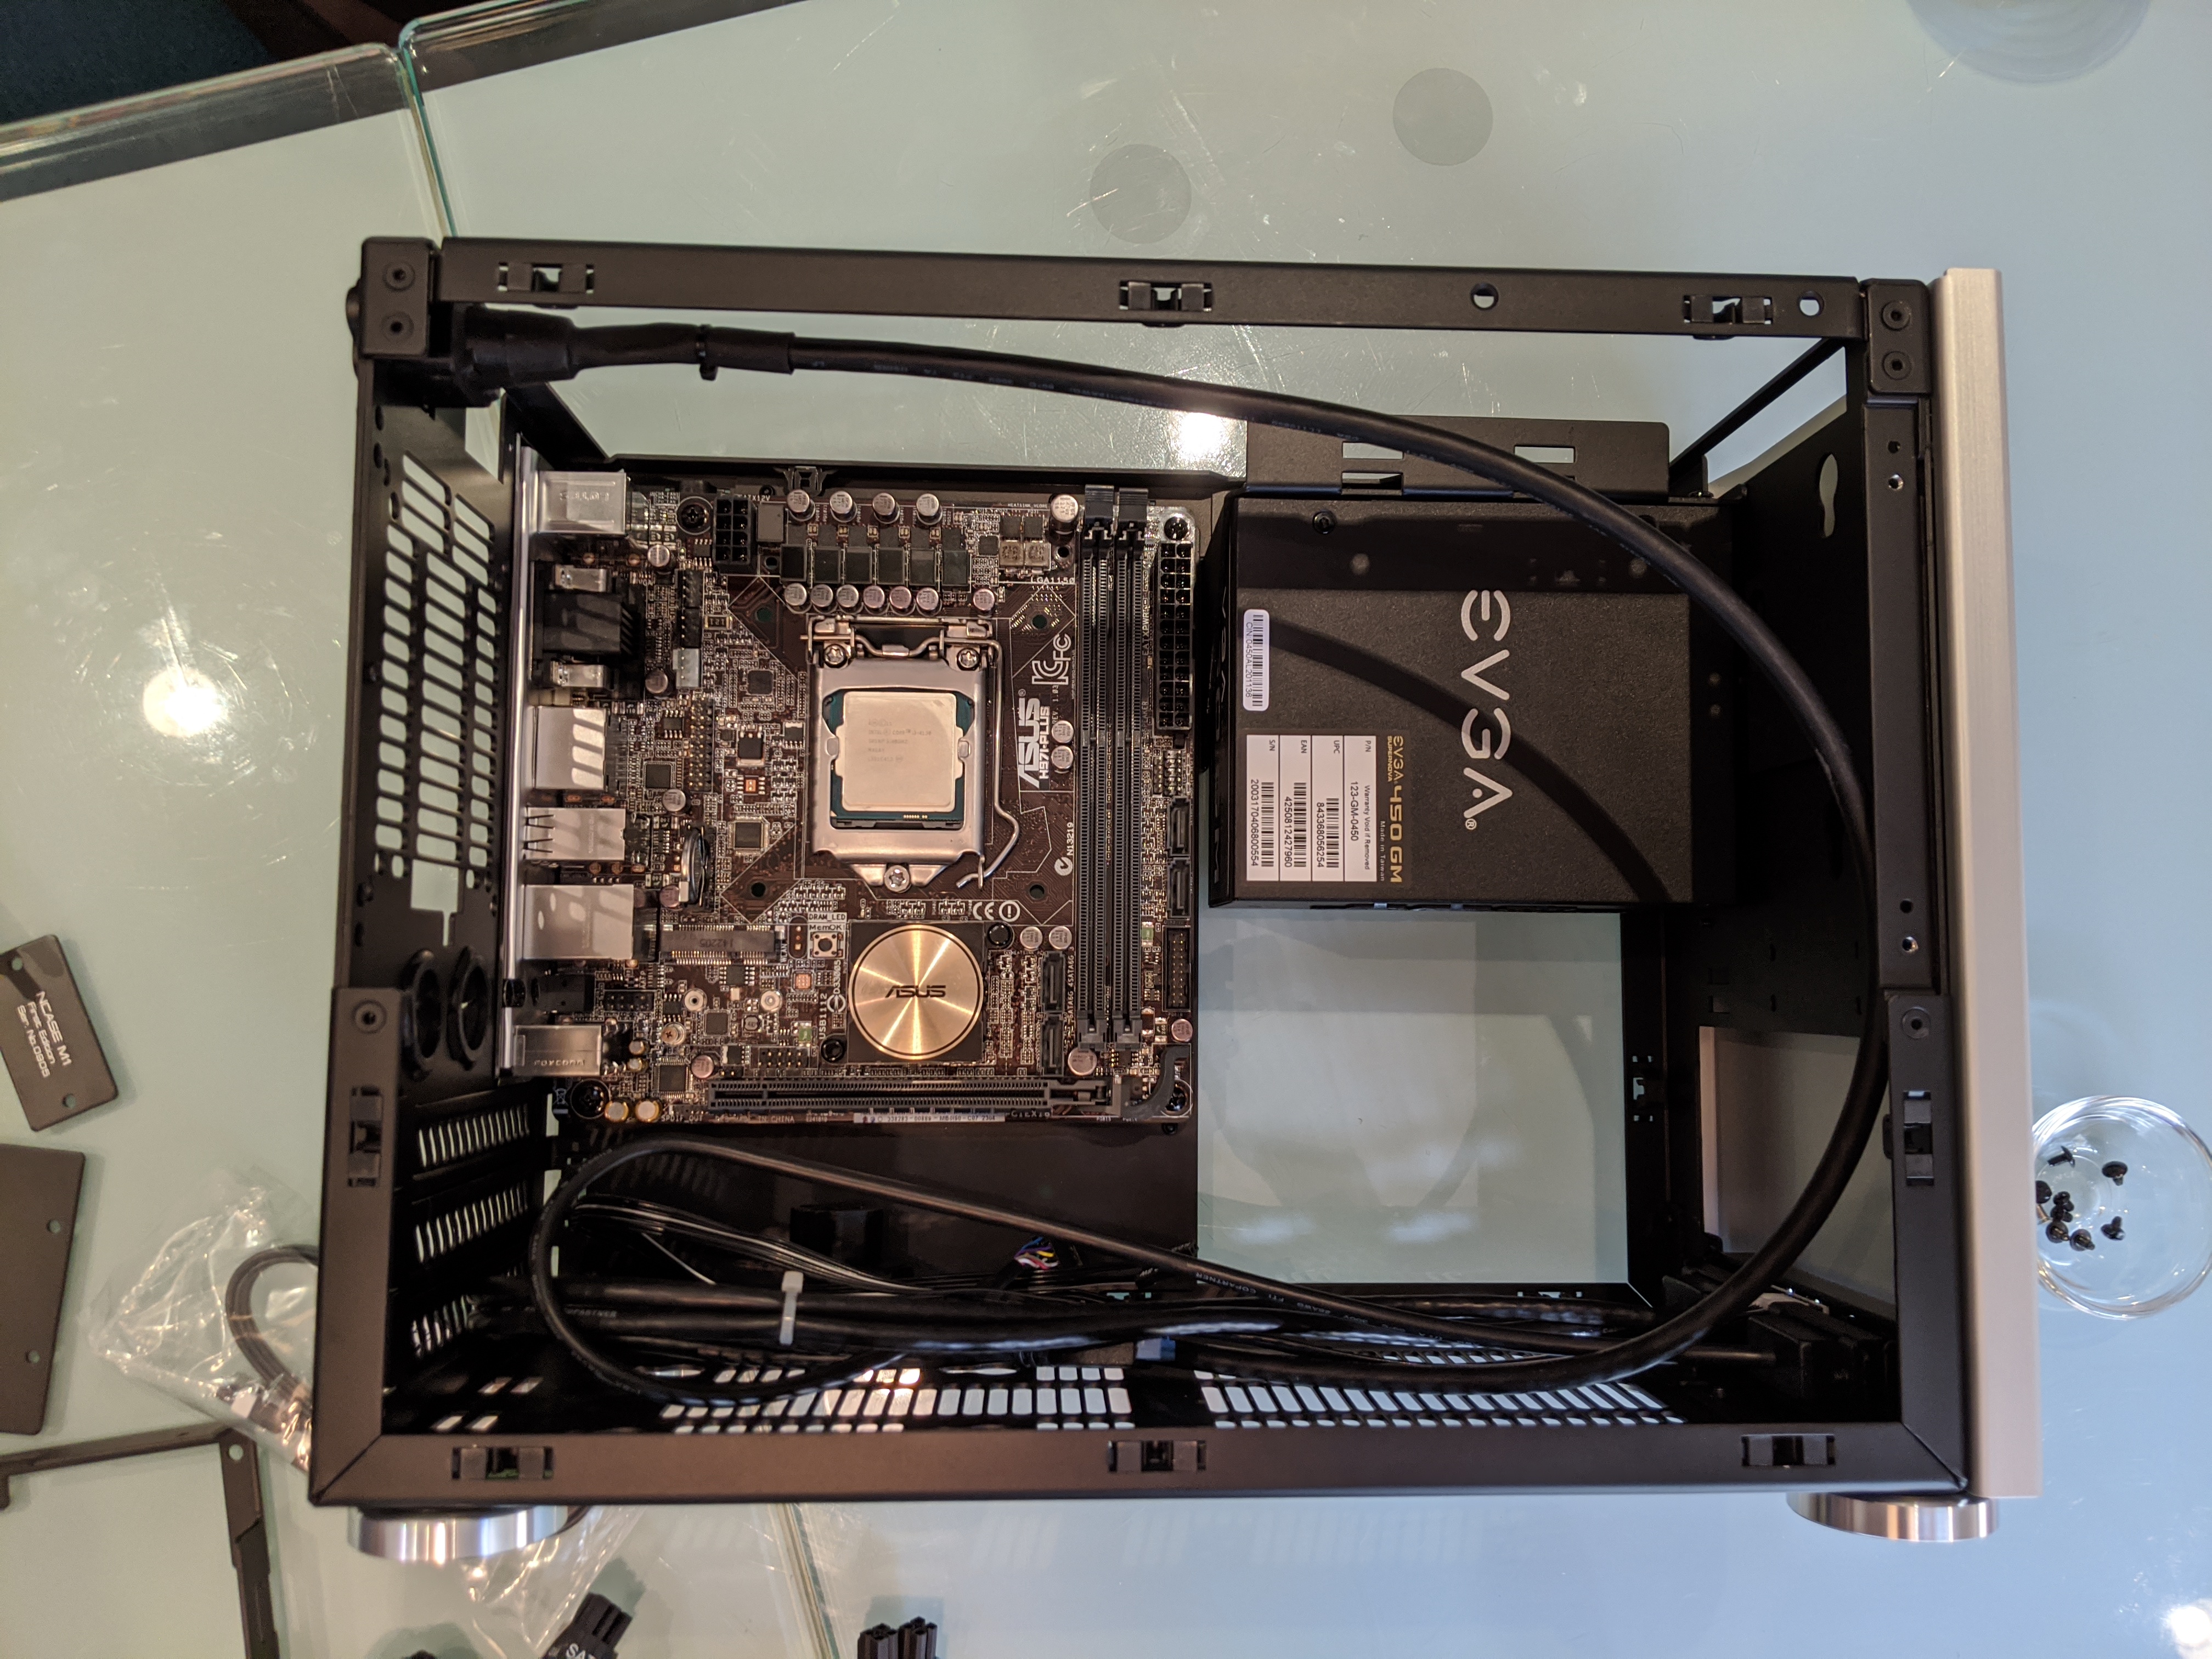
Motherboard, CPU, and power supply installed quickly and easily. For any small form factor case, I highly recommend a modular power supply. The space you save by not having to wrangle excess cables is worth the extra cost.
Also, pro tip for any case with a front-mounted PSU: make sure you flick the power switch before you close up your build. Otherwise you'll have to open it back up when you try to turn it on later (not that I'm speaking for recent experience, because I'd never overlook something so obvious).
One more tip: Get some little bowls to hold your screws. You really don't need them, but it'll make you feel fancy.
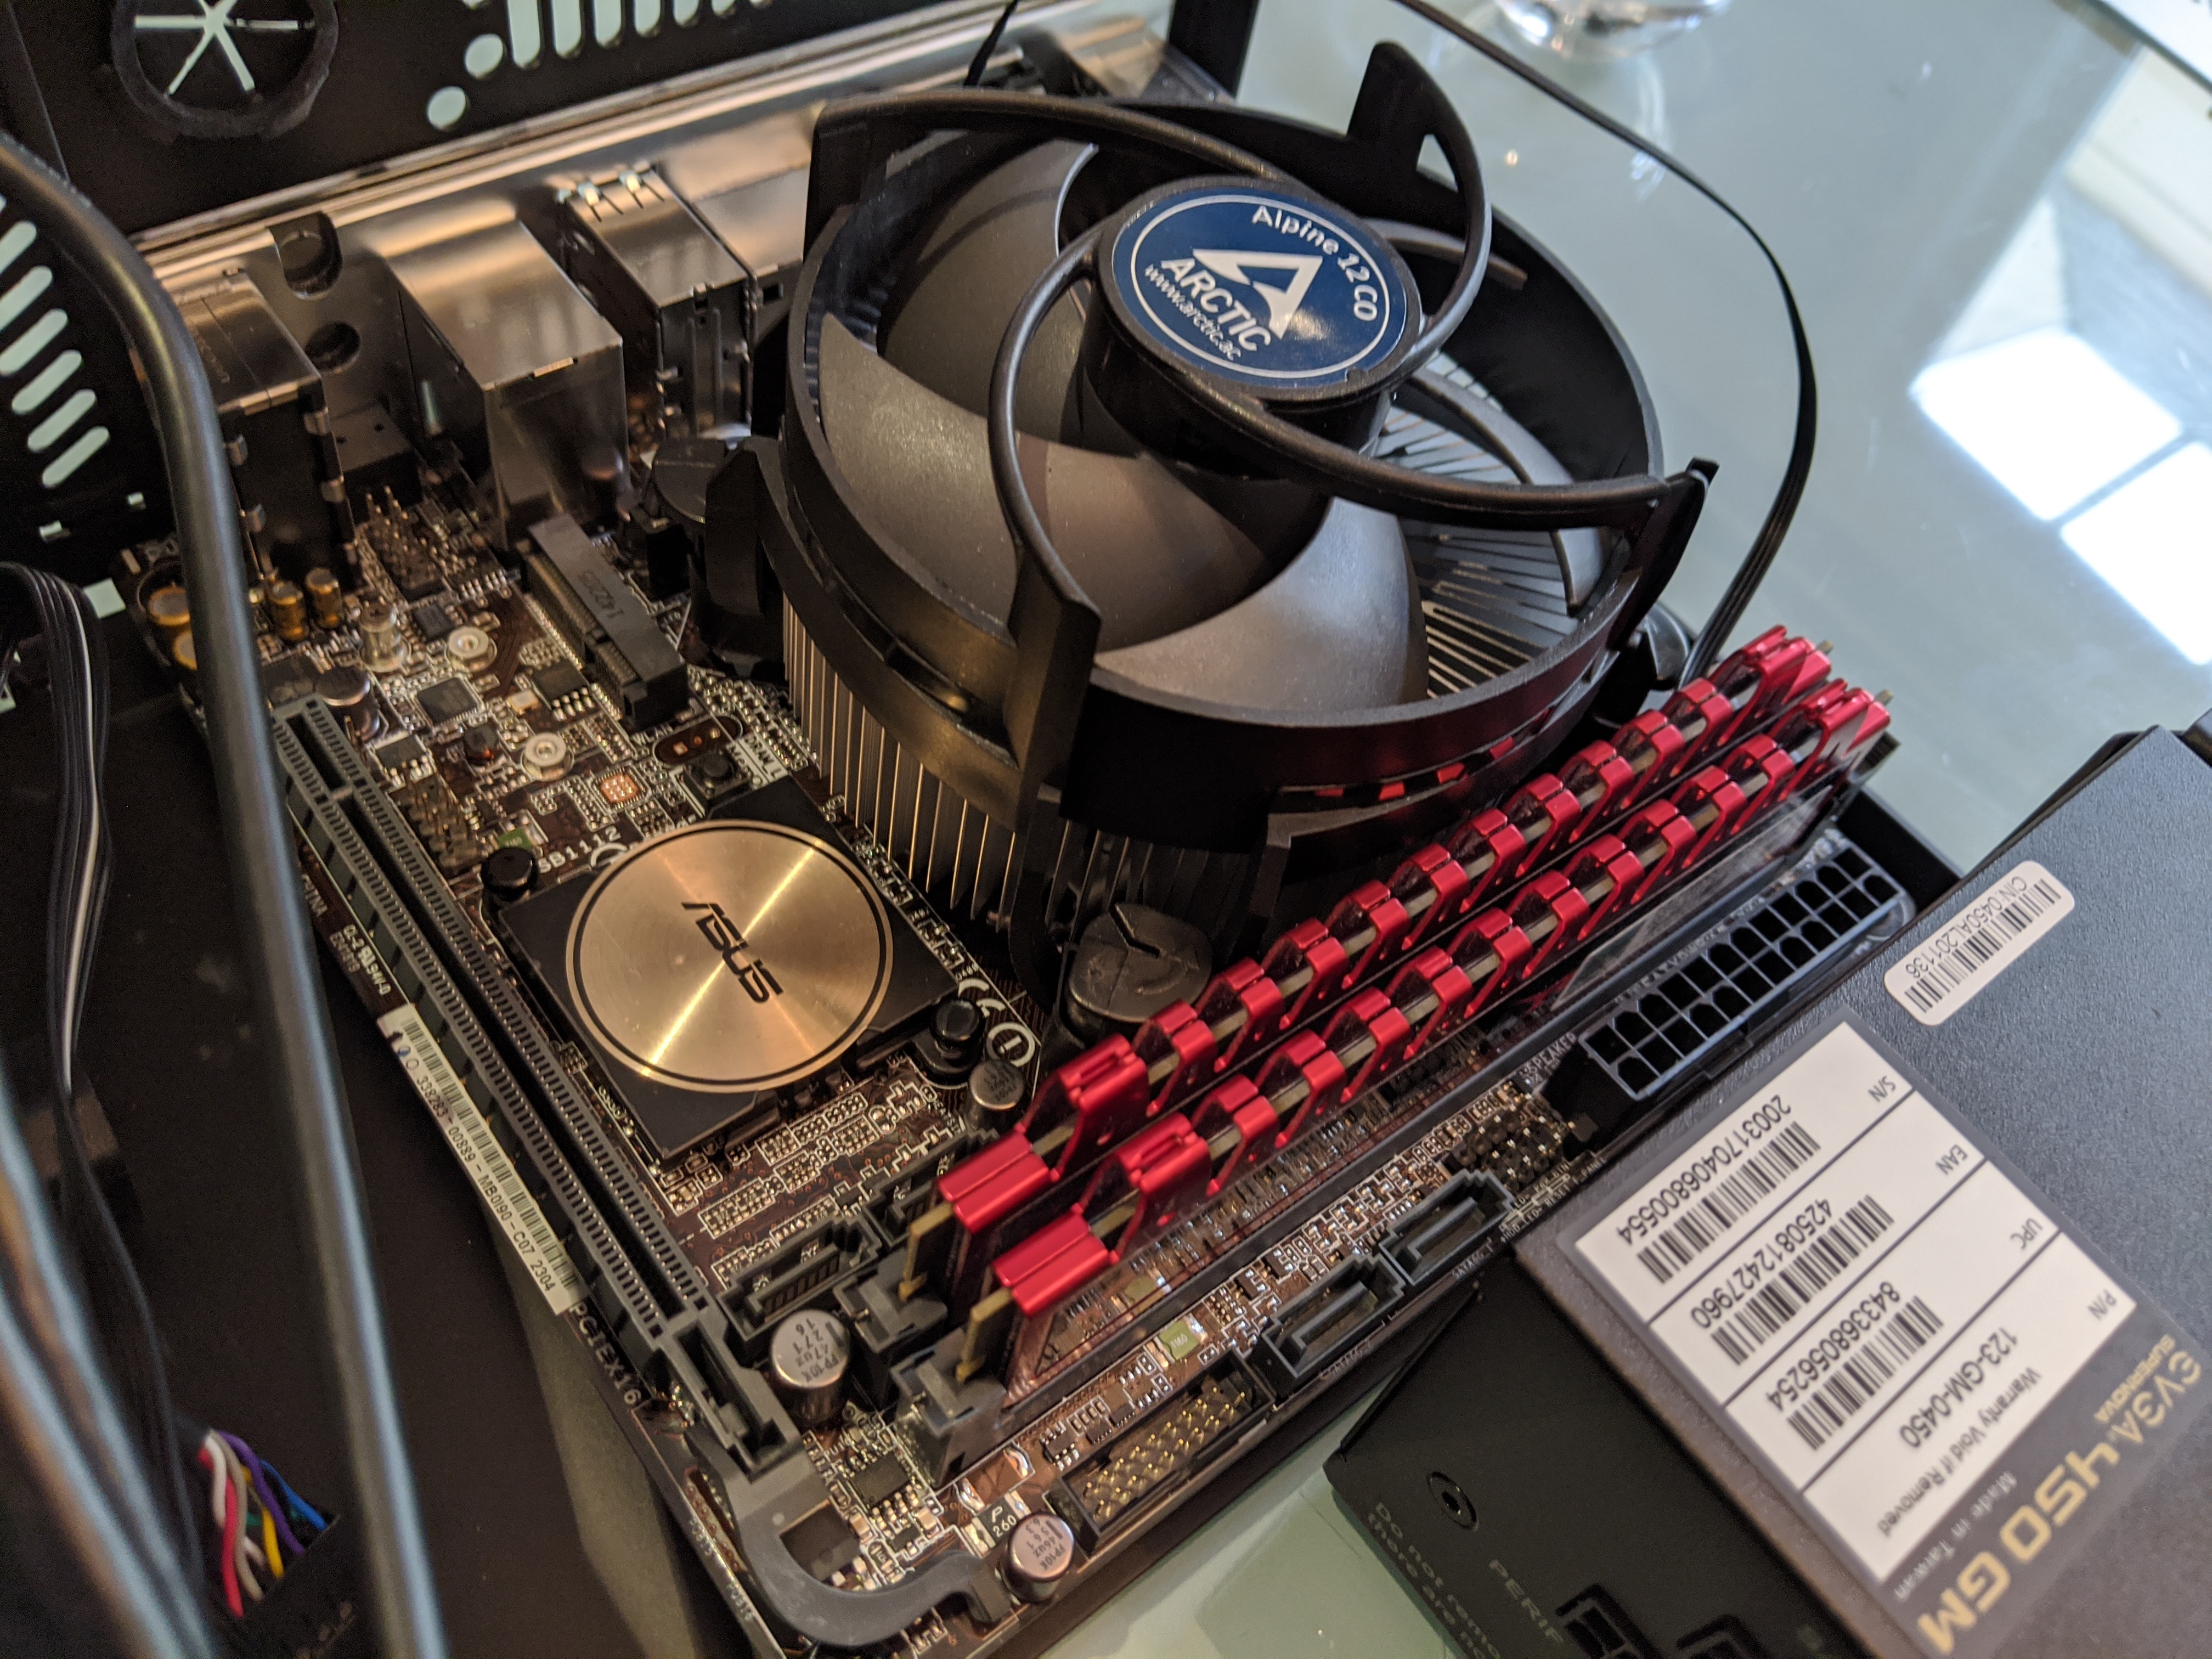
If you're building with a mini-ITX motherboard, make absolutely sure that your CPU cooler won't block the RAM slots. These compact boards give you very little wiggle room, and I nearly bought a cooler that would've been too wide for this build. Read the documentation and user reviews carefully before buying.
Also, reminder that you get what you pay for. This $12 cooler will get the job done, but like the stock Intel coolers, it uses cheap plastic pegs to attach to the CPU socket, and one of them immediately bent upon installation and refused to poke all the way through to the backside of the motherboard. Thankfully, the other three held firm so it wasn't worth spending too much time fiddling with. Eh, good enough!
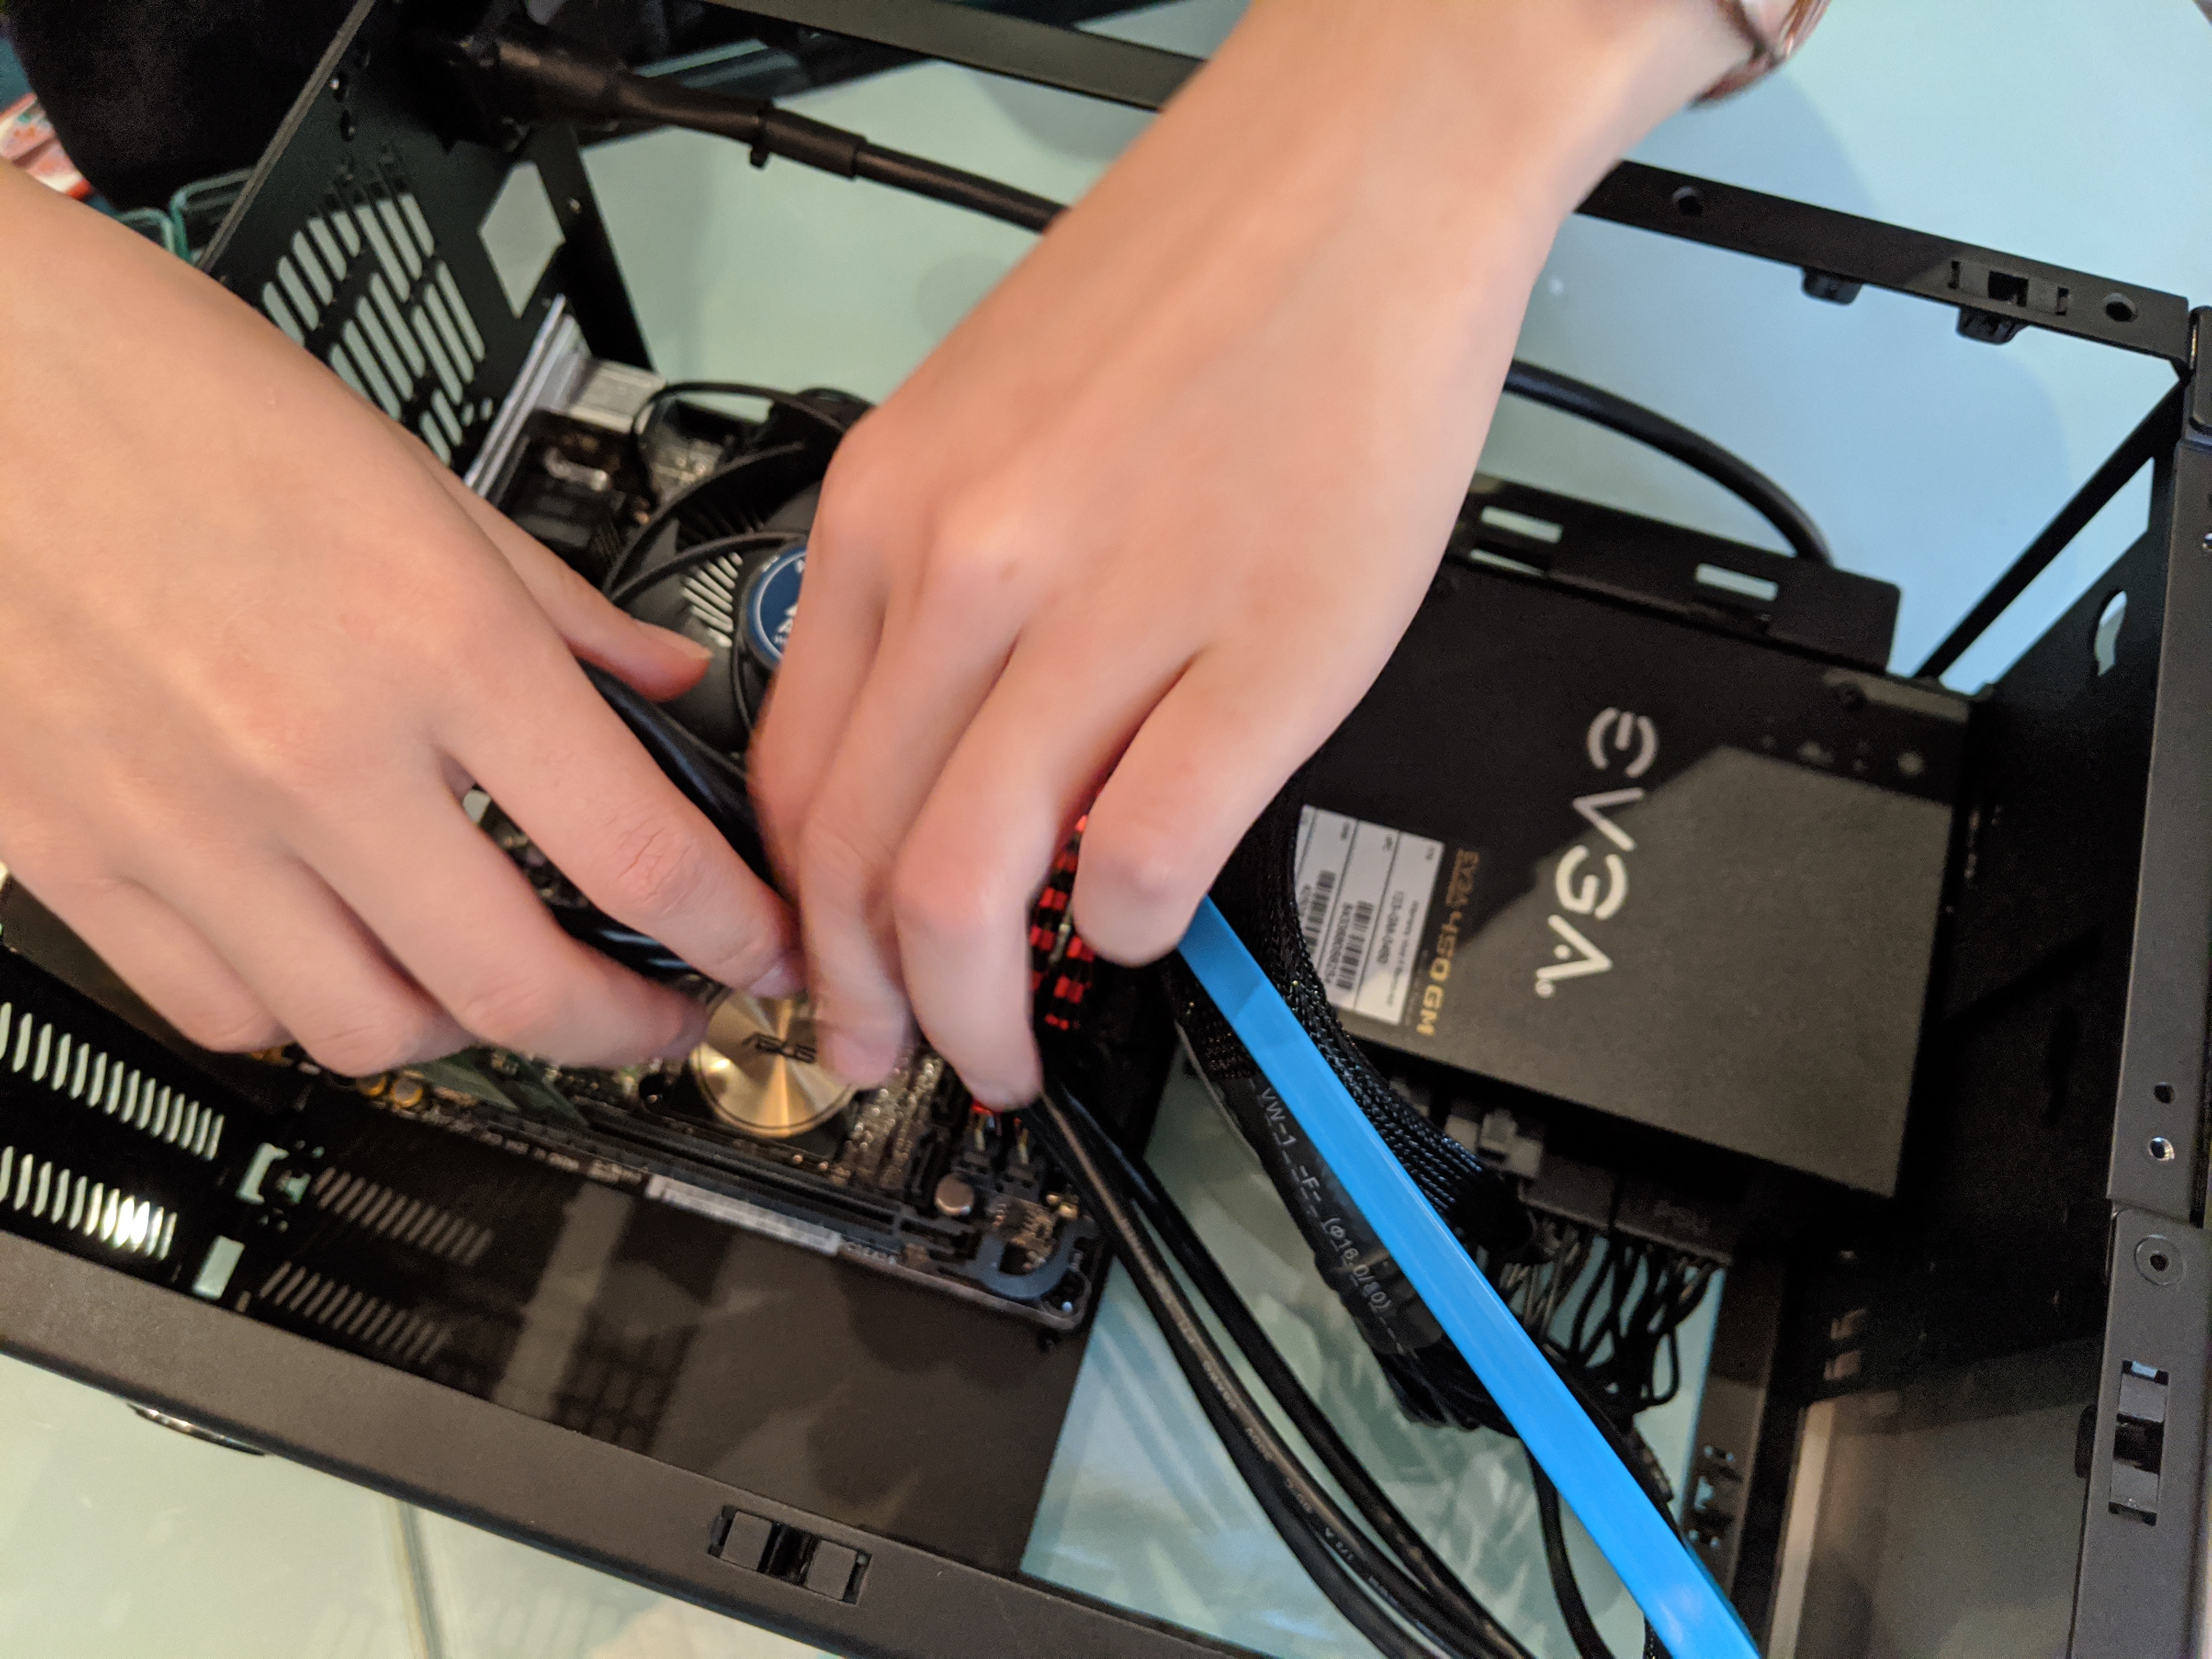
It's been awhile since I've done a mini-ITX build, so I remembered another thing by doing it wrong: Don't save your cabling for last. Usually I'll plop in the PSU, CPU cooler and RAM before plugging in power, SATA, and case front panel cables. But that's kind of a nightmare on a mini-ITX motherboard and in a case as compact as the M1. There was barely any space between the power supply and the RAM to plug in the tiny cables that power the front panel. Eventually we took the RAM out just to get a little space.
Having someone with small hands that fit into those tight spaces is also a big help.
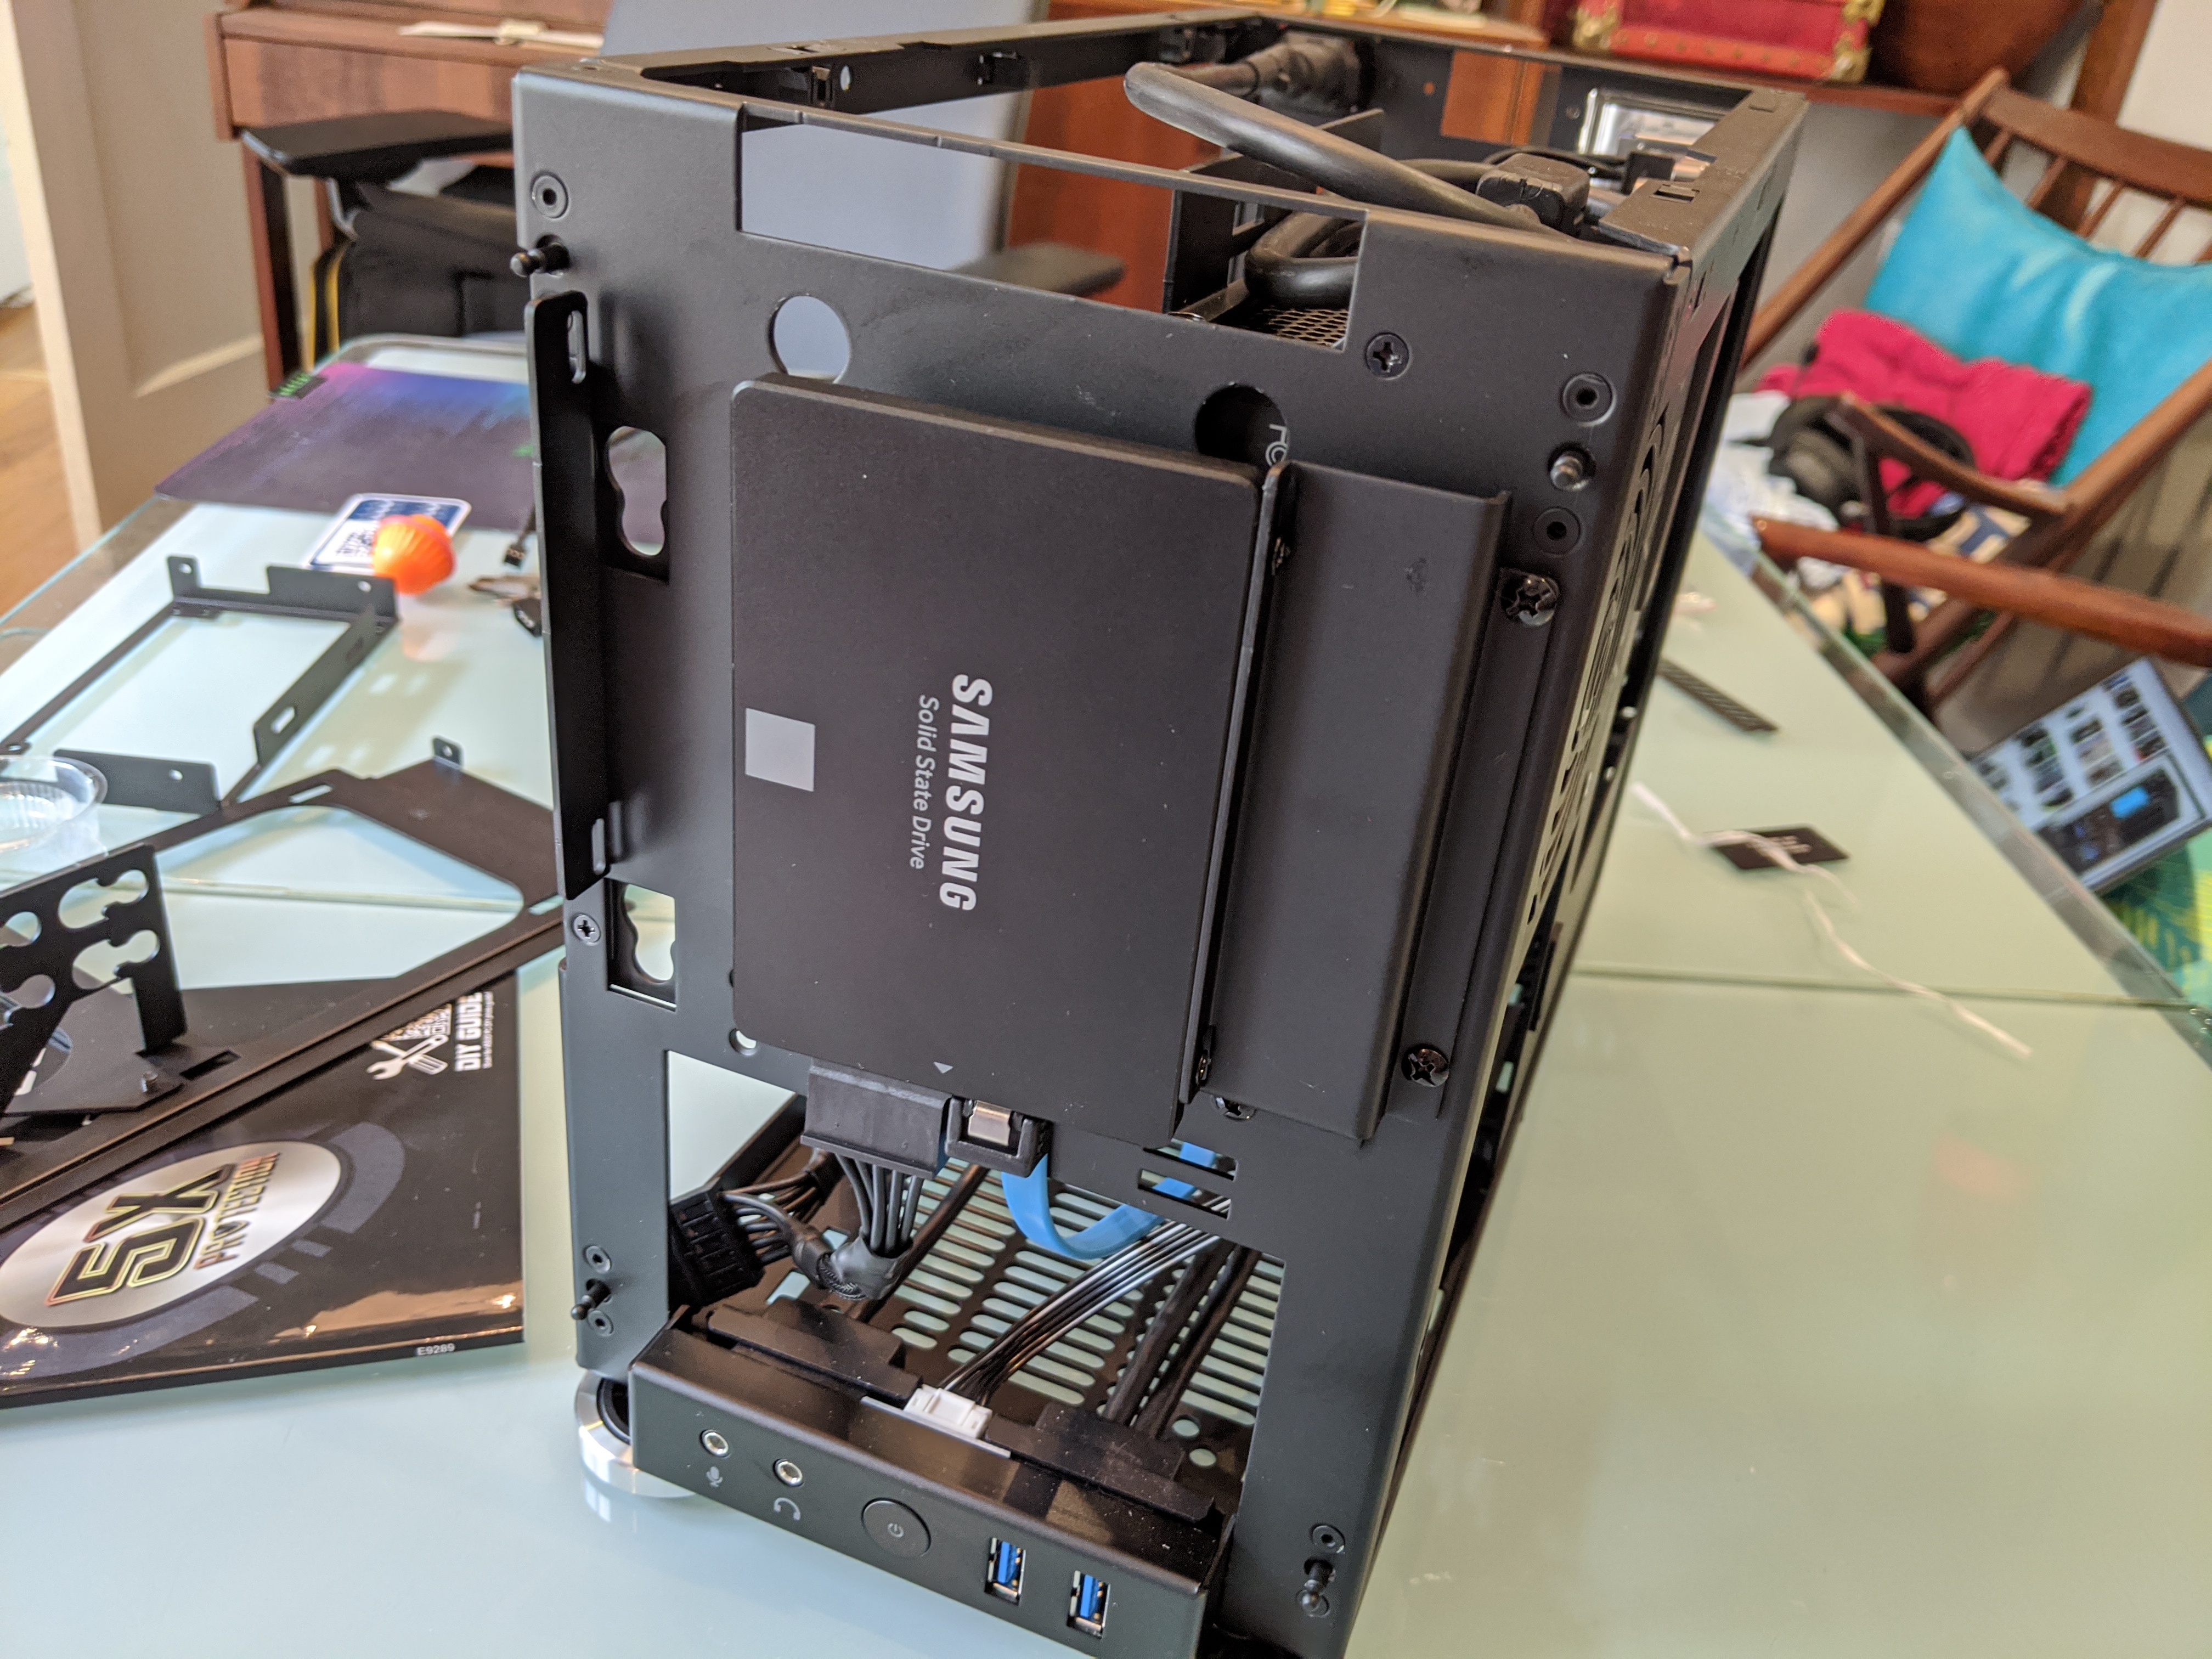
Another "good enough" example is how I mounted the SSD at the front of the M1. This space behind the front panel is designed for a slim optical disc drive, but you can also mount an SSD here. I'm pretty sure I was supposed to move the mounting brackets around somehow to secure the SSD from both sides, but honestly, it's held in place plenty tight like this, so I decided to just get on with it.
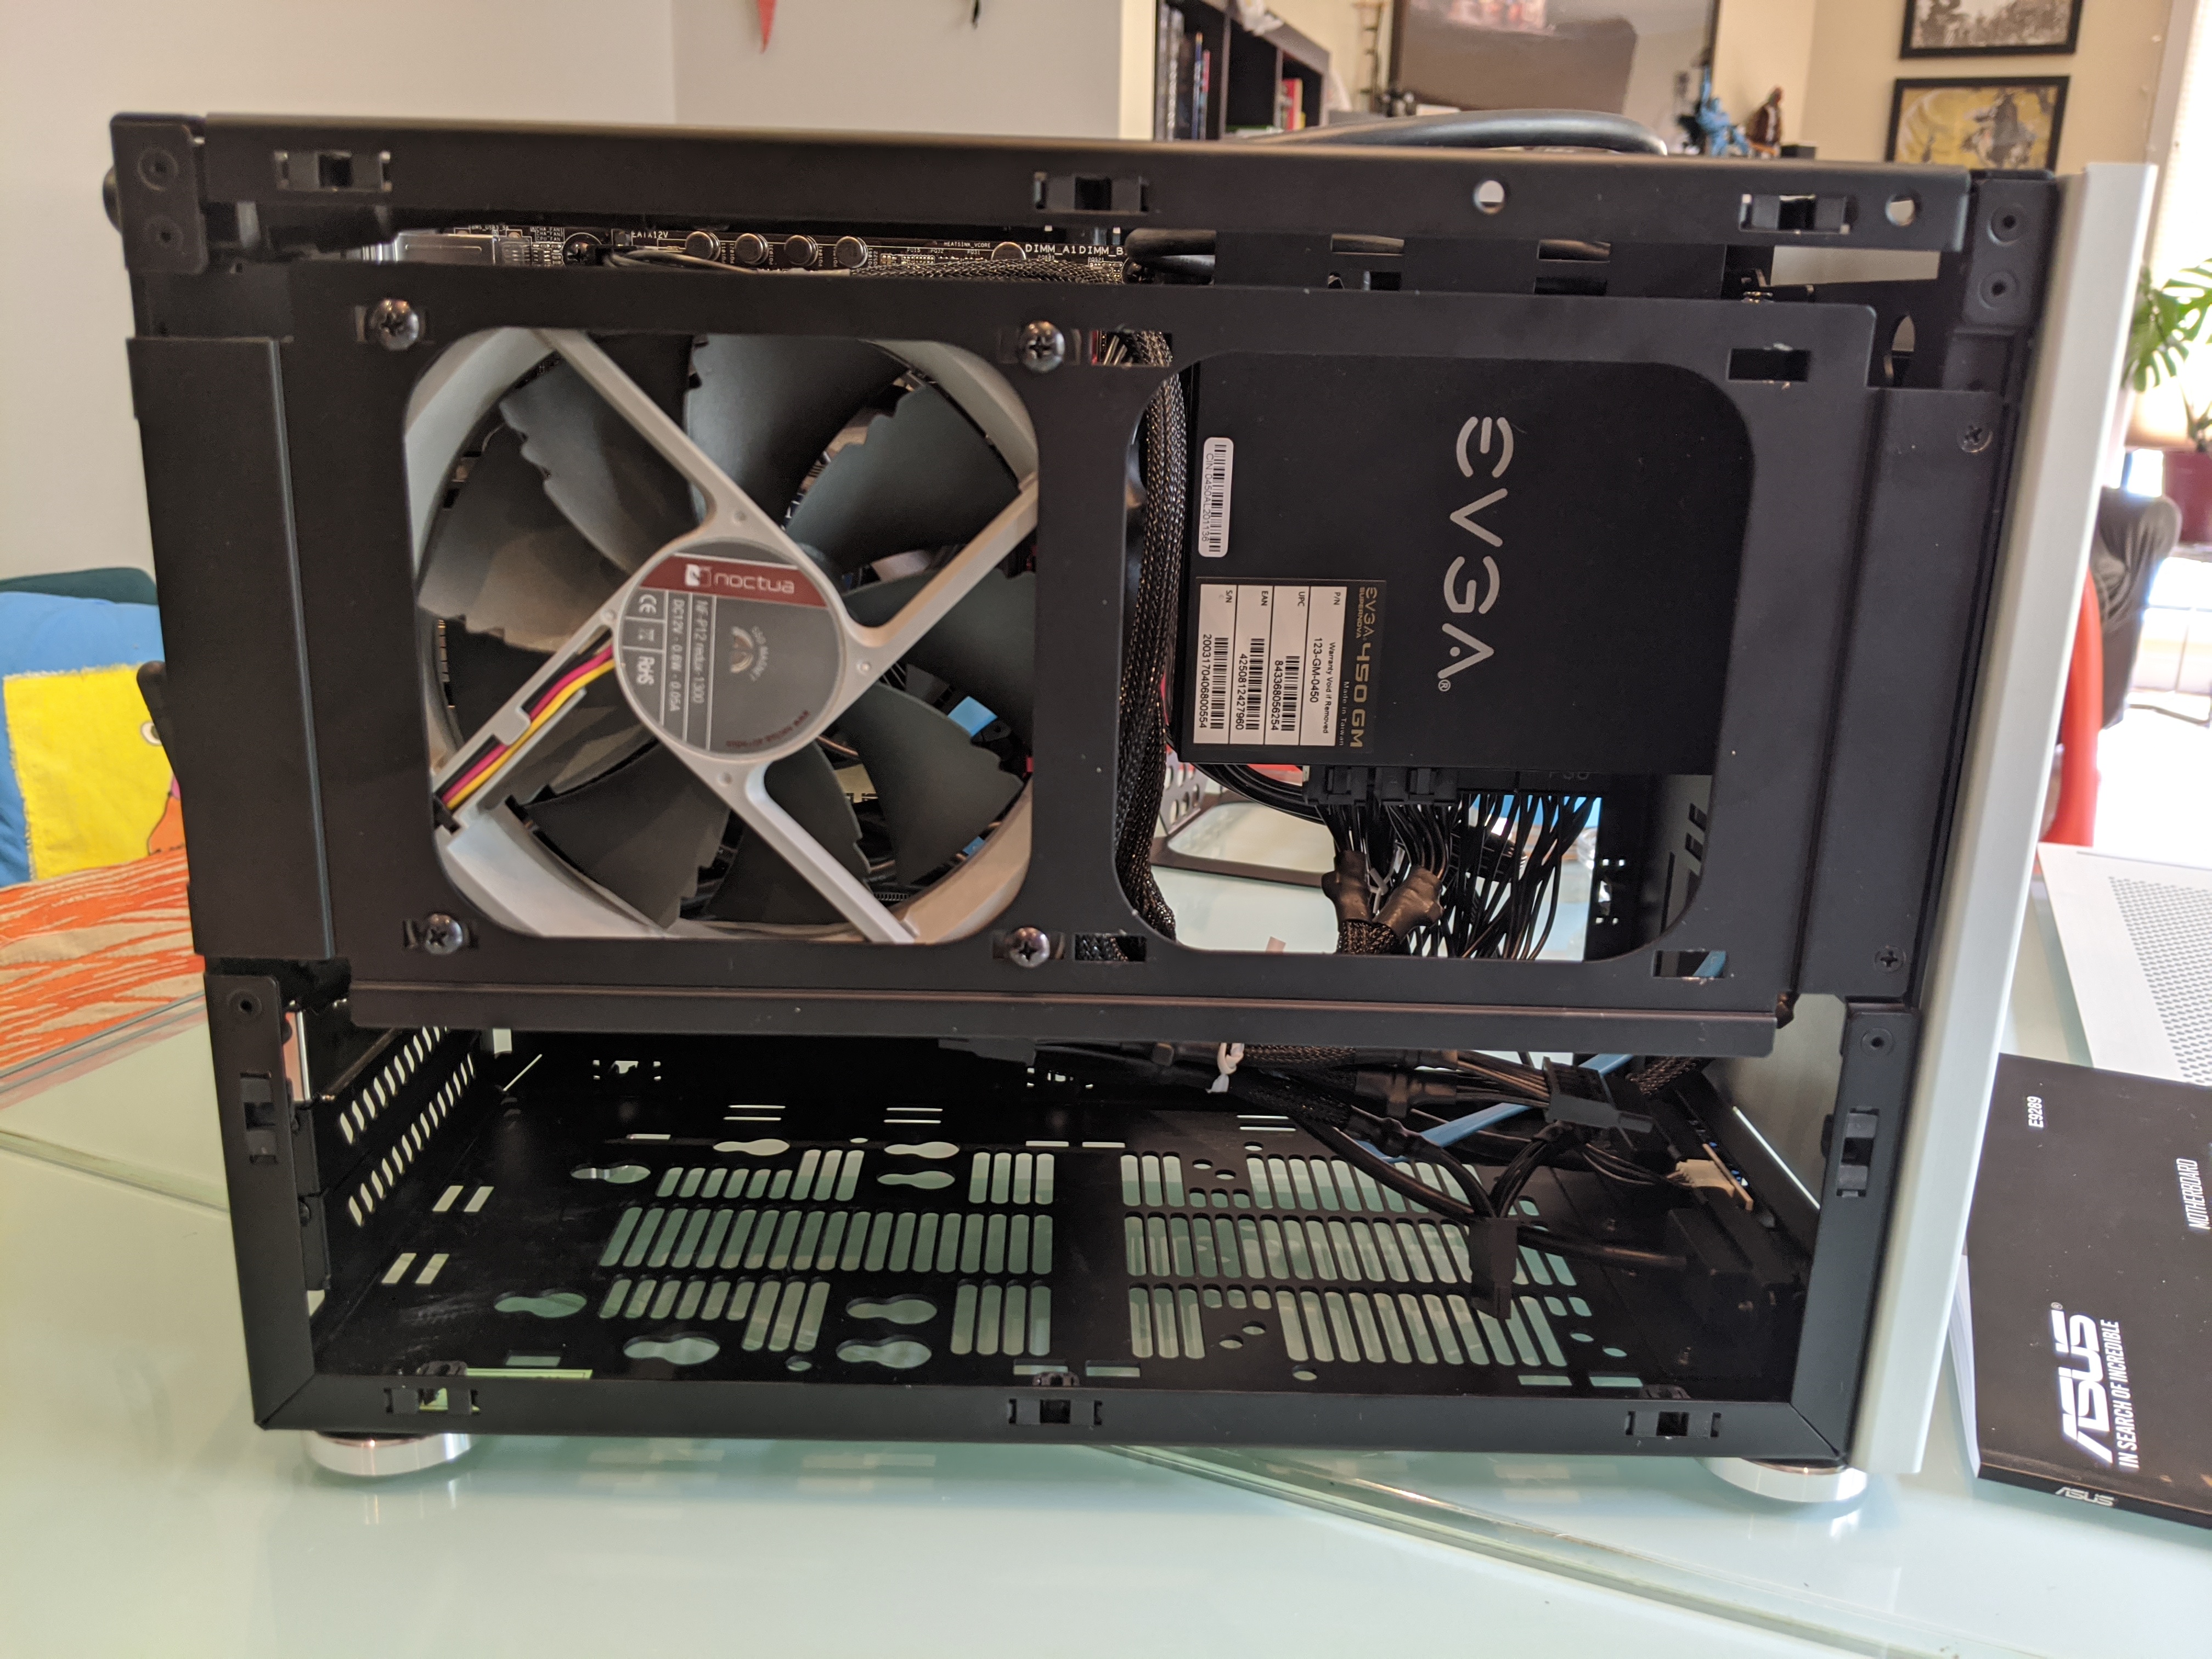
The M1 offers a lot of ventilation options for its small size, including mount points for two 120mm fans on this bracket, if you remove the interior hard drive cage. Which I did, because I had no use for it. You could mount a radiator here, or do what I did, and add an extra fan right above the CPU, to pull that hot air right out of the case.
Below you can see our cables neatened up a bit with twist ties. We had tons of extra space without a graphics card, but with a card installed, keeping them out of the way would be important for airflow.
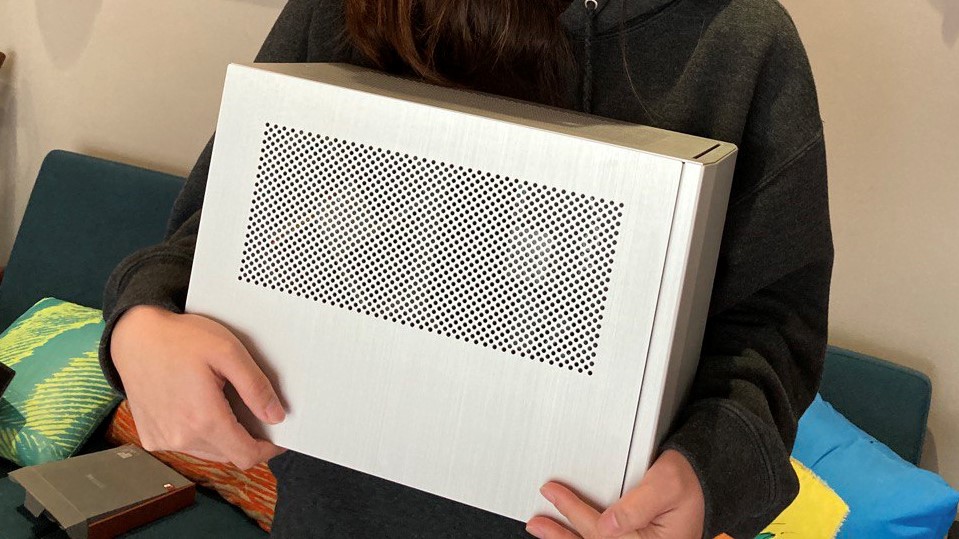
And that's a completed PC! So far I've only installed Windows on it, and now I have to decide what to do with this thing. It'll run retro games well, and if I added in a graphics card it could handle even modern games that aren't too CPU-intensive. Sadly, it's a dual-core chip, which is a bit limiting these days.
Thanks to the M1's aluminum body, this system really is damn light—you could easily toss it in a backpack or duffel bag and travel with it. But since traveling is off the table for now, I need to figure out how else to use this thing. Do I need a kitchen PC? I won't be able to cook an egg on it, but I do still have some spare counter space...

Wes has been covering games and hardware for more than 10 years, first at tech sites like The Wirecutter and Tested before joining the PC Gamer team in 2014. Wes plays a little bit of everything, but he'll always jump at the chance to cover emulation and Japanese games.
When he's not obsessively optimizing and re-optimizing a tangle of conveyor belts in Satisfactory (it's really becoming a problem), he's probably playing a 20-year-old Final Fantasy or some opaque ASCII roguelike. With a focus on writing and editing features, he seeks out personal stories and in-depth histories from the corners of PC gaming and its niche communities. 50% pizza by volume (deep dish, to be specific).
