How To Build Your Own IR Head Tracker
With all the recent hubbub about Microsoft’s Kinect and Sony’s PlayStation Move, you’d be excused for thinking that motion control is some new phenomenon. In reality, it’s a technology that’s been around on the PC for years. Head tracking allows you to control your PC with your head. Mostly used in sim games, head tracking lets you move and tilt your head to control where your character looks. There are, of course, some excellent commercial head-tracking systems available, but it’s possible (thanks to free software called FreeTrack) to build your own head tracker with just a webcam and a few dollars worth of electrical supplies. We’ll show you how.
How It Works

(Image B)
Not so complicated, right? Here’s what you need:
The Webcam
First, you need a webcam. Most modern webcams will work, but what you really want is one that has a high frame rate, low CPU usage, and an auto-exposure function that can be turned off. Note that we didn’t mention high resolution—you don’t actually need anything more than 320x240. So if your camera lets you turn down the resolution and get a higher frame rate, that’s a plus.
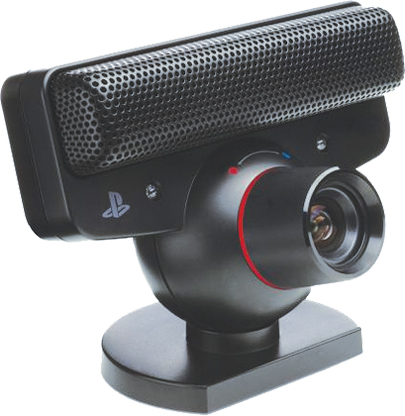
You can find a list of webcams that have been successfully used with FreeTrack here . For our build, we went with the PlayStation 3 Eye (image C). There are some great reasons to use it (it’s a high-quality, super–high frame rate camera that doesn’t cost a lot. But we had an even better reason—we already have one, modified to see only infrared light. If you remember when we built the multitouch surface computer , you’ll recall that we had great luck using the PlayStation 3 Eye, so we’re going to use it again.

(Image C)
What’s that, you say? You don’t already have a modified webcam? Well, don’t worry, there are plenty of resources that will help you modify your camera. The link for the FreeTrack Forum above has info about how to modify a webcam, and if you decide to go with the PlayStation 3 Eye, you can check out our very own illustrated guide to turning it into an IR camera here .
The Point Model
Once your camera is ready to go, it’s time to get started on the point model. The point model is the gear that will, one way or another, let your computer see (via the webcam) which direction your head is pointed. There are a lot of ways to make a point model.
The simplest is a single point of light—an LED or a reflector attached to your head. This is enough to allow the computer to calculate your head’s location along two axes. When you look up, the point of light moves up, when you look right it moves right, and so forth.
However, if we’re going to all the trouble of strapping some lights to our head, we might as well get a full three degrees of precision out of it. By upgrading from a single point to a three-point model, FreeTrack gains the ability to determine your head’s position and rotation about the Z axis—in addition to being able to tell when you’re looking right or left, and up or down, it can also tell when you move and cock your head.
For a three-point model, you can either use a “clip” model, in which the three points are arranged in a lopsided V shape, and attached vertically to a headset (image A), or a hat model, where one point is placed on top of a baseball cap or visor, and two are placed along the rim. Whichever one you want to go with is really up to you. We chose to go with the clip model because we usually wear a headset while gaming.
Keep up to date with the most important stories and the best deals, as picked by the PC Gamer team.
The Light Source
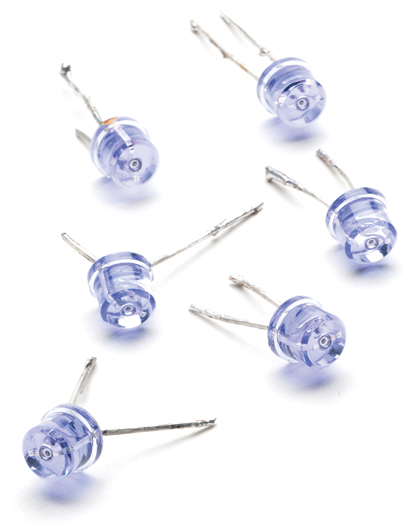
Now that you’ve decided on a configuration for your point model, you need to pick a light source. Your two choices here are infrared LEDs (image D) and reflectors. The advantage to LEDs is that because they emit a ton of infrared light, your webcam will have no trouble isolating the three points. The downside is that they have to be powered, meaning you’ll have a battery pack attached to your body somewhere. Reflectors are popular, because they don’t require a battery pack. However, they require significant illumination to function, so you’ll need to shine a bright array of eight or more IR LEDs on them, preferably from a source near your webcam.

(Image D)
For their consistency, and because we don’t mind keeping track of a battery pack with a single triple-A battery, we chose to use IR LEDs. Of all the infrared LEDs available, the SFH485P model is the most recommended, for its wavelength and viewing angle. We happened to have some on hand (again, from the Surface Computer) but you can find them for well under a dollar apiece at online electronics dealers like Digi-Key .
Some people swear up and down that you need a resistor any time you’re building an LED into a circuit. It so happens that the forward voltage drop of the SFH485P is 1.5V, same as a standard battery, so it’s possible that you can get away without one. If you want to play it safe, you can find a very handy resistor calculator here .

