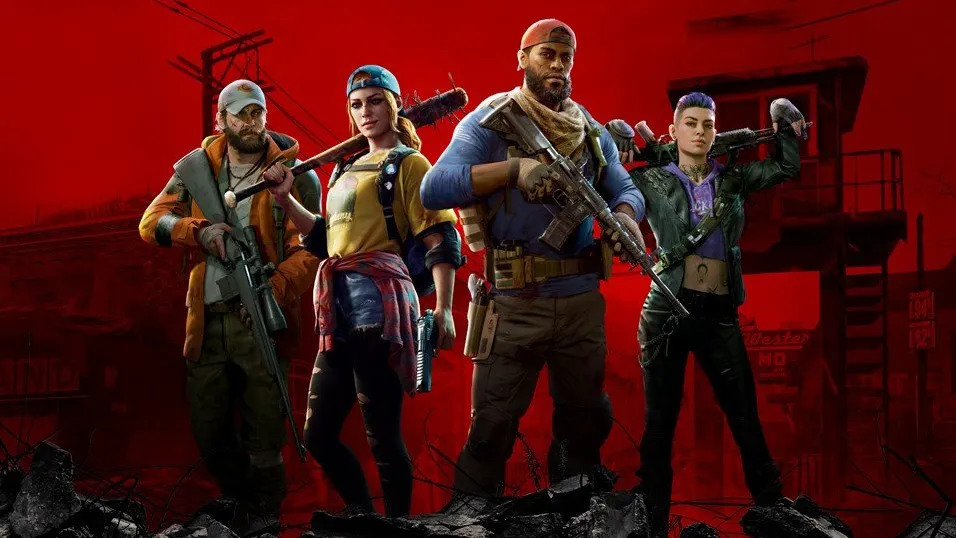
Looking for the best Back 4 Blood build? Thanks to the card system, there are plenty of ways to customise your character's playstyle, and a strong build can mean the difference between life and death, especially on the higher difficulties.
Turtle Rock Studios' new Ridden-infested FPS is a spiritual successor to Left 4 Dead. While there are a lot of similarities between the two games, ignoring the advantages of a good build will significantly lower your chances of survival. So, here are the best Back 4 Blood builds to get you started.
Best Back 4 Blood builds
While it's possible to play solo with bots, the game shines when you play as part of a team. As you'll want to diversify your roles—and weapons—as much as possible to help in different situations, these builds will work as a good starting point.
Article continues belowThe cards I've picked for these builds complement each characters' strengths, but they're not set in stone. With so many potential combinations to choose from, there's certainly room for experimentation, and you might find substituting certain cards work better with your particular playstyle or team composition.
Also, bear in mind that cards are drawn in order, so shuffle these builds around, depending on the team's needs overall.
Melee

Back 4 Blood melee build: Holly/Evangelo
Both Holly and Evangelo have buffs that lean more towards a melee build. First, Holly's 10% damage resistance means she's the best Cleaner if you want to get up close and personal with any Ridden you come across. She also receives 10 stamina with each kill and offers the team a sizable 25 stamina increase.
On the other hand, Evangelo offers a 25% increase to his stamina regeneration, his breakout speed is increased by 75%, and he brings a 5% boost to the team's speed. Any melee weapon will work with this build, and having a shotgun on standby can help out early on.
- Berserker: Gain 10% Melee Damage, 10% Melee Speed, and 5% Move Speed for each Melee kill in the last 4 seconds.
- Battle Lust: Melee Kills heal 2 Health.
- Meth Head: 40% Melee Attack Speed, 40% Melee Stamina Efficiency, Your Melee Attacks no longer stick in tough enemies, Disables: Aim Down Sights.
- Face Your Fears: Gain 3 Temporary Health whenever you kill a Ridden within 2 meters.
- Numb Defense: Gain 15% Damage Resistance while you have Temporary Health.
- Ignore the Pain: 20% Melee Damage against Mutations. When you deal Melee damage to a Mutation gain 1 Temporary Health and recover 3 Stamina.
- Sunder: Melee hits cause the target to take 20% increased damage for 5 seconds.
- Brazen: 30% Melee Stamina Efficiency, 30% Melee Attack Speed, -5% Damage Resistance.
- Slugger: 5 Health, 10% Melee Stamina Efficiency, 20% Melee Attack Speed.
- Batter Up: 50% Melee Damage, 5 Health.
- Spiky Bits: 25% Melee Damage, 10% Damage Resistance while using a Melee weapon, -15% Ammo Capacity.
- Fleet of Foot: 10% Move Speed, -5% Damage Resistance.
- Superior Cardio: 20% Stamina, 20% Sprint Efficiency, 5 Health.
- Evasive Action: When you take a hit for 10 or more damage gain 20% Move Speed for 3 seconds.
- Mugger: Melee kills have a 2% chance to spawn ammo.
Assault rifle/sniper

Back 4 Blood assault rifle/sniper build: Walker
Walker gains 20% accuracy for 5 seconds after a precision kill, so you'll want to focus on either sniper or assault rifles for this build. He also buffs the team with an extra 10 health, which could be the difference between life and death in tricky situations.
One of the first cards you'll want to draw is 'Two is One and One is None'. This gives you the option of equipping two primary weapons so you can switch between an assault rifle and sniper if you can't choose between the two, and depending on the situation.
- Two is One and One is None: You can equip a Primary weapon in your Secondary slot. -25% Swap Speed.
- Reckless Strategy: 30% Weakspot Damage, -5% Damage Resistance.
- Ridden Slayer: 20% Weakspot Damage.
- Hyper-Focused: 50% Weakspot Damage, -75% Aim Down Sight Move Speed.
- Overwatch: Kills from greater than 15 meters grant 5 Temporary Health to teammates within 10 meters of the target.
- Broadside: Precision Kills have a 20% chance to cause Ridden to explode, dealing 15 damage to other Ridden within 4 meters.
- Patient Hunter: Each second you Aim Down Sights increases your Damage by 10% (up to 3 stacks).
- Stock Pouch: 30% Sniper Ammo Capacity, 10% Damage with Sniper Rifles.
- Shredder: Each bullet hit causes the target to take 1% increased damage for 3 seconds.
- Line 'Em Up: 100% Bullet Penetration with Assault Rifles.
- Tactical Vest: 30% Rifle Ammo Capacity, 10% Damage with Assault Rifles and LMGs.
- Widemouth Magwell: 30% Reload Speed, -5% Damage Resistance.
- Silver Bullets: 10% Bullet Damage, 150% Bullet Penetration. When you kill a Mutation, you lose 5 Copper.
- Reload Drills: 20% Reload Speed.
- Sadistic: Gain 5% Weakspot Damage for each Precision Kill in the last 10 seconds.
Support

Back 4 Blood support build: Mom/Doc
Both Mom and Doc's bonuses make them decent support characters. Mom can instantly revive a teammate once per level, has a larger support inventory, and grants the team an extra life. Doc's passives offer some defense, increasing the entire team's trauma damage resistance by 25%, letting her heal each teammate for 25 health on every level, and increasing her overall healing efficiency by 30%.
As both of these Cleaners' perks don't relate to a specific playstyle, you can use any weapon to help your team deal damage.
The cards in this deck focus on strengthening their role as support, but if you're after a hybrid build, you can swap in some cards to buff your weapon of choice.
- Inspiring Sacrifice: Team Effects: When you or a teammate becomes incapacitated, all teammates heal for 25 Health over 20 seconds.
- Support Scavenger: You can sense nearby Support Accessories. More Support Accessories spawn.
- Amped Up: When you exit a starting safe room, your team gains 50 Temporary Health.
- Charitable Soul: Healing a teammate also applies 50% of the effect to you.
- EMT Bag: 40% Healing Efficiency, -20% Stamina Efficiency.
- Antibiotic Ointment: 20% Healing Efficiency.
- Rousing Speech: 225% Revive Speed, Disables: Offensive Accessories, Team Effects: 20% Reduced Incap Trauma.
- Pep Talk: 150% Revive Speed, -5% Damage Resistance.
- Smelling Salts: 100% Revive Speed.
- Combat Medic: 50% Use Speed, Heals teammates for an additional 20 Health when you revive them.
- Poultice: When you use a Medical Accessory, the target heals for an additional 20 Health over 30 seconds.
- Experienced EMT: When you use a Medical Accessory, the target gains 20% Maximum Health until the end of the level.
- Group Therapy: When you use a Medical Accessory, all teammates heal for 5 Health.
- Avenge The Fallen: Team Effects: When you or a teammate becomes incapacitated, all teammates gain 30% Damage, 20% Reload Speed, and Unlimited Ammo for 10 seconds.
- Chemical Courage: Pain Meds you apply also grant 25% damage for 60 seconds.
SMG/assault Rifle

Back 4 Blood SMG/assault rifle build: Hoffman
Choosing to play as Hoffman will help bolster the team's ammo. He has the chance to find ammo whenever he kills a Ridden, has an extra grenade, and increases teammates ammo capacity by 10%. This makes picking either an assault rifle or SMG a pretty solid choice, and using the 'Two is One and One is None' card will allow you to carry two primary weapons.
This build also takes into account Hoffman's extra offensive slot, so I've given him cards that buff explosives, too.
- Two is One and One is None: You can equip a Primary weapon in your Secondary slot. -25% Swap Speed.
- Bomb Squad: 100% Explosive Damage, 35% Explosive Resistance.
- Double Grenade Pouch: 2 additional Offensive Inventory, -10% Damage Dealt.
- Offensive Scavenger: You can sense nearby Offensive Accessories, more Offensive Accessories spawn.
- Admin Reload: When you stow your weapon it reloads, -15% Ammo Capacity.
- Guns Out: 50% Weapon Swap Speed, -5% Damage Resistance.
- Ridden Slayer: 20% Weakspot Damage.
- Reckless Strategy: 30% Weakspot Damage, -5% Damage Resistance.
- Tactical Vest: 30% Rifle Ammo Capacity, 10% Damage with Assault Rifles and LMGs.
- Large Caliber Rounds: 7.5% Bullet Damage, 100% Bullet Penetration, -20% Stamina Efficiency.
- Demolitions Expert: 50% Accessory Damage, -15% Ammo Capacity.
- Ammo Mule: 75% Ammo Capacity, Disables: Support Accessories.
- Grenade Training: 25% Accessory Damage.
- Combat Training: 5% Bullet Damage, 50% Bullet Penetration.
- Ammo Scavenger: You can sense nearby Ammo, more Ammo spawns.


