How to lock down Facebook to protect privacy
Take back control of your online data.

Web browser If installing the Adblock Plus or Ghostery extensions, your browser must meet the minimum requirements.
There are currently more than 2 billion active Facebook users. The platform is a great way to stay in touch with friends and family, especially considering it’s free to use. The fact that virtually everyone has an account, however, means it can be difficult to make sure that the status updates, photos, and messages you share stay only within a limited audience of friends. While Facebook has some very powerful privacy features, these are not all enabled by default. For instance, when you create a new account, your public profile is automatically visible to search engines such as Google. This can include information such as your name, birthday, and home town.
In this guide, you’ll discover how to lock down Facebook to give you back control of your data. You can do this firstly by keeping track of the devices where you’re logged in, and enabling extra security for new sign-in attempts. You can also fine-tune which sections in your timeline are visible to people who aren’t confirmed Facebook contacts, such as your friends list, timeline posts, and places you’ve checked in. You’ll also explore some ways to block annoying ads and tracking cookies on the site itself.
For broader advice, check out our guide to protecting your privacy online.
Disable automatic logins
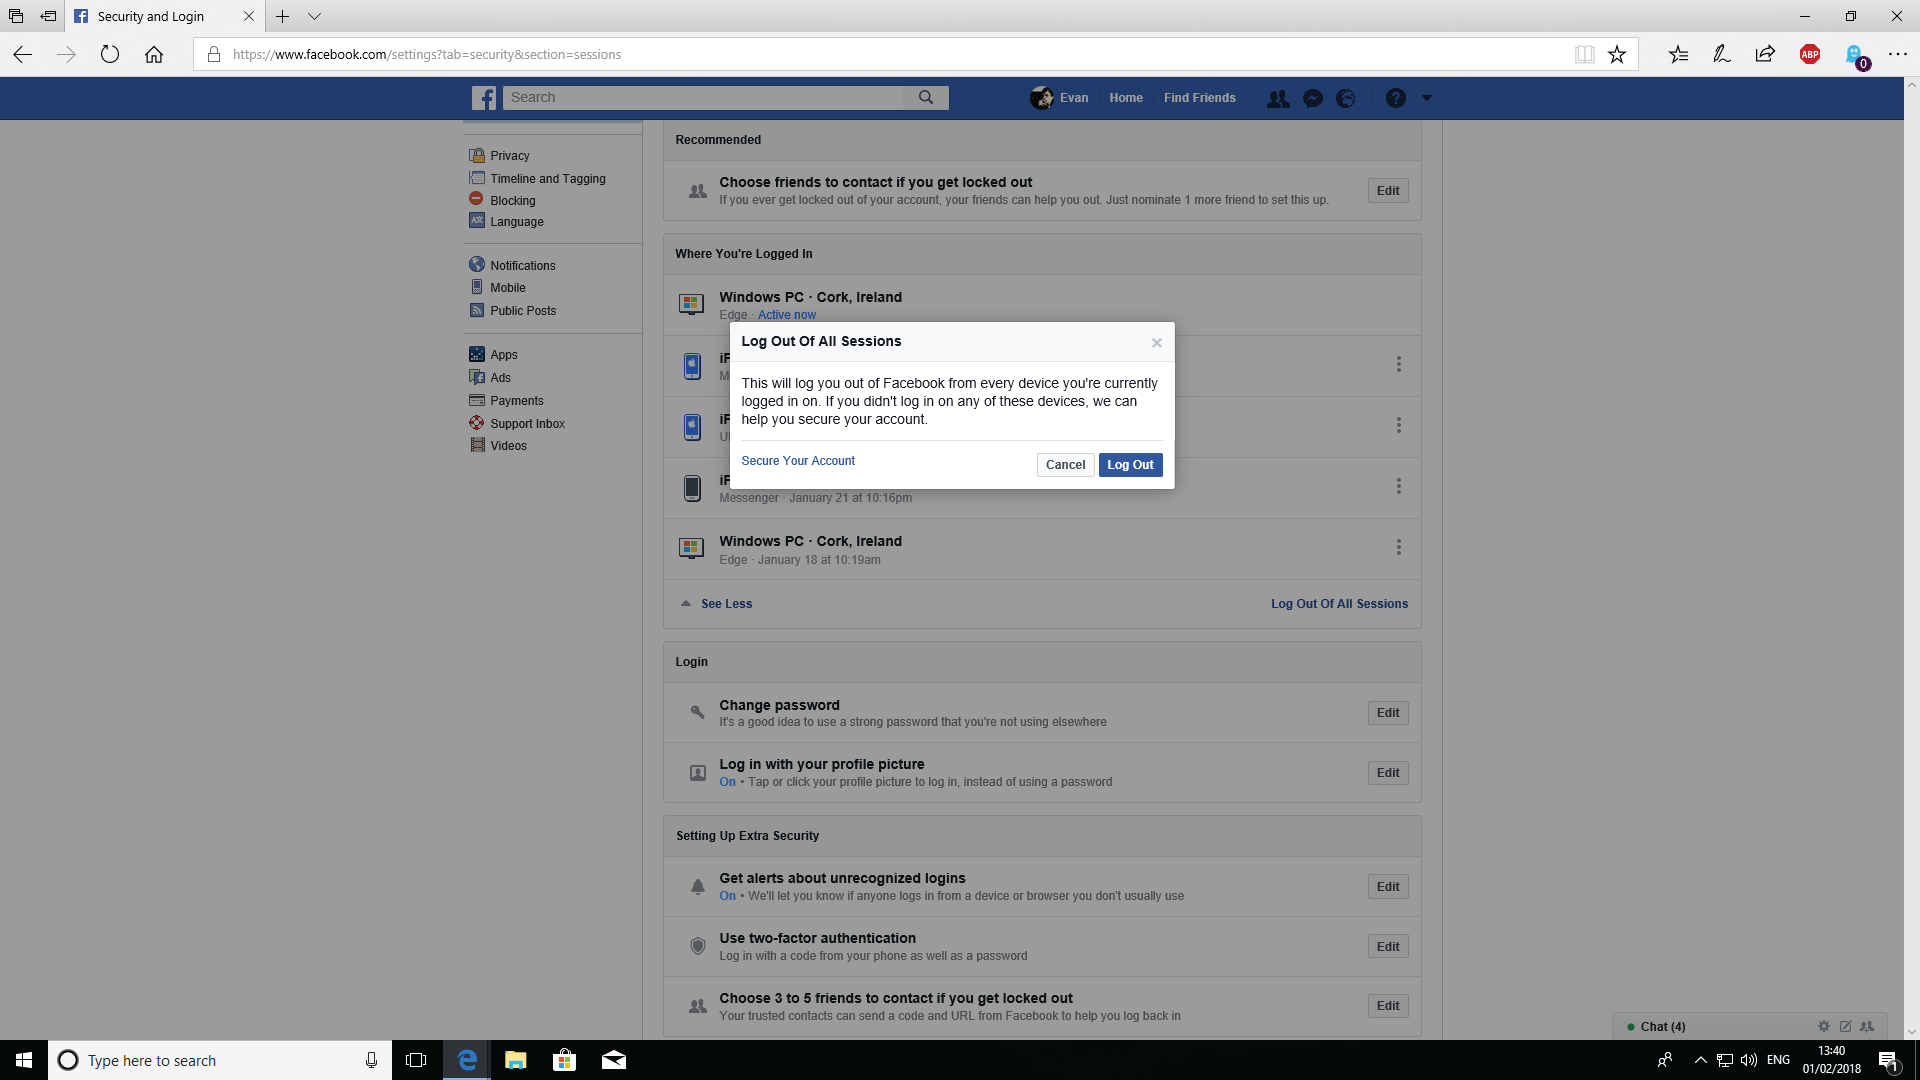
Facebook is designed to be easy to use, so that it remembers logins, and even allows you to access your account by clicking your profile picture. As convenient as this is, if someone were to get to your machine, they could access your account without permission. Click on the options arrow at the top-right of the Facebook screen, and choose “Settings > Security and Login.” From here, you can click “Edit” beside “Log In with your Profile Picture” to turn this feature off (see image above).
While you’re here, click “See More” under “Where you’re logged in,” and choose “Log Out of All Sessions.” Click “Edit” beside “Change Password,” and choose a new, strong one.
Enable two-factor authentication
If you set up two-factor authentication (2FA), each time you log in to Facebook from a new device and/or browser, you need to enter a six-digit code as well as your password. This makes it much harder for hackers to access your account. You can enable this from the “Security and Login” screen you opened in the previous step. Scroll down to “Use two-factor authentication,” and click “Edit.” You need to choose an authentication method—for example, to receive a code via SMS. Click “Enable” once you’ve confirmed your choice.
Change privacy settings
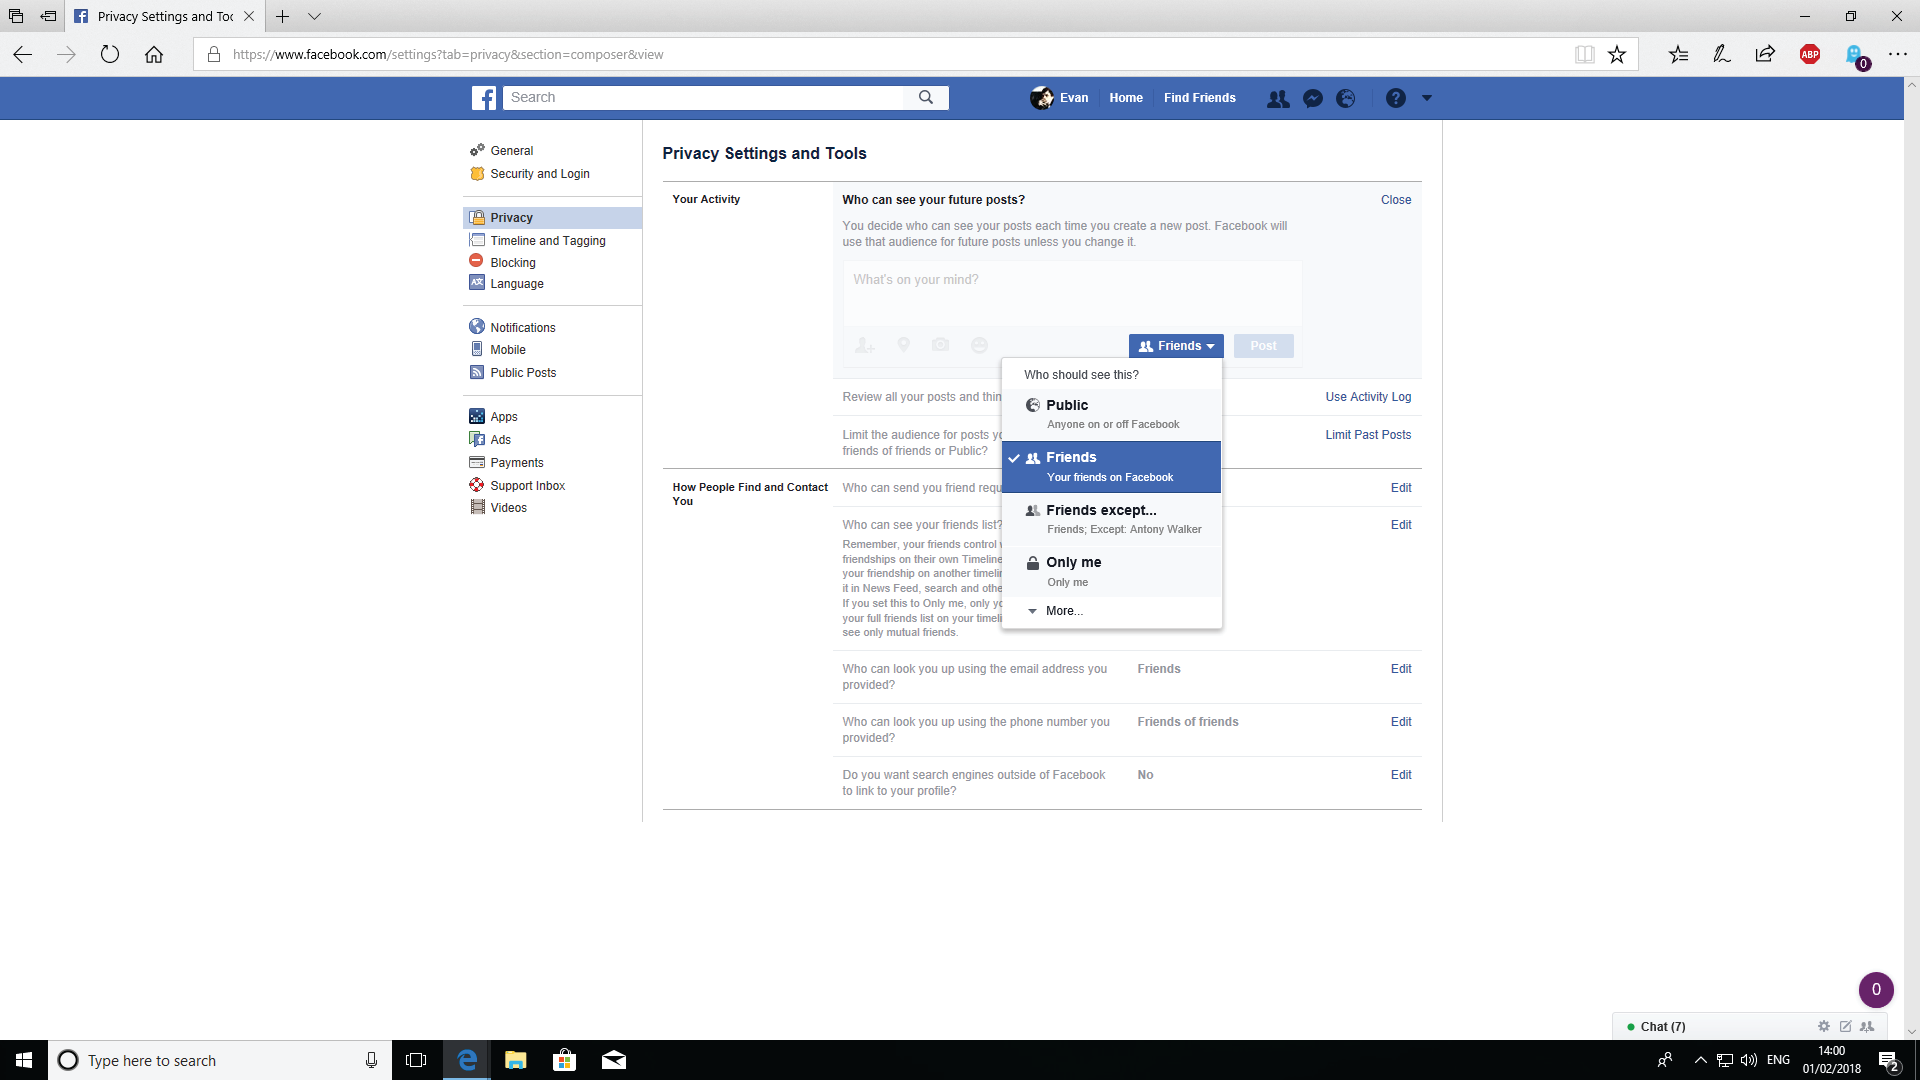
Facebook has a dedicated “Privacy” section, which you can find under “Settings.” Click “Edit” next to “Who can see your future posts” to change to “Friends” only. Make sure to click “Limit Past Posts,” too, to make sure only confirmed friends can see posts on your timeline. Next, click “Edit” next to “Who can see your friends list?” and change to “Only Me.” Click “Edit” on the next two options to make sure that only your confirmed friends can search for you using your registered email address and phone number (see image above). Finally, click “Edit” next to “Do you want search engines outside Facebook to link to your profile?” and uncheck the box. Other Facebook users can still find you using the search bar.
Keep up to date with the most important stories and the best deals, as picked by the PC Gamer team.
Timeline and tagging
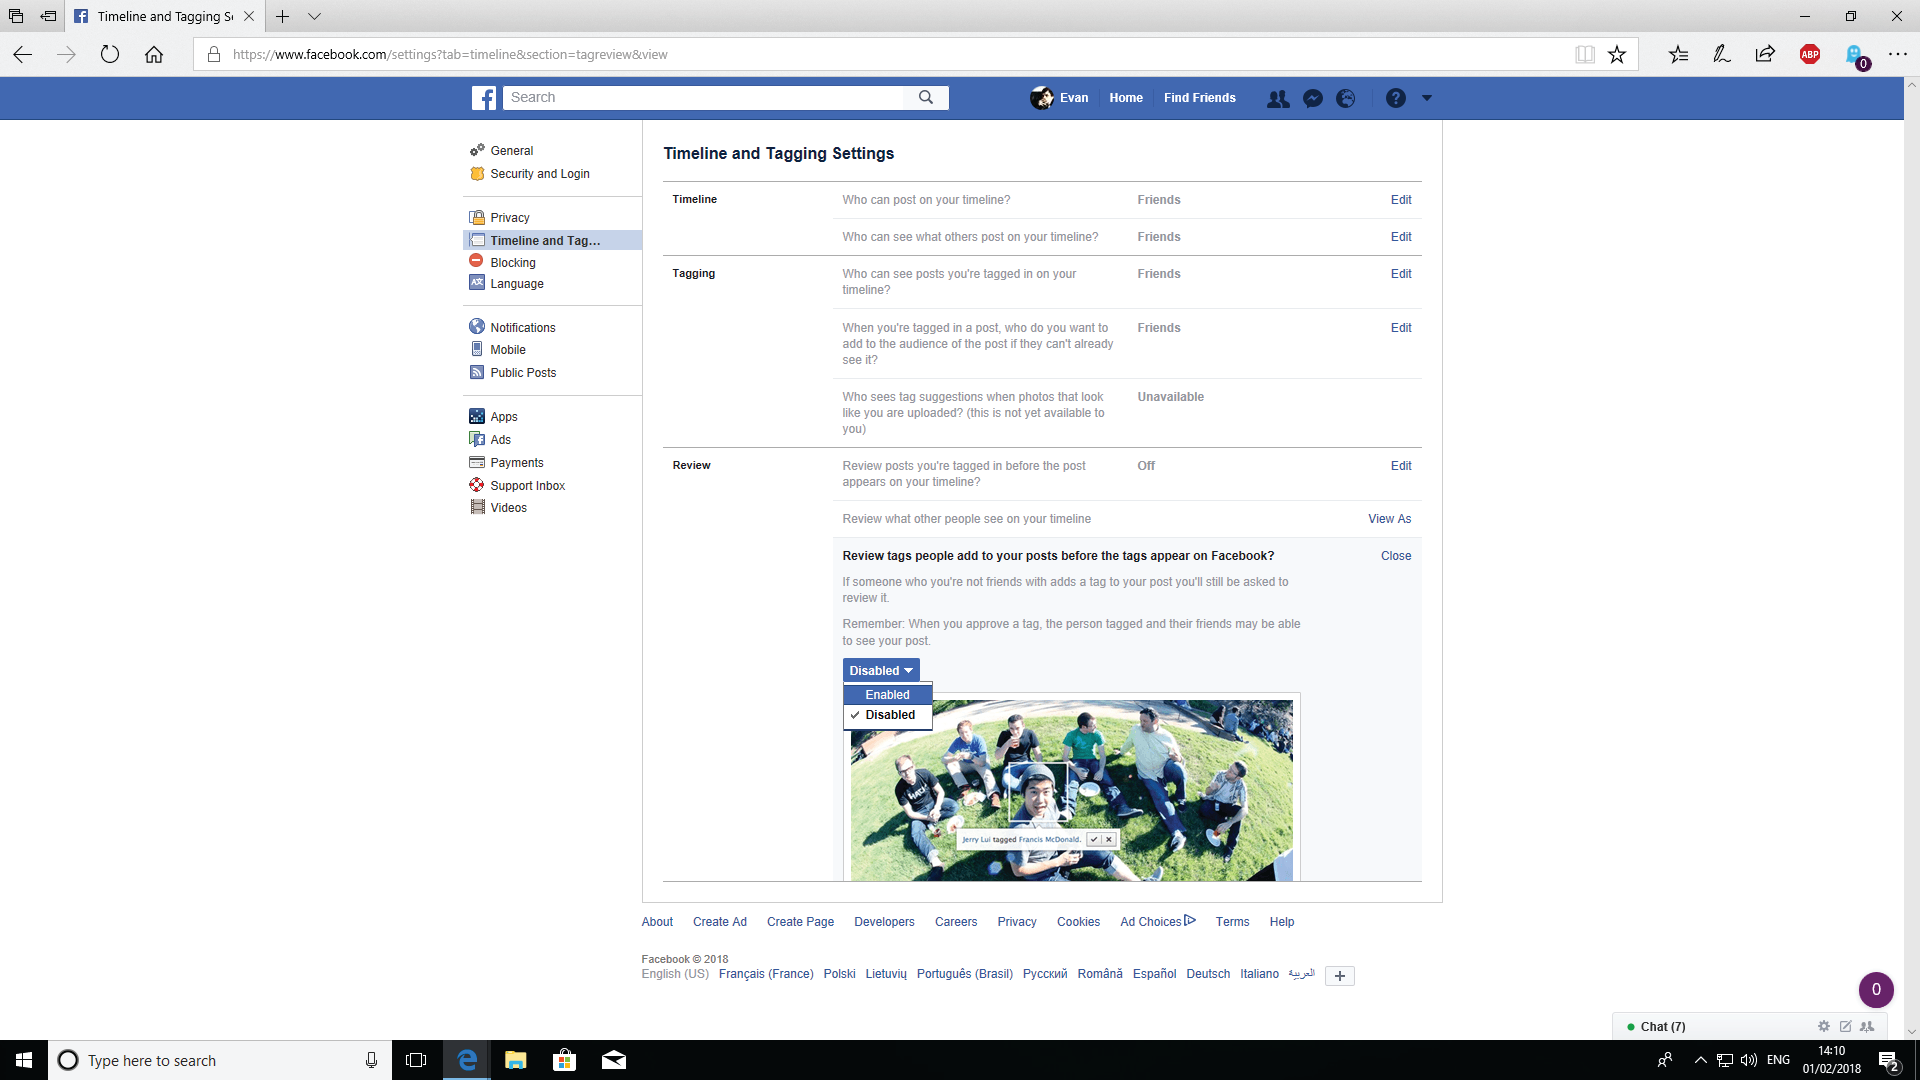
Your “Timeline and Tagging” settings can also be found in “Settings” immediately below “Privacy.” From here, you can control both who can post in your timeline and who can see them and any other posts you’re tagged in (image above). Work through both the “Timeline” and “Tagging” sections by clicking “Edit” and changing the settings to “Friends” only. If you don’t access Facebook often, click “Edit” next to “Review posts you’re tagged in before the post appears on your timeline?” and set to “Enabled.” You can do the same for tags people add to your posts, too, if you wish.
Breaking and blocking
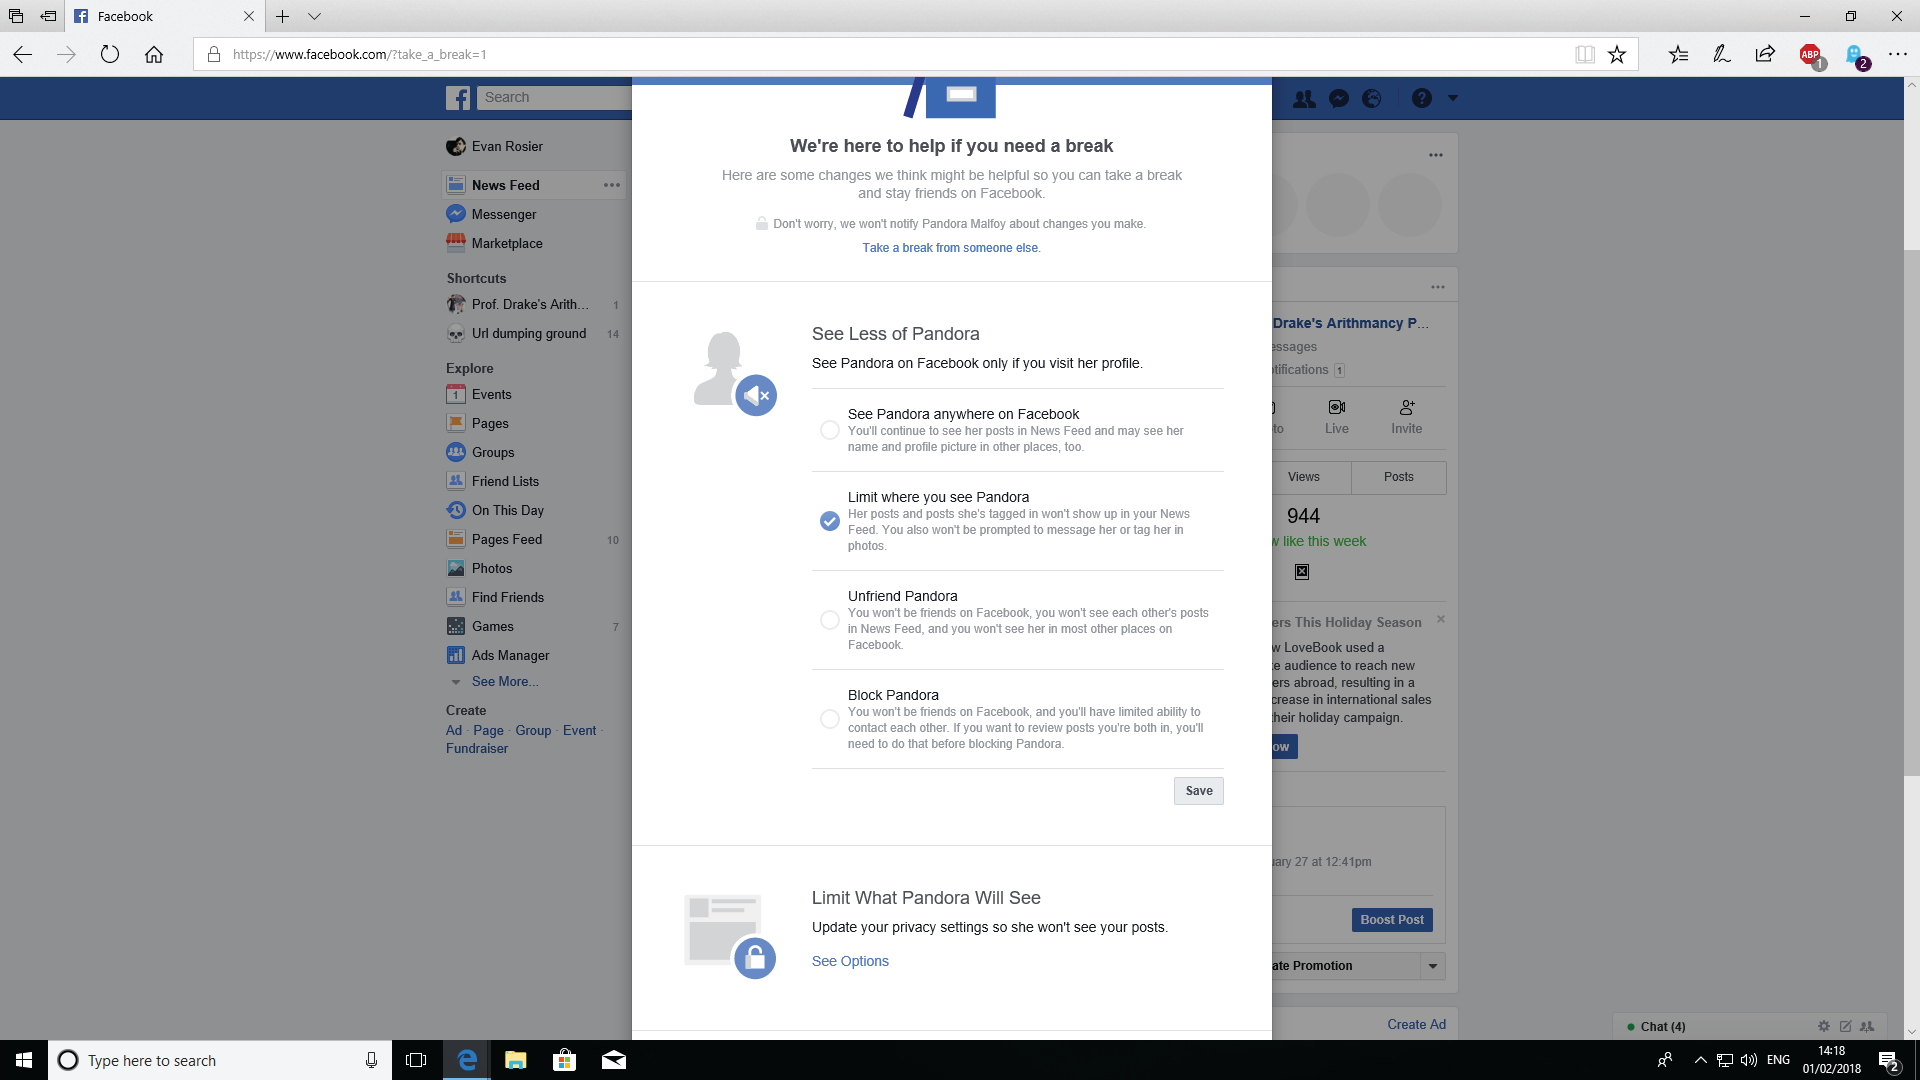
If someone is regularly posting content you don’t enjoy, Facebook enables you to “take a break,” unfriend them, or block them. Click this link to get started (see image above). Enter the person’s name to see the options available to you. Click “More options” under “See less of X” to explore further. If you want to remain friends with them, choose “Limit Posts” so that your friend’s posts and any they’re tagged in won’t appear in your news feed. If you choose to “unfriend” a person, they can still see Public posts on your timeline, and contact you via Messenger. If you choose to “block” another user, they can neither view your timeline nor message you.
Manage About page
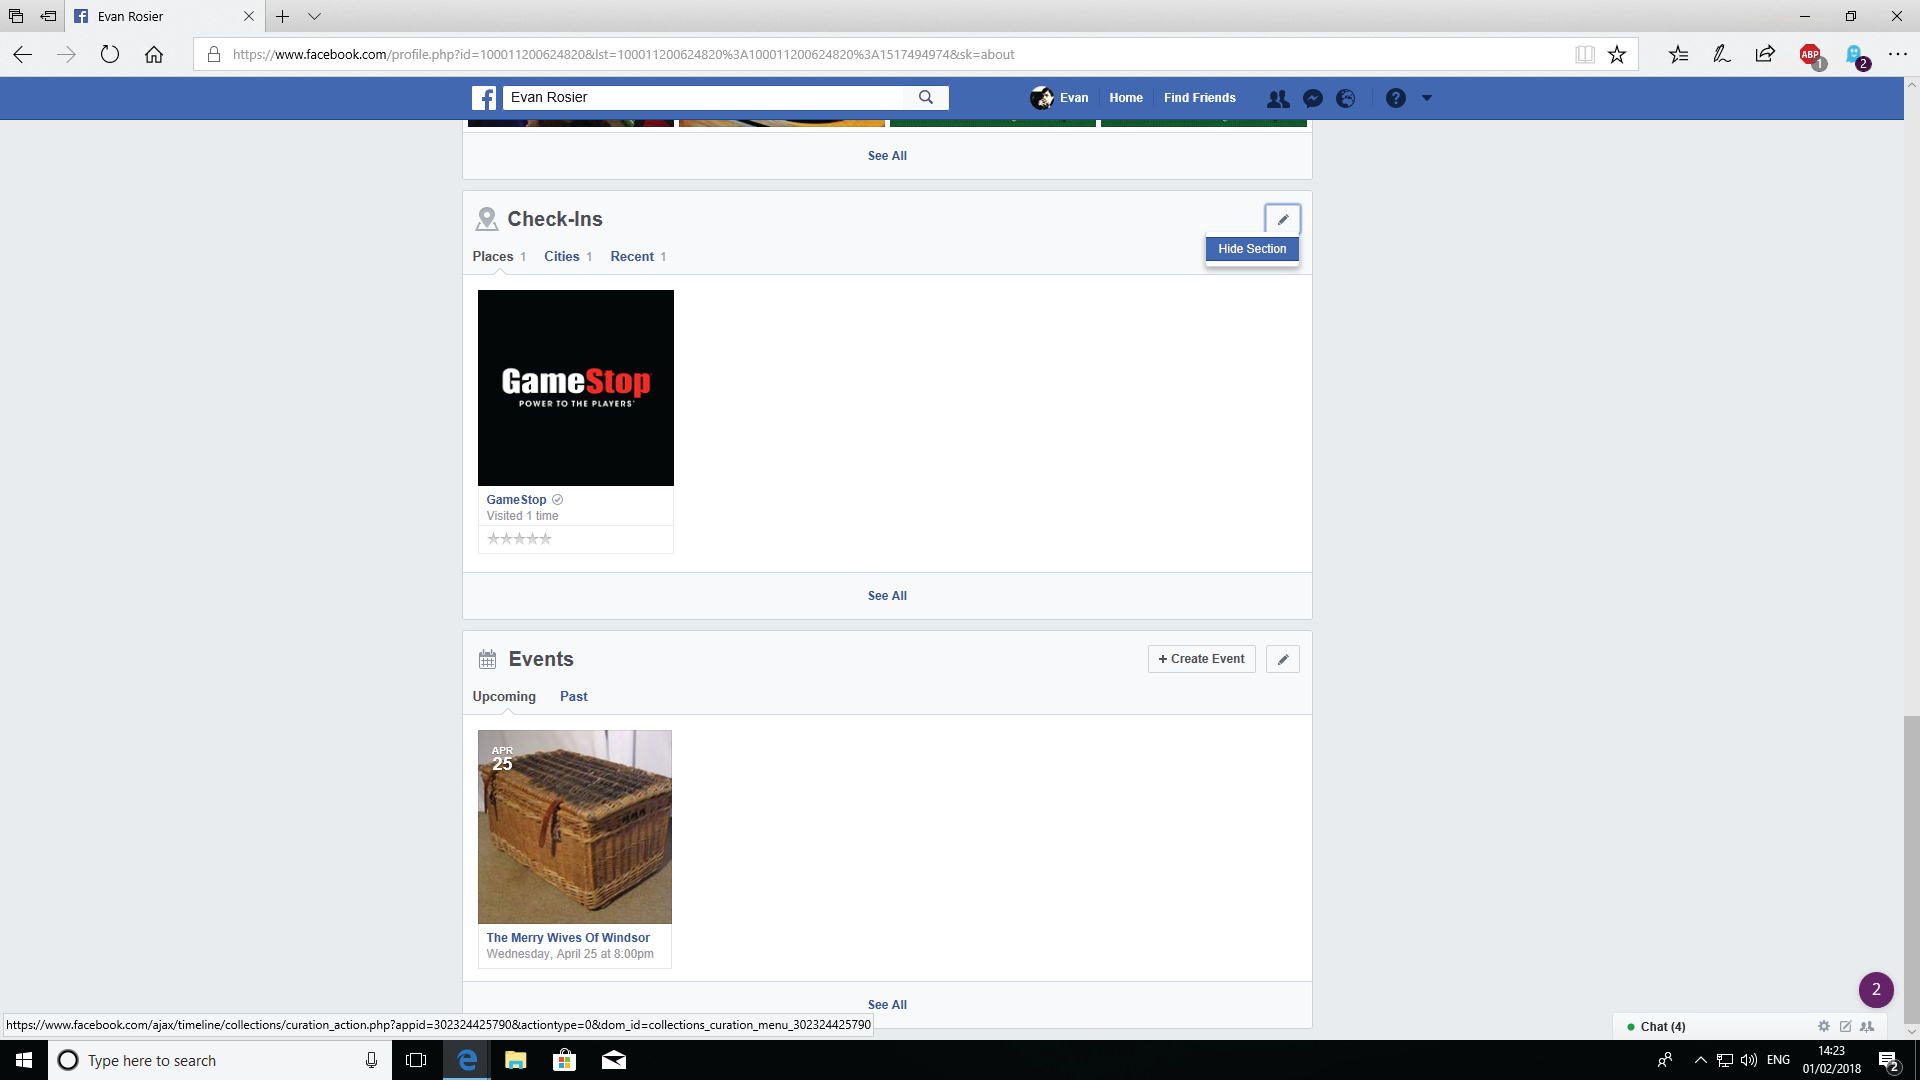
Your public timeline contains a large amount of personal information by default. Click “About” on your timeline to manage this. Work through the sections on the left-hand side. Click “Edit” next to each item to ensure that these are visible only to confirmed “Friends.” Scroll further down the page to view sections such as “Check In” and “Events.” These are visible to the public by default (see above image). Click the “Edit” button at the top-right and choose “Hide Section” to remove this from your timeline. This won’t prevent you from posting check-ins and attending Facebook events in your own news feed.
Block ads and trackers
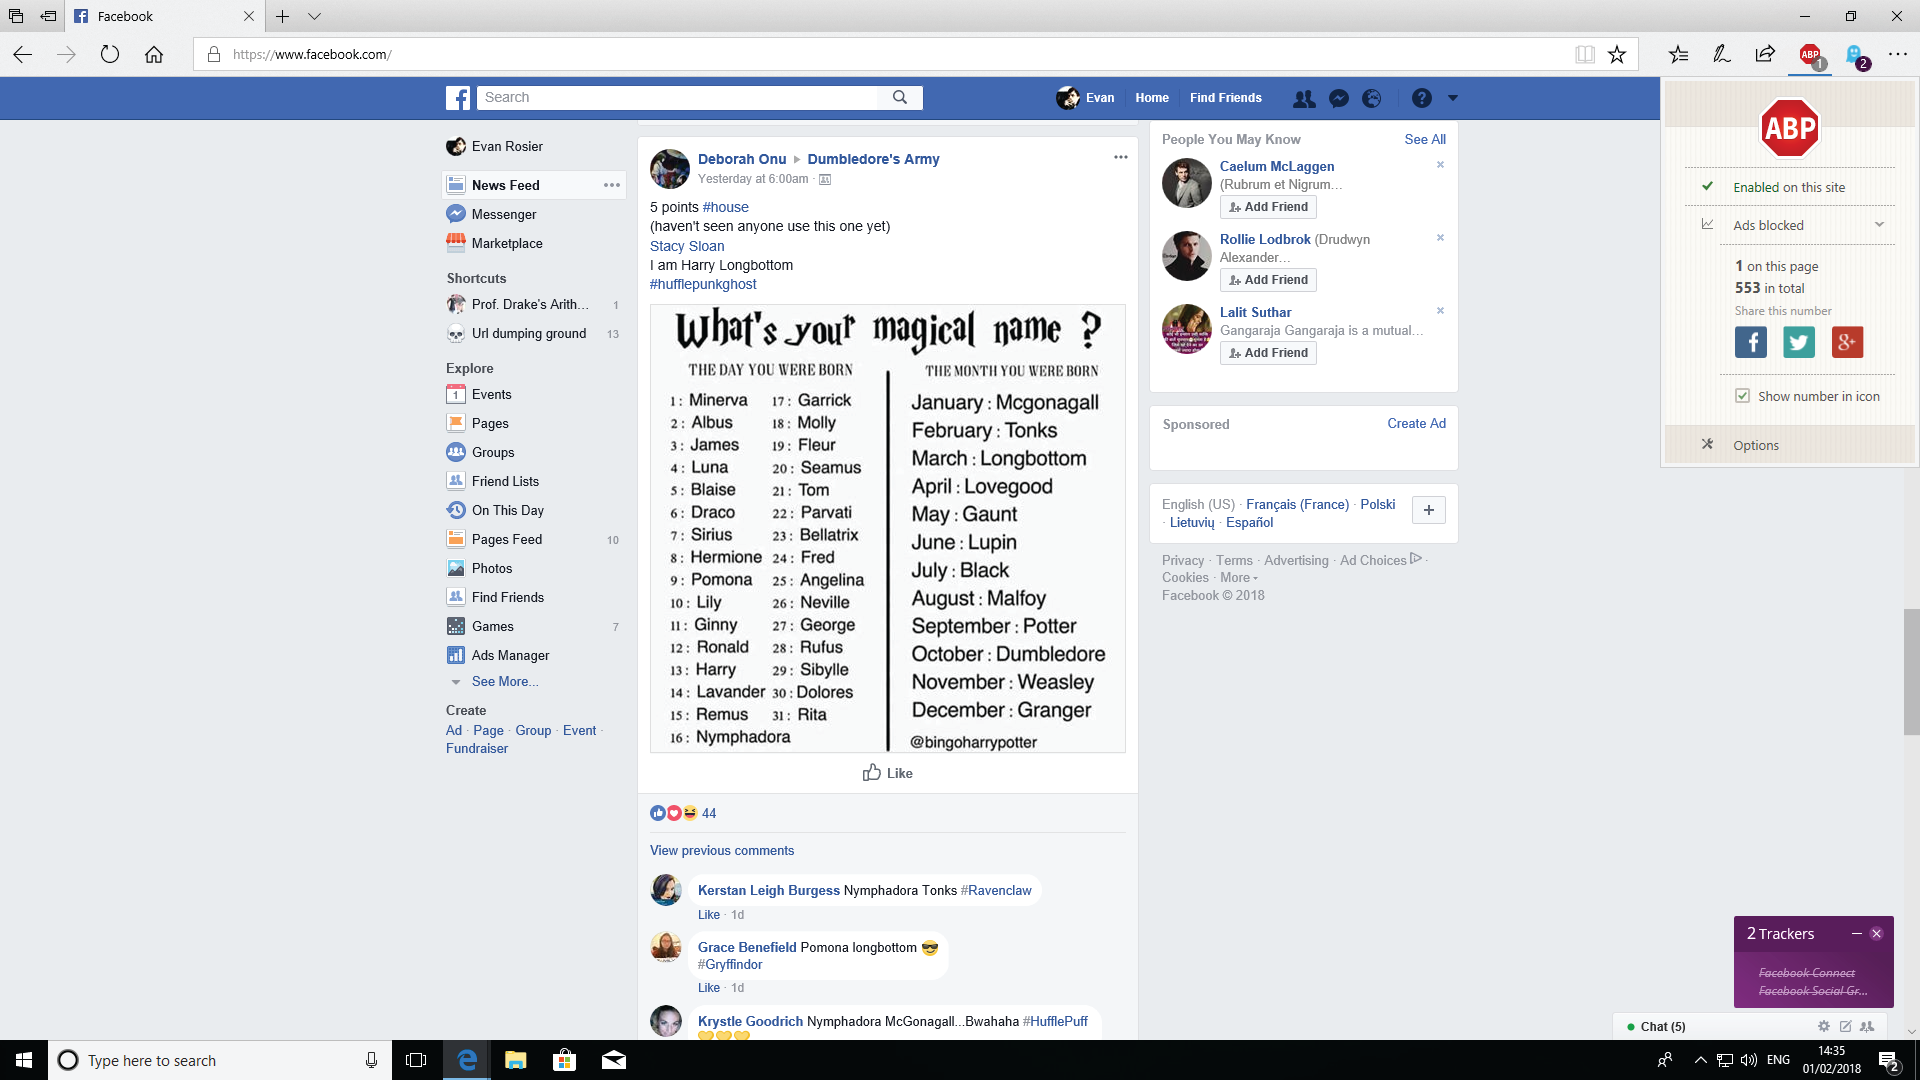
Although Facebook does its best to make sure advertisements meet community standards, they can be very distracting, and if you accidentally click on them, they may take you to a site containing harmful code. You can prevent this by installing an ad-blocking browser extension, such Adblock Plus. Facebook also uses “tracking cookies” to gather information about your browsing habits in order to show you targeted content. You can block most types of cookies by installing the Ghostery browser extension. Both of these extensions are available for Microsoft Edge, Chrome, Opera, and Firefox. Click on the icon for each extension at any time to see which ads and/or cookies have been blocked (image above).
Manage your lists
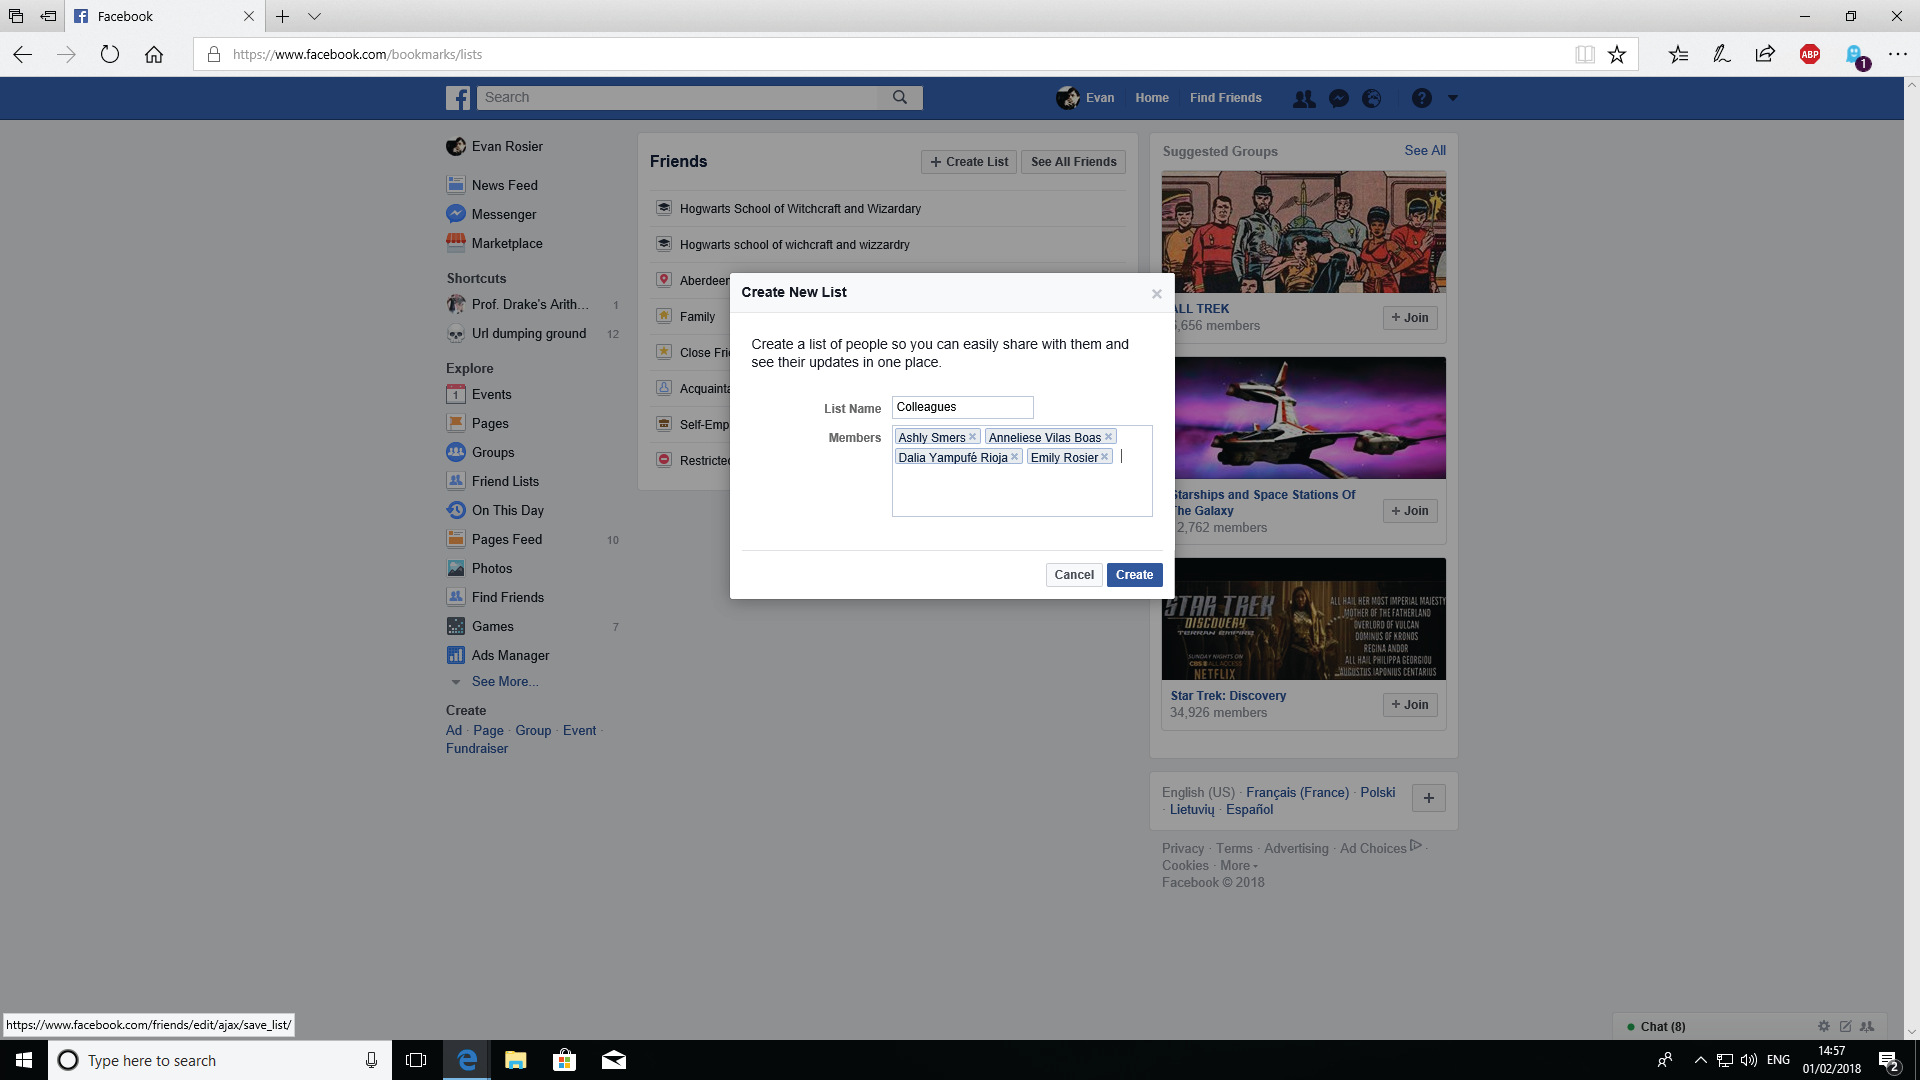
When you post an item to your timeline that isn’t visible to the public, you can control who sees it by using lists. Click on “Friends List” on the left to get started, then on the “Create List” button. From here, you can create a new group—”Colleagues,” for example—and add members to it. Click “Save” when you’re done. In future, when creating posts, click the “Audience selector” button, then “More > See All.” You can now select a “Custom” view for your post, such as to show to all friends except those in your “Colleagues” list. Click the “Friends” tab in your timeline and hover over “Friends” next to the name of a person to add a person to a list.
Facebook has several pre-configured lists for you: “Acquaintances” is self-explanatory; use “Restricted” to make sure friends only see your public posts or those in which you’ve specifically tagged them. There’s also a “Close Friends” list. If you add someone here, you’ll receive a notification every time they post. Facebook also tries to generate “smart” lists for you automatically, for family members or people who share your job or home town.
This article was originally published in Maximum PC issue 151. For more quality articles about all things PC hardware, you can subscribe to Maximum PC now.
