10 Sweet GIMP Photo Editing Tricks to Wean You Off Photoshop
Convert Photos to Neon
There are a billion and one tutorials on the Net that show you how to convert text into neon in GIMP, but not many tell you how to convert an image. In fact, we only found one , and it was missing some critical steps. Here's how you can create a neon effect from any photo without pulling your hair out.
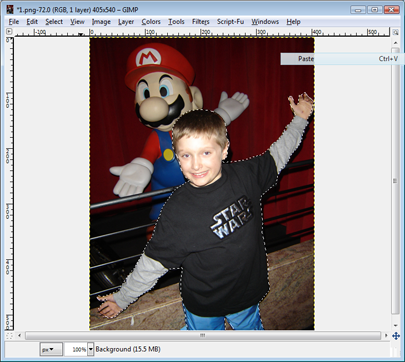
This works best if you pick out an image where the person you want to crop isn't just standing upright. Once you've found a suitable candidate, zoom in, select the Paths Tool, and create an outline around the subject. Don't worry about making it perfect, we just need a general outline. Click on Edit>From Path to activate the selection, then copy it to your clipboard.
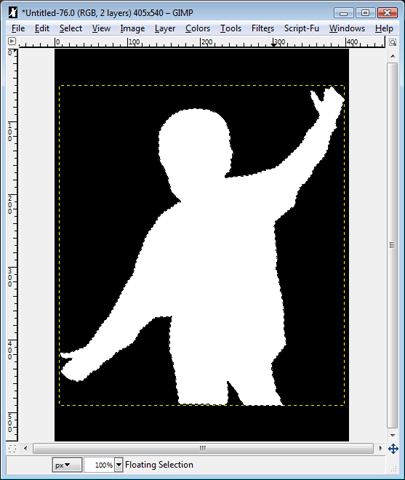
Open a new image with a black background, then select Edit>Paste as>New Layer. Now click on Layer>Transparency>Alpha to Selection. If it isn't already, change the background or foreground to white then click Edit>Fill with BG Color (or Fill with FG Color, whichever one is white). You should now be left with a black background and a white image of your selection.
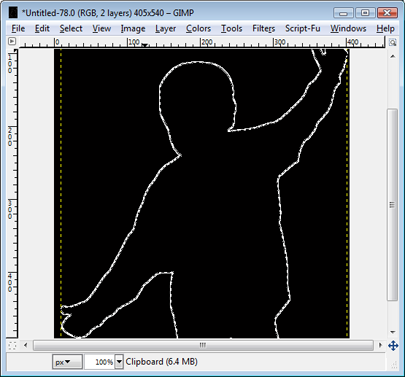
Now click on Select>Grow and choose the value 1 where it says 'Grow selection by.' Click OK to get rid of the dialog box, then hit the DEL key. Next, navigate to Edit>Stroke selection (make sure white is selected as your foreground). Chose 2.0 for the line width and make sure the Solid color radio button is selected, and then click on Stroke.
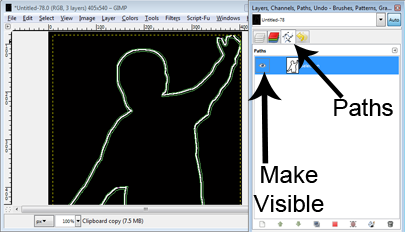
Next, click on Layer>Transparency>Alpha to Selection, then duplicate the layer (Layer>Duplicate Layer). Now click on Select>To Path, then Select>None. Duplicate the layer again, then go to Filter>Blur>Gaussian Blur and input 10 for both the horizontal and vertical values.
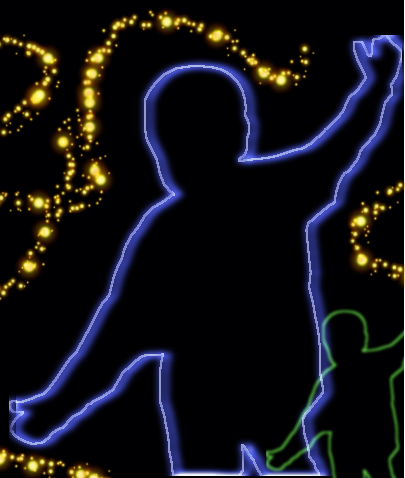
It's starting to look like a neon outline, but we need to give it some color. Click on Colors>Colorize and adjust the Hue left or right to change the color. For an added effect, Duplicate the layer, change the Mode to Addition, change the Hue just as you did before, and move the layer slightly off of the original. Rinse and repeat as many times as you want, and feel free to add some flair with the different brushes.
Keep up to date with the most important stories and the best deals, as picked by the PC Gamer team.

