10 Sweet GIMP Photo Editing Tricks to Wean You Off Photoshop
Wield a Lightsaber Like Luke Skywalker
In a perfect world, we'd all have lightsabers and settle our disputes like they do in Star Wars. While technology is probably still a few years off from perfecting the lightsaber, we can at least fake it in our photos, and all it takes is a little bit of editing..
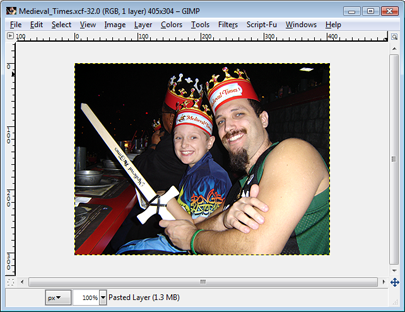
It's helpful if you start off with a picture that already has a sword, stick, or other similar object in it, though this isn't required. For our example, we're going to alter a snapshot from Medieval Times.
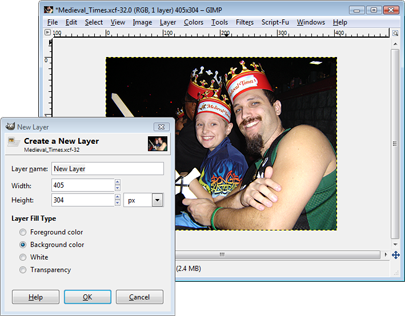
After you've selected and opened the photo you want to modify, create a new layer with a black background. To do this, select Layer>New Layer, or press Shift+CTRL+N. Where it says Layer Fill Type, select Foreground or Background color, depending on which one you have set to black.
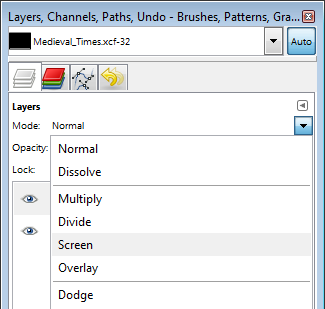
Highlight the new layer in the Layer Console window and change the Mode to Screen, as shown above. Once you do this, you should be able to see your original photo. This begs the question, 'why not just create a transparent layer?' We tried doing that, but were unable to change the color of the lightsaber (which we'll get to in a bit). For an in-depth explanation on the different layer modes, see here .
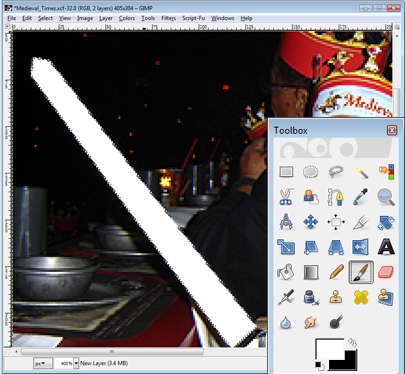
With the black background layer still highlighted, click on the Paths Tool in the Toolbox window (second row, third icon). Use this tool to create a selection around the object you want to transform into a lightsaber (you may find it helpful to zoom in on your image while doing this). In our example, we're going to outline the sword's wooden blade.
Once youv'e made an outline, navigate to Select>From Path, or hold Shift+V to activate your selection, then use the Bucket Fill Tool or Paintbrush to completely fill in the selection with white. When you're finished, deselect the object by going to Select>None.
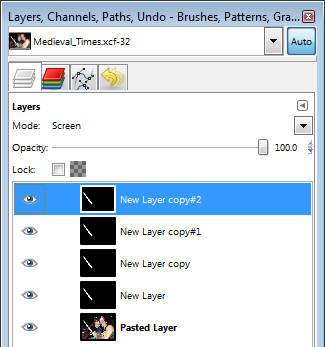
Next, create three duplicate layers (Layer>Duplicate). You should now have five layers total - your original picture plus four black layers.
Keep up to date with the most important stories and the best deals, as picked by the PC Gamer team.
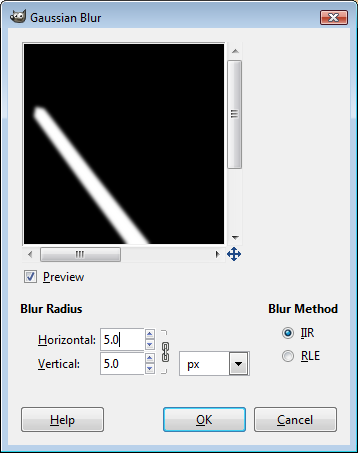
Highlight the top layer, then navigate to Filters>Blur>Gaussian Blur. Change both the horizontal and vertical values to 5. When you're finished, repeat the same step for the second layer, but change the values to 10. Repeat again for the third layer and change the values to 20, then one more time on the fourth layer and change the values to 40.
By this point, your object should look like a lightsaber, but we're not finished yet. Right-click the top layer, select Merge Down, then change the Mode to Screen. Repeat this step two more times so that all you're left with is the original picture (bottom layer) and a black background layer with a white lightsaber (top layer).
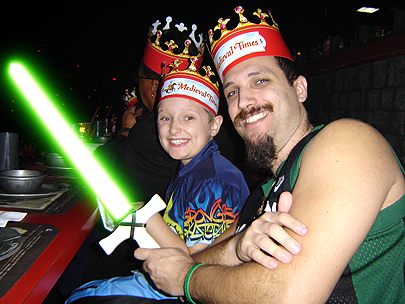
At this point, you're ready to customize your lightsaber. With the top layer highlighted, go to Colors>Color Balance and adjust the sliders until you're happy with the result. For an added effect, click the Shadows radio button and adjust the sliders some more.

