How-To: Recover from a Soda-Spill Disaster
There are few moments in life quite as sickening as realizing that you’ve spilled a beverage on one of your gadgets. The feeling can range from mild infuriation (spilling a Bud Light on your PlayStation controller) to near-coronary levels (knocking over a Mountain Dew: Code Red onto your brand-new laptop). Either way, it’s never something you want to go through. Because of that, we’ve put together a simple disaster plan for dealing with beverage-soiled electronics. We hope you never have to use it, but if you do, you’ll be glad you read it.
1. Act Fast
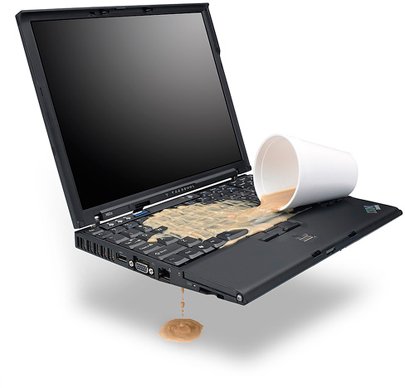
Yeah, we know. You’re pissed. You just splashed merlot on your expensive gaming laptop. And while we do feel your pain, there’s no time to sit around and pout. Every second you waste is another second that whatever you’ve spilled gets to dry into a sticky, short-circuiting, corrosive mess. So act fast.
Start by unplugging your gadget from the wall, if it’s plugged in. If it’s a laptop, remove the battery. If it’s a keyboard, disconnect it from the PC. Liquid will create short-circuits inside your electronics, so getting it unplugged quickly will improve the chance of recovering your gadget intact.
2. Assess the Damage
Now that you’ve unplugged your device, take a second to assess the location and quantity of the spill. If it’s just a few drops on a keyboard, you might be able to get away with prying off the surrounding keys (image A) and wiping down the affected area. For this, we recommend alcohol swabs, which break up stains and dry very quickly. You can get enough to last for years for about $4 in the first-aid section of a drug store, so get some now, before you need them.
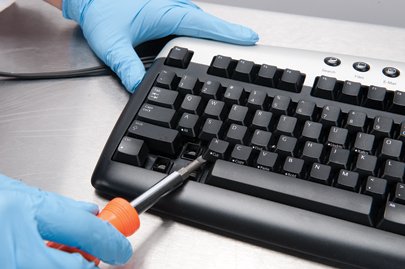
(Image A)
3. Take it Apart
You can’t clean a bespoiled device without first taking it apart. If the thought of opening up your expensive toys scares you, that’s understandable, but just remember that any chance is better than no chance at all, which is what you’ve got if you let that spill just sit there. Of course, if you don’t know which end of a screwdriver goes where, it might be worth calling a more electronically handy friend to help you out.
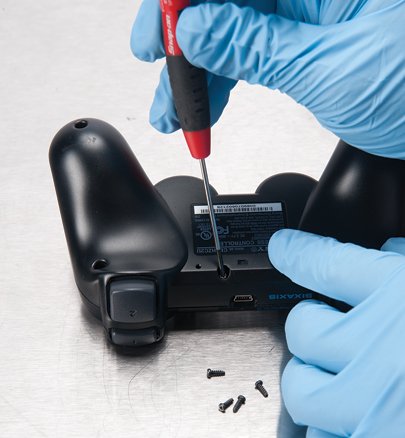
(Image B)
- You may need to use some force to pry apart your device, but be careful, especially with circuit boards. If something seems to be taking more force to pull apart than it should, check again for hidden screws.
- Be careful to save all your screws as you go. Don’t just throw them all into a coffee mug, either, because most gadgets have several different-size screws in them, and you’ll need to remember which goes where when you put everything back together.
- If something is particularly complicated, and you’re afraid you won’t be able to put it back when you’re done, grab a digital camera and snap some photos before you start taking stuff apart.
- Your ultimate goal is to expose any circuit boards or other electronics that might have gotten spilled on. If you’re taking apart a laptop, this means you’ll need to isolate the motherboard and any daughterboards.
4. Wash It Off
Once you’ve exposed the circuitry in your device, you’ll have to clean off the stain. If you can see that the stain is contained in a certain part of the board, you can use alcohol swabs, as described above, to clean it off (images C and D). If an entire circuit board is soiled, you’ll need to resort to more drastic measures: completely disconnect it from the rest of the gadget and run it under soapy water.
Keep up to date with the most important stories and the best deals, as picked by the PC Gamer team.
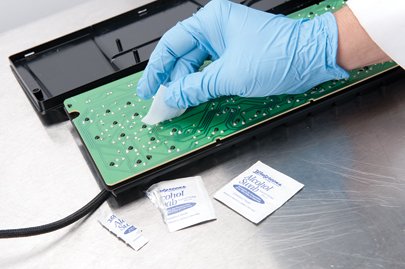
(Image C)
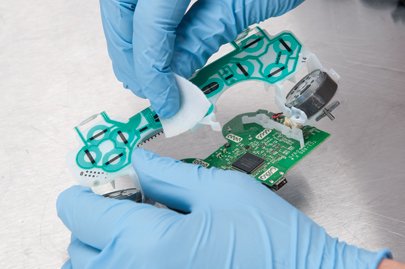
(Image D)
