Building a next-level liquid cooled PC with Ryzen
Follow our guide to building your own mini-ITX piece of computational perfection.
Every time we hit up the drawing board for a build like this, there’s a sense of apprehension. The degree of organization and luck required is Herculean, and even with all our experience, it never comes easy.
From planning the spec list, to requesting hardware, arranging photography, and more, it can take months for everything to come together, only for a new product to launch, or a shipping deadline to fall through, and scupper the entire thing.
Unlike our Dream Machines, these one-off specials are not about absolute power and pushing everything to the bleeding edge of technology, but about crafting a PC that’s perfect for the individual it’s designed for.
Let’s be realistic: You can probably get the same performance for half the cost. But you rarely find someone who’s invested this much time and effort into a rig and regrets it. It’s a real labor of love.
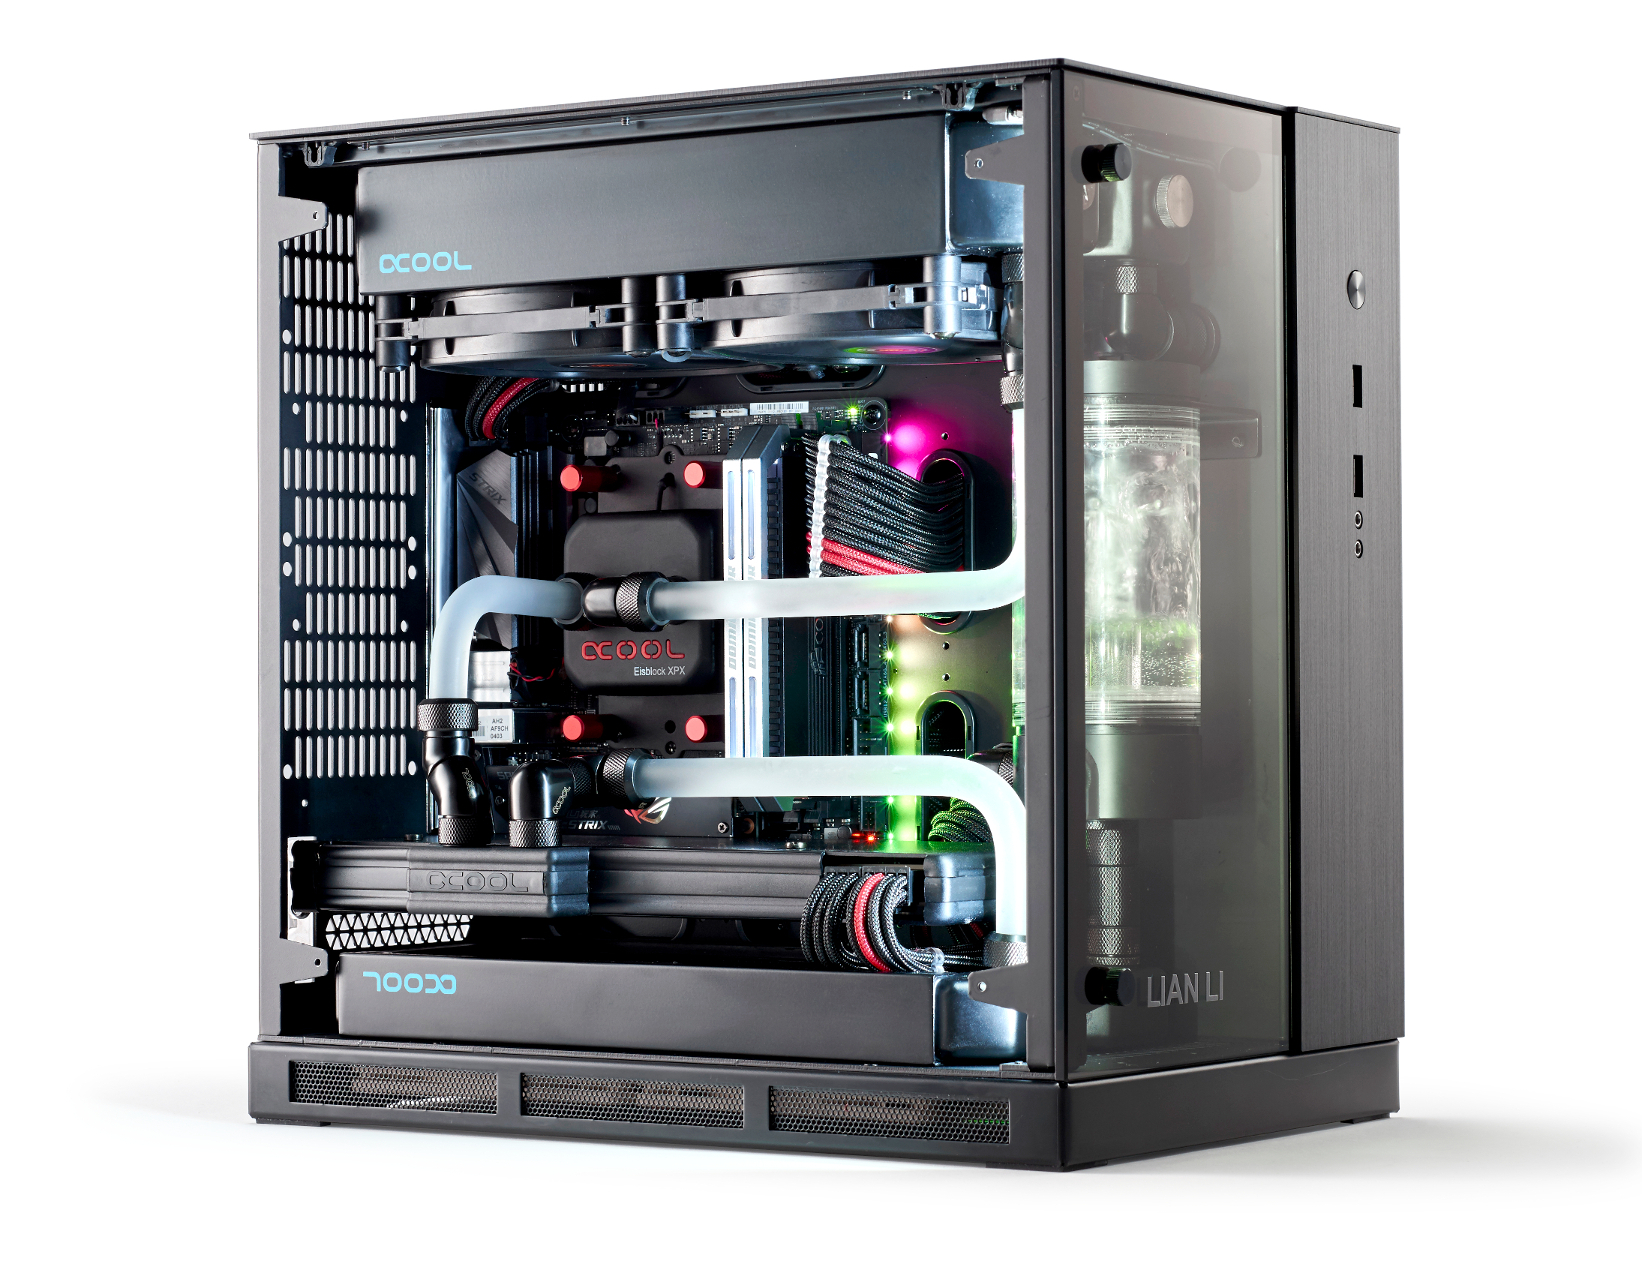
This time around, we’ll be crafting a super-small liquid-cooled ITX Ryzen 2 rig, packing some incredible hardware into as small a chassis as possible. On top of that, we’ll be divulging all our tips and tricks to make the micro manageable, giving up our secrets on exactly which manufacturers and products we chose to make our system build as easy as can be, and hopefully inspiring you to create your own slice of silicon perfection, on any budget, in any chassis.
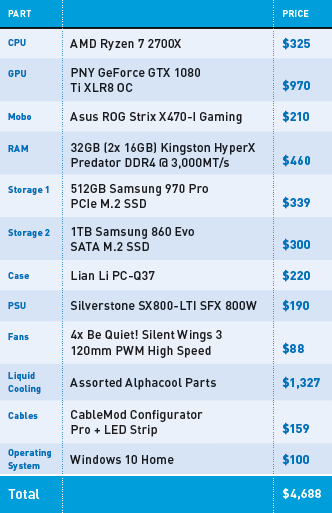
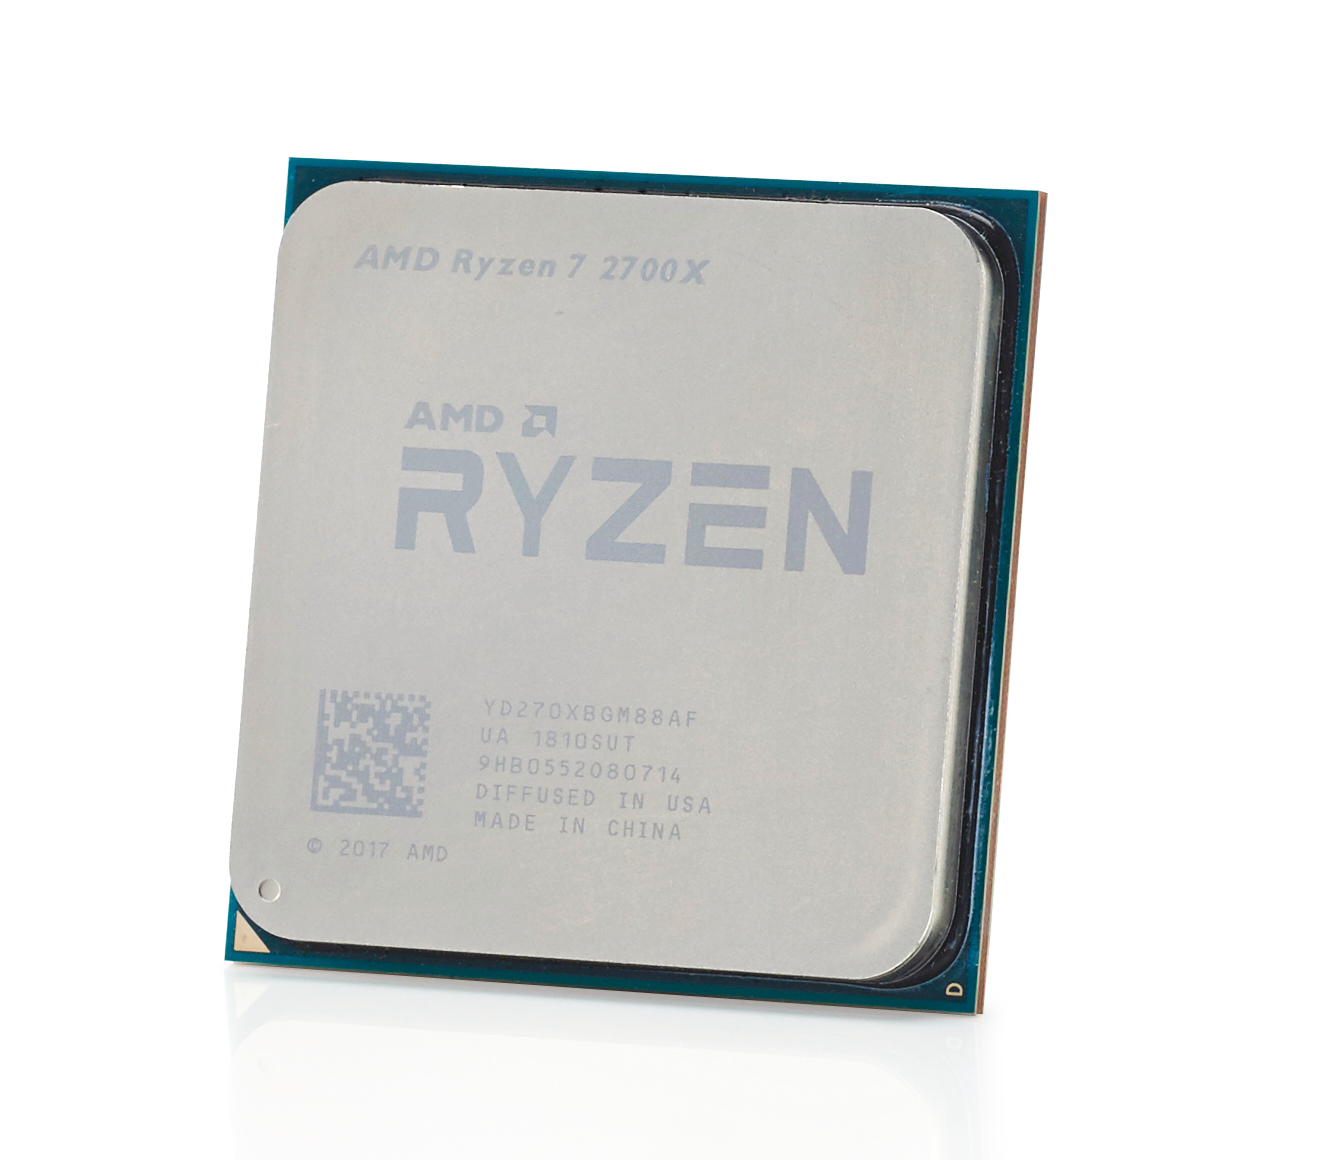
CPU: AMD Ryzen 7 2700X ($325)
Our processor of choice and the linchpin holding everything else in our rig together is AMD’s Ryzen 7 2700X. It’s no secret that we’re fans of AMD’s Ryzen architecture here at Maximum PC, both for reintroducing competition to the industry and for bringing more cores to the mainstream platform. That winning combination of strong single-core grunt along with multicore prowess on a mainstream platform is exceedingly appealing.
AMD’s Ryzen refresh has been divisive—however, gaining a flat 10–15 percent performance increase, alongside improved memory latency, and some beefier overclocking headroom makes it a no-brainer for this build. Coffee Lake’s Core i7- 8700K was certainly tempting, but without delidding it, or running a monoblock to cover the chipsets (severely limiting our choice of motherboards), it wouldn’t really be worth the extra single-core grunt that we’d achieve from it.
Keep up to date with the most important stories and the best deals, as picked by the PC Gamer team.
Choosing your processor is one of those decisions that really locks your build down. It’s that platform-deciding choice that will dictate what memory you get, which motherboard you choose, and more, so making sure you’re happy with that whole package is paramount when planning any system.
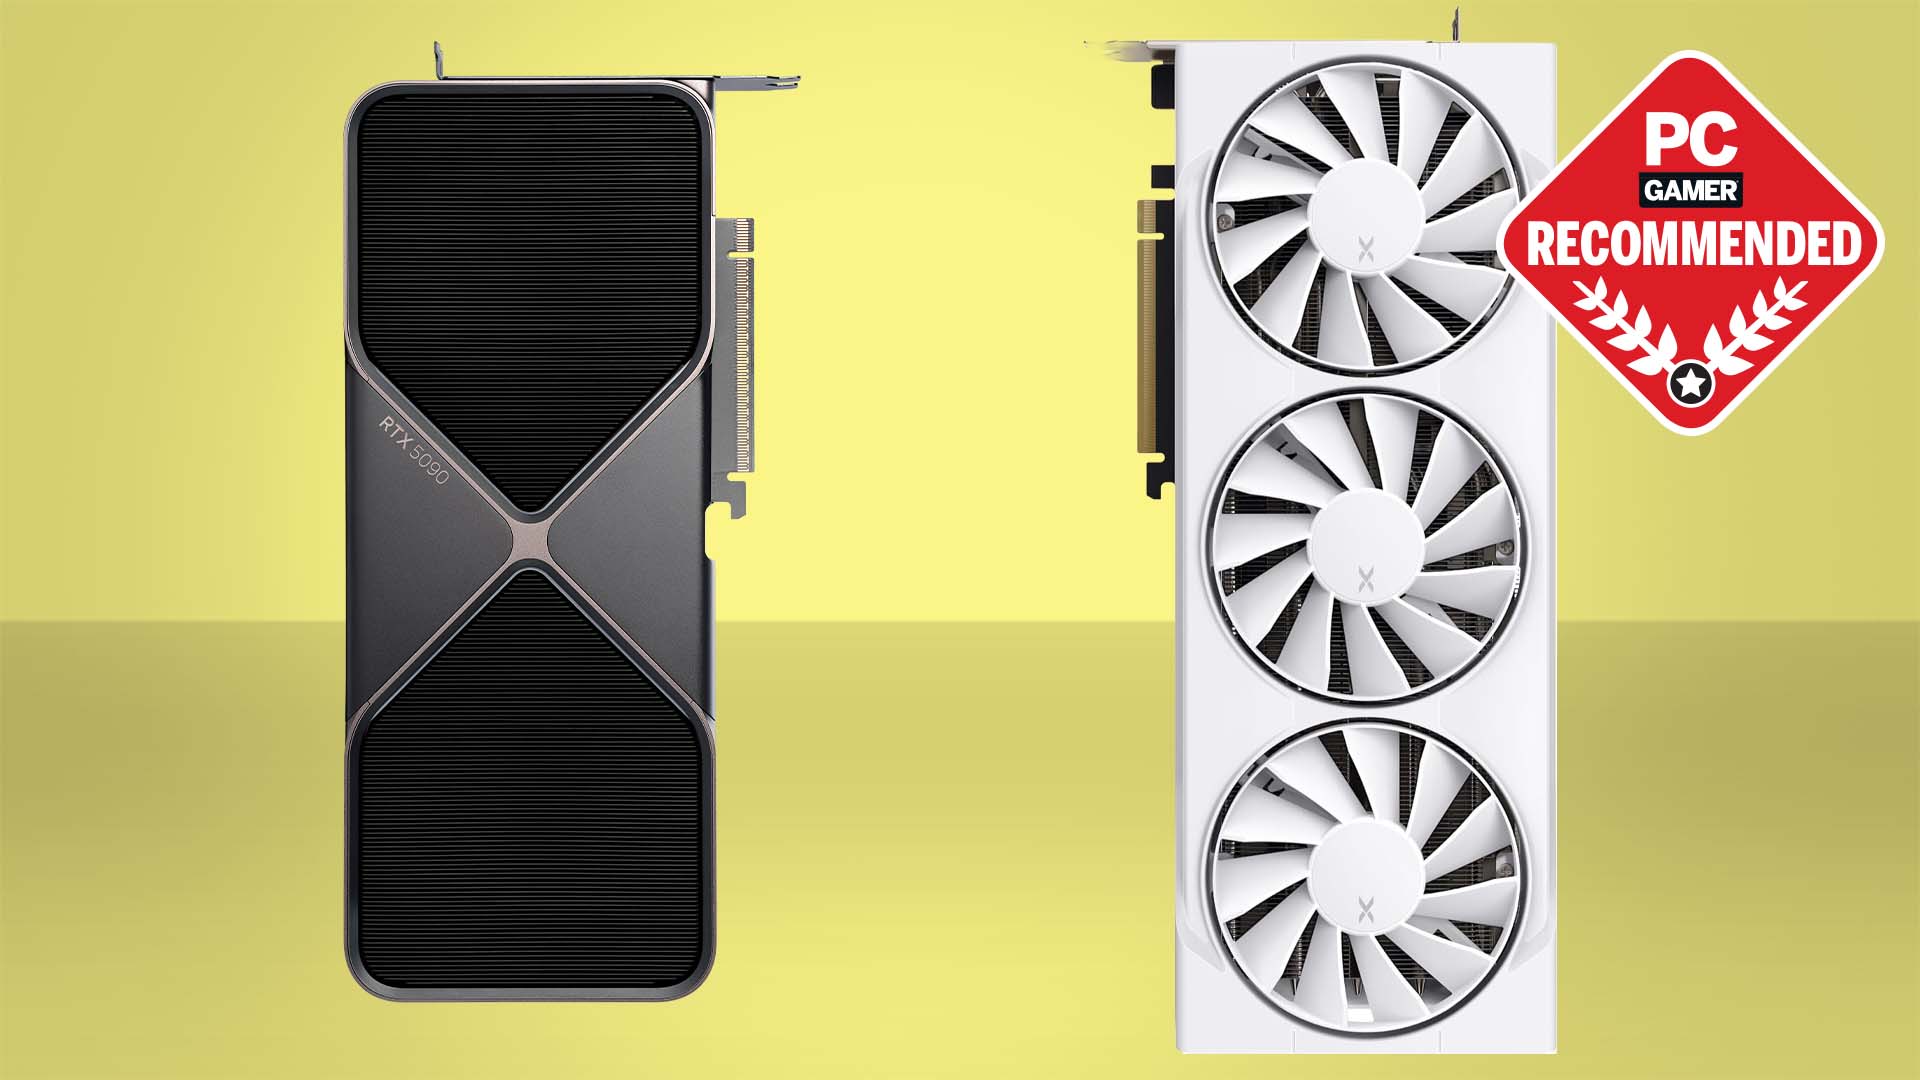
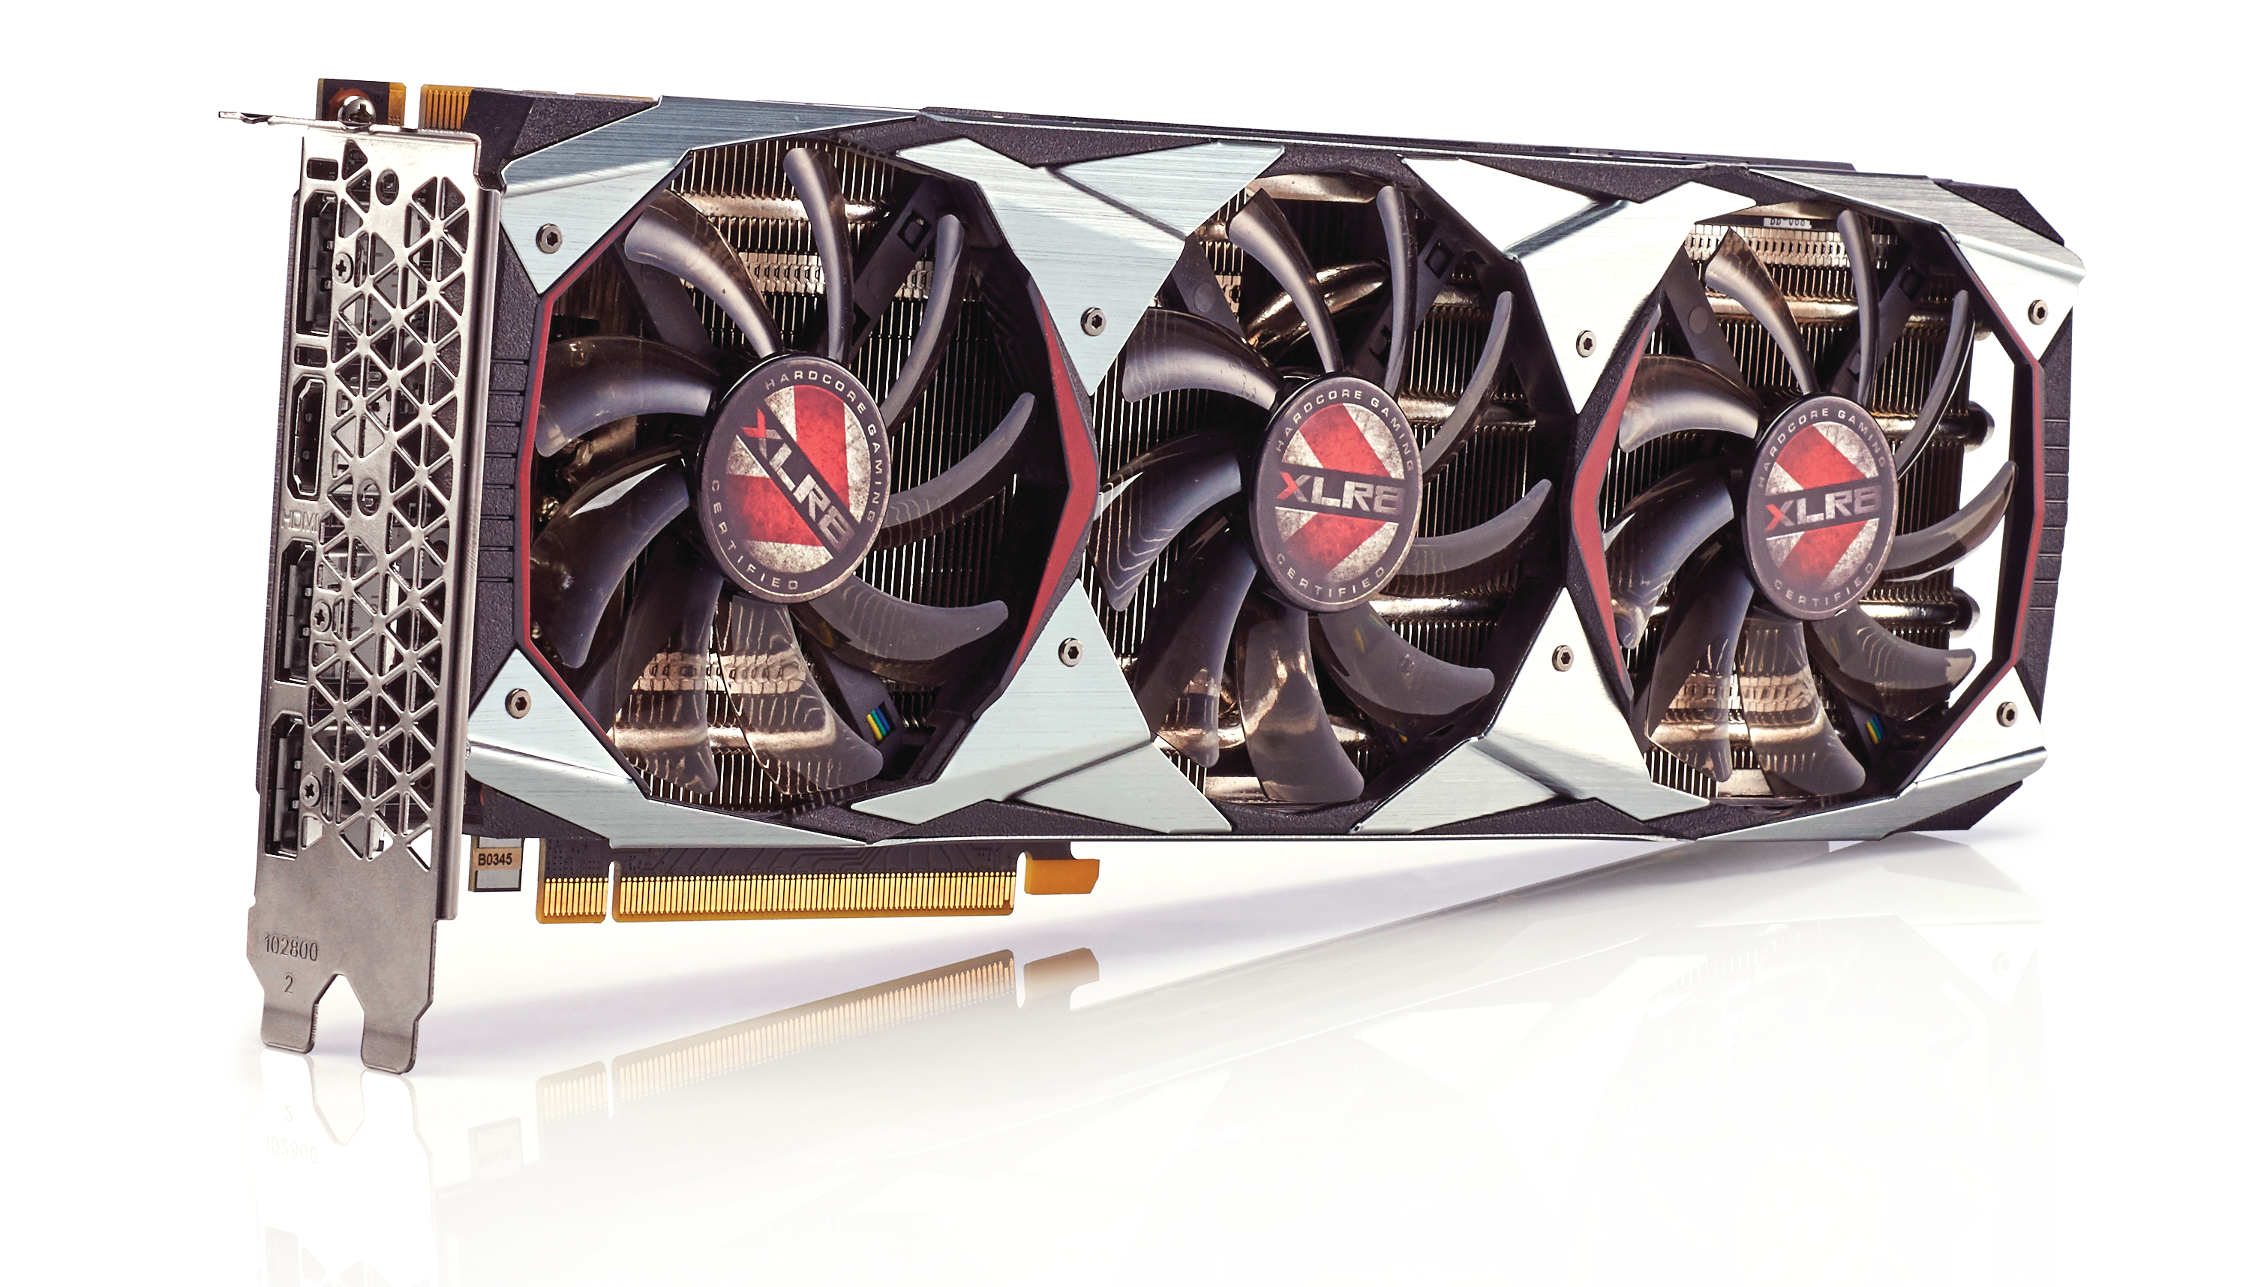
GPU: PNY GeForce GTX 1080 Ti XLR8 OC ($970)
The GTX 1080 Ti XLR8 was our card of choice, especially as it needed to drive at least one 4K screen. It’s by far the best value high-end card available before Nvidia's new RTX line, and it makes 4K gaming viable at high resolutions without too much trouble.
We went with the PNY XLR8 variant on this one, because it’s one of the few manufacturers that still run the standard reference design PCB from Nvidia. The reason for this need was due to the fact we’re using a prototype GPU block from Alphacool, designed to fit around the reference PCB of the Titan Xp or GTX 1080 Ti. That said, the difference in performance between this and something more sophisticated, such as an Asus ROG Strix or MSI Gaming X, is negligible at best.
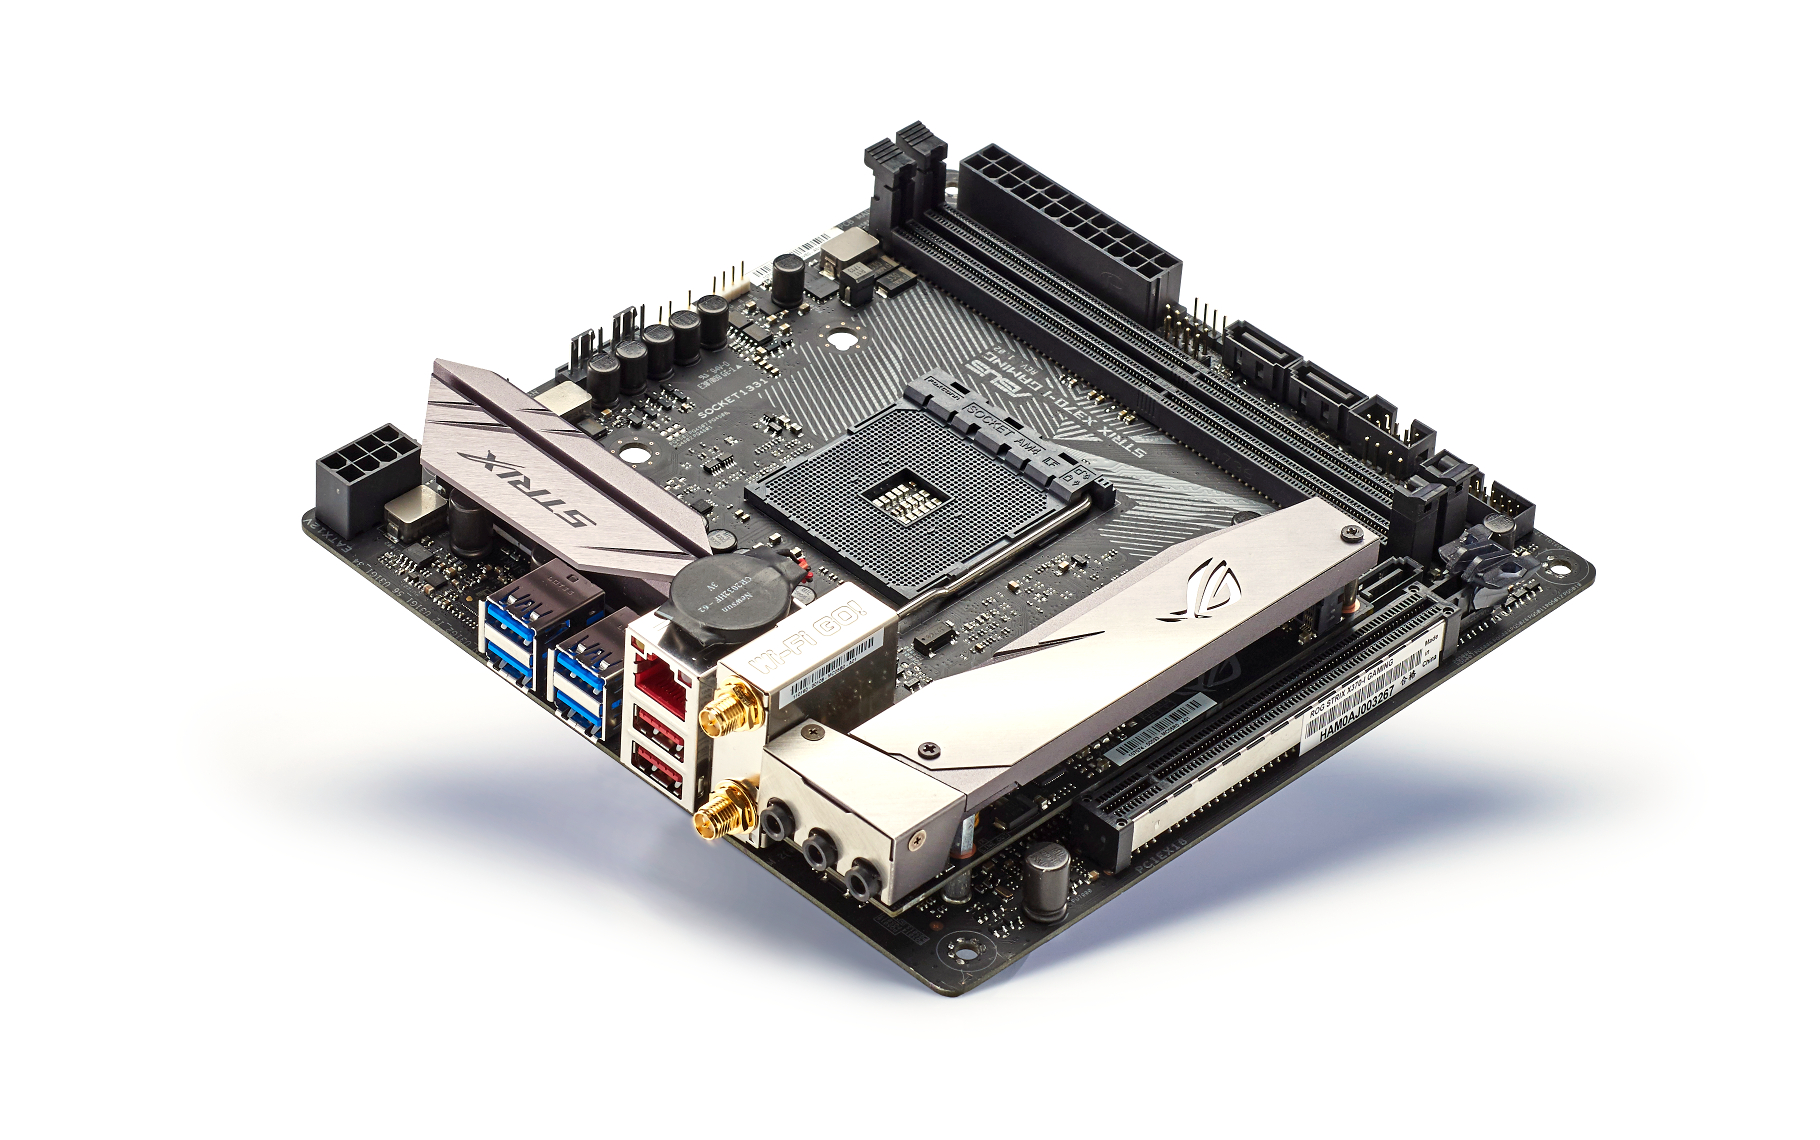
Motherboard: Asus ROG Strix X470-I Gaming ($210)
When picking an ITX motherboard for a showcase system like this, it’s imperative that you pay attention to the location of the 24-pin and CPU power ports. Especially for cable management, because many ITX cases aren’t designed with vertical-mounted PCBs in mind, and some manufacturers place the 24-pin at the top of the board, or the EPS power midway down, which can be a little frustrating.
With Ryzen, there’s a limited selection of ITX boards to choose from. Our decision fell on the Asus X370-I, thanks to its fantastic BIOS and neutral color palette. After speaking to Asus, it sent us an X370-I on the condition that we try to hold off as long as we could, and wait for the X470-I. Although there are no major changes, there’s an improved rear I/O, and a more stylized design, which Asus was keen for us to show off. Luckily, the X470-I arrived in time for the build, but too late for our photo shoot.
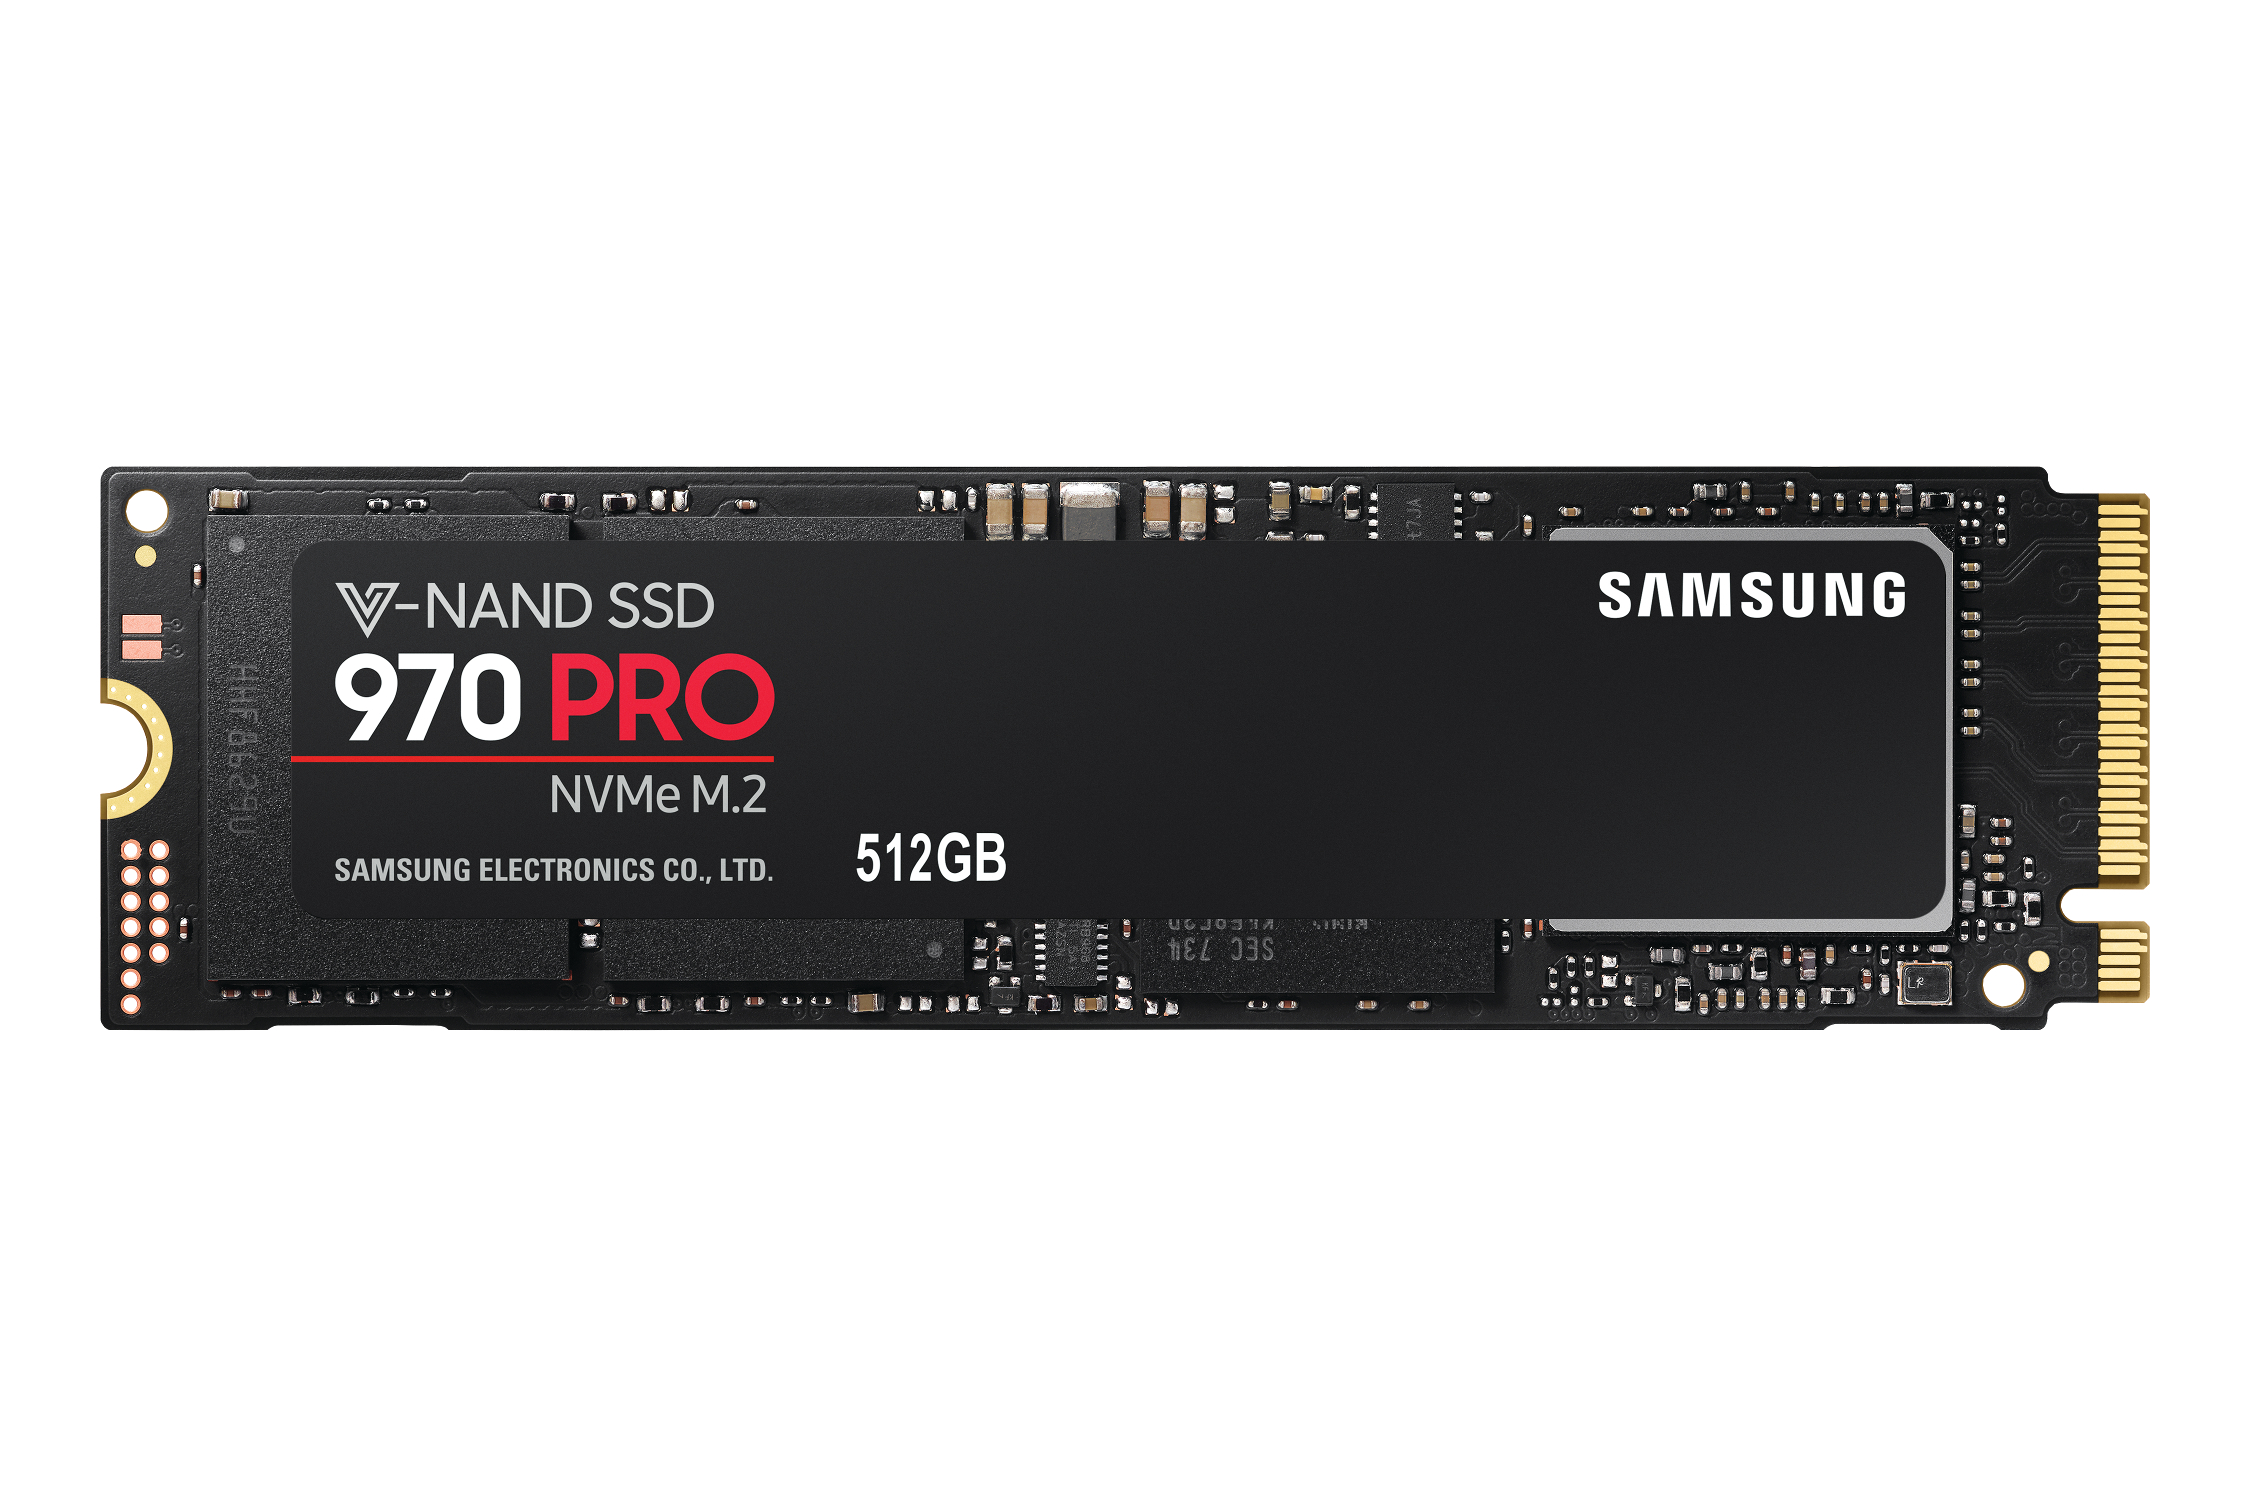
SSD: 512GB Samsung 970 Pro PCIe NVME M.2 PCIe SSD ($339) / 1TB Samsung 860 Evo SATA M.2 SSD ($300)
There’s nothing like trying something new, and that’s what we’re doing here. We know Ryzen supports a single PCIe SSD M.2 drive over four dedicated PCIe lanes, but many motherboards have multiple M.2 ports, with some dropping the main x16 lanes for the GPUs down to x8, so you can populate the other port with a PCIe M.2. The question is: If that’s an isolated event, down to the fact it’s a PCIe M.2 SSD, what happens if you add a SATA M.2 drive?
To try to answer our question, we decided to run a single 970 Pro 512GB drive (if it arrived on time; if not, we’d use a 960 Pro 512GB), and add a 1TB 860 Evo M.2 variant. Samsung’s Evo drives have long been a staple of many a budget build, and the company’s 1TB range of drives is perfect for the avid gamer, looking for quick and responsive storage. That said, we’ve never checked out one of these beauties in M.2 before, so sticking this into the second M.2 port on the back of the Asus X470-I motherboard should make for some interesting testing, and a very snappy system.
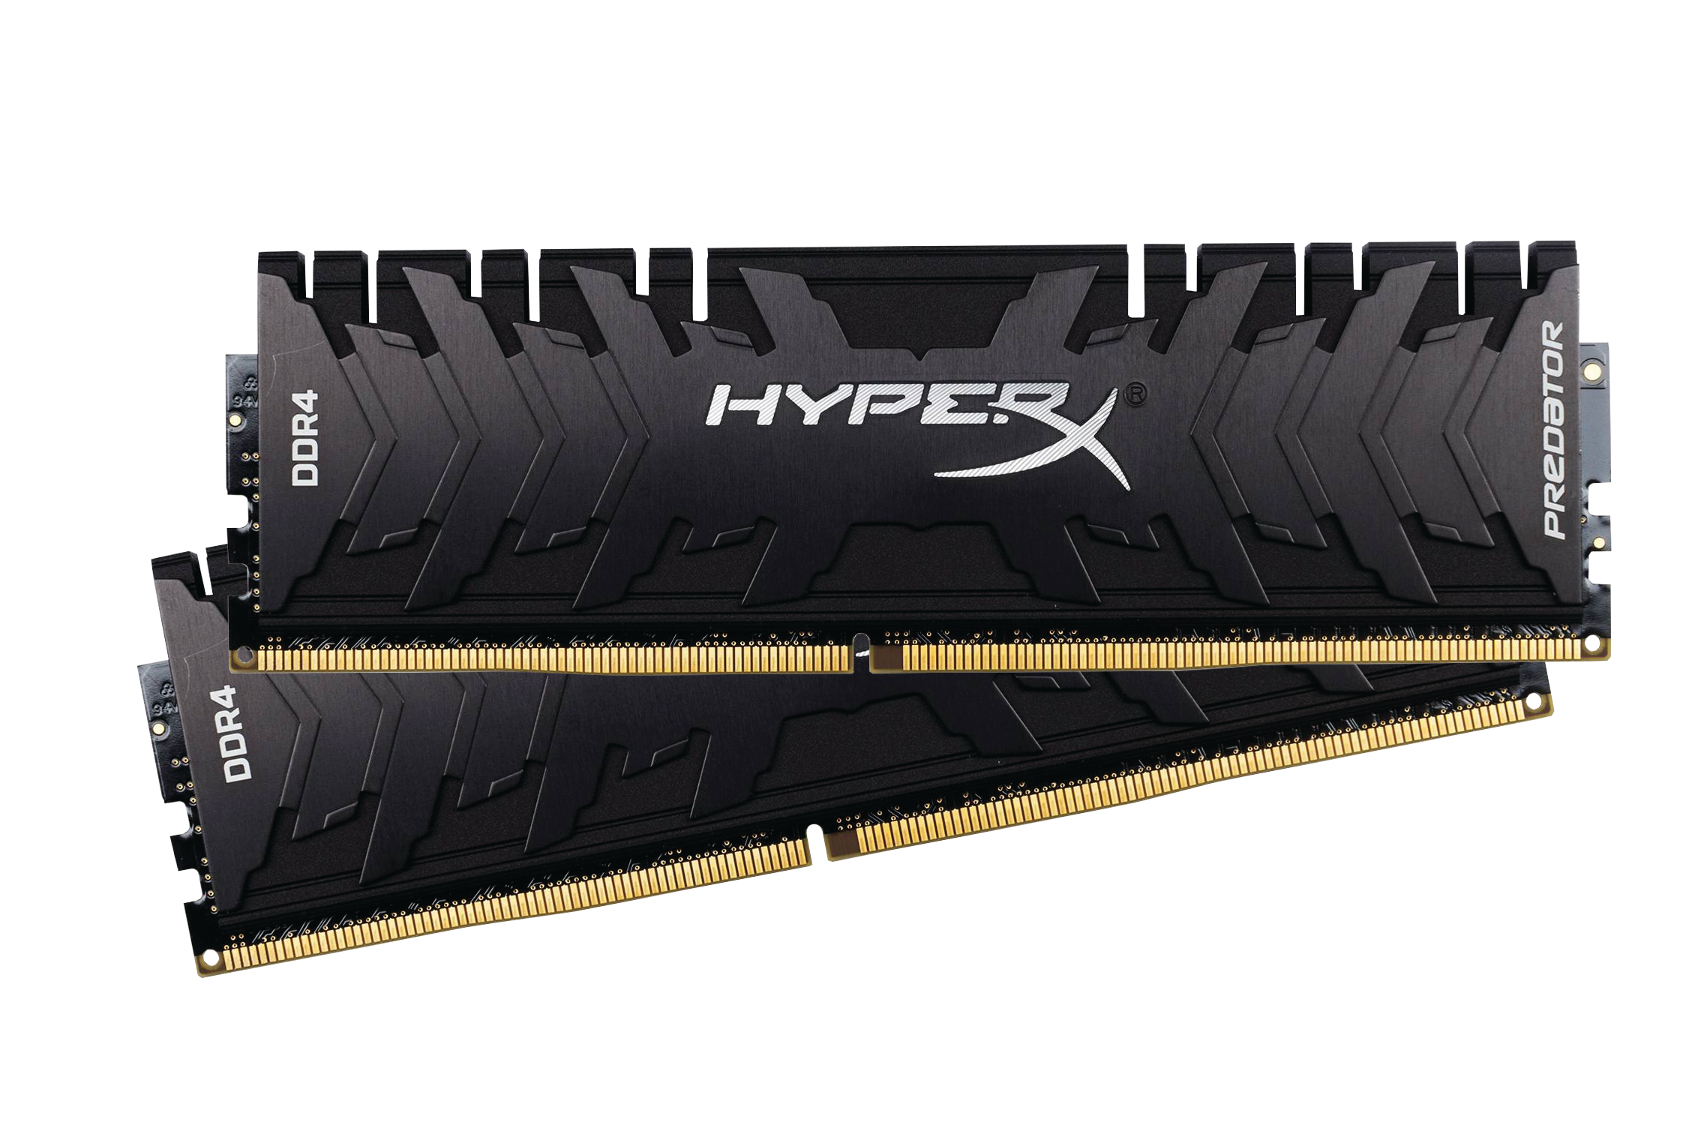
Memory: 32GB (2x 16GB) Kingston HyperX Predator DDR4 @ 3,000MT/S ($460)
Any Ryzen enthusiast knows that memory spec is imperative if you’re going to get the most out of your AMD processor. It’s an architecture that benefits massively from 3,200MT/s and higher, so this was one of our first concessions in the name of form over function. We could have gone with some Crucial Ballistix Elites, as we usually do, or Corsair Dominator Platinums with custom black light bars, but those are both kits we’ve used numerous times before, and we felt like a change.
You can get Predator DDR4 in 3,200MT/s SKUs, but those only come in 8GB DIMMs, and we wanted the absolute maximum capacity we could get, which means 16GB per stick. It might be possible, with a bit of extra voltage, to get the 3,200MT/s we desired, but for everyday running, 3,000MT/s should be just enough to keep up the frame rates, and make sure the Infinity Fabric is pumping out some juicy connectivity in all those multithreaded applications. As it turned out, things didn’t quite go to plan, as you’ll discover later in the feature...
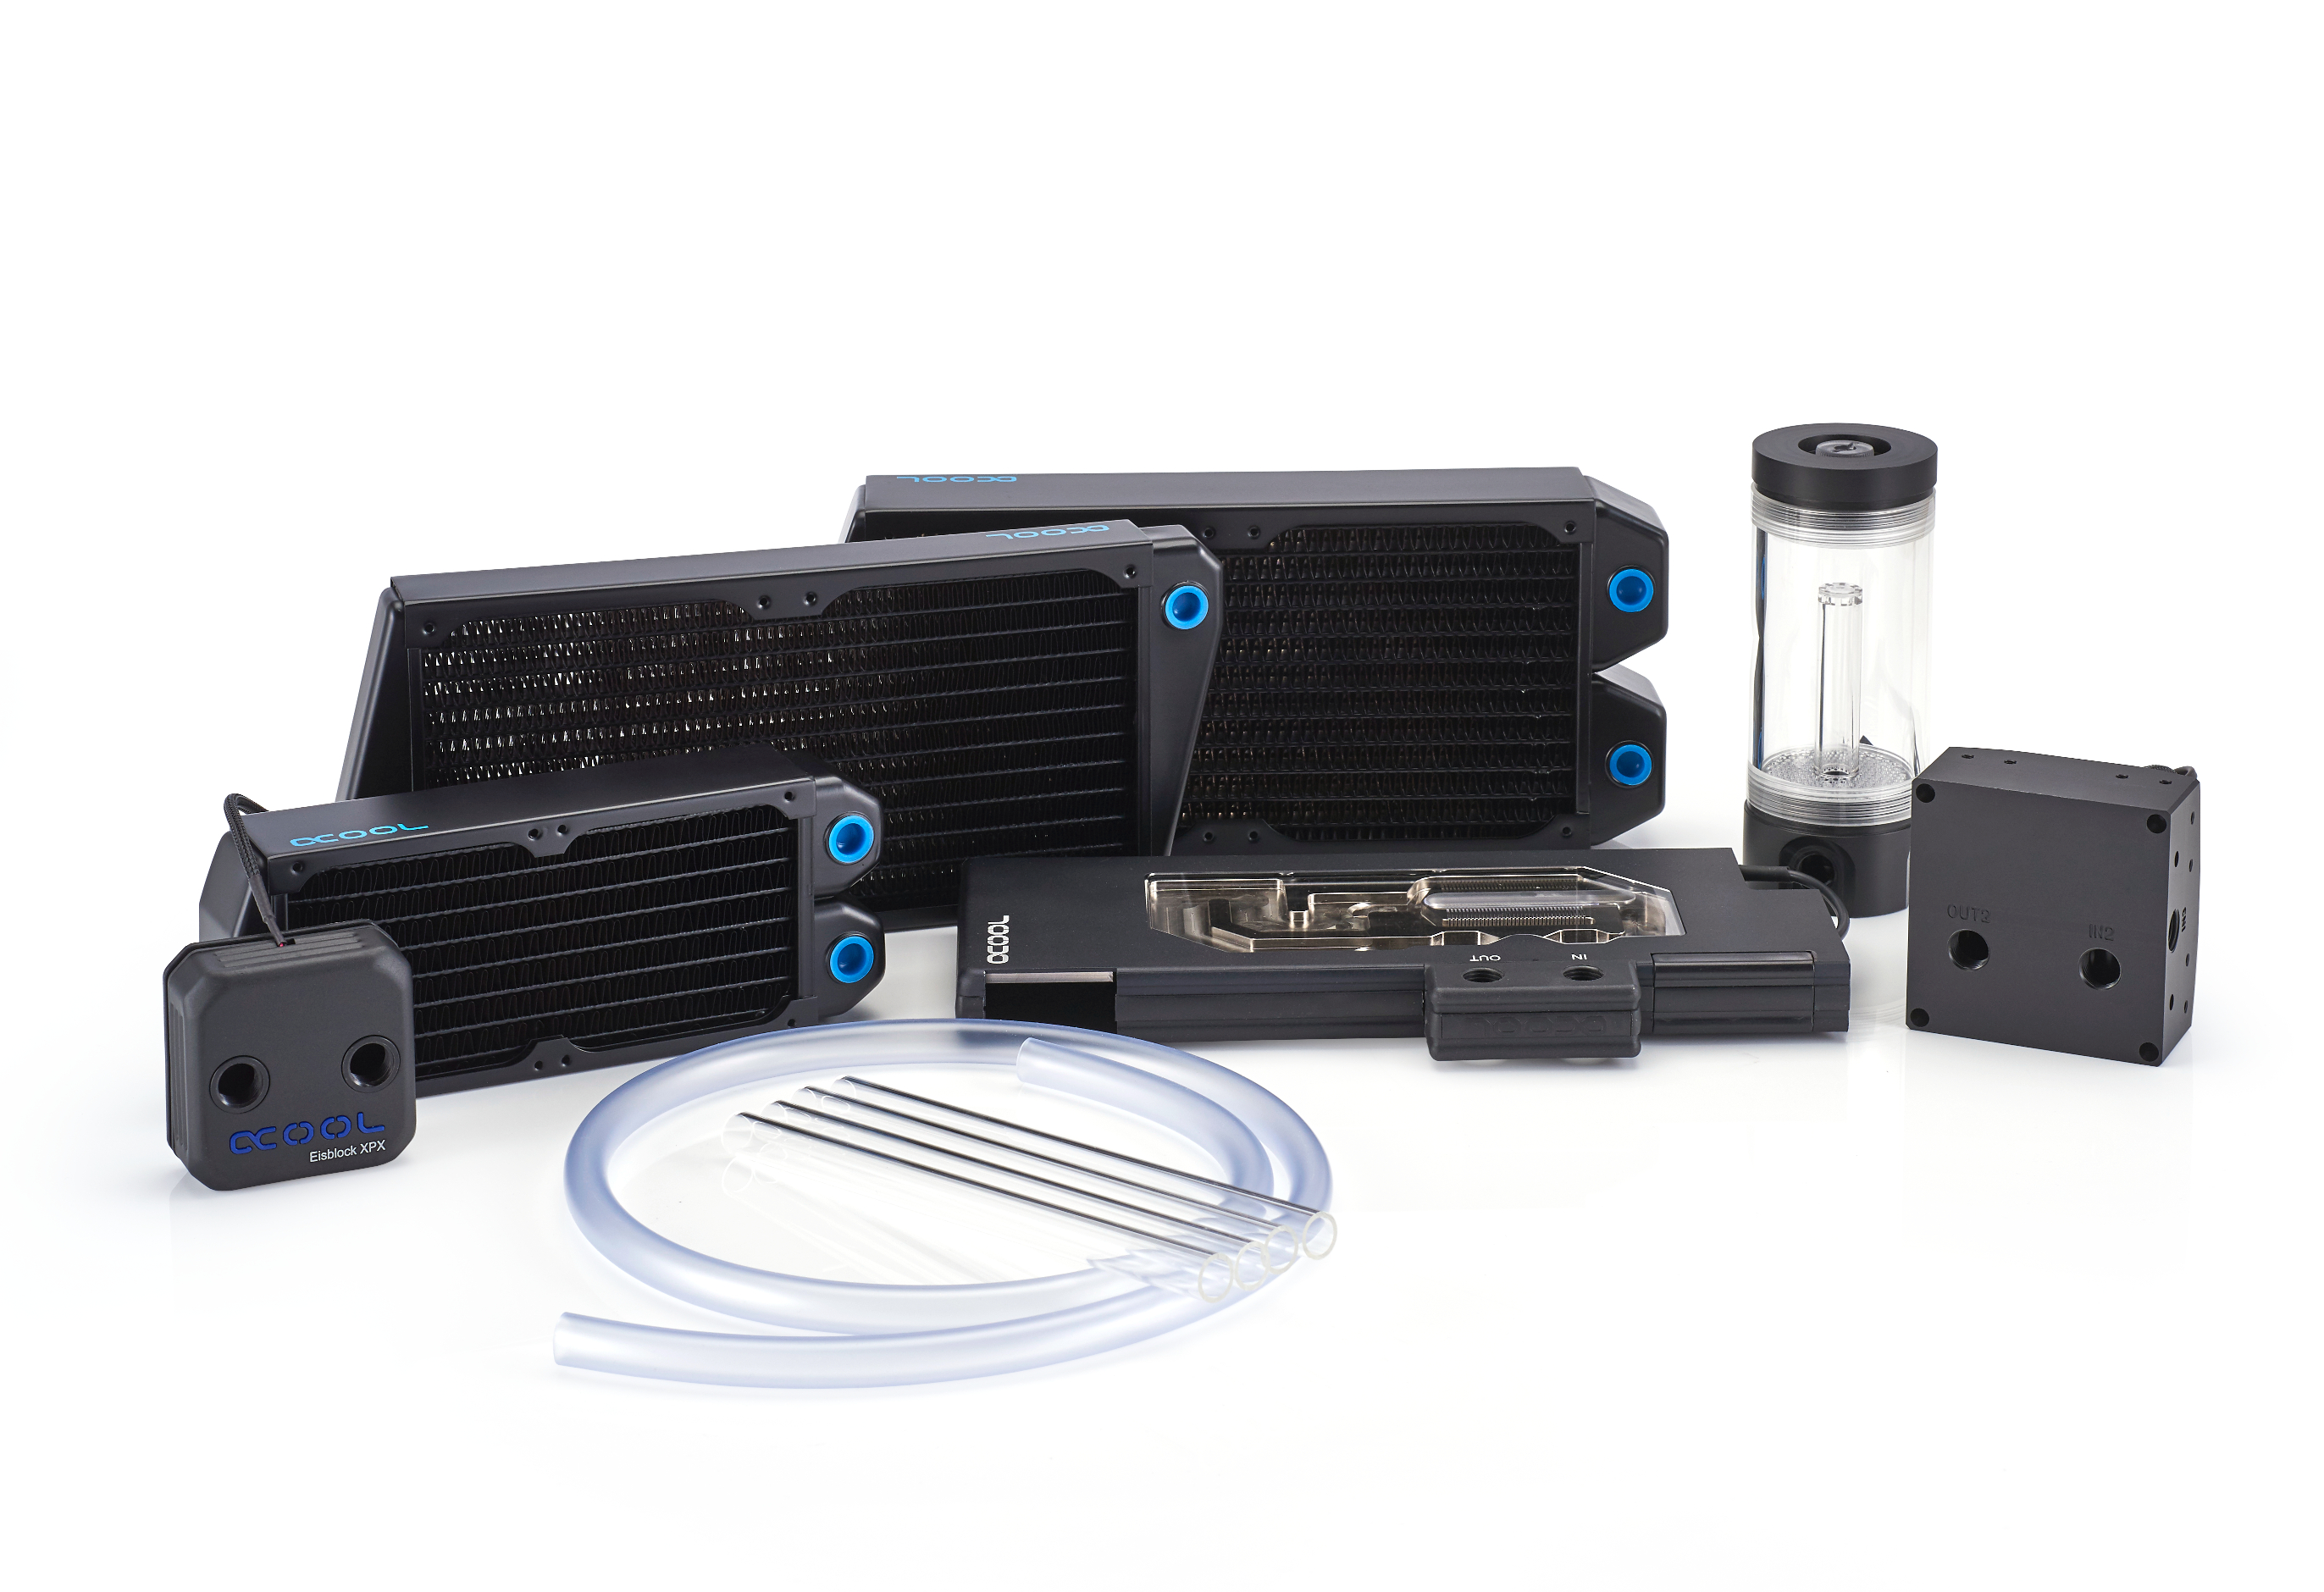
Liquid cooling: Alphacool ($1,327)
Alphacool is one of the companies we’ve been itching to work with for a while now. We’ve been liquid cooling for a fair few years, but typically sticking with EKWB for the duration. Another European manufacturer, Alphacool is based just outside Wolfsburg, Germany. A place notorious for its precision engineering from the likes of Volkswagen and others. That engineering prestige absolutely comes at a cost, of course, but the quality of the componentry that Alphacool produces is second to none.
For our build, we had a few configurations in mind, but the plan was to take advantage of twin 240mm rads (one thick one, actively cooled in the roof, and a second skinny one in the bottom, running passively), then run a reservoir and pump separately. We’ll be using soft tubing and fittings in the rear compartment, along with the D5 PWM pump, and frosted hard tubing in the front, with the reservoir and liquid-cooling blocks, too.
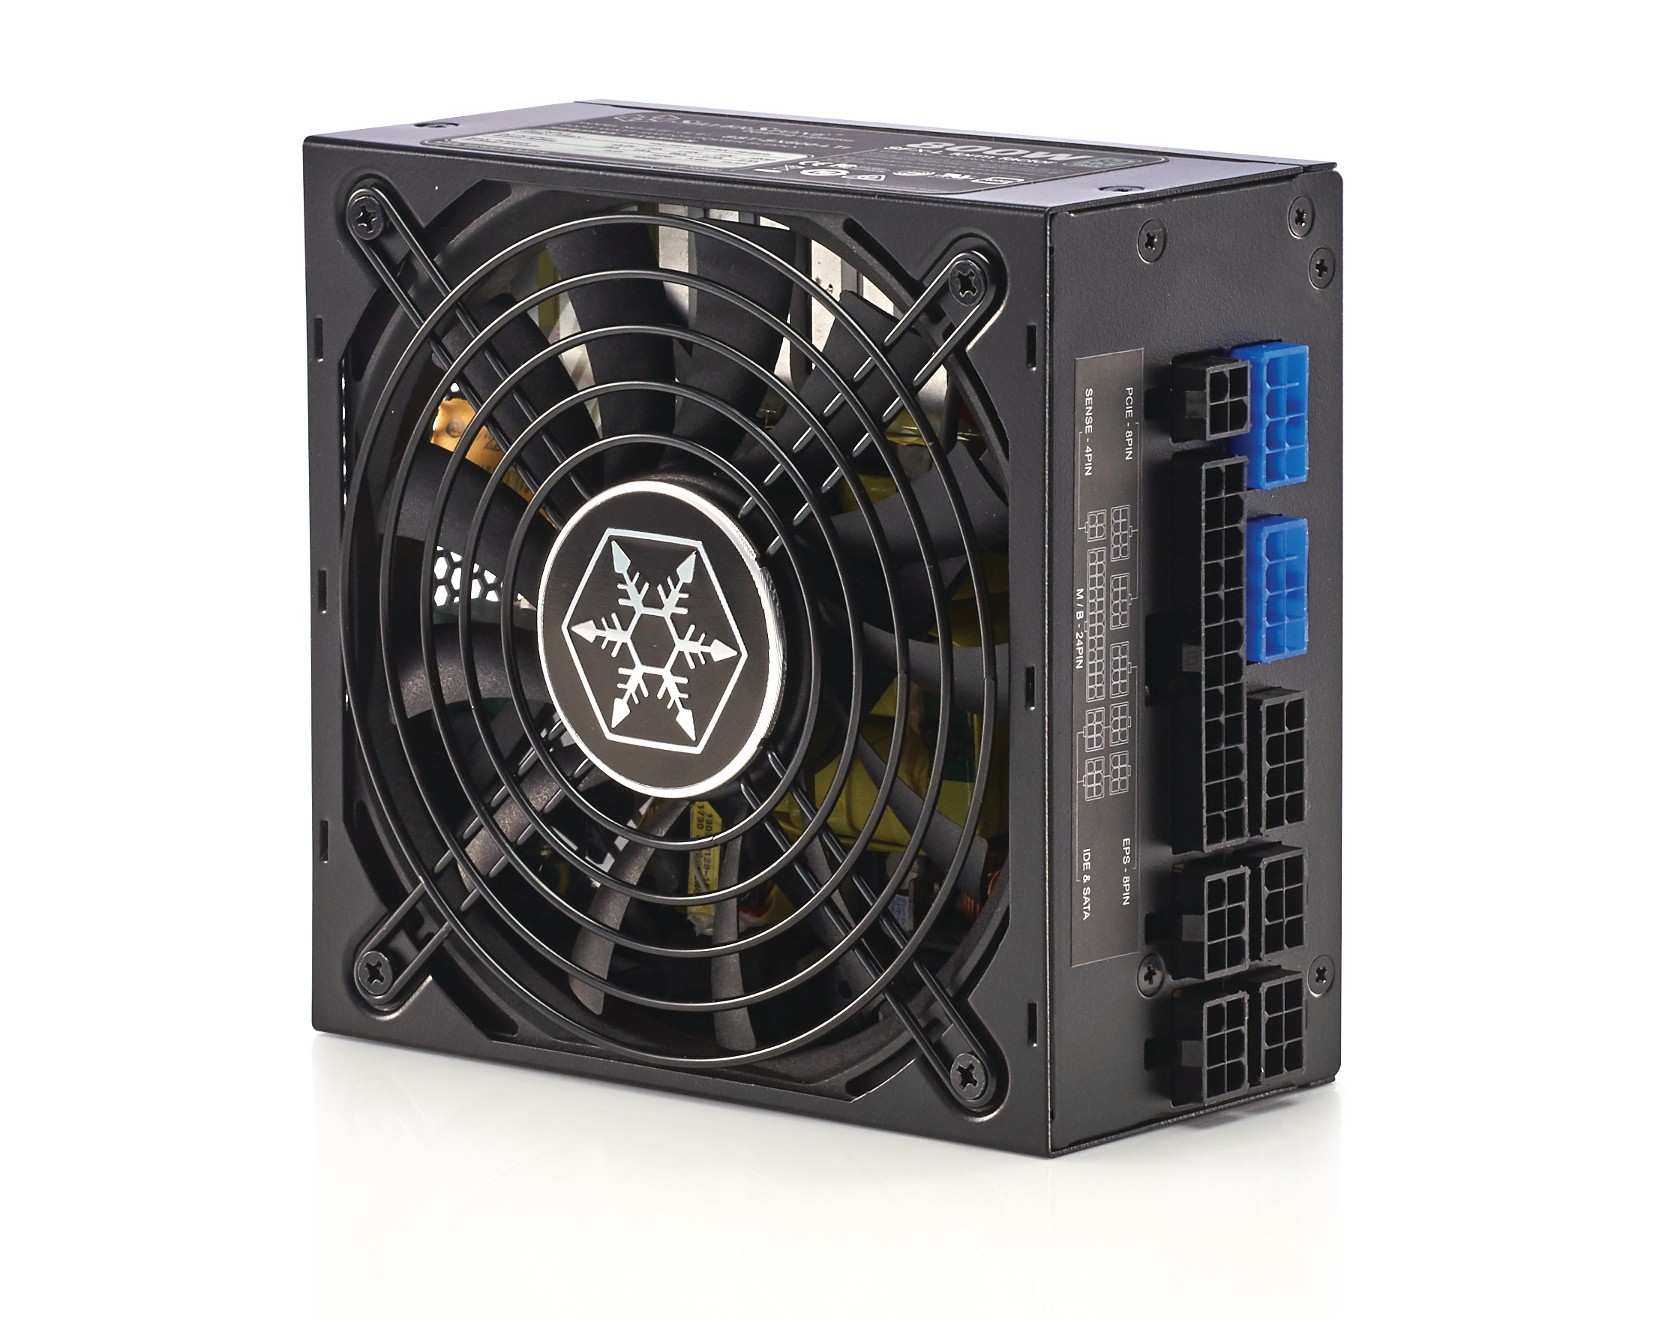
Power supply: Silverstone SX800-LTI SFX ($190)
This is the real gem in this rig. An unbelievable feat of engineering on Silverstone’s part, and damn impressive on multiple levels. And there’s a few reasons as to why. First up is the form factor. By default, this is an SFX PSU—it measures an impressive 4.92 x 2.5 x 5.12 inches. It’s unbelievably tiny in contrast with many of the giant 1,200W-plus monsters we’ve used in the past. It also comes packing an incredible 800W rating of max DC output, peaking at 850W at a push. It’s the most powerful SFX power supply we’ve ever seen.
It’s also fully modular by design, which means we have the opportunity to get in some custom cables from the likes of CableMod—or you could sleeve your own, of course. Then there’s the 0dB fan technology on top of that, stopping the fan from kicking in until the PSU is at over 30 percent load. And then it has that 80 percent Titanium efficiency rating.
Each of these features on their own, on a standard power supply, would be nothing new, but combined into such a small package, they make the Silverstone SX800-LTI one of the most advanced power supplies on the market to date.
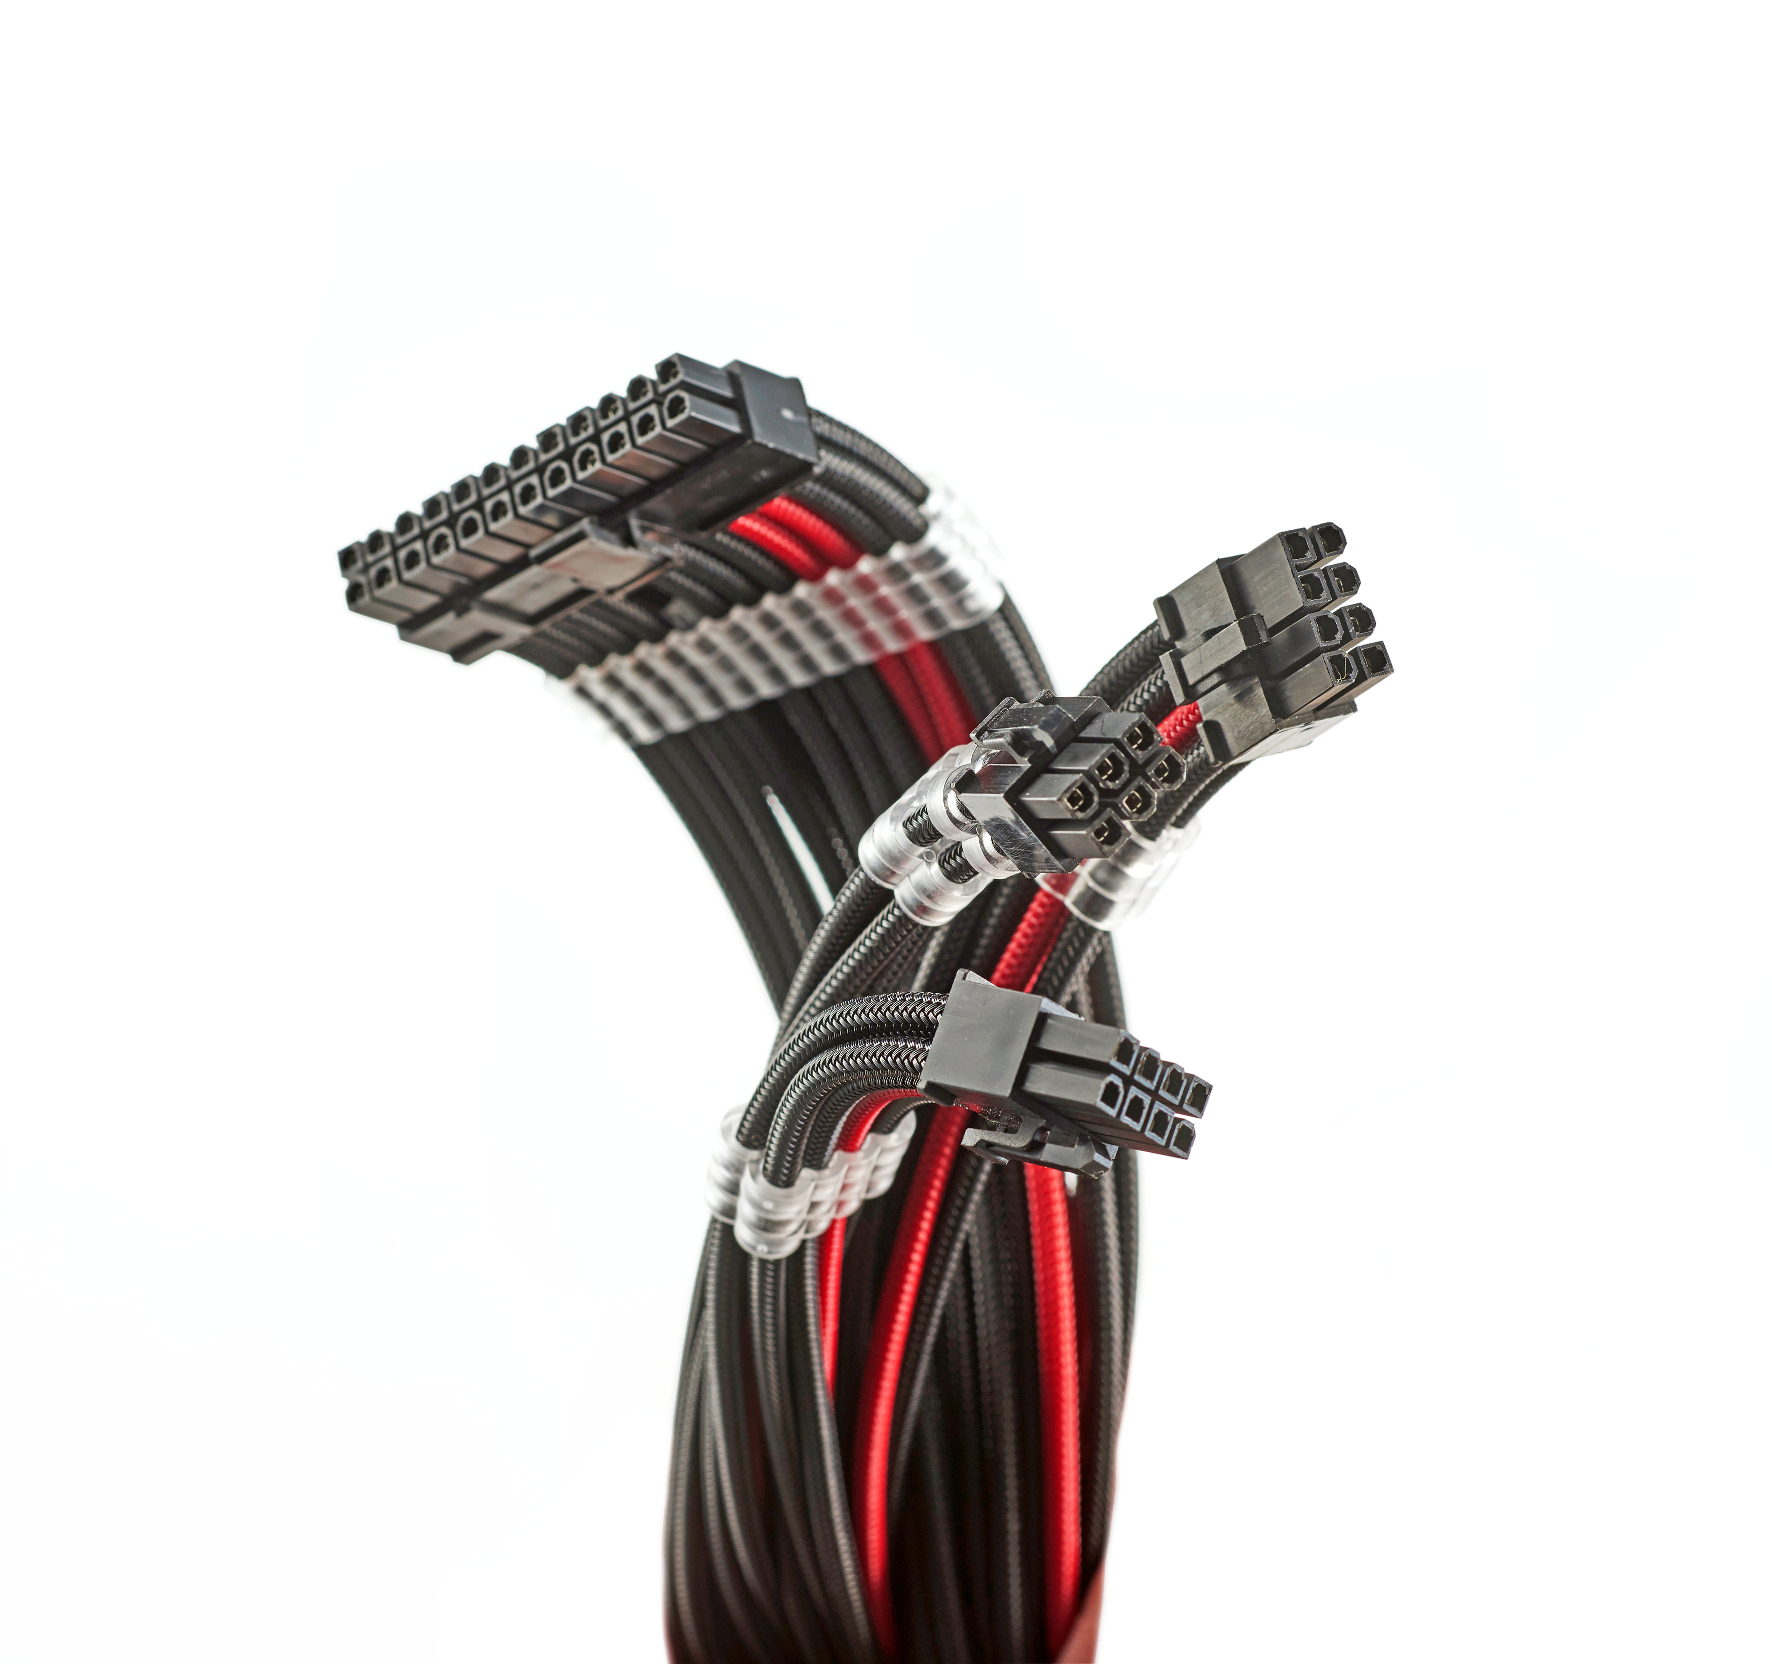
CableMod pro cables
We’ve also decided to splash out on some of that juicy CableMod goodness, this time going with the Pro configured cables. So, what do you get for these extra-pricey cables? Fully locked cable combs added on beforehand, mostly, in your choice of clear plastic or colored aluminum. We’ve also customized these cables to be shorter than standard. With each cable hand-sleeved and cut to size, specific to our build, it will minimize cable room in the rear, and hopefully make our building life easier.
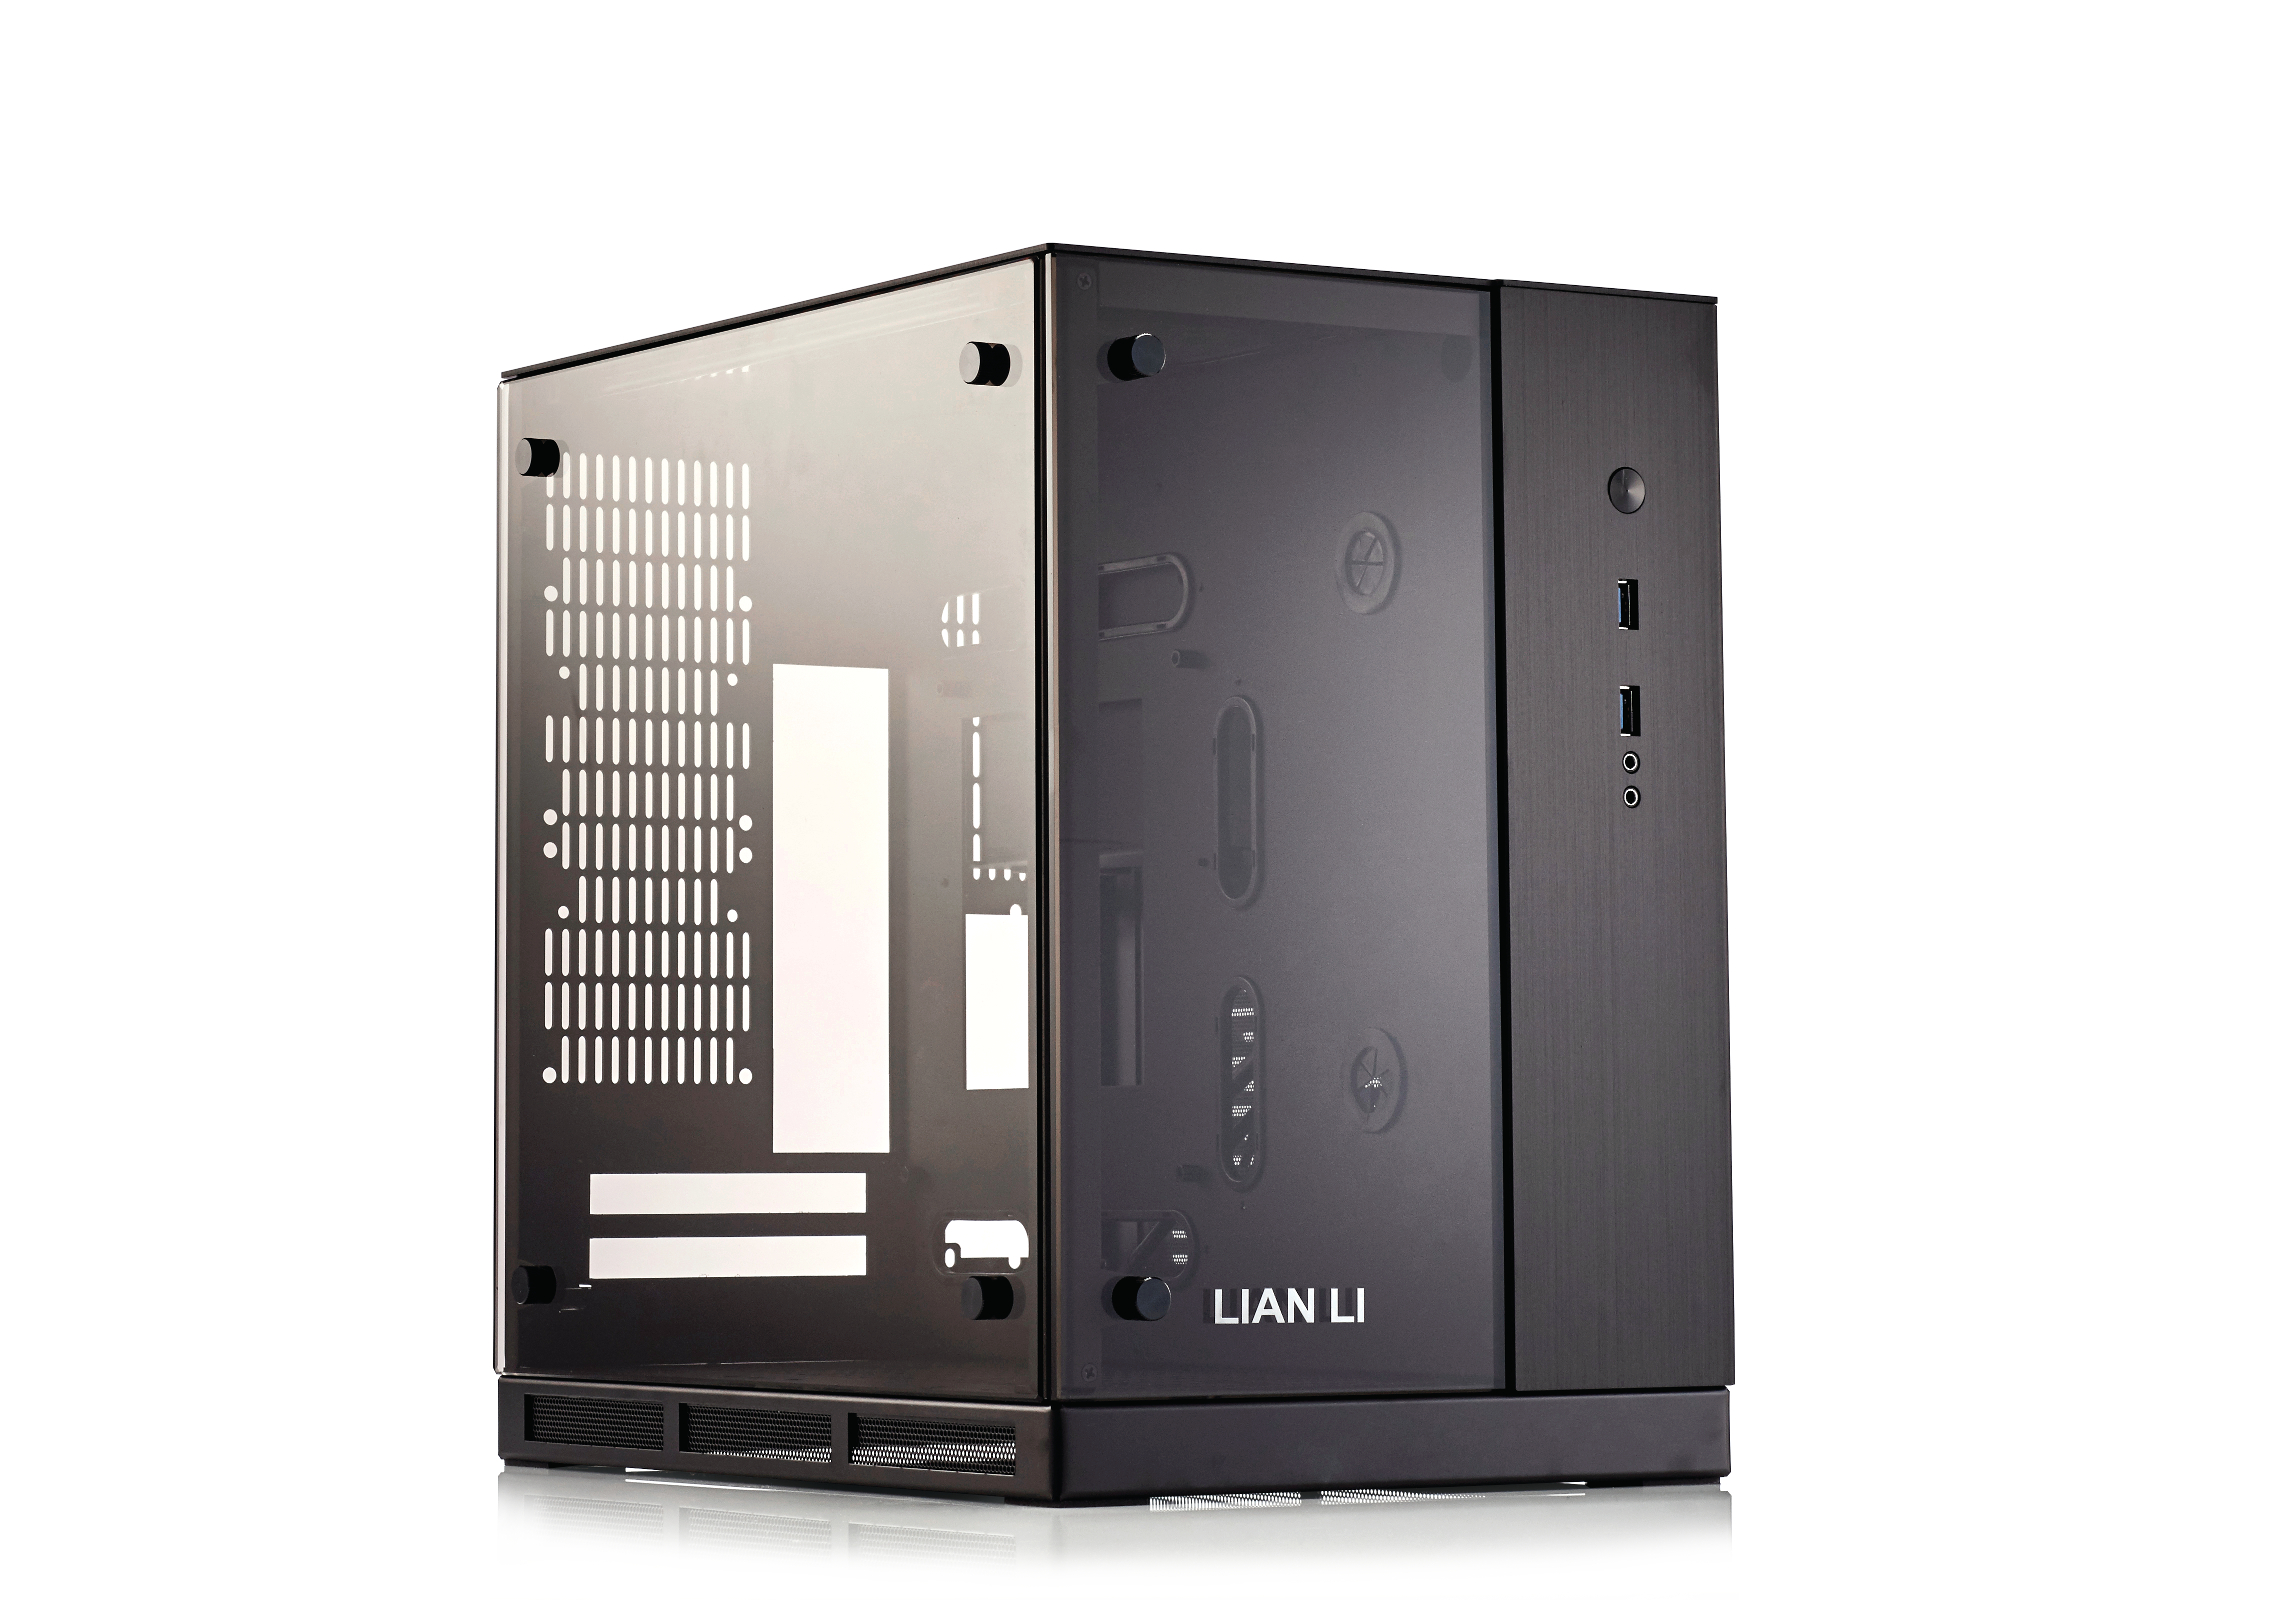
Case: Lian Li PC-Q37 ($220)
And here’s our centerpiece: Lian Li’s PC-Q37. It’s subtly small and dual-compartmentalized, capable of housing twin 240mm rads, up to four 120mm fans, and dual 80mm fans. It’s a beautiful combination of tempered glass and brushed aluminum, with a plethora of modern-day features.
It’s not cheap, but Lian Li is known for its premium styling and high-end materials, and they don’t disappoint.
That said, there are things to take into consideration. Due to the small form factor, you’re limited to an SFX power supply, and there’s only room for two hard drives in the rear compartment—2.5-inch or 3.5-inch—which is why we’re trying to be a little smarter with our storage solution. You also need to be careful with your choice of GPU, making sure it’s not too high. The PC-Q37 will happily support most reference cards, but a Strix, for example, or a thicker MSI GTX 1080 Ti will cause issues.
It’s flawed but beautiful, and with the right liquid cooling, it’s potentially a force to be reckoned with, too.
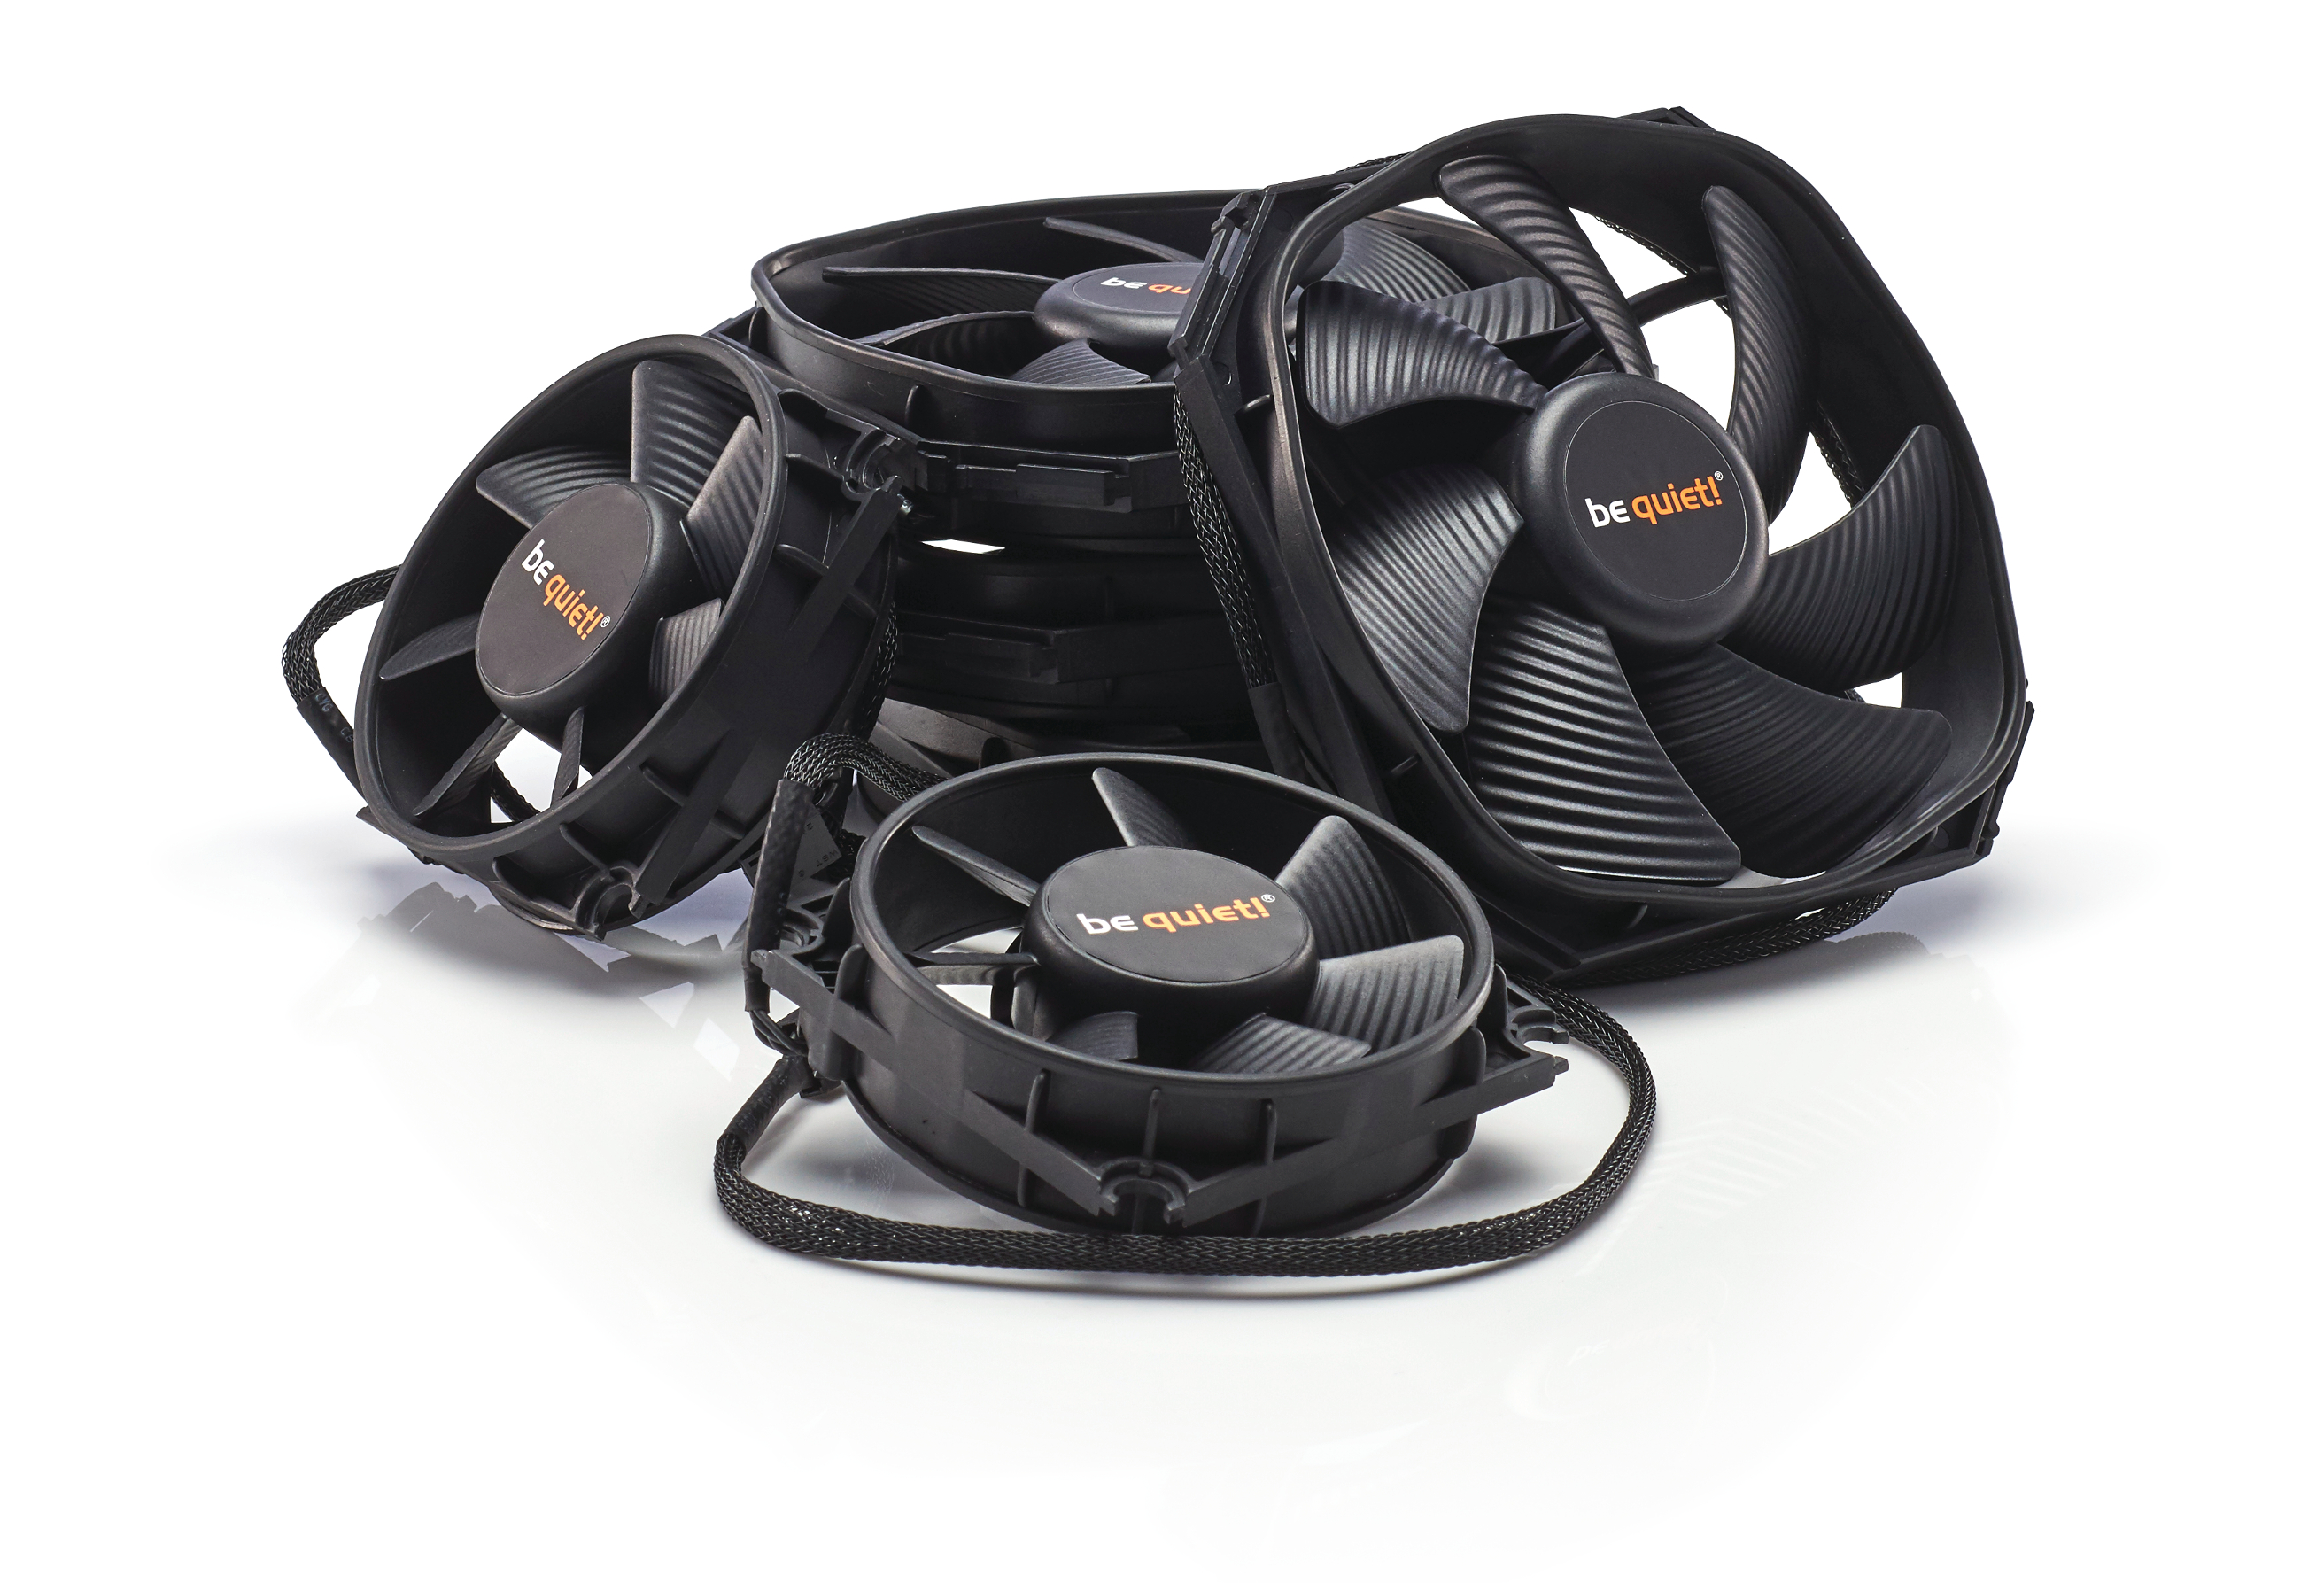
Air cooling: Be Quiet! 120mm Silent Wings 3/2 PWM fans ($88)
In essence, liquid-cooling is an advanced form of air cooling, but with more water vapor and surface area. What you use to cool that surface area, especially in a case with such limited internal airflow, is vital.
We’ve decided to opt for some of Be Quiet!’s Silent Wings 3 PWM high-speed fans. These 120mm beauties are super-quiet and pack some serious stats for their size. We’re talking a max decibel level of 28.6, and air pressure coming in at 3.37mm H2 O, giving even Noctua a run for its money. We’re not sure whether we can fit all four fans, and we’ve even got two 80mm Silent Wings 2 variants for the rear, in case we do something crazy, but when it comes to super-sleek fans, other than Noctua, Be Quiet! and Corsair are our go-to brands.
Coolant: Mayhems X1 & Blitz Kit ($60)
For our coolant, we’ve decided once again to work with Mayhems on this project. The company provided us with the awesome Aurora particulated coolant for Dream Machine 2017, and the quality and dedication it gives its products is second to none.
Because this build is a flexible one, it’s imperative we have options when it comes to color choice. From the get-go, we knew we wanted to keep the colors fairly basic, with only slight accents here and there. To this end, the custom cables are black, with a single red stripe, and the motherboard and blocks are black, too. That leaves us with three base colors—sort of—to work from as far as coolant is concerned: black, red, and clear.
Mayhem’s X1 is a non-toxic environmentally friendly coolant, with plenty of biocides. We’ve got two liters of both the UV Oil Black coolant and the clear coolant (not to be confused with plain ol’ water) for the build, which should be enough for all the blocks and rads, thanks to the build’s small size. On top of that, we also requested in a Blitz Kit to flush out the radiators and blocks of any excess flux and radiator gumpf ahead of time, to ensure we have no coolant coloring issues or sludge deposits later down the line.
On page 2, we go through the build itself.
After graduating from the University of Derby in 2014, Zak joined the PC Format and Maximum PC team as its resident staff writer. Specializing in PC building, and all forms of hardware and componentry, he soon worked his way up to editor-in-chief, leading the publication through the covid dark times. Since then, he’s dabbled in PR, working for Corsair for a while as its UK PR specialist, before returning to the fold as a tech journalist once again.
He now operates as a freelance tech editor, writing for all manner of publications, including PC Gamer, Maximum PC, Techradar, Gamesradar, PCGamesN, and Trusted Reviews as well. If there’s something happening in the tech industry it’s highly likely Zak has a strong opinion on it.

