This article was originally published as a diary series across four issues of PC Gamer. For more quality articles about all things PC gaming, you can subscribe now in the UK and the US.
The Dishonored games are often described as being about choice, but it might be more fitting to say they are about judgement. After all, when you make decisions in Dishonored, you aren’t simply selecting from a list of potential actions, as you would order a dish from a takeaway menu. Instead, those decisions are always made with a view to their potential consequences. What’s the best way to clear out this room? Or what’s the best way to sneak through it? How should I kill this person? Actually, should I kill them at all?
This notion of judgement is most evident in the assassination targets Corvo and Emily pursue in each mission, who can be dispatched via lethal or nonlethal methods. Dishonored 2 never guides players toward one option or the other, yet throughout each level are documents, recordings and other environmental details that provide insight into that character’s life and personality, helping players judge for themselves the best way to deal with their target.
1. Judge the actions of NPCs using clues from the Heart.
2. Only kill NPCs with clear evidence of wrongdoing.
3. A High Chaos rating must be avoided if possible.
Yet beyond these key imperial conspirators is an Empire bustling with criminals and rogues. The cities of Dunwall and Karnaca are prowled by corrupt guards and thuggish gangsters, while all manner of thieves and killers hide in plain sight among the Empire’s citizenry.
Hence, what if we extrapolated Dishonored’s core mechanic across every citizen in Dishonored 2, dispensing justice like a whalepunk Judge Dredd? That’s my plan for this run of Dishonored 2. I will be the judge, jury and executioner for all of Karnaca, safeguarding the innocent and killing the guilty.
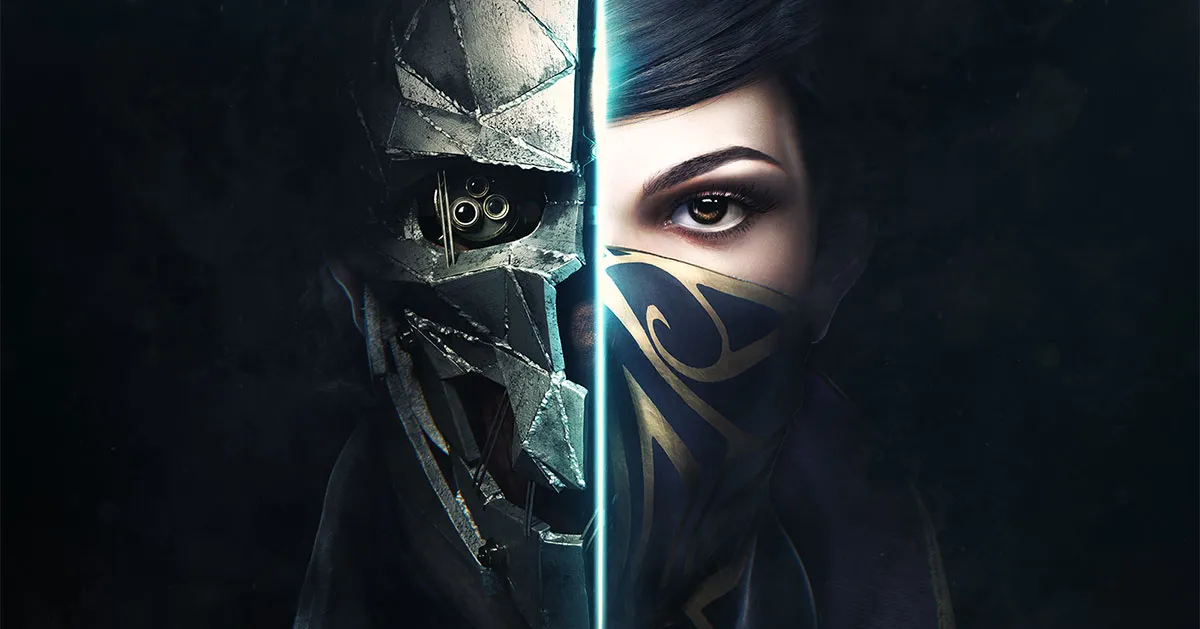
My first judgement is simple, who to play as. For this run, I’m going to play as Corvo. While I think Emily’s powers are more interesting, particularly the wonderful Domino, a couple of Corvo’s abilities, namely Possession and Slow Time, are more useful for manipulating and eliminating individual targets in crowded environments.
"Forgiveness isn't my speciality"

For the first mission, however, I’ll have to exact my judgements sans powers, or much of anything really. Emily has been overthrown by the witch Delilah and her lapdog the Duke of Serkonos, while I’ve been locked inside Emily’s private chambers by the traitorous captain of the guard, Mortimer Ramsey. In addition to treason, I’ve just watched Ramsey cold-bloodedly murder one of the Watch’s lieutenants, so I’m feeling unambiguous about what his fate is going to be.
The same goes for the four of Ramsey’s guards lurking inside the palace. As I start prowling the halls, I see that there are bodies everywhere, far more than Ramsey could have killed on his own. These “traitorous dogs” as Corvo himself puts it, are clearly Ramsey’s most trusted aides, so I feel little regret as I sneakily cut them down. Ramsey isn’t long for the world, either. I hide behind a stack of shelves as he heads to unlock Emily’s vault, and shish kebab him through the shoulder as he passes.
With everyone inside dead, I head to the streets. Out here, I’m less certain about how to deal with the guards. The streets are littered with dead civilians and watchmen loyal to Emily. Clearly Dunwall is ripe with murderers, but I’ve no idea who’s done what.
As I cross the rooftops to the palace gate, a sergeant declares to his men that, “We’re in this with the Duke, sink or swim.” I decide to help them all sink with the addition of several new orifices. For the remainder of the level, I resolve that my priority needs to be to get out of Dunwall with my skin intact. If I can sneak past the guards, fine, but if they attack me, all bets are off. Without my powers, skulking around is tricky, and I get into several messy fights. The only considered judgement I make is to put a bullet in a sergeant about to murder a local journalist. “Forgiveness isn’t my speciality,” Corvo tells the journalist afterward, a fitting motto given what I have planned.
Home is where the heart is

In the end, I escape Dunwall leaving 13 guards dead. Considering the situation, I’m okay with this, but I would have preferred a less chaotic start. Thankfully, after a visit from the Outsider, I get my powers back. More importantly still, I get the Heart.
The Heart of a Living Thing is the most important tool in this approach to playing Dishonored 2. Its purpose is to guide you toward upgrades, but if you right-click on an NPC with the Heart equipped, it will tell you that person’s innermost secrets. With the Heart, I’m no longer reliant on appearances. I can see right into people’s souls; quite useful for a self-appointed judge of humankind.
Newly empowered, I step onto Karnaca docks for the first time. Officially I’m on the trail of the Crown Killer, which leads toward an old Solarium known as the Addermire Institute. But I have plenty of other work to do en-route, starting right here, on the jetty.
I set the Heart to work, and instantly I’ve got a raft of judgements to make. “At the gaming table, he keeps cheating cards in his boot,” the Heart tells me of one dockworker. I’m not killing someone for that. At the end of the jetty, a woman is taking photographs of the ocean. “She tells them it’s whale meat, but it’s not,” the Heart whispers. I’m ready to spring upon this cannibal-by-proxy, when I realise the Heart was not specific about what meat was being served. Now that I’m out of the treasonous mire of Dunwall, I don’t want to kill someone unless I’m sure they deserve it. If the Heart says something ambiguous like that, I’m going to ignore it.
With this rule in place, I move further into the docks. Interestingly, my next couple of targets don’t come from the Heart at all. At a jetty farther down the dockside, an altercation over money ends in a man openly bludgeoning two people to death with a length of pipe. We have a winner! I slit his throat and drop the body in the ocean. I then turn the corner and head up the street, where I catch a guard pushing a man into an electrified wall of light. I’m too slow to save the poor fellow, but I can at least give him justice. I swoop down, choke out the guard, and throw his unconscious body into the wall of light. Zap!

I return up the same street when the Heart delivers its first proper target. A woman is leaning on a balcony on the floor above. “She tells the children it’s just tea, and when they’re asleep, she puts them on boats bound for Morley.” Crikey, that’s nasty. Frankly I can’t think of a punishment harsh enough, so I plant a springrazor on her back, and blink away before it triggers.
It’s interesting how the Heart’s stories tug and pull at my own sense of ethics. I quickly decide that I’m not killing anyone for stealing. Partly because it’s excessive, and partly because I’m practically hoovering up stuff that doesn’t belong to me as I explore, and I’m not comfortable with that level of hypocrisy. At one point, the Heart whispers a story to me that I really struggle with. It relates to a man tending a ramshackle dockside tavern. “He took her books, and made her watch as he burned them.” The thought of it makes me genuinely angry, but cruel and nasty as such an action is, in the end I stay my blade. If I’m giving thieves a pass, it would be wrong to kill for destruction of property, however vindictive.
I continue up the hill, judging as I go. The Overseer’s Headquarters proves particularly fruitful. From a rooftop, I drop blade-first onto the shoulders of someone who had a woman dragged to her death for witchcraft. Inside, the Heart hisses of another, “He’s not a believer, but he tortures them anyway.” Wow, champion of the world here. I use a flame dart for this one.
By the time I jump into a carriage bound for Addermire, I’ve relieved another 16 people of their vicious lives, and those were just the really bad ones. All-told, I’m feeling pretty bleak about Dishonored’s world as the Art Deco bulk of Addermire looms into view.
Cat person

Mercifully, Addermire appears to have sensed my ailing mood and prescribes a remedial sprinkling of decency. As I arrive and explore the area surrounding the carriage station, I find guards who for once are more kind than cruel. “He’ll never be a rich man, but he is honest,” it says of one watchman. Of another, the Heart whispers “He gives part of his rations to two street urchins.” I love the colour the Heart’s oral vignettes add to the world, but it’s a relief to use a paint that isn’t black.
I sneak by this little cluster of wholesomeness. Upon entering Addermire proper, Karnaca’s ugliness rises to the surface again. “He crushed her fingers and told her she needed a permit to fiddle on street corners.” Grim, but I grit my teeth and move on. “She dumped them in the bay.” I draw my sword, but for all I know the Heart could be talking about fl y-tipping, so I settle for a sleep dart and head to an outdoor terrace.
“He threw her cat out of the window.” Okay, murder time. I rush across the terrace and gut Addermire’s resident cat-launcher. But in my haste I neglect to check my surroundings and alert a cluster of guards to my presence, including a pistol-toting officer. Once I escaped Dunwall, I resolved that bets were no longer off, so I don’t want to kill any of these guards unless I’m sure they deserve it.

What ensues is a semi-farcical battle across the terrace as I deflect blades and bullets with my sword, while juggling the Heart to see into the souls of my opponents. The grunts have done nothing particularly egregious, so I knock them out with a combination of sleep darts and stun mines. The officer, however, is a rum one. “He put the poison in the wine and replaced the cork. He plans to give it to his father as a gift.” Oh aye? Well, I’ve got a gift for you pal. Plot twist, the gift opens you.
With the officer dead, I focus on completing my objectives. In the end, I leave Addermire with seven more souls weighed upon my imaginary scales. I spared the Crown Killer, however, for story reasons that I won’t spoil.
As I leave Addermire, I reflect on my actions so far. I feel like I’ve been sufficiently strict with my judgements. Okay, maybe the cat thing was an overreaction, but nearly all the others have been traitors, murderers, or worse. Nonetheless, up to this point I’ve killed 36 people, leaving me with a High Chaos rating. If I carry on like this, my overall effect on Karnaca and the Empire will be negative.
If I’m going to continue, I’ll have to start thinking longer term, and focus on eliminating the apples that aren’t just bad but seething with maggots. Otherwise, I’m liable to doom the Empire to a fate worse than if I’d stayed a prisoner in Dunwall.
Part 2: The judgemental playthrough of Arkane Studios’ revenge fantasy continues.

We’re off to the Clockwork Mansion today to put a spanner in the works of inventor and philosopher Kirin Jindosh, as well as rescuing Anton Sokolov, currently in Jindosh’s clutches. The good doctor Hypatia, who I spared in my visit to Addermire, describes Jindosh as having “the empathy of a Mantis”, so I’m already leaning toward a permanent solution to this particularly human enigma.
I’m less certain about how to approach the dozens of other guards, gangsters and civilians I’ll encounter en-route. I left Addermire having killed a total of 36 people. Thanks to the Heart telling me their innermost secrets, I’m confident they thoroughly deserved it, but it’s also left me with a High Chaos rating. This basically points you towards the bad ending, although the game doesn’t explicitly say this. I’m supposed to be cleaning up Karnaca, not smearing the blood around to make a bigger mess, so ideally I need to rein my murder in a little to avoid dooming the city.
Naturally, the moment I arrive at Karnaca’s Aventa District, the Heart provides me with a nightmare judgement. I point it at a civilian hanging around outside a wine shop, and it says, “He knew hagfish was not a fit food for the child. All those little bones. But he didn’t care.”
Jeeeeebus Eight Cripes, everything about this is horrible. The story is horrible. The phrasing is horrible, disturbingly vivid but also just vague enough to put doubt in my mind. The man is clearly horrible, but is he horrible enough? Remember, I need to try to minimise my footprint. In the end, it’s the specificity of the words “All those little bones” that forces my hand. I possess him, walk him toward a secluded area and put a dart in his ear. All those little bones.

I think this encounter must have thrown my concentration, because almost immediately afterwards I stumble into a fight with two of the grand guard. I race into a nearby tenement to escape, but they follow me in.
I deflect blades and bullets with my sword as I backpedal up the stairs, trying to focus the Heart on the officer at the front. “They place bets, he and the other guards, on which prisoner will cry first.” Hardly person of the year material, but not one who deserves to die by my hand. I counter his attack and grapple him, trying to choke him out as the second guard closes in. The officer is between us, but the guard raises his sword anyway.
Don’t do it.
He swipes, cutting clean through the officer’s leg, who crumples and dies. Aghast at what he’s done, the other guard flees the scene, while I’m left standing on the stairs with the corpse of a man I didn’t want dead.
Great. Just perfect. This is exactly the kind of scenario I’m trying to avoid. I leave the tenement, trying to get my head straight. But the guard who fled has apparently had time to think about how he just ran through his own superior, and has evidently decided that it was all my fault, and comes after me again.
After what just happened, I don’t want to mess about, so I Blink onto a first-floor balcony. Taking very careful aim, I shoot the guard with a sleep dart. But he’s still running as the toxin takes hold, and he topples over a railing, landing hard on the cobbles running along the canal. Oh no.

I blink down to street level and rush over to where he lies sprawled, dead as a doornail.
Civilians are screaming now, so I don’t have time to process this monumental fuck up. I cut down an alley and make haste to the carriage station. I decide to head straight there and resume my judgements in the next area, but I at least focus the Heart on the people I pass, and mercifully it comes up with nothing too egregious.
As I turn into the square behind the carriage station, however, I’m immediately set upon by a group of Howlers—Karnaca’s meanest gang. Simply being Howlers puts them in the frame for a death sentence, as does the fact that they’ve attacked me unprovoked. But after what’s just happened, I really don’t want to kill more people than necessary, so I do the best I can to avoid lethal force. At the end, two Howlers are dead, and three are unconscious. I’ll take it.
I hop in the carriage to Upper Aventa, which I need to navigate before heading to the mansion. I also use the Heart to scan for any murky souls lurking around. One guard stood by a wall of light, “Killed his neighbour’s dog [and] sold the meat to a cook on a merchant ship.” So I pop his head from a distance with a dart.
Another, “Locked a squadmate in a blood-fly infested apartment out of jealousy.” The Heart even specifies this poor squaddie, “Died a horrible death,” so I walk this guard to a quiet spot using possession, then plant a spring razor on his back.
Feeling a little more reassured, I cross the gorge that separates Upper Aventa from the Clockwork Mansion, and enter Jindosh’s whirring labyrinth. I stick to, as Corvo puts it “the space between the walls” as much as possible, trying to avoid the bladed hulk of the prowling Clockwork Soldiers. Inevitably though, I have to creep out to deal with a particularly unpleasant guard. “They won’t let him back into the bathhouse,” the heart says. “Not after what he did to a boy there.” Barf.

I sneak out to shank the guard, but I’ve failed to notice a sleeping Clockwork nestled in the wall, which promptly stirs. I have enough time to do the deed, but then the Clockwork is on me. I blink away, spin around, and shoot the Clockwork’s head off with my pistol, which stops it from being able to hunt me.
It’s the slickest move I’ve made all day, but unfortunately it sends the Clockwork haywire, while the gunshot attracts the attention of several other guards.
I watch in horror at the storm of blades and blood that unfolds. I can’t get close without being attacked from half a dozen angles, so I try to take out the Clockwork with bolts and bullets. It’s like shooting peas at a tank, and it’s only when the Clockwork has minced all three guards that I finally manage to destroy it.
How many of them deserved to die? How many didn’t? I’ll never know. What a mess. The only good thing about this calamity is it’s given me an idea of a way to deal with Jindosh. I find my way to his laboratory, where the inventor is protected by two Clockworks.
There’s no way for guards to get in here, so I deliberately attract the attention of one, and swiftly decapitate it. I then draw the second one away while the headless Clockwork makes short work of its master.
Job done, I quickly locate Sokolov, and grab him from his prison. As I’m leaving, a cluster of guards appear from the elevator and spot me.
I’m not trying to fight them with a pensioner on my shoulder, so I dash back to Jindosh’s lab, and use the walkway across the gorge to escape the mansion.
Suffering witches

I leave Aventa with 13 people dead, almost half of them accidental. This is a disaster, about as far away from clockwork as you can get. As night falls, and I depart for my next target, my overriding feeling is “must try harder”.
Tonight I have an appointment with the curator of the Royal Conservatory, Breanna Ashworth. We’re going to have a sharp discussion about preserving items of questionable value, namely her life. I’m also going to keep my eyes peeled for more general rotten apples, but I need to be strict now more than ever.
Problem is, this is very difficult when the whole damn orchard seems to be festering. Once again, my first targets sets the tone. “He pushed her hard against the machinery. She lost the child,” the heart says. Grim, grim, grim. I possess the guilty dockworker and walk him up the street a little, then snuff him out with a bolt. Further up the street, a female guard killed a woman wearing “a blue dress with butter roses”, while her male squadmate killed two people and made it look like “a lover’s quarrel”. A well placed spring razor deals with them both.
I try to be careful, precise, thinking every movement through, but it never seems to be enough. I’m too slow to stop a grand guard officer pushing a servant girl off a roof. I give the poor wretch the best justice I can, but it feels hollow. In an alley near the district’s black market, I bump into another group of Howlers. I manage to take them out non-lethally, yet as I walk away I hear a crunching sound. I turn to find a swarm of rats devouring one of the unconscious Howlers. I kill the rats before they can move on to the main course, but the starter is well and truly consumed.
By the time I enter the conservatory, my mood has turned black, and unlike when I arrived at Addermire, Dishonored II provides no ray of hope.

Quite the opposite really, as the conservatory is overrun by Empress Delilah’s coven of witches.
In a world that is filled with nasty people, the witches still manage to stand out. They kill for fun and use magic to torture their victims in truly horrific ways. This isn’t abstract lore, either, evidence of their depravity litters the conservatory. There are bodies everywhere, sprawled on the floor and dangling from the ceiling.
In one room, I find a corpse pin-cushioned by sleep darts. In another, a literal pile of dead half-charred from a clear attempt to burn them.
It’s at this point I decide to break my own rules. There’s no point looking for guilt here. I’m surrounded by it.
It literally paints the walls. Instead, I’m going to look for innocence, and if I don’t find it, then to hell with them all.
I set the heart to work, only now with a different objective. As I suspected, it comes up with little in the way of redemptive insight. I let one witch go because she “struggles to hold on to who she was” while another “misses the younger brothers she left behind”. Small hope for change, but at least it’s some hope.
The rest, though? Ugh. I stalk through the halls, no longer even trying to sneak, fi ghting and killing almost every witch I come across. I run out of spring razors halfway through the level. At one point I spot a witch stood on the statue of a turtle, performing a mock scene of Delilah’s usurpation of Emily. The Heart whispers, “Her spirit is as black and distorted as the void. She takes delight in slaughter.” She burns.
In the end, I leave the conservatory with 22 more souls on my list, most of them witches. Ashworth is somewhere amongst them, shot in the head as I carved my way through her underlings. It’s going to take a miracle to avoid High Chaos now, but at this point, with everything I’ve seen, I’m struggling to believe Karnaca is even worth saving.
Part 3: Reserving judgement in an attempt to save Karnaca from Chaos.

Today we’re visiting mining mogul Aramis Stilton, who resides in his manor on the outskirts of the Dust District. Stilton knows the secret to the usurper Delilah’s invulnerability, and I need to retrieve it from him one way or another. To get there, I must also crack the riddle of the Jindosh lock, a huge mechanical door commissioned by Duke of Serkonos that separates Stilton’s manor from the rest of the district.
Yet as I prepare for the mission, my concern rests entirely with the mess I made while judging the citizens of Karnaca last time. I’m only supposed to kill people who the Heart tells me are guilty of wrongdoing, but a series of calamities en-route to the Clockwork Mansion resulted in multiple accidental deaths. I then stupidly took my frustration out on the Witches who brought merciless slaughter to the Royal Conservatory. There’s little doubt they deserved this, but my gratuitous actions have also sent my Chaos rating skyrocketing.
I left the Conservatory ready to let Karnaca burn, as finding a good person in Serkonos is harder than finding a Malteaser in a cow pat. But I’ve since had a change of heart. If I end the game on High Chaos, then all my efforts to rid Karnaca of its most evil inhabitants will be rendered pointless. I need to start reducing my Chaos level, and fast. Trouble is, I said this last time and ended up killing more people than I did previously. So as Anton Sokolov ferries me to the Dust District, I make a decision. I’m not killing anyone today. I’ll still use the Heart to judge those I come across, but my blade is staying sheathed, no matter what they’ve done.
A different way

Instead, I’m going to focus on cleaning up the streets a different way. The Dust District is ground zero for a war between the Overseers and the Howlers. The Howlers are led by a man called Paolo, while the boss of the Overseers in this area is Vice Overseer Byrne. Either man will help me crack the Jindosh lock provided I eliminate the other and show them the corpse. But there’s a third way to get the code, one that also lets me neutralise both men without killing them.
Pulling this off is tricky. First I must retrieve a key to the nearby Silvergraph studio from the office of a Howler named Durante. The Howlers are based out of a pub called the Crone’s Hand Saloon, so that’s my first stop. As I make my way there, the Heart decides to test my murder-abstinence by offering a few choice chumps. “He was afraid she’d tell the Overseers about his hobbies” the Heart whispers of one civilian sat on a bench. “He dragged her to a bloodfl y nest.” A little further on, I discover a man who blinded a cobbler with her own hobnails. Delightful.
It’s tempting, very tempting. But I stick to my guns and move on. As if sensing my reluctance to get stabby, the Heart tries a different tactic. I sneak into the Crone’s Hand via an adjacent apartment condemned due to Bloodfly infestation. Inside, I discover a couple of Nest-Keepers, humans turned into thralls by the Bloodflies. I don’t know how human they still are, but I focus the Heart on them anyway. “They’ve taken over his body, his mind,” the Heart says. “Until he draws his last breath, they will control him.”

Oh God. Must I ponder a mercy-killing now? Dishonored excels at making me feel bad about not- murdering people. No, I have to think about the bigger picture. I put both Keepers down with a sleep-dart, and enter the Crone’s Hand.
I’m beginning to think this is going to end in another rampage. I’m already fi nding it hard to stay my blade, and to make matters worse I’m now inside the den of the Howlers, one of the most depraved factions in the game. Yet as it turns out, things aren’t so simple amongst the locals of the Crone’s Hand.
“He brings flowers to her grave every day.”
Oh, that’s nice.
“No wine for this one, his coin goes to bread and cloth for that mother and her babe.”
That’s very nice.
“His mother taught him to hide trumps in his sleeves and other card cheats.”
Right, here we go.
“Yet he plays an honest game.”
Oh Heart, you tease!
Finding decent souls amongst the Howlers boosts my spirits, although sadly it doesn’t last long. I manage to sneak to Durante’s office, only to discover the door is locked. Turns out Durante got captured by the Overseers, and his key went with him. Great, so now I have to cross town, steal the key from the Overseers’ HQ, and then come back. This not-killing people lark is a right faff.
People in narrow alleys...

The Overseer HQ is a crumbling multi-storey tenement shored up with elaborate wooden-scaffolding. The key I need is in the Vice-Overseer’s office, right at the top. As I carefully sneak through the building, I set the Heart on any Overseers I pass. Nothing too egregious comes up, not that it would have mattered much.
In the end, I swipe the key unseen from Byrne’s office with four other Overseers in the room. I’d forgotten how satisfying Dishonored’s stealth play is, and I’m enjoying sneaking over rooftops and slipping through cracks once again. I return to the Crone’s Hand and grab the Silvergraph studio key. I also nab the code for the Jindosh lock, scrawled on a piece of paper on another desk. I then scoot across the rooftops to the studio. Inside are two coffin-like transport cases that a pair of now-dead miners planned to use to escape Serkonos. I’m going to put Paolo and Byrne in them instead.
Paolo first, as he’s directly below me in the Crone’s Hand courtyard. I possess him, sneak him into a quiet corner, and choke him out. Instead of flopping to the ground however, he transforms into a swarm of rats.
Damn it, I’d forgotten Paolo is protected by black magic. As if that wasn’t bad enough, the swarm scurries through the courtyard, alerting all the other Howlers. The result is a massive, multi-staged fight, as I gradually make my way up through the floors of the Crooked Hand, trying to fight off around a dozen Howlers without killing any of them. I achieve this with a combination of slow time, sleep-darts, and a whole lot of chokeholds, before finally knocking out Paolo a second time on the top floor of the building.
This time he remains un-rat-ified, and I transport the body to the Silvergraph studio.
Sorted. Byrne next. I head to the Overseer’s office, but this time by a different route. Earlier I noticed a gap in the brickwork near the Overseer’s HQ. Beyond it is an alley that leads to a back-entrance. I figure this will make for a slightly easier infiltration.

I figure wrong. Turns out a couple of Overseer’s have booby-trapped the passage, and as I sneak up the path, I trigger one of said traps. The bolt misses, but the noise alerts the two Overseers at the top, and they spot me. I don’t want to get into another fight, so I race back down the path and slide through the gap in the brickwork. I figure they won’t follow me this way.
This time I figure right, although I wish I hadn’t. As I walk away from the Black Market, a massive explosion detonates behind me. I return through the gap in the brickworks to discover bits of Overseer everywhere. Seems there was a miscommunication in tactics between the Overseers. Only one chased me down the path, while the other decided to throw a grenade at me, which rolled down the hill and exploded at the feet of the first Overseer, blowing him to smithereens.
I mean come on! If I go to all this trouble to avoid killing you, the least you could do is avoid killing each other! You know what? I’m not taking the blame for this one. People in narrow alleys shouldn’t throw grenades. Simple as that.
In the end the shortcut proves little more helpful than going in the front, which given someone just died for it is intensely annoying.
Nonetheless I manage to slip past the Overseer security and quietly choke out Byrne. I exit through the window in Byrne’s office, and drop down onto the street below to deliver him to the Silvergraph studio.
Job done. Hopefully the Dust District will be a little better off without those two squabbling over territory. I make my way to the Jindosh Lock and enter the code, completing the level. My chaos level is still high, which is frustrating but unsurprising.
Fortunately, we’re not finished yet, and I have a plan that, with luck, will tip the balance.
Sealing the crack

Aramis Stilton’s manor is unlike any other location in Dishonored II. A strange ritual performed there has left a leak between the void and the real world, hence the mission’s official title A Crack in the Slab. This leak means my Outsider powers won’t work here. Fortunately in their place the Outsider has provided me with a Timepiece that lets me travel between the manor’s past and present. More importantly, actions performed in the past will have consequences for the manor’s present.
I’m going to use this to save Aramis Stilton’s life.
The mechanics of this are pretty straightforward, I just need to reach the manor’s back-garden in the past, and choke Stilton out in his gazebo, preventing him from attending the ritual and witnessing the horror that took place there—a horror which drove him mad. The process, however, is tricky. The house is a gigantic maze stretched across two timelines. Doorways blocked in the present are clear in the past, and vice-versa. The absence of my powers makes movement trickier, although I can avoid guards easily enough by escaping into the other timeline.
Alongside the fact that I’m currently murder-averse, my journey through the manor is relatively low-key. The only truly notable event happens when I arrive in the back-garden and almost completely screw up saving Stilton. As I drop into the gazebo to choke him out, a pair of guards spot me, rushing over while I grab Stilton around the neck. One of them raises his sword to attack right through Stilton. I desperately back away as he swipes, and his blade misses Stilton’s stomach by a hair’s breadth. I put a sleep-dart in the guard, then hide Stilton amid the foliage before absconding to the present.
It works. Years of grime and decay are instantly swept away from Stilton’s manor, replaced by gleaming marble polished by newly appeared servants. It isn’t merely Stilton’s home that has changed, either. As I complete my remaining tasks and head out into the Dust District, it too is revived. The buildings are no longer crumbling, and the miners are no longer hungry. “Maybe no one will even notice,” Corvo mutters. “But things have changed here for the better.” Seems all that not-killing people has paid off. But has it paid off for me? As I return to Sokolov in the skiff, I get my answer. Highlighted in bright green lettering, my Overall Chaos level now reads “LOW.”
A big relief. But the job isn’t done yet.
I’ve only just tipped the balance of Chaos in my favour, and there are still two missions to go. I’m going to be walking a tightrope for the final stretch of the game, but the Judge is back in action.
Part 4: The Judge returns to Dunwall, and makes his final ruling.

We’re approaching the endgame now. Two targets remain, Duke Luca Abele of Serkonos, and the Usurper herself, Delilah Copperspoon. Thanks to largely staying my blade last time, I managed to nudge my overall Chaos rating down to Low. This means I’m free to judge and, if needed, execute the citizens of Karnaca once again. I’m only just under the threshold, however, so I’ll need to be exacting in my final judgements, or else it might spell disaster for the whole Empire.
Tonight, however, we bring down a duke. Abele is holed up in his Grand Palace, a sprawling modernist structure made of shards of white marble which vaguely resembles a dropped pavlova. Meagan drops me off in the nearby district, letting me visit the Black Market, and providing the opportunity for a little judgement along the way.
The safe house
I cross the main boulevard and head to a narrower street further up the hill. There’s a gaggle of guards patrolling down the far end, so I use my optical zoom to focus the Heart on them. The officer grew up as a street urchin and now wears his uniform proudly, which is nice for him, I guess. One of his subordinates is less pleasant, however. “He stole an entire case of potted whale meat on the way to the children’s home, a gift from the Empress.”
What a prize git. I’m tempted, but this is only a middling moral outrage in Karnaca. I leave him be and instead decide to explore the nearby safe shop. This, incidentally, is a shop that sells safes, rather than a shop that is safe. Indeed it’s rather the opposite for the owner, as he’s currently being threatened by a guard.
I’m deliberating how I feel about extortion when the guard makes the decision for me. “No one knows who started that fire,” he says, referring to another outlet of the store chain, with the unsubtle inference that he started it.
“Our brother died in that fire,” the owner responds.
Ding ding ding! We have a winner folks!

I sneak up behind the guard and slit his throat. You’d think the owner would be thankful for me solving this problem for him. But for some reason the sight of a masked killer throws him into a panic, and he rushes out of the shop screaming for help. The two guards I spotted before rush in. I knock out the whale-meat thief, and use my new wind-blast power to knock the officer off his feet, giving him a kick to the temple as he attempts to stand.
As I depart, I notice that the meat thief is apparently also dead. My wind-blast must have slammed him into a wall, breaking something vital. Oh well, no point crying over spilled whale-meat. I move on.
I head to an apartment-block up the street. On the roof is a wind-turbine powering a wall-of-light which blocks the entrance to the Grand Palace. I disable this without the guards noticing, and then drop into a bloodfly-infested apartment below to grab a rune. As I burn the bloodfly- nests, a nest-keeper shambles into the room. I don’t have any sleep darts, so I use a howling bolt to temporarily blind him, and then grab him around the neck to knock him out. As I do this, however, the bloodflies descend, and sting their own nest-keeper to death.
Two things: 1) including previous runs, I’ve played this game for over 40 hours and it’s still finding ways to surprise me, and 2) fucking hell Dishonored! Is there no limit to how grim you can get? Given the guy was basically a zombie, technically it’s a mercy, although that doesn’t stop me from feeling more than a little sick.
Double jeopardy

I press on to the Grand Palace. Here the duke and his cronies live in a perpetual state of debauchery and depravity. I experience this first-hand when I find a group of aristocrats throwing knives at two servants strapped to giant targets. Both servants are quite clearly dead, while one of the nobles remarks, “What was it you said? That you could hit him in the head, or avoid hitting him in the head?”
Absolute monsters. I slow time, rush in, and drop a springrazor in between them. I watch with a deep sense of satisfaction as they’re torn apart in slow motion. Good riddance. The aristos aren’t the only deeply repugnant individuals I discover lurking in the palace. In what appears to be the palace bar, a group of guards are playing cards, while another is asleep behind the bar. According to the Heart, the sleeping guard covered a baker in syrup and “let the rats do the rest”, (WTAF?!) while one of the players pushed a man from a roof and made it look like an accident. A crossbow bolt to the head silently deals with the sleeper. As for the card-player, I possess him, walk him out into a nearby bedroom, and shank him in the back. This alerts two noblewomen also in the room, but they’re quickly neutralised with a pair of sleep-darts.

At this point, I move on to the duke himself. My instinct is just to kill him, only I’m mindful of my Chaos rating. Fortunately, there’s a subtler way of eliminating the duke. Abele employs a body-double. En-route to the palace, Meagan described the double as a “good man”, so perhaps we can arrange a smooth transition of power.
I locate the double in what appears to be a throne room. He’s guarded, but the guards are easily dealt with via a combination of possession and a really tight hug. The double agrees to my plan, stating, “I’ve spent years mimicking this asshole.” All he needs me to do is knock the duke out. I head to the real duke’s chambers and, after a little scuffle, do exactly that. The fake summons the guards, and tells them his body double went mad and tried to stage a coup. Abele is dragged off to Addermire kicking and screaming, compounding his fate with every protestation that he’s the real duke.
Our time at the palace is almost up. But there’s one, sad job left to do. Hidden in the duke’s secret vault is a statue of Delila that contains a piece of her soul, making her effectively invulnerable. Before I can kill Delilah, I need to put her soul back together. To do this, however, I need a vessel—the Heart. In other words, it’s time to say goodbye to the Judge’s most true and faithful sidekick. With Delilah’s soul corrupting it, the Heart can no longer tell me about the souls of others. When I depart Karnaca to make my final judgements, I’ll be making them alone.
Homecoming

We’re back where we started. Delilah’s short yet sharp reign has not been kind to Dunwall. The streets are abandoned, save for prowling Wolfhounds and members of the Hatter gang. I no longer have the Heart to guide me in who’s just and who isn’t, so it’s all down to my eyes and ears. Looking around, I’m not feeling especially merciful. I won’t kill anyone without clear evidence they deserve it, but if I’m attacked unprovoked, all bets are off.
My journey to Dunwall Tower is largely uneventful. The only notable event occurs when I encounter a couple of Hatters chucking glass bottles across a courtyard. “Nothing to stop us tearing up the city!” yells one gleefully. Are you sure about that, pal? A blast from my pistol sends him sprawling into a barbed-wire fence, while I tranquillise his partner with a sleep-dart.
As I approach the tower, the city increasingly resembles a warzone. The Overseers recently assaulted the tower, but only succeeded in giving it a bold new paint-job. Moments later, I discover why. The tower is overrun by clockwork soldiers and Delilah’s witches—the bane of my judging career. Most of Dishonored’s factions use violence to further their own ends, but none of them delight in it quite as much as Delilah’s coven.
I’m feeling extremely stabby, but as I search for an entrance to the tower, I limit my violence to blasting the head off one witch who spots me approaching (not my specific intent, I would add).
Inside, however, I discover the witches have been up to their old tricks. About a half-dozen of them are sat around a dining table shared with an equal number of corpses. The witches are eating, chatting, laughing—it’s a banquet of depravity. I can’t let this go unpunished, but witches are powerful foes, and there are a lot of them. So I decide to enlist some help. In an adjacent room is a patrolling clockwork soldier. I slow time and blink across to the soldier’s flank, quickly rewiring its circuitry so that it will fight on my side. Immediately, the clockwork clocks the witches in the next room, and marches through the door, arm-blades raised.

What results is the most spectacular battle I’ve experienced in this entire play-through. A second clockwork soldier that I didn’t spot activates in the dining room, and rushes over to meet my clockwork bot. I don’t get to enjoy the duel, however, as I’m suddenly rushed from all sides by witches. I blast a couple with my pistol, but there are so many that I’m concerned about tipping the balance of Chaos if I kill them all.
Instead, I drop a stun-mine on the floor to knock a few unconscious, and mop up the rest with a combination of sword and crossbow.
Meanwhile, my clockwork soldier has made short work of his doppelganger, and is now carving his way through the last remaining witches. I leave the machine to it, and head to the security room to activate the power, before ascending the elevator to confront Delilah.
Unlike the duke, there’s no tangible benefit to keeping Delilah alive, and I’ve seen what her coven is capable of. It’s a long, tough fight that takes us to an entirely different dimension.
Eventually, however, I tackle her to the ground and put a sword through her heart.
It’s done. Delilah is dead, and Emily is restored to her throne. Now it’s all down to numbers. Eleven dead in Dunwall, most of them in the tower’s dining room. It’s high, but not high enough to undo the work I did last time around. Looks like I’ve squeaked through without ruining the Empire. Huzzah for the Judge! Huzzah!

Before we end, I want to briefly discuss the reason for playing Dishonored 2 in this manner. While it undoubtedly provides an interesting (and sometimes worrying) insight into your personal ethics, the reason I like playing Dishonored in this way is how it encourages you to explore the full extent of the game’s systems.
It’s not so much about choosing who deserves to live or die (although that can be fascinating in its own right). It’s more about how you approach solving each little puzzle the rule set then throws at you. How to slip between three innocent citizens to get to the guilty one. How to fight four guards while only killing two of them. It just makes you much more aware of how broad and deep Dishonored’s mechanics go, while keeping you present and focussed in every moment.
And that’s just with Corvo. Goodness knows how a Judge run plays out with Emily. Heck, maybe you can tell me. After all, Karnaca certainly isn’t short of rotten eggs that need cracking.

