10 Sweet GIMP Photo Editing Tricks to Wean You Off Photoshop
Draw Graffiti without Being Harassed by the Five-O
We don't condone tagging (or whatever it is kids are calling it these days), nor would we want to explain to the local cop on duty or wandering gang banger why we're leaving our mark on a perfectly good wall. Luckily for us, neither of their jurisdictions extends into the virtual world.
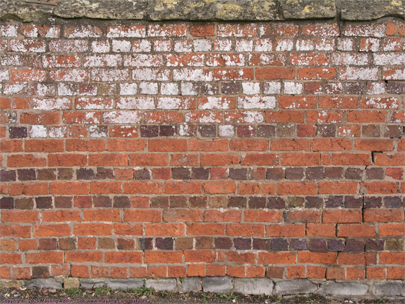
A prerequisite for this effect is a good graffiti font. There are a ton of free ones floating around the Web (see here ), and the one we're using is called Nosegrind. You also need a good backdrop, like a brick wall. Once again, the Web proves invaluable
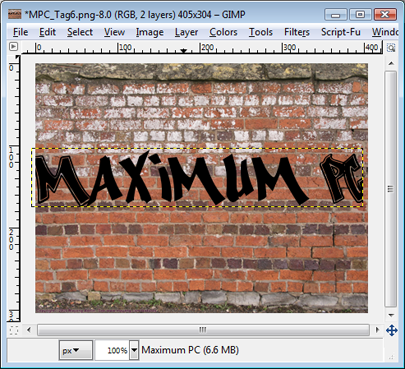
Open the image in GIMP that you want to tag, then select the Text Tool in the toolbox. Choose your font and desired size, then click on the image and begin typing.
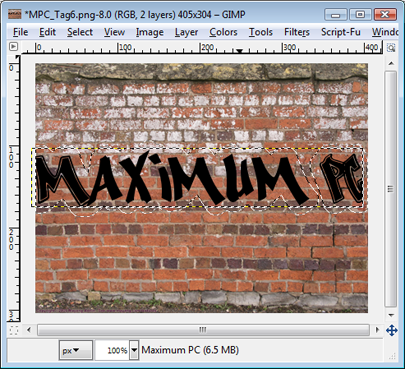
Next, right-click the text layer and select Alpha to Selection, then create a new transparent layer drag it and under the text layer. Click on Select>Grow. How large you decide to grow the selection will depend on how large your image is, but we recommend starting with a value of 10 and seeing how it looks.
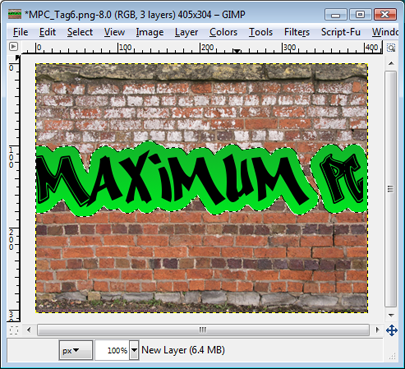
Now we're ready to add color to our graffiti. Pick a light and dark color for your foreground and background. Make sure the new layer you created above is highlighted, then select the Blend tool with Mode set to Normal, Gradient to FG to BG (RGB), and Shape to Linear. Draw a straight line up or down on your selected text. Click Select>None.
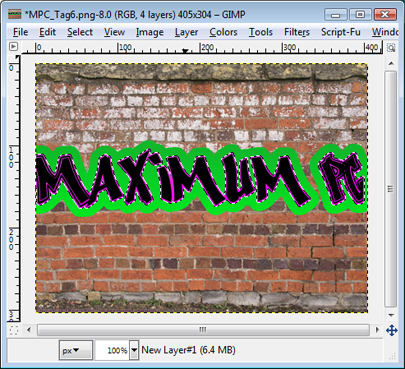
Right-click the top black text layer and select Alpha to Selection, then Select>Grow. Grow the selection by about 25 percent of the original value you grew it by previously (so if you grew it by 20 before, grow it by 5 this time). Make a new transparent layer and move it beneath the black text layer. Pick a different color than the one you used before and select a light (foreground ) and dark (background) shade. Select the blend tool and draw a line down over your text. Merge the layer down.
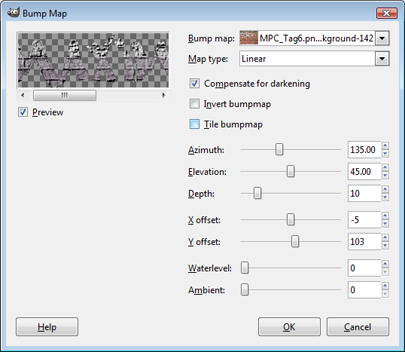
Now we need everything to blend into the brick background. Right-click on the top layer with black text and select Alpha to Selection. Change the foreground and background to a dark and light gray, respectively, and draw a line from the bottom to the top of your text with the Blend tool. Now go to Filters>Map>Bump Map. In the top pull-down menu, select your brick layer, change the depth to about 10, and hit OK.
Keep up to date with the most important stories and the best deals, as picked by the PC Gamer team.
We also need to change those gray colored bricks back to black. Go to Colors>Brightness and Contrast and decrease the brightness to about -115 and increase the contrast to around 35.
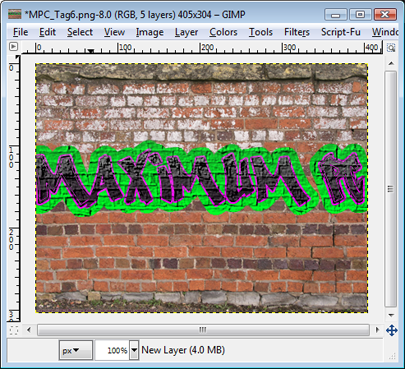
In our example, we used green and pink colored graffiti. To make these also blend in with the brick wall, go to Select>None, then right click the green text layer and select Alpha to Selection. Apply the bump map filter as you did before, only this time you don't need to follow that up with a brightness and contrast adjustment. When you're finished, click Select>None and repeat this step for the pink text layer.
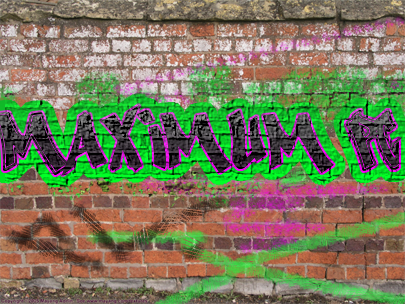
Use different brushes to sprinkle in some paint splatters and other effects to make it look more realistic.
Additional Resources
www.ghuj.com
Gimp.org/Tutorials
Gimp-Tutorials.net
Gimp-Tutorials.com
Gimper.net
Gimpology.com
Pixel2Life.com
