10 Sweet GIMP Photo Editing Tricks to Wean You Off Photoshop
| digg_url = 'http://www.maximumpc.com/article/features/10_sweet_gimp_photo_editing_tricks_wean_you_photoshop'; |
| tweetmeme_url = 'http://www.maximumpc.com/article/features/10_sweet_gimp_photo_editing_tricks_wean_you_photoshop'; |
You could buy a used car -- albeit not a very good one -- for the same scratch it takes to pick up a copy of Adobe Photoshop, the de facto standard in high-end photo editing software. Or a pair of GTX 285 graphics cards for that killer SLI setup you've always wanted. We could go on, but at $700 for a piece of software, Photoshop's MSRP hardly needs put into perspective. In short, it's expensive.
It's also powerful, but don't worry if you don't have a handful of Benjamins lying around. Thankfully, you can perform a lot of the same photo editing tricks for free with GIMP. Short for GNU Image Manipulation Program, GIMP is the open source (and no-cost) equivalent to Photoshop, and like it's paid counterpart, GIMP can be a little overwhelming at first. That's where we come in.
Like swimming, it's best if you just dive in. To help give you that push, we waded through the gazillion tutorials floating around the Web and brought back a sundry collection of groovy tips and tricks that, along with some touches of our own, will have you learning the ins and outs of GIMP while having fun doing it. We'll show you how to make lifeless photos pop with detail, how to tap into the Force and add a lightsaber to any pic, make your own custom brushes, and much more.
Be More Efficient with Batch Processing
After spending hours resizing and making minor adjustments to each of the hundreds of photos you took on your last vacation, you vowed to be much more seletive in what shots you take the next time you go on a trip. But you knew it was a promise you'd never keep, and that's okay, because even though GIMP doesn't come with a built-in batch editing feature, there's a plugin available that will add that functionality.
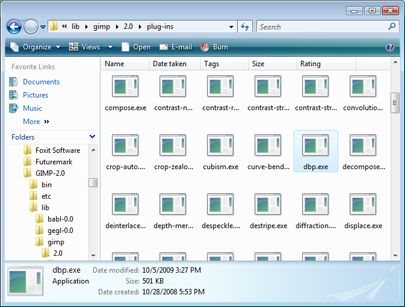
The plugin you're looking for is called David's Batch Processor (DBP), which you can download here . Scroll down to the Windows Users sections and grab the latest download ( dbp-1.1.8.zip ). Extract dbp.exe from the ZIP file and place it in C:\Program Files\GIMP-2.0\lib\gimp\2.0\plug-ins . That's all there is to it!
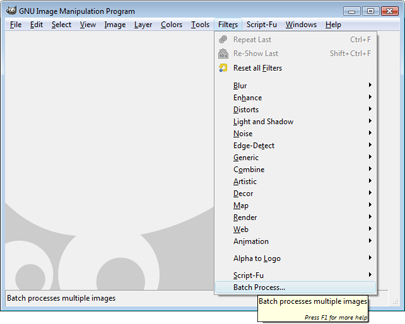
The next time you fire up GIMP, you'll find the Batch Process feature under the Filters menu. If you don't see this option, make sure you put the plugin the correct folder and reload GIMP.
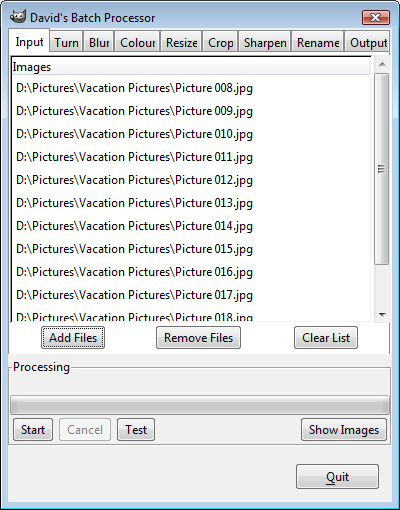
The Batch Processor window contains several tabs, but the first thing you need to do is click on Add Files and select the photos you want to alter. You can remove individual files if you accidentally add one or change your mind, or clear the entire list.
Keep up to date with the most important stories and the best deals, as picked by the PC Gamer team.
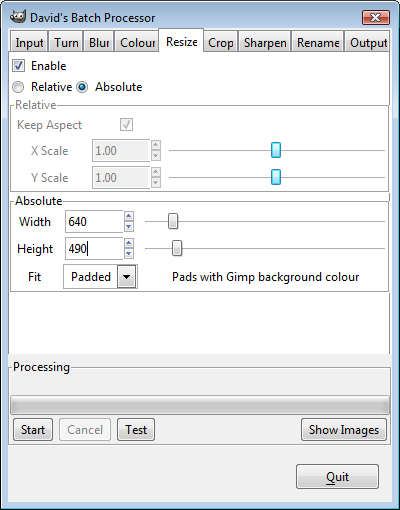
We tend to take high resolution images, which gives us the flexibility to come back later and edit them for different projects. But this also makes them unwieldy to send to friends and family who have no interest in downloading a 10MB attachment. We can rectify this by selecting the Resize tab, clicking on the Enable checkbox, and then choosing whether to downsize by Relative or Absolute.
Other options include the ability to turn, flip, and rotate images, blur photos, adjust the color (including auto adjustments), crop, and sharpen. We can also choose to rename our snapshots and output to a variety of file formats, such as BMP, JPG, PNG, and several others.
