10 Sweet GIMP Photo Editing Tricks to Wean You Off Photoshop
Mix B&W with Color
Some of the best looking effects are also the easiest to pull off, and that's definitely the case with this one. All that's required is a bit of patience and a whole lot of experimentation.
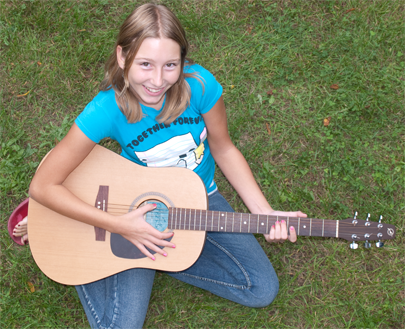
There's no hard and fast rule that says one type of picture will end up looking better than another, but generally speaking, you want to start with one where the main character or object is vibrantly colored.
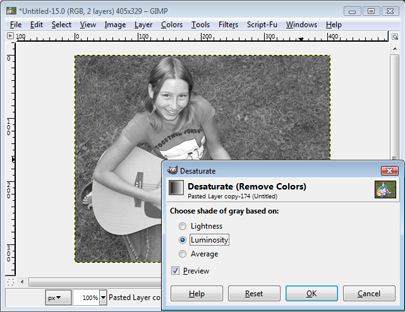
Once you've selected a photo and opened it in GIMP, duplicate the layer (Layer>Duplicate layer). We need to remove the color from this duplicate shot, and do that, navigate to Colors>Desaturate. You have three options to choose from -- Lightness, Luminosity, or Average -- each one representing a different shade of gray. We chose Luminosity for our example, but use whichever one you like.
Now you should have a black and white layer on top of the original color photo. Right-click the top b&w layer and select Add Layer Mask. Select the White (full opacity) radio button and hit Add.

Now you're ready to start restoring color. One way to do this is by simply grabbing the brush tool and going to town willy-nilly, but we found it easier to zoom in and create a selection path around our area of focus. Once you're zoomed in, select the Paths Tool and create points all around the area you want to color. Then choose Select>From Path or press Shift+V to make the selection active. Now you can restore color using the paint brush without fear of accidentally spilling into other objects.
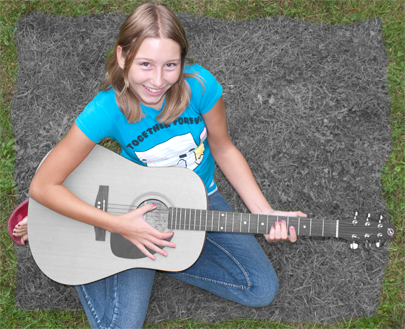
How much or how little of the picture you want to restore is up to you, but it doesn't hurt to play around (just keep pressing CTRL-Z to undo each step if you don't like the result). In our example, we partially restored an outline in the grass for a natural border..
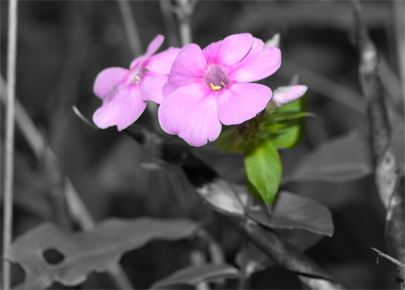
You'll often see this trick applied to flowers and plants, but don't be afraid to experiment with different types of photos and see what you can come up with!
Keep up to date with the most important stories and the best deals, as picked by the PC Gamer team.

