


If you want to keep your web presence as safe as your hard drive, check out our guide to protecting your privacy online.
Massive hacks and security breaches, the looming presence of the NSA, and the recent introduction of stringent data protection laws in the EU have many of us rightly worried about data security. As any power user knows, files that are nominally “deleted” by Windows usually remain recoverable on your hard drive. The OS simply changes a few bits in the file header to tell the system the data is no longer required. As useful as this is for legitimate users who may have deleted data by accident, bad actors, such as hackers, can use freely downloadable digital forensic tools to recover your files in seconds.
Eraser is a tool that seeks to restore the balance. This free utility works by repeatedly overwriting every bit of data in files or folders you select to delete it securely. Eraser is highly customizable: You can choose your own erasure method, such as seven passes of pseudo-random data, and can even automate tasks, such as overwriting free space on your hard drive. While Eraser isn’t completely effective when it comes to flash memory (see SSDs: A special case) and more advanced forensic techniques, you can gain some peace of mind knowing you’re using the very best erasure methods available.
1: Set up Eraser
Open your web browser of choice and navigate to here. Click the “Download” tab and then choose the most recent stable version of Eraser, which is at the top of the list. Your browser is now redirected to Source Forge, which hosts the installation files. Windows 10 displays a security alert at this stage. Click “Yes” to begin installation. The setup wizard first tries to install the .NET Framework 4 on your machine. If this is already installed on your version of Windows, you may see a system prompt. Click “Close” to proceed. Select “Next” on the welcome screen, and check “I accept the terms in the license agreement.”

The wizard now asks you to choose an installation type. A “Typical” install incorporates of all Eraser’s main features. Choose a “Complete” installation if you want to include additional functions, such as shell extensions. Click the “Install” button once you’ve chosen the type of installation you want, then click “Finish” to close the setup wizard.
2: Erase data
If you chose to install shell extensions, you can access Eraser with just a few clicks of your mouse. Open the File Explorer, and navigate to the file or folder you wish to securely delete. Right-click to open the context menu, and move your mouse to “Eraser,” then choose “Erase” (see image below). The first time you do this in Windows 10, you’ll need to click “Yes” to grant Eraser permission to make changes.
Eraser asks you to confirm before proceeding. Remember that any data removed will not be stored in the Recycle Bin prior to deletion, so carefully check you have the right information before clicking “Yes.” Eraser displays a notification reading “Task Completed” once your data has been securely erased. This may take some time, depending on Eraser’s configuration.

3. Configure Eraser settings
By default, Eraser uses the Gutmann method to delete files, which involves overwriting data 35 times. While this is ultra-secure, it’s usually overkill for most users, and can take hours or days to complete for larger files. Fortunately, Eraser supports a number of different methods to remove data.
Launch Eraser and click “Settings.” Find the “Erase Settings” section, and select the drop-down menu marked “Default file erasure method.” The US DoD (Department of Defense) standards for erasing data involve either three or seven passes, depending on the sensitivity of the information. While theoretically not as secure as the Gutmann method, they are much more efficient. Click “Save Settings” at the top-right to confirm changes.
4. Plausible deniability
While deleting files with Eraser makes them very difficult to recover, anyone with access to your hard drive can potentially view the clusters of pseudo-random data on your drive, and realize that you have something to hide. Mercifully, Eraser supports “plausible deniability.” This works by placing a harmless-looking file, such as an MP3, over erased data, making it much more difficult to tell where sensitive files were located previously. To do this, first choose a folder to use for decoy files, such as a music album. Open Erasure’s settings, and check “Replace erased files with the following files to allow plausible deniability.” Next, click “Add folder,” and select your chosen files (see image below). Click “Save Settings” once you are done.
Note that with the advent of file journaling and SSDs, plausible deniability has become difficult to achieve in practice. We strongly recommend using full-drive encryption (see “SSDs: A special case” below).

5. Scheduling tasks
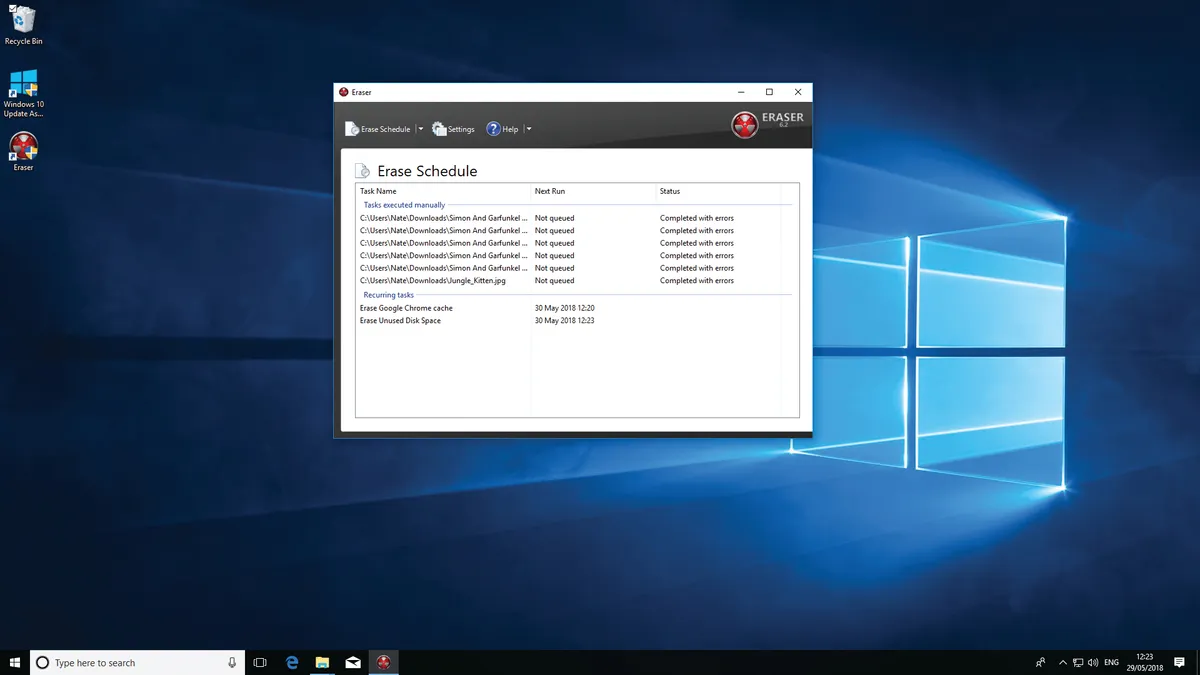
Eraser supports automated deletion of data (image below). This is useful for removing files in obscure locations, such your web browser’s cache.
Click “Erase Schedule,” then select “New Task.” Under “Task Properties,” first enter a meaningful name in the name field, such as “Erase Google Chrome cache.” Choose “Recurring” under “Task Type,” then click “Add Data.”
In the new window, select “Target type”—for example, “files in a folder”—and choose an erasure method, such as “Gutmann.” Use “Browse” to enter the file or folder path, then click “OK” to confirm.
Finally, click the “Schedule” tab to determine the time and frequency of your new task, such as @ 13.30 daily. Click “OK” to set your new scheduled task.
You can also use this feature to regularly erase free space on your hard drive. Simply choose “Unused disk space” in the “Add Data” section. You can also manually overwrite free space on any drive by right-clicking it in File Explorer, and choosing “Eraser > Erase Unused Space.”
6. Secure move
Eraser also incorporates a handy feature for moving files and folders securely. It does this by creating a copy of your data in virtual memory, securely erasing the original, and copying the file or folder to a destination of your choice.
To make use of this feature, first open File Explorer and navigate to the file or folder you wish to move. Right-click to open the context menu, and choose “Eraser > Secure Move” (image below) Eraser automatically opens a prompt asking you to select the target destination, such as a USB drive. Navigate to this and click “OK.” Eraser manages the copy process and securely removes data in the usual way.
By default, Eraser overwrites drives with one pass of pseudo-random data. If this isn’t sufficient to abate your paranoia, access Eraser’s settings, and choose a more secure method from the drop-down menu under “Default drive erasure method.”

7. Securely erase recycle bin
If there’s content on your PC that you’ve deleted previously, follow the steps outlined above to erase free space on your hard drive. If, however, the files and folders you want to remove are still in your Recycle Bin, Eraser can securely move these in place. Simply right-click the Recycle Bin and choose “Erase.” If you’ve previously enabled the plausible deniability feature, note that Erasure doesn’t place decoy files in the Recycle Bin. Be sure to use Eraser directly on sensitive data in future if you want to avoid scrutiny of your hard drive.

SSDs: A special case
Solid-state drives and USB sticks use flash memory. While this works much faster than a magnetic hard drive, each sector can only be written to a finite number of times. For this reason, most solid-state devices employ “wear leveling” mechanisms, which spread data around the drive as evenly as possible. This means the drive lasts longer, but is a nightmare from a security perspective, as most wear leveling procedures interfere with the secure erasure of data. When it comes to flash memory, there is no way to be sure sensitive data is completely gone, no matter how many times a file or folder is overwritten.
Short of incinerating your SSD or giving it an honorable burial at sea, the only way to be certain your files are safe is to employ full-disk encryption, using a program such as VeraCrypt or Microsoft’s own BitLocker. If someone attempts to recover data from an encrypted solidstate drive, they will find only fragments of encoded data, which are useless without the correct decryption key.
This article was originally published in Maximum PC's August issue. For more quality articles about all things PC hardware, you can subscribe to Maximum PC now.


