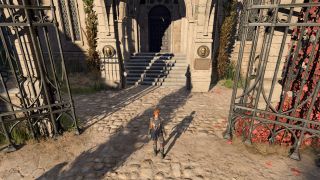
How to get to the House of Hope in Baldur's Gate 3
Head to the hells to steal the Orphic Hammer.

You may remember the House of Hope from when Raphael first teleported you there for a not-at-all sinister chat during Act 1 of Baldur's Gate 3. The deal-making devil's home is located in the nine hells, so isn't the easiest location to breach. However, if you've arrived in Act 3 and turned down Raphael's deal to give you the Orphic Hammer, you're likely realising that the only other route is to steal it from him.
Heading to the House of Hope and taking the Orphic Hammer is your best bet if your mind's made up about freeing Orpheus, but it's worth noting that this is entirely optional and pretty challenging. The final boss fight, in particular, can be very rough, so be sure to save before you try any of this. That all said, here's how to get to the House of Hope.
How to get to the House of Hope
How to get to the House of Hope


In order to travel to the House of Hope in Act 3, after you've heard Raphael's offer at Sharess' Caress, you're going to need to do a few things. First off, head to the Devil's Fee, directly north of the Lower City Central Wall waypoint—it's easy to recognise this house as there are little devil symbols on the pillars outside. The proprietor, Helsik, can send you to the House of Hope, but first you need to uncover her past dealings with Gortash.
If you visited the House of Grief for Shadowheart's quest, you can find a note there in the Infiltration Training room exposing Helsik, otherwise, you can just poke around upstairs, read her diary, and open some chests to discover she's more than she seems. Talk to her about sending Gortash to the hells, or just tell her you're interested in going to the House of Hope. The price is:
- Agree to pay her with a powerful artifact stolen from Raphael.
- Persuade her to halve the price.
- Pay her 20,000 gold.
If you've got the full sum I recommend paying her then immediately pickpocketing it back afterwards. Either way, she'll provide the ritual instructions and materials, which you take upstairs and arrange around the star as described. Make sure to take a long rest before you head to the House of Hope, since you're in for some hard fights.
How to get the Orphic Hammer and fight Raphael


Progressing through the House of Hope isn't especially tricky, though the last boss battle in particular is very tough. Here are three key bits of info that'll help you get through the main house:
- Wear a disguise: Hope can give you a disguise when you first arrive, or you can loot them from the wardrobes scattered around the area. If you don't wear the Debtor's Attire, you'll have to fight everyone in the House of Hope.
- Pickpocket the Archivist: This is how you get the boudoir invitation that allows you to pass through the barrier in front of Raphael's bedroom. Disarm the trapped painting on the left side of the room, then press the button below to reveal Raphael's Safe. Inside are some Soul Coins and Raphael's Notes, which contain the phrase needed to deactivate the barrier around the Orphic Hammer.
- Get into the prison by jumping off the balcony: If you choose to rescue Hope after you've stolen the hammer, you can get into the prison via a back entrance by jumping onto the cliffs from the balcony. This will give you an extra cleric in the final battle, but to free her you'll have to kill two Spectators and a bunch of Imps, so it's ultimately up to you as to whether that's a trade you're willing to make.
For the final battle, I used Shadowheart's Divine Intervention to refresh everyone's spell slots, and summoned a fair few minions to help out. The two most important things are closing down Raphael into melee, so he isn't just doing whatever he wants, and destroying the Pillars of Souls that buff him. I transformed Jaheira into an Owlbear for this and just had her jump around the room, smacking them.
The biggest gaming news, reviews and hardware deals
Keep up to date with the most important stories and the best deals, as picked by the PC Gamer team.
If you pass a very high persuasion check, you can also recruit Yurgir, and this will ultimately lead to him helping you during the game's final battle, too. He isn't especially powerful to fight against, but his Concussive Blasts will cause a lot of chaos in terms of positioning. The trickiest part of the battle is keeping the Cambions occupied and whittling them down while you destroy the pillars and deal with Raphael, so minions are extremely useful.
The Danse Macabre ability from the Necromancy of Thay which lets you summon six ghouls, will help a lot if you're struggling. Once Raphael is defeated, loot his body to get the Legendary Helldusk Armour set.
Baldur's Gate 3 guide: Everything you need
Baldur's Gate 3 infernal iron: Karlach collectibles
Baldur's Gate 3 owlbear cub: Befriend the bird
Baldur's Gate 3 find Halsin: Where's the bear?
Baldur's Gate 3 defiled temple: Solve the moon puzzle

Sean's first PC games were Full Throttle and Total Annihilation and his taste has stayed much the same since. When not scouring games for secrets or bashing his head against puzzles, you'll find him revisiting old Total War campaigns, agonizing over his Destiny 2 fit, or still trying to finish the Horus Heresy. Sean has also written for EDGE, Eurogamer, PCGamesN, Wireframe, EGMNOW, and Inverse.
Most Popular


