Climb the leaderboards with these F1 2020 setup tips
How to design an F1 2020 setup for every circuit.
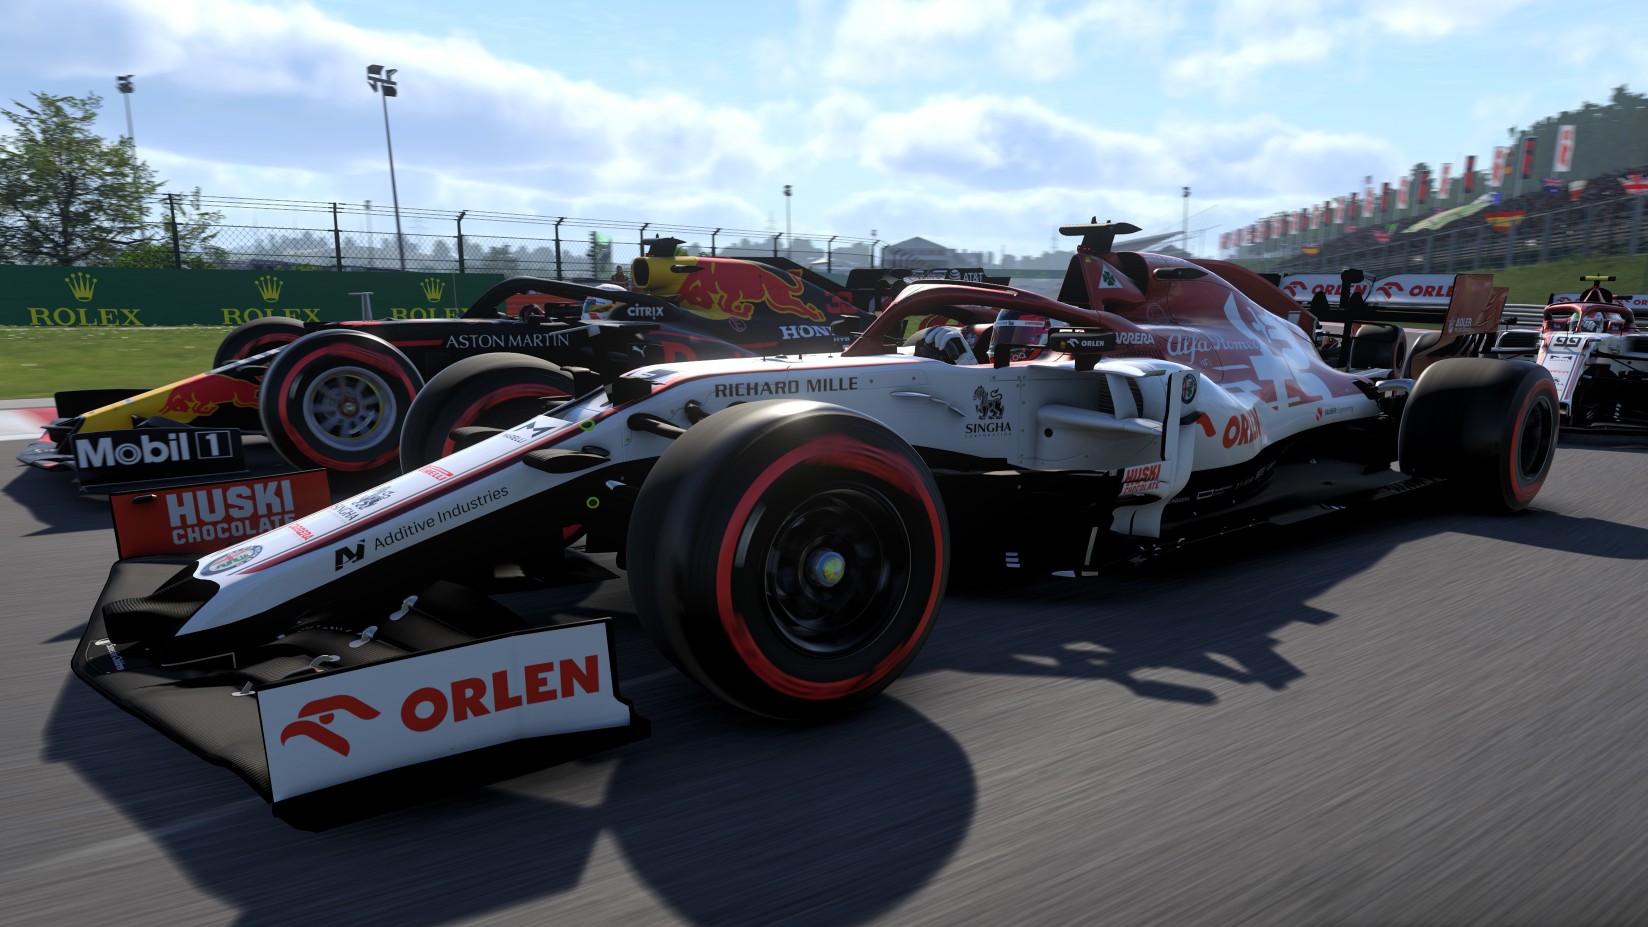
Looking for some F1 2020 setup tips? It’s been a hotly contested area in F1 for years: How much of a driver’s performance comes down to their raw motor skills and inputs, and how much are they being carried along by superior equipment? In sim racing that debate is: Are you just slower than the other racer, or do they have a better setup?
Realistically, it’s probably both. But either way, the default setup works pretty well at any of the 22 circuits; It’ll probably keep you competitive against the AI up until the mid 70s on the difficulty slider. But for online races, and especially time trials where leaderboard glory awaits, anyone using a good custom setup is going to have a huge advantage over your default car.
That's because a setup makes sure your car is working very specifically for the demands of a track, so it needs to be different at every circuit. If your opponent has tweaked their downforce and diff so they hit their top speed just at the end of the longest straight, and you haven’t, you’ve effectively handed them free extra horsepower. So, here's how to nail your own F1 2020 setups to give yourself the edge.
How to design a top-tier F1 2020 setup
Steal someone else's
There are a lot of settings to adjust on the car setup screen, and it can be overwhelming at first. Cards on the table, I don’t know what every single one of them does after a decade of playing the Codemasters F1 games, beyond what happens when I tinker with their values in pure trial and error. Thankfully you don’t need to know. You can just steal someone else’s setup.
If you head to time trial leaderboards and select a particular driver, you’ll be able to apply their setup to your car. This is a wonderful, wonderful thing because picking a setup from a top 50-placed driver will almost certainly gain you huge time over a lap compared to your default and you can learn from what they’ve tweaked.
Sadly simply applying Bono Huis’ setup to your car doesn’t turn you into Bono Huis. Everyone has a slightly different driving style, and they’re using slightly different wheels with slightly different hardware settings. For pad players in particular, using setups built for a wheel doesn’t always translate perfectly. But they’re a start.
Keep up to date with the most important stories and the best deals, as picked by the PC Gamer team.
And indeed, an end, if that’s as far as you want to take it. It’s absolutely possible to compete at a high level using other drivers’ setups. But if you’d rather learn all the inner workings for yourself, here’s one way to go about it.
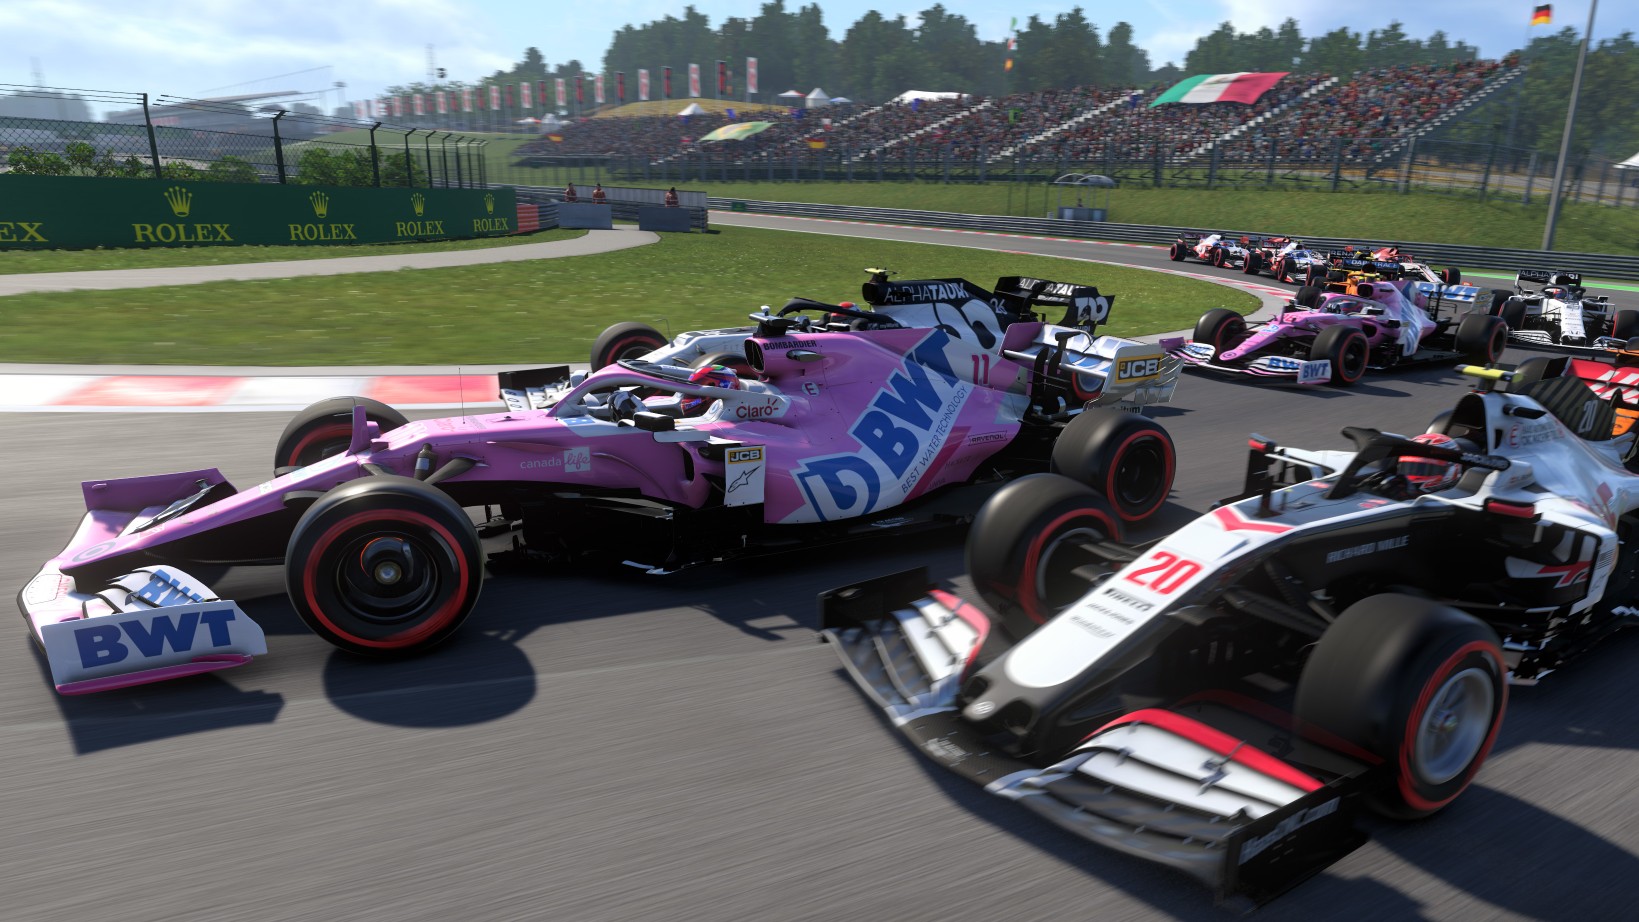
Reduce your downforce as much as possible
Before we get into a couple of example setups, here are a few basic principles that guide the process. The ultimate aim for any setup on any track is to run with your downforce as low as possible, and your suspension as stiff as possible. It’s not about making your car as easy to drive as possible. You’re finding out how fast and unresponsive a car you can get away with before its understeer or lack of stability affects your ability to hit the apexes quickly and consistently. It’s a sweet spot in a constant balancing act between speed and grip.
So downforce is a good place to start. Finding the best front and rear wing levels for a track is a bit more of a ‘feel’ thing—gradually reduce both until you’re finding your lap deltas suffer, then build them back up until you see the sweet spot reveal itself in the times you’re posting. You can save yourself a bit of time here by looking at the circuit map and asking how many low-speed corners and high-speed corners it has.
Monaco and Hungaroring have a lot of low-speed corners and require a higher downforce level than normal, so you can pitch your initial front and rear wing aero levels a bit higher; Spa has some huge straights and plenty of nearly flat-out turns, so it’s a low-downforce track. Remember, you’re not trying to make the car as easy to drive, but as fast as possible before you’re unable to consistently control it.
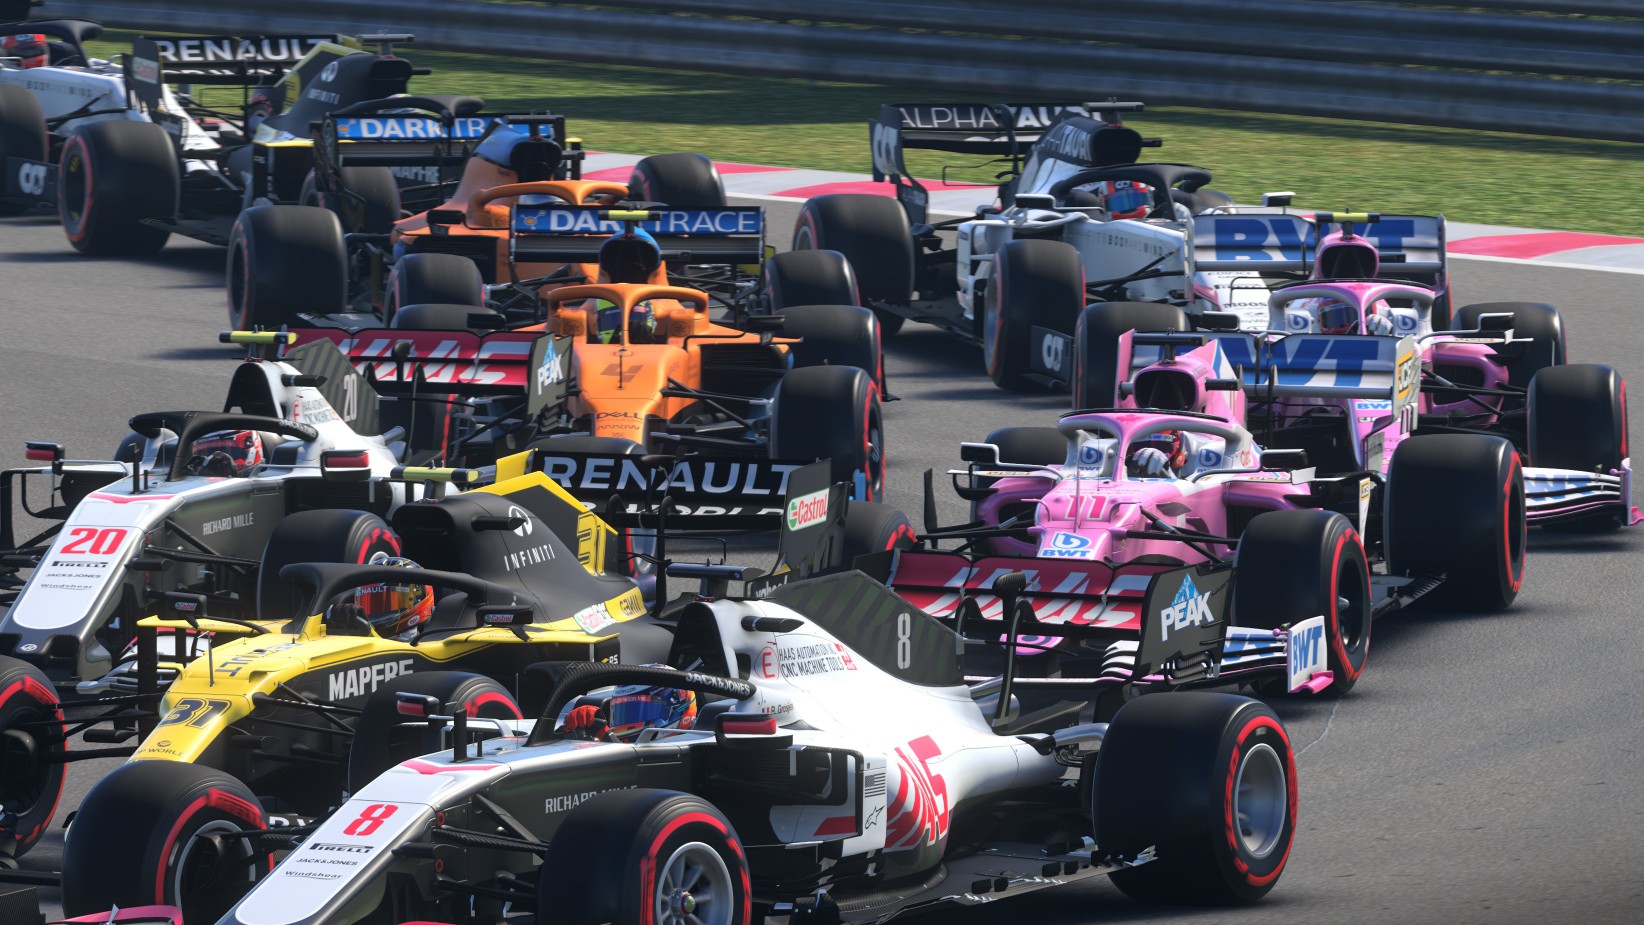
Understeer vs oversteer
The next area to tackle is oversteer. If you’re struggling for traction mid-corner and on corner exits, or finding the car a bit too twitchy to your inputs all over the circuits, there are a few F1 2020 setup categories to tweak. The first is either increasing rear wing aero or decreasing front wing aero (but not both) to introduce some understeer from the air. Making the front suspension and roll bar stiffer than the rear will also introduce understeer, but again make sure you either increase front stiffness or decrease the rear, not both. Finally, under transmission settings, you can either decrease the differential adjustment on throttle or increase the off throttle diff.
If you find it hard to hit the apexes because your car feels unresponsive and sluggish to your steering inputs, that's understeer, and remedying it is a matter of doing the exact reverse of the above. Softening up front suspension or adding more front wing downforce will make it ‘pointier’ when you turn it into corners.
From here your setup's just about fine tuning, and with this it’s important to identify whether you’re trying to make the car reliable over long races, or maximising pace over one lap.
Set the right brake pressure
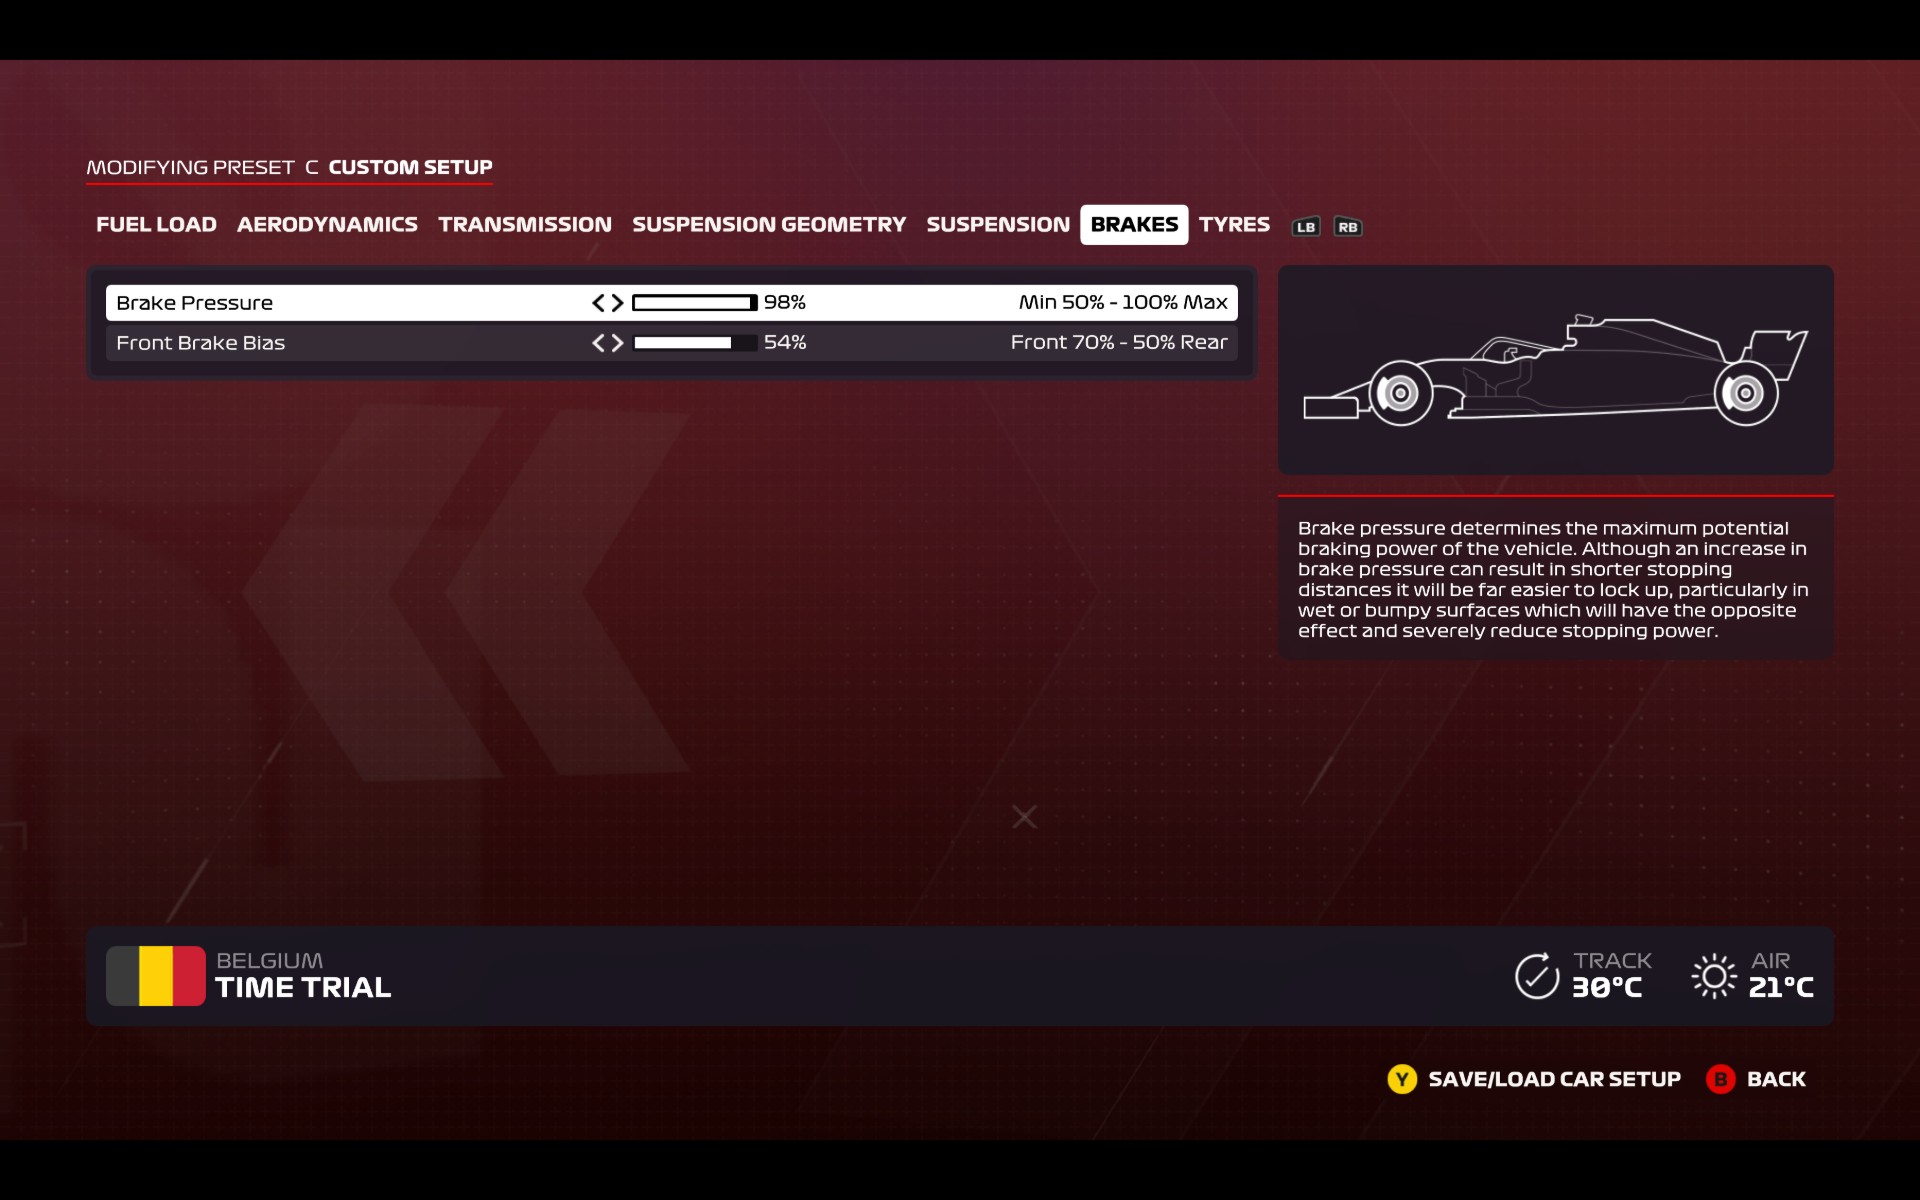
The best example of setting a car up for raw pace over one lap versus a full race comes in the brake menu. Setting your brake pressure to 100% means you can cut down on braking zones and get fantastic stopping power throughout the track—if you’re doing a one-lap time trial. Run a full race with 100% brake pressure though and you’ll run into durability problems quickly.
The same goes for many of the suspension settings, particularly toe and camber. The former describes the angle of the tires when viewed from above, and the latter when viewed head-on. High camber or toe-in will increase grip in high-speed turns and general stability, at the expense of tire wear. Again, not a problem in a time trial,
but more so in career mode.
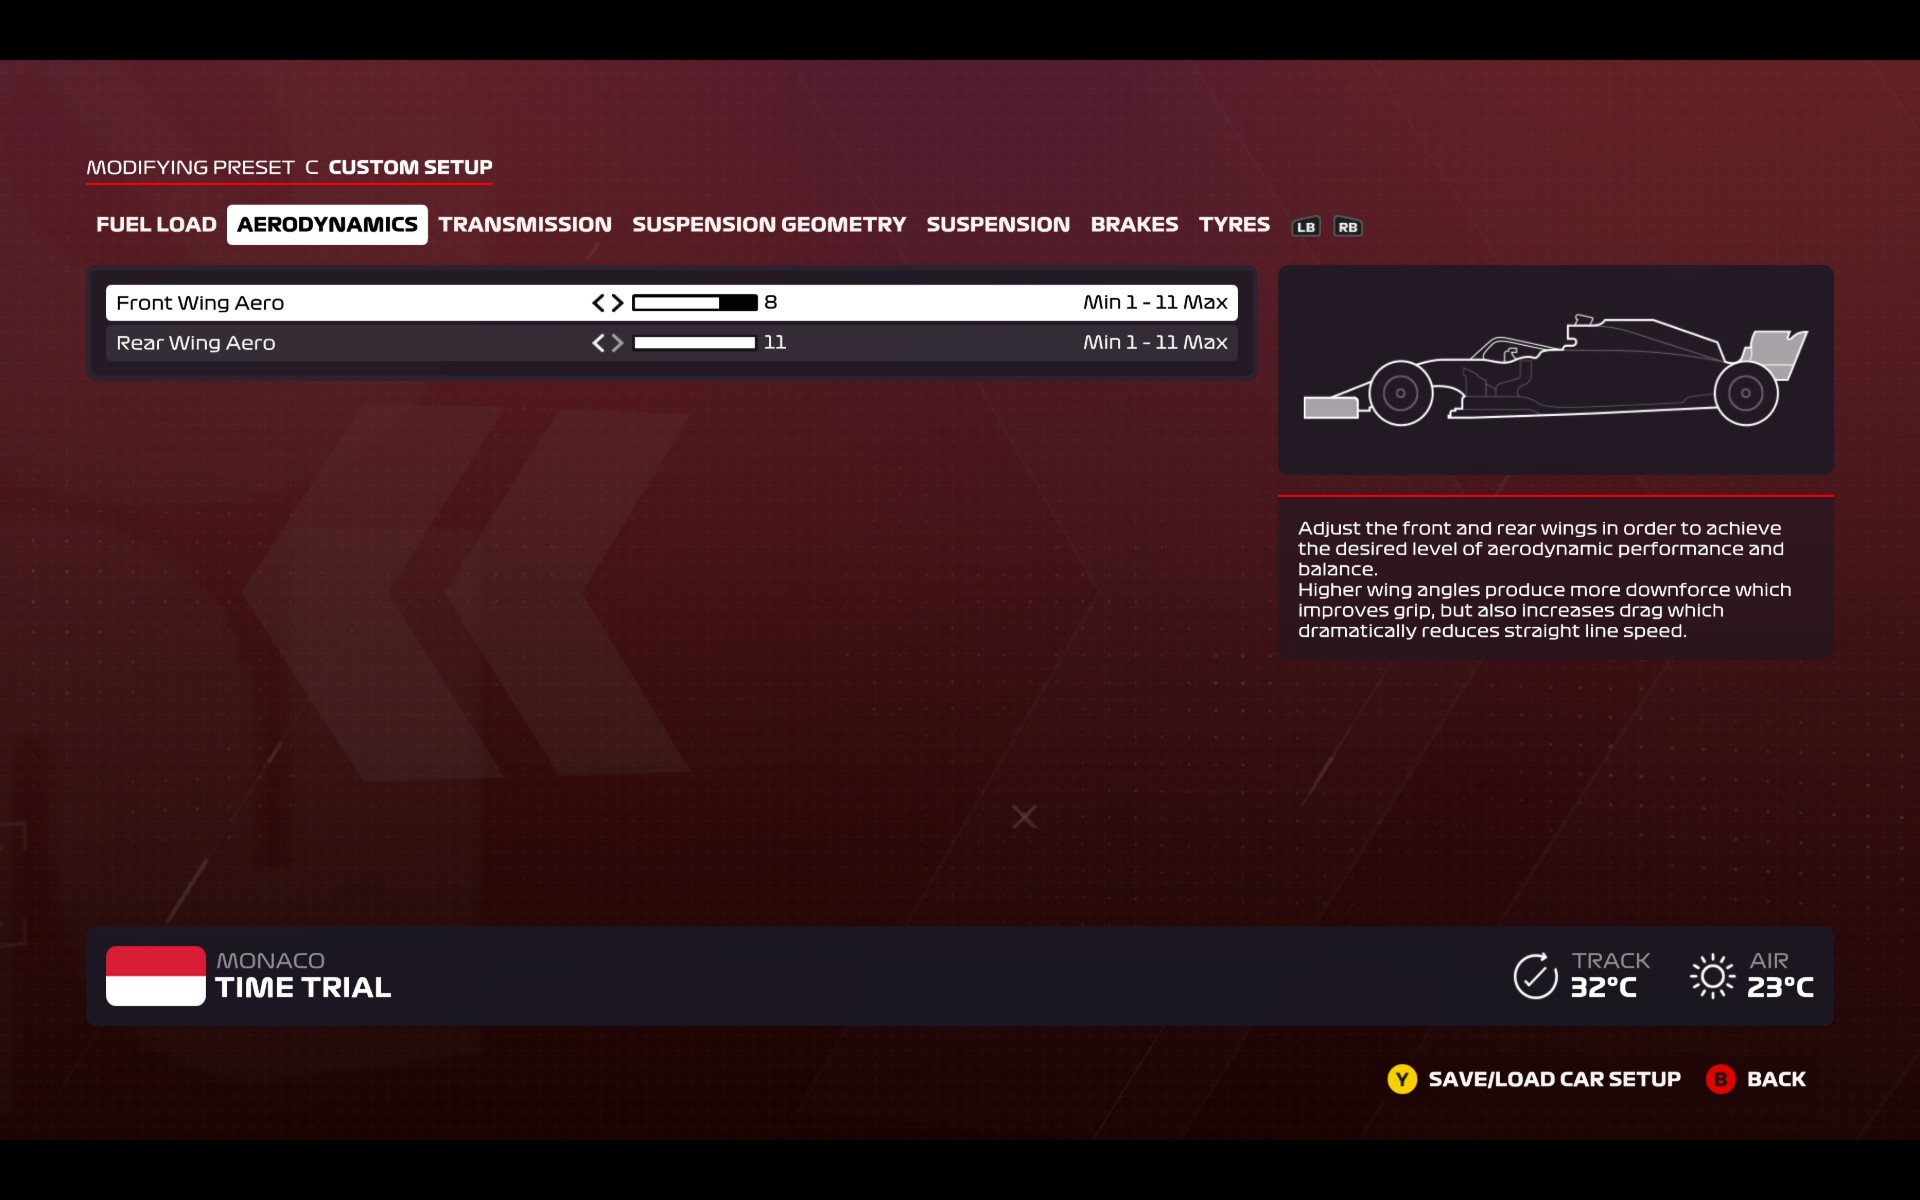
F1 2020 setup example: Monaco
This setup was created by the great Jarno Opmeer, a Dutch driver with great chops in real motorsport and sim racing. He’s currently P10 on the leaderboards at Monaco with this setup.
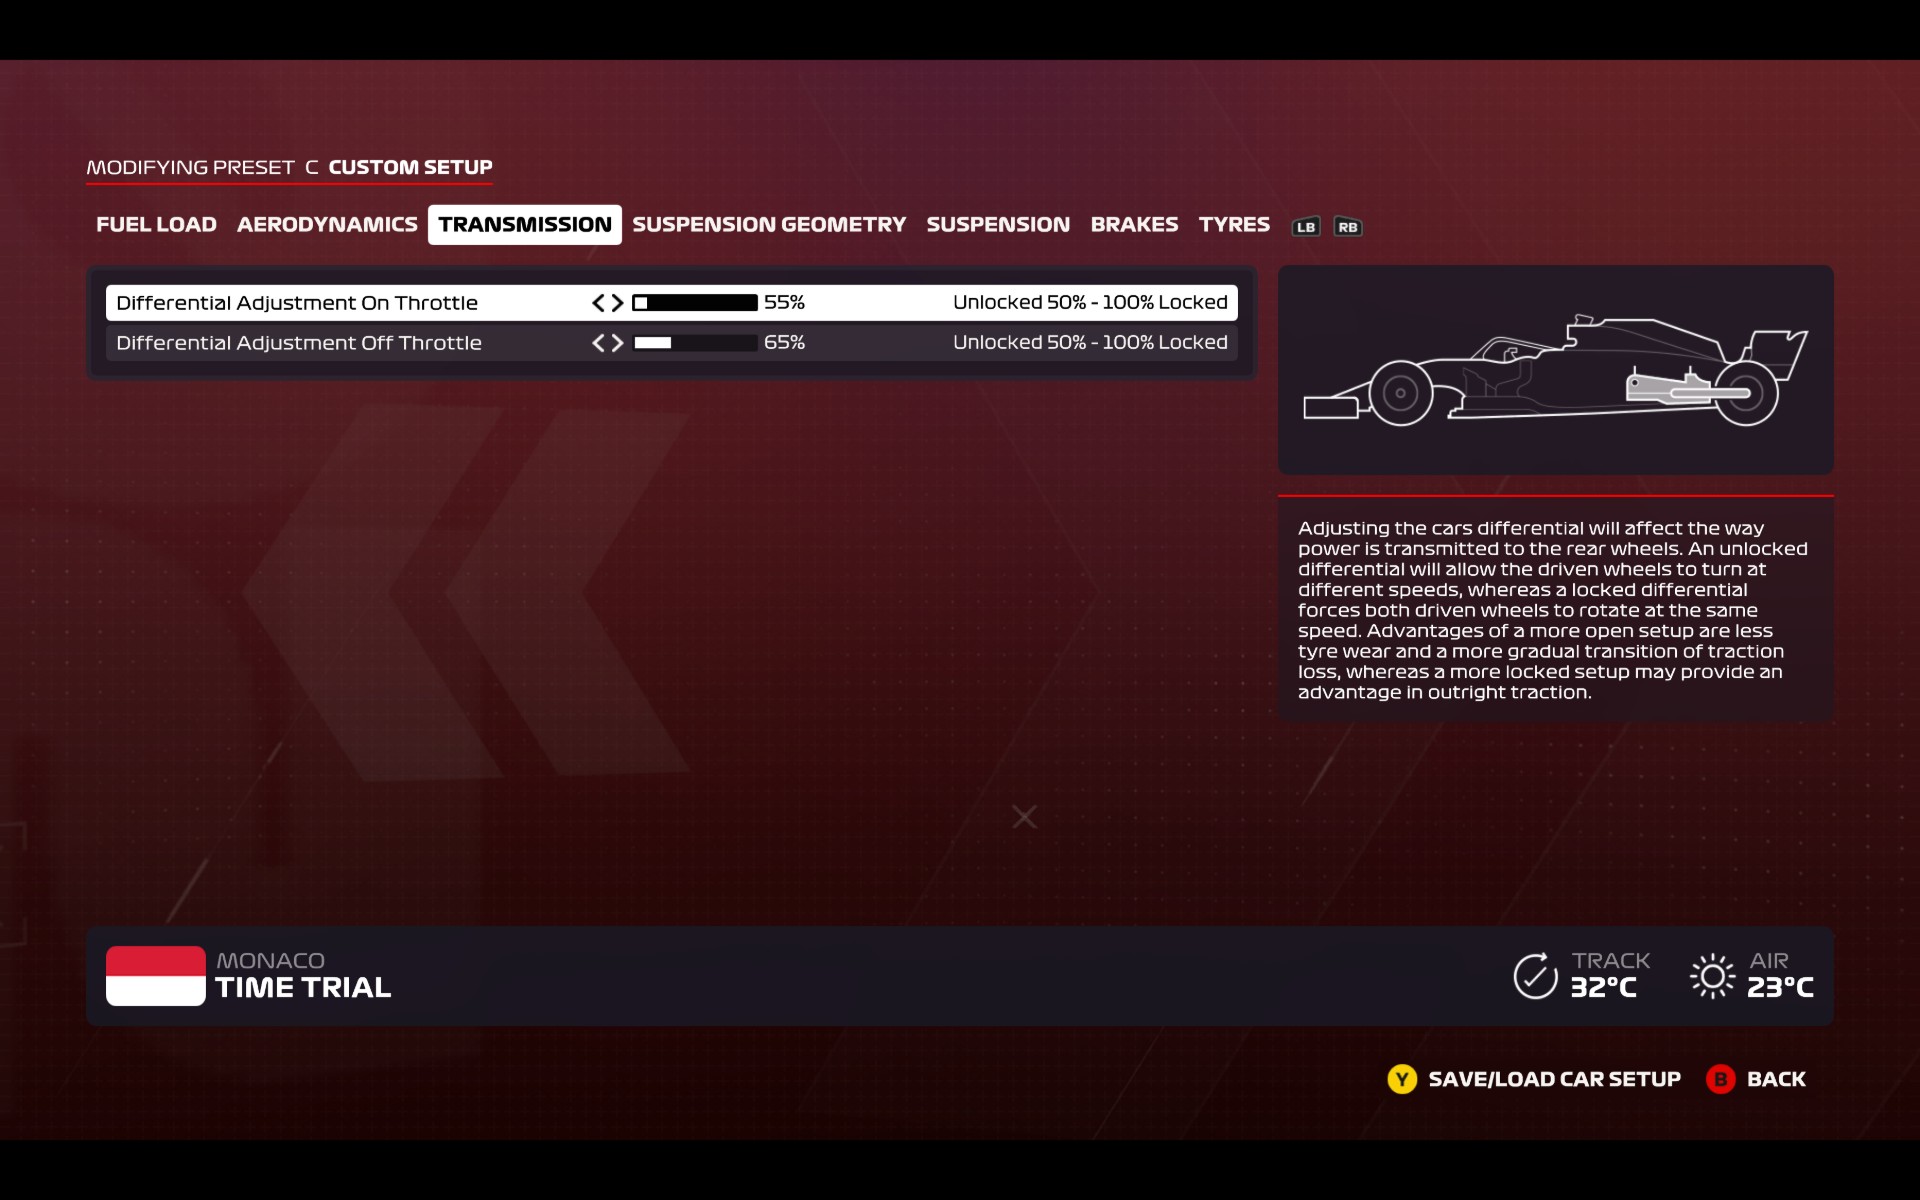
Both wing values are almost maxed out here, Monaco being the highest downforce track on the calendar. Note that there’s still a difference of three between front and rear wing, though - this keeps the car stable and better able to turn-in sharply, which is particularly handy for the hairpin.
Continuing a theme of extremes in this setup, the on and off diffs are both set very low. Monaco has a lot of low-gear traction zones where wheelspin’s possible, so a bit of babying’s needed to keep the lap smooth. While it might seem more logical to slam the diff levels really high since tire wear isn’t an issue in time trial mode, it’s set low here so that it’s easier to keep traction out of all those low-gear corners. Again note that off-diff is set higher to preserve the balance between oversteer and understeer.
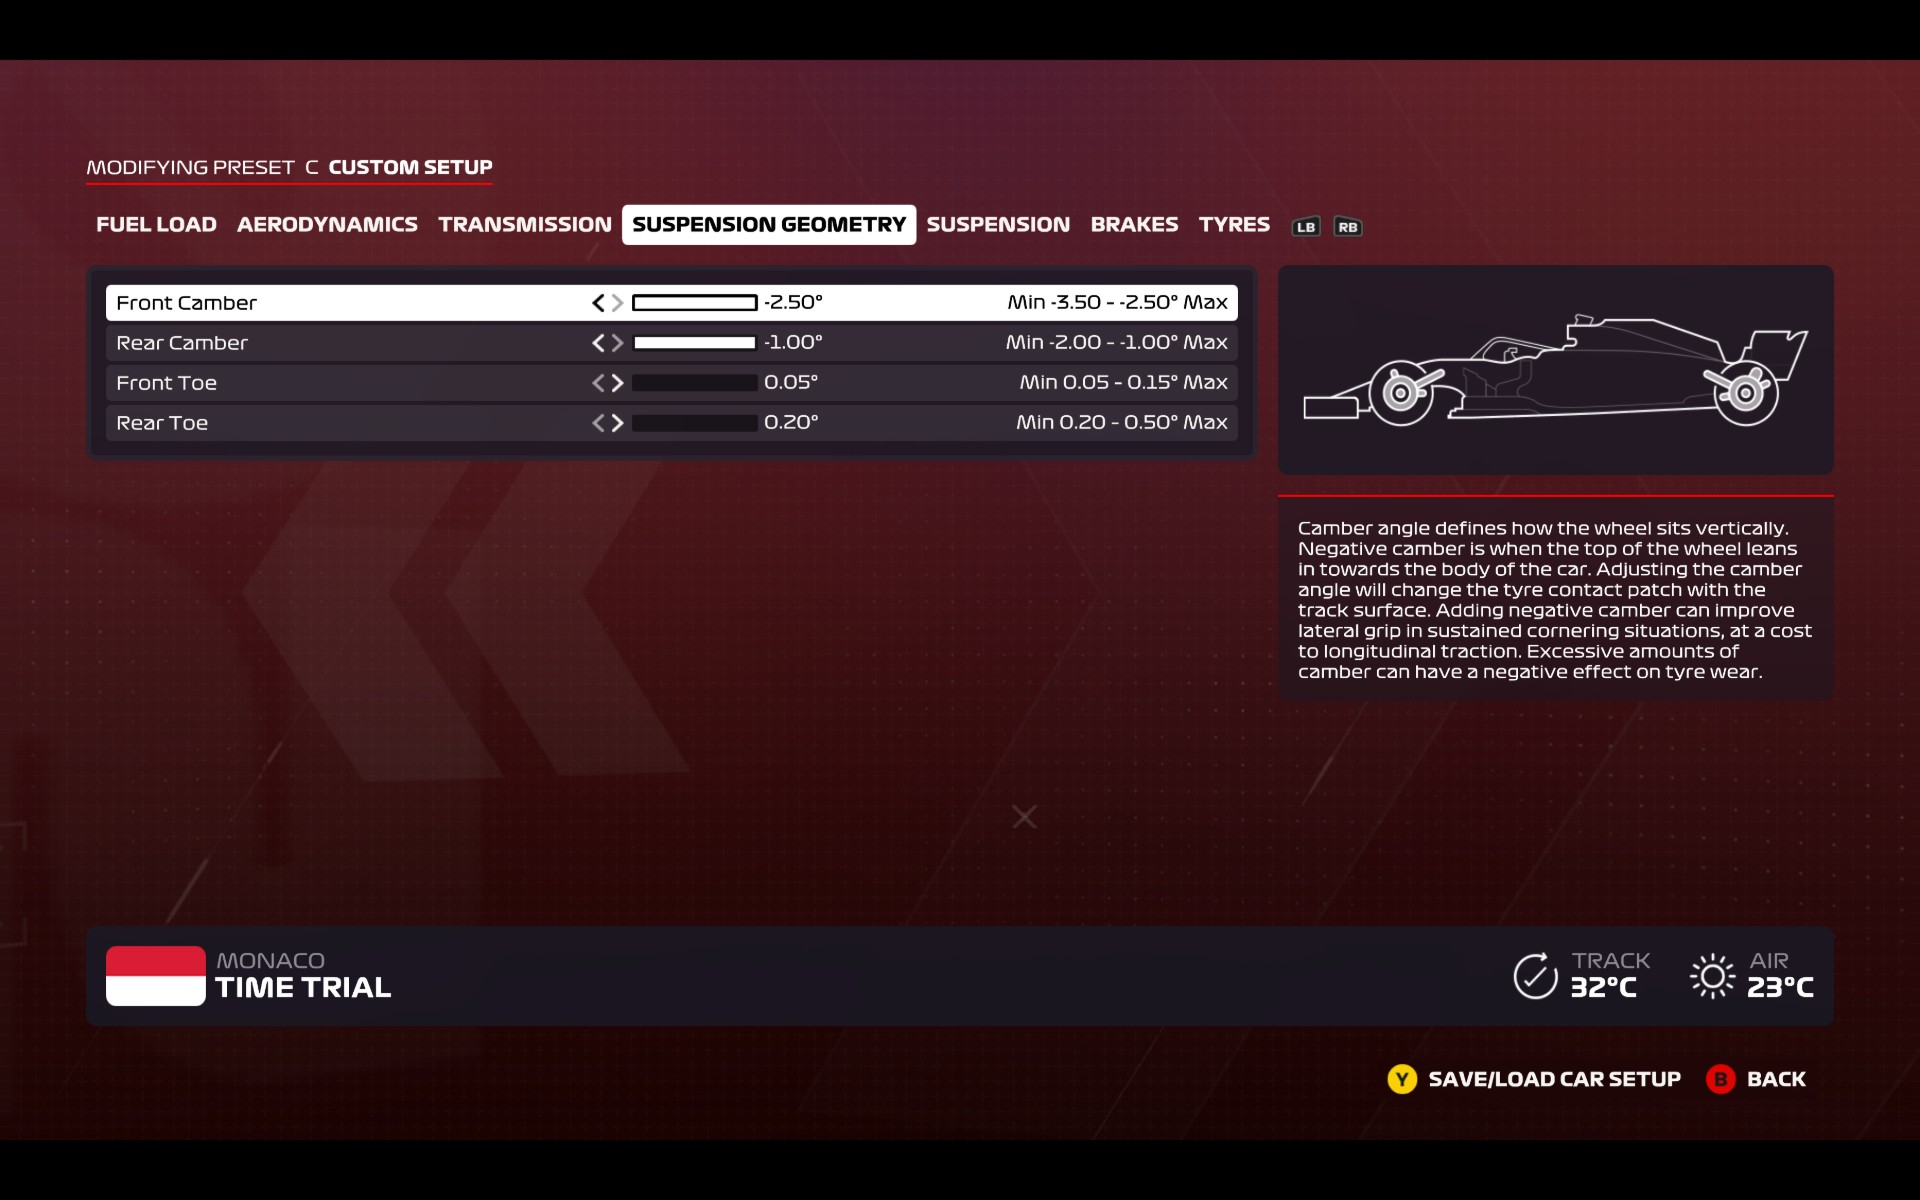
More extremes. Camber levels set to nearly max, toe levels at nearly min. This gives a lot of grip through every corner, but it can make the car twitchier on corner exits - this is likely why the diff is set up the way it is.
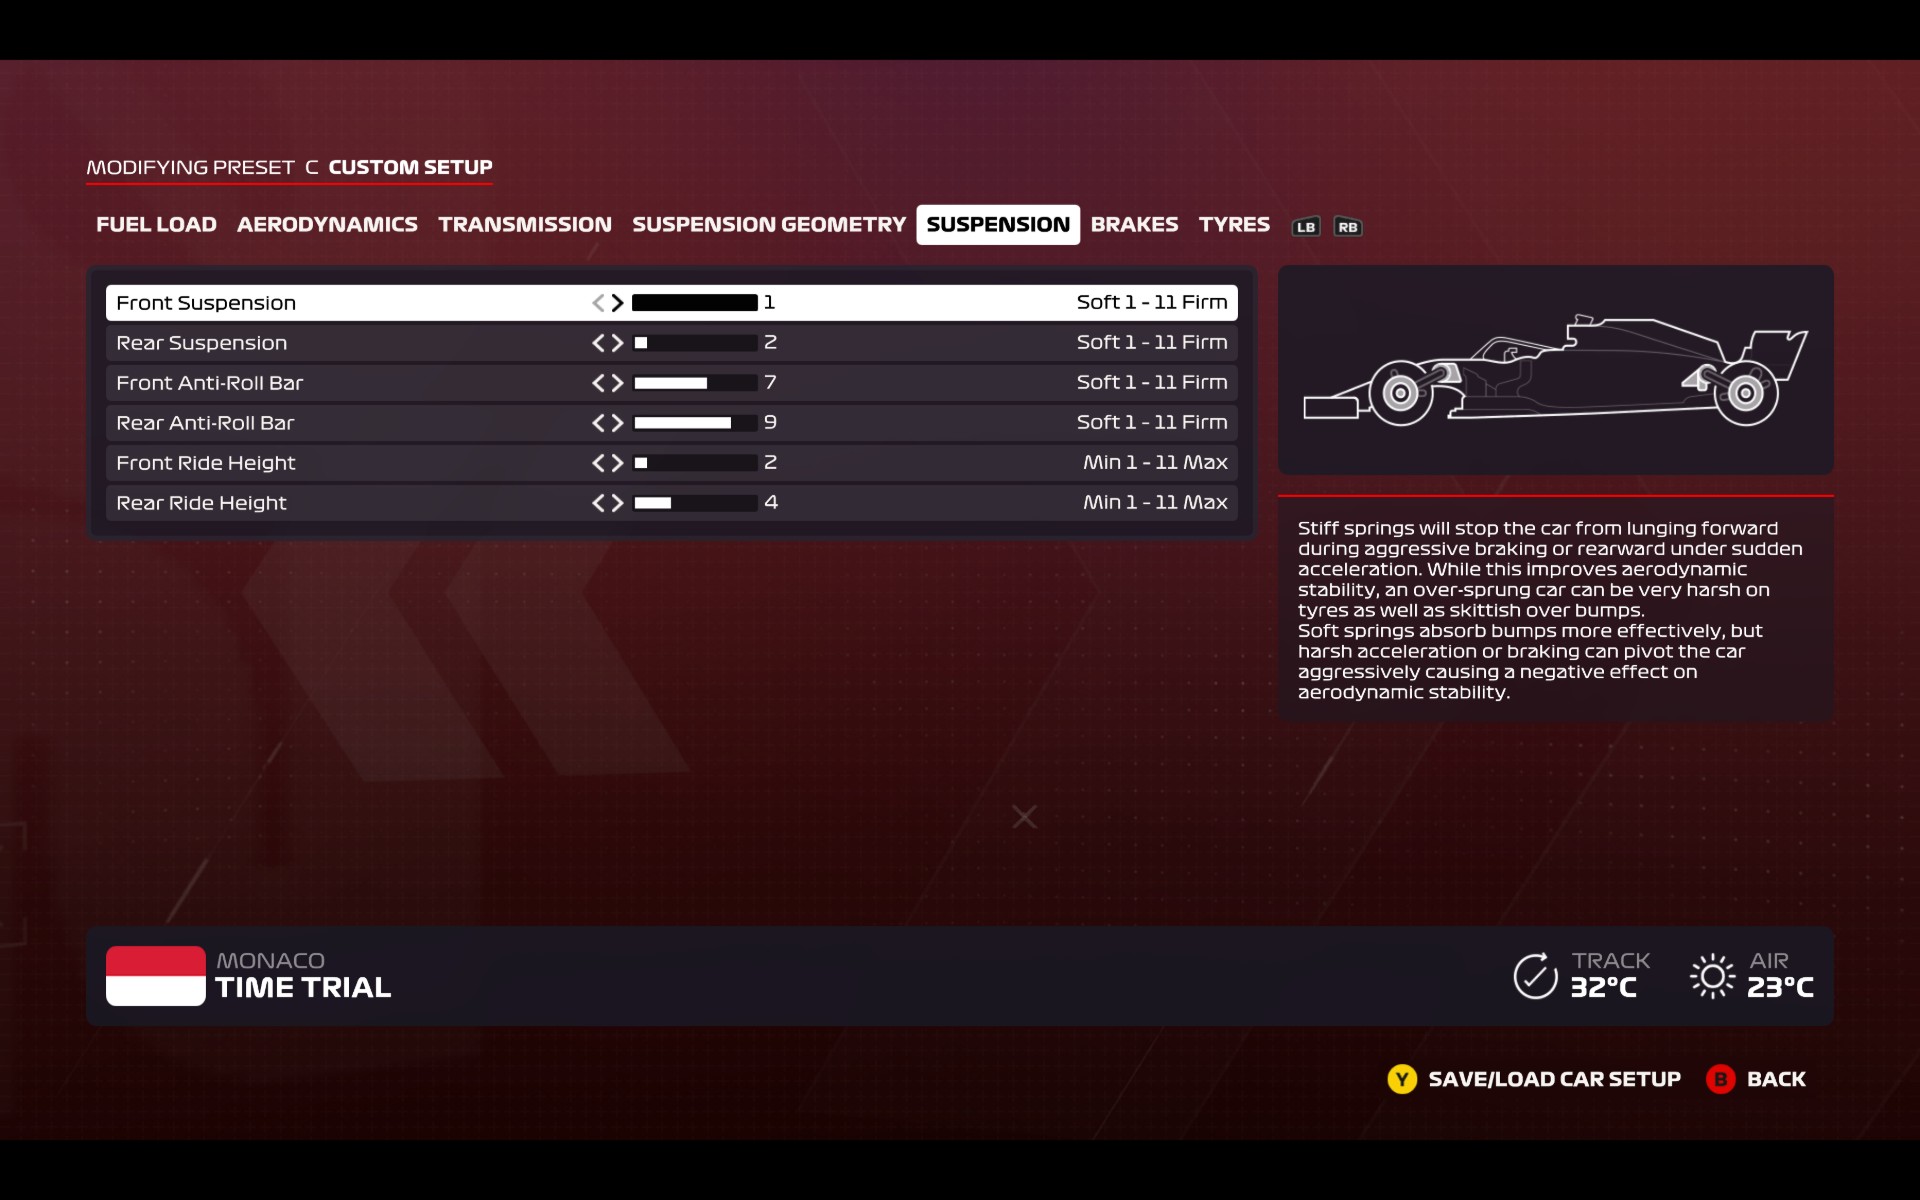
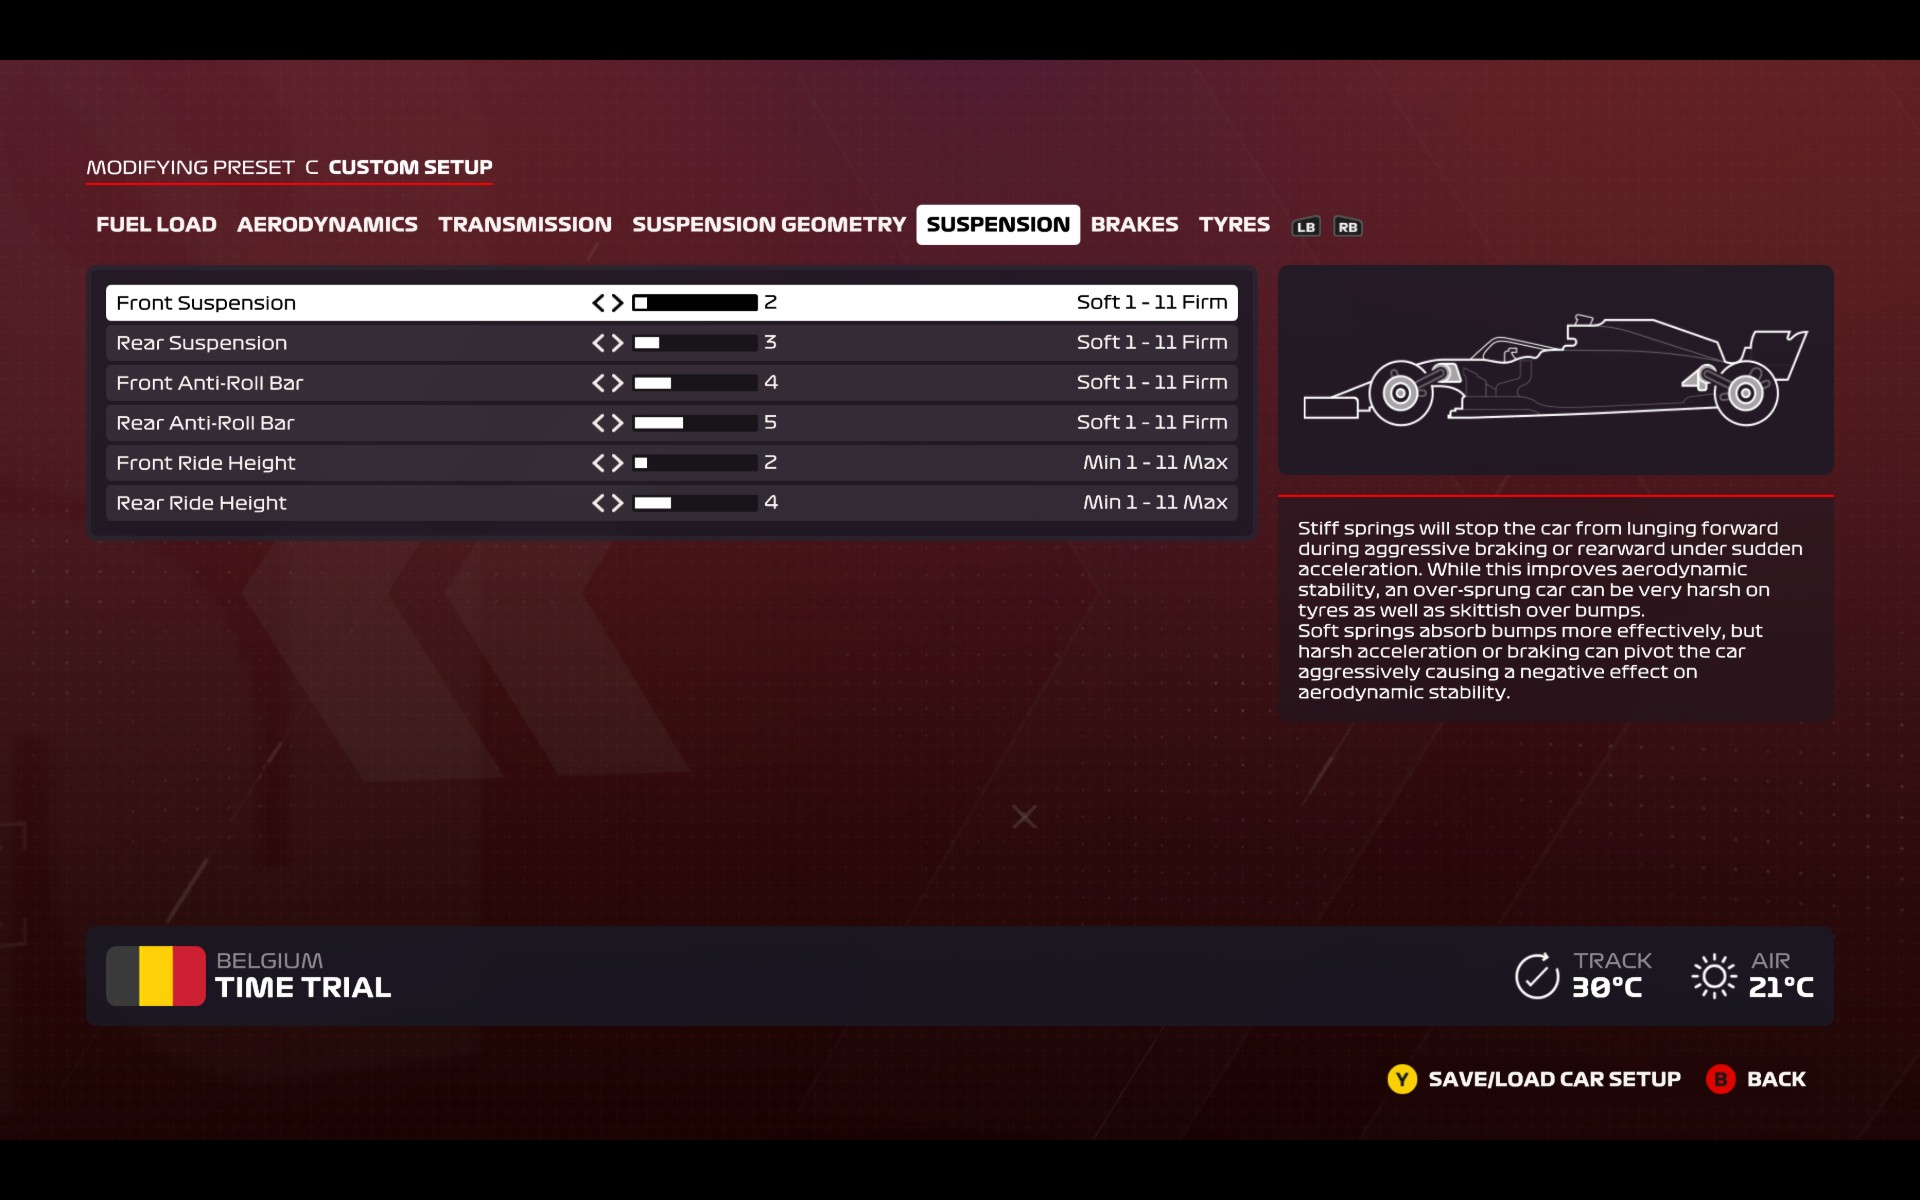
This is as soft as you’ll see on a car setup screen at any track. While every value is stiffer at the front than rear to improve turn-in, this configuration is all about grip since there are no high-speed corners at Monaco (unless you count that kink through the tunnel). The roll-bars are kept comparatively stiff to maintain stability, and probably to make it easier while you’re cutting a lot of kerb in place like the Nouvelle Chicane and Saint Devote (no heroics please etc).
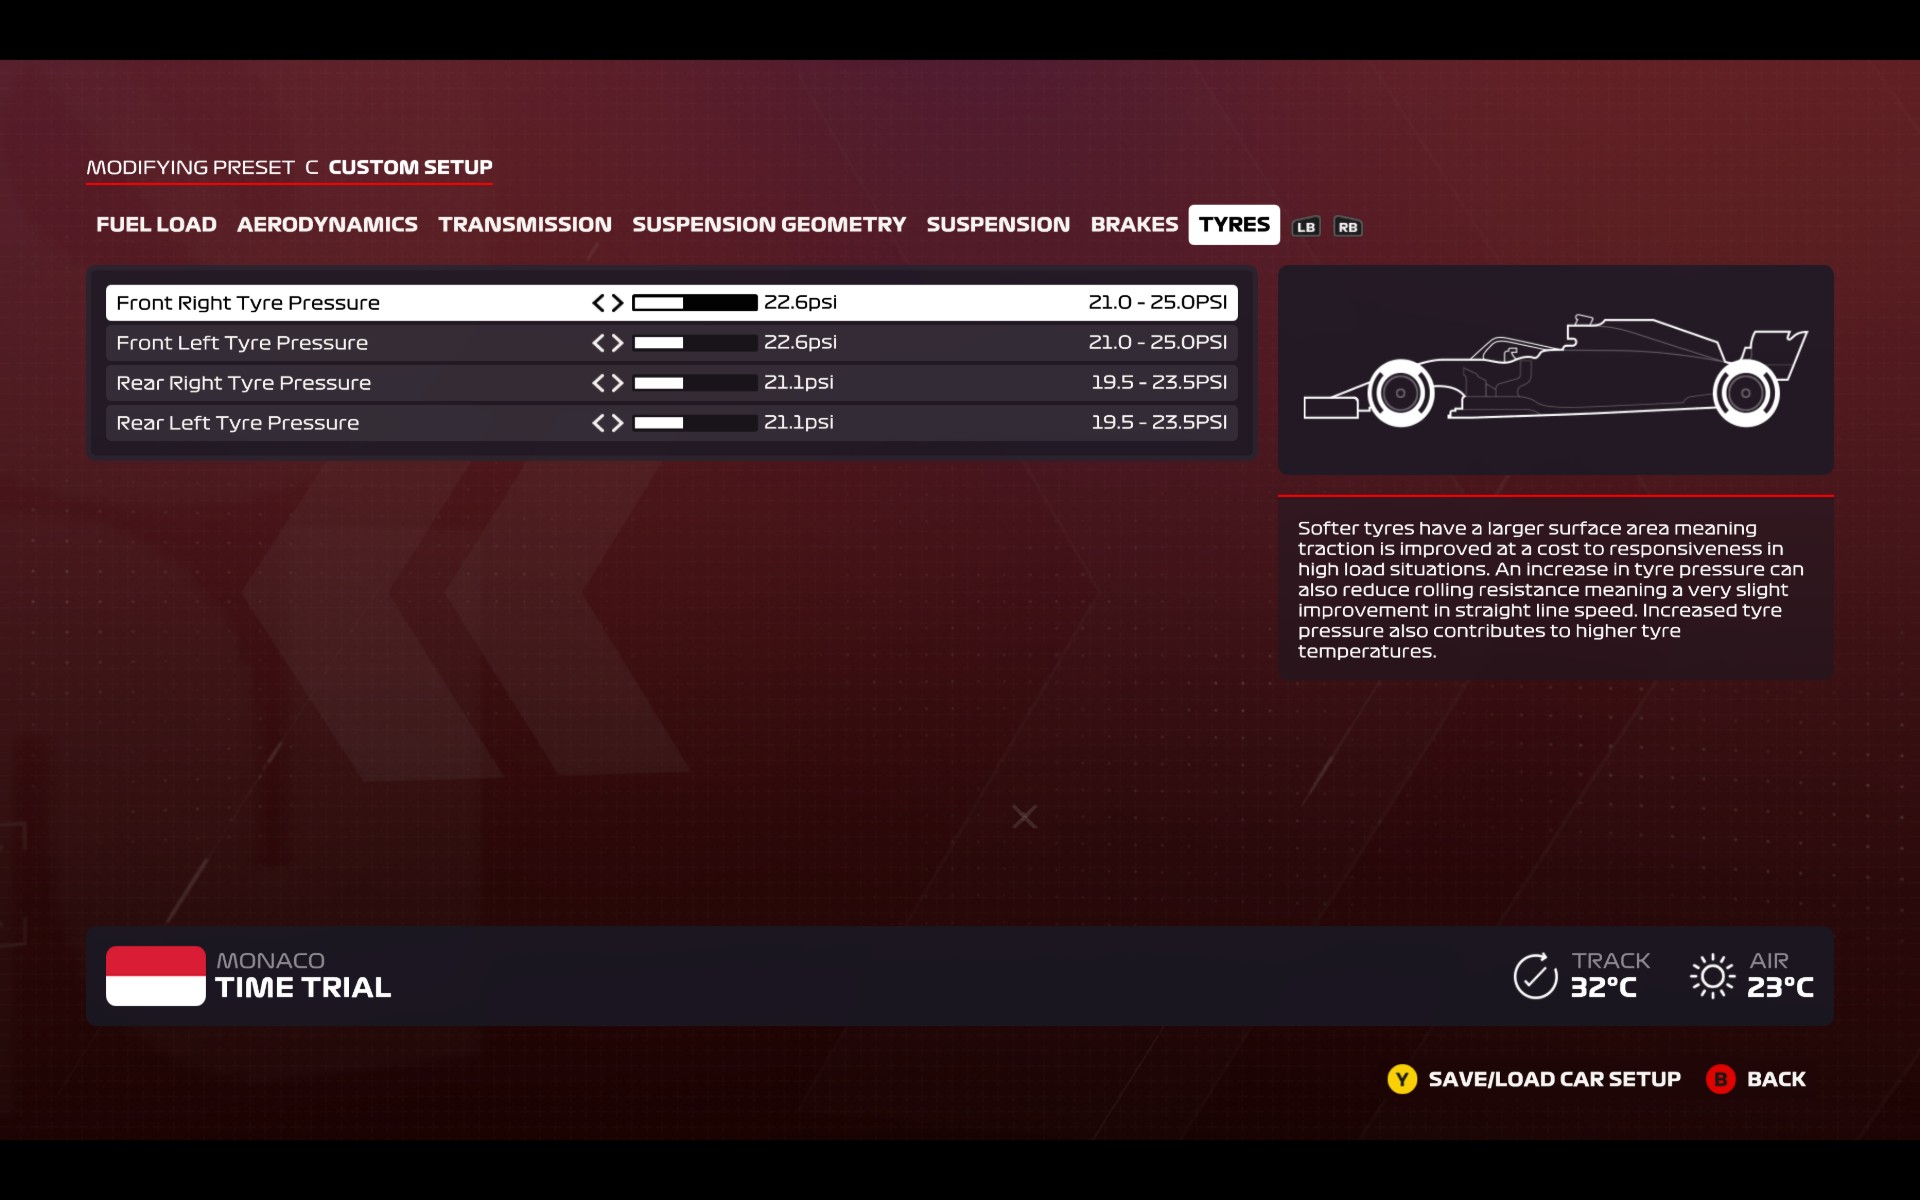
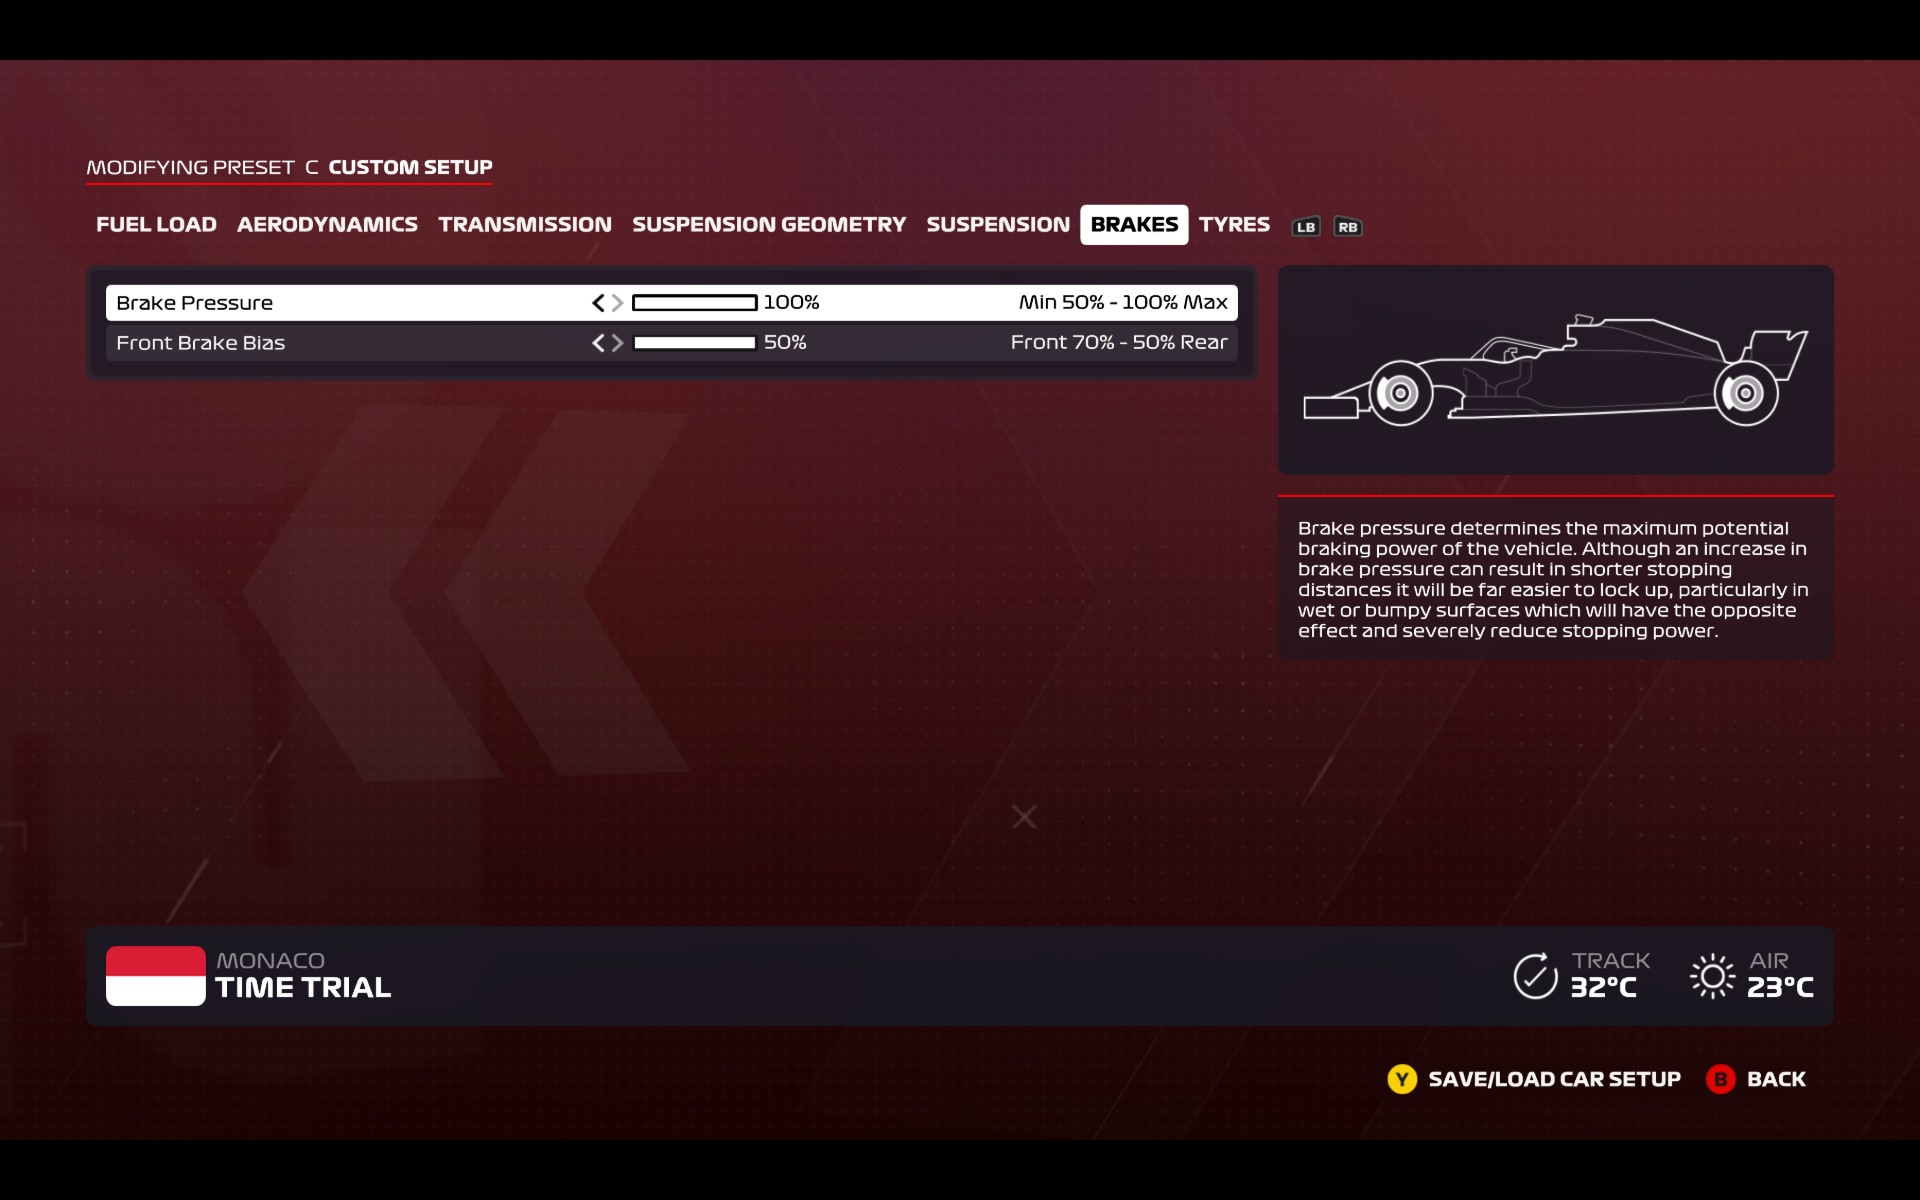
As you’ll see from a great many setups at any circuit, brake pressure is at 100% here. There are some serious braking zones at Monaco, like the Mirabeau-Grand Hotel-Portier complex and the aforementioned Nouvelle Chicane. Keeping the brake pressure at 100% means you can brake a few meters later than when using a default setup and still hit the apex.
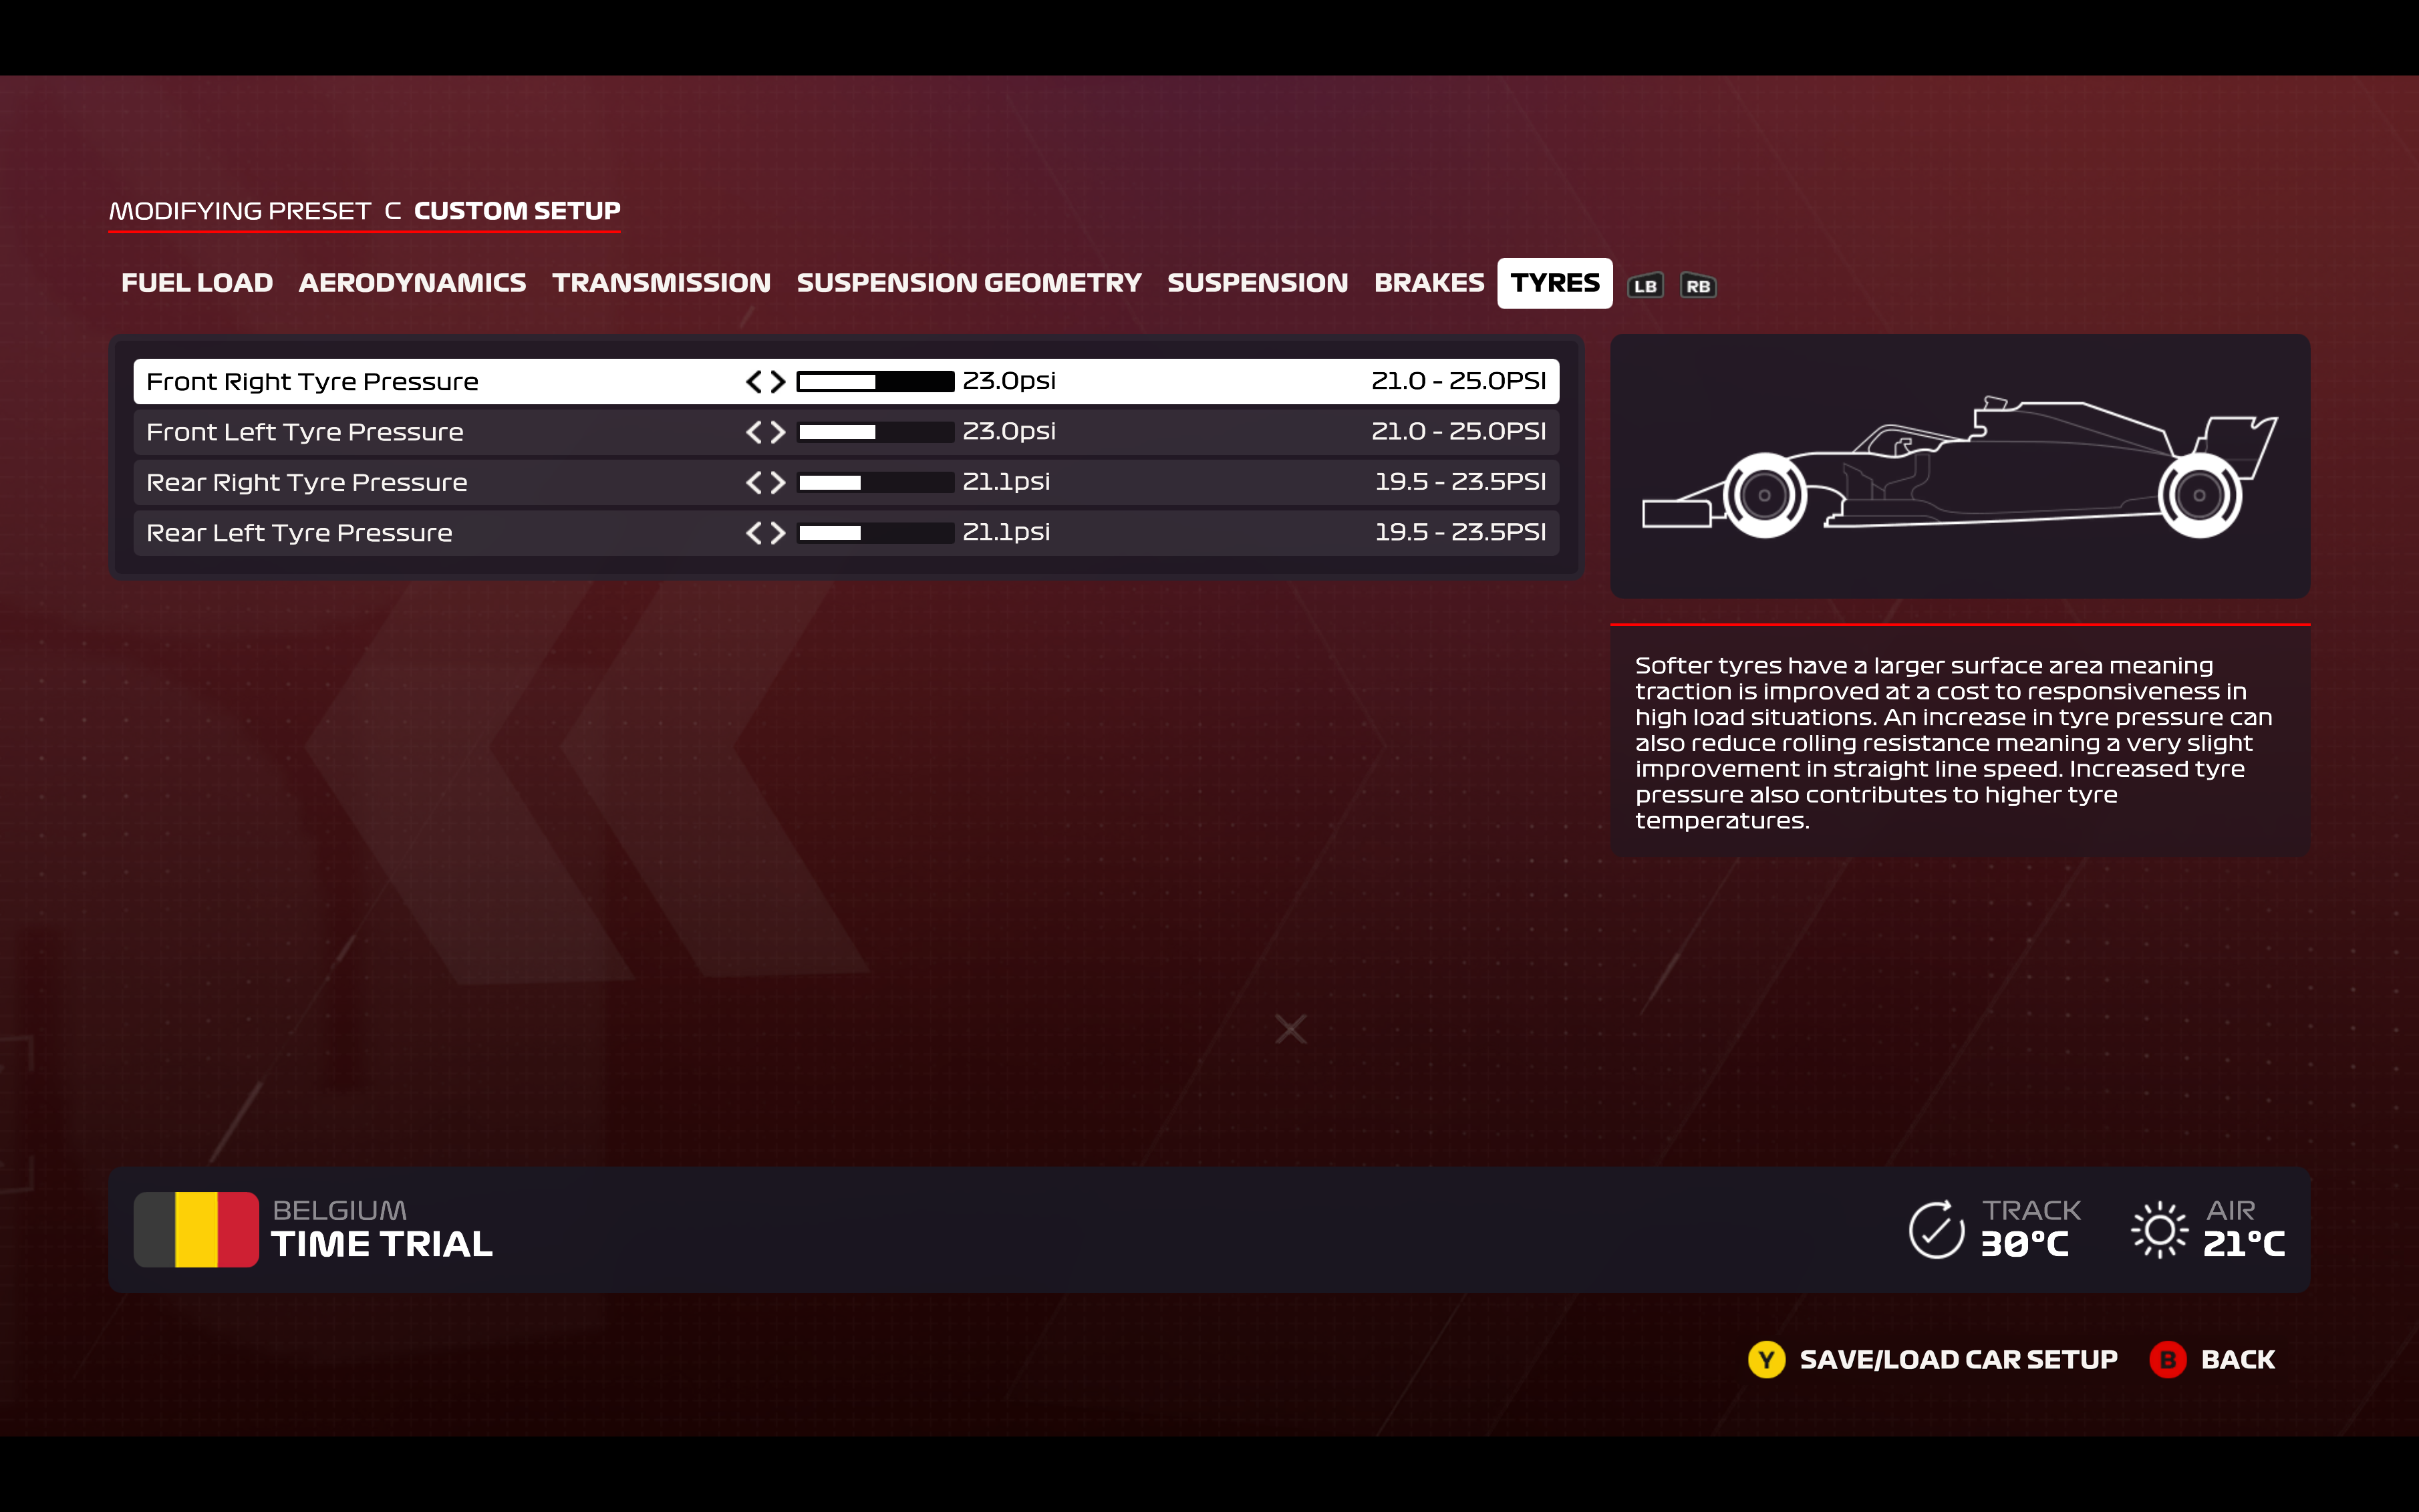
Finally, the tire pressures are kept on the low side to increase grip. When tires are inflated to a lower PSI they physically cover more surface area on the track, working their way into all the tiny gaps in the surface of the tarmac, and the more they do this, the faster you can take a turn without hitting the traction break point - when the molecules in the tire can’t work fast enough to counteract your forward momentum. Tempting as it may be to slam the PSI right down for Monaco, it’s kept just under halfway here to ensure you don’t lose any speed on the straights.
F1 2020 setup example: Spa-Francorchamps
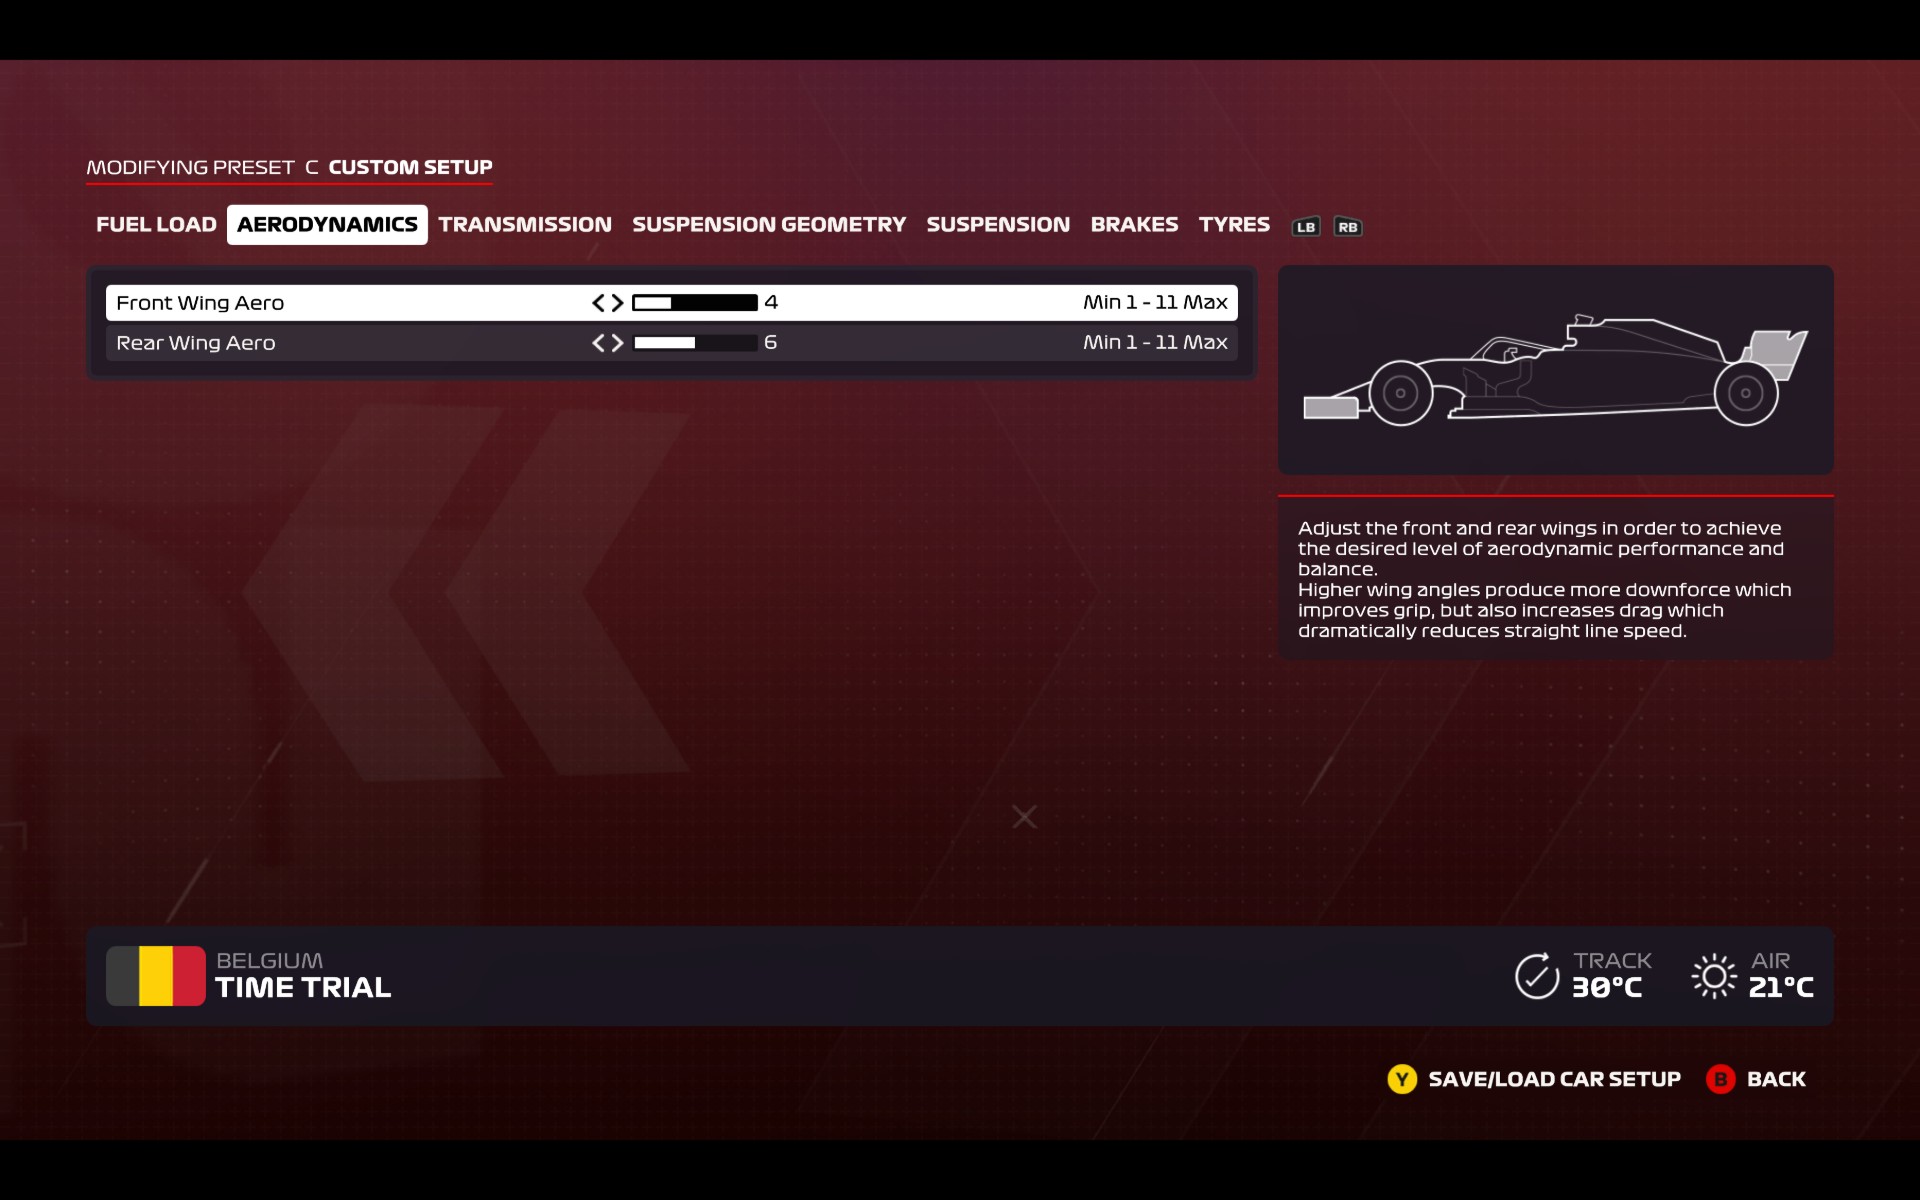
At the exact opposite end of the spectrum, this ultra-low downforce setup for Spa comes from AlexFire96, who’s currently 18th on the leaderboards with these settings.
Both wing values are much lower here than at Monaco, but again there’s more at the rear to keep good front-end stability and turn-in.
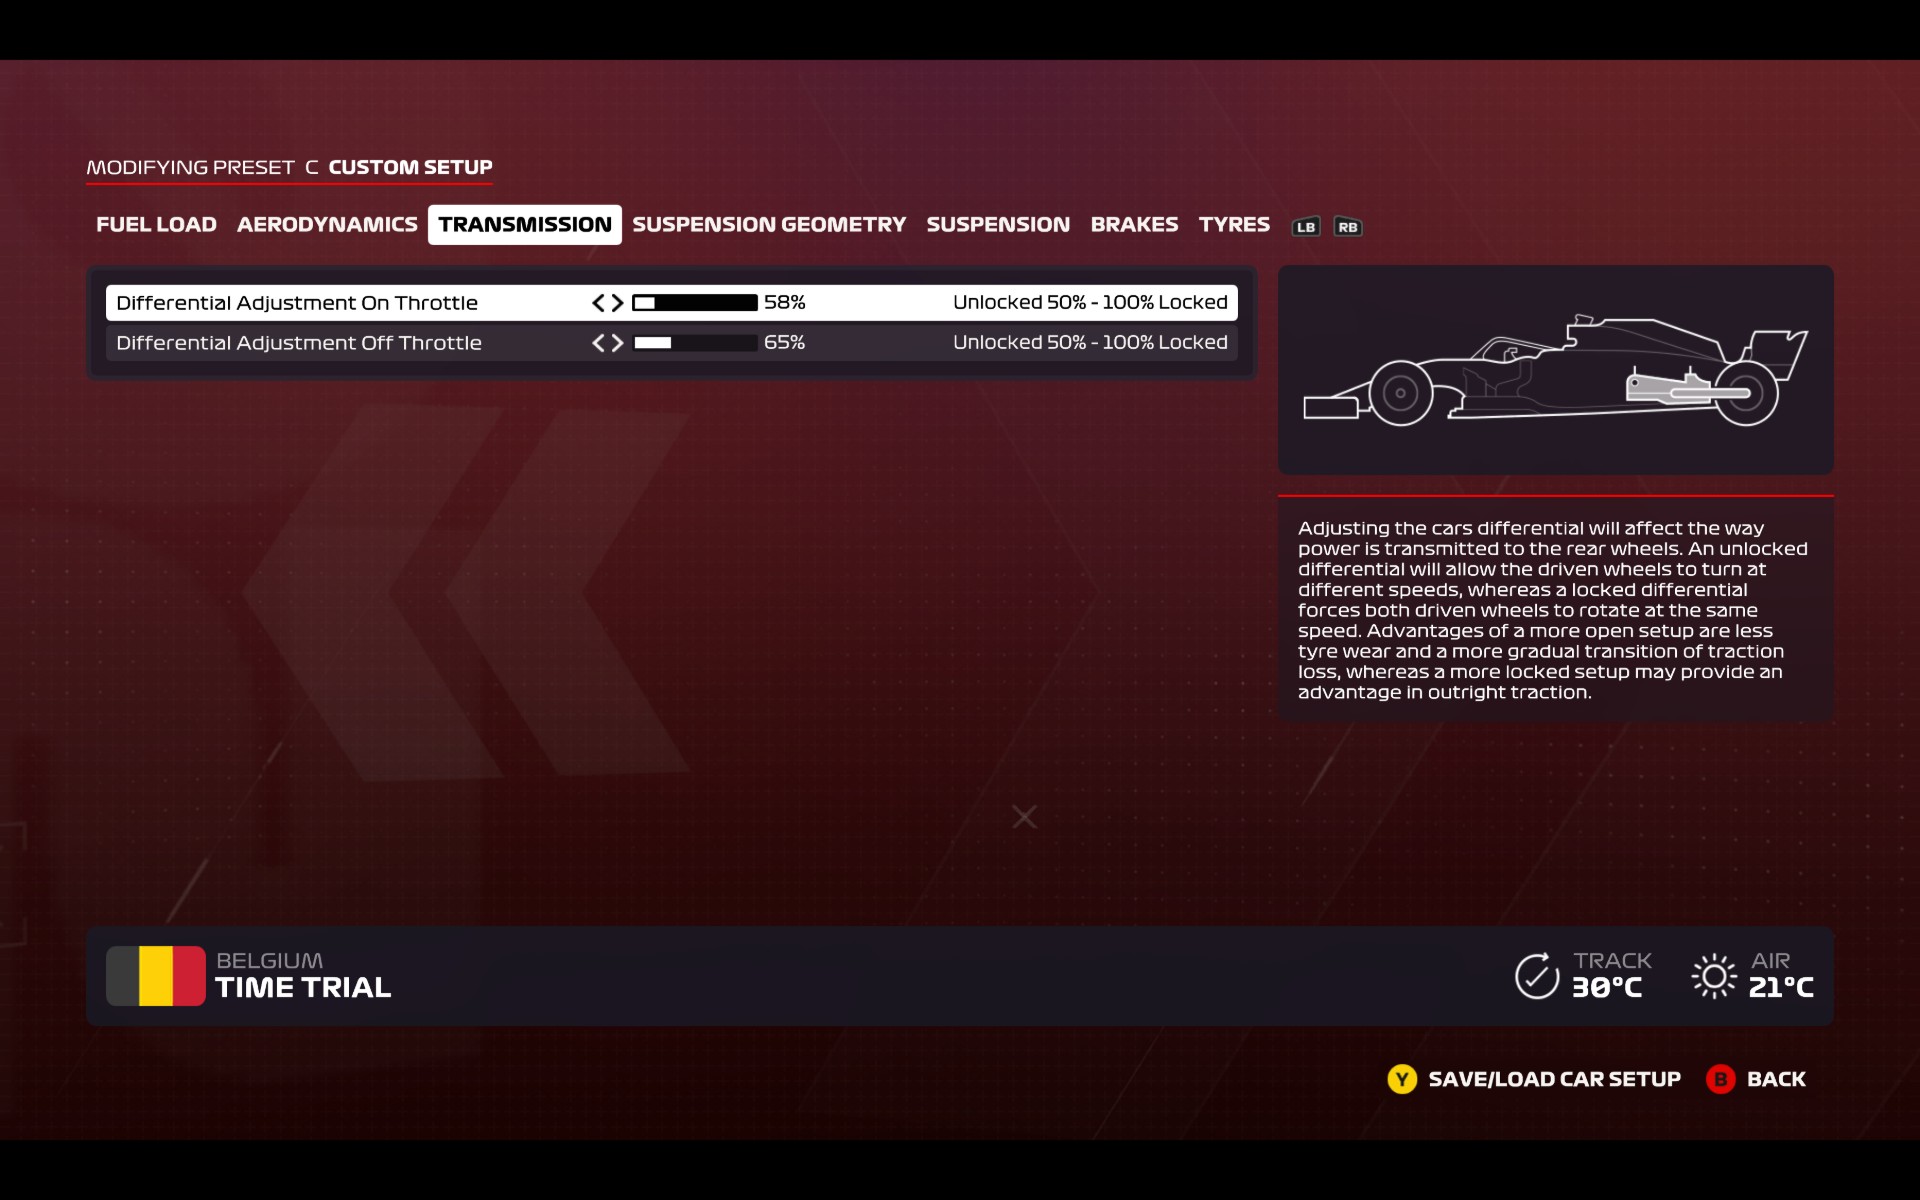
Spa has a real mix of corner speeds, and these low values reflect the need for a more gradual loss of traction at corners like Chicane and La Source.
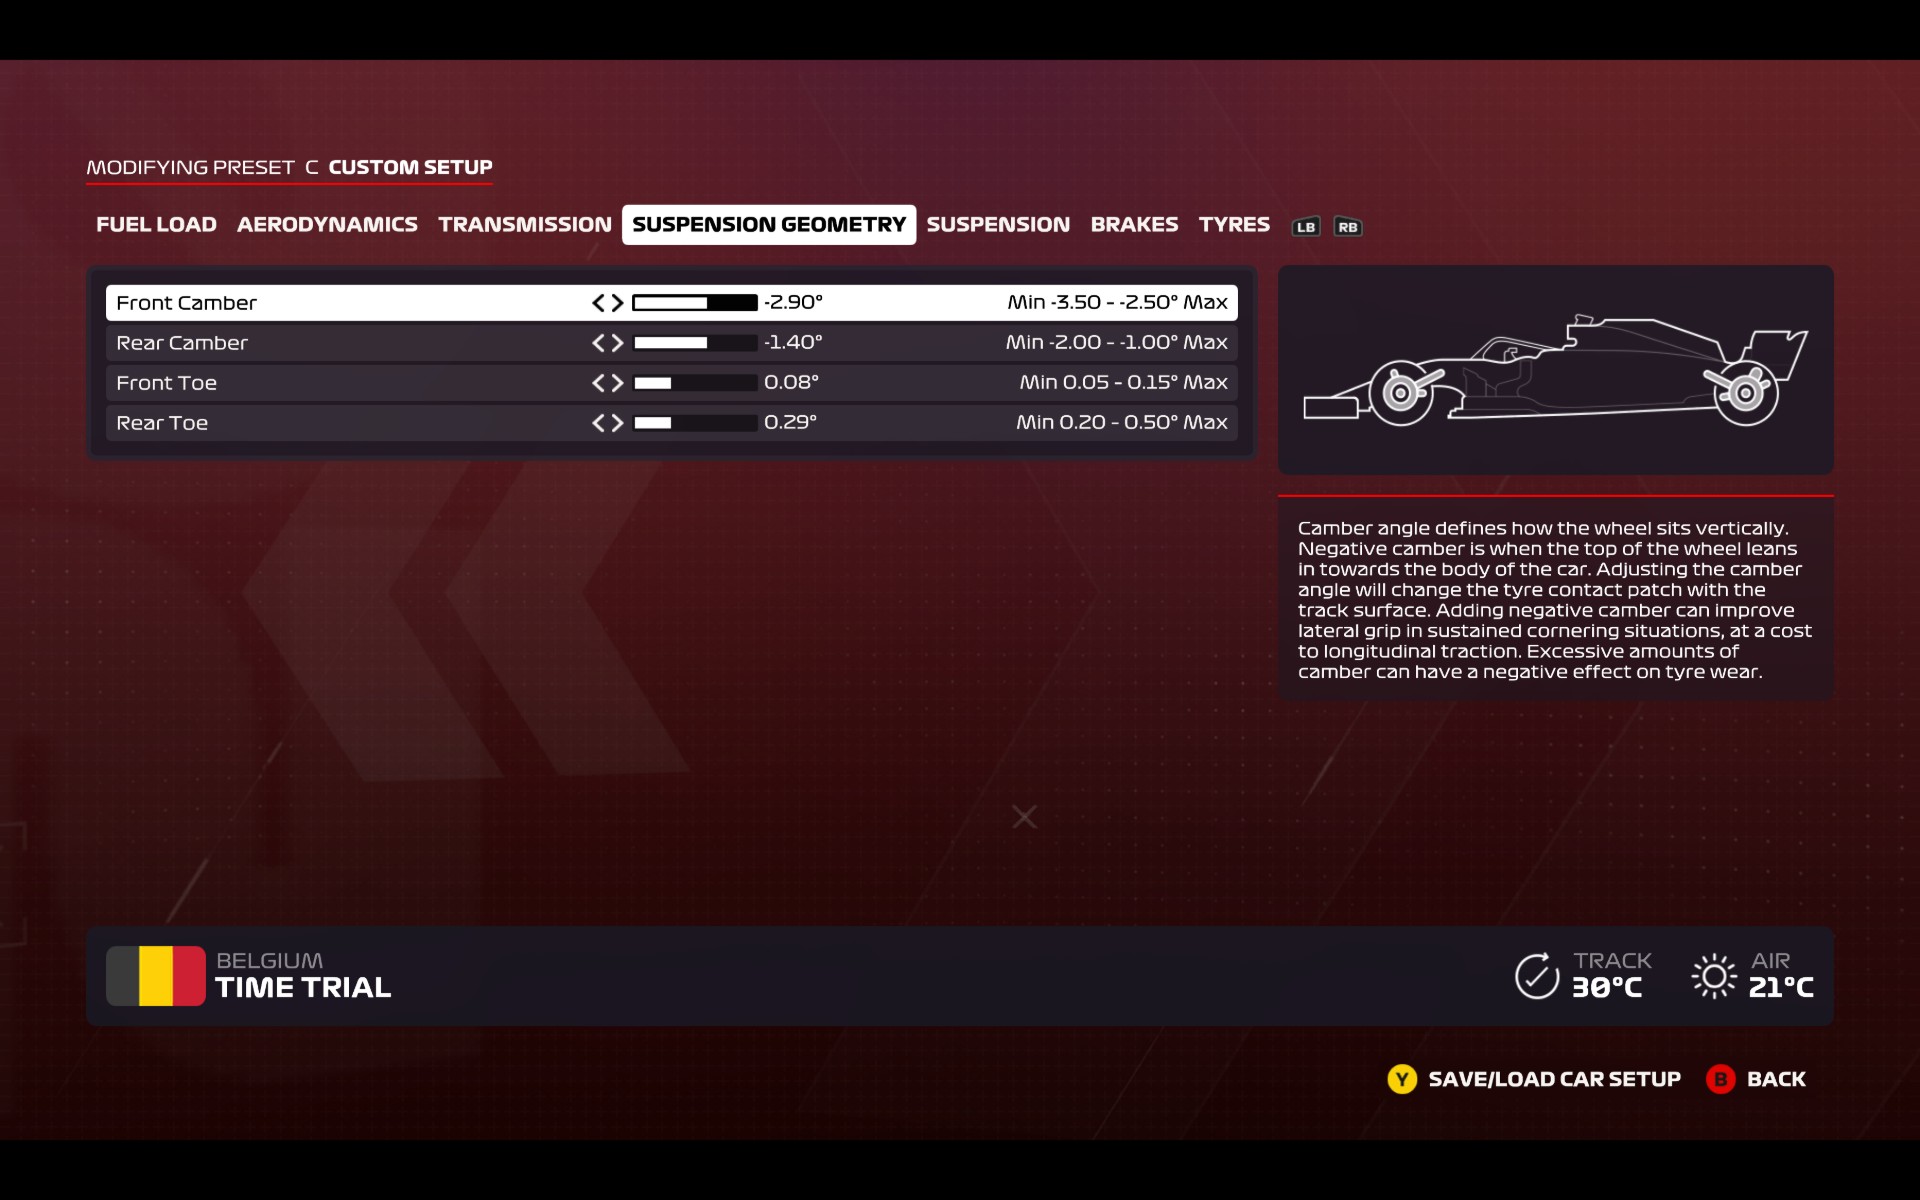
Both camber and toe settings are kept more moderate here than in the Monaco setup, because the car has to work hard at Double Gauche, Stavelot and Blanchimont to find mid-corner grip at very high speed and RPM levels, and also be able to take the chicane and turn one hairpin nimbly.
This is an example of the setup working for the driver’s particular style. Many would run much stiffer settings at Spa for higher top speeds, but the creator has obviously found they’re better able to herd the card round with these very soft, unorthodox settings.
As before, the brake pressure’s ramped right up for the time trial, cutting braking distances everywhere on the track at the expense of durability in career mode.
Tire pressures are kept bang medium here. You could also run a stiffer setup with higher PSI to make the most of Spa’s long straights and earn back any time lost taking the corners with a bit more understeer.
Phil 'the face' Iwaniuk used to work in magazines. Now he wanders the earth, stopping passers-by to tell them about PC games he remembers from 1998 until their polite smiles turn cold. He also makes ads. Veteran hardware smasher and game botherer of PC Format, Official PlayStation Magazine, PCGamesN, Guardian, Eurogamer, IGN, VG247, and What Gramophone? He won an award once, but he doesn't like to go on about it.
You can get rid of 'the face' bit if you like.
No -Ed.


