How To: A Guide to BIOS Settings
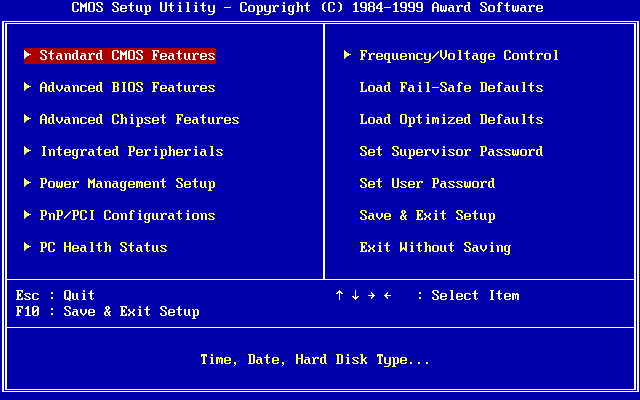
What are the common BIOS settings, and what do they really signify and actually do for you?
If you've ever spent time tweaking your system, chances are you've played around in the motherboard's BIOS settings. You sift through the options, only to find a massive laundry list of settings you can tweak, with many of them these days defaulted to "Auto." Chances are, you won't ever have to touch these settings. But if you're looking to expand your knowledge on what these settings do and when you should tweak them, this guide's for you!
A note about manufacturers and how they organize options
Not every manufacturer organizes these settings in the same manner. Fortunately, the organization a company uses is usually the same regardless of the platform. Below is where these options lay for four popular manufacturers from their recent BIOS settings organization:
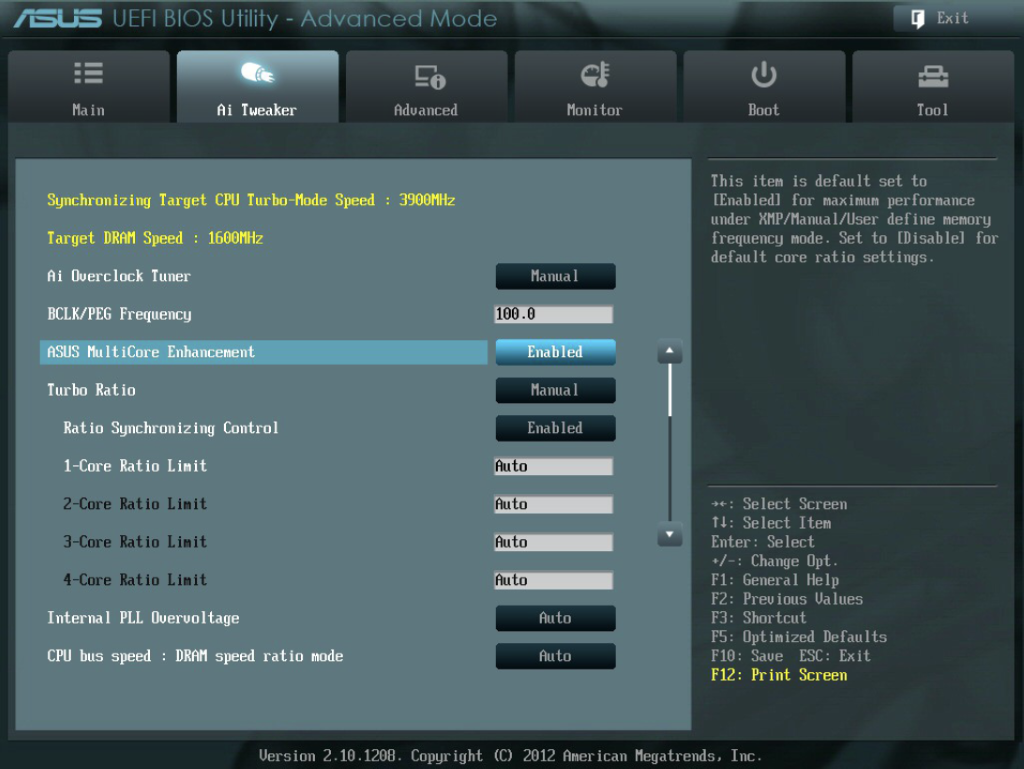
ASUS:
AI Tweaker: CPU and memory options
Advanced: Chipset, storage, and power options
Monitor: System health and fan-speed options
Boot: Boot and security options
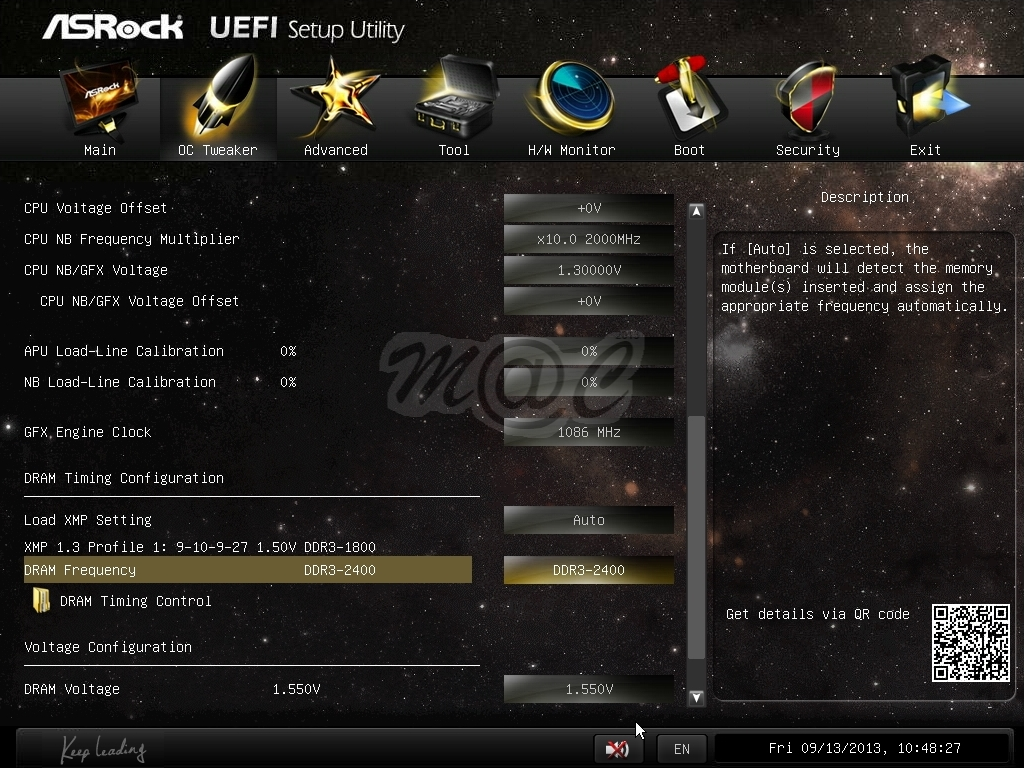
ASRock:
OC Tweaker: CPU and memory options
Advanced: Chipset, storage, and power options
H/W Monitor: System health and fan-speed options
Security: Security options
Boot: Booting options
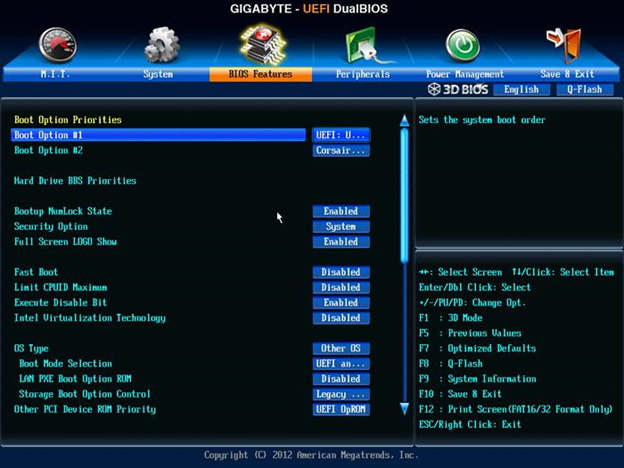
Gigabyte:
Keep up to date with the most important stories and the best deals, as picked by the PC Gamer team.
M.I.T. : CPU, memory, system health, and fan-speed options
BIOS Features: Boot and security options
Peripherals: Chipset and storage options
Power Management: Power options
MSI:
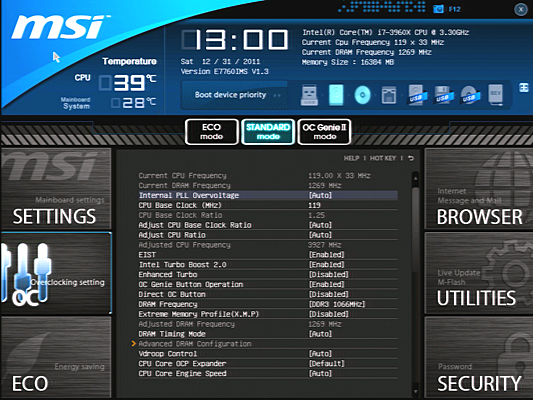
OC: CPU and memory options
Settings: Chipset, boot, and security options
Hardware Monitor: System health and fan-speed options
Adding to the confusion, the specific names for each setting may differ from one manufacturer to another.
CPU Options
BCLK/Base Clock: This is the main system clock for the processor. If the motherboard supports changing this option, it provides is a universal way to overclock the processor, even if you don't have a processor that was marketed for it, such as Intel's non-K processors. However, since this affects everything on the processor, including memory controller and integrated GPU, you normally can't tweak this value very high before stability issues start.
CPU Ratio: This allows you to change the frequency multiplier of the processor. Normally, this only affects the cores themselves, and not the other parts of the processor, such as the memory controller or integrated GPU. Changing this value is the easiest way to overclock. However, this is only supported on the following processors:
Intel's K or X suffix processors (e.g., i5-2500K, i7-4690K, i7-5960X)
Intel's Pentium Anniversary Edition (Pentium G3258)
AMD's FX series processors (e.g., FX-8150, FX-6300)
AMD's K suffix APUs (e.g., A10-7850K, A8-6600K)
Spread Spectrum: As the name suggests, this option is used to spread the electromagnetic interference (EMI) coming off the processor across a broader range of frequencies. This doesn't reduce the total amount of EMI, but it helps prevent all of it from being concentrated on the frequency of interest, namely the processor's clock frequency. This should normally be left on, although if you're doing some serious overclocking, it may help with stability to turn it off.
CPU Voltage: This is useful if you're overclocking, as higher clock speeds require higher voltages. However, approach this setting gingerly. Even a relatively small change (about 15 percent) can fry the CPU. And note that frying doesn't have to show any signs of physical damage to the part.
Host Clock/PCIe Clock: As the name suggests, this is used for adjusting the processor's on-board PCI Express controller frequency. While it might be tempting to tweak this, thinking it could help with graphics, it won't actually do much for the graphics card. It's best to leave this alone unless you've been touching BLCK, run into stability issues, and have run out of other options to tweak.
Intel SpeedStep/AMD Cool'N'Quiet: Both options will adjust the clock frequency of the processor to lower frequencies if it's not doing much and bump it back up to normal if it becomes busy. If you prefer to have your processor running at full speed all the time, disable this.
C-State Options: The C states (denoted by C# State) are processor power levels. These are useful to turn off when attempting extreme overclocking to keep the processor from switching power states.
x86 Virtualization: If your processor supports it, this will help virtual machines perform at near native level. On Intel machines, it may be called VT-x, while AMD machines it may be called AMD-V. On older machines, it'll be called "Vanderpool."
Memory Options
Memory Frequency: Sets the operating frequency of the memory. However, unlike BCLK on the processor, you can't chose an arbitrary frequency. Instead, you're left with options based on the BCLK multiplied by the memory's frequency multiplier. If you're left with strange frequencies after adjusting BCLK, it's best to pick the fastest one that isn't faster than the memory's rated spec. For best results though, leave this on auto.
Big list of timing values
Higher-end motherboards will allow you to directly adjust the timing values of RAM; the list of these values is long. But the most important ones are:
CAS Latency
RAS to CAS delay
Row Precharge Time
RAS Active Time
These are the four numbers you see in memory timings on product specifications. If you're overclocking your memory, adjusting those four values will usually help push the overclocking further. The other options you'll find are beyond the scope of this article.
DRAM Voltage: This is mostly useful if you're trying to overclock your RAM speed beyond its normal specification. This value should be handled gently, as going over even a small amount (about 15 percent or more) can fry the RAM. And frying can happen without apparent physical damage.
Storage Options
SATA Mode: The SATA protocol allows for three modes:
IDE: This is a backward-compatibility feature. It's only necessary if the operating system doesn't support SATA. Yes, you can install something like Windows 98 on a SATA drive with this mode on!
AHCI: Enables all of SATA's features. If you're using a modern operating system, the drives should be left on this.
RAID: This sets up the SATA ports for the motherboard's on-board RAID. Otherwise, it acts like AHCI.
This is one of the options that you should ensure is set to the proper value before installing an OS. It can be hard to switch between IDE and AHCI/RAID on the boot drive once the OS has been installed.
Hard Disk S.M.A.R.T.: This enables S.M.A.R.T. features on drives that support it.
Chipset/Peripherals Options
Graphics Adapter and Integrated GPU (IGPU) settings: These options are normally for changing which primary graphics adapter you're using, what PCI Express mode you want to use, and how much memory should be allocated to the IGPU. Regarding choosing a primary graphics adapter: If the computer can't use the one selected, it'll attempt to use the other.
Onboard peripherals: These options include the integrated audio and Ethernet adapter. Unless your operating system has conflicts with the integrated peripherals, you don't need to disable them when installing other hardware that serves their purpose. For example, if you're installing a sound card, you don't need to disable the onboard audio.
Legacy USB Support: This allows environments that do not normally support USB to use USB devices, such as older OSes and utilities that run on boot (like memtest86). Unless you're having USB compatibility issues at the OS, do not disable this.
Intel- and AMD-specific features
Intel Rapid Start: A way to resume from hibernate very quickly.
Intel Smart Connect: Allows certain programs to receive updates over the internet while the computer is sleeping.
AMD Dual Graphics: If you have an APU and an AMD GPU, this will allow a hybrid CrossFire option that allows the use of both GPUs to work in tandem, rather than be separate entities.
Power (ACPI) Options
S-State configuration: S-States are system level power states. The most common ones people use are:
S1: Power on suspend. The CPU stops executing instructions, but both it and RAM remain on. If a device says it can be powered off, it will be.
S3: Standby/Sleep/Suspend to RAM. The contents of RAM are kept and remains powered. Everything else shuts off. This allows for minimal power consumption while quickly powering on to resume use.
S4: Hibernate. The contents of RAM are stored in the HDD/SSD, then the system powers off completely. This allows you to resume where you left off, but the time from power on to that is usually the same as a cold boot time.
ErP S5: S5 is the system has completely shut down. Some motherboards have a feature called ErP, which allows the PC to consume the least amount of power possible, but not completely to 0W. Something still needs to be powered on to respond to the power button. This will disable certain features though, such as peripheral power on.
Peripheral Power On: You can configure the computer to power on or wake from S3 sleep from one of these peripherals:
PS/2 keyboard
USB keyboard, mouse, or other supported device.
On-board LAN, using the Wake-On-LAN protocol.
The motherboard's real-time clock. You can set it up for the BIOS to wake up the computer or allow it to be done so by the OS.
State after Power Loss: If the computer has a loss of power, the computer can do the following once power is restored:
Last state: If the computer was off, the computer will remain off. If it was on, it'll power back on.
Always on: The computer will always power on after power loss.
Always off (default): The computer will remain powered off.
Note that some motherboard manufacturers may put this in another location (ASRock for instance, puts this in Chipset Configuration).
System Health/Monitoring
Fan Speed Settings: These will tweak the speed of the fan. The labels on the settings correspond to the header name on the motherboard. For example, if you have header names FAN_1, FAN_2, and FAN_3, these should correspond to Fan 1, Fan 2, and Fan 3 in the BIOS respectively.
Typical speed settings include letting the system adjust the fan speed based on noise/performance profile or setting it to a flat value. More advanced features may let you create a customized speed to temperature curve.
Temperature Alarm Settings: Some BIOSes allow you to set warnings or actions to take when the CPU or chipset reaches a certain temperature. If an alarm is set, the PC speaker will beep. Other drastic measures will simply shut down the computer. This option may be simplified to just acting on the chipset temperature, as processors have gotten really good at preventing catastrophic overheating.
Case Open Feature/Reset: Some motherboards have a header that you can use to attach a sensor to detect if the case has been opened. This option is useless without that sensor.
Boot and Security
Fast/Ultra Fast Booting: This will minimize POST times. For most modern BIOSes, "Fast" means it won't enumerate USB drives, so you can't boot from them. "Ultra Fast" requires Windows 8 or later, and allows skipping the routine POST startup entirely. However, this means you cannot access the BIOS menu from boot until you either reset the settings or from Windows 8 itself.
Num Lock on Boot: Sets whether Num Lock should be on or off on boot. If you have a laptop with Num Lock but not the numeric keypad, you'll want to make sure this is left off if there's an option. Otherwise, the right half of the keyboard will act as the numeric keypad.
Full Screen Logo: Let's you see the motherboard manufacturer's splash screen or the regular POST output. This doesn't affect boot times either way.
Boot/POST beep: Leave this on, as this will aid in troubleshooting if the computer doesn't boot up. You may have to buy a PC Speaker (the little buzzer speaker) if your case or motherboard didn't come with one to take advantage of this.
Boot Order: This configures which storage devices to boot from in order. This can be one of the storage drivees (HDD or SSD), optical drives (if one is installed), USB drive or "removable disk", or from the network. Old computers may even allow you to boot from a floppy drive. By default, it's best to configure this for the boot drive, then either the optical drive or USB drive.
Boot/Setup Password: You can set a password that must be entered any time the computer boots or goes into the BIOS settings. Unfortunately, there are plenty of ways to circumvent this so don't rely on this keeping your computer secure.
Secure Boot: Enabling Secure Boot requires the operating system you want to run to support it. This option may not be available on prebuilt computers. If it is available, do not disable this feature if the OS was already installed, as the OS will not boot. Otherwise, you can leave it disabled and install any OS, regardless if it supports Secure Boot.
