The best Star Wars: Squadrons loadouts
Here's a Star Wars: Squadrons loadout for every kind of pilot.
Keep up to date with the most important stories and the best deals, as picked by the PC Gamer team.
You are now subscribed
Your newsletter sign-up was successful
Want to add more newsletters?
Looking for a killer Star Wars: Squadrons loadout? The main objective of Motive Studios’ space-battling sim is to realise your rose-tinted childhood fantasies of X-Wing and TIE Fighter combat among the stars. But you don’t want just to fly any old A-Wing: You want your starfighter to feel like your own.
Squadrons lets you customise every part of their chosen ship, letting you build specialised loadouts to fit your desired playstyle. Having a range of Star Wars: Squadrons loadouts in your arsenal is immensely useful, especially when you need to adapt to a morale shift in a tense Fleet Battle. In this guide, I'm going to run through a few carefully curated loadouts to help beginners and veterans alike find a ship setup that suits them across both in-game factions.
How to build a top Star Wars: Squadrons loadout
Head to your hangar from the main menu and click on your starfighter to customise it. From this menu, you can apply cosmetics and skins, but also swap out ship parts using a resource called Requisition—you earn that by playing matches, earning XP, and levelling up. Keep playing Fleet Battles and Dogfights, and you’ll also unlock extra loadout slots for your ships, which let you quickly swap between different builds in-game.
Article continues belowOnce you earn enough Requisition to unlock parts, all you have to do is head to the first components tab in the ship customisation menu and filter through the different areas of the starfighter you can upgrade. Once you find an upgrade you want, you can pay to unlock it with Requisition and then equip the upgrade to your starfighter to commit to your new build.
Star Wars: Squadrons loadouts: New Republic
Y-Wing Shipbreaker
- Primary Weapon: Rotary Cannon
- Left Auxiliary: Beam Cannon
- Right Auxiliary: Proton Torpedo
- Countermeasures: Seeker Warheads
- Hull: Dampener Hull
- Shields: Ray Shield
- Engine: SLAM Engine
The best Star Wars: Squadrons players play the objective in the game’s main Fleet Battles mode, and this loadout is perfect for getting rid of Cruisers, Corvettes, and Star Destroyers. The Rotary Cannon is a devastating charged blast of lasers that deals serious hull damage to enemy starfighters.
Still, the main event is the Beam Cannon and Proton Torpedo, which make short work of bigger ships once you get in range. The laser will stop you in your tracks and ruin your mobility, but if you want to complete objectives and win your placement matches quickly, this is the ultimate loadout. Be stealthy on the approach with it: Your Dampener Hull will slow hostile lock-on time, and the ray shield will lower the damage dealt to you by local ship lasers when you start blasting.
Keep up to date with the most important stories and the best deals, as picked by the PC Gamer team.
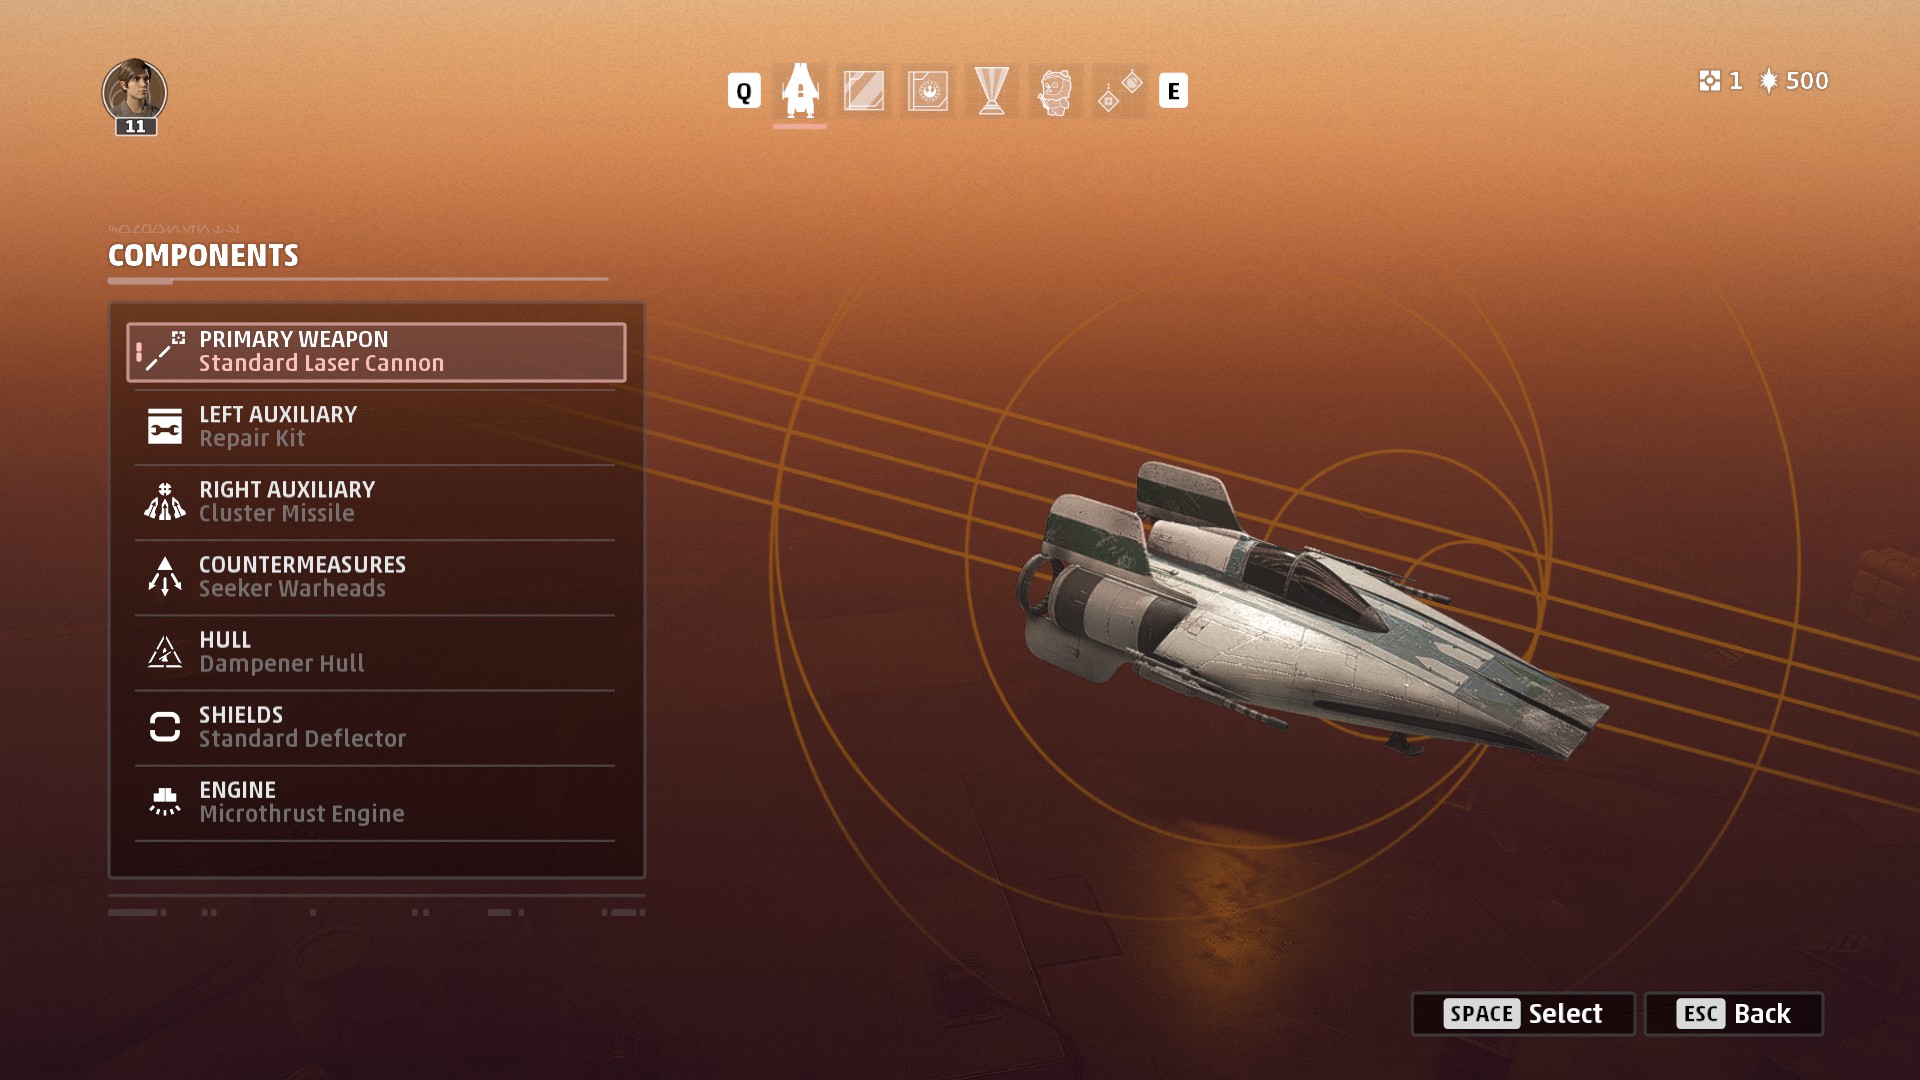
A-Wing All-Rounder
- Primary Weapon: Standard Laser Cannon
- Left Auxiliary: Repair Kit
- Right Auxiliary: Cluster Missile
- Countermeasures: Seeker Warheads
- Hull: Dampener Hull
- Shields: Standard Deflector
- Engine: Microthrust Engine
This is a more general build that's great for dogfighting and taking out approaching ships at the start of a Fleet Battle. It’s especially useful before you swap to a bomber and start dealing tremendous damage. Your Repair Kit will keep you healthy in between hit-and-run battles, and your cluster missiles will let you quickly fire a big salvo at more heavy starfighters.
The Dampener Hull makes you difficult to lock on to, and your Microthrust Engine will ensure that you have the mobility necessary to swerve inside destroyed ships and escape Interceptors. You could swap from the Standard Laser Cannon to the Rapid Fire Cannon in Dogfight mode when you don’t need the range to make this build even more deadly.
Star Wars: Squadrons loadouts: Galactic Empire
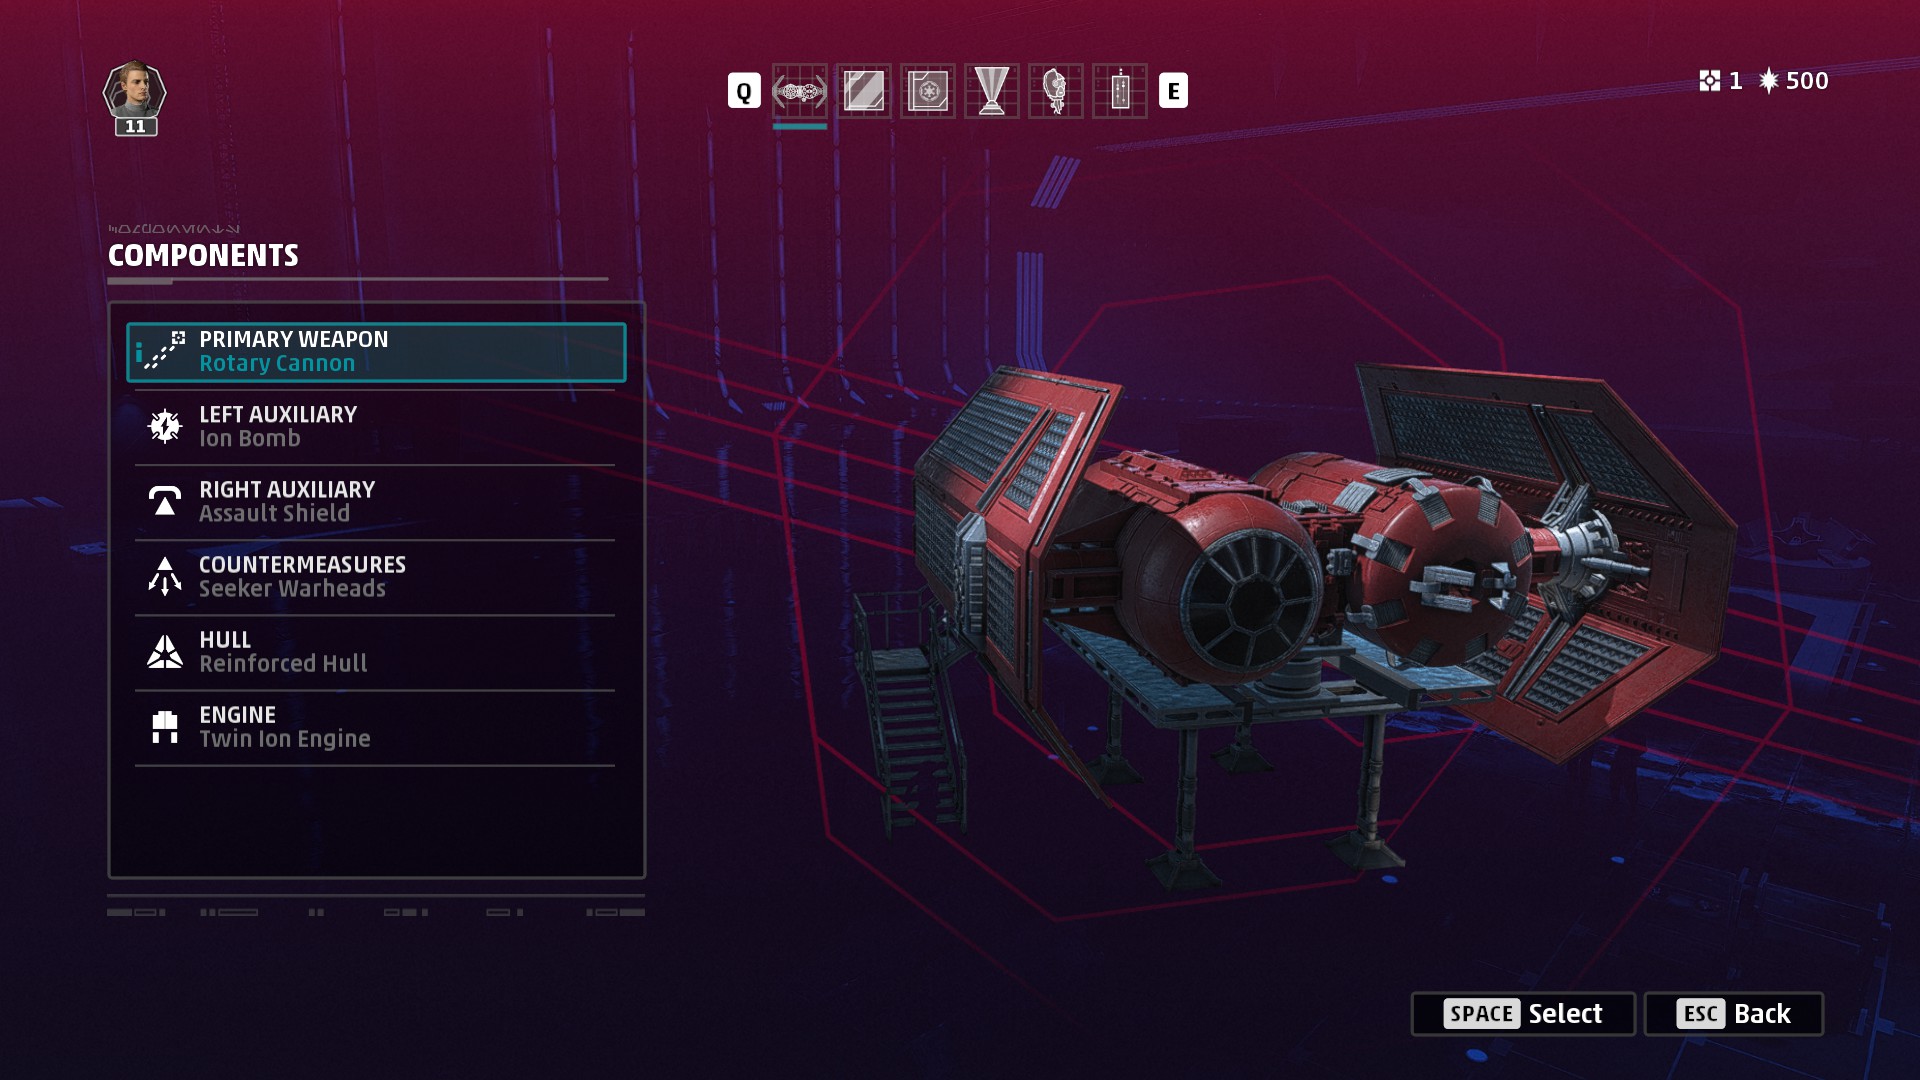
Tie Bomber Behemoth
- Primary Weapon: Rotary Cannon
- Left Auxiliary: Ion Bomb
- Right Auxiliary: Assault Shield
- Countermeasures: Seeker Warheads
- Hull: Reinforced Hull
- Engine: Twin Ion Engine
If you see this beast coming, kick your engine into overdrive. This dangerous Star Wars: Squadrons TIE Bomber build is versatile, with components that fit both playstyles. The Rotary Cannon deals incredible damage, especially if you can track an enemy fighter’s flight path. Then you’ve got the Assault Shield for bullish, full-frontal attacks and Capital Ship protection.
The Ion Bomb deals ridiculous damage if you can get above an enemy fleet, and the Seeker Warheads should keep those missiles off your tail on the approach. The Reinforced Hull adds a whopping 60 percent max health, and the standard engine 's decent speed gains will suit you just fine. But, if you’re feeling reckless, you could swap the Twin Ion for the Unstable Twin Engine, which explodes upon death and deals massive damage, at the expense of your max health.
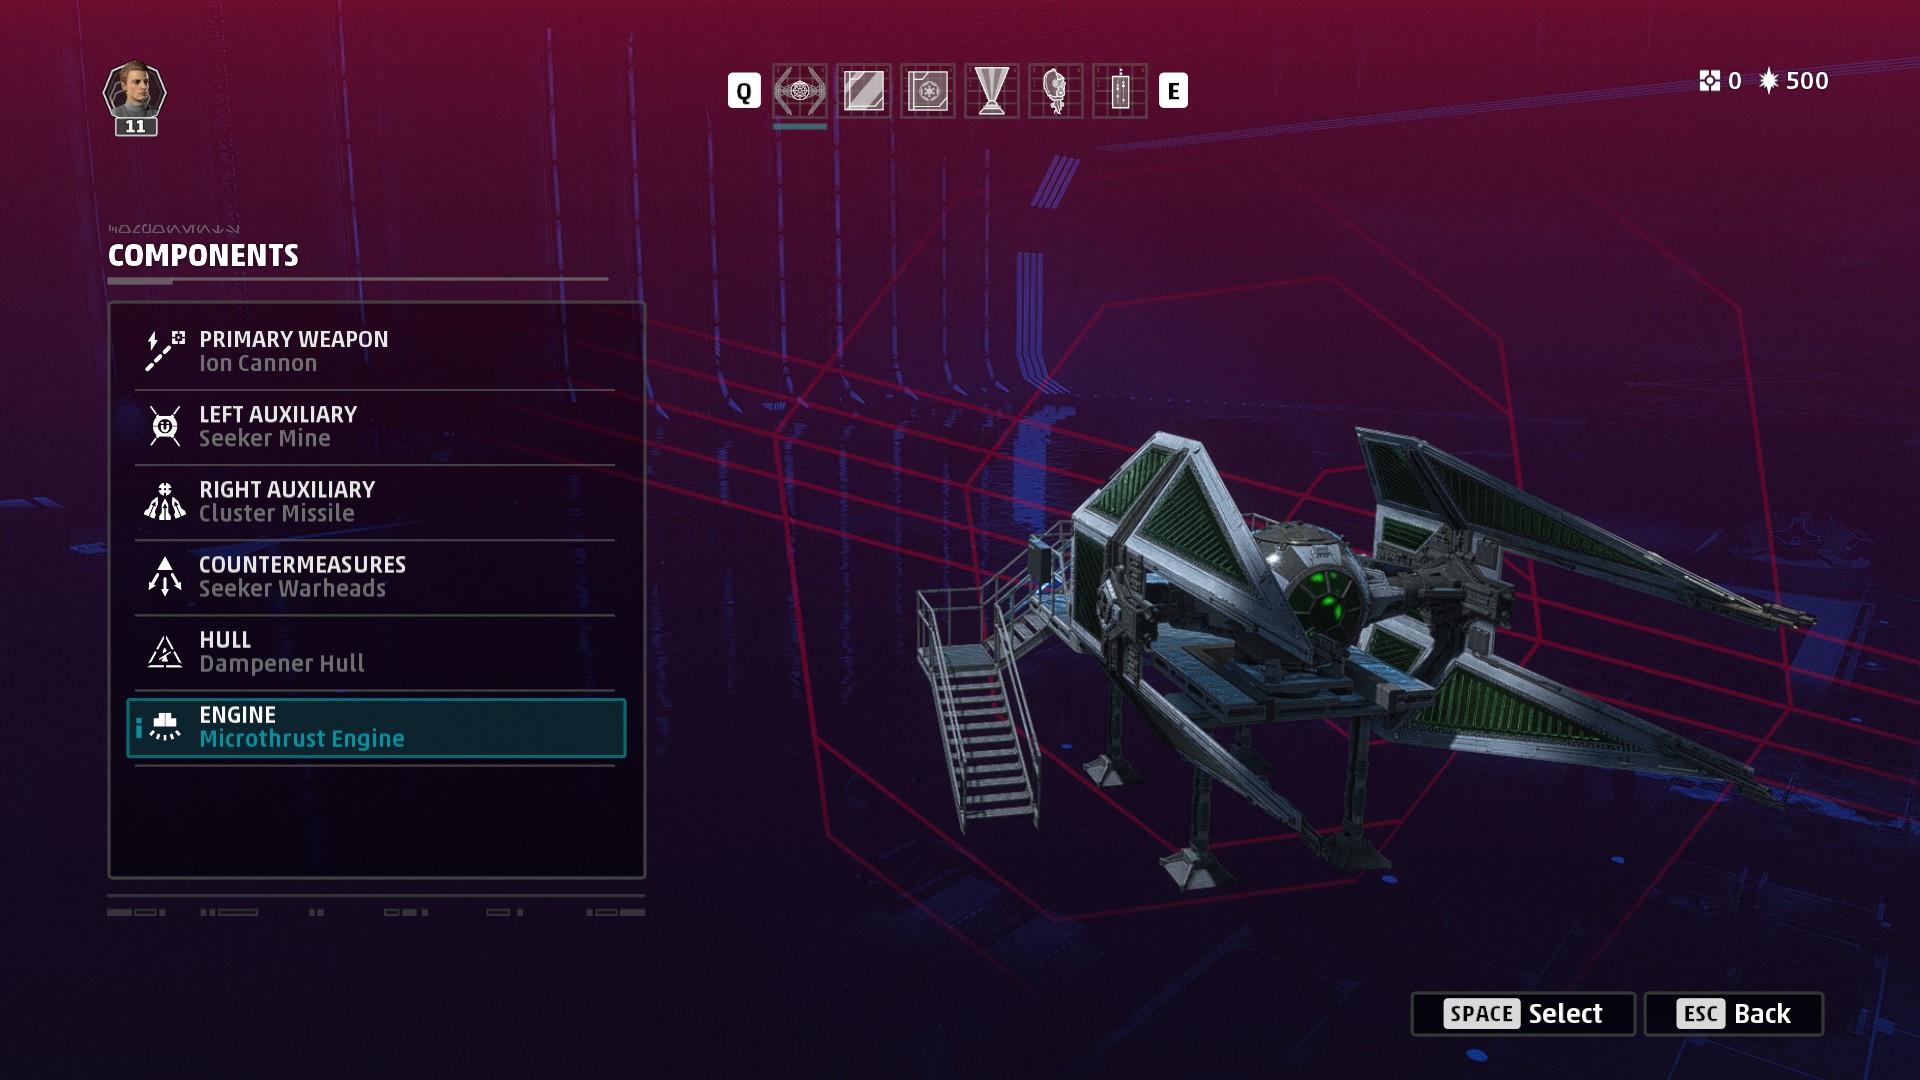
Tie Interceptor Disabler
- Primary Weapon: Ion Cannon
- Left Auxiliary: Seeker Mine
- Right Auxiliary: Cluster Missile
- Countermeasures: Seeker Warheads
- Hull: Dampener Hull
- Engine: Microthrust Engine
If you’re looking for a new approach or a high risk, high reward tactic, try this disabling Interceptor build. Here I’ve chosen the Ion Cannon, which doesn’t deal much hull damage but builds a meter that eventually completely disables an enemy ship, rendering them utterly helpless in the air, forced into a button-mashing QTE. Once they’re a sitting duck, unload a full clip of the Cluster Missile to turn enemies into spare parts.
It’s hugely dangerous in the right hands and made even more potent by the lock-on slowing Dampener Hull and the Microthrust Engine. These components give you the mobility you need to track enemy flight paths so you can bury them with lasers and get closer to the disabling debuff.
- How to drift in Star Wars: Squadrons
- Star Wars: Squadrons VR: The setup tips you need
- Star Wars: Squadrons crossplay: How it works
