
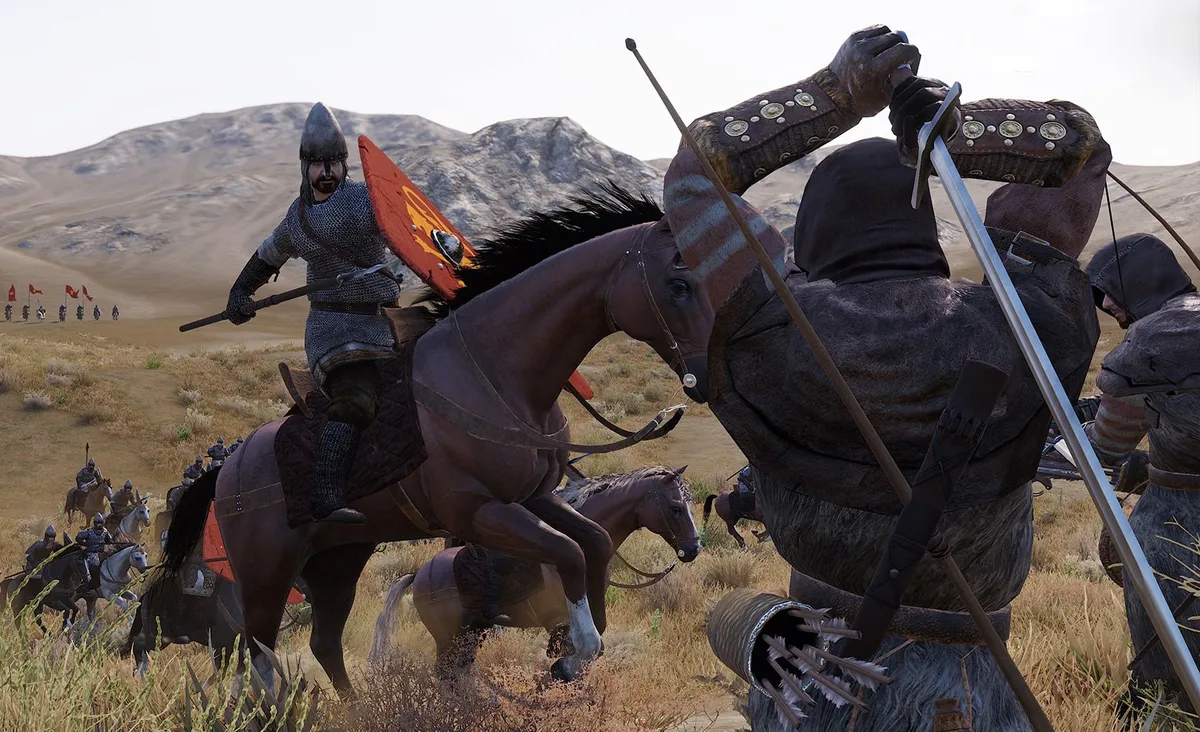
Mount & Blade 2: Bannerlord's combat strikes an idiosyncratic balance between the tactics of positioning and snap reflexes. A duel or skirmish is about quick play and counter play, like a fighting game. Larger battles, with 100 or more soldiers per side, are sprawling affairs where a single combatant means little and where as commander you’re playing a real-time tactics game more than an action RPG.
This guide covers how to choose a weapon, win a fight, and reign victorious on the field of battle in Mount & Blade 2. So longer will you be cast aside, bloody and beaten, by pretenders to your medieval kingdom: Here are my top tips to help you survive combat.
Which Bannerlord weapons to choose
But first, weapons: Every character has four active inventory slots. Each can hold a single weapon, shield, or ammunition. Select a couple of weapon skills early on and stick with them to maximize the return on your stats and focus points. Character loadouts requiring only two of the six weapon skills are best for new players, but players who can reliably land hits to increase their skills will do fine with three. Here are some of the most popular loadouts:
Classic: Sword, shield, bow and arrows
An effective set of weapons for most situations, and all new players. Average swords like a Spatha, Longsword, Straight Sword, or Warsword are long enough to give you sufficient range in one-on-one fights, though it takes skill to learn the fine art of chopping up enemies below you while mounted. Carry a sword, shield, and a bow to shoot arrows while directing your troops, then enter the thick of the fight on your own terms as the battle progresses.
Versatile: Sword, axe or mace, shield, and thrown weapon
Carrying a secondary one-handed weapon means sacrificing your bow, but you get something in return: Axes do bonus damage to break enemy shields, which is great for dueling other Heroes. Maces are extra effective against heavy armor and can knock enemies down if you hit hard enough. The major downside here is that you only get three or four shots with throwing weapons, and they're harder to land hits with.
Cavalry: Sword, shield, spear or lance, and javelins
If you prefer to melee from horseback, this loadout helps you harass enemies, shock charge troop formations, and wade into the midst of the action. You could use throwing axes instead of javelins, but javelins hit harder have a better range. Plus, weight doesn’t matter when you’re on a horse.
More advanced setups may remove a shield entirely, or include two-handed weapons. Big weapons are a bit of a, er, handful for new players, because they have to actively block every stroke coming their way. With practice you can get around this in 1v1 combat, but it’s near-impossible once you’re fighting more than two or three enemies. Those doing ride-by cavalry charges will find some use for a greatsword or polearm, but most new players should stay away.
The Mongol: Bow and arrows, lance, and sword
This setup is about harassing the enemy at range and occasionally charging. It relies on speed for defense and makes room for time to spend commanding troops. The lance picks off enemy infantry in ride-by attacks and the sword defends you against enemy cavalry who get in close. It’s tricky to master this setup, but with practice, it’s the most powerful set of weapons on the battlefield since the AI struggles to keep up with a skirmishing player.
You’ll notice we’ve left off crossbows entirely. Crossbows are deadly, and you can swap them for a bow, but they can’t be used mounted without a perk. Crossbows are also rare and overpriced in the game’s current, broken economy.
Armor is a matter of personal preference. Generally the rule is the heavier the better, but it slows you down more. If you have low Athletics skills, consider holding back in the chain mail range until you’re swole enough to carry the extra load.

Mount and Blade 2: Bannerlord combat tips
Success in Mount & Blade 2's combat relies on directional movement, fast reactions, and situational awareness. If you can’t beat the tutorial instructors every time, taking little or no damage, then leave the player damage taken difficulty setting on very easy.
We’ll start with duels, small 1v1 and 1v2 scenarios, like you’d find in the game’s Arena tournaments. Arenas, along with the training grounds, are a great consequence-free place to test out your skills.
Learn attacks and blocks
All attacks and blocks correspond to the direction you’re moving the mouse as you click and release. This is the hardest controller skill for new players to grasp. For example, flicking the mouse to the left as you attack will cause your character to swing from their left—that’s a horizontal swing across their body from left to right. (Thankfully, everyone in Calradia is right-handed.)
The swing of your weapon can also collide with other enemies, allies, and terrain. In other words, don't fight with a wall on your right. For parries, the direction has to match where the enemy attack is coming from to work. Practice directional attacks and blocks in the training grounds until they’re second nature, then put those skills to the test by doing Arena practice rounds.
Bannerlord cheats: Get rich and dominate battles
Bannerlord companions: How to recruit the best
Bannerlord tips: Our full beginner's guide
Bannerlord difficulty: Which to choose
Bannerlord mods: The best player-made additions
Bannerlord marriage: How to start a family
Bannerlord money: Get rich quick
Bannerlord factions: Which should you choose?
Bannerlord workshop: Make easy money
Bannerlord caravan: How best to trade
Hit locations and headshots
All strikes in Mount & Blade 2 are location-based. Hitboxes exist for hands, shoulders, knees—most major areas of the body. Armor broadly covers these areas, and is usually weakest on the head and arms, sometimes the legs. Aiming for the head or the arms is often your best chance of incapacitating your enemy quickly, so land overhead attacks on enemies whenever you can to hit the head, neck, or shoulders.
Shields are your friend
Shields are large enough to block most attacks, even if you block in the wrong direction. Also, only shields can protect you from ranged weapons. Try to keep your shield up if you’re under ranged fire or if enemies are near enough to strike, and only lower it when you’ll attack soon after. Watch your shield’s hit points (the yellow bar above your own health). It’s not fun to scramble around looking for some dead guy’s shield mid-melee.
Here's how to feint
Each attack has to completely finish before you can start a new one, and you’re vulnerable to being hit during the whole animation, though your swinging weapon can hit an opponent’s to parry. Attacks can be canceled by blocking, however, so some players find it useful to feint by starting one attack, blocking briefly, then attacking from another direction.
Keep moving
Keep moving, in all combat situations. Stepping left, then swinging from your left as you step right, will give you a good chance to catch the enemy off-guard. (Strafing is a tactic that skilled players can abuse to incredible effect.) You can do a similar trick in close quarters by moving backward, then quickly forward, as you throw an overhead swing—this move unblocked is particularly murderous. If you find yourself against a big shield or backed into a corner, use E to kick or shield bash to create some distance and a chance to strike.
Take advantage of the simpler ranged combat
You either kill them before they reach you or get remedial melee lessons. Lead your targets, arc your shots, aim for the head.

How to fight battles
In the early stages of the game you’ll engage in smaller skirmishes. Fights with 5-30 combatants per side are often decided by troop quality and equipment rather than fancy tactics or positioning. Your hero and companions really shine at this stage, since one skilled soldier felling five enemies can really make a difference. Use this low-pressure environment to learn the positioning and selection commands, the number and function keys on your keyboard. Here are some good basic command strategies:
Use your archers and javelineers smartly
Put archers or javelineers in front of your force as a skirmish line, then move them behind the infantry as the enemy closes. Try finding a slope facing the enemy, then put your archers at the top and infantry halfway down for a more defensive strategy. Practice getting your infantry into combat with the Advance or Follow Me orders, then set them loose with Charge. You then follow up with the Move to Position order to regroup, or reign them back in with Follow Me.
Be wary of using the Charge order too liberally
When enemy cavalry is on the field troops under Charge will happily run off on their own to pursue enemy horse. In most battles, save the charge for when the enemy is definitely broken, as it can isolate small clumps of your troops to get picked off by enemies whose morale hasn’t broken yet—or leave you completely alone against marauding cavalry.
Avoid better-equipped enemies
Early on, avoid opponents with the edge over you in equipment or tactics: More than a handful of Steppe Bandits, Sea Raiders, or Forest Bandits will reliably ruin your day. Likewise, even small groups from the Khuzait or Vlandian kingdoms can contain lethal concentrations of horse archers or heavy cavalry, respectively. Don’t bother with any quest involving Deserter Soldiers until you’ve got at least 25 to 30 real warriors, not just raw recruits. (Forest Bandit camps are especially lethal, due to massed longbow fire, and should be completely avoided in the mid-to-late game until Taleworlds balances them.)
Adapt your counter strategy in larger battles
In larger battles with more complex troop compositions, your strategy to counter the enemy will change from fight to fight. Issuing commands can be slow, and even if you know the shortcuts to jump back and forth between the home row, number keys, and function keys, it isn’t simple. A strong mid-game army has a core of shielded infantry, about as many ranged fighters to provide covering fire on defense or to skirmish on attack, and as much cavalry as you can afford to maintain. Horse archers can reliably command themselves using F6. Proper use of melee or shock cavalry will have you leading from the front to charge, break through, wheel, and charge again.
Mount & Blade 2 combat recap
The fundamentals of medieval combat that you learn and practice early will always apply, so here are the key things to remember:
- Make sure your archers have a clear field of fire, either in front of, well behind, or elevated above your other forces.
- Use your cavalry to ensure your infantry isn’t flanked.
- Commanding the biggest battles (with as many as 500 troops on each side) involves as much ordering your troops around as actual fighting on your part. You may end up in these larger battles as a solo character, or in command of only part of the army, but the fundamentals are the same if you want to make an impact.
- Memorize command hotkeys now to save yourself a lot of pain later.

