How To: Set Up And Use A Plex Server

Set up a streaming solution for your old movies
So, you've watched all the good movies on Netflix. You know that there's a big box of DVDs buried somewhere in your closet, but it would be too much trouble to rummage through all of your junk for just one movie night. The good news is, if you can manage to unearth that box, you can digitize your entire collection. No longer will you need to shuffle boxes and scrounge around for that movie you swear you bought a while back. All you need is Plex, a capable computer, and some free time. After that, your DVDs can go back where they belong—the bottom of your closet.
The Service
Plex allows you to store, organize, and access your entire movie catalog from anywhere. It even supports music and photos. It's free if you only want to use it on PCs in your home network. To take full advantage of Plex, you will need to upgrade to Plex Pass. With that upgrade, you will get the ability to access your library from anywhere, download and watch your movies offline on phones and tablets, get access to free apps on PS4, Xbox One, Android, Roku, Windows 8.1, and Windows phone, and have increased control over account management. The only app that you will have to pay for is the iOS app, which is currently $4.99. If you do decide to upgrade to Plex Pass, there are three payment options: $4.99 a month, $39.99 a year, or a one-time payment of $149.99 for a lifetime subscription. So, those are the free and paid versions. Let's take a look at how to use it.
[No, you do not need a Plex Pass to watch your media from anywhere. But you do need it if you want to sync your media from device to device.--Ed]
The Server
Plex functions by dedicating one device as a Plex media server. This server can be either a PC or a NAS. If you decide to go with a NAS, you will need to make sure that it has a decent CPU. While streaming a movie to another device, your server will need to transcode the media. In order for it to do that at a reasonable pace, it will need a decent CPU; Plex recommends a 2.4GHz Intel Core 2 Duo processor or better. We recommend going with a PC for your server. Any decent gaming PC with an i3 or up should serve nicely. Unless you have a beefy processor in your NAS, we would recommend relegating it to storage duties.
Speaking of storage, depending on the size of your physical library, you will want to allocate a large amount of space for your movies. Blu-rays generally take about 8GB of space while DVDs take about 2GB. Those numbers can add up quickly, so it's best to guess high when purchasing storage.
To get your server ready, you will first want to create your folder structures. Having your media well organized from the beginning will save you time and trouble in the future. Designate one folder for your Plex library (for example, ours is called Plex Movies), and another for your ripped media (Movies). Within the folder for your ripped movies, you will want to create separate folders for each movie. Later on, when you start creating .mkv files, they will not have usable titles. This will cause problems when you attempt to encode that file later. Placing your .mkv files in designated folders makes finding them later on much easier.
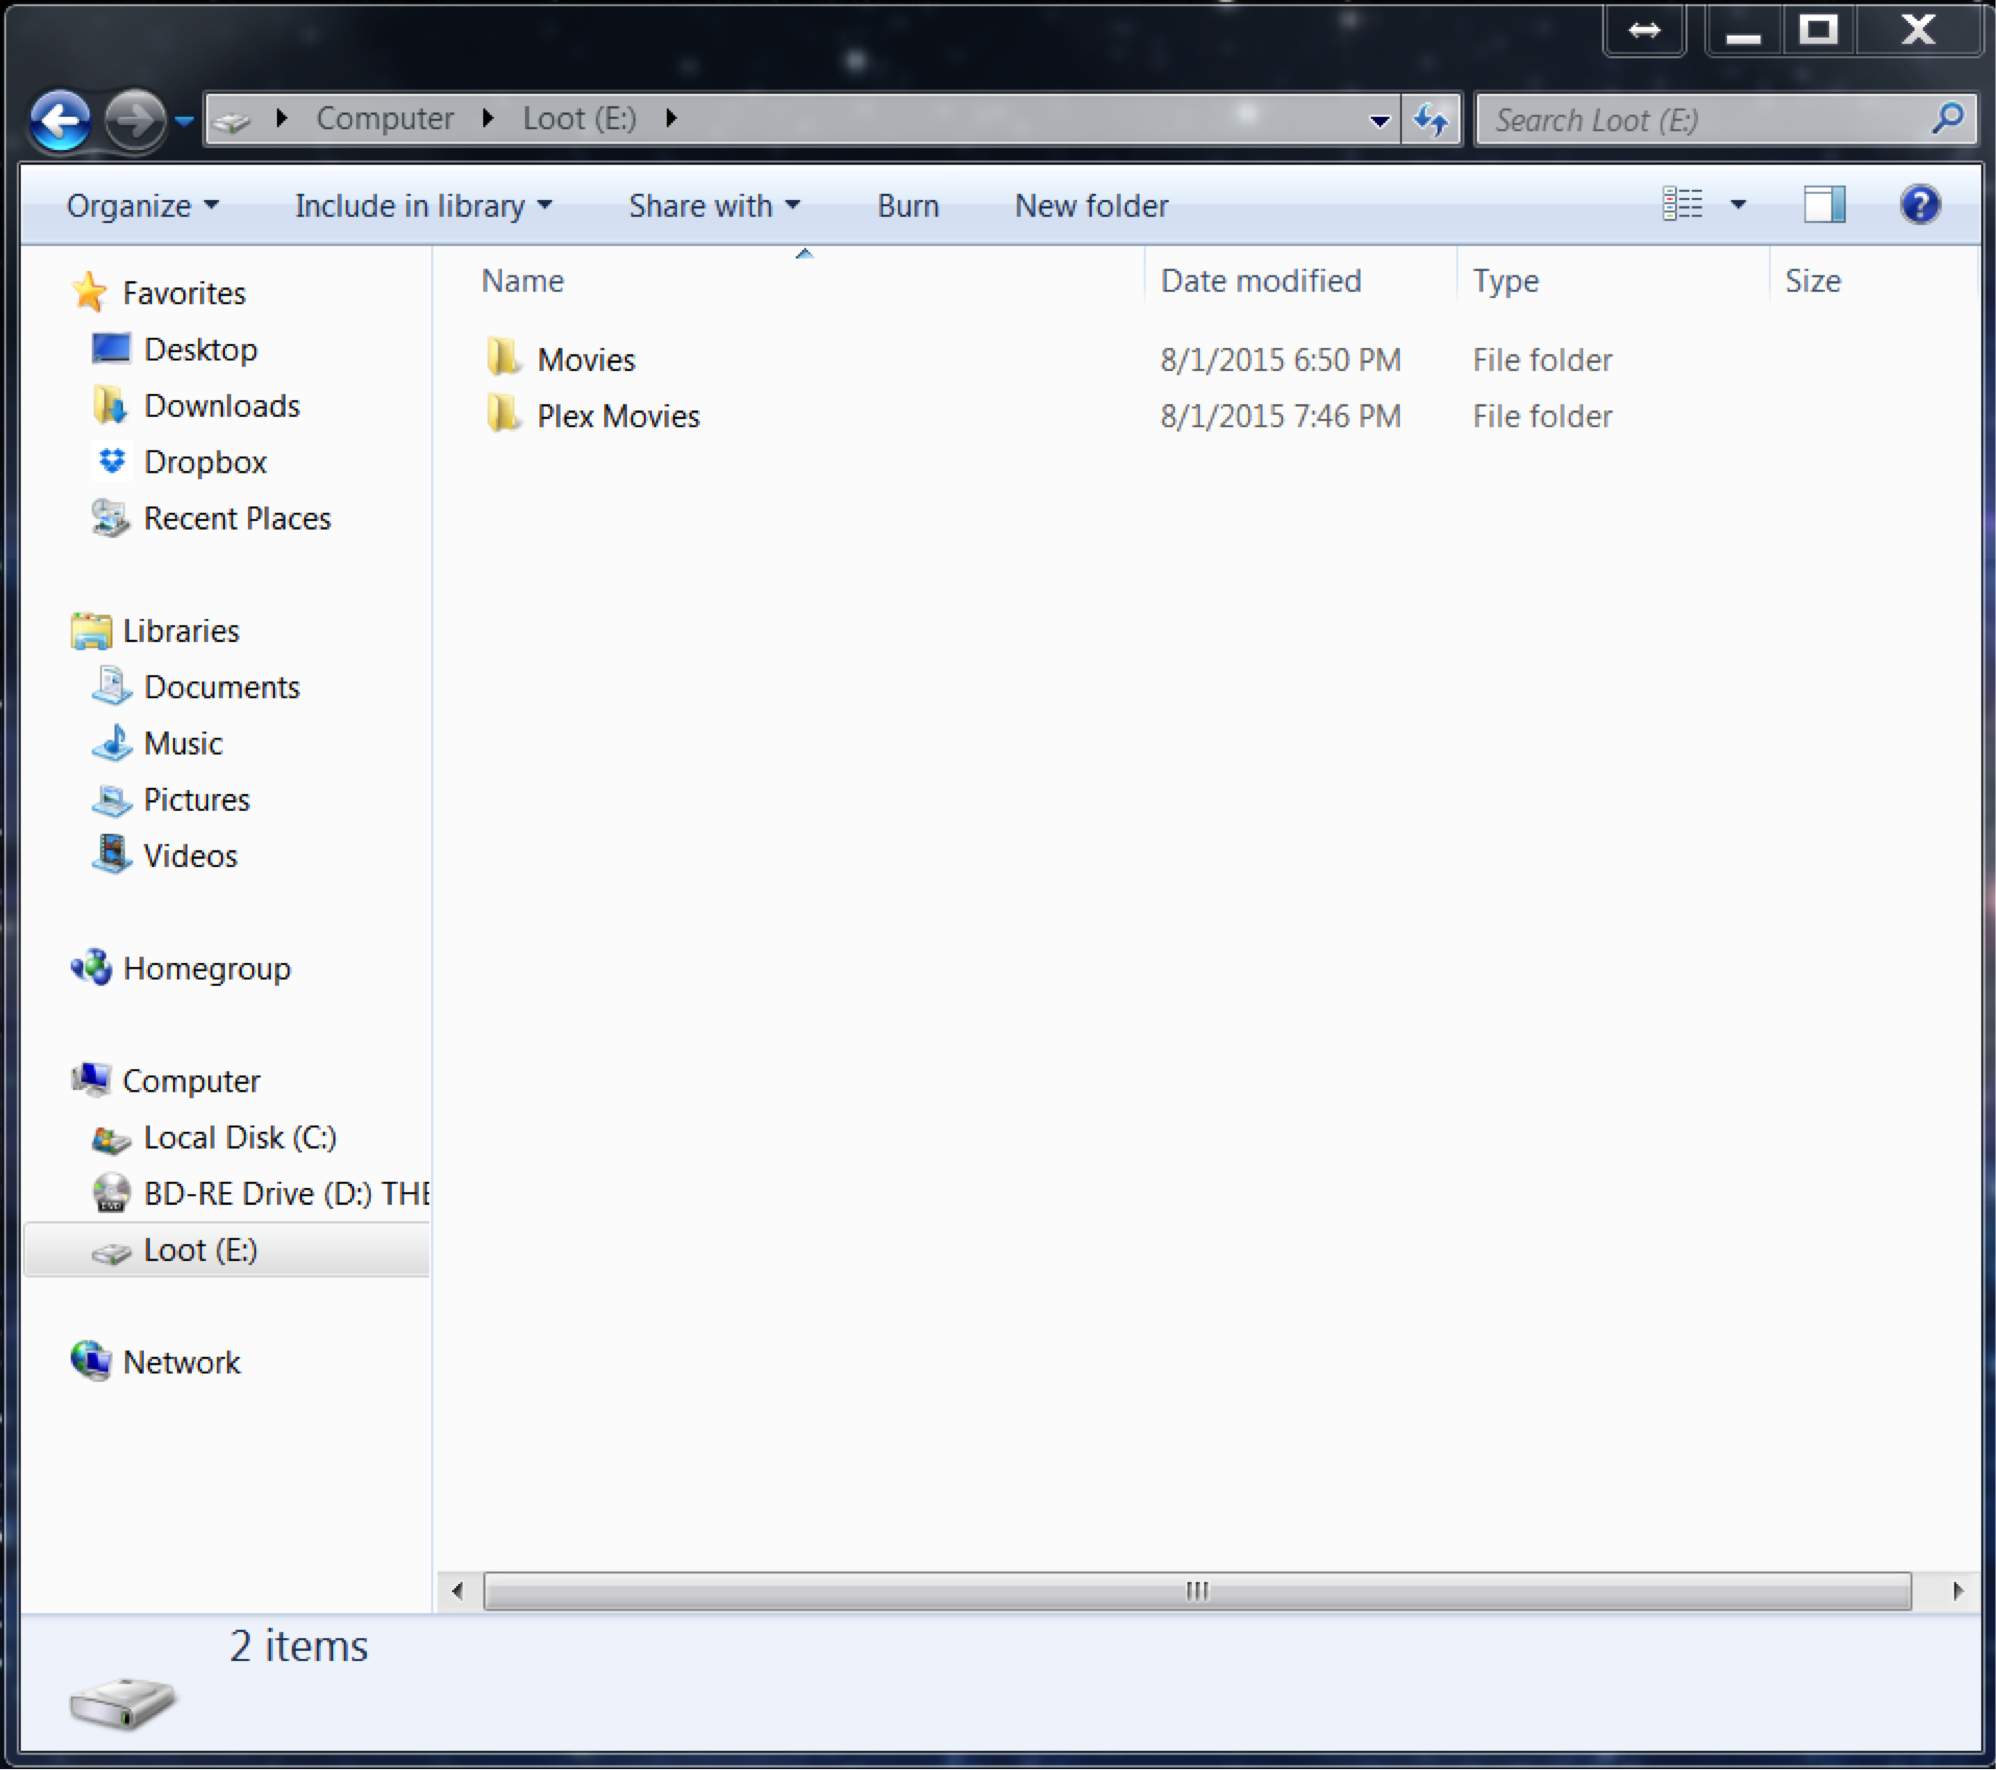
Once you have created your folders, you will want to go ahead and download Plex media server. You’ll be able to choose between Computer or NAS. Plex is available for Windows, Mac, Linux, and FreeBSD. Choose your OS and run the installation. Once your installation is complete, it’s time to configure.
Keep up to date with the most important stories and the best deals, as picked by the PC Gamer team.
Setting up Plex
Now that you've got the media server installed on a suitable device, you'll need to create an account. As we mentioned earlier, you have the option between a free or paid account.
When you've set up your account, sign in on the Plex homepage, and click the Launch button. You should be prompted to create a library during the new user welcome. Select what type of media this library will be used for and give it a name. We just went with “Movies.”
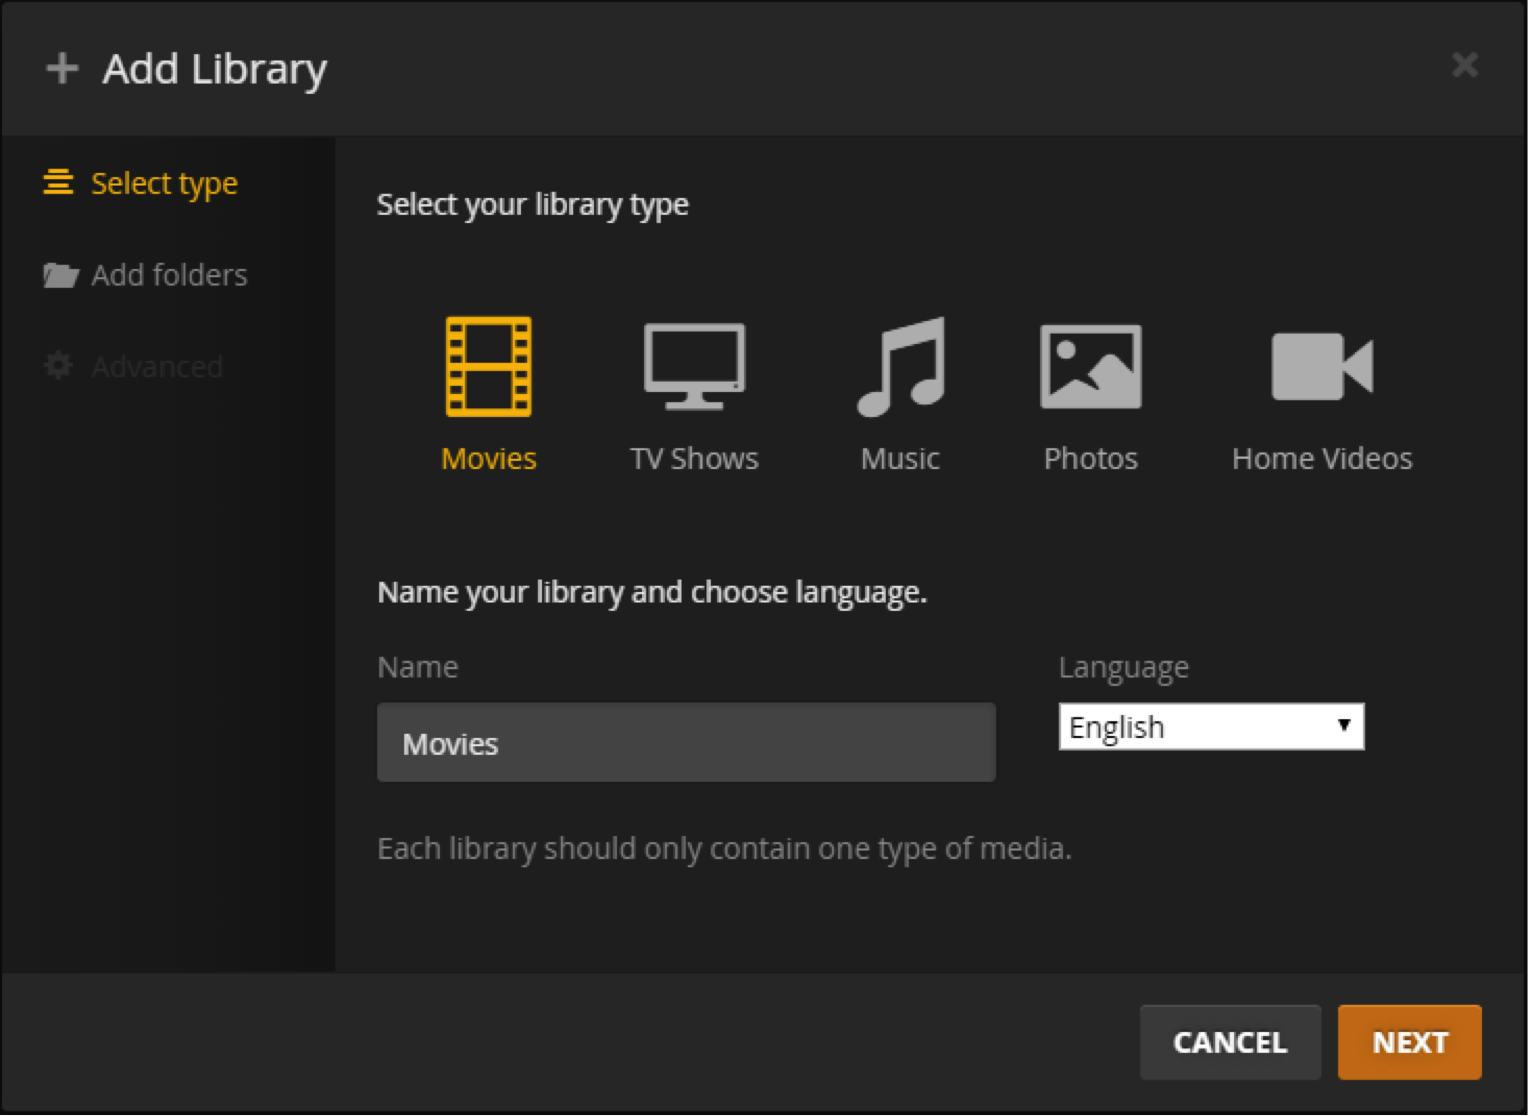
Next, you will need to point your new library to the folder where you will be storing your movies. For us, it was the “Plex Movies” folder.
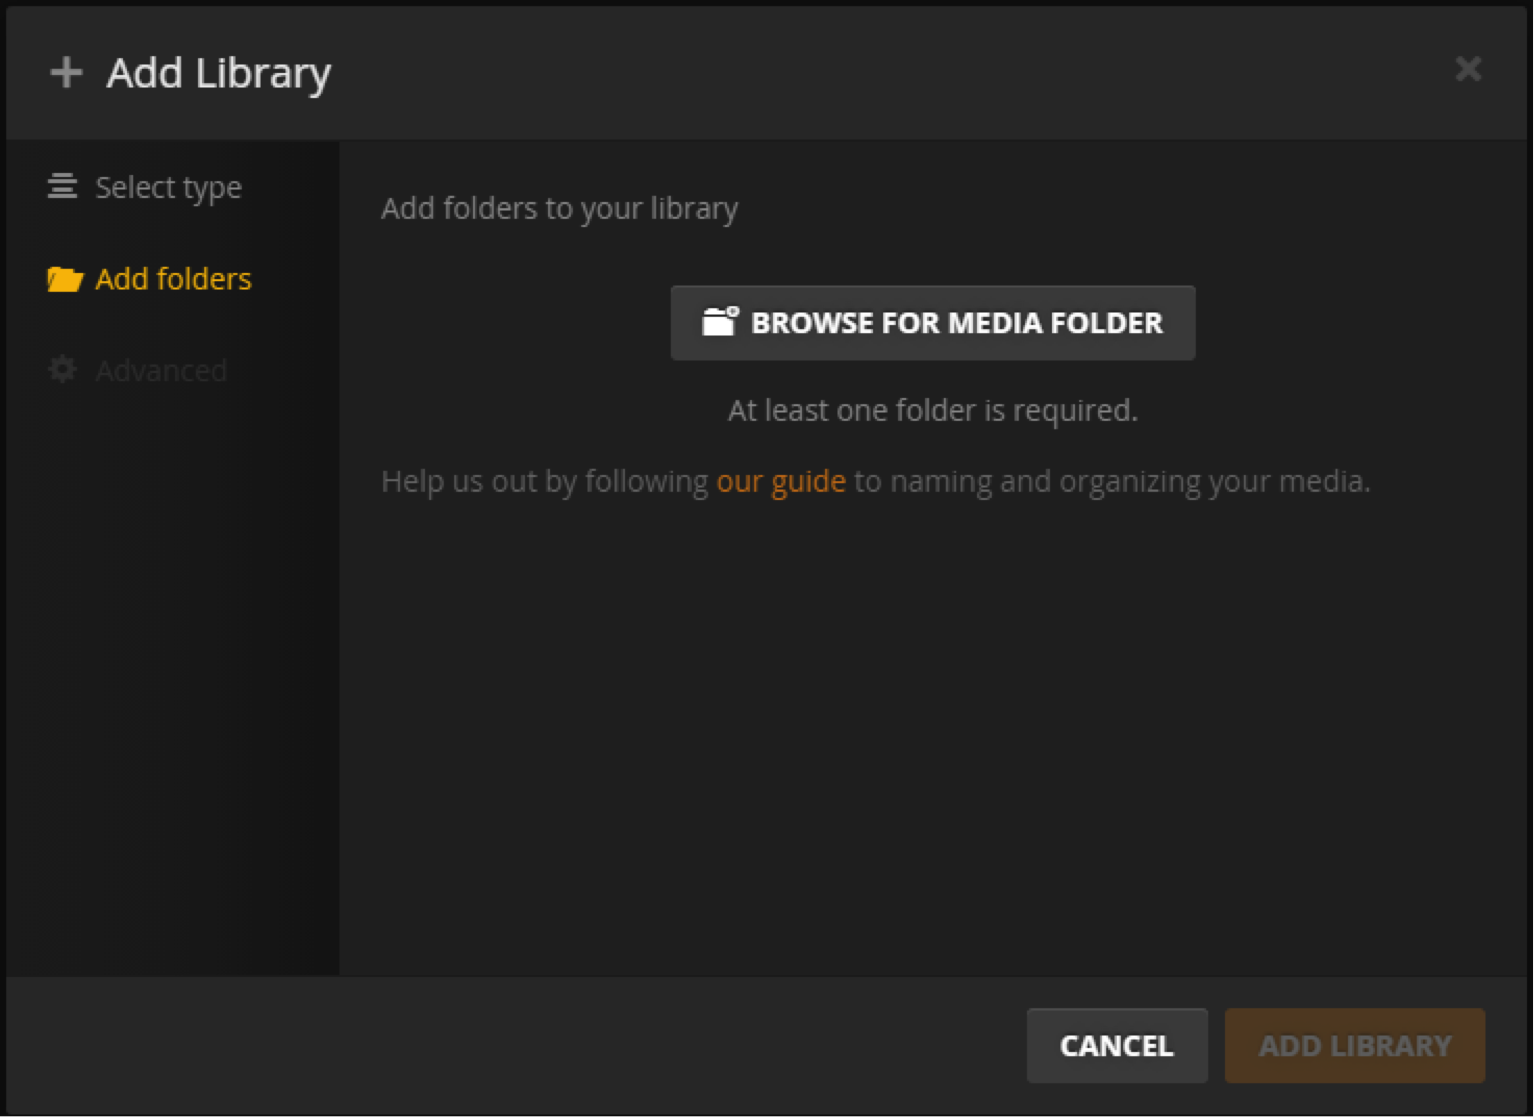
Click “Add Library” and your new library will be created. You can now start adding movies to your new library.
Ripping Movies
Now it's time to start ripping your movies. To do this, you're going to want to use two applications: MakeMKV and Handbrake. There is good reason to use two separate applications for this process. MakeMKV is the fastest and most efficient movie-ripping software we have found. The only downside to it is that most of the Plex apps don’t support .mkv files. The one file type that is supported across all apps is .mp4, and this is where Handbrake comes in. It encodes the .mkv files into .mp4 files, so that you’ll be able to view the media across all of the Plex apps. This is the easiest method we’ve found for adding movies to your Plex library.
MakeMKV
Install and open MakeMKV. When you insert a movie you want to rip, it will automatically detect it in your optical drive. Click on the large picture of the drive.
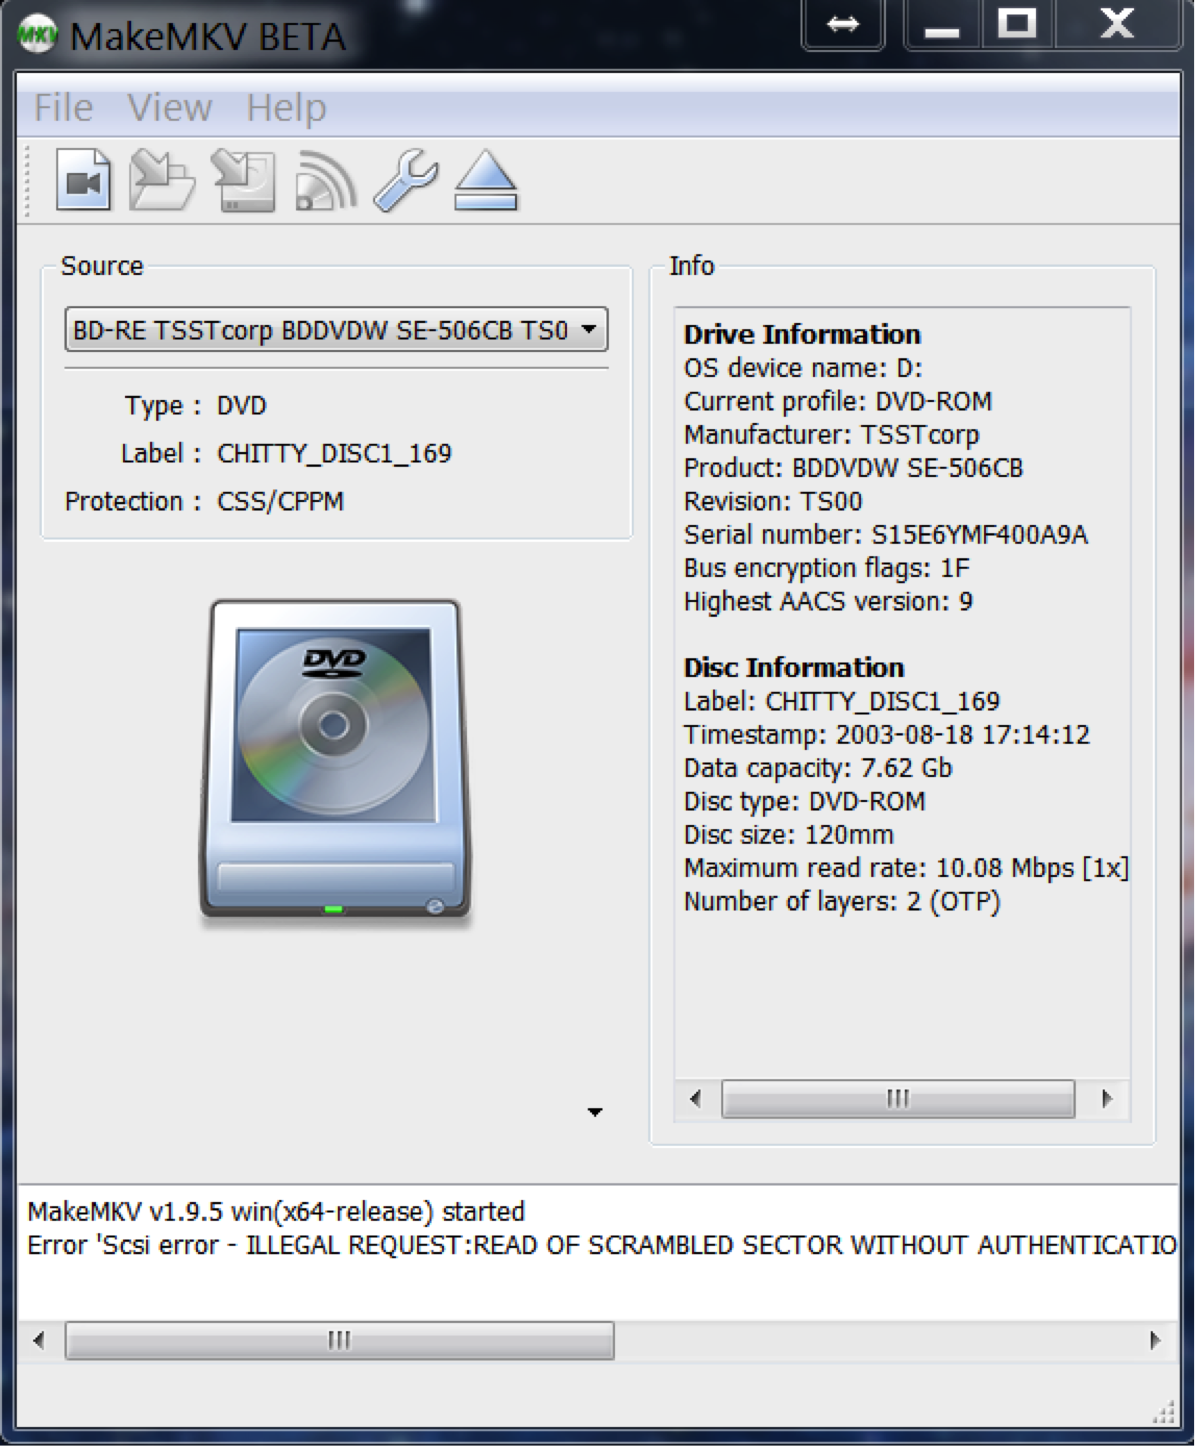
MakeMKV will prompt you with a 30-day warning before you’ll need to pay for the software—a one-time payment of $50. If you plan on using Plex a lot, it's worth it.
Dismiss the window and MakeMKV will open the disc and provide you with a list of its contents. At this point, you will be able to open the file structures and select the content you want. The movie itself is always the largest file. The rest of the content is usually the special features.
Once you've made your selections, be sure to specify where you want to create the .mkv file. You can click the folder button next to the “Make MKV” button to specify which folder you want to use. If you followed our folder-creation advice, choose the movie-specific folder within the main folder you created for ripped movies.
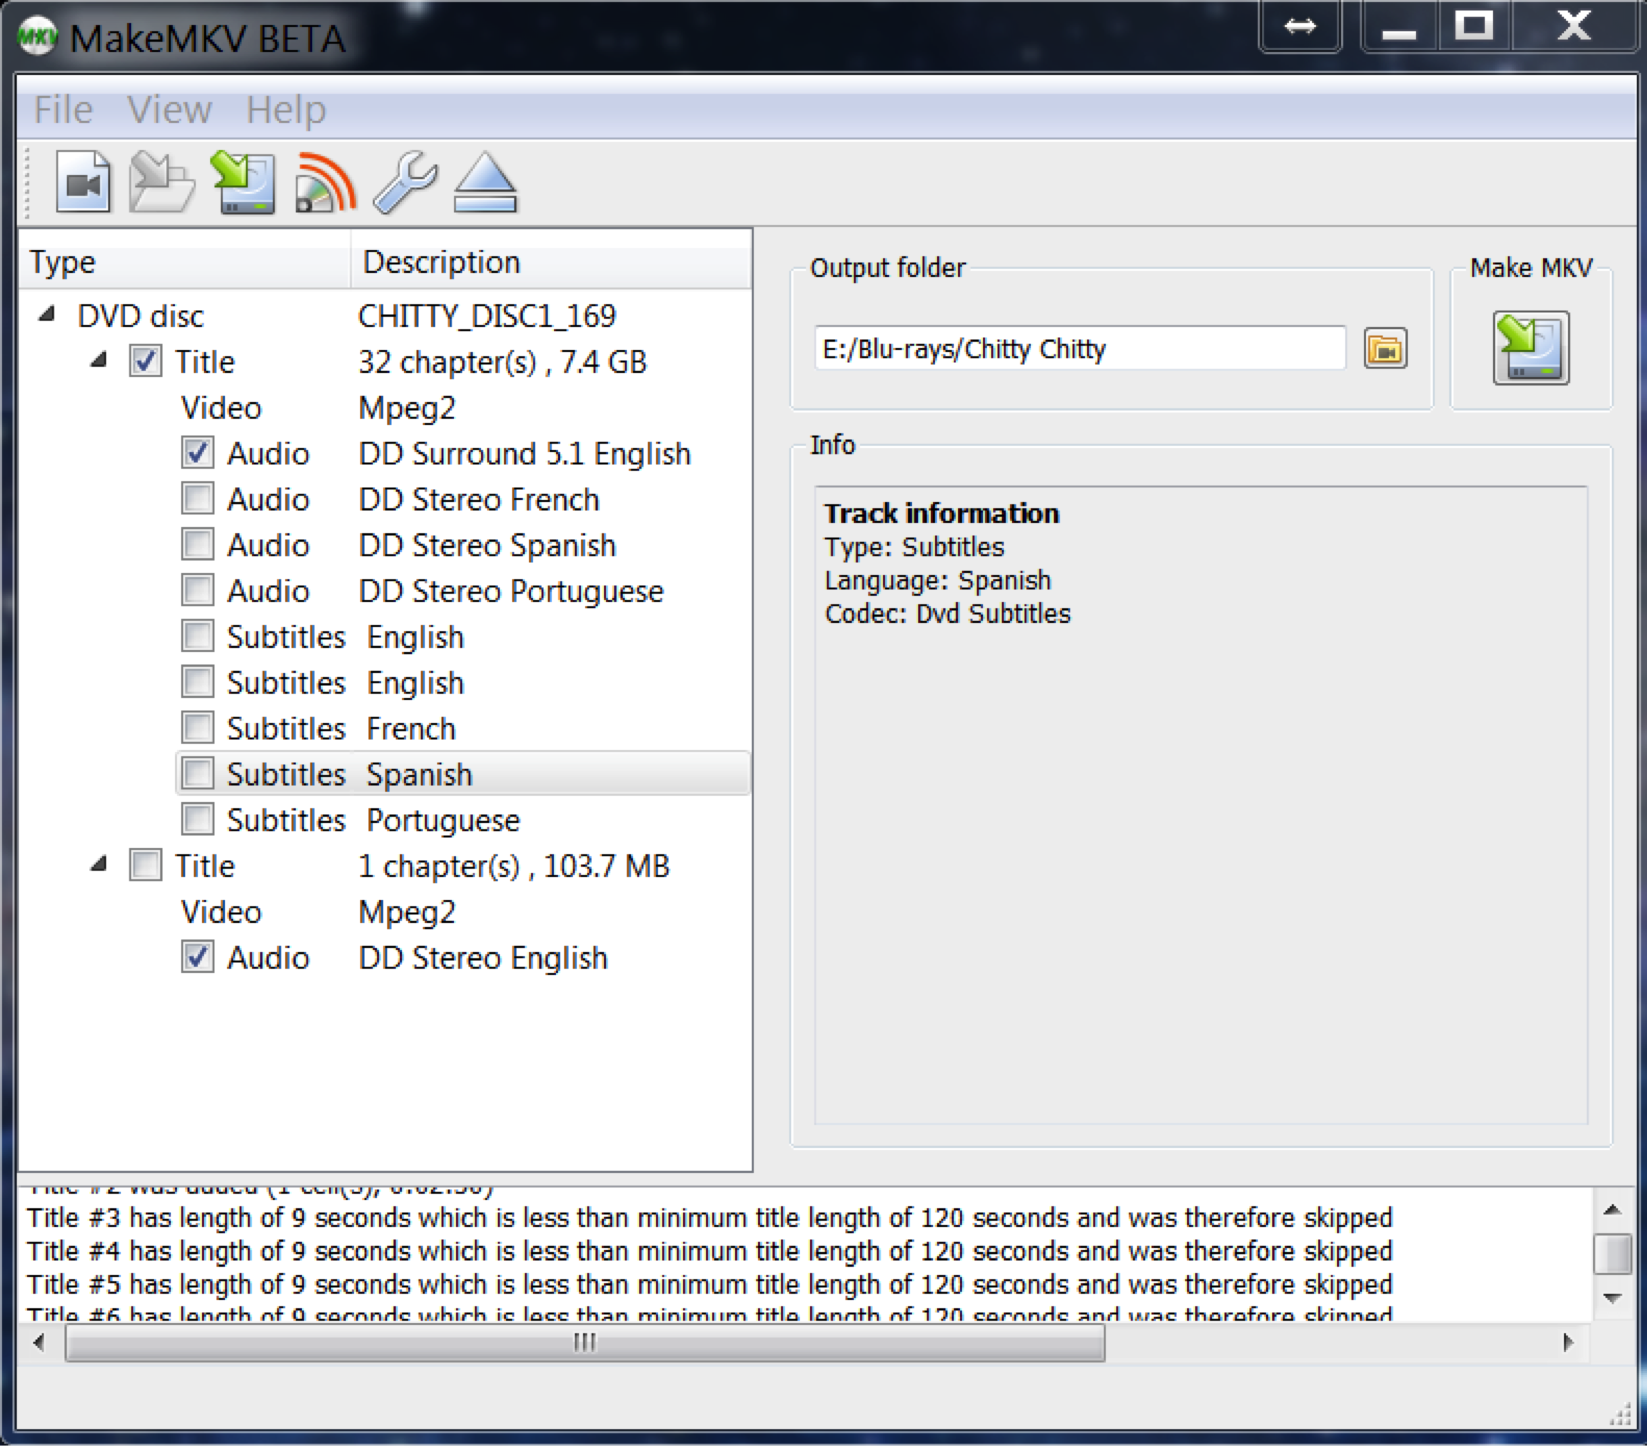
Once you've done that, click the “Make MKV” button and wait. Blu-rays take noticeably longer to rip than DVDs. Ultimately, the speed will depend on how powerful your machine is.
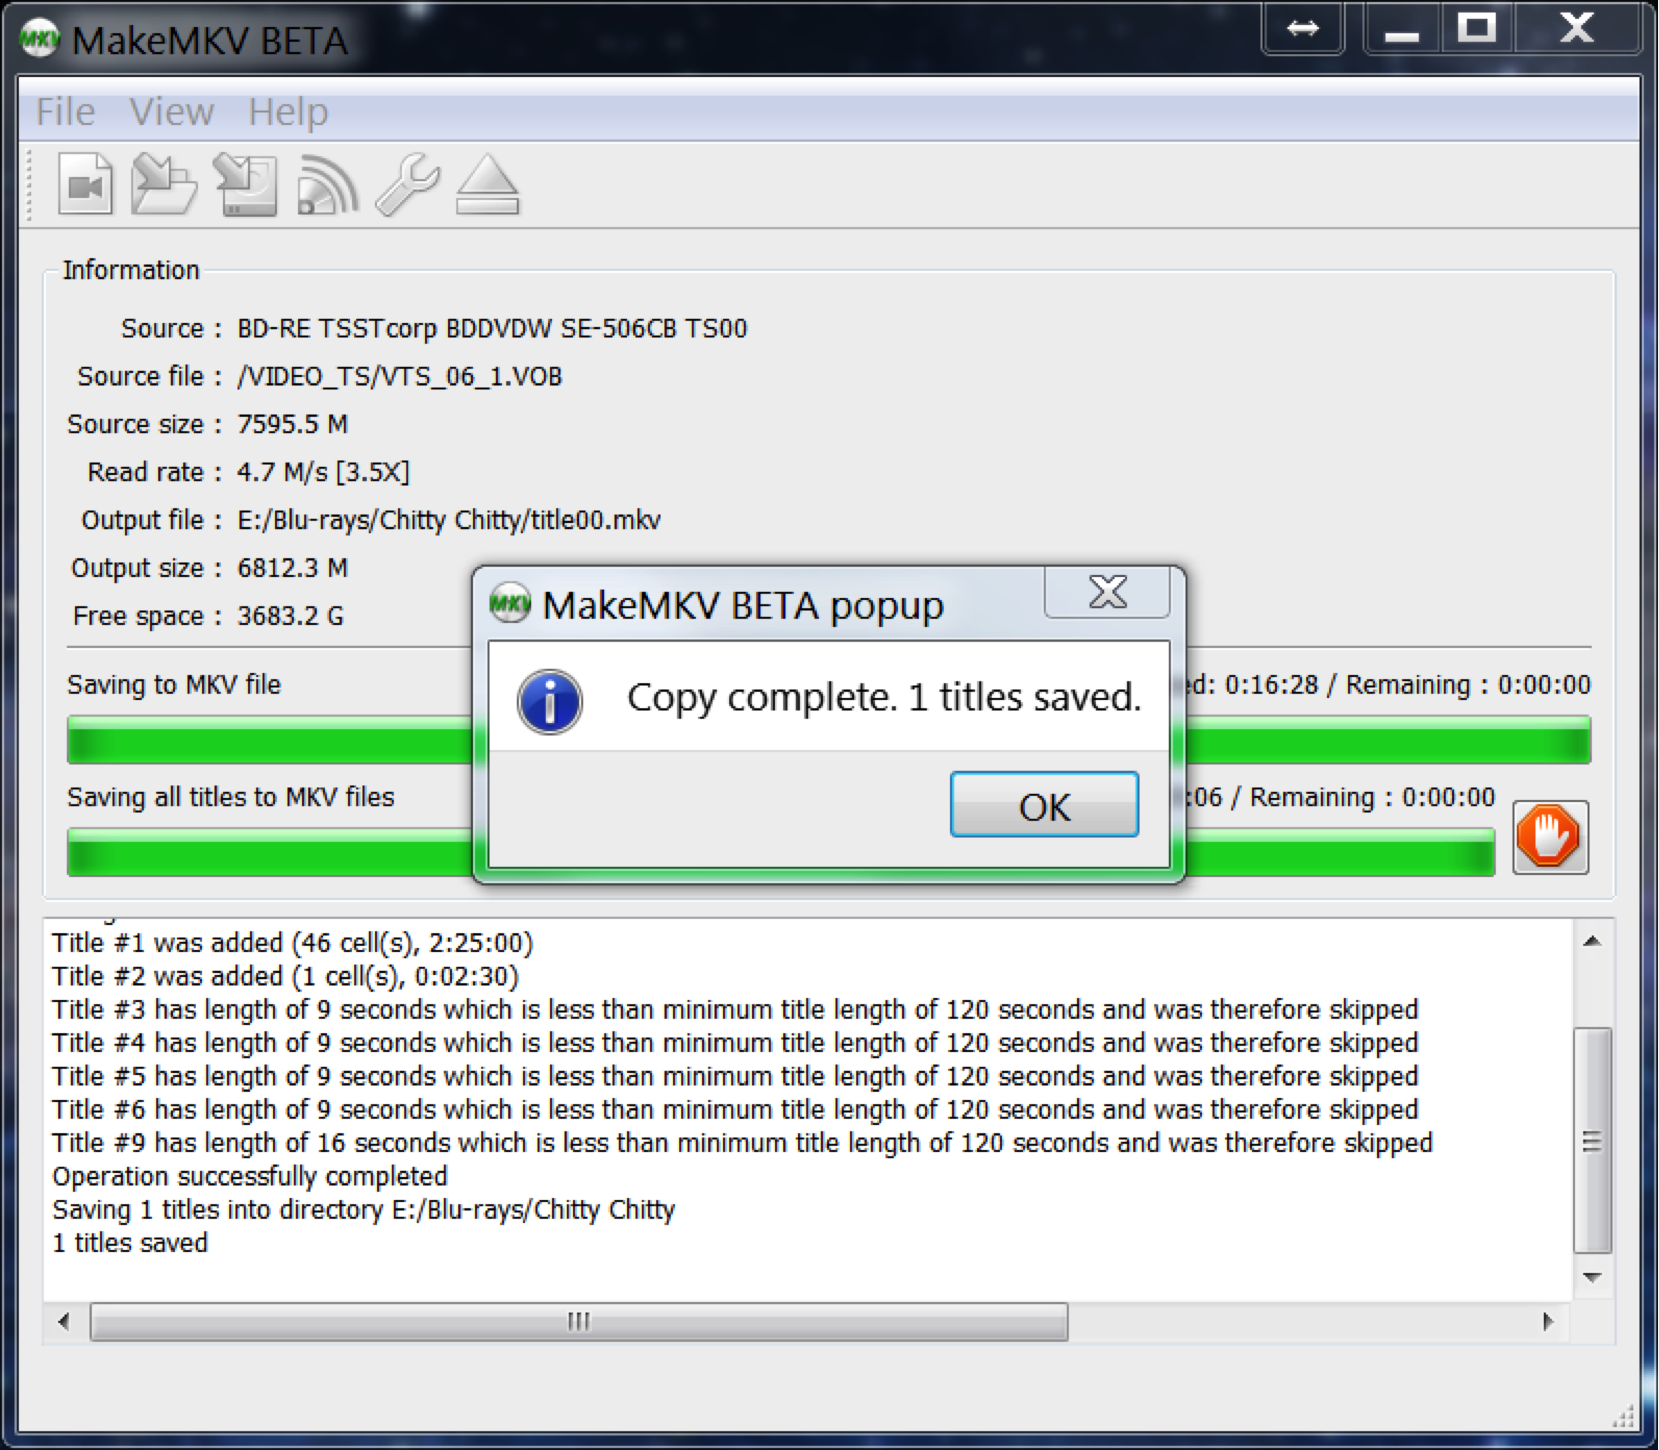
Once the .mkv file has been created, you can move over to Handbrake.
Handbrake
Install and open Handbrake. Click the Source button and select the File option. Drill down and choose the new .mkv file you just created.
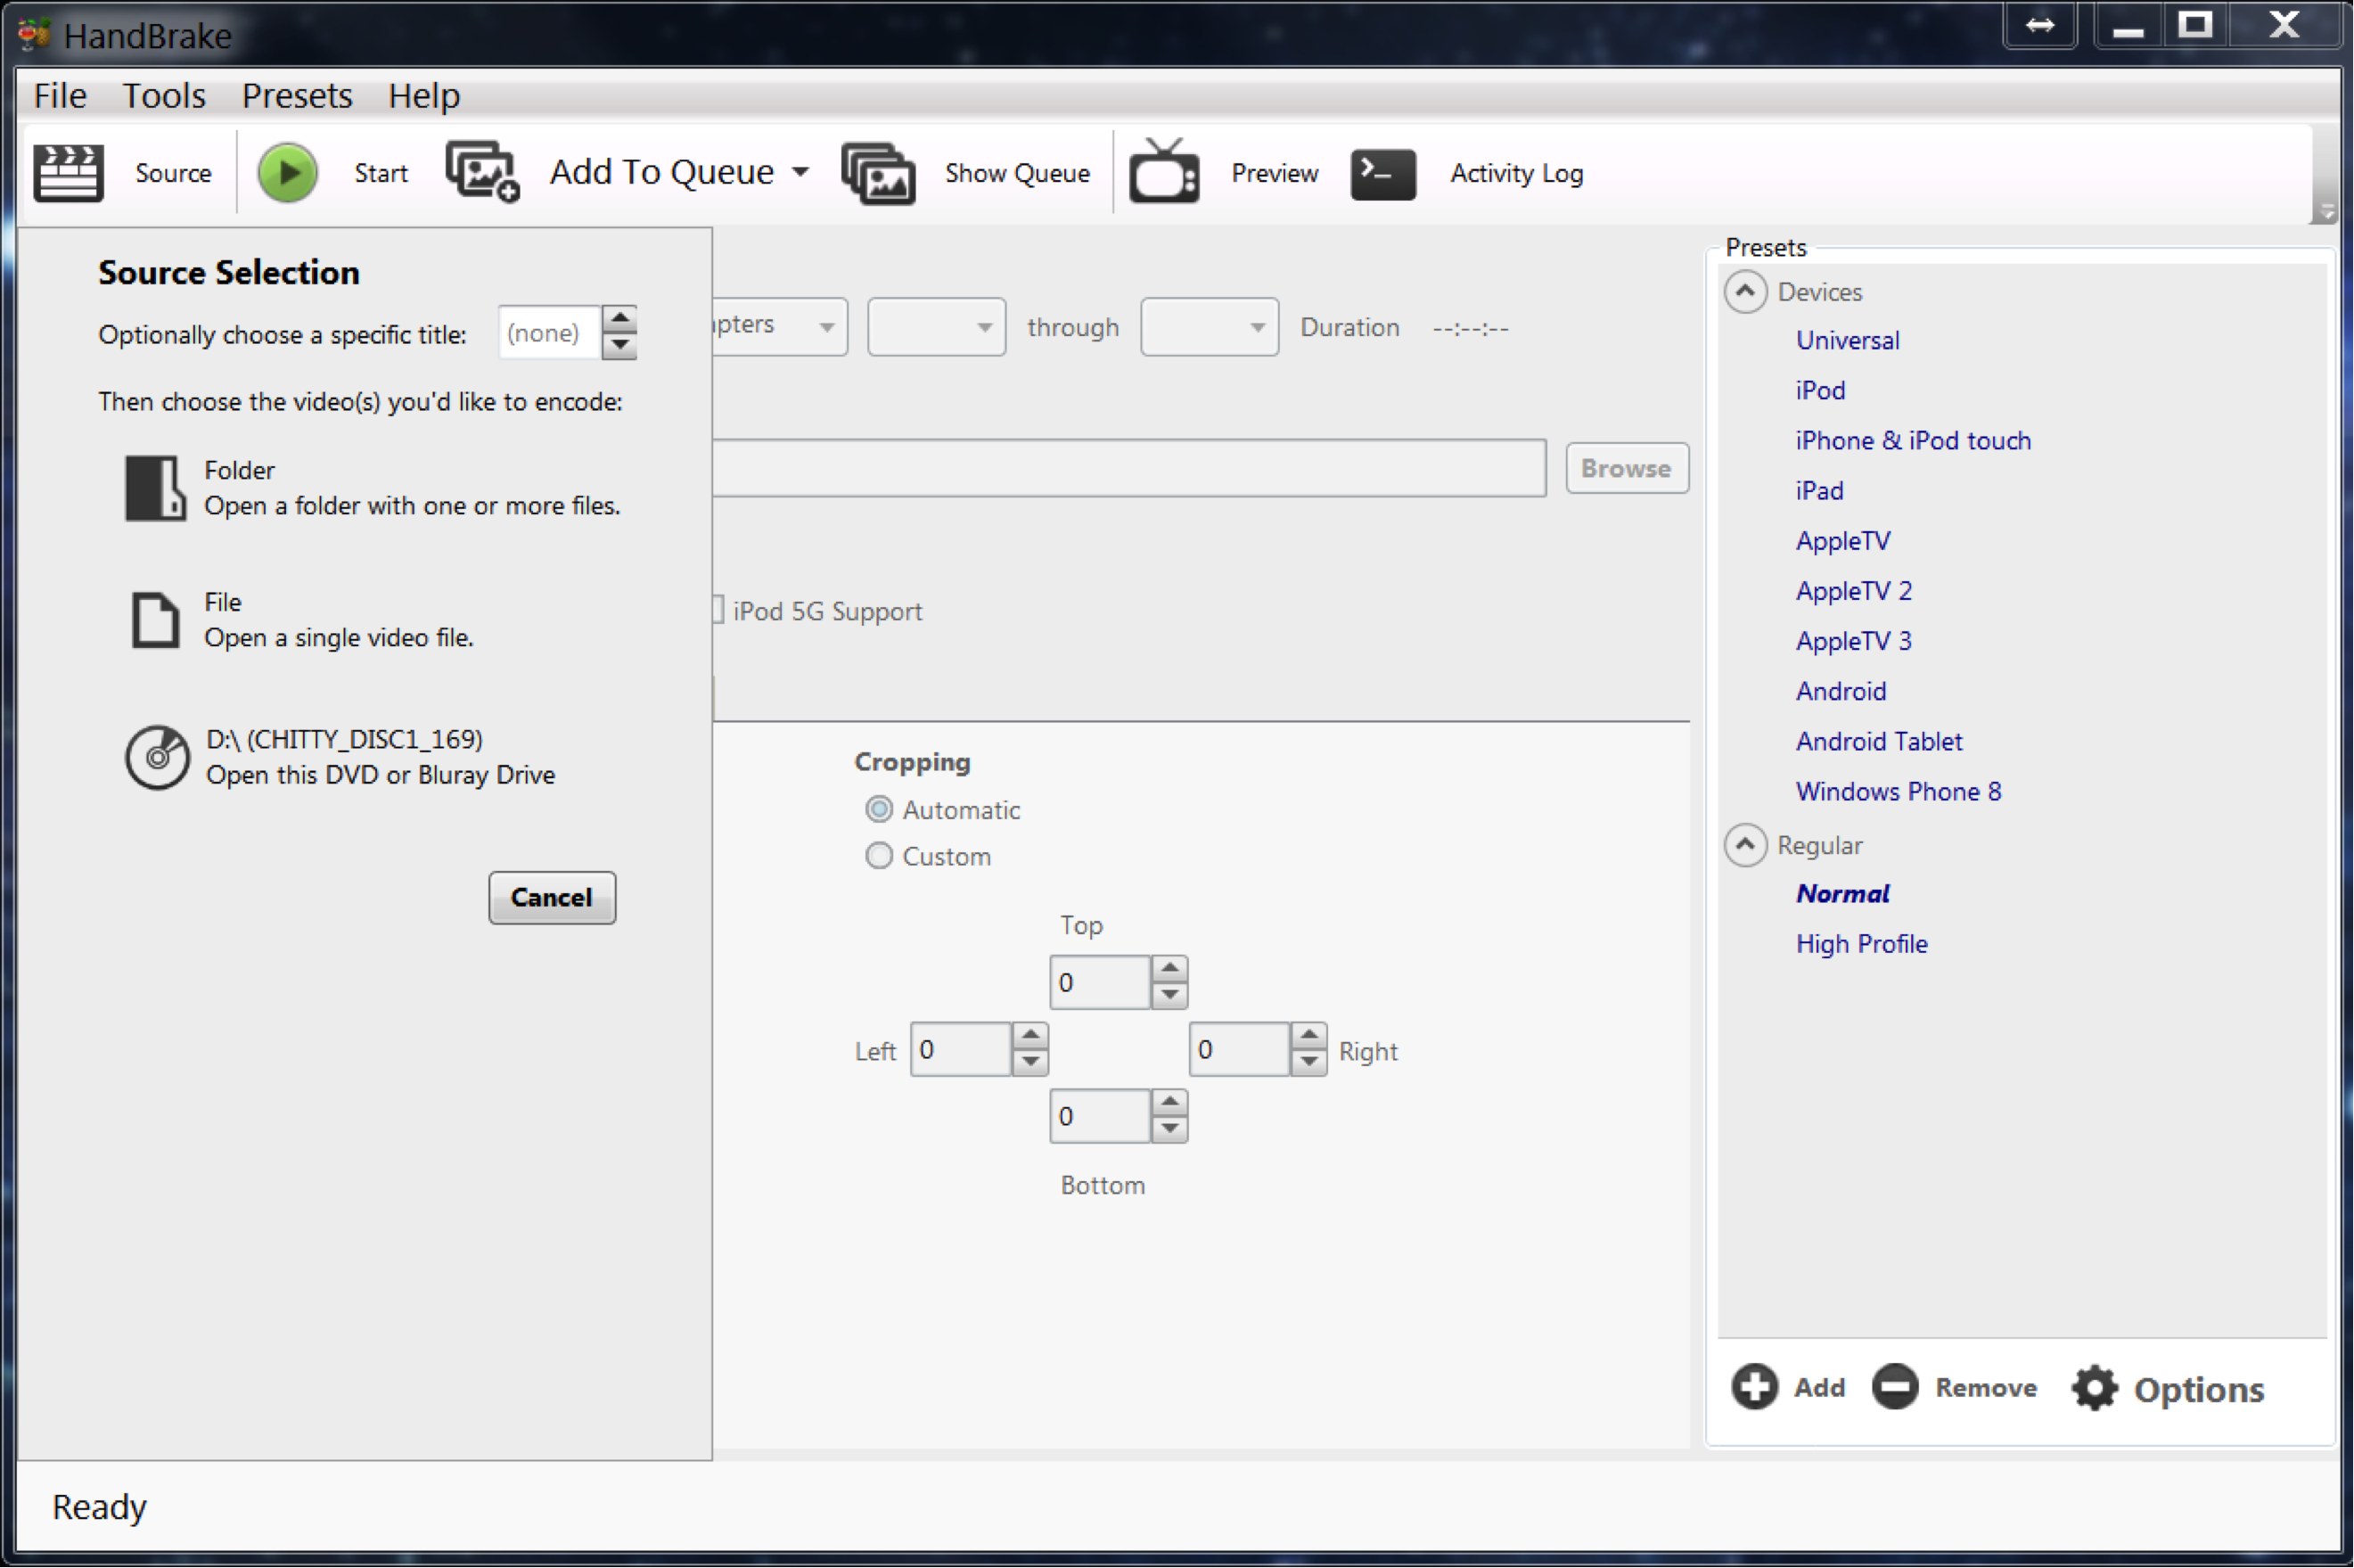
Now, under Destination, select Browse. You'll want to point it to the same folder that your Plex library is pointed to. Before you hit Start, be sure to select the “High Profile” option under the presets to the right. This should give you the best quality.
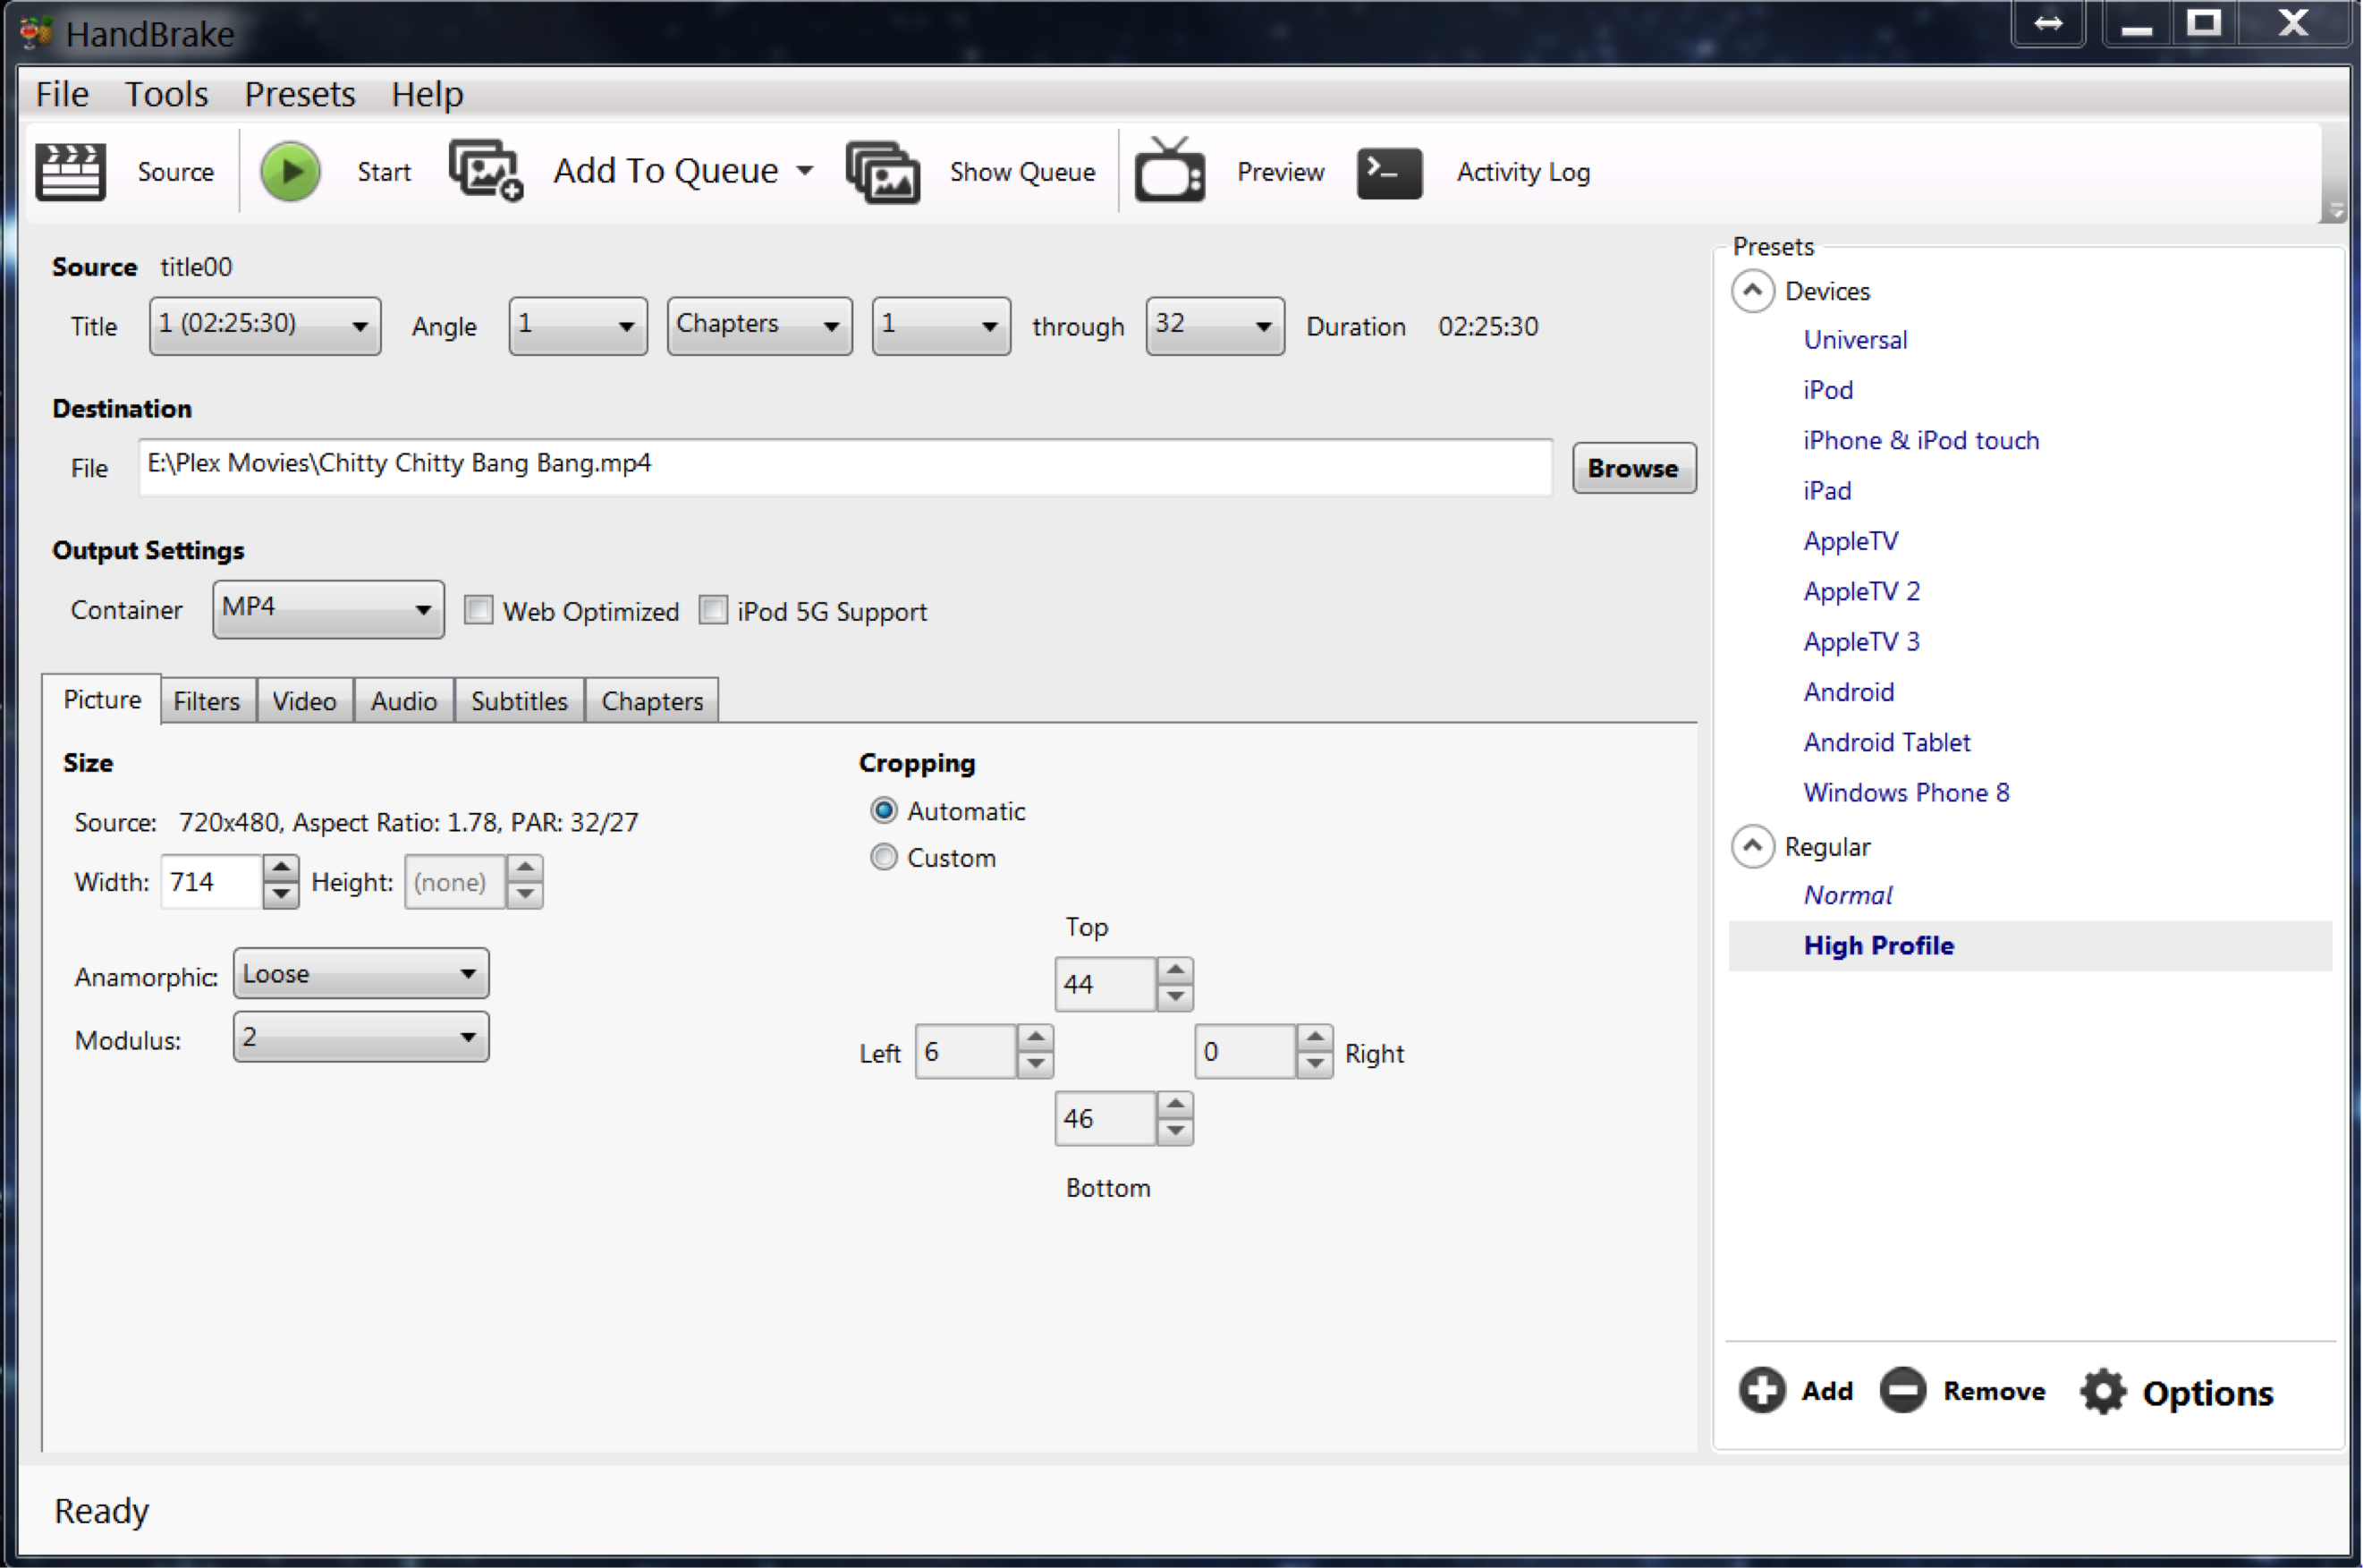
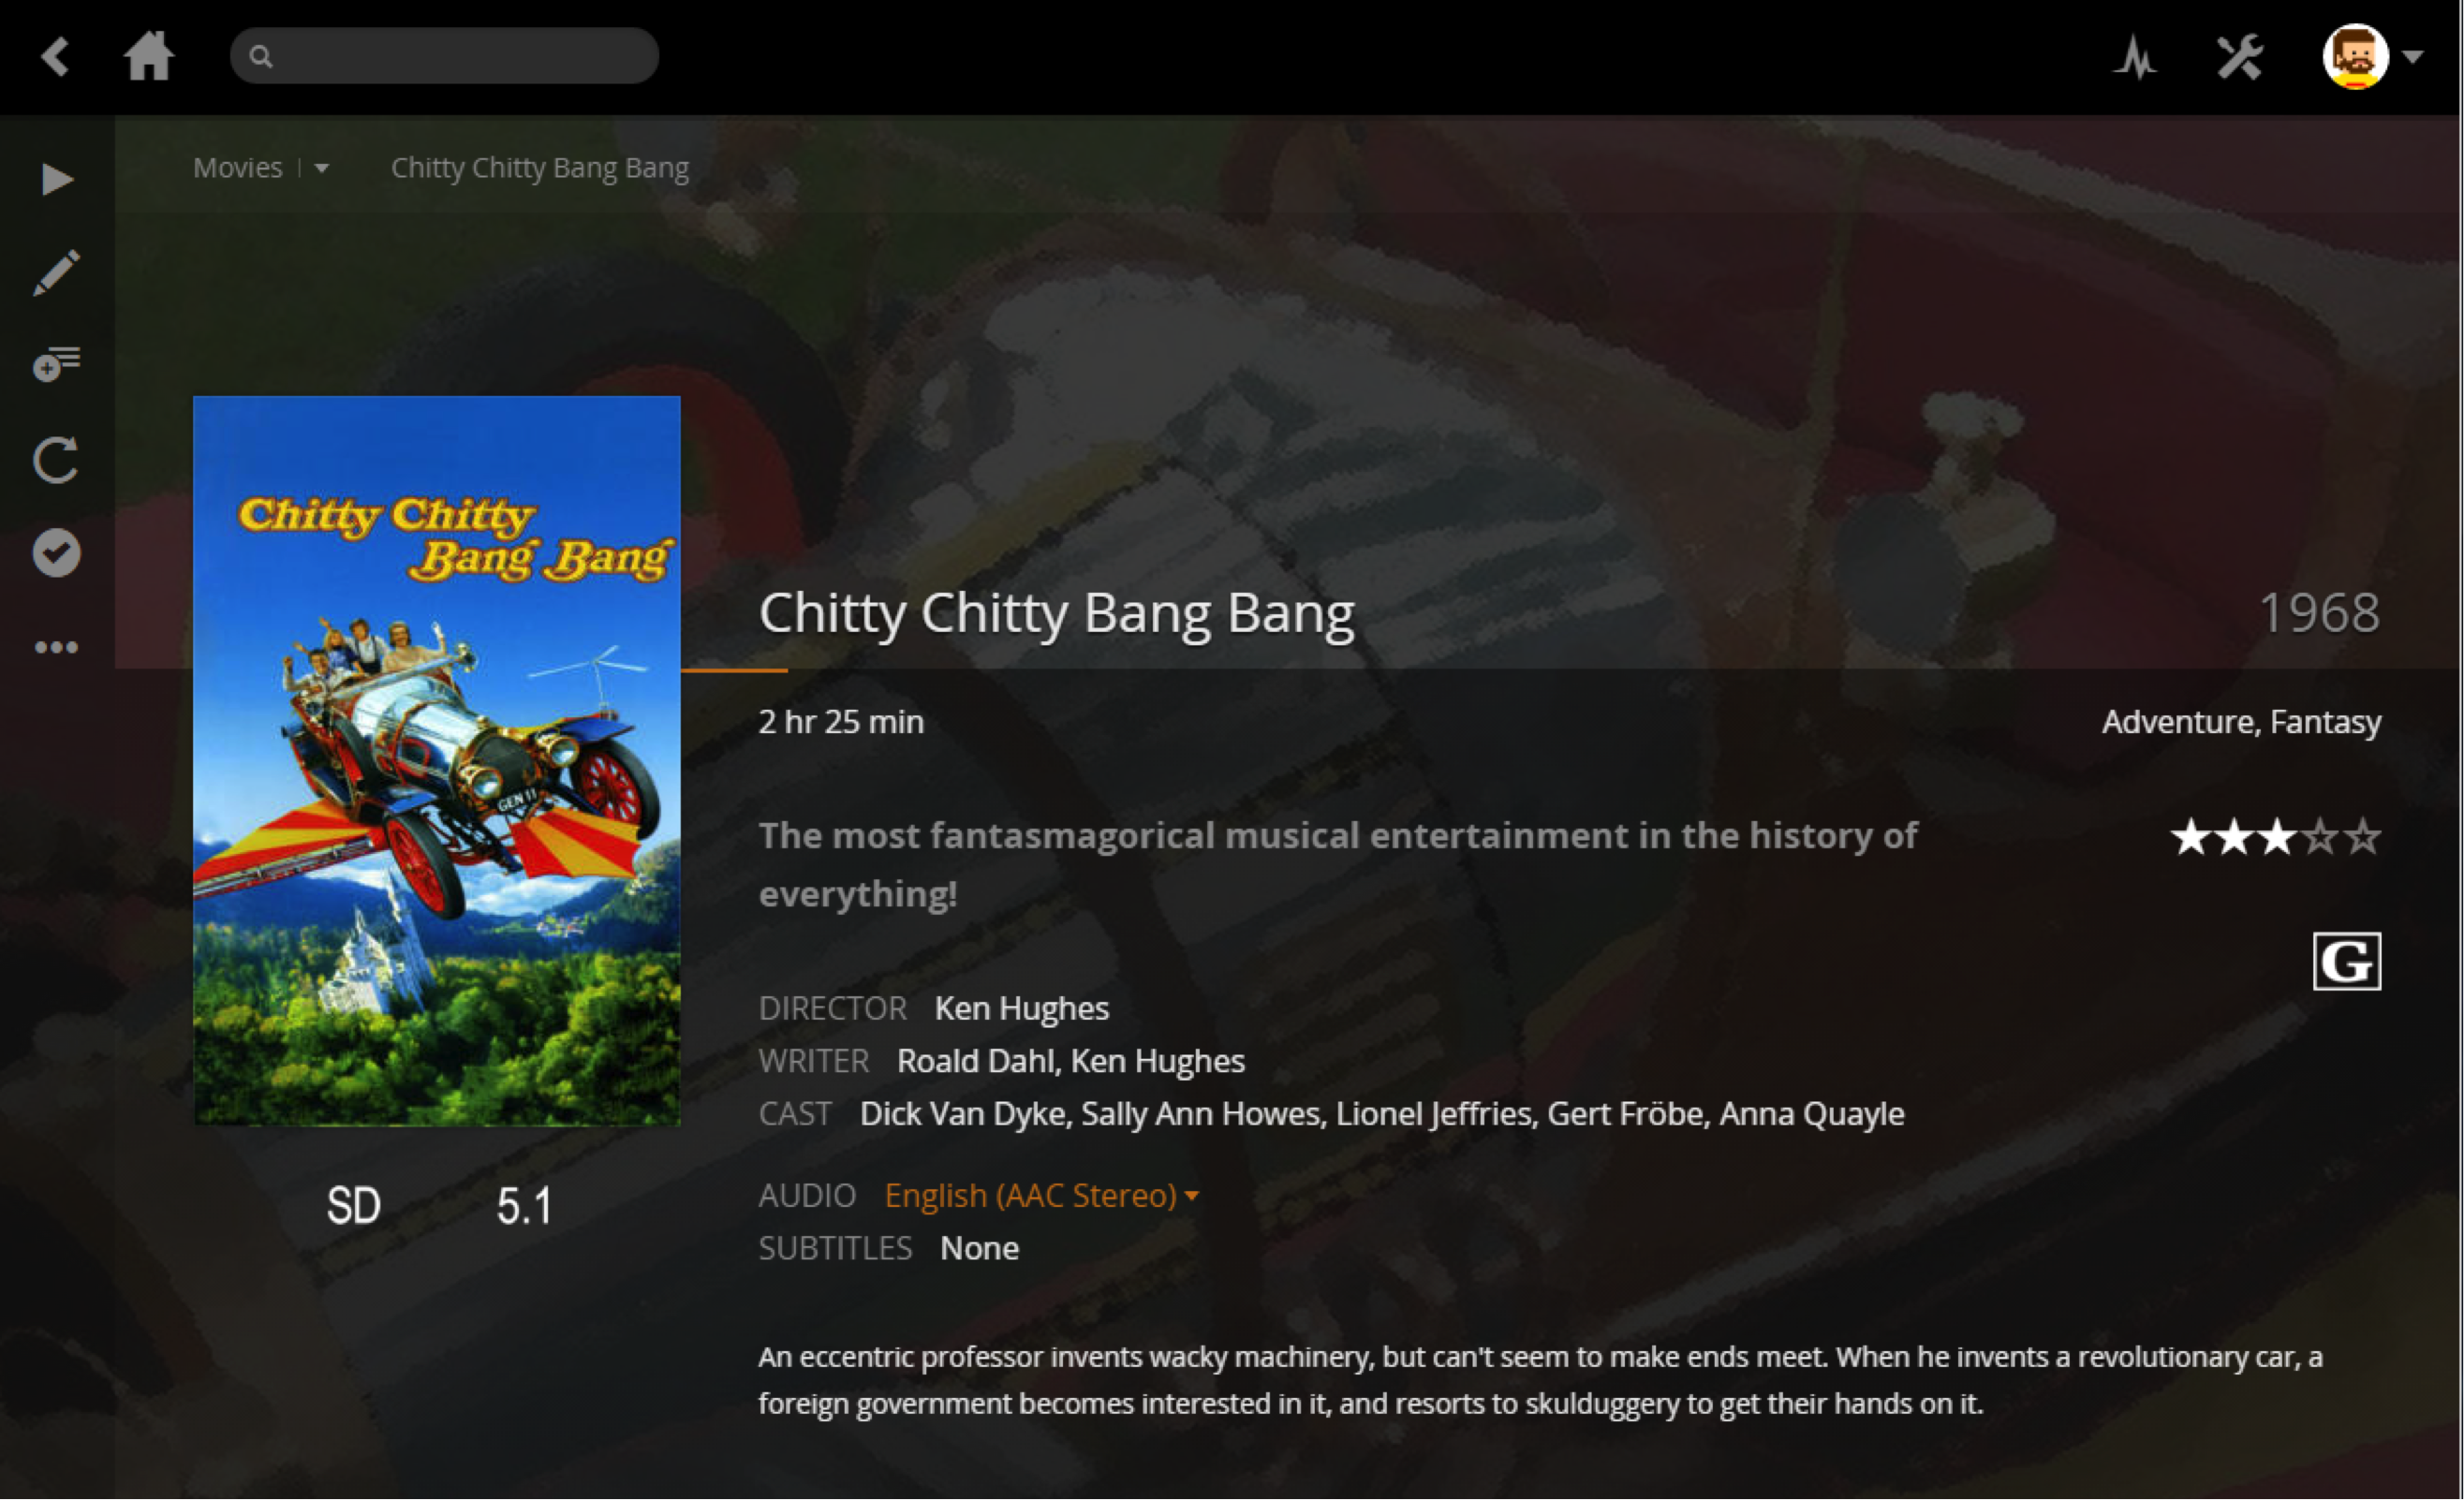
Click Start and wait for Handbrake to do its magic. If you haven't noticed yet, you'll be doing a quite a bit of waiting during this process. Go make yourself a sandwich. After Handbrake has finished, you can move back over to Plex in your web browser and hit the Sync button on the homepage. It will detect the new file, automatically pull metadata for it, and you’ll be ready to go.
Rip, Encode, Repeat
Now that you know the process, it's just a matter of repeating it until you've got all the movies you want into your Plex library. Once that's done, you'll be able to connect Plex across multiple devices and apps. Each time you set up the app on a new device, you'll be required to register the device with your account by inputting a code provided by the app at a designated web address. It takes all of about five seconds. Once that's done, you can sit back and start watching all those movies you bought and forgot about. Happy streaming!
