The Destiny 2 Menagerie rune combos system, introduced with the Season of Opulence, gives you some control over the loot you'll be rewarded at the end of the Menagerie. The Chalice of Opulence, along with its associated runes allows you to narrow down the weapon or gear you'll receive once you complete the Menagerie and open the chest.
The Chalice allows the placement of up to three runes and each of these runes will add a condition to the loot you receive. Once the chest at the end of the Menagerie is opened, the runes used in the Chalice will be consumed. There are a fair few rune combinations available, along with a ton of potential outcomes, so read on to discover the Destiny 2 Menagerie rune combos and what you'll get in return.
Menagerie rune combos for specific guns

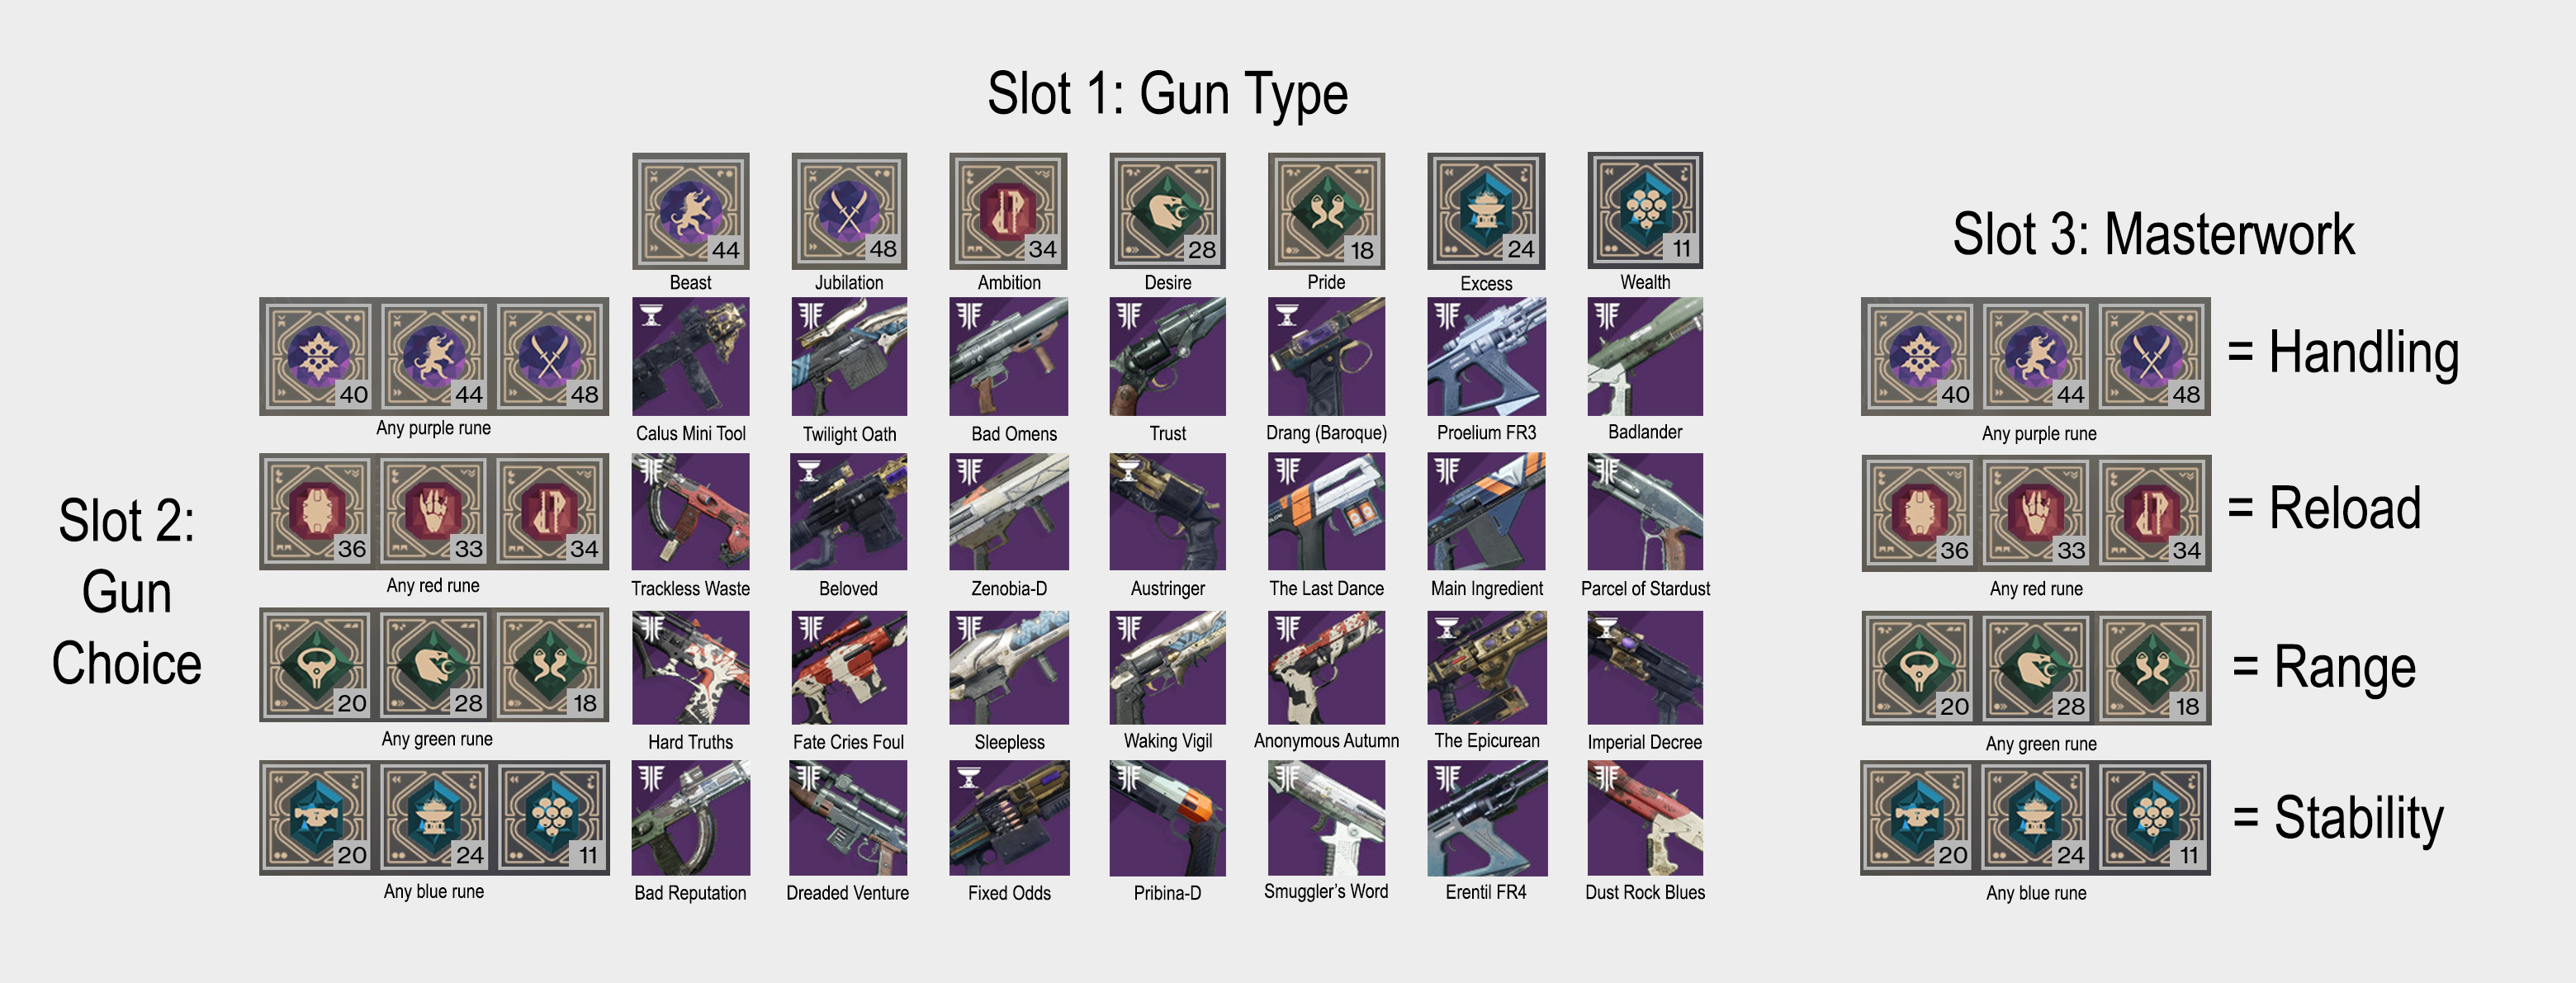
The first rune slot will control the weapon type that the chest will reward you, whether you're after a sniper, SMG, hand cannon, rocket launcher, sidearm, shotgun, or fusion rifle. The second rune alters the specific model within your chosen weapon type, while the third rune will allow you to specify the Masterwork stat for the weapon. The graphic (above) shows how the rune combinations work.
Here are a couple of examples: if you're after a Waking Vigil hand cannon with a reload Masterwork, you'd put a Desire rune in the first slot, a green rune in the second slot, and any red rune in the third. But if you wanted a Twilight Oath sniper with a handling Masterwork, you'd use a Jubilation rune in the first slot, a purple rune in the second, and another purple rune in the third slot.
Menagerie rune combos for specific armour

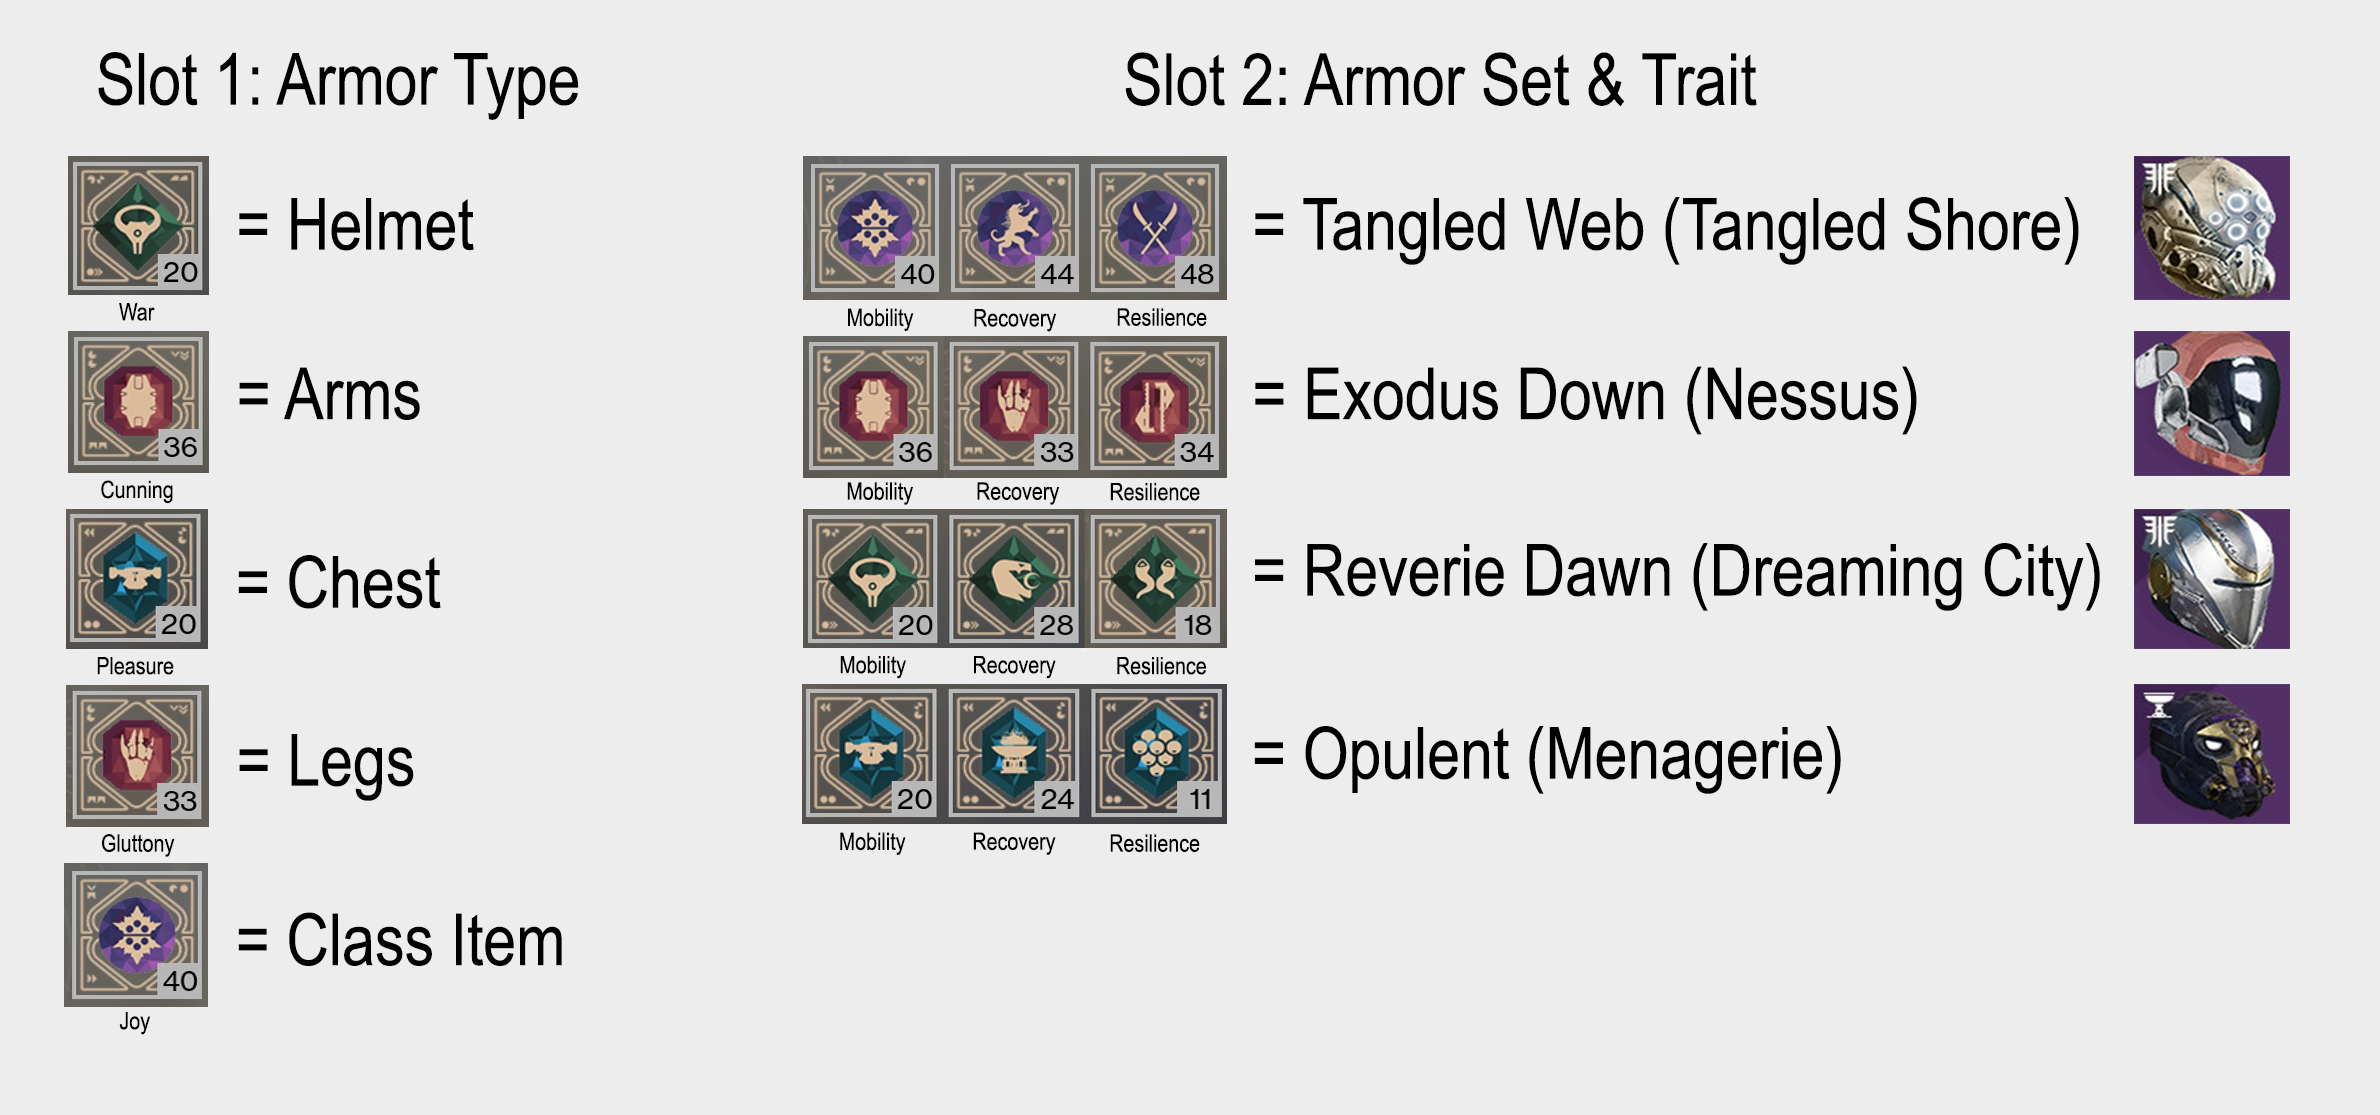
Obtaining armour works in much the same way but now each rune you place will correspond to armour types or traits. The first rune will determine which armour piece you'll receive, so helmet, chest, arms, legs, or a class-specific item. The second rune will specify the armour set that the gear belongs to, as well as its stat trait. As an example, placing a red rune in the second slot will give you an Exodus Down piece but to determine the accompanying stat trait—let's say Recovery for this example—you'll want to use the Gluttony rune specifically.
The third rune will determine the elemental resistance of the armour—though it's questionable whether you'll want to waste a rune for the third slot as the resistances on armour generally aren't worth agonising over. But if you do decide you want to make use of it, red and blue runes give solar resistance, green give you void, and purple runes give arc resistance.
If you want to test out different rune combos before committing your runes in-game, you can check out this tool from Peter Phillips.
Keep up to date with the most important stories and the best deals, as picked by the PC Gamer team.
The collective PC Gamer editorial team worked together to write this article. PC Gamer is the global authority on PC games—starting in 1993 with the magazine, and then in 2010 with this website you're currently reading. We have writers across the US, UK and Australia, who you can read about here.


