There's nothing worse than a machine that seems to have given up the ghost. Windows refuses to boot. Your precious files are locked away. And, without proper diagnostic tools, you can’t quite figure out what’s wrong with the thing, let alone nurse it back to health. That’s where Ultimate Boot CD (henceforth UBCD) comes in. Cobbled together over the course of some 15 years, UBCD is a bootable collection of the best freeware tools for all kinds of rescue tasks.
You don’t need to run it from a disc—it’s happy enough to run from USB if you’ve long ago cast off the shackles of optical media—and it can do just about anything you need, from cloning or selectively copying from dying drives to checking individual hardware components to determine just what’s gone wrong with your ailing hardware. While it’s been kept up to date as much as possible, it’s worth bearing in mind that many of the tools and drivers in UBCD are geared toward older hardware, so it’s best used to bring life to those long-forgotten laptops; if you’re resurrecting a more modern Windows 10 machine, try Microsoft’s own rescue tools first.
Ultimate Boot CD 5.3.7 Download the free software from here.
USB stick This needs a minimum capacity of 1GB.
Prepare media
Logical first step time: In order to use the Ultimate Boot CD, you need to be able to boot from it. Use a working computer to grab the UBCD ISO via one of the mirrors here (or use the torrent, if you’re feeling conscientious toward the bandwidth bills of volunteers), and find either a USB stick with at least 1GB capacity, or a blank CD or DVD if you’re going the optical route. Burn the ISO as you would any other—if you don’t have the software, use CDBurnerXP—or write it to USB using Rufus. Make sure you format your USB media using the appropriate option.
Boot from it
Plug in or insert your media into your target machine, and boot from it either by setting the boot priority in the BIOS, or by invoking its boot media menu. One tiny prerequisite: If your BIOS is somehow hosed, you may not be able to select the appropriate media manually. You could be out of luck if this is the case—although UBCD can help retrieve lost BIOS passwords—but search online for any secret key combinations your hardware manufacturer might have slipped in, because there’s often a way to force a USB or optical boot by holding down a modifier on power on.

Check your components
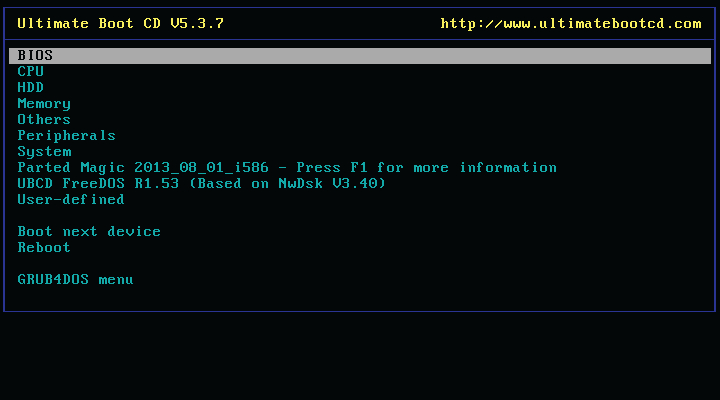
The main UBCD menu (see image above) is broken up, usefully, by category. Unless you hear that telltale clicking that means your hard drive is about to breathe its last, it’s probably a good idea to give your hardware a quick once-over first of all. The “CPU” menu gives you a chance to test the stability of your processor with a number of stress tests and challenging benchmarks—and if you want a realistic view of your machine’s capabilities without the Windows overhead, benchmarking from UBCD is about as close to working on bare metal as you can get.
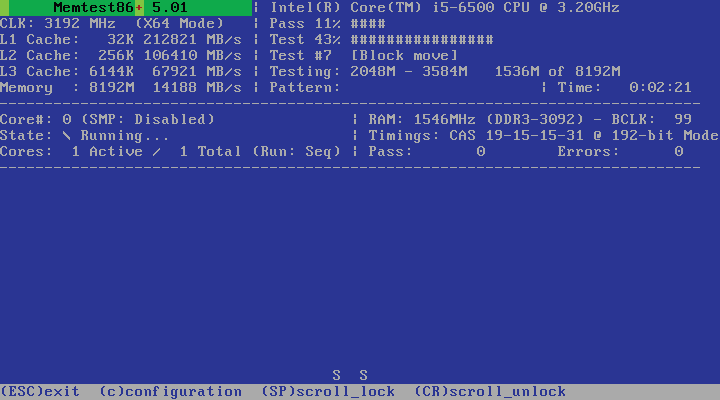
In the “Memory” section, run the failure-detecting Memtest86+ 5.01 (see image below) to comprehensively test every byte of your RAM. And if you don’t know what you’re working with, a trip to the “System” menu and the Hardware Detection Tool will reveal all about your system.
Drive tools
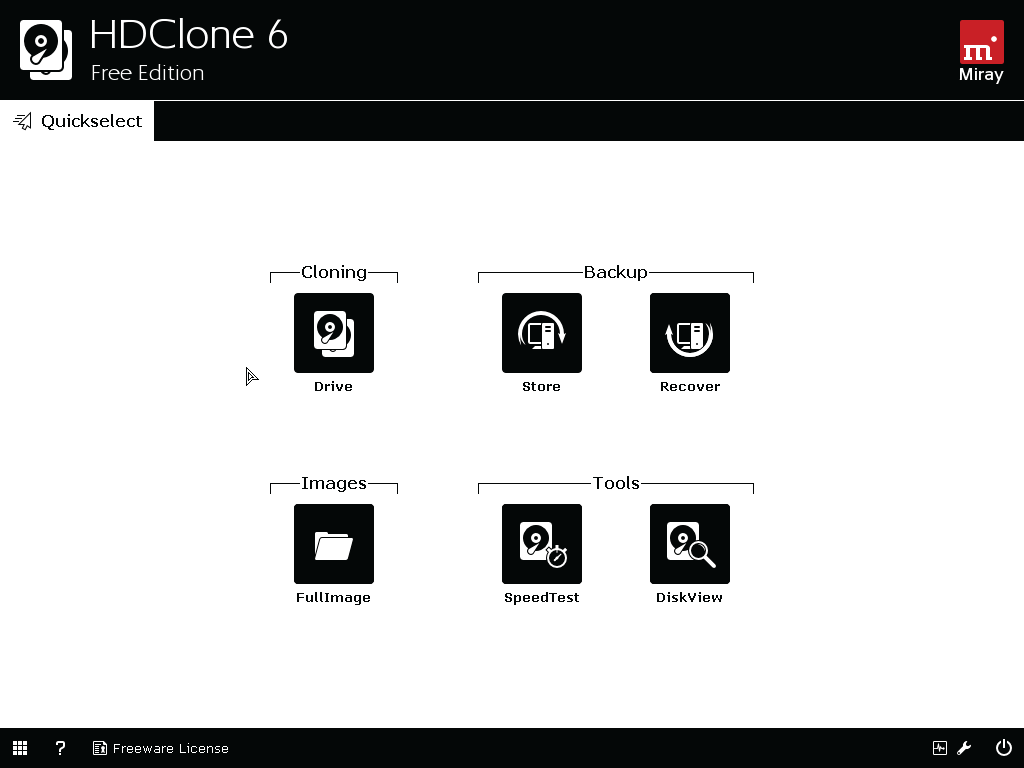
UBCD’s area of specialization is its drive tools, and you’ll find a whole host in the “HDD” submenu. Problem is, many of these are a little archaic and specific—while there’s a long list, it’s mostly one collated from drive manufacturers through the ages. Dig around and you may find the right tool for your hardware, either to test it or potentially recover it, and it’s worth checking out EaseUS Disk Copy (in “HDD/Disk Cloning”) and the slightly hobbled free version of HDClone (same menu) for their maximum hardware compatibility and graphical interfaces (see image below).
Keep up to date with the most important stories and the best deals, as picked by the PC Gamer team.
But for all UBCD’s individual tools, you may be better served going with the expert choice: Parted Magic. The version included with UBCD is the final free edition of Parted Magic—the tool jumped to a paid-for program in 2013—but it’s perfectly adequate for backup and recovery purposes.
Drive access
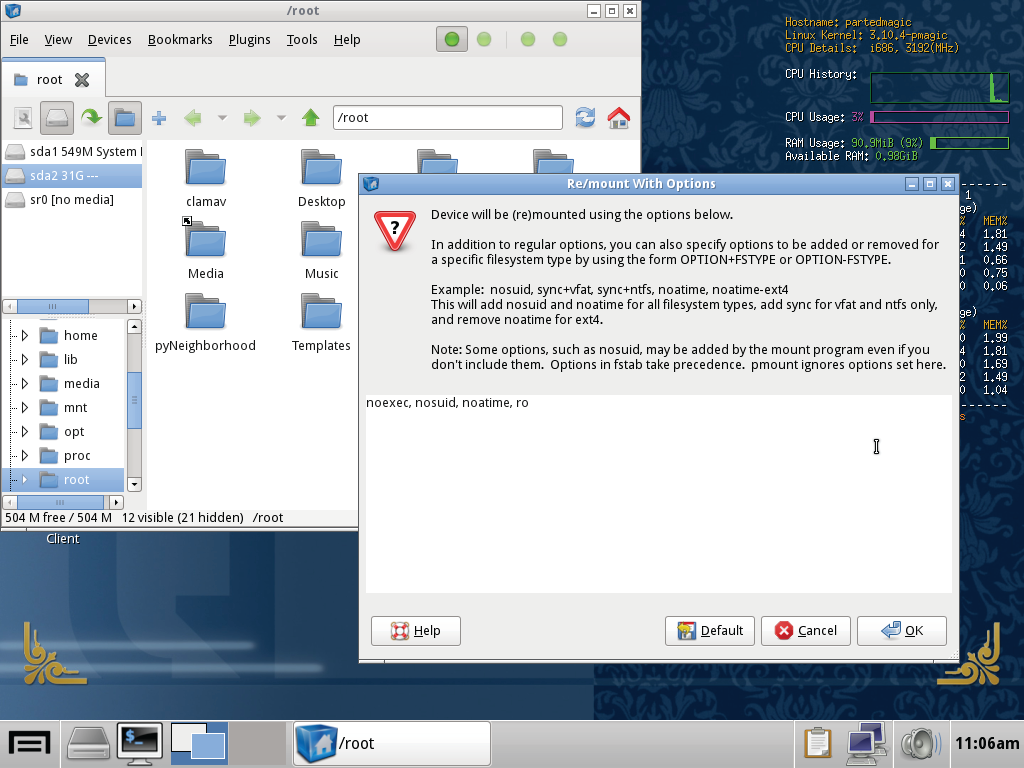
Fire up Parted Magic from the main menu—just select the default “Run from RAM” option—and you’ll reach a Linux desktop packed with tools. The File Manager should be your first port of call; find your misbehaving hard drive on the left, right-click it, and select “Re/mount.” Add the option “ro” to the end of the list (see below) in order to mount the drive as read-only, because presumably we’re not here to break anything, and a Windows install that’s not playing nice likely won’t have shut down properly. You should now be able to dig around in your files; plug in and mount a USB drive, and you’ll be able to copy them over.
Clone and clean
Linux app Clonezilla is a great tool for swapping out drives—you can, as its name suggests, exactly clone the contents of one drive to another. It’s on the Parted Magic desktop as “Disk Cloning.” With no drives mounted, fire it up, choose whether you want to back up to an image file or do a bit-to-bit copy of a drive, select “local_ dev” on the next screen, plug in your USB drive, and you should be away. Of course, backing up a drive that’s failing not because of hardware but because of some insidious infestation is asking for trouble.
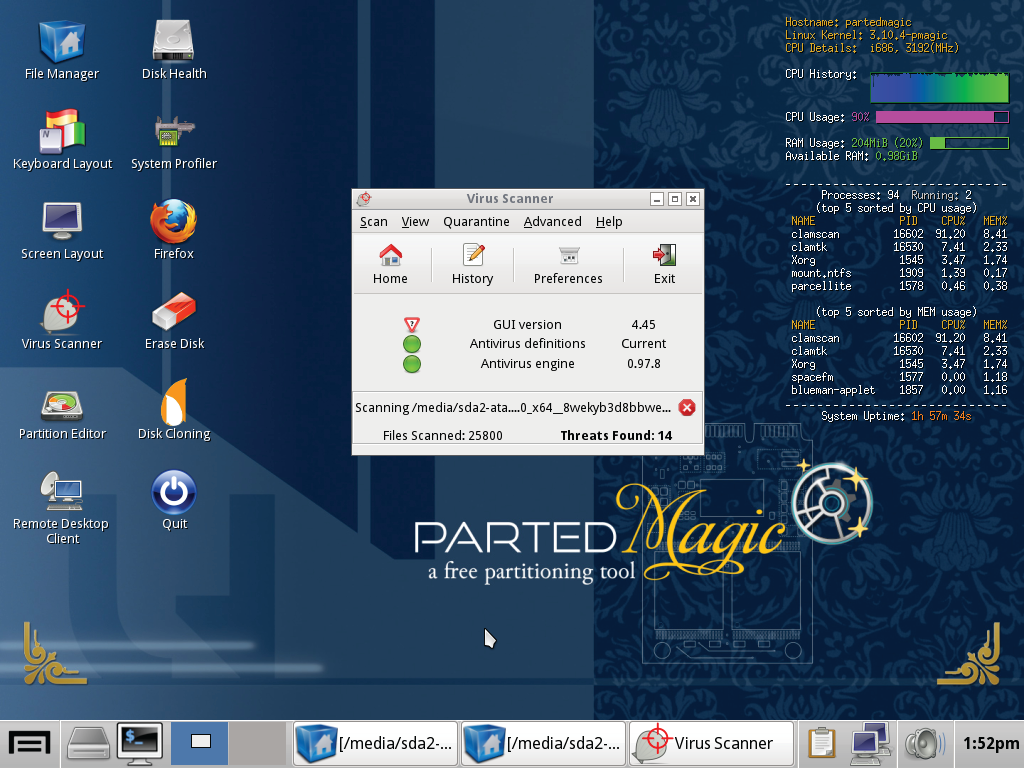
ClamAV—launched via the “Virus Scanner” shortcut on the Parted Magic desktop— automatically downloads the latest virus definition files and, provided you’ve mounted your target drive with read/write access (see “Password Panic” below to find out how), it’ll attempt to clean up your mucky disk (see image below). Run it before you clone for some peace of mind—or after, if you don’t think your platter will last that long...
Password panic
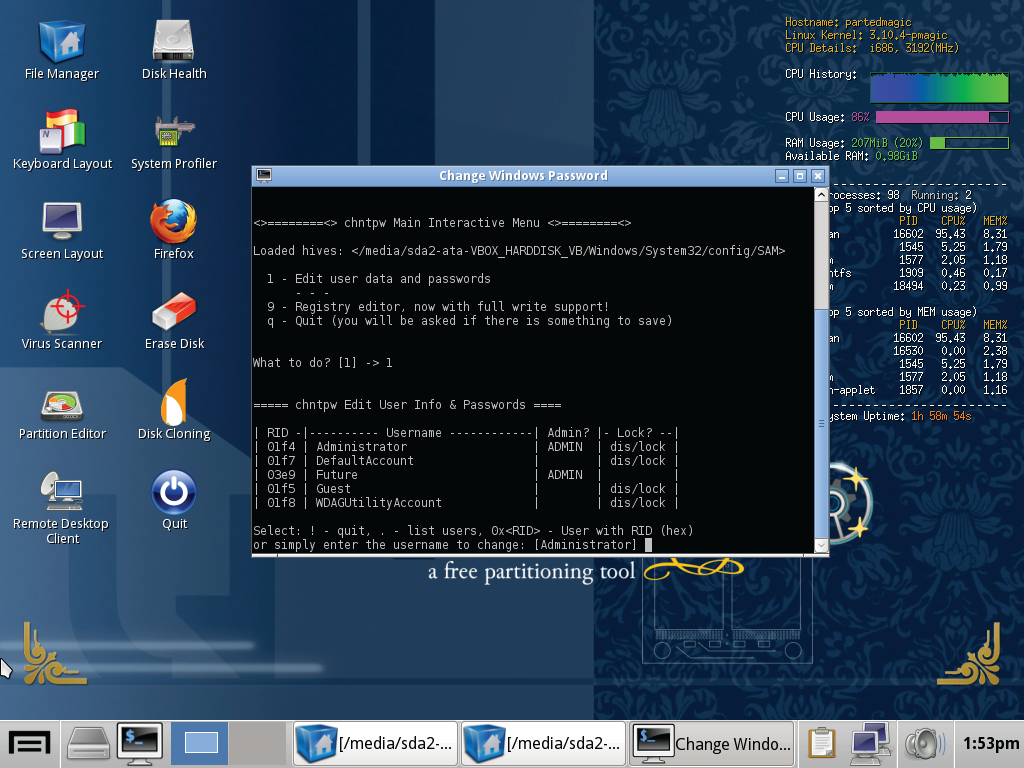
Forgotten your Windows password? Picked up a new-to-you machine that’s locked down? UBCD can help. First, you need to do a little preparation to get Windows out of its default fast boot mode. Just launch Windows as usual, initiate a restart (you don’t need to log in), and immediately boot from UBCD—if you try to access it after a full shutdown, you can only use your Windows drive in read-only mode. Launch Parted Magic, mount your drive in File Manager, head to the “System Tools” menu via the app launcher in the bottom-left, and open “Change Windows Password.”
Select your target hard drive, and use option one to see a list of the installed users. Enter the username you want to change, and use the appropriate options to clear the password, promote the user to administrator, or unlock an account that may have been stifled by over-zealous admin abuse. It’s best not to set a new password with this tool—just clear it, log in to Windows, and set a new one from there.
This article was originally published in Maximum PC issue 149. For more quality articles about all things PC hardware, you can subscribe to Maximum PC now.
