Shadow of the Tomb Raider: all Challenge Tomb locations revealed
A spoiler-free guide to all the Challenge Tombs in the latest Tomb Raider game.

You'll hear Shadow of the Tomb Raider's Challenge Tombs before you see them, usually. There's the gentle tinkle of wind chimes, and then a telltale splash of yellow paint, sometimes accompanied by crude paintings of human skulls (or actual skulls—ew). Find those, and somewhere nearby you'll also find one of the latest Tomb Raider game's most challenging puzzles.
While we won't be giving away any story spoilers here, the maps below may contain subtle hints about events and places, so if you're particularly sensitive to spoilers, I'd recommend clicking away now.
There are nine tombs scattered across the regions altogether; two in the Peruvian Jungle, three in the Hidden City, one in Cenote, two in the Mission of San Juan, and one in Kuwaq Yaku. Here's how you can find each one…
Peruvian Jungle #1—Judge's Gaze
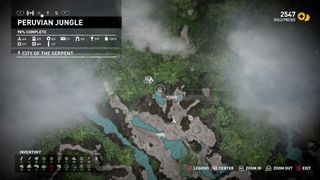
Heading west from the Plane Wreckage base camp, you'll see some scalable trees and a u-shaped vine, hinting that there's a ledge higher up somewhere. On landing, you'll see some decorative animal skulls with a hint of yellow. Follow the sound of the chimes north and enter the small gap in the stone wall. Jump down into the water, doggy-paddle through the opening, and you'll find the Jungle Cavern base camp just ahead of the tomb itself.
Peruvian Jungle #2—Underworld Gate
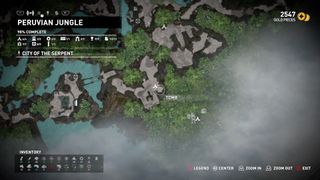
Get to the Jungle Ruins base camp and you'll instantly see the yellow skulls and hear the chimes. Move southwards through the archway and then under the low tree trunks. Run forward and you've arrived at Underworld Gate.
Kuwaq Yaku—Howling Caves

From the Kuwaq Yaku Ruins head east—pretty much in a straight line—until you hit a ledge. Climb up, spin right, and you'll see the yellow skulls indicating a tomb is nearby. Run all the way through, past more skulls, until you come to a broken bridge with a huge splodge of yellow paint on the wall in front of you. Jump down—it's safe, there's water!—and get out near the skulls (yes, there's more). You can't jump over the gap in front of you, so veer left and up the scramble wall. Welcome to the Howling Caves. Don't pet the doggos here.
The Hidden City #1—Ancient Aqueduct

From the Temple of Kukulkan base camp, head north and you'll come to the the edge of the cliff with a climbing wall in front of you—there's wind chimes and yellow skulls to tell you you're on the right track. Don't climb the wall, though—you just need to drop down, hop into the water, and dive so you can pass beneath the rocks. Swim forward until you find a hole in the wall, pass through, and shoot up to catch your breath. Here's the Ancient Aqueduct.
The biggest gaming news, reviews and hardware deals
Keep up to date with the most important stories and the best deals, as picked by the PC Gamer team.
The Hidden City #2—The Temple of the Sun
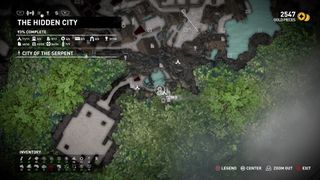
She may be posh but it seems Lara Croft lacks basic manners. For this one you need to wander into the villager's house—sans invitation—and contaminate their water supply by hopping into their indoor well. Dive down, swim through, and you'll come out into a cave. Follow the chimes and skulls and you'll hit the Temple Path base camp. Rather than go through the doorway, though, turn and head upwards instead, following the stone staircase and then scramble up the wall. Slip through the gap in the wall and you're at the Temple of the Sun.
The Hidden City #3—Warrior's Trial

From the Wild Jungle base camp turn left, jump down, and you'll immediately see the yellow skulls on either side of a stream on the lefthand side. Wade up, dive down, and you'll find a yellow-edged hole in the stone beneath the water. Keep swimming—avoiding the spikes—and you'll shortly get to the Warrior's Trial tomb. Your base camp will be beneath you.
Cenote—San Cordoba

The Cenote temple is in the north of the region. As you move towards the tip of the area, you'll come to what seems to be a dead end, only it isn't, because there's yellow paint indicating you're on the right path. Duck under the water and swim forward until you're swept away in a strong water current. I'll leave you to work out the rest on your own—enjoy!
Mission of San Juan #1—Thirsty Gods
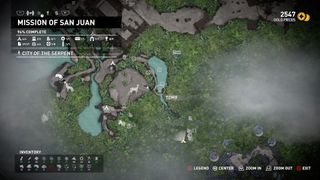
Swim southwards from the Ruined Tower base camp—to the right of where you find the empress jaguar—and you'll see the telltale yellow smudges of paint and skulls at the most southerly part of the lake. Swim past, jog for a bit—there are no paths leading elsewhere—and you'll find further yellow skulls, confirming you're on the right track. When you seemingly come to a dead end, dive beneath the water and swim forward (trying to avoid the eels, of course). When you hit red weeds and a strange wooden ladder in front of you, resurface, and you'll be able to jump out of the water. In front of you there'll be a scramble wall, and a cave entrance in the shape of a skull on the other side. Welcome to the Thirsty Gods tomb.
Mission of San Juan #2—Tree of Life
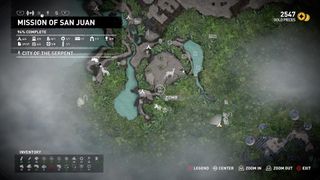
This time lying in the south-east of the area, head southerly from deer habitat until you hear the twinkle of wind chimes. Slip past the gate and up the stairs, and you'll hit the Deserted Cloisters base camp. From there, head up the steps and into the ruined building, jogging forward until you see a hole in the wall. Leap across—using you axe to grab onto the rocks—then rappel down. You've arrived at the Tree of Life tomb.
Most Popular


