How to customize GPU cooling using MSI Afterburner
Here's how to squeeze the most performance out of a stock GPU.
As video cards get more powerful, the need to dissipate heat efficiently becomes more important. While custom coolers tend to do a sufficient job, sometimes reference coolers are too tame; this makes managing temperatures while trying to achieve a stable overclock, much more difficult. Issues such as thermal throttling occur more often and hamper your efforts to gain precious FPS. This can all be solved quite easily by managing your fan speed and striking a balance between noise and performance—taking advantage of the fan profile features in MSI’s Afterburner utility make this process a breeze.
If you haven’t already done so, make sure to download the latest version of Afterburner from MSI’s website. Optionally install Kombuster if you plan on doing any GPU stability testing.
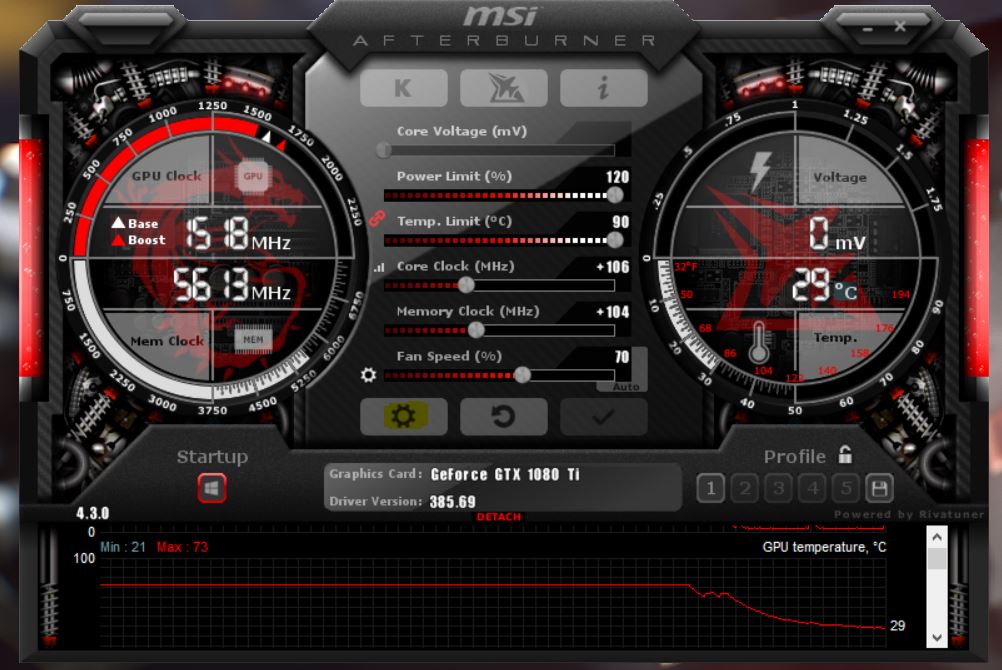
You’ll notice that the UI is pretty simple but if you click the little cog you will be presented with a large array of options to keep you busy for hours.
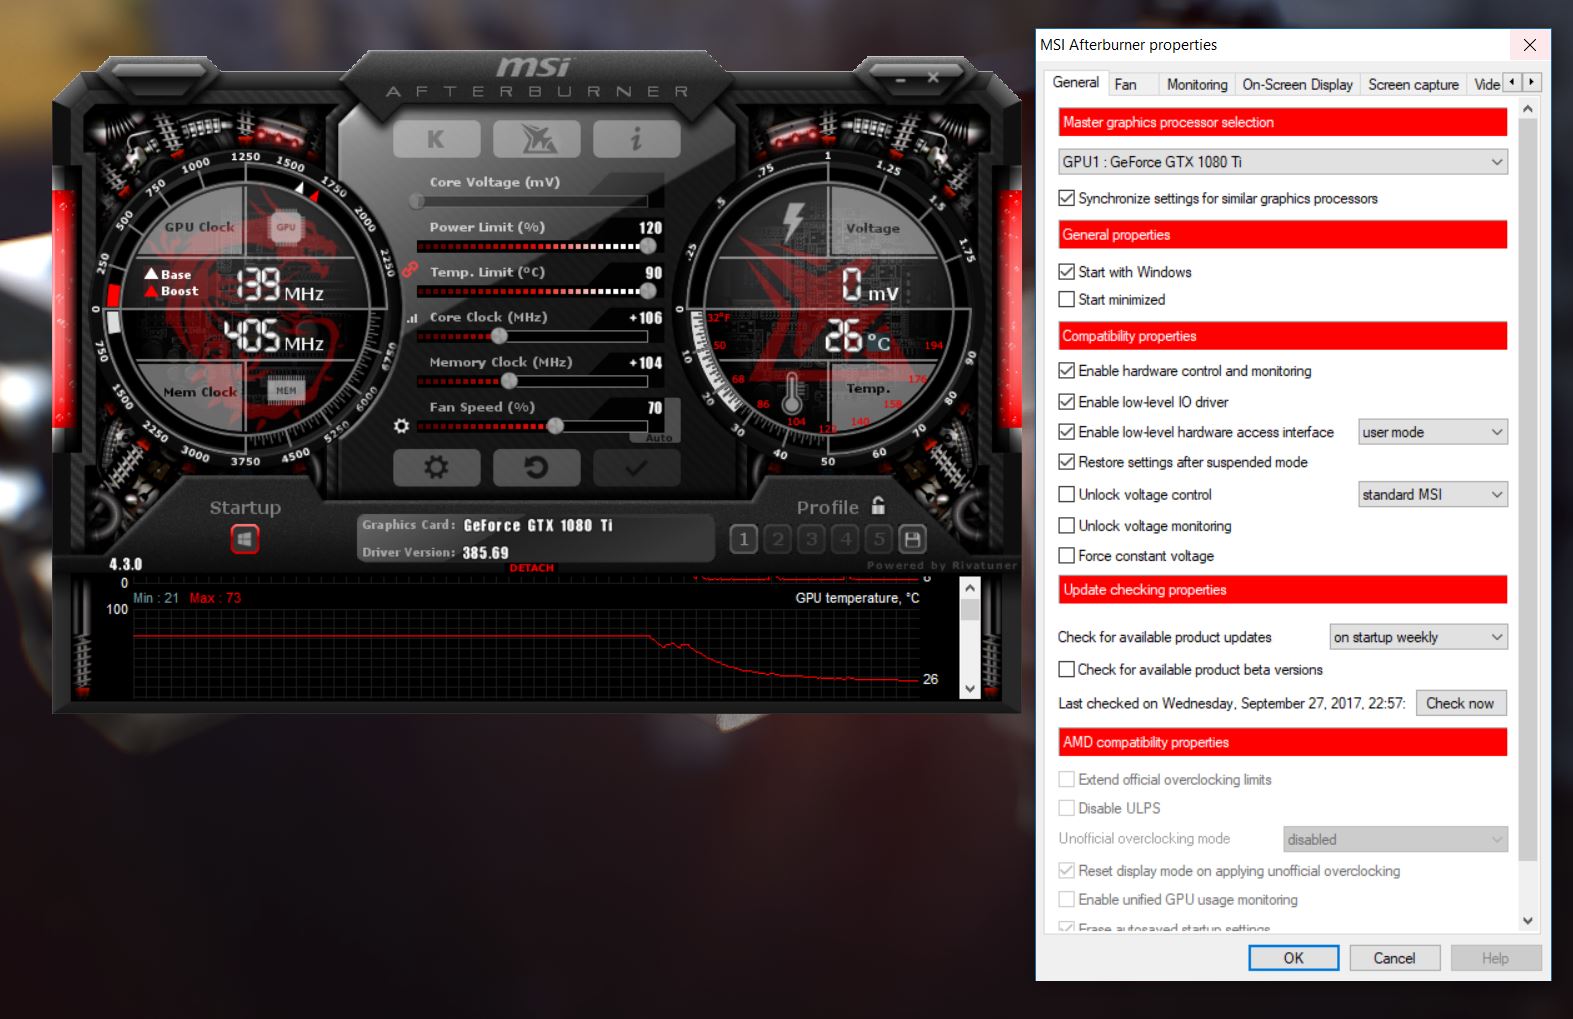
Before you start configuring your fan profile, I recommend checking the option to start Afterburner with Windows. There is nothing more annoying than loading a game only to find out your fan isn’t behaving how you expected. Click on the “Fan” tab to get started.
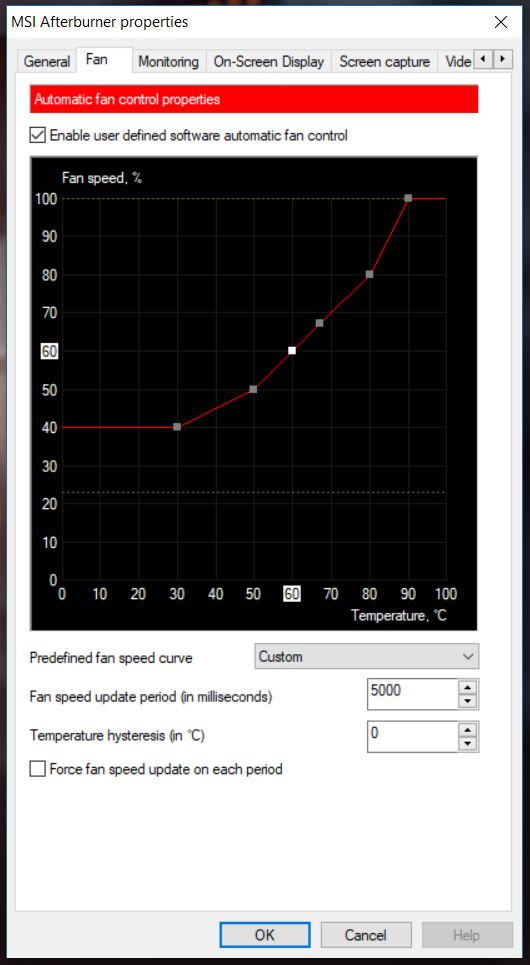
Here you will be presented with the default fan curve. The vertical numbers represent fan speed while the horizontal numbers represent temperature. The default curve has a 1:1 ratio which often leads to thermal throttling since the fan speed doesn’t increase fast enough to dissipate the extra heat. If we simply move the points back a bit we can solve any potential throttling issues. If you left click in between two points on the graph you can add a new point to manipulate which allows you to make finer adjustments.
It’s important to take your time with this since you will need to keep the fan within whatever noise levels you deem acceptable. If you installed Kombuster, it can be very convenient to run a benchmark to check noise levels. If the fan is still too loud you can then dial back the profile a bit. I tend to leave the “100 percent” point at the default temperature since operating at full speed is usually much louder than I’m willing to tolerate.
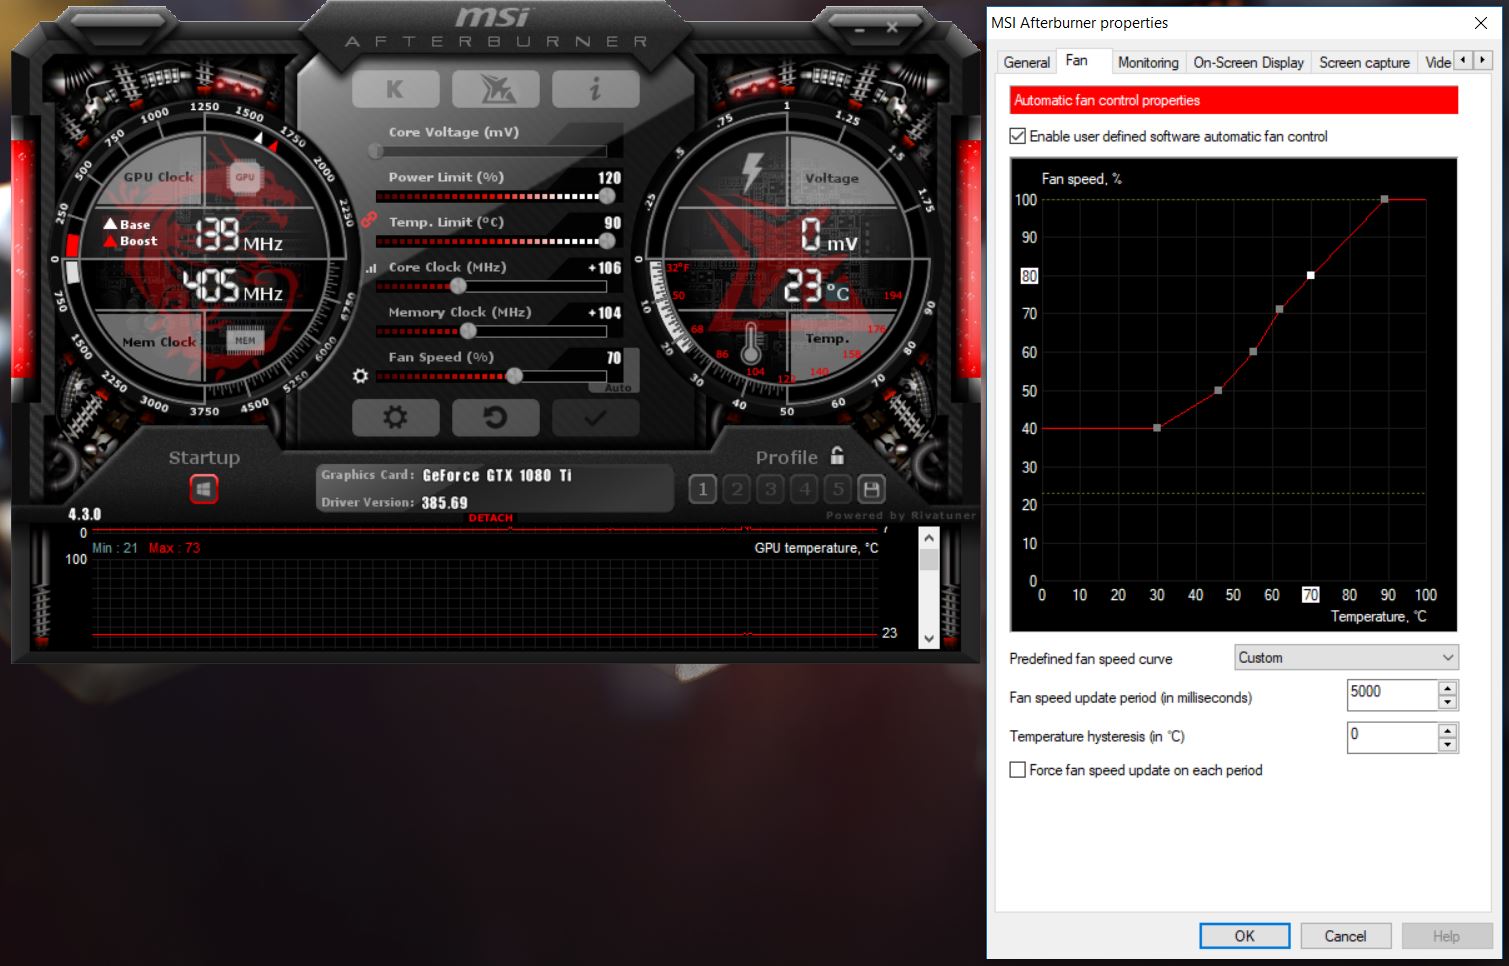
Once you’re satisfied with your profile, click “OK” and save your settings to one of the 5 available profiles shown on the bottom right of the main UI.
Keep up to date with the most important stories and the best deals, as picked by the PC Gamer team.
Afterburner functions as so much more than a simple fan controller. The utility provides GPU monitoring with more statistics than you can shake a stick at as well as a full feature set for overclocking. It even includes a handy FPS overlay for testing, though it has been known to cause issues with other overlays such as Steam’s and Origin’s. Even if you don’t intend on using the full feature set, I find afterburner to be the most intuitive option for customizing your GPU cooling.
