Warning: Act 3 spoilers ahead!
The first time I heard about an Iron Throne in Baldur's Gate 3 was through a cryptic message hidden inside a fireworks shop. "Hah! That clever Gortash," I thought as I read through the letter. "He's stashed a bunch of explosives under that chair in his throne room, doubtless in an attempt to blow me up should I ever agree to share power with him. Well no matter, I will not be fooled!" I tucked the note away again, feeling smug in the knowledge that I had uncovered Gortash's secret gunpowder plot and wouldn't be tricked by one of the RPG's three main villains
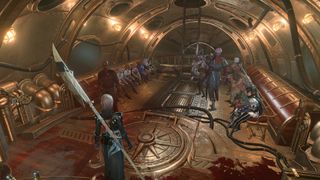
Imagine my surprise, then, when it turned out the Iron Throne was not a chair, but an underwater prison—and by stumbling into it I had accidentally triggered one of the game's most demanding fight sequences. Oops. On balanced difficulty, you are given just six turns to rescue all the Gondian prisoners inside—each of them serving as hostages to ensure Gortash gets a constant supply of mechanical guards—and return to the submarine before the whole place floods and explodes. In my playthrough the prisoner list also included some rather important characters, such as Wyll's father Duke Ravengard, and friendly neighbourhood mind flayer Omeluum. Just to add to the pressure.

My first reaction to all this, naturally, was to panic. It seemed like Gortash's words of warning were correct, and I had already doomed everyone inside to death. The floodwaters were rising, sirens were wailing, and the entire compound was shaking. I fell to despair, and dejectedly began to shuffle my characters through the map. But as I did so, I started to realise that perhaps the situation wasn't quite as hopeless as I first thought. I began to make some mental calculations, and experimented with my options. And to my great surprise, an hour or so later, I had utterly fallen in love with the Iron Throne.
The unforgiving nature of the mission, though initially daunting, is exactly what makes it one of the most remarkable dungeons in the entire game. It's a level designed to provoke high emotions, create moments of heroism, and challenge your combat prowess in every way possible. It also comes at the perfect point in the game's wider structure, providing a refreshingly intense experience in the middle of the meandering third act. I've since replayed the fight several times (willingly) just to see if I can perfect my tactics and strategy. It really is that good.
I will admit that my first attempt was a total disaster, and after a couple of turns, I quickly decided to reset and start over. The Iron Throne fight might be the best example of why save scumming is perfectly acceptable in Baldur's Gate 3: there's simply no way you could anticipate all the level's weird quirks on your first try. So unless you're truly dedicated to sticking with your first attempt no matter the consequences—and fair play if you are—I'd argue it's worth giving yourself a second chance to get a somewhat satisfying result.
Making a splash
With some idea of what I was now dealing with, on the second attempt I made sure to properly prep my team. Up until this point in the game I had relied on brute-forcing my way through most fights using my characters' regular abilities, and had barely touched my scrolls and potions stockpile. As a shameless loot hoarder I had collected dozens of items, telling myself I was saving them 'for when I really needed it'. Boy did I need them now. It was due to the unique challenges posed by the Iron Throne that I was forced to finally think about how to use these consumables. The dungeon is less about nuking a big boss, and more about mobility. The restrictive time limit means every single turn counts, so squeezing the maximum possible amount of mobility and actions from each character is key. Speed potions, haste scrolls and dimension doors quickly become your best friends.
The biggest gaming news, reviews and hardware deals
Keep up to date with the most important stories and the best deals, as picked by the PC Gamer team.
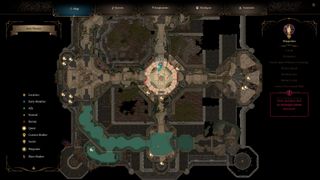
I also took a closer look at my party members to see if I could use their abilities more effectively. In previous battles I had been pretty sloppy with my decision-making, often finishing encounters with at least one character looking like a bruised plum (sorry Astarion). But the Iron Throne leaves no margin for error. It feels like Larian really throws down the gauntlet here, challenging you to put all you've learned into practice, forcing you to refine your combat skills until they are brutally efficient. Even one simple misclick can set you on a path to disaster. The Iron Throne's level design—a cross-shape of long corridors—means that you must split your party up if you want to save all the prisoners, effectively putting each character through their own personal combat test. Just how strong is each party member in isolation? It's time to find out.
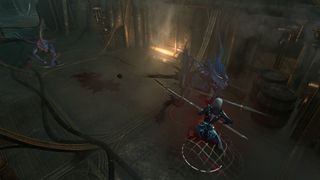
But beyond providing a serious combat challenge, the Iron Throne sets the stage for some brilliant narrative moments told through gameplay. It provides the ingredients for hero moments, with each party member put under the spotlight, and each of their actions having life or death consequences. These events feel unique to your playthrough, too, as each player will inevitably approach the encounter in a slightly different way.
In my own playthrough, all seemed lost for Astarion as I sent him on a mission to rescue Omeluum in a distant corner of the map, until I checked the mind flayer's combat abilities and spotted… gasp! A two-person teleport to the submarine. I imagined them both doing a high-five and vanishing out of there, leaving behind some very angry fish monsters. Lae'zel, meanwhile, became a battering ram, carving through entire corridors of enemies to clear a safe path for the Gondians.
Unexpectedly, even one of my summoned ghouls became a hero: single-handedly battling six sahuagin in the darkness as the walls caved in and the place flooded. Weird, but heroic nonetheless. And if you are of the more villainous persuasion, Larian has left opportunities for you within the encounter too. In one corridor there are no prisoners, just several rooms filled with enticing loot chests. So you can be a complete bastard and spend your precious turns grabbing gold instead of rescuing hostages.
Beach holiday
Arguably the most memorable parts of the encounter, however, come when something goes catastrophically wrong—and there are plenty of ways this can happen. Rushing past the sahuagin, for instance, may seem like a great strategy until you learn that they have nets, which can render you (or a prisoner) immobile for several turns. The tantalisingly-placed fire barrels found in one corridor might strike you as a great way to clear the place of enemies, but igniting them will cause the doors to slam shut, giving you nothing but more problems.
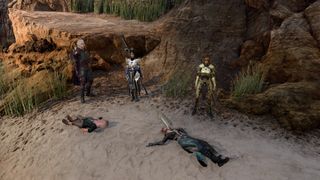
When things go wrong, some players may need to make difficult decisions about which prisoners to save. In my case, I miscounted the number of turns I had left, realising too late that my player-character was still standing by the ladder as the floodwaters arrived. In my head I imagined this as a 'captain going down with the ship' moment, with my character saying something badass while slamming the submarine hatch shut. It turns out that Gortash's threat about watching "the corpses start to wash up on the shore" was entirely correct: I discovered this because it was my body on the beach. This led to an amusing scene where the rest of my party had to go to the beach to collect me. I could almost sense their eye rolls and tuts of not this again through the screen.
Ultimately, I decided to stick with my flawed second attempt as the 'canon' version I would keep for the rest of my campaign. It was an imperfect result with several casualties, but the story told through my messy fight was fantastic. That being said, I did want to see whether I could save everyone, so I loaded the file up again. After several agonisingly close attempts, I eventually managed it, even raiding all the treasure chests in the same run. For me, the key to this was releasing the most distant prisoners first—affording them plenty of time to escape—while also distracting the fish monsters with a bunch of summons.
The process made me realise just how much of the fight rides on a knife edge, with luck playing a fairly significant role, with the AI occasionally able to sabotage everything. (For reasons unknown to me, a Gondian prisoner once decided to punch a fire barrel and set the whole corridor on fire, locking themselves inside the prison in the process.) But for me, this was all part of the fun: something weird and bizarre seemed to happen on each attempt, which only made me more determined to try again.
Despite the Iron Throne being one of the most stress-inducing levels in the game (or perhaps because of it), the fight remains one of the true highlights of my campaign. It's unusual to see a level provoke so many storytelling moments through its gameplay, while also providing such a challenge that players are willing to replay it multiple times to perfect their strategy. After completing it, I felt so much more knowledgeable about the game's combat systems, and the experience undoubtedly improved my efficiency in all the fights to follow. All that remains now, I suppose, is for me to try again on tactician mode. Only five turns for that, you say? Bring it on.

The new subclasses coming in Baldur's Gate 3 are a powergamer's paradise, and I know because I've seen them do terrible work in D&D

Baldur's Gate 3 is going out with a big bang by adding 12 new subclasses, so you can finally become a drunken master or maybe just befriend some bees, along with crossplay and a photo mode
Most Popular


